
Chapter 9
Establishing Web Links
In This Chapter
- Learning about Internet addresses
- Linking web pages
- Dreamweaver Technique: Linking to Files
- Pointing to a file
- Creating anchors within web pages
- Dreamweaver Technique: Inserting Named Anchors
- Targeting URLs
Links are the web. Everything else about the medium can be replicated in another form, but without links, there would be no World Wide Web. As your web design work becomes more sophisticated, you’ll find additional uses for links: sending mail, connecting to an FTP site—even downloading software.
In this chapter, you learn how Dreamweaver helps you manage various types of links, as well as how to set anchors within documents to get smooth and accurate navigation, and establish targets for your links. To give you a full picture of the possibilities, this chapter begins with an overview of Internet addresses, called URLs.
URL stands for Uniform Resource Locator. An awkward phrase, it is one that, nonetheless, describes itself well—the URL’s function is to provide a standard method for finding anything on the Internet. From web pages to newsgroups to the smallest graphic on the most esoteric of pages, everything can be referenced through the URL mechanism.
A typical URL for a web page can have up to six different parts. Each part is separated by some combination of a slash, colon, and hash-mark delimiter. When entered as an attribute’s value, the entire URL is generally enclosed within quotation marks to ensure that the address is read as one unit. A generic URL using all the parts looks like this:
scheme://server:port/path/file#anchor
Here’s an example that uses every section:
http://www.idest.com:80/Dreamweaver/index.htm#bible
From left to right, the parts are as follows:
- http—The URL scheme used to access the resource. A scheme is an agreed-upon mechanism for communication, typically between a client and a server. The scheme to reference web servers uses the Hypertext Transfer Protocol (HTTP). Other schemes and their related protocols are discussed later in this section.
- www.idest.com—The name of the server providing the resource. The server can be either a domain name (with or without the www prefix) or an Internet Protocol (IP) address, such as 199.227.52.143.
- :80—The port number to be used on the server. Most URLs do not include a port number, which is analogous to a telephone extension number on the server, because most servers use the defaults.
- /Dreamweaver—The directory path to the resource. Depending on where the resource (for example, the web page) is located on the server, the following paths can be specified: no path (indicating that the resource is in the public root of the server), a single folder name, or a number of folders and subfolders.
- /index.htm—The filename of the resource. If the filename is omitted, the web browser looks for a default page, often named index.html or index.htm. The browser reacts differently depending on the type of file. For example, GIFs and JPEGs are displayed by themselves; executable files and archives (Zip, StuffIt, and so on) are downloaded.
- #bible—The named anchor in the HTML document. This part is another optional section. The named anchor enables the web designer to send the viewer to a particular section of an HTML page.
Although http is one of the most prevalent communication schemes used on the Internet, other schemes are also available. Whereas HTTP is used for accessing web pages, the other schemes are used for such things as transferring files between servers and clients or for sending e-mail. Table 9-1 describes the most common schemes used in URLs.
Table 9-1: Common URL Schemes and Associated Protocols
|
Scheme Syntax |
Protocol |
Usage |
|
ftp:// |
File Transfer Protocol (FTP) |
Links to an FTP server that is typically used for uploading and downloading files. The server may be accessed anonymously, or it may require a username and password. |
|
http:// |
Hypertext Transfer Protocol (HTTP) |
Used for connecting to a document available on a World Wide Web server. |
|
javascript: |
JavaScript |
Although it is not part of a true URL, some browsers support a scheme of javascript:, indicating that the browser should execute JavaScript code. This provides an easy way to execute JavaScript code when a user clicks a link. |
|
mailto: |
Simple Mail Transfer Protocol (SMTP) |
Opens an e-mail form with the recipient’s address already filled in. These links are useful when embedded in your web pages to provide visitors with an easy feedback method. |
|
news:// |
Network News Transfer Protocol (NNTP) |
Connects to the specified Usenet newsgroup. Newsgroups are public, theme-oriented message boards on which anyone can post or reply to a message. |
|
telnet:// |
Telnet |
Enables users to log on directly to remote host computers and interact directly with the operating system software. |
Part of the richness of today’s web browsers stems from their capability to connect to all the preceding (and additional) services.
Note: The mailto: scheme enables you not only to open up a preaddressed e-mail form but also, with a little extra work, to specify the topic. For example, if Joe Lowery wants to include a link to his e-mail address with the subject heading “Book Feedback,” he can insert a link such as the following:
mailto:[email protected]?subject=Book%20Feedback
The question mark acts as a delimiter that enables a variable and a value to be passed to the browser; the %20 is the decimal representation for a space that must be read by various servers. When you’re trying to encourage feedback from your web page visitors, every little bit helps.
Surfing the Web with Hypertext
Often, you assign a link to a word or phrase on your page, an image such as a navigational button, or a section of graphic for an image map (a large graphic in which various parts are links). To test the link, you preview the page in a browser; links are not active in Dreamweaver’s Document window.
Designate links in HTML through the anchor tag pair: <a> and </a>. The anchor tag generally takes one main attribute—the hypertext reference, which is written as follows:
href="link name"
When you create a link, the anchor pair surrounds the text or object that is being linked. For example, if you link the phrase Back to Home Page, it may look like the following:
<a href="index.html">Back to Home Page</a>
If you attach a link to the image logo.gif, your code looks as follows:
<a href="home.html"><img src="images/logo.gif"></a>
Creating a basic link in Dreamweaver is easy. Simply follow these steps:
1. Select the text, image, or object you want to establish as a link.
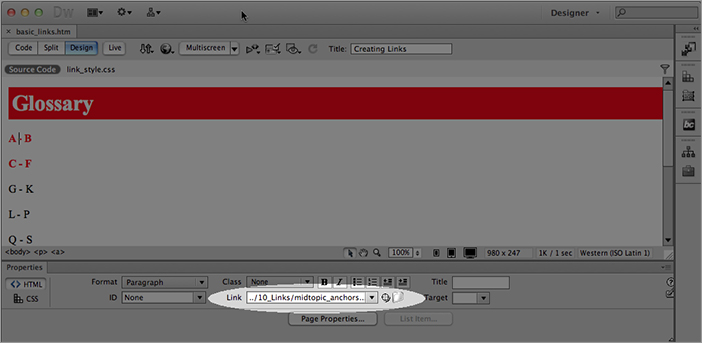
2. In the Property inspector, enter the URL in the Link text box, as shown in Figure 9-1. You can use one of the following methods to do so:
- Type the URL directly into the Link text box.
- Click the Browse for File folder icon to the right of the Link text box to open the Select File dialog box, where you can browse for the file.
- Click the Point to File icon and drag your mouse to an existing page in the Files panel or anchor on the current page. This feature is explained later in this section.
Figure 9-1: You can enter your link directly into the Link text box, click the folder icon to browse for a file, or point to the file directly with the Point to File icon.
You can also create a link by dragging a URL from the Assets panel onto a text or image selection—a procedure covered more fully later in this chapter.
Finally, you can create a link using the Insert menu or Insert panel. Without selecting any text, choose Insert Hyperlink, or in the Common category of the Insert panel, click the Hyperlink button. The Hyperlink dialog box opens, and you can specify the link text, the URL for the link, and a link target (described later). This method also enables you to specify the following:
- Tab index: A number specifying the order in which a user can tab through the page. Links with lower numbers are given focus first, and links with no tab index defined appear last in the tab order.
- Title field: A description of the link. In Internet Explorer 6.0, the text appears as a tooltip when the user holds the cursor over the link.
- Access key: A single letter that serves as the keyboard equivalent for the hyperlink. Access keys work only in the most recent browser versions, and they do not work consistently. Pressing the Alt (Option) key plus the access key may just select the link, or it may actually execute the link.
Note: If you don’t see the Hyperlink dialog box when you insert a hyperlink, choose Edit Preferences (Dreamweaver Preferences) and, in the General category, select the Show Dialog When Inserting Objects option.
Regardless of how you create a link in Dreamweaver, a few restrictions exist for specifying URLs. Dreamweaver does not support any letters from the extended character set (also known as High ASCII), such as ¡, à, or ñ. Complete URLs must have fewer than a total of 255 characters. You should be cautious about using spaces in pathnames and, therefore, in URLs. Although most browsers can interpret the address, spaces are changed to a %20 symbol for proper UNIX usage. This change can make your URLs difficult to read.
Text links are, for almost all browsers, rendered with a blue color and underlined. Depending on the background color for your page, you may want to change the color of text links to improve readability. You can specify the document-link color by choosing Modify Page Properties and selecting the Links color box. In Page Properties, you can also alter the color to which the links change after being selected (the Visited Links color), and the color flashed when the link is clicked (the Active Links color). All of these changes are written as CSS statements in the <head> of the current document.
Eliminating underlines from links
Disabling the underline for the anchor tag, <a>, which is normally associated with hyperlinked text, is one modification commonly included in style sheets.
Caution: Be careful when using this technique. Underlined text is a standard method of indicating a hyperlink on the web, and some clients or users may find your pages not as intuitive if the underline indicator is no longer visible.
To disable the underline on the anchor tag, follow these steps:
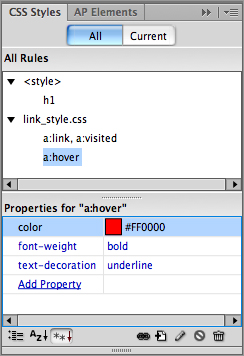
1. Open the CSS Styles panel by choosing Window CSS Styles. The CSS Styles panel, shown in Figure 9-2, displays existing styles and provides controls for creating and managing styles.
2. At the bottom of the CSS Styles panel, click the New CSS Rule button. This action opens the New CSS Rule dialog box.
3. Select the Tag option and choose the anchor tag, a, from the drop-down list. Finally, select Define In This Document Only to create an internal CSS style sheet or choose an external style sheet from the drop-down list. Click OK, and the CSS Style Definition dialog box opens.
Figure 9-2: The Dreamweaver CSS Styles panel helps you apply consistent styles to a web page.
Tip: You can also select the “Compound (based on your selection)” option rather than Tag and choose a:link from the drop-down list. You can even employ the a:hover style, which enables text to change color or style on rollover. You must, however, define the four CSS Selector styles in a particular order for them to work correctly. Start by defining the a:link class and then proceed to define a:visited, a:hover, and a:active, in that order. Note that in Dreamweaver’s Design view you can preview only the a:link altered style; to see the other styles, use Dreamweaver’s Live View or preview the page in a browser.
4. In the CSS Rule Definition window, make sure that the correct category is displayed by selecting Type from the list of categories.
5. In the Text-decoration section of the Type category, select the None option. You can also make any other modifications to the anchor tag style, such as color or font size. Click OK when you’re finished.
Tip: Many designers, myself included, like to make the link apparent by styling it bold and putting it in a different color.
The CSS Rule Definition window closes, and any style changes instantly take effect on your page. If you have any previously defined links, the underline disappears from them.
Now, when viewed through a browser, any links that you insert on your page still function as links—the user’s pointer still changes into a pointing hand, and the links are active—but no underline appears.
One variation on this technique is to make the underline appear only when the mouse rolls over the link. To accomplish this variation, define a CSS rule for the a:hover selector and set the Decoration to Underline.
To eliminate the border around an image designated as a link, create a rule like this:
a img { border: none; }
This CSS rule looks for any image within an anchor tag and removes the border.
Inserting URLs from the Assets panel
Internet addresses get more complicated every day. Trying to remember them all and avoid typos can make the web designer’s job unnecessarily difficult. You can use the Dreamweaver Assets panel’s URLs category to drag-and-drop the trickiest URLs with ease.
The Assets panel lists URLs that are already referenced somewhere within your site. If you want to link to the same URL again, just drag it from the Assets panel.
Tip: To avoid rework, after you have typed a URL for a link in a document, test that link in a browser to be sure it’s correct. Then, when you assign the same URL to other links using the Assets panel, you can be confident that the link works as expected.
The Assets panel lists only full Internet addresses—whether to files (such as http://www.idest.com/dreamweaver/) or to e-mail addresses (such as mailto:[email protected]). Document- or site-relative links are not listed as Assets. To assign a link to a document- or site-relative page, use one of the other linking methods discussed in this chapter, such as pointing to a file.
To assign a URL from the Assets panel, follow these steps:
1. If the Assets panel is not already visible, choose Window Assets to display it.
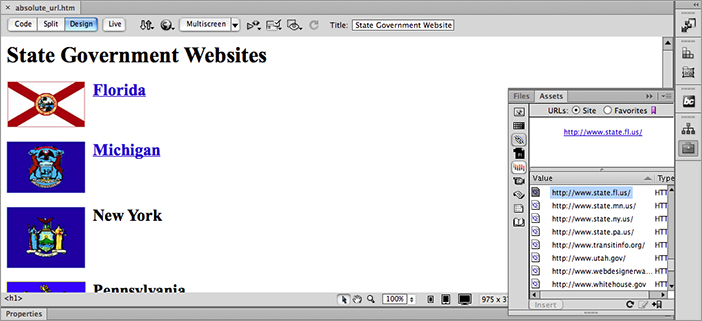
2. Click the URLs icon on the side of the Assets panel to display that category (see Figure 9-3).
Figure 9-3: Banish typos from your absolute URLs by dragging a link from the Assets panel to any selected text or graphic.
3. If necessary, click the Refresh Site List button on the Assets panel to list the most current links found in the site.
Note: As with other Assets panel categories, you need to click the Refresh Site List button to make available all the possible URLs in a site. Alternatively, you could choose Refresh Site List from the context menu on the panel. Either action causes Dreamweaver to scan all the web pages within the site and extract all of the complete Internet addresses it finds.
4. In the Document window, select the text or image you want the link assigned to.
5. Drag the desired link from the Assets panel onto the selected text or image; alternatively, highlight the link in the panel and click the Insert button.
If you don’t select text or an image before dragging the URL from the Assets panel, a link is still created in your document. In this situation, Dreamweaver uses the URL name as the hotspot.
The Edit button on the Assets panel is unavailable for the URLs category. Links cannot be edited; they can only be applied as shown in the preview area.
Pointing to a file
Dreamweaver provides an alternative method of identifying a link—pointing to it. By using the Point to File icon on the Property inspector, you can quickly fill in the Link text box by dragging your mouse to any existing named anchor or file visible in the Dreamweaver environment. With the Point to File feature, you can avoid browsing through folder after folder as you search for a file you can clearly see onscreen.
You can point to another open document, to a document in another frame in the same window, or to any named anchor visible on the screen. If your desired link is a named anchor located farther down the page, Dreamweaver automatically scrolls to find it. You can even point to a named anchor in another document, and Dreamweaver will enter the full syntax correctly. Named anchors are covered in detail later in this chapter.
Perhaps one of the slickest ways to apply the Point to File feature is to use it in tandem with the Files panel. The Files panel lists all the existing files in any given website, and when both it and the Document window are onscreen, you can quickly point to any file.
You point to a file with what could be called a drag-and-release mouse technique, as opposed to the more ordinary point-and-click or drag-and-drop method. To select a new link using the Point to File icon, follow these steps:
1. Select the text or the graphic that you’d like to make into a link.
2. In the Property inspector, click and hold the Point to File icon located to the right of the Link text box.
3. Holding down the mouse button, drag the mouse until it is over an existing link or named anchor in the Document window or a file in the Files panel. As you drag the mouse, a line extends from the Point to File icon, and the reminder Drag to a file to make a link appears in the Link text box.
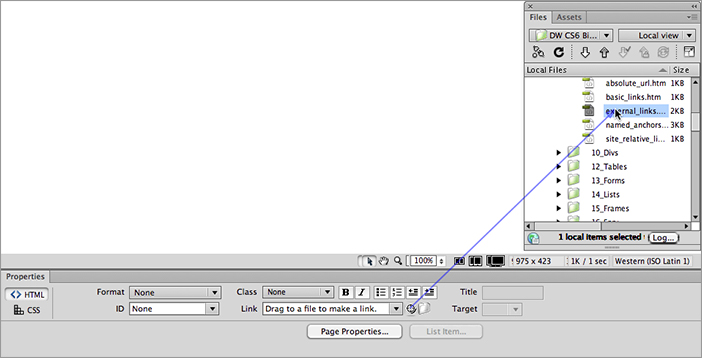
4. When you locate the file you want to link to, release the mouse button. The filename with the accompanying path information is written into the Link text box, as shown in Figure 9-4.
Figure 9-4: The Point to File icon enables you to quickly insert a link to any onscreen file.
Addressing types
Three types of URLs are used as links: absolute addresses, document-relative addresses, and site-root–relative addresses. The following list briefly looks at these address types:
- Absolute addresses require the full URL, as follows:
http://www.adobe.com/products/dreamweaver/
This type of address is most often used for referencing links on another web server.
- Document-relative addresses know the scheme, server, and path aspects of the URL. These include additional path information only if the link is outside the current web page’s folder. Links in the current document’s folder can be addressed with their filenames only. To reference an item in a subfolder, just name the folder, enter a forward slash, and then enter the item’s filename, as follows:
images/background.gif
- Site-root–relative addresses are indicated with a leading forward slash:
/navigation/upndown.html
This example links to a file named upndown.html stored in the navigation directory at the current site root. Dreamweaver translates site-relative links to document-relative links when the Preview in Browser feature is used.
Tip: You can set your preference for document- or site-root–relative links on a site-by-site basis. Open your Site Definition dialog box by double-clicking the displayed site name in the Files panel drop-down list. In the Advanced Settings Local Info category of the Site Definition dialog box, choose the Links Relative To option you’d prefer.
Checking links
A Webmaster must often perform the tedious but necessary task of verifying the links on all the web pages in a site. Because of the web’s fluid nature, links can work one day and break the next. Dreamweaver includes powerful link-checking and link-updating capabilities.
Dreamweaver can generate reports for broken links, for external links (links to files outside your site), and for orphaned files (files in your site with no links to them). You can check links for an open document, for all documents in a site, or for selected documents in the Files panel.
Warning: When Dreamweaver checks your external links, it verifies that the links are well formed and not that they link to an actual page or other file. Be sure to verify your links actually go where they’re supposed to before pushing the site live.
To check links in the current document, choose File Check Page Links, or press Shift+F8. To generate a link report for the entire site, open the Files panel (Window Files), and, from the Site menu, choose Check Links Sitewide. To report on links for certain files, select the files or folders in the Files panel, right-click (Control+click) and choose Check Links Selected Files. If the Link Checker panel is open, you can also click the Check Links button and then select the scope of your check: current document, entire site, or selected files in the site.
Tip: To stop an in-progress link check, click the Stop button in the Link Checker panel.
All these methods open the Link Checker panel, displaying the results of the link check. In the Show drop-down list at the top of the Link Checker panel, select the report you want to see: Broken Links, External Links, or Orphaned Files. The Orphaned Files report is available only if you check the entire site. The Broken Links report verifies not only clickable hotspots to other HTML files but also references to graphics and other external files.

Linking to Files
Linking to files properly is an essential task in building websites. In this Dreamweaver Technique, you practice linking to other files from text phrases and images.
1. From the Techniques site, expand the 09_Links folder and open the links_start file.
2. Select the phrase at the end of the first paragraph of placeholder text, Learn more . . .
3. In the Property inspector next to the Link field, click Browse for File (the folder icon) to open the Select File dialog box.
4. When the Select File dialog box opens, navigate to the 09_Links folder and choose split_level_details.htm; click OK when you’re done.

The proper path is entered into the Link field by Dreamweaver. Assigning a link to a graphic is just as easy.
5. Select the image next to the Ranch style 2 bedroom label.
6. From the Property inspector, drag the Point to File icon to the Files panel and hover over the new_properties subfolder within the 09_Links folder. The new_properties subfolder expands.
7. Select ranch_style.htm and release your left mouse button.
8. Repeat Steps 5–7, selecting the image next to the Multi-level gardener’s delight label and selecting multi_level.htm in the new_properties folder.
9. Save your page.
10. Press F12 (Option+F12) to test your links in the primary browser.
It’s especially important to let Dreamweaver write your links for you when target files are located in a different folder. Get into the habit of using the Browse for File and Point to File icons, and you’ll save yourself from linking errors.
You can save the link report by clicking the Save Report button on the Link Checker panel or by right-clicking (Control+clicking) in the panel and choosing Save Results from the pop-up menu. To clear the Link Checker panel, right-click (Control+click) in the Link Checker panel and choose Clear Results.
Double-clicking an entry in the Link Checker panel opens the document where the error occurred, with the broken link selected. You can quickly correct the link using the Property inspector or by choosing Modify Change Link. To remove the link but leave the hotspot text, clear the Link field in the Property inspector, or choose Modify Remove Link. If the same URL is referenced in more than one place in your site, you can change all occurrences of it at once. To do this, choose Site Change Link Sitewide from the main menus, and enter the URL to be changed and then the new URL. Finally, click OK.
E-mail links are very common on the web. When a user clicks an e-mail link, it displays a window for sending a new e-mail message (rather than opening a new web page as a regular link does). The message window is convenient because it is preaddressed to the recipient. All the user has to do is add a subject, enter a message, and click Send.
Dreamweaver includes an object that streamlines the process of adding e-mail links. Just enter the text of the link and the e-mail address, and the link is ready. E-mail links, like other links, do not work when clicked in Dreamweaver; they must be previewed in a browser.
To enter an e-mail link, follow these steps:
1. Position your cursor where you want the e-mail link to appear.
2. From the Common category on the Insert panel, click the Email Link button. The Email Link dialog box, shown in Figure 9-5, appears.
Figure 9-5: The Email Link dialog box helps you create links that make it simple for your web page visitors to send e-mail messages.
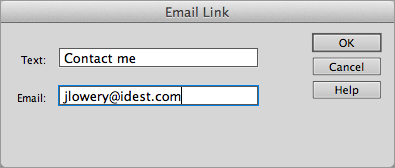
3. Enter the visible text for the link in the Text field.
4. Enter the e-mail address in the Email field.
Caution: The e-mail address must be in the format [email protected]. Dreamweaver does not check to ensure that you’ve entered the address in the proper format.
5. Click OK when you’re finished.
E-mail Warnings
Here’s a bit of the frustration that web designers sometimes face: On some browsers, notably Internet Explorer, users may see a dialog box when the e-mail link is first selected. The dialog box informs them that they are about to send an e-mail message over the Internet. The user has the option not to see these warnings, but there’s no way for the web designer to prevent them from appearing when an e-mail link is used. However, another method of collecting data from users—HTML forms—doesn’t require the users to have e-mail software installed on their computer, and it allows users to send information to the server without receiving the warning message. Chapter 13 explains how to create HTML forms.
Note: If you already have the text for the e-mail link in the document, you can use the Property inspector to insert an e-mail link. Just highlight the text, and in the Link field of the Property inspector, enter the URL in the following format:
mailto:[email protected]
Make sure that the URL is a valid e-mail address with the @ sign properly placed.
Whenever you normally link to an HTML page, through absolute or relative addressing, the browser displays the page from the top. Your web visitors must scroll to any information rendered below the current screen. One HTML technique, however, links to a specific point anywhere on the page regardless of the display window’s contents. This technique uses named anchors. A named anchor is simply an HTML anchor tag pair (<a> ... </a>) that includes a name attribute. The named anchor serves as a target for links, allowing links to the middle of a page or wherever the named anchor is located within the document. One of the most common uses for named anchors is a Frequently Asked Questions page or FAQ. This allows you to post all of the most common questions together at the top of the page, and when users click on a particular question, they’re automatically taken further down the page, sometimes dozens of screens down, to where the question is usually rewritten, followed by the specific answer they were looking for.
Using named anchors is a two-step process, although you usually find this two-step process repeated, in reverse, afterward for convenience (see the Technique later in the chapter). First, you place a named anchor somewhere on your web page. This placement is coded in HTML as an anchor tag using the name and id attributes, with nothing between the opening and the closing tags. In HTML, named anchors look like the following:
<a name="bible" id="bible"></a>
Note: If an HTML5 doctype is declared, the name attribute is not used, and anchor tags use the ID value.
The second step includes a link to that named anchor from somewhere else on your web page. If used, a named anchor is referenced in the final portion of an Internet address, designated by the hash mark (#), as follows:
<a href="http://www.idest.com/Dreamweaver/index.htm#bible">
You can include any number of named anchors on a page and any number of links to named anchors on the current page or different pages. Named anchors are commonly used with a table of contents or index.
To insert a named anchor, follow these steps:
1. Place the cursor where you want the named anchor to appear.
2. Choose Insert Named Anchor. You can also click the Named Anchor button in the Common category of the Insert panel or use the keyboard shortcut Ctrl+Alt+A (Command+Option+A).
3. The Named Anchor dialog box opens. Type the anchor name in the text box.
Caution: Named anchors are case-sensitive and must be unique within the page.
When you click OK, Dreamweaver places a named anchor symbol in the current cursor location and opens the Named Anchor Property inspector (shown in Figure 9-6).
Figure 9-6: The Named Anchor tag enables you to link to specific areas of a web page.
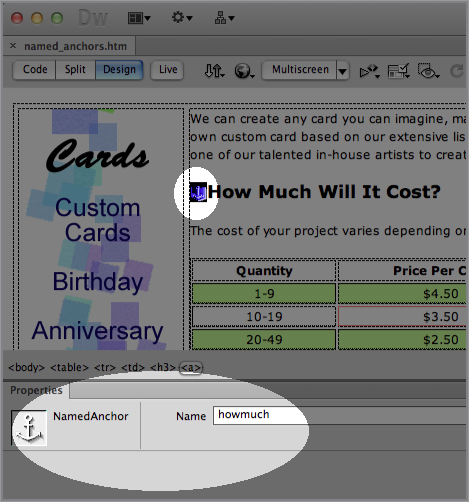
Tip: In Design view, named anchors are represented by a small yellow icon with—surprise!—an anchor image on it in the page. If you can’t see the named anchor symbol, choose View Visual Aids Invisible Elements; if the symbol is still not visible, update your Preference settings for the Invisible Elements category.
4. To change an anchor’s name, click the named anchor symbol within the page and alter the text in the Property inspector.
As with other invisible symbols, the named anchor symbol can be cut and pasted or moved using the drag-and-drop method.
Moving within the same document
One of the major advantages of using named anchors is the almost instantaneous response viewers receive when they link to named anchors from the same page. The browser just scrolls to the particular place in the document because the entire page is already loaded. For long text documents, this capability is an invaluable time-saver.
After you have placed a named anchor in your document, you can link to the anchor. You can create more than one named anchor in your document before adding links to the anchors. To create a link to a named anchor in the same document, follow these steps:
1. Select the text or image that you want to designate as a link.
2. In the Link text box of the Property inspector, type a hash mark (#) followed by the exact anchor name:
#start
Remember that anchor names are case-sensitive and must be unique in each document.
Tip: Place the named anchor one line above the heading or image to which you want to link the viewer. Browsers tend to be quite literal. If you place the named anchor on the same line, the browser renders it against the top of the window. Placing your named anchor up one line gives your topic a bit of breathing room in the display.
In Dreamweaver, you can also use the Point to File icon to choose a named anchor link. If your named anchor is in the same document, just drag the Point to File icon to the named anchor symbol. When you release the mouse, the address for the named anchor is inserted into the Link text box. If the named anchor is on the same page, but off-screen, Dreamweaver automatically scrolls the Document window as you drag toward the edge. In Windows, the closer you move to the edge, the faster Dreamweaver scrolls. Dreamweaver returns the screen to your original location, with the new link at the top of the screen after you release the mouse button.
In long documents with a table of contents or index linking to a number of named anchors, it’s common practice—and a good idea—to place a link back to the top of the page after every screen or every topic. This technique enables your users to return to the menu quickly and pick another topic without having to manually scroll all the way back.
Using named anchors in a different page
If your table of contents is on a separate page from the topics of your site, you can use named anchors to send the viewer anywhere on a new page. The technique is the same as that already explained for placing named anchors, but with one minor difference when it comes to linking. Instead of placing a hash mark and name to denote the named anchor, you must first include the URL of the linked page.
Suppose you want to call the disclaimer section of a legal page from your table of contents. You could insert something like the following in the Link text box of the Property inspector:
legal.htm#disclaimer
This link, when activated, first loads the referenced web page (legal.htm) and then goes directly to the named anchor place (#disclaimer). Figure 9-7 shows how you enter this in the Property inspector. Keep in mind that you can use any form of addressing prior to the hash mark and named anchor.
Figure 9-7: You can link to any part of a separate web page by using named anchors.

Creating null links
One of the more obscure uses for named anchors comes into play when you are trying to use Dreamweaver’s JavaScript Behavior feature. Because JavaScript needs to work with a particular type of tag to perform onMouseOver and other events, a useful trick is to create a null link—a link that doesn’t actually link to anywhere.
You create a null link by marking some text or an image with a link to #nowhere. You can use any name for the nonexistent named anchor. In fact, you don’t even have to use a name—you can just use a hash mark (#) by itself.
There’s one problem to note, however: Some earlier browsers had a tendency to send the page to the top if a link of this type is used. Many programmers have begun to substitute an empty call to a JavaScript function instead, such as javascript:;. Dreamweaver itself now uses javascript:; instead of # when a new behavior is attached to an image.
Inserting Named Anchors
Named anchors are an excellent way to navigate within a page. In this Dreamweaver Technique, you add links and named anchors to a page to allow the user to move about the page more easily. To save time, three of the five named anchors have been done for you.
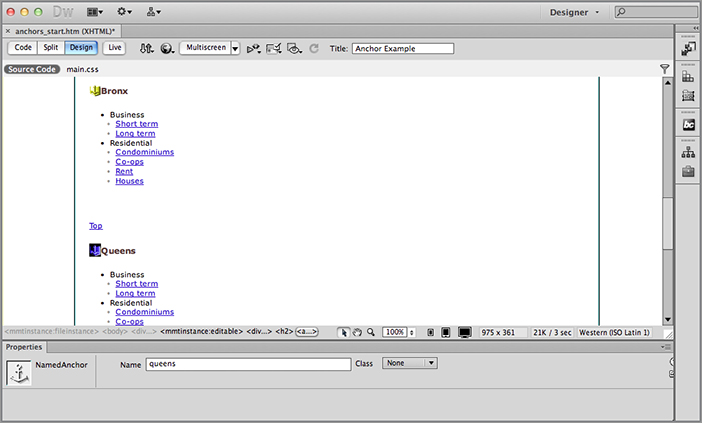
1. From the Techniques site, expand the 09_Links folder and open the anchors_start file.
2. Scroll down the page and place your cursor in front of the Queens heading.
3. Choose Insert Named Anchor.
4. When the Named Anchor dialog box appears, enter queens in the Anchor Name field.
5. Near the top of the page, select the Queens entry in the list.
6. In the Property inspector’s Link field, enter #queens and press Tab.
7. Repeat Steps 2–6 to create a named anchor named statenIsland and a link for the Staten Island entry, #statenIsland.
It’s good practice on a long page to include a link to the top of the page for every named anchor section. Again, most of the work has been done for you; you’ll just need to add anchor links for the last two sections and a named anchor at the top of the page.
8. Scroll to the Queens section and select the word Top at the bottom of that section.
9. In the Property inspector’s Link field, enter #top and press Tab.
10. Repeat Steps 8 and 9 to add a link named #top to the word Top following the Staten Island section.
11. The last action is to insert a named anchor named top. Place your cursor at the top of the page and select Insert Named Anchor.
12. When the Named Anchor dialog box opens, enter top.
13. Save your page and press F12 (Option+F12) to test it in your primary browser.
When you test the links, notice that the page moves up and down with each anchor link selected.
Thus far, all the links discussed in this chapter have had a similar effect: They open another web page or section in your browser’s window. What if you want to force the browser to open another window and load that new URL in the new window? HTML enables you to specify the target for your links.
Cross reference:Targets are most often used in conjunction with frames—that is, you can make a link in one frame open a file in another. For more information about this technique, see Chapter 15.
Targets do more than just display a page in a certain frame. Take a look at one of the HTML predefined targets used in a situation where you want to load another URL into a new window.
To specify a new browser window as the target for a link, follow these steps:
1. Select the text or image you want to designate as your new link.
2. In the Property inspector, enter the URL into the Link text box. After you’ve entered a link, the target option becomes active.
3. In the Target drop-down list, select _blank, as shown in Figure 9-8. You can also type it in the list box. Either way, Dreamweaver inserts a _blank option in the Target list box. Now, when your link is activated, the browser spawns a new window and loads the referenced link into it. The user has both windows available.
Figure 9-8: With the Target attribute, you can force a user’s browser to open a separate window to display a specific link.
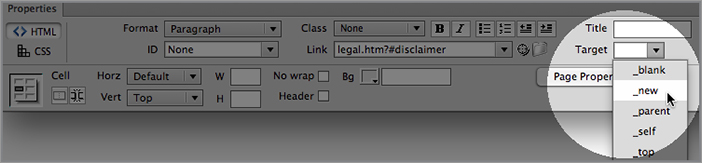
The _blank target is most often used when the originating web page is acting as a jump station and has numerous links available. By keeping the original web page open, the user can view another page without losing the origin point. You can even use a _blank target with links to named anchors in the same document.
Three other system-wide targets exist: _top, _parent, and _self. Both _top and _parent are primarily used with framesets: The _top target replaces the outermost frameset, and _parent replaces the frameset containing the current page. These two have the same effect, except in the case of nested framesets. The _self target is the default behavior, and only the current page is replaced.
Note: Many modern browsers allow windows to be grouped as a series of tabs. If the user has his or her browser preferences set to open new windows in tabs, the _blank target opens in a tab rather than a completely new window.
Whether they are links for website navigation or jumps to other related sites, hypertext links are an essential part of any web page. Dreamweaver gives you full control over your inserted links. Keep in mind the following points about links:
- Through a unique URL, you can access virtually any web page, graphic, or other item available on the Internet.
- The Hypertext Transfer Protocol (HTTP) is one of the most common methods of Internet connection, but web pages can link to other formats, including FTP, e-mail, and newsgroups.
- Any of the three basic address formats—absolute, document relative, or site-root relative—can be inserted in the Link text box of Dreamweaver’s Property inspector to create a link.
- Dreamweaver has several quick linking capabilities in the Assets panel and Point to File feature.
- Named anchors give you the power to jump to specific parts of any web page, whether the page is the current one or one that is located on another server.
- With the _blank target attribute, you can force a link to open in a new browser window, leaving your original window available to the user.
In the next chapter, you learn how to work with AP elements and <div> tags in Dreamweaver.