7.5. Configuring Tomcat to Use SSL
Servlet and JSP containers are not required to support SSL, even in fully J2EE-compliant application servers or with version 2.3 of the servlet specification. Of the three servers that are free for development use and are most commonly discussed throughout the book (Tomcat, JRun, and ServletExec), only Tomcat can directly support SSL. With JRun and ServletExec, traffic between the client and the Web server can be encrypted with SSL, but local communication between the Web server and the JRun or ServletExec plugin does not use SSL. So, Web applications that rely on SSL are not necessarily portable.
Nevertheless, SSL is extremely useful, and many applications make use of it. For example, many application servers are self-contained; they do not have a servlet/JSP plugin that is separate from the main Web server. In addition, some server plugins use SSL even for the communication between the Web server and the plugin. The BEA WebLogic plugin and IBM WebSphere support this very useful capability, for example.
Even with Tomcat, the default configuration lacks SSL support; you have to install some extra packages to add this support. This section summarizes the steps necessary to do so. For more details, see http://jakarta.apache.org/tomcat/tomcat-4.0-doc/ssl-howto.html.
1. |
Download the Java Secure Socket Extension (JSSE).
Obtain it from http://java.sun.com/products/jsse/index-102.html. Note that this step is unnecessary if you are using JDK 1.4 or later; JSSE is integrated into the JDK in such case. | |||
2. |
Put the JSSE JAR files in Tomcat’s CLASSPATH.
JSSE consists of three JAR files: jcert.jar, jnet.jar, and jsse.jar. The server needs access to all of them. The easiest way to accomplish this step is to put the JAR files into jdk_install_dir/jre/lib/ext, thereby making JSSE an installed extension. Note that the Tomcat documentation describes another approach: setting the JSSE_HOME environment variable. As of Tomcat 4.0, this approach fails because of a bug in the way Tomcat processes the variable (Tomcat erroneously looks for jsse.jar in JSSE_HOME instead of JSSE_HOME/lib). | |||
3. |
Create a self-signed public key certificate.
SSL-based servers use X509 certificates to validate to clients that they are who they claim to be. This prevents attackers from hacking DNS servers to redirect SSL requests to their site. For real-world use, the certificate needs to be signed by a trusted authority like Verisign. For testing purposes, however, a self-signed certificate is sufficient. To generate one that will be valid for two years (730 days), execute the following: keytool -genkey -alias tomcat -keyalg RSA -validity 730 The system will prompt you for a variety of information starting with your first and last name. For a server certificate, this should be the server’s name, not your name! For example, with a server that will be accessed from multiple machines, respond with the hostname (www.yourcompany.com) or the IP address (207.46.230.220) when asked “What is your first and last name?” For a development server that will run on your desktop, use localhost. Remember that, for deployment purposes, self-signed certificates are not sufficient. You would need to get your certificate signed by a trusted Certificate Authority. You can use certificates from keytool for this purpose also; it just requires a lot more work. For testing purposes, however, self-signed certificates are just as good as trusted ones.
The system will also prompt you for your organization, your location, a keystore password, and a key password. Be sure to use the same value for both passwords. The system will then create a file called.keystore in your home directory (e.g., /home/username on Unix or C:Documents and Settingsusername on Windows 2000). You can also use the -keystore argument to change where this file is created. For more details on keytool (including information on creating trusted certificates that are signed by a standard Certificate Authority), see http://java.sun.com/j2se/1.3/docs/tooldocs/win32/keytool.html. | |||
4. |
Copy the keystore file to the Tomcat installation directory.
Copy the.keystore file just created from your home directory to tomcat_install_dir. | |||
5. |
Uncomment and edit the SSL connector entry in
tomcat_install_dir/conf/server.xml.
Look for a commented-out Connector element that encloses a Factory element referring to the SSLServerSocketFactory class. Remove the enclosing comment tags (<!-... -->). Change the port from 8443 to the default SSL value of 443. Add a keystoreFile attribute to Factory designating the name of the keystore file. Add a keystorePass attribute to Factory designating the password. Here is an example (class names shortened and line breaks added for readability). <Connector className="...http.HttpConnector" port="443" minProcessors="5" maxProcessors="75" enableLookups="true" acceptCount="10" debug="0" scheme="https" secure="true"> <Factory className="...net.SSLServerSocketFactory" clientAuth="false" protocol="TLS" keystoreFile=".keystore" keystorePass="your-password"/> </Connector> | |||
6. |
Change the main connector entry in
tomcat_install_dir/conf/server.xml
to use port 443 for SSL redirects.
Use the redirectPort attribute to specify this. Here is an example. <Connector className="...http.HttpConnector"
port="80" minProcessors="5" maxProcessors="75"
enableLookups="true" redirectPort="443"
acceptCount="10" debug="0"
connectionTimeout="60000"/> | |||
7. |
Restart the server. | |||
8. |
Access https://localhost/.
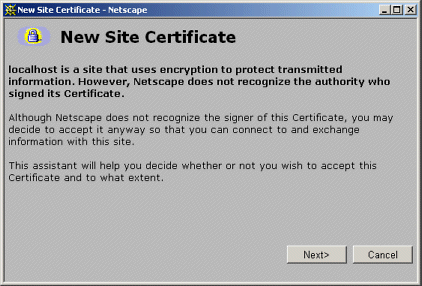
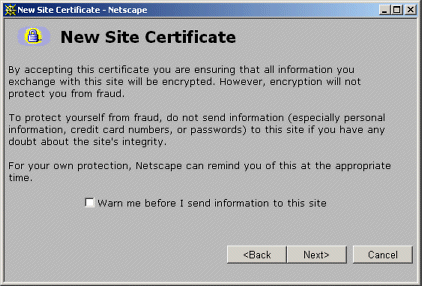
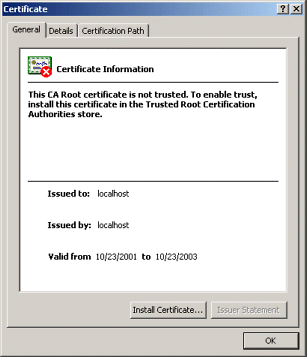
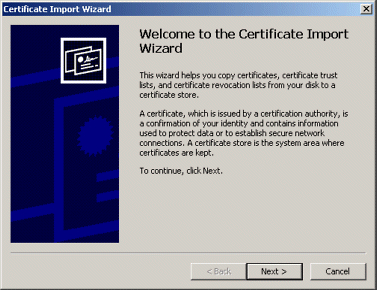
(Note that this URL starts with https, not http.) With Netscape, you should see initial warnings like those of Figures 7-21 through 7-25. Once you have accepted the certificate, you should see the Tomcat home page (Figure 7-26). With Internet Explorer, you will see an initial warning like that of Figure 7-27. For future requests, you can suppress the warnings by viewing and importing the certificate (Figures 7-28 and 7-29). Figure 7-21. First new-certificate window supplied by Netscape.
Figure 7-22. Second new-certificate window supplied by Netscape. Self-signed certificates are for testing purposes only.
Figure 7-23. Third new-certificate window supplied by Netscape. By choosing to accept the certificate permanently you suppress future warnings.
Figure 7-24. Fourth new-certificate window supplied by Netscape.
Figure 7-25. Fifth new-certificate window supplied by Netscape.
Figure 7-26. A successful attempt to access the Tomcat home page using SSL.
Figure 7-27. New-certificate page for Internet Explorer. View and import the certificate to suppress future warnings. Again, self-signed certificates would not be trusted in real-world applications; they are for testing purposes only.
Figure 7-28. Result of choosing View Certificate in Internet Explorer’s new-certificate page.
Figure 7-29. Importing self-signed certificates in Internet Explorer lets you suppress warnings that the certificate comes from a company that you have not chosen to trust.
|
