2.2. Basic Servlet Structure
Listing 2.1 outlines a basic servlet that handles GET requests. GET requests, for those unfamiliar with HTTP, are the usual type of browser requests for Web pages. A browser generates this request when the user enters a URL on the address line, follows a link from a Web page, or submits an HTML form that either does not specify a METHOD or specifies METHOD="GET". Servlets can also easily handle POST requests, which are generated when someone submits an HTML form that specifies METHOD="POST". For details on using HTML forms, see Chapter 16 of Core Servlets and JavaServer Pages (available in PDF at http://www.moreservlets.com).
Listing 2.1. ServletTemplate.java
import java.io.*;
import javax.servlet.*;
import javax.servlet.http.*;

public class ServletTemplate extends HttpServlet {
  public void doGet(HttpServletRequest request,
                    HttpServletResponse response)
      throws ServletException, IOException {

    // Use "request" to read incoming HTTP headers
    // (e.g., cookies) and query data from HTML forms.

    // Use "response" to specify the HTTP response status
    // code and headers (e.g. the content type, cookies).

    PrintWriter out = response.getWriter();
    // Use "out" to send content to browser.
  }
} |
To be a servlet, a class should extend HttpServlet and override doGet or doPost, depending on whether the data is being sent by GET or by POST. If you want a servlet to take the same action for both GET and POST requests, simply have doGet call doPost, or vice versa.
Both doGet and doPost take two arguments: an HttpServletRequest and an HttpServletResponse. The HttpServletRequest has methods by which you can find out about incoming information such as form (query) data, HTTP request headers, and the client’s hostname. The HttpServletResponse lets you specify outgoing information such as HTTP status codes (200, 404, etc.) and response headers (Content-Type, Set-Cookie, etc.). Most importantly, it lets you obtain a PrintWriter with which you send the document content back to the client. For simple servlets, most of the effort is spent in println statements that generate the desired page. Form data, HTTP request headers, HTTP responses, and cookies are all discussed in the following sections.
Since doGet and doPost throw two exceptions, you are required to include them in the declaration. Finally, you must import classes in java.io (for PrintWriter, etc.), javax.servlet (for HttpServlet, etc.), and javax.servlet.http (for HttpServletRequest and HttpServletResponse).
A Servlet That Generates Plain Text
Listing 2.2 shows a simple servlet that outputs plain text, with the output shown in Figure 2-2. Before we move on, it is worth spending some time reviewing the process of installing, compiling, and running this simple servlet. See Chapter 1 (Server Setup and Configuration) for a much more detailed description of the process.
First, be sure that your server is set up properly as described in Section 1.4 (Test the Server) and that your CLASSPATH refers to the necessary three entries (the JAR file containing the javax.servlet classes, your development directory, and “.”), as described in Section 1.6 (Set Up Your Development Environment).
Second, type “ javac HelloWorld.java ” or tell your development environment to compile the servlet (e.g., by clicking Build in your IDE or selecting Compile from the emacs JDE menu). This will compile your servlet to create HelloWorld.class.
Third, move HelloWorld.class to the directory that your server uses to store servlets (usually install_dir/.../WEB-INF/classes—see Section 1.7). Alternatively, you can use one of the techniques of Section 1.8 (Establish a Simplified Deployment Method) to automatically place the class files in the appropriate location.
Finally, invoke your servlet. This last step involves using either the default URL of http://host/servlet/ServletName or a custom URL defined in the web.xml file as described in Section 5.3 (Assigning Names and Custom URLs). Figure 2-2 shows the servlet being accessed by means of the default URL, with the server running on the local machine.
Listing 2.2. HelloWorld.java
import java.io.*;
import javax.servlet.*;
import javax.servlet.http.*;

public class HelloWorld extends HttpServlet {
  public void doGet(HttpServletRequest request,
                    HttpServletResponse response)
      throws ServletException, IOException {
    PrintWriter out = response.getWriter();
    out.println("Hello World");
  }
} |
A Servlet That Generates HTML
Most servlets generate HTML, not plain text as in the previous example. To build HTML, you need two additional steps:
1. |
Tell the browser that you’re sending back HTML. |
2. |
Modify the println statements to build a legal Web page. |
You accomplish the first step by setting the HTTP Content-Type response header. In general, headers are set by the setHeader method of HttpServletResponse, but setting the content type is such a common task that there is also a special setContentType method just for this purpose. The way to designate HTML is with a type of text/html, so the code would look like this:
response.setContentType("text/html"); Although HTML is the most common type of document that servlets create, it is not unusual for servlets to create other document types. For example, it is quite common to use servlets to generate GIF images (content type image/gif) and Excel spreadsheets (content type application/vnd.ms-excel).
Don’t be concerned if you are not yet familiar with HTTP response headers; they are discussed in Section 2.8. Note that you need to set response headers before actually returning any of the content with the PrintWriter. That’s because an HTTP response consists of the status line, one or more headers, a blank line, and the actual document, in that order. The headers can appear in any order, and servlets buffer the headers and send them all at once, so it is legal to set the status code (part of the first line returned) even after setting headers. But servlets do not necessarily buffer the document itself, since users might want to see partial results for long pages. Servlet engines are permitted to partially buffer the output, but the size of the buffer is left unspecified. You can use the getBufferSize method of HttpServletResponse to determine the size, or you can use setBufferSize to specify it. You can set headers until the buffer fills up and is actually sent to the client. If you aren’t sure whether the buffer has been sent, you can use the isCommitted method to check. Even so, the simplest approach is to simply put the setContentType line before any of the lines that use the PrintWriter.
|
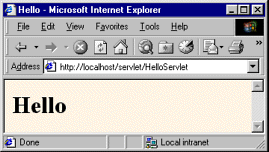
The second step in writing a servlet that builds an HTML document is to have your println statements output HTML, not plain text. Listing 2.3 shows Hello-Servlet.java, the sample servlet used in Section 1.7 to verify that the server is func-tioning properly. As Figure 2-3 illustrates, the browser formats the result as HTML, not as plain text.
Figure 2-3. Result of HelloServlet.

Listing 2.3. HelloServlet.java
import java.io.*;
import javax.servlet.*;
import javax.servlet.http.*;

public class HelloServlet extends HttpServlet {
  public void doGet(HttpServletRequest request,
                    HttpServletResponse response)
      throws ServletException, IOException {
    response.setContentType("text/html");
    PrintWriter out = response.getWriter();
    String docType =
      "<!DOCTYPE HTML PUBLIC "-//W3C//DTD HTML 4.0 " +
      "Transitional//EN">
";
    out.println(docType +
							"<HTML>
" +
							"<HEAD><TITLE>Hello</TITLE></HEAD>
" +
							"<BODY BGCOLOR="#FDF5E6">
" +
							"<H1>Hello</H1>
" +
							"</BODY></HTML>");
  }
} |
Servlet Packaging
In a production environment, multiple programmers can be developing servlets for the same server. So, placing all the servlets in the same directory results in a massive, hard-to-manage collection of classes and risks name conflicts when two developers accidentally choose the same servlet name. Packages are the natural solution to this problem. As we’ll see in Chapter 4, even the use of Web applications does not obviate the need for packages.
When you use packages, you need to perform the following two additional steps.
1. |
Move the files to a subdirectory that matches the intended package name.
For example, I’ll use the moreservlets package for most of the rest of the servlets in this book. So, the class files need to go in a subdirectory called moreservlets. |
2. |
For example, Listing 2.4 presents a variation of HelloServlet that is in the moreservlets package and thus the moreservlets directory. As discussed in Section 1.7 (Compile and Test Some Simple Servlets), the class file should be placed in install_dir/webapps/ROOT/WEB-INF/classes/moreservlets for Tomcat, in install_dir/servers/default/default-app/WEB-INF/classes/moreservlets for JRun, and in install_dir/Servlets/moreservlets for ServletExec.
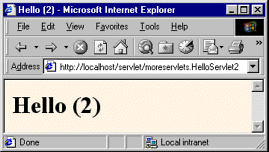
Figure 2-4 shows the servlet accessed by means of the default URL.
Listing 2.4. HelloServlet2.java
							package moreservlets;

import java.io.*;
import javax.servlet.*;
import javax.servlet.http.*;

/** Simple servlet used to test the use of packages. */

public class HelloServlet2 extends HttpServlet {
  public void doGet(HttpServletRequest request,
                    HttpServletResponse response)
      throws ServletException, IOException {
    response.setContentType("text/html");
    PrintWriter out = response.getWriter();
    String docType =
      "<!DOCTYPE HTML PUBLIC "-//W3C//DTD HTML 4.0 " +
      "Transitional//EN">
";
    out.println(docType +
                "<HTML>
" +
                "<HEAD><TITLE>Hello (2)</TITLE></HEAD>
" +
                "<BODY BGCOLOR="#FDF5E6">
" +
                "<H1>Hello (2)</H1>
" +
                "</BODY></HTML>");
  }
} |
Simple HTML-Building Utilities
As you probably already know, an HTML document is structured as follows:
<!DOCTYPE ...>
<HTML>
<HEAD><TITLE>...</TITLE>...</HEAD>
<BODY ...>...</BODY>
</HTML>
When using servlets to build the HTML, you might be tempted to omit part of this structure, especially the DOCTYPE line, noting that virtually all major browsers ignore it even though the HTML 3.2 and 4.0 specifications require it. I strongly discourage this practice. The advantage of the DOCTYPE line is that it tells HTML validators which version of HTML you are using so they know which specification to check your document against. These validators are valuable debugging services, helping you catch HTML syntax errors that your browser guesses well on but that other browsers will have trouble displaying.
The two most popular online validators are the ones from the World Wide Web Consortium (http://validator.w3.org/) and from the Web Design Group (http://www.htmlhelp.com/tools/validator/). They let you submit a URL, then they retrieve the page, check the syntax against the formal HTML specification, and report any errors to you. Since, to a visitor, a servlet that generates HTML looks exactly like a regular Web page, it can be validated in the normal manner unless it requires POST data to return its result. Since GET data is attached to the URL, you can even send the validators a URL that includes GET data. If the servlet is available only inside your corporate firewall, simply run it, save the HTML to disk, and choose the validator’s File Upload option.
|
Admittedly, it is a bit cumbersome to generate HTML with println statements, especially long tedious lines like the DOCTYPE declaration. Some people address this problem by writing detailed HTML-generation utilities, then use the utilities throughout their servlets. I’m skeptical of the usefulness of such an extensive library. First and foremost, the inconvenience of generating HTML programmatically is one of the main problems addressed by JavaServer Pages. Second, HTML generation routines can be cumbersome and tend not to support the full range of HTML attributes (CLASS and ID for style sheets, JavaScript event handlers, table cell background colors, and so forth).
Despite the questionable value of a full-blown HTML generation library, if you find you’re repeating the same constructs many times, you might as well create a simple utility file that simplifies those constructs. For standard servlets, two parts of the Web page (DOCTYPE and HEAD) are unlikely to change and thus could benefit from being incorporated into a simple utility file. These are shown in Listing 2.5, with Listing 2.6 showing a variation of HelloServlet that makes use of this utility. I’ll add a few more utilities throughout the chapter.
Listing 2.5. moreservlets/ServletUtilities.java
							package moreservlets;

import javax.servlet.*;
import javax.servlet.http.*;

/** Some simple time savers. Note that most are static methods. */

public class ServletUtilities {
  public static final String DOCTYPE =
    "<!DOCTYPE HTML PUBLIC "-//W3C//DTD HTML 4.0 " +
    "Transitional//EN">";

  public static String headWithTitle(String title) {
    return(DOCTYPE + "
" +
           "<HTML>
" +
           "<HEAD><TITLE>" + title + "</TITLE></HEAD>
");
  }

  ...
} |
Listing 2.6. moreservlets/HelloServlet3.java
package moreservlets; import java.io.*; import javax.servlet.*; import javax.servlet.http.*; /** Simple servlet used to test the use of packages * and utilities from the same package. */ public class HelloServlet3 extends HttpServlet { public void doGet(HttpServletRequest request, HttpServletResponse response) throws ServletException, IOException { response.setContentType("text/html"); PrintWriter out = response.getWriter(); String title = "Hello (3)"; out.println(ServletUtilities.headWithTitle(title) + "<BODY BGCOLOR="#FDF5E6"> " + "<H1>" + title + "</H1> " + "</BODY></HTML>"); } } |
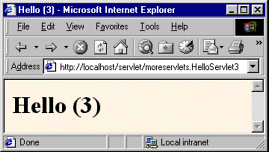
After you compile HelloServlet3.java (which results in ServletUtilities.java being compiled automatically), you need to move the two class files to the moreservlets subdirectory of the server’s default deployment location. If you get an “Unresolved symbol” error when compiling HelloServlet3.java, go back and review the CLASSPATH settings described in Section 1.6 (Set Up Your Development Environment). If you don’t know where to put the class files, review Sections 1.7 and 1.9. Figure 2-5 shows the result when the servlet is invoked with the default URL.
Figure 2-5. Result of HelloServlet3.


