In general, printing in FileMaker is not too different from printing in your other applications. But there are a few twists worth considering, so read on.
Unless you change it, FileMaker will use your regular printer and its default settings. If you want to use a different printer for FileMaker files than your regular printer, do this:
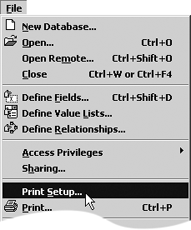
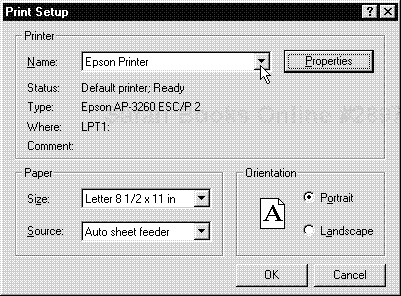
 In Windows, choose File > Print Setup (Figure 15.1). When the Print Setup dialog box appears, select a new printer using the pop-up menu (Figure 15.2). Make sure your page margins are correct by checking the Paper and Orientation panels at the bottom of the dialog box. When you’re done, click OK.
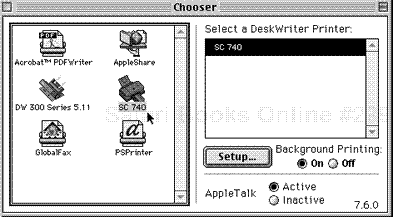
 On a pre-OS X Mac, select Chooser from the Apple menu. When the Chooser dialog box appears, make your new selection (Figure 15.3). Click the close box in the upper-left corner of the title bar.
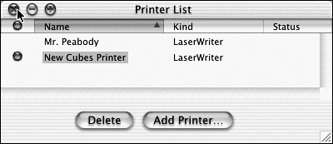
- On a Mac running OS X, choose File > Print. When the Print dialog box appears, click the Printer drop-down menu and choose Edit Printer List (top, Figure 15.4). When the Printer List dialog box appears, click Add Printer (bottom, Figure 15.4). Use the drop-down menu that appears to choose the network connection that leads to the desired printer (e.g., AppleTalk) (top, Figure 15.5), navigate to the printer you want and after highlighting it, click Add (bottom, Figure 15.5). When the Printer List dialog box reappears, the newly selected printer will be highlighted (Figure 15.6). Click the dialog box’s red close icon in the upper-left corner when you’re done.
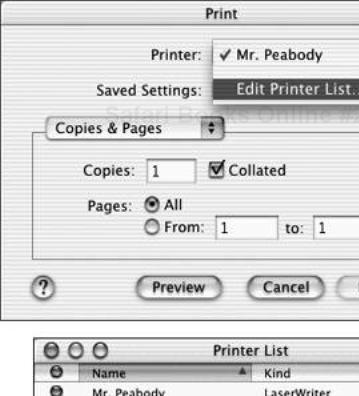
Figure 15.4.
To change the default printer on a Mac running OS X, choose Edit Printer List from the Printer drop-down menu (top), then click Add Printer in the Printer List dialog box (bottom).

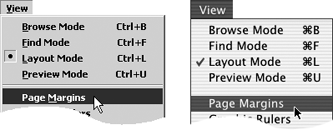
Switch to Layout mode (
 in Windows,
 on the Mac), and choose View > Page Margins (Figure 15.7). The page margin is marked by a gray boundary, while the edge of the paper is marked by a darker boundary (Figure 15.8).
First, make sure you have the right paper size selected by choosing File > Print Setup (Windows) or File > Page Setup (Mac) and selecting your paper as necessary using the pop-up menus.
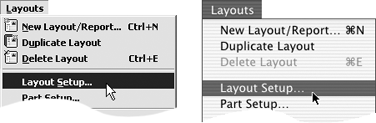
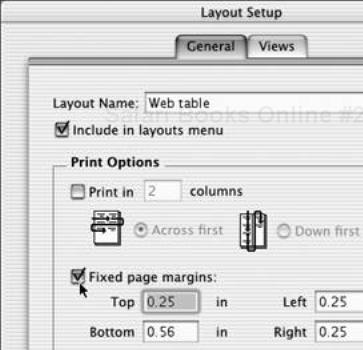
Switch to Layout mode (
in Windows, on the Mac), and choose Layouts > Layout Setup (Figure 15.9).When the Layout Setup dialog box appears (Figure 15.10), select the Fixed page margins checkbox and use the four number-entry boxes to adjust your Top, Bottom, Left, and Right margins. Check Facing Pages to account for a narrower inside margin if you’ll be printing on both sides of the paper.
Click OK.
Data varies: some runs long, some short (Figure 15.11). To eliminate wasted field space, create a neater printout—and keep Al and Beauregard happy—you want to use a feature FileMaker calls “sliding.” With this feature, FileMaker automatically closes up unused space either to the left or above any fields you select. The great thing about sliding is that FileMaker only applies it when necessary. If you have a field with a long text entry, it gets the room it needs.
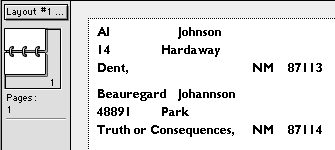
Figure 15.11. The problem with fixed field size printouts: Giving Beauregard enough room makes Al space out.
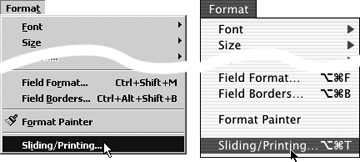
Switch to Layout mode (
in Windows, on the Mac).Use the Pointer Tool to select all the fields you want to make sure are closed up properly. Choose Format > Sliding/Printing (

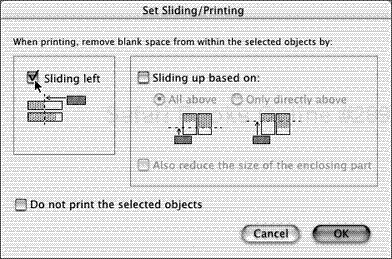
 on the Mac, no Windows equivalent) (Figure 15.12).
When the Set Sliding/Printing dialog box appears, check the Sliding left box (Figure 15.13). (Check Sliding up based on to control vertical spacing in a layout, especially within layout parts.) Click OK.
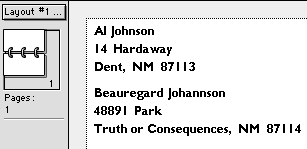
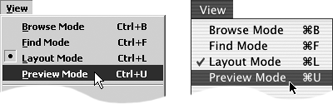
Switch to Preview Mode (
 in Windows,
  on the Mac) to see the change (Figure 15.14).
 Tips
Tips
Sliding can be applied to objects, along with layout items that aren’t in a field, such as lines you’ve placed in a layout for visual effect. In both cases, just select the item and apply sliding via the Format menu.
Sliding only works on the body; headers and footers won’t slide. Instead, see To resize a part on page 161.
Choose View > Preview Mode (
in Windows, on the Mac) to see if your printout will be just as you want it (Figure 15.15).
Switch to the layout you want to print from and run any needed Find Requests or Sorts. Choose File > Print (
 in Windows,
  on the Mac).
When the Print dialog box appears:
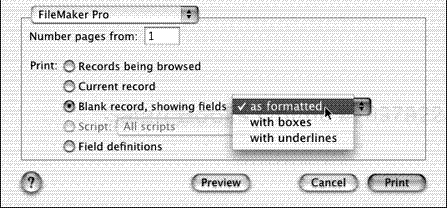
Use the Print drop-down list (Figure 15.16) to determine whether you print all the records being browsed (the found set), only the current record, a blank record with the fields showing, a list of field definitions, or the script definitions for the current layout.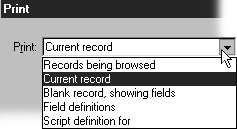
Figure 15.16.
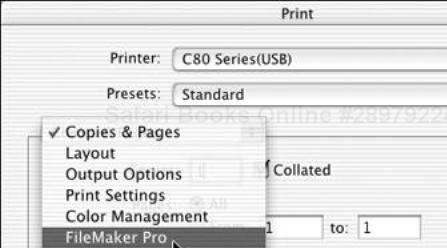
In Windows, the Print drop-down list lets you choose which FileMaker records you print. Use the pop-up menu to choose FileMaker Pro (Figure 15.17). When the FileMaker settings appear in the lower portion of the Print dialog box (Figure 15.18), use the radio buttons to choose whether you print all the records being browsed (the found set), only the current record, a blank record with the fields showing, the script definitions for the current layout, or a list of field definitions. A pop-up menu for the blank record option lets you choose whether you want fields in blank records printed as formatted, with boxes, or with underlines.Once you’ve set your other choices (print range and number of copies), click OK (Windows) or Print (Mac).