
Chapter 7. Transport, Routing, and SMTP
Introduction
Microsoft made a radical departure from the Exchange 5.5 architecture when they designed Exchange 2000. The first obvious difference to most experienced Exchange administrators was the removal of the Exchange-specific directory service in favor of Active Directory, which is provided by the underlying Windows operating system. Microsoft also switched the native transport from X.400 to SMTP. To implement this change, they followed the pattern of using components already provided by the operating system.
Windows 2000 and 2003 include Internet Information Services (IIS), a modular framework that provides support for many Internet protocols including HTTP, NNTP, and SMTP. Exchange makes use of the IIS framework by extending the SMTP service with additional capabilities not present in the base IIS installation. Many advanced aspects of the Exchange system are controlled through the various IIS management mechanisms such as the IIS Management MMC plug-in and the IIS metabase. It is important to understand how the reuse of the IIS architecture affects the design and function of Exchange.
In Exchange 5.5, the SMTP implementation was provided by the Internet Mail Service, an add-on component that performed all the necessary translations between the internal Exchange message transport (based on the X.400 protocol) and SMTP. This translation was imperfect, given the differences between the two protocols. Each IMS instance functioned as a separate connector; they did not share common information between them. In Exchange 2000, the Active Directory schema permits the storage of both SMTP and X.400 attributes, so all components of Exchange now understand both X.400 and SMTP. No translation is necessary within the organization.
Exchange 2000 and Exchange Server 2003 build upon the virtual server model provided by the IIS SMTP service. Each physical server has at least one SMTP virtual server instance which provides the core capabilities for SMTP transport. By itself, the SMTP virtual server is a limited Extended SMTP implementation that provides the majority of the functionality required by both intra-organization and external SMTP sessions. On multiple-homed servers, SMTP virtual server instances can be bound to listen only to specific interfaces, providing the ability to partition traffic by network.
Exchange SMTP virtual servers have another benefit: they expose an interface for custom functionality. Developers can create custom message-handling code and register it as an event sink with one or more virtual servers; these event sinks will be activated by Exchange and have access to incoming or outgoing messages. This is the same mechanism used to supply the extended Exchange SMTP functionality; Microsoft-provided event sinks extend and, in some cases, replace the underlying IIS SMTP code. Custom event sinks can be used for many purposes; one common one is to append a specific disclaimer on every outgoing message. Since each collection of registered event sinks is unique to a specified virtual server, strategic creation of additional SMTP virtual server instances gives you control over application of your event sinks in ways that might be extremely difficult or even impossible with your code.
Exchange 2000 still contains a native X.400 Message Transfer Agent (MTA) component, which handles any X.400 connections, as well as native RPC connections to Exchange 5.5 sites. The MTA is not used for normal message traffic between Exchange 2000 and Exchange Server 2003 servers; it is only used for messages that traverse X.400 connectors, are sent to Exchange 5.5 servers in the administrative group, or are sent over non-SMTP connectors such as the Novell Groupwise and Lotus Notes connectors. Messages are not directly moved between the SMTP transport and MTA; they are first tagged with the appropriate message properties and handed to the Exchange information store, which then determines whether to deliver the message to a local recipient or pass it to the appropriate transport. To provide efficient traffic control on busy systems, each Exchange transport component, as well as the Exchange store, creates multiple queues. These queues are used by the categorizer to transfer messages between components of the Exchange system.
By default, each SMTP virtual server creates a combination of
static system queues as well as destination-dependent transient queues
known as link queues. Each system and link queue is located in a
separate directory. Queue directories are initially located underneath
the <ExchangeRoot>Mailroot<VirtualServer>Queue
directory; <ExchangeRoot> is
the directory Exchange was installed into, normally C:Program FilesExchsrvr, while <VirtualServer> is the directory
specific to the SMTP virtual server instance; the default SMTP virtual
server is usually vsi 1. There are a few specific notable SMTP
system queues that vary between Exchange 2000 and Exchange Server 2003.
The Exchange Advanced Queuing Engine component is responsible for
maintaining message flow between the various system and link queues. It
also provides detailed status information for each queue, allowing you
to monitor and track the flow of messages through the SMTP system by
using the Exchange System Manager. These queues are detailed further in
Recipes Recipe 7.12
through Recipe
7.15.
Although the X.400 and foreign message system connectors use the MTA transport, there are two connectors that use the SMTP transport: the SMTP connector and the Routing Group Connector (RGC). The SMTP connector provides advanced SMTP functionality such as precise control over the SMTP namespace, SMTP authentication, and both client and server support for SMTP message retrieval using the ATRN, ETRN, and TURN methods. The RGC is used to connect the various routing groups within the Exchange organization and provide a seamless, low-maintenance method of controlling message traffic where required, such as over low-bandwidth links between routing groups or where security concerns dictate. SMTP connectors must be associated with specific SMTP virtual server instances and may override their configuration, while RGCs are associated with every SMTP virtual server in the routing group that has been specified as a bridgehead server for the connector. You can find more information about routing groups in Recipes Recipe 7.7 through Recipe 7.10 and about the RGC and SMTP connectors in Recipes Recipe 7.17 through Recipe 7.19.
Microsoft provides additional detailed technical reference material for the Exchange transport and routing architecture:
Microsoft has provided the contents of Chapter 8, “Information Flow and Routing,” of the Microsoft Press book Introducing Microsoft® Exchange 2000, available from the Microsoft TechNet web site at http://www.microsoft.com/technet/prodtechnol/exchange/2000/deploy/exinfflo.mspx.
The Exchange Server 2003 Technical Reference Guide provides a thorough look at the design of the entire Exchange Server 2003 system. In particular, Chapter 5 (“Message Routing Architecture”), Chapter 6 (“SMTP Transport Architecture”), and Chapter 7 (“X.400 Transport Architecture”) discuss the core message routing and transport components, but the entire guide is recommended reading. Although geared for Exchange Server 2003, much of this information still applies to Exchange 2000. This guide is available from the Microsoft TechNet web site at http://www.microsoft.com/technet/prodtechnol/Exchange/guides/E2k3TechRef/4c8062cb-f07d-463b-a297-00614095ca24.mspx.
7.1. Creating a New SMTP Virtual Server
Solution
Open the Exchange System Manager (Exchange System Manager.msc).
Expand the organization→ Administrative Groups→ target administrative group→ Servers→ target server→ Protocols→ SMTP.
Right-click the SMTP container and click New → SMTP Virtual Server. Enter the name of the new virtual server instance and click Next.
Select the specific IP address this virtual server listens on or leave it on All Unassigned. Click Finish to create the new instance. If the combination of IP address and port is not unique on this server, the new instance will not start.
To modify the port assignment, right-click the new virtual server instance and click Properties. On the General tab, click the Advanced button. Select the identity and click Edit. Modify the TCP/IP port and click OK twice.
Click OK to close the property sheet.
Discussion
Every Exchange 2000 and Exchange Server 2003 server creates a default virtual server instance that is configured to listen on all unassigned IP addresses on port 25. As you create additional virtual servers, you should assign them to specific IP addresses or alternate ports so that they do not interfere with the default virtual server instance. Assigning servers to alternate ports, however, can cause problems with messages passed between virtual server instances using SMTP, such as those between servers in an organization; they will not be able to communicate if one virtual server is on a non-standard port.
While it would be very useful in certain large deployments to be able to create new virtual servers through script, Microsoft gives no documentation or guidance to assist you in this task. This is one of the notable remaining areas in which script support could be increased. On the other hand, Microsoft does not recommend creating multiple virtual servers except under specific conditions, such as dual-homed Exchange servers.
See Also
The Introduction for a discussion of how virtual servers fit into the Exchange architecture, MS KB 266686 (How to Configure a SMTP Virtual Server Part 1), and MS KB 268163 (How to Configure a SMTP Virtual Server Part 2)
7.2. Choosing the Correct Connector
Problem
You need to choose the best type of connector to create a link to another Exchange 2000/2003 routing group, Exchange 5.5 site, or foreign mail system.
Solution
The general rule of thumb for choosing connectors is simple: use a RGC unless there is a specific reason to use another connector. Luckily, these reasons are easily listed and remembered:
Use the appropriate specific connector when interfacing your Exchange organization with foreign mail systems. Exchange Server 2003 supports specific connectors for Novell GroupWise and Lotus Notes; SP1 provides support for Notes R6. In addition, the Exchange Calendar Connector allows users in your Exchange organization to bidirectionally access calendar data with these systems. Exchange 2000 also provides connectors for cc:Mail and Microsoft Mail. Other vendors may offer additional connectors.
Use the SMTP connector for gateways to the Internet, other generic foreign SMTP mail systems, or Exchange 5.5 sites that are not part of your organization. These Exchange 5.5 sites must have the Internet Mail Service configured.
Use the SMTP connector for connections between routing groups in your organization if you want to take advantage of the additional features of the SMTP connector, such as support for outbound SMTP security. This is desirable if your physical network link with the other site passes through the Internet and not over a private leased line.
In Exchange 5.5 you would use the X.400 connector for connections between sites if you need to transmit a large amount of binary traffic over a low-bandwidth link; it does not encode binary data as 7-bit ASCII like the IMS does. In Exchange 2000 and Exchange Server 2003, this is not required because the underlying SMTP transport supports the 8-bit MIME SMTP extensions.
Use the X.400 connector for connections to foreign X.400 mail systems and Exchange 5.5 sites within your organization. This connector interfaces with the Exchange 5.5 X.400 site connector.
Discussion
The advice for creating routing groups applies to connectors as well: create the absolute minimum number that you need. Most Exchange organizations will use at least one SMTP connector for passing traffic to and from the Internet (although they are not required), RGCs for connections to other routing groups, and the occasional X.400 connector for connections with Exchange 5.5 sites. These three connector types are the core connectors in Exchange 2000/2003; they can all be used to fully connect routing groups within the organization, as they will all recognize when they are talking to another routing group within the same organization and transmit all Exchange-specific traffic. These connectors have many common controls and options shown in Table 7-1.
Property | Description |
Schedules | You have the following scheduling options for the RGC and SMTP connectors: once per day, once per hour, once every two hours, once every four hours, or according to a custom schedule, which has a 15-minute resolution. The X.400 connector has a more limited set of options: always, custom schedule, or only upon remote initiation. |
Local bridgeheads | You can specify one or more severs in the local routing group to act as bridgehead servers for this connector. If you do not specify any, any server in the routing group can directly send messages through this connector. You may only specify a single local bridgehead for X.400 connectors. |
Remote bridgeheads | You can specify one or more servers in the remote routing group to act as bridgehead servers for this connector. If you do not specify any, messages passing through this connector will be routed directly to the appropriate destination server in the remote routing group. You may only specify a single remote bridgehead for X.400 connectors. |
Direction | You can only create one-way connectors; they only handle traffic from the local routing group to the remote routing group. If you wish the connector to be bidirectional, you must establish a second connector in the remote routing group and point it back to the local routing group. If you have administrative permissions in the remote routing group, Exchange will offer to establish this second connector automatically. |
Delivery restrictions | You can select Active Directory users, groups, and contacts from which to accept or reject messages. This matching is performed by email address, so it can be used to allow or deny messages from foreign mail systems; the catch is that the address must be assigned to a contact object. By default, there are no restrictions set. |
Content restrictions | You can specify the properties of messages this connector will permit: high priority, normal priority, low priority, system messages, non-system messages, and message size. By default, there are no restrictions set. |
Cost | Even though the RGC implements this slightly differently than the SMTP and X.400 connectors, the concept is the same: you can specify a routing cost and thus weight the different connections between routing groups to establish preferred message routes while still permitting redundancy. The RGC uses this field for the entire connector; the SMTP and X.400 connectors permit you to assign a cost to each separate address space defined by the connector. |
Public folder referrals | You can specify whether referrals to public folder replicas in remote routing groups can pass over this connector. |
While both RGCs and SMTP connectors use SMTP over TCP/IP, X.400 connectors can use either TCP/IP or X.25 if you have it. No matter which underlying protocol you use for X.400 connectors, you must first install the corresponding X.400 stack on the Exchange server. Because X.400 has always been 8-bit clean, X.400 connectors have traditionally been used by Exchange administrators to route large binary messages without requiring the conversion to the 7-bit ASCII (and corresponding bandwidth increase) used by the Exchange 5.5 SMTP connectors. The X.400 connector is no longer included with Exchange Server 2003 Standard Edition; this means that if you are going to be upgrading from Exchange 5.5 and require an extended period of co-existence, you will need the Enterprise Edition.
See Also
Recipe 7.3 for creating an RGC, and Recipe Recipe 7.4 for creating an SMTP connector, MS KB 822941 (How to use SMTP connectors to connect routing groups in Exchange 2003), and MS KB 839594 (Support for the Exchange Connector for Lotus Notes in Exchange Server 2003 Service Pack 1)
7.3. Creating a Routing Group Connector
Solution
Using a graphical user interface
First, enable viewing of routing groups in the Exchange System Manager:
Open the Exchange System Manager (Exchange System Manager.msc).
Right-click the organization container and select Properties.
Check the Display routing groups and Display administrative groups checkboxes.
Click OK.
Close the Exchange System Manager. The configuration change will apply the next time it is launched.
Next, create the new RGC:
Open the Exchange System Manager (Exchange System Manager.msc).
Expand the organization→ Administrative Groups→ target administrative group→ Routing Groups→ target routing group.
Right-click the Connectors container and select New → Routing Group Connector.
On the General tab, enter a name for the connector.
Specify the remote routing group by choosing it in the Connects with this routing group list. Modify the route cost as desired.
If you wish to specify local bridgehead servers, select These servers can send mail over this connector and designate one or more virtual servers in the local routing group.
On the Remote Bridgehead tab, select at least one virtual server in the remote routing group to be the remote bridgehead.
Click OK to create a new one-way connector with default settings. If you have permissions in the remote routing group, you will be asked if you want to create the RGC in the remote routing group. Click Yes to create a corresponding RGC in the remote routing group and permit the link to be two way.
If you wish to change these defaults, right-click the new connector object, select Properties, and make your desired changes.
Discussion
RGCs are essentially stripped-down SMTP connectors that have been specifically tuned and optimized for the job of passing traffic between routing groups with minimal fuss and muss. You do not have to worry about your connector scope, address spaces, recipient filtering, connection filtering, authentication options, and message queuing; Exchange takes care of all that for you.
As is the case with other connector types, RGCs are one-way. If you want bidirectional traffic flow between routing groups, you should allow Exchange to automatically create RGCs to form the corresponding reverse link.
Microsoft gives no guidance on creating RGCs programmatically. In a sense, this is understandable; script automation tends to be useful for objects that will be created, modified, and deleted on a regular basis. Most organizations will create their administrative and routing group structure, along with associated connectors, during their initial deployment and then make changes only as necessitated by upgrades, migrations, or resource changes.
Connectors are Active Directory objects and can be modified
through ADSI once they have been created. They reside in the CN=Connections, CN= <Routing
Group>, CN=Routing Groups, CN= <Admin
Group>, CN=Administrative Groups, CN=
<yourorg>, CN=Microsoft Exchange, CN=Services, CN=Configuration, DC=
<Domain> container. RGCs are objects
of class msExchRoutingGroupConnector, while the
msExchConnector class provides the
properties common between all connectors. The MSDN web site provides a
reference to the specific properties of these classes.
See Also
Recipe 7.2 for choosing the correct connector, Recipe 7.4 for creating an SMTP connector, MS KB 267992 (XADM: How to Configure a Routing Group Connector), MS KB 822929 (HOW TO: Use Routing Group Connectors to Connect Routing Groups in Exchange Server 2003), MSDN: msExchConnector, and MSDN: msExchRoutingGroupConnector
7.4. Creating an SMTP Connector
Solution
Using a graphical user interface
Open the Exchange System Manager (Exchange System Manager.msc).
Ensure that you have enabled viewing of administrative and routing groups (see Recipe 7.3).
Expand the organization→ Administrative Groups→ target administrative group→ Routing Groups→ target routing group.
Right-click the Connectors container and select New→ SMTP Connector.
On the General tab, enter a name for the connector.
If this connector should forward all outbound traffic to a smart host, select Forward all mail through this connector to the following smart hosts and enter either the IP address or fully-qualified domain name of the smart host. IP addresses must be in brackets. You can include multiple values by separating them with commas or semicolons.
Click Add and add at least one virtual server as a local bridgehead.
On the Address Space tab, click Add, select the address type from the list (usually SMTP), and click OK. Enter the domain name for the address space and the routing cost for this connector. A domain name of * matches all domains. Click OK.
Select the scope for this connector: Entire organization or Routing group.
Click OK to create the new connector with default settings. If you wish to change these defaults, right-click the new connector object, select Properties, and make your desired changes.
Discussion
The Exchange 2000 SMTP implementation provided a large improvement over the Internet Mail Service SMTP implementation that was included in Exchange 5.5. It solved many interoperability problems that could affect Exchange’s ability to communicate with other SMTP implementations. It also added support for several standard extended SMTP verbs and keywords:
Exchange 2000 does not provide its own SMTP implementation; rather, it extends the SMTP service in IIS. Consequently, you need to be more aware of the tighter integration between Exchange and the underlying Windows operating system, as changes you make to the SMTP service in IIS can affect your Exchange organization. Exchange takes over the default SMTP virtual server unless you configure alternate virtual server instances for it to use; you generally should not need to.
You do not need an SMTP connector to receive and send Internet mail in an out-of-the-box Exchange 2000/2003 organization, although MS KB 294736 gives a list of reasons why you would need one. The default Exchange transport is SMTP and the default SMTP virtual server will accept incoming connections on all interfaces; as long as your DNS MX records point to an Exchange machine and your firewall and IPSec policy settings permit, you can receive SMTP connections. If you do not have an SMTP connector in your organization, or an IMS instance in a mixed-mode organization, then each Exchange server will use the settings of the underlying SMTP virtual server when it receives mail that is not destined to a recipient in your organization’s address space. By default, this means it will perform an MX lookup for the recipient domain in DNS and attempt to send the message directly. If the underlying virtual server is configured to use a smart host, the Exchange server will hand the message to the designated machine.
You change this behavior when you add an SMTP connector, with a scope of either the routing group or the entire organization. The scope allows you to fine-tune your specific routing situation and control which routing groups can use a given connector. One scenario when this capability is useful is to ensure that branch offices use their own local Internet connection for SMTP mail instead of routing through the organization’s WAN links to a central link. The connector must be bound to one or more local bridgehead servers within its routing group; each virtual server may be bound separately, permitting you to segregate traffic routing responsibilities through your virtual server definitions. Each SMTP connector must have one or more address spaces defined; the default address space “*” refers to any domains not otherwise defined by membership to the organization or by another connector. Multiple connectors can have the wildcard address space; Exchange servers will use the one that has the lowest routing cost from their location. SMTP connectors can also use DNS-based lookups to intelligently route outbound mail or forward traffic to a smart host. If the configuration of the bound virtual servers and the SMTP connector disagree, the connector wins.
There is no provision for preventing incoming mail through a specific SMTP connector in the Exchange management tools. To prevent a particular Exchange server from receiving incoming connections from the outside world, you will have to apply IPSec policy filters to one or more of the interfaces on the machine (Recipe 10.3 shows how to enable IPSec policies between back- and front-end servers, but you can adapt the same principle to create packet filters), use an external packet filtering firewall, or re-point the DNS MX records to another host record as discussed in Recipe 7.25.
Unlike the Exchange 5.5 Internet Mail Service (IMS), SMTP connectors can be used to connect routing groups without any loss of functionality. Within the same organization, SMTP connectors will pass the extended message properties (as did IMS), make use of full Active Directory-aware Kerberos authentication, and transmit organizational system messages and routing updates. Unlike RGCs, you can restrict the address space that a particular SMTP connector will service, even if it is space within your Active Directory forest. If you do this, ensure that your machines have a valid route to the affected address space or you will be troubleshooting message delivery failures.
Exchange 5.5 allowed you to authenticate SMTP connections using basic (plaintext) authentication; Exchange 2000 expanded this to permit Kerberos and NTLM as well. Although Exchange SMTP authentication follows the appropriate RFCs and interoperates with all compliant clients, it does not support some of the cryptographic authentication methods used by other mail servers, such as DIGEST-MD5 and CRAM-MD5; use of these methods requires the client’s credentials to be stored using a reversible encryption method. Active Directory does permit user accounts to use reversible encryption, but this functionality has not been extended to Exchange to permit the use of these methods. Any mail system (client or server) that wishes to protect its authentication credentials with an Exchange system must support NTLM or Kerberos; in practice, you will usually end up using NTLM authentication, as Kerberos authentication requires both systems to be in the same Kerberos realm or have a cross-realm trust in place.
When you are using SMTP connections to bridge two Exchange organizations (Active Directory forests), you may have issues getting address expansion to work properly when messages are submitted anonymously in one organization and routed into the other. The way to fix this is to create two users, one in each organization, that have Send As permissions (see Recipe 5.21 for more details). These accounts are then used in conjunction with the cross-forest SMTP connectors to authenticate the connection. MS KB 828770 (Resolve Anonymous Senders Functionality in Microsoft Exchange Server 2003) has more details.
SMTP connectors share many characteristics with RGCs (see Recipe
Recipe 7.3). There is
a distinct lack of guidance for creating SMTP connectors
programmatically. Like RGCs, SMTP connector objects reside in the
CN=Connections, CN= <Routing
Group>, CN=Routing Groups, CN= <Admin
Group>, CN=Administrative Groups, CN=
<yourorg>, CN=Microsoft Exchange, CN=Services, CN=Configuration, DC=
<Domain> container. SMTP connectors
are objects of class msExchRoutingSMTPConnector. The MSDN web
site provides a reference for the specific properties of these
classes.
See Also
Recipe 7.1 for creating a new virtual server, Recipe 7.2 for choosing the correct connector, Recipe 7.3 for creating an RGC, MS KB 245019 (Transfer Modes and the SMTP Connector), MS KB 265293 (How to configure the SMTP connector in Exchange), MS KB 257569 (How to turn off ESMTP verbs in Exchange 2000 Server and in Exchange Server 2003), MS KB 294736 (When to create SMTP connectors in Exchange 2000 and later), MS KB 812455 (Definitions of Verbs That Are Used Between 2 Exchange Servers), MS KB 822941 (How to use SMTP connectors to connect routing groups in Exchange 2003), MS KB 828770 (Resolve Anonymous Senders Functionality in Microsoft Exchange 2003), MSDN: msExchConnector, and MSDN: msExchRoutingSMTPConnector
7.5. Configuring a Connector to Allow Routing of Messages from Specific Senders
Solution
Using a graphical user interface
Open the Exchange System Manager (Exchange System Manager.msc).
Ensure that you have enabled viewing of administrative and routing groups (see Recipe 7.3).
Expand the organization→ Administrative Groups→ target administrative group→ Routing Groups→ target routing group.
Click Connectors, right-click the desired connector, and click Properties. Click the Access tab. Click Authentication.
Enable either Basic authentication or Integrated Windows Authentication.
Click Users. Specify one or more users or groups and assign them the appropriate permissions: Submit or Relay.
Click OK twice.
Discussion
For Exchange to be able to determine whether a given user is allowed to send messages through a connector, it has to be able to validate that a given message actually comes from a user. Since message headers can be faked, Exchange needs to be able to validate that a message was submitted by a given user. To do this, you need to enable SMTP authentication, so that Exchange can track the required message properties from end-to-end throughout the organization.
Warning
This recipe does not work for SMTP connectors, which achieve the same functionality through the mechanism of SMTP authentication. See Recipe 10.2 for more details.
See Also
Recipe 10.2 for enabling SMTP authentication on SMTP connectors
7.6. Allowing Large Messages Through Specific Connectors
Problem
You need to ensure that large messages only go through specific connectors, usually those with sufficient bandwidth for the traffic.
Solution
Using a graphical user interface
Open the Exchange System Manager (Exchange System Manager.msc).
Ensure that you have enabled viewing of administrative and routing groups (see Recipe 7.3).
Expand the organization→ Administrative Groups→ target administrative group→ Routing Groups→ target routing group.
Click Connectors, right-click the desired connector, and click Properties. Click the Content Restrictions tab.
If this is a connector you wish to allow large messages through, uncheck the Only messages less than (KB) checkbox. Otherwise, check it and fill in the value of the largest message you wish to allow through this connection.
Click OK.
Discussion
In Exchange 5.5 the SMTP connector did not support the 8-bit SMTP extensions; any binary attachments that went through the IMS had to undergo a conversion to 7-bit format, causing a notable increase in reported size and bandwidth usage. It was common practice to restrict large messages from traversing the IMS, letting them route through an X.400 connector.
In Exchange 2000, this design feature was changed. SMTP connectors and RGCs can transmit binary attachments using the 8BITMIME and CHUNKING extended SMTP features. A common design feature in many deployments is to create connectors to allow direct traffic between two sites over a low-bandwidth link, restricting it to small messages. A second set of connectors is then used to pass larger messages at regular intervals, or over higher-bandwidth links that use less direct routing. This arrangement is more complicated than the Use different delivery times for oversize messages option on connectors, but can ensure that an organization with redundant routing paths reserves low-bandwidth links for smaller messages while permitting bulky attachments to travel a more roundabout path over higher bandwidth links.
See Also
Recipe 7.1 for creating SMTP virtual servers, Recipe 7.3 for RGCs, and Recipe Recipe 7.4 for SMTP connectors
7.7. Creating a Routing Group
Solution
Using a graphical user interface
Open the Exchange System Manager (Exchange System Manager.msc).
Ensure that you have enabled viewing of administrative and routing groups (see Recipe 7.3).
Expand the organization→ Administrative Groups→ target administrative group.
If the Routing Groups container does not exist, right-click on the administrative group container and select New→ Routing Groups Container.
Right-click the Routing Groups container and select New→ Routing Group.
On the General tab, enter a name for the group, and click OK.
Using VBScript
' This code creates a Routing Group in an Exchange administrative group.
' ------ SCRIPT CONFIGURATION ------
' The common name of the Exchange server object to be made RGM
strExchangeServer = "<ExchangeServerName>" ' e.g., red-exch02
' Name of the administrative group the routing group will be in
strAdminGroup = "<SourceAG>" ' e.g., SeattleAG
' Name of the new routing group to create
strRoutingGroup = "<TargetRG>" ' e.g., RedmondRG
' Name of the Exchange organization
strExchangeOrg = "<ExchangeOrg>" ' e.g., ExampleOrg
' ------ END CONFIGURATION ---------

strConfigDN = GetObject("LDAP://RootDSE").Get("configurationNamingContext")
' The path of the routing group container
strRGContainerDN = "LDAP://CN=Routing Groups,CN=" & strAdminGroup &_
   ",CN=Administrative Groups,CN=" & strExchangeOrg &_
   ",CN=Microsoft Exchange,CN=Services," & strConfigDN
' The path of the new routing group
strRoutingGroupDN = "LDAP://CN=" & strRoutingGroup &_
   ",CN=Routing Groups,CN=" & strAdminGroup &_
   ",CN=Administrative Groups,CN=" & strExchangeOrg &_
   ",CN=Microsoft Exchange,CN=Services," & strConfigDN
' Create the routing group
Set objRGContainer = GetObject(strRGContainerDN)
Set objRoutingGroup = objRGContainer.Create("msExchRoutingGroup", "CN=" &_
   strRoutingGroup)
' Create the Connectors container in the new routing group
Set objConnectionsContainer = objRoutingGroup.Create("msExchConnectors", _
   "CN=Connections")
objConnectionsContainer.Put "adminDisplayName", "Connections"
objConnectionsContainer.SetInfo
Wscript.Echo "Created routing group: " & strRoutingGroup & VbCrLF
Discussion
The division between routing groups and administrative groups is one of the most powerful differences between Exchange 5.5 and Exchange 2000/2003. Routing groups are members of an administrative group; your administrative groups can have zero, one, or more routing groups. You will have least one routing group in your organization, placed in the First Administrative Group during installation. They have absolutely no correlation with the underlying site structure of your Active Directory forest.
What is a routing group? Very simply, it is a group of Exchange servers that have sufficient local bandwidth between them to allow them to form a full mesh connection. Each member server in a routing group will send all traffic destined to other members directly; if it cannot connect, it will queue the messages for a later attempt. It will not attempt to pass them to any other server as an intermediate relay. An Exchange routing group provides similar routing functionality as an Exchange 5.5 site.
The only practical consideration when deciding how many routing groups you need is whether message flow is helped or harmed by creating them. There are a lot of guidelines and thumbnail calculations floating around, but the only real rule is to create as few routing groups as you can get away with. You may want to look at your network map and make note of busy routers and WAN links; these are the first places to look at your Exchange bandwidth and see if there are bottlenecks that routing groups will help relieve.
Properly used, routing groups give you an immense amount of flexibility in controlling message flow within your organization. You won’t see that full power until you have made the switch to native mode; mixed-mode Exchange organizations make some fundamental assumptions about the relationship between administrative and routing groups in the name of backward compatibility, leading to the following limitations:
Each Exchange 5.5 site will be represented within the Exchange 2000/2003 organization by a paired administrative group and routing group. Even if you add new administrative groups that only contain Exchange 2000/2003 servers, they will be created as 1:1 pairings so they can be properly represented to the Exchange 5.5 servers.
Exchange will ignore multiple routing groups within an administrative group; it will only use the first one.
Servers can only be members of the routing group within their administrative group. In native mode, routing group memberships can cross administrative group boundaries, allowing you to easily separate routing administration from recipient and mailbox administration.
After installation, neither administrative nor routing groups are displayed in the Exchange System Manager. You can easily toggle them as shown in the first part of the GUI solution.
By default, the first member server in a routing group is selected as the Routing Group Master (RGM). The RGM is responsible for sending and receiving routing updates to other routing groups and propagating the updated routing table to the other member servers. See Recipe 7.9 for more information on RGMs.
Routing groups can be renamed at any time. Depending on your Active Directory topology it may take some time before the updated name is replicated throughout your organization, but the servers will still know which routing group they belong to as the change propagates. Mail routing will likewise be unaffected.
Unfortunately, Microsoft did not in its wisdom create or expose
any interfaces for management of routing groups for easy scripting.
Routing groups are Active Directory containers, though, so you can
view them using ADSIEdit or LDP by binding to the Configuration NC and
maneuvering to the CN=Routing
Groups, CN=
<Admin
Group>, CN=Administrative Groups, CN=
<yourorg>, CN=Microsoft Exchange, CN=Services, CN=Configuration, DC=
<Domain> container. The key
attributes that control routing group membership are displayed in
Table 7-2.
Object | Attribute | Purpose |
| | Backlink to DNs of servers whose SMTP transport instances are member of this RG. You should not need to edit this property directly. |
| List of DNs of servers whose MTA (X.400) instances are members of this RG. | |
| DN of the member server that holds the RGM role. | |
| | DN of the RG this server’s SMTP transport instances belong to. |
| Backlink to the DN of the RG this server’s MTA (X.400) instance belongs to. Only populated if the server has an X.400 connector. You should not need to edit this property directly. |
While scripted creation of routing groups using ADSI is undocumented, it is not difficult
either. Each administrative group has a Routing Groups container that holds any routing
groups belonging to that administrative group. Each routing group
(msExchRoutingGroup object) not
only lists any member servers using the properties show in Table 7-2, but also has an
additional container object, Connections, to hold any connectors that are
located in the routing group.
The VBScript solution presets DNs to the parent Routing Groups container and the new routing
groups. It uses standard ADSI scripting to connect to the Routing Groups container and create a new
msExchRoutingGroup object. It then creates the Connections container, a msExchConnectors object, within the new
routing group and tweaks the adminDisplayName property. If you fail to
create the Connections container,
it will be automatically created for you if you view the contents of
the routing group in ESM. When ESM auto-creates the missing container,
however, it does not populate the adminDisplayName property as it does when
you create a new routing group using the regular interface. Be safe
and create the container in your scripts; you are assured of it being
there when other tasks require it.
Be aware this method is not supported by Microsoft. Since routing group structures tend to be fairly static and changes are one-time events, you can probably get by with using ESM to create your routing groups.
See Also
Recipe 7.8 for deleting routing groups, Recipe Recipe 7.9 for designating an RGM, Recipe 7.10 for moving server between routing groups, and Chapter 5, “Configuring Your Routing Topology,” of the Exchange Server 2003 Transport and Routing Guide:
| http://www.microsoft.com/technet/prodtechnol/exchange/guides/E2k3TransnRouting/bbc67fb7-a702-4a18-b5ea-e40b0923213b.mspx |
7.8. Removing a Routing Group
Solution
Using a graphical user interface
Open the Exchange System Manager (Exchange System Manager.msc).
Ensure that you have enabled viewing of administrative and routing groups (see Recipe 7.3).
Expand the organization→ Administrative Groups→ target administrative group→ Routing Groups→ target routing group.
Ensure that all member servers have been moved to other routing groups (see Recipe 7.9).
Select the Routing Groups container. Right-click the routing group object and select Delete.
Confirm the deletion.
Using VBScript
' This code deletes a routing group if it meets several tests
' ------ SCRIPT CONFIGURATION ------
' Name of the Exchange organization
strExchangeOrg = "<Organization>" ' e.g., ExampleOrg
' Name of the administrative group the routing group is in
strAdminGroup = "<AdminGroup>" ' e.g., SeattleAG
' Name of the routing group the server is in
strRoutingGroup = "<RoutingGroup>" ' e.g., RedmondRG
' Default boolean state; do not change
boolReady = True
' ------ END CONFIGURATION ---------

' Create the routing group object
strConfigDN = GetObject("LDAP://RootDSE").Get("configurationNamingContext")
strRoutingGroupDN = strRoutingGroup & ",CN=Routing Groups,CN=" & _
    strAdminGroup & ",CN=Administrative Groups,CN=" & _
    strExchangeOrg & ",CN=Microsoft Exchange,CN=Services," & _
    strConfigDN
Set objRoutingGroup = GetObject("LDAP://CN=" & strRoutingGroupDN)

' Test for member servers still in the RG; set boolean false if found
objRoutingGroup.GetInfo
numProperties = objRoutingGroup.PropertyCount
For PropCount = 0 To (numProperties-1)
   Set propEntry = objRoutingGroup.Item(PropCount)
   If (propEntry.Name = "msExchRoutingGroupMembersBL") Then
      Wscript.Echo "Member servers found in routing group " &_
         strRoutingGroup & ";"
      Wscript.Echo "  See Recipe 7.10 to move servers to a new RG."
      boolReady = False
   End If
Next

' Test for connectors still in the RG; set boolean false if found
strConnectorsDN = "Connections,CN=" & strRoutingGroupDN
Set objConnectors = GetObject("LDAP://CN=" & strConnectorsDN)
For Each objConnection in objConnectors
   Wscript.Echo "Connector found: " & objConnection.Name
   boolReady = False
Next

' If the boolean is still true, it's safe to delete the RG
If boolReady = True Then
   objRoutingGroup.DeleteObject(0)
   Wscript.Echo "Deleted RG " & strRoutingGroup & "." & VbCrLF
Else
   Wscript.Echo "RG " & strRoutingGroup & " not deleted." & VbCrLF
End If
Discussion
Deleting a routing group is simpler than creating it, although you do need to ensure that you have moved all member servers to other routing groups. You will not be able to move a server from routing group if it hosts any connectors to or from that routing group.
Scripting this task is not documented but is a simple
application of basic ADSI scripting methods. There is a caveat:
because it uses the DeleteObject(0)
method, which recursively deletes the object and any
objects it contains, you need to first verify two items of
information:
You have moved all member servers to other routing groups. Verify this by ensuring that the
msExchRoutingGroupMembersBLattribute is not present. If it is present, it will contain a list of the DNs of the servers that are still configured as members of the group. Deleting the routing group will not remove the associated server objects, but they will not be members of a valid routing group until you change their membership (see Recipe 7.10 for how to do this in your scripts).You have removed all connector objects from the routing group. You can see this by checking if the Connectors container within the routing group is empty. If you intend to delete any existing connectors, you do not need to take any special action in your script; they will be deleted when the routing group is deleted.
The scripted solution performs these checks for you to ensure
that deleting the routing group object will not cause problems. Since
this is a two-part test, we use a simple Boolean variable and set it
to False if we fail a test.
Testing for member servers is relatively easy: we merely need to
check for the existence of the msExchRoutingGroupMembersBL property on the
routing group object. This property is a backlink to the msExchHomeRoutingGroup properties on the
server objects. Active Directory maintains the backlinks
automatically; when all the servers are moved out of the routing
group, the backlink property is removed from the routing group object.
We use the GetInfo method to pull
the object’s attributes into the local cache, then iterate through
them with the Item method to check
the current attribute’s Name
property. If we find a match, we have failed the test.
The second test is just as simple, although this time we merely
need to check to see if the Connections container in the routing group
object is empty or not. We do this with a simple For Each loop; if the loop runs at all, it
means we have one or more objects in the container. We print out the
names of the objects and set
the Boolean variable to False.
See Also
Recipe 7.7 for creating routing groups, Recipe 7.9 for setting the RGM, Recipe 7.10 for moving server between routing groups, Recipe 5.5 Deleting an OU” of Active Directory Cookbook (O’Reilly), and Chapter 5, “Configuring Your Routing Topology,” of the Exchange Server 2003 Transport and Routing Guide:
| http://www.microsoft.com/technet/prodtechnol/exchange/guides/E2k3TransnRouting/bbc67fb7-a702-4a18-b5ea-e40b0923213b.mspx |
7.9. Designating the Routing Group Master
Solution
Using a graphical user interface
Open the Exchange System Manager (Exchange System Manager.msc).
Ensure that you have enabled viewing of administrative and routing groups (see Recipe 7.3).
Expand the organization→ Administrative Groups→ target administrative group→ Routing Groups→ target routing group.
Click on the Members container to display the list of member servers in the right pane. Right-click the server you wish to be the new RGM and check Set as Master.
Using VBScript
' This code creates a new Routing Group Master in a routing group.
' ------ SCRIPT CONFIGURATION ------
' The common name of the Exchange server object to be made RGM
strExchangeServer = "<ExchangeServerName>" ' e.g., red-exch02
' Name of the administrative group the routing group is in
strAdminGroup = "<SourceAG>" ' e.g., SeattleAG
' Name of the routing group the server is in
strRoutingGroup = "<TargetRG>" ' e.g., RedmondRG
' Name of the Exchange organization
strExchangeOrg = "<ExchangeOrg>" ' e.g., ExampleOrg
' ------ END CONFIGURATION ---------

strConfigDN = GetObject("LDAP://RootDSE").Get("configurationNamingContext")
strExchangeServerDN = "CN=" & strExchangeServer & ",CN=Servers,CN=" & _
    strAdminGroup & ",CN=Administrative Groups,CN=" & _
    strExchangeOrg & ",CN=Microsoft Exchange,CN=Services," & _
    strConfigDN
strRoutingGroupDN = "LDAP://CN=" & strRoutingGroup & ",CN=Routing Groups,CN=" & _
    strAdminGroup & ",CN=Administrative Groups,CN=" & _
    strExchangeOrg & ",CN=Microsoft Exchange,CN=Services," & _
    strConfigDN
Set objRoutingGroup = GetObject(strRoutingGroupDN)
objRoutingGroup.Put "msExchRoutingMasterDN", strExchangeServerDN
objRoutingGroup.SetInfo
Wscript.Echo strExchangeServer & "is now RGM for the " &_
    strRoutingGroup & " routing group." & VbCrLF
Discussion
When you install the first server in a routing group, it is
automatically configured to be the RGM, which is signaled in Active
Directory by populating the msExchRoutingMasterDN attribute on the
server. The RGM is responsible for collecting the state of all servers
and connectors within the routing group on a regular basis and sending
updates to other routing groups by means of the X-LINK2STATE SMTP
extension over SMTP and Routing Group Connectors, and specially
crafted messages over X.400 connectors.
When it receives updates from other routing groups, it propagates them to the rest of the members using the link-state protocol over TCP port 691. Each server in the organization thus keeps its own copy of the entire link-state map for the organization; they use the Dijkstra algorithm (popularized in the Open Shortest Path First, or OSPF, TCP/IP routing protocol) to dynamically determine the best route for outgoing messages. While this can be computationally intensive in a large, dynamic organization, the link-state algorithm prevents the routing loops that could plague the Exchange 5.5 Gateway Address Routing Table (GWART). The GWART used a distance vector protocol for routing calculations; this protocol is known to have certain circumstances under which it will generate loops. Using the link-state algorithm, Exchange 2000/2003 servers will never generate loops, even if they cannot transmit mail over the most efficient route.
If the RGM cannot be reached, each server is able to continue routing messages but will not receive further updates on links external to their routing group. As the quality of their link-state map degrades, messages may take less-than-optimal routes; member servers cannot share link updates and must discover failures individually. You can check the application log for transport events 958 (RGM no longer exists) or 961 (Member server fails to authenticate with the RGM) to see if there are failures between your RGM and member servers.
Scripting this is fairly straightforward, even though it is a
not a well-documented process. The msExchRoutingMasterDN attribute on the
routing group object in Active Directory controls which server is the
RGM; it contains the DN
of server with the master role.
See Also
Recipe 7.7 for creating routing groups, Recipe 7.8 for deleting routing them, Recipe Recipe 7.10 for moving servers between routing groups, and Chapter 5, “Message Routing Architecture,” of the Exchange Server 2003 Technical Reference Guide:
| http://www.microsoft.com/technet/prodtechnol/exchange/guides/E2k3TechRef/b4938c19-f27d-4657-a55a-823a8184e690.mspx |
7.10. Moving a Server Between Routing Groups
Solution
Using a graphical user interface
Open the Exchange System Manager (Exchange System Manager.msc).
Ensure that you have enabled viewing of administrative and routing groups (see Recipe 7.3).
Expand the organization→ Administrative Groups→ target administrative group→ Routing Groups→ source routing group. Also expand the target routing group.
Click on the Members container of the source routing group to display the list of member servers in the right pane.
Move the server to the new routing group through either of the following methods:
Click on the server you wish to move and hold the mouse button down while dragging it to the Members container of the target routing group.
Right-click on the server you wish to move and select Cut. Right-click the Members container of the target routing group and select Paste.
Using VBScript
' This code moves an Exchange server to a different routing group.
' ------ SCRIPT CONFIGURATION ------
' The common name of the Exchange server object
strExchangeServer = "<ExchangeServerName>" ' e.g., red-exch02
' Name of the administrative group the server is a member of
strSourceAG = "<SourceAG>" ' e.g., SeattleAG
' Name of the target routing group to move the server to
strTargetRG = "<TargetRG>" ' e.g., RedmondRG
' Name of the administrative group the target routing group is in
' If you are in mixed mode, this must be the same as strSourceAG.
strTargetAG = "<TargetAG>" ' e.g., RedmondAG
' Name of the Exchange organization
strExchangeOrg = "<ExchangeOrg>" ' e.g., ExampleOrg
' ------ END CONFIGURATION ---------

strConfigDN = GetObject("LDAP://RootDSE").Get("configurationNamingContext")
strExchangeServerDN = "LDAP://CN=" & strExchangeServer & ",CN=Servers,CN=" & _
    strSourceAG & ",CN=Administrative Groups,CN=" & _
    strExchangeOrg & ",CN=Microsoft Exchange,CN=Services," & _
    strConfigDN
strTargetRGDN = "CN=" & strTargetRG & ",CN=Routing Groups,CN=" & _
    strTargetAG & ",CN=Administrative Groups,CN=" & _
    strExchangeOrg & ",CN=Microsoft Exchange,CN=Services," & _
    strConfigDN
Set objExchangeServer = GetObject(strExchangeServerDN)
objExchangeServer.Put "msExchHomeRoutingGroup", strTargetRGDN
objExchangeServer.SetInfo
Wscript.Echo strExchangeServer & "is now in the " &_
    strTargetRG & " routing group." & VbCrLF
Discussion
Remember that an Exchange 2000/2003 routing group is simply a group of Exchange servers with sufficient stable local bandwidth and low enough connection latency to permit each member server to send all traffic directly to other members. Any traffic destined outside the routing group, whether to another server in a different routing group in the same Exchange organization or to a foreign server, must be routed through the appropriate connector.
Given the typical Exchange 2000/2003 deployment, there is a good chance that most Exchange administrators will need to change their routing group configuration at some point. Three common reasons for needing to change routing group membership include but are not limited to:
You have upgraded your organization from Exchange 5.5 and switched to native mode, and you want to reduce the number of legacy routing groups left by mixed-mode operation.
You are deploying Exchange Server 2003 because of its site-consolidation benefits and will be moving a server to a new location.
You have increased (or decreased) the WAN bandwidth between two locations and need to change your routing design.
Changing a server’s routing group membership using ESM is
simple; it is literally a drag-and-drop operation. It is just as easy
to do with a script, even though there are no ready examples of the
process in the MSDN documentation. MS KB 830828 gives the necessary
hint: routing group membership is controlled by the msExchHomeRoutingGroup attribute on the
server object in Active Directory. If you change this attribute,
Active Directory will automatically update the msExchRoutingGroupMembersBL on the source
and destination routing group objects to reflect the respective
deletion and addition.
Our script constructs two strings: the full DN of the server to
move and the full DN of the routing group it will be joining. We then
perform a standard ADSI task: bind to the desired object (the Exchange
server) and update the msExchHomeRoutingGroup property with the new
value. Note that you can move servers into a routing group that
belongs to a different administrative group if your organization is in
native mode. The server’s administrative group membership does not
change when you do this.
Your production scripts should check to ensure that the target
routing group has the msExchRoutingMasterDN attribute set after
the server has been moved. Moving a server into an empty routing group
will not set this value automatically, which would result in the
server not receiving routing updates. You should also set a new RGM
for the existing routing group before you move that server. Recipe 7.9 shows you how to
set this value.
See Also
Recipe 7.7 for creating routing groups, Recipe 7.8 for deleting them, Recipe 7.9 for setting the RGM, and MS KB 830828 (How to Manually Re-Create a Routing Group After the Routing Group Is Accidentally Removed)
7.11. Examining Your Routing Structure
Problem
You wish to examine your Exchange organization’s routing structure: routing groups, connectors, addresses spaces, and limitations.
Solution
Download the WinRoute tool from the Microsoft Download Center:
http://www.microsoft.com/downloads/details.aspx?familyid=c5a8afbf-a4da-45e0-adea-6d44eb6c257b&displaylang=en Extract the WinRoute binary and documentation and install them on your management station.
As a user in the Domain Users group, open the winroute.exe binary from the location in step 2.
Click File→ New Server Query. Fill in the name of the Exchange server from which you wish to pull routing information.
If you need to use alternate credentials, click Override Credentials and fill in the appropriate credentials. Click OK.
Click OK to connect to the Exchange server and Active Directory. Click Actions→ Refresh Now to update the displayed information.
Discussion
WinRoute is a freely downloadable Exchange tool that is designed to retrieve and display all information that pertains to message routing. This allows you to troubleshoot message routing issues more easily in organizations with complicated routing topologies. It displays the relevant information on your organization, routing groups, servers, and connectors in a tree view. The included documentation is brief, but covers what you will see in the display and how to use the minimal features of the program.
WinRoute does not have, nor does it need, a lot of functionality or automation. By its very nature, troubleshooting is not easily automated; what WinRoute does admirably is pull your organizational data and display it in a manner that allows you to see how a specific server sees the routing table. This tool will not help you learn about routing groups, connectors, and the minutia of Exchange message routing if you do not already know the basics; it will help you learn how it applies to your configuration by seeing exactly how your servers are configured and how that information is replicating throughout your organization.
See Also
The WinRoute tool download page:
| http://www.microsoft.com/downloads/details.aspx?familyid=c5a8afbf-a4da-45e0-adea-6d44eb6c257b&displaylang=en |
7.12. Listing the SMTP Queues on a Specific Virtual Server
Problem
You need to list the SMTP queues associated with a specific virtual server instance on your Exchange server.
Solution
Using a graphical user interface
Open the Exchange System Manager (Exchange System Manager.msc).
Expand the organization→ Administrative Groups→ target administrative group→ Servers.
Expand the appropriate server container and select the Queues object.
The right pane will display all queues on this server, including MTA, SMTP, and foreign connector queues.
Click the Source field of the header to group the queues according to the component they are associated with and locate the SMTP virtual server.
Using VBScript
' This code enumerates the SMTP links and queues on an
' Exchange Virtual Server and only works on Exchange Server 2003.

' ------ SCRIPT CONFIGURATION ------
' host name of the Exchange server
strHostname = "<ExchangeServerName>" ' e.g., red-exch02
' The number of the SMTP virtual server instance
strVSInstance = "<VSInstanceNumber>" ' e.g., 1 for the default SMTP virtual server
' ------ END CONFIGURATION ---------

' Get the Exchange Namespace WMI object
Set objWMIExch =  GetObject("winmgmts://./root/MicrosoftExchangeV2")

' Get the list of Exchange_SMTPLink instances from the default virtual server
' and iterate through them.
Set objLinksList = objWMIExch.ExecQuery ("Select * from Exchange_SMTPLink" &_
   " Where VirtualMachine='" & strHostname &_
   "' And VirtualServerName='" & strVSInstance & "'")
For each objLinkInst in objLinksList
   strLinkInfo = strLinkInfo & "Link Name: " &_
      objLinkInst.LinkName & VbCrLF & "  Link ID: " &_
      objLinkInst.LinkID & VbCrLF
   ' Now, get the associated Exchange_SMTPQueue instances and iterate through
   ' them.
   Set objQueuesList = objWMIExch.ExecQuery ("Select * from Exchange_SMTPQueue" &_
      " Where VirtualMachine='" & strHostname &_
      "' And VirtualServerName='" & strVSInstance &_
      "' And LinkID='" & objLinkInst.LinkID &_
      "' And LinkName='" & objLinkInst.LinkName & "'" )
   For each objQueueInst in objQueuesList
      strLinkInfo = strLinkInfo & "  Queue Name: " &_
         objQueueInst.QueueName & VbCrLF & "    Queue ID: " &_
         objQueueInst.QueueID & VbCrLF
   Next
   strLinkInfo = strLinkInfo & VbCrLF
Next
Wscript.Echo strLinkInfo
Discussion
To get a good understanding of traffic flow through Exchange,
you need to understand queues and links. Each Exchange SMTP virtual
server (or X.400 stack for the MTA transport) has its own set of
queues, which are a set of folders on an NTFS partition. Each queue
holds messages destined for a single DNS domain; messages addressed to
recipients in the 3sharp.com and
redmond.3sharp.com domains are
placed in two different queues.
Links are virtual memory structures that represent the next system a message must be sent to. Each link is associated with zero or more queues. While it may sound odd that links can have no queues, not all links are transient in an Exchange organization; routing group connectors and smart hosts provide dedicated links to next-hop systems and the links to them exist even when there is no traffic to route through them. Conversely, a link can have more than one associated queue, such as when the remote server is published in DNS as the MX host for multiple domains.
Tracking links and queues through the Exchange System Manager Queue Viewer can be somewhat confusing; what ESM calls queues are actually links. It uses the Queue API to provide a unified management interface for the links and queues on the server, presenting them without distinguishing precisely what is a link and what is a queue. WMI always makes the difference explicit. There are a default set of SMTP system queues and links that are always present. They are shown in Table 7-3 along with their corresponding WMI properties and ESM queue names.
WMI QueueName property | WMI LinkName property | ESM queue name |
| | Messages queued for deferred delivery |
| | Failed message retry queue |
| | Local delivery |
| | DSN messages pending submission |
| | Messages awaiting directory lookup |
| | Messages waiting to be routed |
| | Messages pending submission |
To get an accurate view of the queues and links, you need to use
WMI scripting. Exchange 2000 provides two classes through the
ExchangeQueueProvider provider; these classes, ExchangeLink and ExchangeQueue, provide read-only access to
the status of all links and queues on the server. Exchange Server 2003
supplies additional WMI providers and classes that allow you to easily
choose between SMTP and X.400 queues and links and manage them. These
new classes are shown in Table 7-4.
Classes | Description |
| Instead of extending the existing classes, these two classes provide the base properties for the new classes. |
| These classes inherit the properties from the
|
| These classes inherit the properties from the
|
For day-to-day management and monitoring of the SMTP queues, you
will only need to deal with the Exchange_SMTPLink and Exchange_SMTPQueue classes. As demonstrated
by the script above, using these classes together to obtain queue
information is not difficult. A simple WMI Query Language (WQL) query, constrained by the
physical server name and (if desired) virtual server instance,
enumerates your existing links. You can then pull the LinkID and LinkName properties to use as a constraint
against a second WQL query for the associated queues.
See Also
MSDN: Exchange_Link, MSDN: Exchange_Queue, MSDN: Exchange_SMTPLink, MSDN: Exchange_SMTPQueue, MSDN: Exchange_X400Link, MSDN: Exchange_X400Queue, Recipe 7.13 for listing messages in a queue, and Recipe 7.14 for deleting messages from a queue
7.13. Inspecting the Contents of a Queue
Solution
Using a graphical user interface
Open the Exchange System Manager (Exchange System Manager.msc).
Expand the organization→ Administrative Groups→ target administrative group→ Servers.
Expand the appropriate server container and select the Queues object.
The right pane will display all queues on this server, including MTA, SMTP, and foreign connector queues.
Click the Source field of the header to group the queues according to the component that they are associated with and find the appropriate SMTP virtual server.
Click on a queue to select it and click Find Messages, or double-click the queue to open the search window. By default, the search will return 100 messages at a time.
If you wish to restrict the search, modify the search parameters.
Click Find Now.
Double-click on a message in the results pane to view its details.
Using VBScript
' This code enumerates the messages within a given queue.
' ------ SCRIPT CONFIGURATION ------
' The host name of the Exchange server
strHostname = "<ExchangeServerName>" ' e.g., red-exch02
' Name of the SMTP queue to search for messages
strQueueName = "<SMTPQueueName>" ' e.g., 3sharp.com
' ------ END CONFIGURATION ---------

' Get the Exchange Namespace WMI object
Set objWMIExch =  GetObject("winmgmts://" & strHostname &_
   "/root/MicrosoftExchangeV2")
' Get the list of queues and process our desired queue
Set objQueuesList = objWMIExch.InstancesOf("Exchange_SMTPQueue")
For Each objQueueInst in objQueuesList
   ' Make sure this queue is the one we're looking for; if not, skip it
   If objQueueInst.QueueName = strQueueName Then
      strMsgInfo = strMsgInfo & "Queue: " & objQueueInst.QueueName & " (" &_
         objQueueInst.QueueID & ")" & VbCrLF
      Set objMsgsList = objWMIExch.ExecQuery ("Select * From " &_
       "Exchange_QueuedSMTPMessage Where ProtocolName='SMTP' And LinkId='" &_
         objQueueInst.LinkID & "' And LinkName='" &_
         objQueueInst.LinkName & "' And QueueId='" &_
         objQueueInst.QueueID & "' And QueueName='" &_
         objQueueInst.QueueName &"' And VirtualMachine='" &_
         objQueueInst.VirtualMachine & "' And VirtualServerName='" &_
         objQueueInst.VirtualServerName & "'")
      For each objMsgInst in objMsgsList
         strMsgInfo = strMsgInfo & "  Message " & _
            objMsgInst.MessageID & VbCrLF & _
            "    Sender: " & objMsgInst.Sender & VbCrLF &_
            "    MessageID: " & objMsgInst.MessageId & VbCrLF
      Next
   End If
Next

Wscript.Echo strMsgInfo
Discussion
Enumerating the messages in a queue using ESM Queue Viewer is difficult; the Queue Viewer, as mentioned in Recipe 7.12, uses the Queue API to provide a unified view of links and queues. Each link represents the next physical hop for a message, so if your Exchange server is performing its own SMTP deliveries to the Internet, you will have one link for each discrete MX host. Depending on your traffic patterns and who you are sending messages to, you may find that each destination has its own link, giving you the effect of having a separate queue. If your Exchange server is handing mail off to a smarthost, however, you will see a single link for that smarthost in the Queue Viewer display; that link actually contains all of the queues that may exist. You cannot find any information in the Queue Viewer to determine which actual queue a given message is in, even when using the advanced search and filter facilities.
In Exchange 2000, you do not have a scripting interface to enumerate messages in queues. Exchange Server 2003 provides several new WMI classes that give you the ability to determine the precise queue that holds a specific message, shown in Table 7-5.
Class | Description |
| This new class provides the base properties for the new classes. Do not use it directly. |
| This class inherits the properties from the
|
| This class inherits the properties from the
|
The VBScript solution shows how to use these classes in
combination with the classes shown in Recipe 7.12 to enumerate
the contents of a script. We start by connecting to the Exchange WMI
namespace and retrieving a list of the Exchange_SMTPQueue objects on the server.
You need to find a way to filter this list down to the specific queue
that you are interested in; in our script, we check the QueueName property against a string we know
ahead of time (the destination’s domain name). Once we have the right
queue, we retrieve the collection of messages in the queue using a WQL
query to select against the server, virtual server instance, link, and
queue. We then work through those messages using a For Each loop and examine the properties we
are interested in.
When you create the WQL query string to filter your Exchange_SMTPQueue objects, you should use
at a minimum all of the following properties:
Note that the script pulls all of the properties (except for
ProtocolName) from the retrieved
queue object for inclusion in the WQL query. You can use presupplied
strings for most of these properties, but be careful when doing so
with the LinkID and QueueID properties. Since queues and links
are generated as needed, their IDs are dynamically generated; queue
IDs are regenerated whenever Exchange attempts to retry delivery of
the messages in that queue. Using static strings can easily cause you
to be searching against the wrong information and turning up an empty
result set.
At the time of this writing, the sample script for the Exchange_QueuedMessage class on the MSDN
Exchange WMI reference demonstrates the use of the Count property with a collection of Exchange_QueuedMessage objects. This is an
error; this class does not have the Count property available for
collections.
See Also
Recipe 7.0, Recipe 7.12 for enumerating queues, and Recipe Recipe 7.14 for deleting messages from queues, MS KB 823489 (How to Use Queue Viewer to Troubleshoot Mail Flow Issues), MSDN: Exchange_QueuedMessage, MSDN: Exchange_QueuedSMTPMessage, and MSDN: Exchange_QueuedX400Message
7.14. Deleting Messages from a Queue
Solution
Using a graphical user interface
Open the Exchange System Manager (Exchange System Manager.msc).
Expand the organization→ Administrative Groups→ target administrative group→ Servers.
Expand the appropriate server container and select the Queues object.
The right pane will display all queues on this server, including MTA, SMTP, and foreign connector queues.
Click the Source field of the header to group the queues according to the component that they are associated with and find the appropriate SMTP virtual server.
Click on a queue to select it and click Find Messages, or double-click the queue to open the search window. By default, the search will return 100 messages at a time.
If you wish to restrict the search, modify the search parameters.
Click Find Now.
Select the message to delete by clicking on it; you can use Shift and Ctrl with additional clicks to select multiple messages. Right-click your selection, select one of the two Delete options, and confirm the deletion.
Using VBScript
' This code deletes a given message within an Exchange SMTP queue.
' ------ SCRIPT CONFIGURATION ------
' The host name of the Exchange server
strHostname = "<ExchangeServerName>" ' e.g., red-exch02
' Name of the SMTP queue to search for messages
strQueueName = "<SMTPQueueName>" ' e.g., 3sharp.com
' Message ID of the message to delete
strMessageID = "<MessageID>"
' ------ END CONFIGURATION ---------

' Get the Exchange Namespace WMI object
Set objWMIExch =  GetObject("winmgmts://" & strHostname &_
   "/root/MicrosoftExchangeV2")
' Get the list of queues and process our desired queue
Set objQueuesList = objWMIExch.InstancesOf("Exchange_SMTPQueue")
For Each objQueueInst in objQueuesList
   ' Make sure this queue is the one we're looking for; if not, skip it
   If objQueueInst.QueueName = strQueueName Then
      strMsgInfo = strMsgInfo & "Queue: " & objQueueInst.QueueName & " (" &_
         objQueueInst.QueueID & ")" & VbCrLF
      Set objMsgsList = objWMIExch.ExecQuery ("Select * From " &_
       "Exchange_QueuedSMTPMessage Where ProtocolName='SMTP' And LinkId='" &_
         objQueueInst.LinkID & "' And LinkName='" &_
         objQueueInst.LinkName & "' And QueueId='" &_
         objQueueInst.QueueID & "' And QueueName='" &_
         objQueueInst.QueueName &"' And VirtualMachine='" &_
         objQueueInst.VirtualMachine & "' And VirtualServerName='" &_
         objQueueInst.VirtualServerName & "' And MessageID ='" &_
         strMessageID & "'")
      For each objMsgInst in objMsgsList
         strMsgInfo = strMsgInfo & "  Message " & _
            objMsgInst.MessageID & VbCrLF &_
            "    Sender: " & objMsgInst.Sender & VbCrLF &_
            "    MessageID: " & objMsgInst.MessageId & VbCrLF
         objMsgInst.DeleteNoNDR
         strMsgInfo = strMsgInfo & "  Message deleted." & VBCrLF
      Next
   End If
Next

Wscript.Echo strMsgInfo
Discussion
This recipe is an extension of Recipe 7.13. When you use ESM to delete messages, you go into the Queue Viewer, select your queue, search for your messages, select one or more of them, and select one of the two deletion options from the right-click context menu: Delete (with NDR) and Delete (no NDR). As their names imply, one will generate an NDR, the other won’t.
This same simplicity exists in the Exchange Server 2003 WMI
classes. While the Exchange_QueuedMessage class provides all of
the properties needed for both SMTP and X.400 messages, the Exchange_QueuedSMTPMessage and Exchange_QueuedX400Message classes extend
those properties with four methods, shown in Table 7-6.
Method | Description |
| This method freezes the message in the queue; Exchange will not attempt to deliver it. |
| This method tells Exchange to resume delivery attempts for this message. |
| This method deletes the given message and generates an NDR to the original sender. |
| This method deletes the given message without generating an NDR. |
The script uses essentially the same code and methodology as
Recipe Recipe 7.13.
The only difference is that we add the specific MessageID property to the WQL query so that
it returns only the specific message we wish to delete. We then use
the DeleteNoNDR method to remove
the message from the queue.
Both etiquette and codified RFC best practices (particularly
section 6.1 of RFC 2821) say you should always generate an NDR when
deleting a message, especially when it originates outside of your
organization. This common wisdom is not always correct; the DeleteNoNDR method is useful more and more
in these days of NDR spam attacks. If you are accepting mail for
nonexistent recipients and generating NDRs, instead of refusing to
accept them to begin with, then your SMTP queues are likely filling up
with NDRs to forged senders, making your server contribute to the spam
problem. If you are cleaning out stale messages of this sort in
your queues, use the
DeleteNoNDR method.
See Also
Recipe 7.12 for enumerating the queues, and Recipe 7.13 for listing the messages in a queue, MSDN: Exchange_QueuedMessage, MSDN: Exchange_QueuedSMTPMessage, and MSDN: Exchange_QueuedX400Message
7.15. Moving SMTP Queues to a New Location
Problem
You want to move the SMTP queues for a specified virtual server from their default location to a new disk or partition.
Solution
Using a graphical user interface
For Exchange Server 2003, do the following:
Open the Exchange System Manager (Exchange System Manager.msc).
Expand the organization→ Administrative Groups→ target administrative group→ Servers→ target server→ Protocols→ SMTP.
Right-click your SMTP virtual server instance and click Stop. When it stops, right-click it again and click Properties. Click Messages.
Provide the new location of the Badmail folder in the Badmail directory field.
Provide the new location of the Queue folder in the Queue directory field.
Right-click your SMTP virtual server instance and click Start.
Warning
This method does not move the Pickup directory. If you want to move it as well, use the Exchange 2000 ADSI Edit method described next.
For Exchange 2000 Server, do the following:
Stop all Exchange and IIS services on the Exchange server.
Create a backup copy of the current location of the virtual server queue files directory. By default this directory is C:Program FilesExchsrvrMailrootvsi 1Queue for the default virtual server.
Move the
vsi 1(or appropriate virtual server directory) to the new location.Open the ADSI Edit (ADSIEdit.msc).
On the menu, click Action→ Connect To, Naming Context, select Configuration Container, and click OK.
Navigate to the following container:
CN=Configuration,CN=Services,CN=Microsoft Exchange,CN=
<Organization>, CN=Administrative Groups,CN=<AGName>,CN=Servers,CN=<server>, CN=Protocols,CN=SMTPClick the container for the desired virtual server instance (
CN=1is the default SMTP virtual server) and click Properties. Select both Show mandatory attributes and Show optional attributes.Find the following attributes and adjust their paths to the location you moved the directory to in step 3:
msExchSmtpBadMailDirectory
msExchSmtpPickupDirectory
msExchSmtpQueueDirectory
Once Active Directory replication is complete, restart the Microsoft Exchange System Attendant service. Open the Event Viewer and wait until you find three event ID 1005 messages from the MSExchangeMU source in the application log that indicate the IIS metabase paths have been updated.
Restart the Exchange server.
Discussion
Exchange keeps a separate set of queue directories for each SMTP virtual server, so this is an operation you must perform for each virtual server whose queue files you wish to relocate. Moving them, especially the default virtual server, can cause a big performance increase, especially if you move them onto a dedicated drive and off the system volume. This is especially important for bridgeheads, systems acting as edge routers, or other high-traffic machines. You also do not want to locate the queue folders on the same drive as any of your storage group log files.
See Recipe 7.12 for a discussion of the various queues.
See Also
Recipe 7.0 for general background on the SMTP services, MS KB 318230 (How to change the Exchange 2000 SMTP Mailroot directory location), MS KB 822933 (How to change the Exchange 2003 SMTP Mailroot folder location), and the Optimizing Storage for Exchange Server 2003 guide (http://www.microsoft.com/downloads/details.aspx?FamilyID=C6084D20-9730-4FFC-805D-B957327604C6&displaylang=en)
7.16. Deleting Messages from the Badmail Folder
Solution
Using a graphical user interface
First, run the Badmail Delete and Archival script (BadmailAdminTool) with default parameters:
Download the BadmailAdminTool from:
http://www.microsoft.com/downloads/details.aspx?familyid=782aaf0f-6239-40ad-adda-97863d852ff7&displaylang=en Extract it to a directory of your choice.
Open a command prompt and navigate to the BadmailAdminTool directory.
Run the following command:
> cscript.exe badmailadmin.wsf
Next, schedule the BadmailAdminTool script to run with default parameters:
Open Scheduled Tasks (All Programs→ Accessories→ System Tools→ Scheduled Tasks).
Click Add Scheduled Tasks, then click Next.
Browse to the directory where you installed the BadmailAdminTool and select badmailadmin.wsf.
Leave the default task name. Select a schedule for the new task: Daily, Weekly, Monthly, One time only, When my computer starts, or When I log on and click Next.
Provide the scheduled time and day to run the script on and click Next.
Provide a user account with local administrative and Exchange Administrator rights to run the script and click Next.
Check the Open advanced properties for this task when I click Finish checkbox and click Finish.
Modify the task to provide the specific script parameters you desire.
Discussion
When Exchange encounters a fatal error during a delivery attempt, it generates an NDR for the original sender and attempts to deliver it. NDRs are messages like any other and work through the same link and queue system. In time, NDRs themselves may prove to be undeliverable. When that happens, Exchange moves the original message to the badmail folder, which is, by default, located underneath the root mail queue folder for the virtual server instance (see Recipe 7.15 for more information on queue folders).
Over time, the badmail directory can fill up and eventually cause space issues. You should check this directory on a regular basis and move or delete messages from it. Microsoft provides the BadmailAdminTool for download from their Exchange Tools download web site. It works with both Exchange 2000 and Exchange Server 2003. You can get it at http://www.microsoft.com/downloads/details.aspx?familyid=782aaf0f-6239-40ad-adda-97863d852ff7&displaylang=en.
The BadmailAdminTool provides the parameters shown in Table 7-7.
Parameter | Description |
| The action to take when the badmail folder exceeds the size limit:
|
| Specifies which virtual server badmail folder to
run against. |
| Specifies whether to move oldest or largest messages until the size limit is reached. |
| Logging level:
|
| The badmail folder will be removed of any badmail
that exceeds this limit; a value of |
| Folder to hold archived badmail messages (see
|
| The name of the Exchange server. |
There are other methods of dealing with the badmail folder: The “Dealing with Badmail” entry (http://hellomate.typepad.com/exchange/2003/07/dealing_with_ba.html) on the MS Exchange Blog gives a short description of the badmail folder and provides an alternate script, the Badmail Report Tool. The Badmail Report Tool provides a weekly report of the contents of the badmail folder via email. You can download it from http://hellomate.typepad.com/exchange/badmailreport.zip.
As of Exchange Server 2003 SP1, the badmail folder is disabled out of the box, but you can re-enable it with selected registry tweaks per MS KB 884068.
See Also
Recipe 7.15 for more information on queue folders, and MS KB 884068 (The Badmail folder is disabled in Exchange Server 2003 SP1)
7.17. Sharing an SMTP Domain Between Exchange and a Foreign Mail System
Problem
You have another mail system within your organization that must share the same SMTP domain namespace with Exchange and you need them to coexist.
Solution
Using a graphical user interface
If you need to use the foreign mail system as the final authoritative system:
Open the Exchange System Manager (Exchange System Manager.msc).
Expand the organization→ Recipients→ Recipient Policies.
Right-click the default policy and select Properties.
Click the E-mail Addresses tab.
Click New, select SMTP Address, and click OK.
Fill in the Address field with the value
@localand click OK.Check the checkbox beside the new SMTP domain and click Set as Primary.
Click Apply. When you are asked if you wish to apply the change to all recipients, click Yes. You may be asked this multiple times.
Open the property sheet of the recipient policy that contains the domain you wish to share.
Click the E-mail Addresses tab.
Click Edit and clear the This Exchange organization is responsible for all mail delivery to this address checkbox. Click OK twice.
Create a new recipient policy and name it
User Addresses.Click the Filter tab, click Modify, and adjust the filter to apply to all users. Click OK on the Find Exchange Recipients screen.
Click the E-mail Addresses tab and set the shared domain as the primary address. Click OK.
Create a new SMTP connector (see Recipe 7.4) with an address space of the shared domain. This connector should have the Forward all mail through this connector to the following smart hosts checkbox enabled.
Configure the smart host using either the FQDN or the
[IPAddress]syntax.Check the Allow messages to be relayed to these domains checkbox and click OK.
If you need to use Exchange as the final authoritative system:
Create Active Directory contact objects for each recipient on the other mail system. Their email addresses should be in the form
[email protected], where the stringhost.domainis not defined as a valid SMTP address namespace in the Exchange organization’s recipient policies.Create a new SMTP connector (see Recipe 7.4) with an address space of
host.domain. This connector should be configured to deliver all messages directly to the appropriate host, using the[host.domain]syntax to avoid MX lookups in DNS.Configure the other mail system to forward any unresolved messages to Exchange.
Configure your DNS and firewall so that incoming SMTP traffic is handled by the other mail system.
Discussion
Conceptually, sharing a domain between Exchange and another mail system is easy:
Decide which system will be the final authoritative server for the domain. You must have a final authoritative server; this server will generate the NDRs for any nonmatched recipients.
Configure incoming SMTP mail to go to the nonauthoritative system first.
Configure the nonauthoritative system to pass all unresolved mail for the domain to the authoritative system.
The devil is in the details, as always. MS KB 315591 provides two methods for configuring Exchange as the nonauthoritative system; we have summarized the first method, which provides domain-by-domain control, in our recipe. The second method shares all domains for which the Exchange server is configured to handle mail and is not covered in this recipe.
There is a per-domain setting for each domain specified in a recipient policy that determines whether Exchange is authoritative for the domain. By default, this setting is enabled. The first hurdle to jump is that Exchange must be authoritative for the primary address in the default recipient policy.
Steps 2-8 of the recipe create a new primary address (@local) on the default recipient policy, for which Exchange is authoritative.
Steps 9-11 configure Exchange as nonauthoritative on the shared domain.
Steps 12-14 are optional and permit your users to retain their primary email addresses in the shared domain.
Steps 15-17 permit Exchange to relay unresolved messages to the authoritative mail system.
See Also
“Supporting Two SMTP Mail Domains and Sharing an SMTP Mail Domain with Another System” in Chapter 6, “Deployment Scenarios for Internet Connectivity,” of the Exchange Server 2003 Transport and Routing Guide on the TechNet web site, MS KB 315591 (XCON: Authoritative and non-authoritative domains in Exchange 2000), MS KB 319759 (XADM: How to configure Exchange 2000 Server to forward messages to a foreign messaging system that shares the same SMTP domain name space), and MS KB 321721 (XCON: Sharing SMTP Address Spaces in Exchange 2000 Server and Exchange Server 2003)
7.18. Accepting Mail for Multiple Domains
Problem
You want the recipients in your Exchange organization to be able to accept mail for an additional domain without having to configure separate secondary addresses for each recipient.
Solution
Using a graphical user interface
Open the Exchange System Manager (Exchange System Manager.msc).
Expand the organization→ Recipients→ Recipient Policies.
Right-click the desired policy and select Properties.
Click the E-mail Addresses tab.
Click New. Select SMTP Address and click OK.
Fill in the Address field as shown in Figure 7-1. Be sure to include a leading
@before the domain. Click OK.Check the checkbox beside the new SMTP domain to activate it.
If you want the new domain to be the primary (default) domain for all recipients, select it and click Set as Primary.
Click Apply. When you are asked if you wish to apply the change to all recipients, click Yes.
Click OK to close the property sheet.
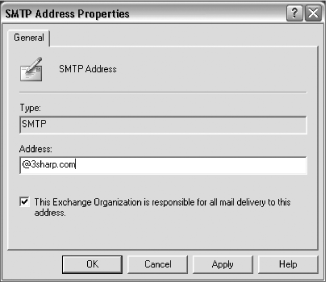
Discussion
This is a straightforward task. By default, your Exchange recipients have a single SMTP domain associated with them (their Active Directory domain). By modifying the default recipient policy or creating a new recipient policy, you can add additional SMTP domains to all recipients, allowing your users to share a common domain namespace. This is commonly used to set an organization’s recipients to use the parent domain when Active Directory has been configured in a subdomain. However, it will trigger a rebuild of your offline address lists, which may, in turn, cause a spike in synchronization traffic to your clients.
Although you can easily find the recipient policy information in
Active Directory by looking in the CN= <Policy
Name> ,CN=Recipient Policies,CN=
<organization> , CN=Microsoft Exchange,CN=Services DN of your domain’s
Configuration naming context, you should only make changes to it via
ESM. The Recipient Update Service will do the work of applying the
change policies to your existing recipients.
See Also
MS KB 268838 (Configuring Exchange to Receive Mail from Multiple Domains)
7.19. Controlling Mail Relaying
Solution
Using a graphical user interface
You can control relay access at the virtual server level or at the SMTP connector level. This is how you do it at the virtual server:
Open the Exchange System Manager (Exchange System Manager.msc).
Expand the organization→ Administrative Groups→ target administrative group→ Servers→ target server→ Protocols→ SMTP.
Right-click the desired virtual server and click Properties. Click the Access tab. Click Relay.
Unless you need to permit authenticated SMTP users to relay through your server, uncheck the Allow all computers which successfully authenticate to relay, regardless of the list above checkbox. Leaving this checked can provide an avenue for stealth relay and password-discovery attacks.
If you wish to restrict a small group of computers from relaying through your virtual server (this is usually only suitable for a server on your internal network), select All except the list below. Otherwise, select Only the list below to permit relay only to the systems listed.
Click the Add button and add a single IP address, a group of IP addresses, or a domain name. Click OK.
When you have the correct entries in the list, click OK.
Here is how you control relay access at the SMTP connector:
Open the Exchange System Manager.
Expand the organization, Administrative Group, administrative group, Routing Groups, routing group, and Connectors containers.
Right-click the desired SMTP connector and click Properties. Click the Address Space tab.
If you wish to allow relaying through this routing group’s bridgehead servers for the domains listed in the address space list, check the Allow messages to be relayed to these domains’ checkbox.
Click OK.
Discussion
One of the big improvements in Exchange 2000 and Exchange Server 2003 is that it no longer is an open relay out of the box. Controlling relaying is an important feature because there are times when you need to allow a subset of accounts or users to relay messages through the server. You can control relaying at the level of both the SMTP virtual server and the SMTP connector.
Controlling relaying at the SMTP connector allows you to specify rules for an entire group of bridgehead servers at once. The relay permissions on an SMTP connector apply to all address spaces handled by the connector, so if you have multiple address spaces listed and need to permit relaying for only one of them, you will need to move that address space to a new SMTP connector (see Recipe 7.4 for details). The connector relay settings override the relay settings for any associated SMTP virtual servers.
Setting the relay options on the virtual server allows you to enable or disable authenticated relay. Any authenticated user account will be able to relay through the virtual server; because this setting is enabled by default, spammers have taken to locating Exchange servers and running password attacks on known and likely accounts using SMTP authentication. See Recipe 11.2 for more details on this attack, how to detect it, and how to prevent it. Unless you absolutely need to allow authenticated user relay, disable this setting on every Internet-facing virtual server.
See Also
Recipe 7.1 for creating new SMTP virtual servers, Recipe 7.4 for creating new SMTP connectors, and Recipe 10.2 for SMTP authentication
7.20. Filtering Messages Based on Recipient
Solution
Using a graphical user interface
Open the Exchange System Manager (Exchange System Manager.msc).
Expand Global Settings, right-click Message Delivery, and select Properties. Click the Recipient Filtering tab.
Click Add and add an address to filter for. You can use wildcards to block entire domains. Click OK.
If you want to automatically reject messages for addresses in your domain namespaces that do not have corresponding recipient objects in Active Directory, click the Filter recipients who are not in the Directory checkbox.
Click OK.
Discussion
There are two main uses for recipient filtering: preventing external senders from sending mail to particular mail-enabled recipients and preventing mail for nonexistent recipients from ever entering your Exchange organization. Recipient filtering is an organization-wide setting; any restrictions you create will be propagated to all servers and apply for every anonymously submitted inbound message submission to the organization. Exchange returns the “550 5.7.1 Requested action not taken; mailbox not available” error when a message is submitted to a filtered recipient.
See Also
MS KB 823866 (How to configure connection filtering to use Realtime Block Lists (RBLs) and how to configure recipient filtering in Exchange 2003)
7.21. Setting IP Address Restrictions for Multiple Servers
Problem
You need to maintain the connection restriction, relay restriction, and global accept/deny lists on your Exchange servers.
Solution
Using a command-line interface
Use the SMTP Internet Protocol Restriction and Accept/Deny List Configuration Tool (ExIpSecurity). You can download it from:
| http://www.microsoft.com/downloads/details.aspx?familyid=dcce0536-7edc-40b4-9950-8b6906abda2d&displaylang=en |
To add an IP address to the connection restriction list:
> cscript ipsec.vbs -d<DC>-s<server>-i<VSnum>-o a -r connection -v<IPaddress>
Example:
> cscript ipsec.vbs -dDC01-sEXCH01-i1-o a -r connection -v192.168.0.1
To add a domain to the relay restriction list:
> cscript ipsec.vbs -d<DC>-s<server>-i<VSnum>-o a -r relay -t domain -v<domain>
Example:
> cscript ipsec.vbs -dDC01-sEXCH01-i1-o a -r relay -t domain -vcontoso.com
To grant connection access to all IP addresses or domains except the list specified:
> cscript ipsec.vbs -s<server>-i<VSnum>-o s -r connection -g grant -d<DC>
Example:
> cscript ipsec.vbs -sEXCH01-i1-o s -r connection -g grant -d DC01
To delete a range of IP addresses from the relay restriction list:
> cscript ipsec.vbs -s<server>-i<VSnum>-o d -r relay -v<IPaddress>-m<mask>-d <DC>
Example:
> cscript ipsec.vbs -sEXCH01-i1-o d -r relay -v192.168.0.1 -m 255.255.255.0 -d DC01
To add a single entry to the global accept/deny list (Exchange Server 2003 only):
> cscript ipsec.vbs -d<DC>-o a -r [accept | deny] -v<IPaddress>
Example:
> cscript ipsec.vbs -dDC01-o a -r accept -v192.168.0.1
To add a range of IP addresses to the global accept/deny list (Exchange Server 2003 only):
> cscript ipsec.vbs -d<DC>-o a -r [accept | deny] -v<IPaddress>-m<mask>
Example:
> cscript ipsec.vbs -dDC01-o a -r accept -v192.168.0.1 -m 255.255.255.0
To delete an entry from the global deny list (Exchange Server 2003 only):
> cscript ipsec.vbs -d<DC>-o d -r deny -v<IPaddress>
Example:
> cscript ipsec.vbs -dDC01-o d -r deny -v192.168.0.1
To list all entries on the global accept or deny list (Exchange Server 2003 only):
> cscript ipsec.vbs -d <DC> -o e -r [accept | deny]Example:
> cscript ipsec.vbs -d DC01 -o e -r acceptDiscussion
The ExIPSecurity tool is a freely available Visual Basic script and COM object that gives you programmatic access to the connection, relay, and global accept/deny restriction lists. The connection and relay restriction functions work on both Exchange 2000 and Exchange 20003; the global accept and deny lists are specific to Exchange Server 2003. Since the command-line tool is actually VBscript, this recipe does not include an example of directly invoking the COM object; you can look directly at the tool and included documentation to see working examples of how to use this COM object in your own scripts.
Using this tool, you can iterate through lists of servers provided by other recipes in the book (such as the VBScript Active Directory query in Recipe 2.14) and maintain consistent settings for your per-virtual server connection restriction lists and relay restrictions. This tool provides quite a few options but the included documentation includes many examples to help you figure out how to put it to use in your organization.
See Also
Download the SMTP Internet Protocol Restriction and Accept/Deny List Configuration Tool with documentation from the Microsoft Download Center:
| http://www.microsoft.com/downloads/details.aspx?familyid=dcce0536-7edc-40b4-9950-8b6906abda2d&displaylang=en |
and MS KB 810913 (XGEN: Programmatic Modification of SMTP Virtual Server Access and Relay Control)
7.22. Using a DNS Block List on Exchange Server 2003
Solution
Using a graphical user interface
Open the Exchange System Manager (Exchange System Manager.msc).
Expand Global Settings, right-click Message Delivery, and select Properties. Click the Connection Filtering tab.
Click Add. Fill in the display name of the DNSBL you are configuring and put the lookup zone in the DNS Suffix of Provider field.
If you wish to use a custom error message, fill it in. The default is
<IPAddress>hasbeen blocked by<DNSBL Display Name>.If the DNSBL returns multiple result codes and you wish to configure which ones you will actually block on, click Return Status Code. Select the appropriate option (usually Match Filter Rule to Any of the Following Responses), fill in the corresponding mask or response codes, and click OK.
Click OK to return the Connection Filter tab.
If you have certain addresses that you want to be able to continue to receive email this DNSBL would otherwise block, click Exception. Click Add and fill in the exempted addresses. Click OK to close the exemption box.
Click OK.
Discussion
DNSBL support is a new feature in Exchange Server 2003 that can have tremendous impact on reducing the amount of spam that enters your organization. There are literally hundreds of blocklists being run around the world; before using any of them, do some research to find out their purpose, listing criteria, delisting criteria, and maintenance policies. Some return multiple result codes to allow you to combine queries for multiple lists into one aggregated zone and still know which source list caused the hit. As an example, on such a list a return value of 127.0.0.1 might signify that the host was added to the list by one source, while 127.0.0.2 was from a second source.
DNSBLs can produce a performance hit on busy systems; they are making one DNS query for every configured DNSBL for every incoming SMTP connection, subject to normal DNS caching. If these queries are to servers outside of your network and over your WAN, the delay could add up (as could the bandwidth). It is generally best to use as few DNSBLs as possible.
You should always program an exception for RFC-required role
accounts such as postmaster@domain
and abuse@domain (see Recipe 7.24 for details)
so that external senders who are trying to send mail through to your
users can contact you. You might also consider putting up a web site
that explains which block lists you use and ways to request
whitelisting and referring to that page’s URL in a custom error
message.
Depending on the number of block lists you query and your traffic volume, you may want to look into the possibility of creating your own DNSBL and feeding by concatenating the data from several block lists together. Doing so has many benefits:
You can host the zone(s) on a server that is network-close to the Exchange server performing the queries, cutting down the query latency.
You can prefilter the block list data to remove entries you do not wish to use.
You can combine multiple lookup zones and block lists into a single zone, thus reducing the number of queries and configured block lists.
Recipe 10.7 has more details on creating a custom DNSBL.
See Also
Recipe 10.7 for creating a custom DNSBL, Chapter 10 of the Exchange Server 2003 Transport and Routing Guide, Chapter 8 of Secure Messaging with Microsoft Exchange Server 2003 (Microsoft Press), and MS KB 823866 (How to configure connection filtering to use Realtime Block Lists and how to configure recipient filtering in Exchange 2003)
7.23. Controlling Global and Internet Message Format Settings
Problem
You need to associate MIME types with specific extensions, define default message format settings, or adjust them on a per-domain basis, throughout your Exchange organization.
Solution
Using a graphical user interface
To add a new MIME types association to a specific extension, do the following:
Open the Exchange System Manager (Exchange System Manager.msc).
Expand Global Settings, right-click Internet Message Formats, and click Properties.
Click Add. In the Type field, enter the MIME content type. In the Associated Extension field, enter the extension. Click OK.
Click OK.
Setting message format settings on a per-domain basis, do the following:
Open the Exchange System Manager (Exchange System Manager.msc).
Expand Global Settings and click Internet Message Formats. You will see a listing of the current domains (* is the default) that have specific format settings in place.
If you wish to create a new domain-specific setting, right-click Internet Message Formats and click New Domain. Fill in the name and the SMTP domain and click OK.
From the list of domains, right-click the domain to modify and click Properties.
Click the Message Format tab and select the message encoding and character set options you wish to use.
Click the Advanced tab and configured the rich-text formatting, wrapping, and autoresponse options you wish to use.
Click OK.
Discussion
Global format options are shared throughout the Exchange organization, meaning that you can easily change them as needed in the GUI and not need to worry about propagating them to all of your servers using scripts.
The first process in this recipe shows how straightforward it is to add a new MIME type/file extension association. Editing and removing them are just as simple.
Controlling message formatting settings on a domain-by-domain basis is a bit more interesting. You can control whether to use MIME or UUEncode (MIME is the default and should be unless you have a specific reason to change it), whether the MIME message body will be text or HTML (or both), and which character sets to use for MIME and non-MIME messages.
The advanced properties give you control over whether to use Exchange rich text and word wrapping. They also control a multitude of autoresponse behaviors, shown in Table 7-8.
Option | Description |
Allow out of office responses | Enables OOF responses. You might want to disable these to domains that host a lot of mailing lists. |
Allow automatic replies | Enables message receipts and automatic replies to be sent to the sender. |
Allow automatic forward | Enables forwarding or copying of the message to another recipient. |
Allow delivery reports | Enables delivery confirmation reports. |
Allow nondelivery reports | Enables NDRs. You should not turn this off for a domain unless you are positive it will never be a valid email source or destination, such as for NDR spam attacks. |
Preserve sender’s display name on message | While not an autoresponse behavior per se, it controls whether Exchange keeps both the sender’s name and email address on outbound messages. |
See Also
MS KB 821750 (How to configure Internet email message formats at the user and the domain levels in Exchange Server 2003)
7.24. Setting Up a Role Email Address
Discussion
This problem is actually pretty simple to solve; in fact, it is so simple to solve that there are at least four different ways to solve it:
- A mailbox-enabled user
Creating a new user and mailbox for each role address is perhaps the simplest method up-front, but it is not terribly scalable if you have a large number of role addresses to manage. Under Exchange 5.5, you could just create a new mailbox and associate it with an existing user, but the one-to-one link between mailboxes and user accounts in Active Directory prohibits this and leads to a lot of overhead. Busy role accounts will need to be checked often by at least one delegate, possibly more, to avoid running into quota issues.
- A mail-enabled group
A distribution group provides an easy way to send role account email to multiple recipient mailboxes, as well as providing an easy method to control recipient access. However, busy role accounts will raise traffic levels for every member of the group, leading to possible quota troubles.
- A mail-enabled public folder
If you are using public folders in your organization or are willing to begin, this option offers a lot of benefits, including freedom from worries about quotas in your user mailboxes.
- Secondary mail address on an existing mail-enabled resource
This option makes use of existing mail-enabled objects in Active Directory, such as users, groups, or public folders, and gives them secondary email addresses. You can add multiple addresses via the ADUC MMC snap-in or by using ADSI scripting to manipulate the contents of the
proxyAddressesattribute on the desired object.
There is at least one role account every email installation must have to be RFC-compliant, as well as one more that is strongly recommended if you intend to be a good network neighbor in dealing with any email abuse issues that may originate from your organization:
postmasterabuse
In addition, there are many others you probably should make sure
are valid, such as the responsible email address listed in your
external DNS zone file (commonly hostmaster), webmaster for issues regarding your web
site, info for business queries,
and more. RFC 2142, “Mailbox Names for Common Services, Roles, and
Functions” provides a proposed standard for these role addresses and
when they should be deployed; you can view the RFC at
http://www.rfc-editor.org/rfc/rfc2142.txt.
See Also
Recipe 5.1 for creating mailbox-enabled users, Recipe 5.4 for creating mail-enabled groups, Recipes Recipe 5.14 and Recipe 5.23 for mailbox delegations, Recipe 5.28 for changing attributes on user objects, and Recipe 9.8 for mail-enabled public folders
7.25. Verifying Your External DNS Configuration for Inbound SMTP
Problem
You need to ensure that you have your external DNS properly configured to allow inbound SMTP traffic to your Exchange organization. In addition, you would like to avoid the kind of configuration errors that might cause your outgoing SMTP traffic to be rejected by other hosts.
Solution
Run the following commands from the command line for each server or cluster you intend to receive or send mail outside of your firewall. For outbound hosts, make sure to use the actual external IP address that will be used by your firewall, NAT device, or other SMTP proxy:
> nslookup<server FQDN> <DNS server hostname or IP address> > nslookup red-exch01.redmond.3sharp.com ns1.msp.eschelon.com Server: ns1.msp.eschelon.com Address: 209.150.200.10 Name: red-exch01.redmond.3sharp.com Address: 64.65.179.146> nslookup<server IP address> <DNS server hostname or IP address> > nslookup 64.65.179.146 ns1.msp.eschelon.com Server: ns1.msp.eschelon.com Address: 209.150.200.10 Name: red-exch01.redmond.3sharp.com Address: 64.65.179.146> nslookup -q=MX<domain> <DNS server hostname or IP address> > nslookup -q=MX 3sharp.com ns1.msp.eschelon.com Server: ns1.msp.eschelon.com Address: 209.150.200.10 3sharp.com MX preference = 10, mail exchanger = exchange.robichaux.net 3sharp.com MX preference = 20, mail exchanger = relay.salmark.net 3sharp.com MX preference = 30, mail exchanger = relay.thorcom.net 3sharp.com nameserver = ns1.msp.eschelon.com 3sharp.com nameserver = ns.mazin.net ns1.msp.eschelon.com internet address = 209.150.200.10
Ensure that the reported FQDN and IP address for the server match. You must use the FQDN to avoid a NetBIOS lookup and you must supply a DNS server that has the same view of the DNS domain as the rest of the Internet.
Discussion
Even though Exchange 2000 and Exchange Server 2003 are thoroughly based around SMTP, Active Directory, and DNS, you do not have to worry about the same DNS configuration issues inside your organization as administrators of other native SMTP mail transports do. Active Directory (and therefore Exchange) is certainly critically reliant on a stable and well-configured DNS deployment, but almost all of the routing information Exchange needs comes from Active Directory, not DNS. It only uses DNS to locate domain controllers and global catalog servers via SRV records; it does not use MX records inside the organization.
Basic DNS health
When you exchange traffic with systems outside of your Exchange organization, however, you need to ensure that you have a solid, well-configured DNS configuration. SMTP mailers use DNS to figure out how to deliver messages to external domains. The basic SMTP and ESMTP transaction relies on the following DNS resource record (RR) types:
- Address record (A)
The A record provides the authoritative mapping between a fully qualified hostname and its corresponding IP address.
- Mail exchanger record (MX)
The MX record advertises a host that is responsible for accepting inbound SMTP connections. It contains a numerical preference field that determines precedence if there are multiple MX records and the FQDN of a corresponding A record. If no MX RRs are found for a given host, SMTP will attempt to locate and use an A record for that host instead. If it cannot find either, the mail will bounce as undeliverable.
- Pointer record (PTR)
The PTR record provides the authoritative mapping from an IP address to a fully qualified host name. If the PTR records are set up correctly, a host can determine the A record of an incoming SMTP connection by doing a PTR lookup, and then confirm that the results of the A lookup match. PTR lookups are not mandated by the SMTP RFCs, but many systems do so as part of their connection filtering.
- Canonical name (CNAME)
The CNAME record provides a noncanonical alias and points to the canonical A record. Although CNAMEs may be chained, this can slow down DNS resolution and can be complicated to maintain. It is a violation of the DNS standards to point an MX record to a FQDN that is a CNAME; this can result in hard-to-troubleshoot mail errors or worse. Likewise, hosts with a CNAME records cannot have an MX record; the remote system should resolve the CNAME to the corresponding A record and use those MX records.
An example zone file for the fictitious domain fqdn.tld, configured to allow proper SMTP,
might look like this:
;  Database file fqdn.tld.dns for fqdn.tld zone.
;
@                       IN  SOA ns.fqdn.tld. hostmaster.fqdn.tld. (
                         32           ; serial number
                         900          ; refresh
                         600          ; retry
                         86400        ; expire
                         3600       ) ; default TTL
;
; Zone NS records
;
@                       NS     ns.fqdn.tld.
;
;  Zone records
;
@                       MX     10 bridge01.fqdn.tld.
@                       MX     20 bridge02.fqdn.tld.
;
bridge01                A      192.168.0.20
bridge01                MX     10 bridge01.fqdn.tld.
bridge01                MX     20 bridge02.fqdn.tld.
;
bridge02                A      192.168.0.30
bridge02                MX     10 bridge01.fqdn.tld.
bridge02                MX     20 bridge02.fqdn.tld.
;
exchfe01                A      192.168.0.40
exchfe01                MX     10 bridge01.fqdn.tld.
exchfe01                MX     20 bridge02.fqdn.tld.
;
exchfe02                A      192.168.0.50
exchfe02                MX     10 bridge01.fqdn.tld.
exchfe02                MX     20 bridge02.fqdn.tld.
;
mail                    CNAME  exchfe01.fqdn.tld.
mail                    CNAME  exchfe02.fqdn.tld.
Though we cannot fully explain the intricacies of DNS here (grab the excellent book DNS on Windows Server 2003 by Matt Larson, Cricket Liu, and Robbie Allen [O’Reilly]) for a thorough grounding), we can highlight some points of interest.
Lines 3-8 are really one record, the statement of authority
(SOA). It refers to the root of the zone, which is the fqdn.tld domain. Lines 12, 16, and 17 also
establish RRs that apply to the root of the zone.
Lines 16 and 17 set up the MX records for the fqdn.tld domain. They establish two
machines that accept incoming mail: bridge01 and bridge02. Because bridge01 has a lower preference (10 versus
20) than bridge02, remote systems
should attempt SMTP deliveries to bridge01 first and fall back to bridge02 otherwise.
Lines 19-21 establish the A record and MX records for the
bridge01 host. Since bridge01 is an inbound MX host, it needs
to have an A record so that remote systems can contact it. If we
left the MX records off, any systems that attempted to deliver to
[email protected] would
fail to find an MX record, find the A record, and always attempt
direct delivery. Some people argue that this behavior is desired for
inbound mail hosts and that the actual hosts therefore do not need
MX records. After many years of running high-traffic mail servers at
ISPs with hundreds of zones, we prefer to keep a level of redundancy
in our DNS arrangements.
Lines 23-33 do the same thing for bridge02, exchfe01, and exchfe02. Again, whether you want to do
this is a matter of taste and preference. Many administrators feel
that this level of DNS is clutter; we have in the past found it very
useful in protecting our domains from unintended consequences of
hasty DNS changes.
Lines 35 and 36 create an alias mail that points to exchfe01 and exchfe02. Because this host is actually a
CNAME, it does not get to have separate MX records. Any systems
trying to send to mail will follow the CNAME to the canonical names
of exchfe01 and exchfe02, performing the MX lookup on that
host instead.
Tip
Many administrators have the idea that they must use a
special hostname for their Internet-facing SMTP hosts such as
smtp or mail. This is not true. Setting up host
aliases like this can make things easier for end users who need to
remember their SMTP server settings, but they also make it more
complicated to properly configure reverse DNS, which can cause
mail to be delayed or worse.
Reverse DNS
Having MX records pointing to the A records of your inbound SMTP servers (whether they are your Exchange servers, a mail firewall application, or some other system) is enough to allow inbound mail to flow. However, you may find you have problems sending mail to a growing number of systems if your forward DNS (A records) do not match up with your reverse DNS (PTR records).
Reverse DNS is delegated out to ISPs from the in-addr.arpa domain. To find the reverse
DNS record for bridge01.fqdn.tld,
the DNS resolver would query for the PTR record for the 20.0.168.192.in-addr.arpa. domain:
$ORIGIN 0.168.192.in-addr.arpa.
20                      PTR    bridge01.fqdn.tld.
The returned answer, bridge01.fqdn.tld., should match up with
the hostname that was initially used to perform the forward query.
If not, you either have an administrator who has not configured
their DNS correctly or someone pretending to be a host they are not.
There is no requirement that a hostname of a mail server be in some
way connected to or a member of the domains it accepts mail for,
which makes it easy for ISPs or other mail servers that handle
multiple domains to do the right thing regarding reverse DNS.
Many systems take this check one step farther. They will note the IP address of the incoming SMTP connection, note the hostname used in the HELO or EHLO SMTP command, and perform a forward and reverse DNS lookup on it all. If it does not all match, they may reject the connection, flag the message as possible spam, or take other actions as their local policies dictate. If you want to avoid trouble and ensure the widest reception for messages from your organization, make sure that your forward and reverse DNS are correct and complete and that your outbound SMTP virtual servers are configured to present themselves with the hostname that matches the public view of their IP address.
There is an unfortunate but widely held perception in many quarters that Exchange is not ready for the rough and tumble world of Internet SMTP. In part, this is because far too many Exchange administrators either do not learn how or do not take the time to perform the simple task of ensuring that their DNS settings are correct and complete. One of the best things that you can do to ensure propagation of your message traffic and be a good neighbor to others on the Internet is to not be one of those administrators.
See Also
DNS on Windows Server 2003 (O’Reilly), Chapter 4, “Configuring DNS,” of the Exchange Server 2003 Deployment Guide on the Microsoft TechNet web site, and MS KB 153001 (XFOR: DNS MX Records and CNAMEs)
7.26. Testing SMTP Manually
Problem
You need to manually test your Exchange server’s SMTP functionality by injecting a test message.
Solution
Using the Windows telnet client:
Open a connection to port 25 of your Exchange server:
telnet<server name or IP address>25At the banner, enter the EHLO command and verify that you receive a 250 response code:
220
<server FQDN>Microsoft ESMTP MAIL Service, Version: 6.0.3790.211 ready at<time and date>EHLO<client FQDN> 250-<server FQDN>Hello [<client IP address>]<list of ESMTP capabilities>250 OKUse the MAIL FROM command to identify the envelope sender. Verify that Exchange accepts the sender with a 250 result code:
MAIL FROM:<sender address> 250 2.1.0<sender address>....Sender OKUse the RCPT TO command to identify the envelope recipient. Verify that Exchange accepts the recipient with a 250 result code. If you want to send to multiple recipients, repeat this step once for every recipient:
RCPT TO:<recipient address> 250 2.1.5<recipient address>Use the DATA command to enter the message body. Although the headers are not strictly required, they can be useful. If the From: and To: headers are not present in the message, Exchange will substitute the envelope values given in the previous steps. Verify that Exchange is ready to accept the message body with a 354 result code:
DATA 354 Start mail input; end with <CRLF>.<CRLF>
From:<sender address>To:<recipient address> Subject: Testing This is a manual SMTP test message.End body entry by typing a single period on a line by itself. Verify that Exchange accepts the message with a 250 result code:
. 250 2.6.0
<MessageID>Queued mail for deliveryUse the QUIT command to close the connection:
QUIT 221 2.0.0
<server FQDN>Service closing transmission channelUse a client such as Outlook or OWA to verify the delivery of the message.
Discussion
Knowing how to manually inject SMTP test messages is a valuable troubleshooting skill that can save you a lot of time and energy. Often, you need to send a quick message through a particular server or to test a specific mailbox. It is easy to script the creation of messages using CDO (although CDO is outside the scope of this book), but you may not always have your script with you.
The SMTP conversation recorded in this recipe is the simplest one that involves actual transmission of a message, yet it allows you to validate the following information:
The SMTP service is running and accepting connections.
The server is correctly identifying itself.
The server is accepting ESMTP functionality (if not, EHLO would be rejected and you would need to use HELO instead).
Sender filtering is working as planned (using an envelope sender address that should be blocked should result in a rejection of the MAIL FROM command).
Recipient lookups (e.g., the DSAccess routines) and recipient filters are working.
Message routing is working.
If you have the ability to test from a special IP address you set aside, you can even test the connection filtering if you need to. If your client IP address is in the filter, you should be denied connection.
If you make a typo during an SMTP command or email address and correct it using the backspace key, you will probably need to re-enter the command. When entering email addresses manually, be sure always to wrap them in angle brackets:
Wrong: MAIL FROM:
[email protected] |
Right: MAIL FROM:
<[email protected]> |
The brackets tell the SMTP address parser code that it is dealing with a raw address, which is a type of quoting specified in the RFCs. It tells the parser that this is to be treated just as an email address and reduces the likelihood of parsing errors. Raw addresses will also transit from SMTP to X.400 without translation or expansion if they are routed through your system.
When entering the message body, you should use at least the following headers, although they are not required:
From:
To:
Subject:
Exchange will automatically create other appropriate headers.
See Also
RFC 2821 (Simple Mail Transfer Protocol) for a description of SMTP and RFC 2822 (Internet Message Format) for a description of the Internet message format