In order to work with any programming language, you need access to a set of software tools that facilitate the software development process. These tools include such things as a code editor, a compiler or interpreter, and a source code debugger. This chapter introduces you to these types of resources using tools provided by Just BASIC to demonstrate how these types of tools are used to develop software applications. In addition, you will receive a thorough overview of Just BASIC’s code editor and learn how to configure it to suit your personal preferences and work habits. You will also learn how to create and package standalone applications, which can then be run on computers where Just BASIC is not installed. In addition to all this, you will learn how to create your second computer game, the Legend of Mighty Molly.
Specifically, you will learn
About Just BASIC menu and toolbar commands
How to configure Just BASIC editor settings
About the different windows that make up Just BASIC
How to create and distribute Just BASIC applications
In this chapter you will learn how to create a new game that tells a mad-lib style story of the Legend of Mighty Molly. Through the development of this game, you will learn how to interact with the player using the default text window that is automatically generated as part of every Just BASIC application. You will also learn how to clear out text displayed in the window and to pause program execution in order to collect player input.
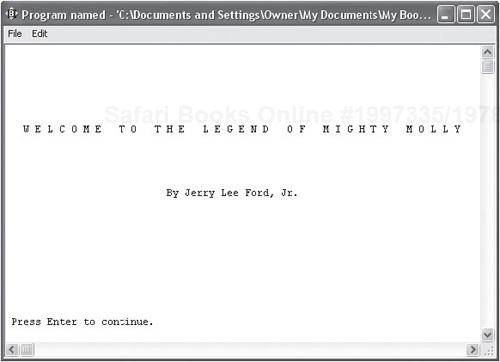
Figure 2.1 shows the game as it appears when first started.
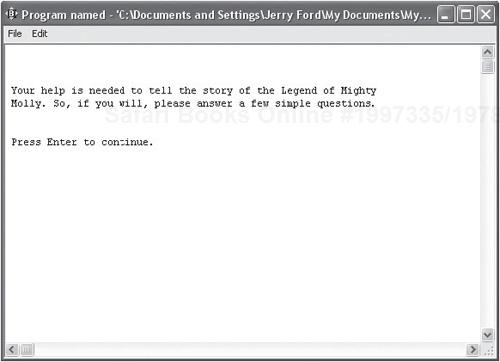
The player must press the Enter key to dismiss the opening welcome screen and advance to the next part of the story. This results in the display of the screen shown in Figure 2.2, which notifies the player that her participation is required to tell the story.
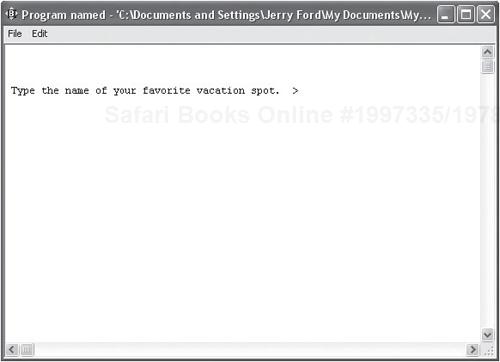
Next, as Figure 2.3 demonstrates, the player is presented with a series of questions. The answers provided by the player will be used in the telling of the game’s story.
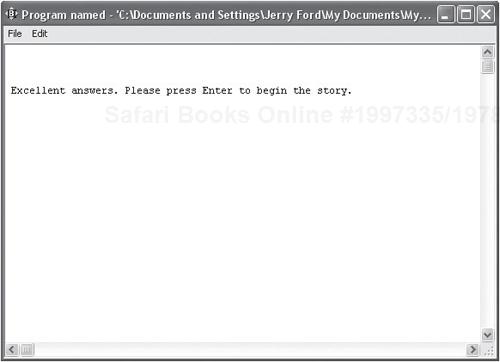
Once all the questions have been answered, the game notifies the player that it is ready to begin telling the story, as shown in Figure 2.4.
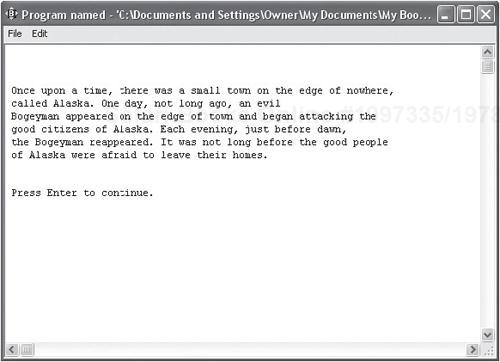
Because the story integrates player input, it will vary slightly each time it is told. The story is told in four parts. The text for the first part of the story is shown in Figure 2.5.
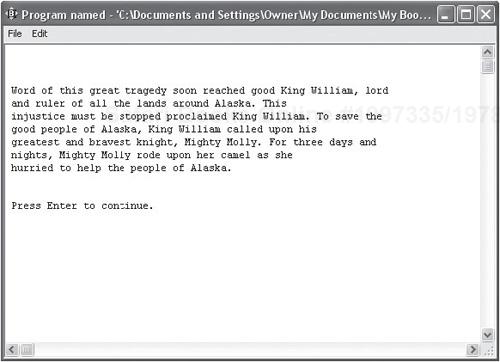
An example of how the second part of the story might look is provided in Figure 2.6.
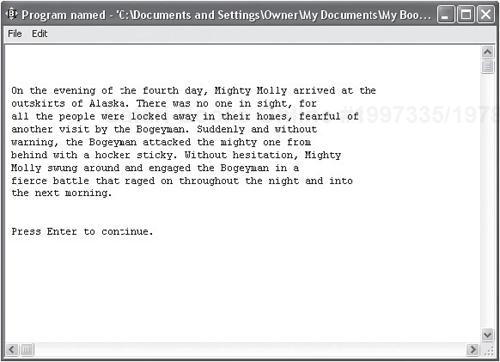
The game automatically pauses after each part of the story is displayed, allowing the player to control the pace at which the story unfolds. Figure 2.7 shows an example of how the third part of the story might go.
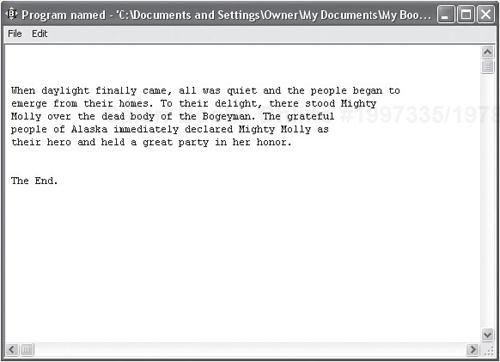
Finally, the last part of the story is told, as demonstrated in Figure 2.8.
In order to work with any programming language, a programmer needs access to a number of different software development tools, including the following:
code editor. A text editor used to enter and save program source code.
compiler or interpreter. Required to convert program source code into machine language code for execution.
integrated debugger. Used to locate and analyze errors that occur during the application development process.
Some programming languages come equipped with everything needed to develop software programs. For example, Microsoft Visual C++ provides a complete integrated development environment or IDE. The IDE includes a code editor, compiler, and debugger. In addition, the IDE includes tools that enable RAD development using drag and drop GUI design. Other programming languages, especially scripting languages, require that you provide your own code editor. In the case of Just BASIC, a code editor, compiler, and debugger are all provided.
Hint

Just BASIC’s distribution package also includes a drag and drop GUI forms designer called FreeForm-J. You will learn how to create Just BASIC applications with graphical user interfaces in Chapter 3, “Creating Graphical User Interfaces.”
As has already been stated, Just BASIC is a simple and straightforward BASIC dialect that provides programmers with everything needed to develop standalone applications that can be executed on Microsoft Windows. Just BASIC provides programmers with a number of helpful features, including:
statement color coding. Just BASIC’s code editor automatically color codes language keywords to make them stand out, which is an especially helpful visual cue for larger programs and can significantly enhance source code readability.
automatic code indentation. Just BASIC’s code editor helps programmers write more legible programs by automatically indenting code statements.
built-in source code debugger. Just BASIC provides a debugging facility that allows programmers to pause program execution to check on the status of program variables, providing programmers the ability to trace program execution flow on a line-by-line basis.
GUI forms editor. Included as part of the Just BASIC distribution is a form generator that enables the drag and drop design of graphical user interfaces.
built-in sprite engine. Just BASIC’s sprite engine provides facilities for adding animated graphical effects to Windows applications.
support for playing audio files. Just BASIC gives programmers the ability to play audio files and MIDI music.
Each time Just BASIC is started, two windows are displayed: The World of Just BASIC! window and the code editor window. The code editor window provides you with access to everything you need to create and test Just BASIC programs. The World of Just BASIC! window provides access to a host of Just BASIC resources.
The World of Just BASIC! window, shown in Figure 2.9, is automatically displayed each time you start Just BASIC.
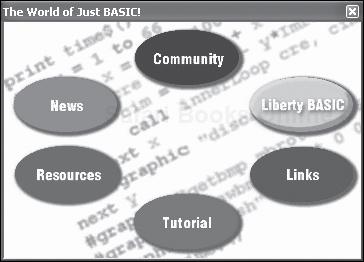
Figure 2.9. The World of Just BASIC! window provides single-click access to a number of helpful programming resources.
This window consists of six graphical links that provide programmers with easy access to the following resources:
Community
Liberty BASIC
Links
Tutorial
Resources
News
Each of these links is explained in detail in the sections that follow.
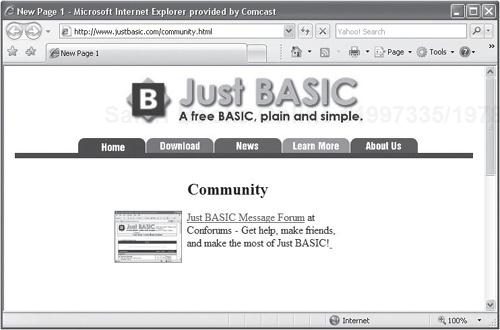
The Community link provides access to the Community web page located on the Just BASIC website, as shown in Figure 2.10. From here, programmers can access the Just BASIC Message Forum. This forum provides an online location for Just BASIC programmers to congregate and share information with one another and is a great resource to use when you run into programming problems that you are unable to figure out on your own.
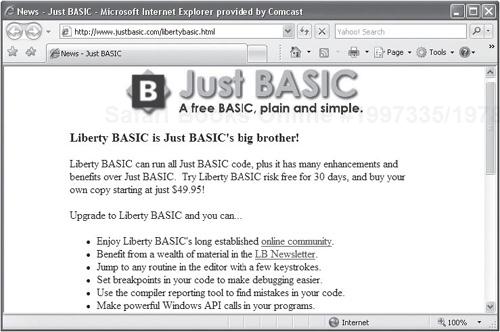
The Liberty BASIC link provides access to information about Liberty BASIC, which is posted at the Just BASIC website, as shown in Figure 2.11. Liberty BASIC is the commercial upgrade to Just BASIC.
Liberty BASIC supports Just BASIC code 100 percent. In addition, it provides a number of features not found in Just BASIC, including the following:
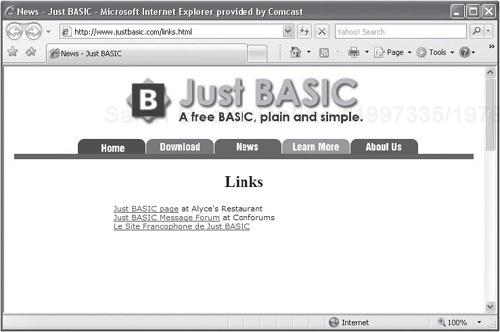
The Links link provides access to a small collection of online Just BASIC websites and resources, as shown in Figure 2.12.
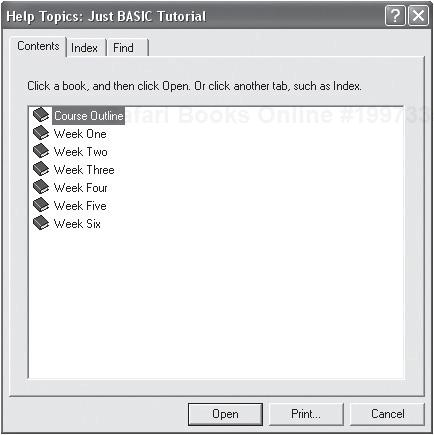
The Tutorial link provides quick access to Just BASIC’s help system. As shown in Figure 2.13, Just BASIC’s help system includes a six-week tutorial as well as the ability to search for Just BASIC information using search and find options.
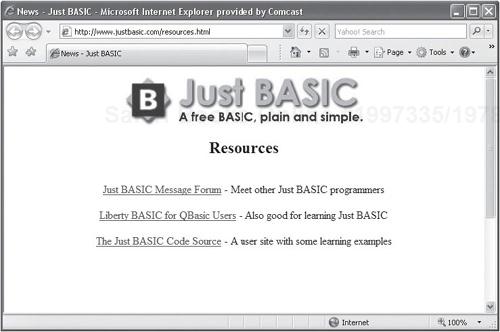
The Resources link provides easy access to a number of websites (as demonstrated in Figure 2.14) where you can interact with other Just BASIC programmers as well as find sample programs.
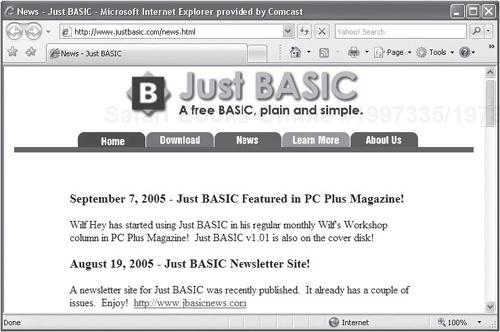
Click on the News link to find current information about what is going on with Just BASIC, as demonstrated in Figure 2.15.
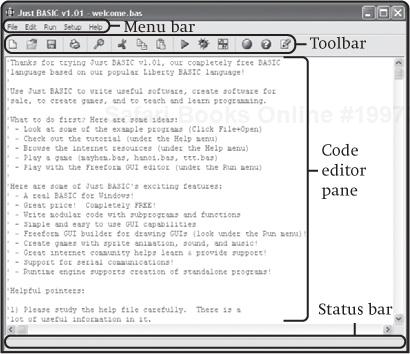
The code editor window is where you will spend most of your time when developing Just BASIC applications. As shown in Figure 2.16, Just BASIC’s code editor is organized into four main parts.
Like any good text editor, the code editor provides slider controls on the right-hand side and bottom of the editor window that are enabled whenever the amount of source code exceeds the window’s visible area.
By default, the code editor automatically opens and displays a basic program named welcome.bas each time it is started. This program consists of a large collection of comments that provide instruction designed to help new Just BASIC programmers get started. If you scroll down to the bottom of this file, you will find the following code statements.
nomainwin
run "winhlp32 justbasic.hlp"
end
When executed, this program opens Just BASIC’s help system. The first statement executes the nomainwin command. This command suppresses the display of the application’s default text window.
Hint

As you may remember, a default text window is automatically created for every Just BASIC program. This window is named mainwin. You can use this window, as demonstrated later in the Legend of Mighty Molly story, to display text and interact with users.
The second statement executes the run command and passes it two arguments for processing. The run command is used to execute external programs. In this example, the first argument being passed to the run command is winhelp32, which is the name of the program to be executed. Winhlp32 is a Windows Help File viewer supplied as part of the Microsoft operating system. The second argument passed to the run command is justbasic.hlp, which is the name of Just BASIC’s help file.
The last statement executes the end command. This command ensures that the program terminates in a clean manner. If you want, you may run this program by opening the Run menu and clicking on the Run command. Most Just BASIC programmers find that having Just BASIC automatically load the welcome.bas program each time it starts to be a nuisance and configure Just BASIC to prevent this behavior from happening. You will learn how to do this later in the chapter in the section titled “Configuring Just BASIC Preferences.”
Hint

The end statement forces the clean termination of an application, ensuring that any open files and windows are properly closed.
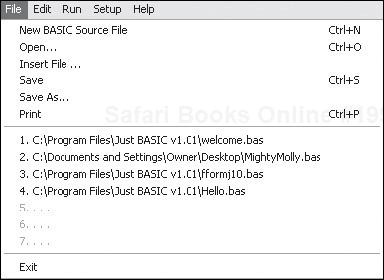
The Just BASIC code editor provides programmers with access to numerous commands through its menu system, located at the top of the editor window. As Figure 2.17 shows, the File menu provides access to commands that allow you to create new BASIC programs, open existing programs, and save and print their contents. In addition, a listing of recently edited programs is maintained, allowing you to easily open them again.
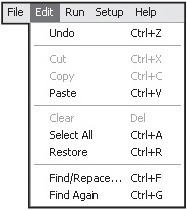
The Edit menu, shown in Figure 2.18, contains commands that provide you with the ability to Copy, Cut, and Paste code statements as well as to select or clear out code currently typed into the editor. The Edit menu also provides access to Find and Replace commands, allowing you to perform code searches and to make mass code changes.
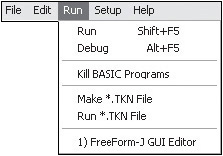
The Run menu, shown in Figure 2.19, contains commands that allow you to run your Just BASIC programs. The Run command runs your program normally and the Debug command runs programs in debug mode, enabling you to track down and fix program errors. The Run menu also provides a Kill command that lets you forcibly terminate the execution of any Just BASIC applications that are currently running.
As Figure 2.19 shows, the Run menu also provides access to a pair of commands that allow you to make and run *.TKN files. A *.TKN file is a token file and provides the basis for creating Just BASIC applications that can run as standalone applications and is the key to creating Just BASIC applications that you can then distribute to other computers. You’ll learn the specific steps involved in creating standalone applications later in this chapter in the section titled, “Building standalone Applications.”
One additional command provided by the Run menu starts the FreeForm-J GUI Editor. FreeForm-J is an external utility that you can use when laying out graphical user interfaces. FreeForm-J assists in designing graphical Windows interfaces using drag and drop to add and organize interface elements such as text boxes and button controls. You will learn how to work with FreeForm-J in Chapter 3.
The Setup menu, shown in Figure 2.20, provides access to windows that can be used to modify Just BASIC configuration settings. You can make changes to these settings in order to customize Just BASIC’s configuration to suit your own personal preferences. A detailed discussion of how to configure Just BASIC is provided later in this chapter.

Figure 2.20. The Setup menu provides access to windows that control Just BASIC’s configuration settings.
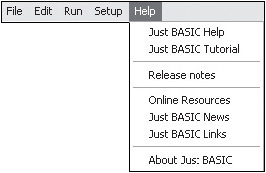
Just BASIC’s last menu is its Help menu. As shown in Figure 2.21, it provides access to Just BASIC’s help systems and to a Just BASIC tutorial. You can also access Just BASIC’s release notes from this menu as well as online news and links.
Just BASIC’s toolbar, shown in Figure 2.22, provides single-click access to a number of commonly used editor commands.
With the exception of The World of Just BASIC button, each button on Just BASIC’s toolbar has an equivalent menu bar command. In addition, as Table 2.1 shows, you can access these same commands directly from the keyboard using shortcut keystrokes.
Table 2.1. Just BASIC’s Toolbar Shortcuts
Toolbar Command | Menu Equivalent | Keyboard Shortcut |
|---|---|---|
New file | File, New BASIC File | Alt – F + N |
Open file | File, Open | Alt – F + O |
Save file | File, Save | Alt – F + S |
File, Print | Alt – F + P | |
Find/Replace | Edit, Find/Replace | Ctrl - F |
Cut | Edit, Cut | Ctrl - X |
Copy | Edit, Copy | Ctrl - C |
Paste | Edit, Paste | Ctrl - V |
Run | Run, Run | Shift – F5 |
Debug | Run, Debug | Alt – F5 |
Preferences | Setup, Preferences | Alt – T + P |
The World of Just BASIC Help | Help, Just BASIC Help | Alt – H + L |
Release Notes | Help, Release Notes | Alt – H + P |
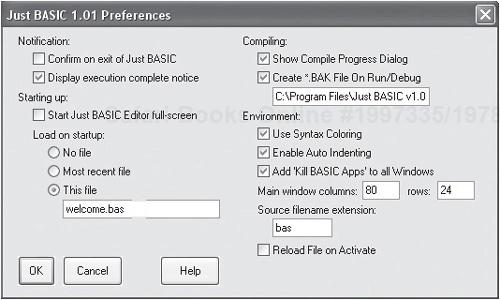
Like many programming languages, you can customize the look and operation of Just BASIC. This is accomplished through its Preferences window, shown in Figure 2.23. You access the Preferences window by clicking on Just BASIC’s Setup menu and selecting Preferences or by clicking on the Preferences button on the Just BASIC toolbar.
Just BASIC Preferences are organized into the following major categories.
Just BASIC’s notification settings allow you to specify how much information and interaction you want when working with the code editor. Either of the following options can be configured.
Confirm on Exit of Just BASIC. Instructs Just BASIC to display a prompt asking for confirmation before closing the Just BASIC code editor window.
Display Execution Complete Notice. Instructs Just BASIC to display a message in the title bar of a program’s main window indicating when program execution has completed. This option is enabled by default.
Just BASIC’s startup configuration settings give you control over the initial appearance of the code editor window as well as the ability to specify which, if any, BASIC file should be automatically located into the code editor at startup. Either of the following options can be configured.
Start Just BASIC Editor full-screen. Instructs Just BASIC to open the code editor window in full screen mode, filling the entire display area.
Load on Startup. Controls which BASIC file, if any, is automatically loaded at startup.
The load on startup option can be useful when working on a BASIC application that will require a considerable amount of time to complete or when working on an application that must be frequently modified. This option allows you to choose from any of the following three options:
As mentioned earlier in this chapter, Just BASIC automatically displays the welcome.bas file each time it is started. You can alter this behavior by specifying No File as the setting for the Load on Startup option.
Just BASIC lets you configure two compiler settings, both of which are enabled by default. The Show Compile Progress Dialog setting instructs Just BASIC to display a graphic representation of the compile process whenever you compile a program. Though often barely noticeable for small programs, this option can be useful for larger applications with a longer compile time, allowing the programmer to cancel the compilation at any time during the process.
The Create *.BAK File on Run/Debug option provides you with the ability to instruct Just BASIC to maintain a backup copy of any Just BASIC application every time you run it from within the code editor. Just BASIC automatically saves backup files in its installation folder, which by default is C:Program FilesJust BASIC v1.0BAK, unless you changed it during the Just BASIC install process. The obvious advantage of this option is that it allows you to recover the previous version of any Just BASIC application in the event something goes wrong with the most recent version. If you need it, all you have to do is navigate to the specified backup folder and retrieve the appropriate backup file. Just rename its file extension from .bak to .bas and you can begin working with it.
The next set of configuration settings that you can modify are the environmental settings. In total, there are six environment settings that you can configure, as outlined here:
Use Syntax Coloring. When enabled, this option instructs Just BASIC to apply different colors to language keywords that make up code statements.
Enable Auto Indenting. When enabled, this option instructs Just BASIC to repeat the previous level of indentation each time the Enter key is pressed when keying in code statements.
Add ‘Kill BASIC Apps’ to all Windows. When enabled, this option instructs Just BASIC to add a special Kill BASIC Apps menu item to each Just BASIC window, which you can use to forcibly terminate any active Just BASIC application.
Main Window Columns. Specifies the default window size for the default main window of any Just BASIC program. The default values define a text window that is 80 columns wide and 24 rows tall.
Source Filename Extension. Defines the default filename extension for Just BASIC programs. The default file extension is .BAS.
Reload File on Activate. When enabled, this configuration option supports the execution of Just BASIC applications being edited outside of the Just BASIC code editor.
Trick
The Reload File on Activate environmental configuration setting deserves a little extra explanation. Its purpose is to allow you to open the same file twice, once in the Just BASIC code editor and a second time in a third-party editor of your choice. This allows you to write and modify your application’s source code using your favorite editor and, if the Reload File on Activate setting has been enabled, switch over to Just BASIC and run your application. Just BASIC will automatically reload a fresh copy of your application running it in order, ensuring that the most current version is executed.
The Just BASIC Setup menu also provides you with the ability to configure editor and printer font sizes for all text. Just BASIC uses the Courier New font with a Regular style font size of 9 as the default for the code editor. Just BASIC’s default for printed text is Courier New, Regular style font with a font size of 10.
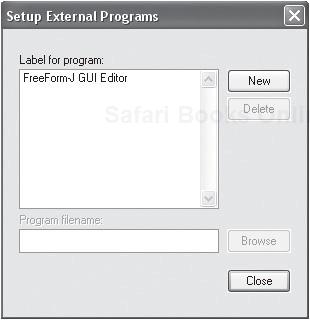
The Setup menu also provides you with the ability to configure Just BASIC to add entries for external programs to its Run menu. This is accomplished by clicking on the Setup menu’s External Programs menu item, which displays the Setup External Programs window shown in Figure 2.24.
As you can see, there is an entry for the FreeForm-J GUI Editor by default, thus making it easy to start this external program from within the Just BASIC code editor. Using the Setup External Programs window, you can add entries for other software programs. For example, you might want to add an entry for an alternative editor or a graphics drawing program. To do so, click on the New button, type a descriptive name for the program being added, click on the Browse button, specify the name and path of the program, and click on Open. When you click on Close to dismiss the Setup External Programs window, a prompt will appear informing you that you must stop and restart Just BASIC for your modifications to become effective.
You have already learned how to use Just BASIC to create and execute new Windows desktop applications. In the sections that follow, you will learn how to reopen saved Just BASIC programs as well as how to kill the execution of a Just BASIC program that did not end properly on its own.
Trick
Unlike many other programming language IDEs, Just BASIC’s code editor only allows you to edit one BASIC program at a time. However, you can start up as many different instances of Just BASIC at a time as you want and edit multiple applications that way.
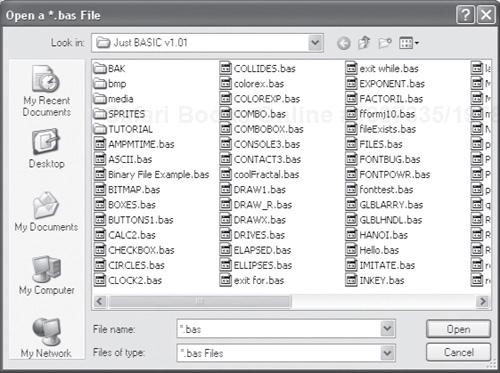
You can re-open and edit any Just BASIC program by clicking on the File menu and selecting the Open menu item. In response, the Open File window is displayed, as shown in Figure 2.25.
Using the Open File window, locate and select the BASIC file you want to edit and click on the Open button. Just BASIC will open the file and display its contents in the code editor pane.
At this point you may edit the program or run it by clicking on the Run button. When Just BASIC’s Run command is executed, be it from the Run menu or by clicking on the Run button on the toolbar, it takes a few moments for your program to begin executing. In the background, Just BASIC must first compile your program’s source code into machine code. Once this task has been completed, Just BASIC runs your compiled program.
Trick
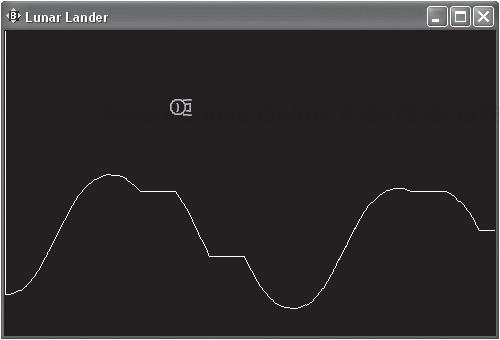
You may have noticed that when the Open File window was first displayed, it displayed the contents of the Just BASIC folder. This folder contains dozens of sample programs supplied as part of Just BASIC’s distribution package. These programs are generally small and demonstrate how to perform a host of different tasks using various Just BASIC programming features. You can learn much from studying these examples. For example, if you were to select Lander.bas, you’d open a Just BASIC drawing application that when executed looks like the application shown in Figure 2.26.
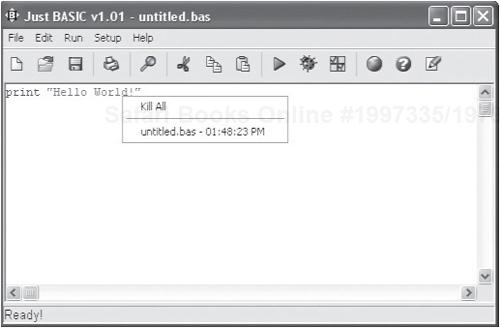
Just BASIC provides a Kill command to assist you in the event that you execute a Just BASIC program that fails to terminate properly. To execute this command, click on the Run menu and select the Kill BASIC Programs option. In response, Just BASIC will display a context menu that lists all currently running Just BASIC programs, as demonstrated in Figure 2.27.
To forcibly terminate a Just BASIC application, click on its name. Take note that also included in the context menu is a Kill All option. Selecting this option will force the termination of all currently running Just BASIC programs.
Just BASIC’s code editor is the only tool that you need to develop and test Just BASIC programs. However, like many modern programming languages, Just BASIC supplies programmers with additional tools that assist in the development of software applications. These programs include an external Just BASIC application called FreeForm-J and Just BASIC’s built-in Debugger window.
Using commands provided by Just BASIC, you can programmatically generate a window’s graphical user interface from code. However, the FreeForm-J program, supplied as part of Just BASIC’s distribution, provides you with the ability to lay out graphical user interfaces by dragging and dropping interface elements onto windows, as demonstrated in Figure 2.28.
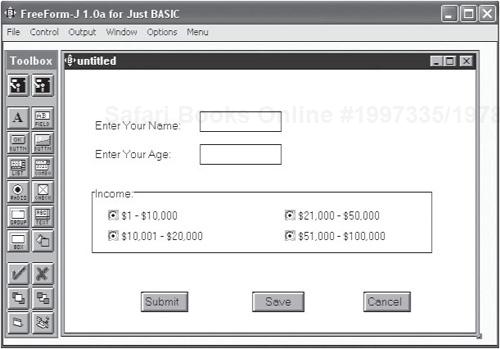
Figure 2.28. FreeFrom-J is an external program supplied with Just BASIC that assists in the development of GUIs.
FreeForm-J is started by clicking on the FreeForm-J entry located on the Run menu. Once you have used FreeForm-J to design a window’s layout, you can then generate the underlying source code required to re-create the interface. You can then add this code to your Just BASIC application in order to enable it to generate the interface. Step by step instructions for using FreeForm-J are provided in Chapter 3.
Every programmer experiences errors when developing software programs. Programmers commonly refer to such errors as bugs. With proper design and testing, programmers can eliminate most program bugs. Unfortunately, some program errors are harder to track down and fix than others. To assist you in performing this difficult task, most programming languages provide some sort of debugging program or utility. Just BASIC is no exception, supplying programmers with access to its own GUI debugger program.
You can start Just BASIC’s debugger by opening the Run menu and selecting the Debug menu item or by clicking on the toolbar button that looks like a small beetle bug. Once started, the debugger window appears, as demonstrated in Figure 2.29.
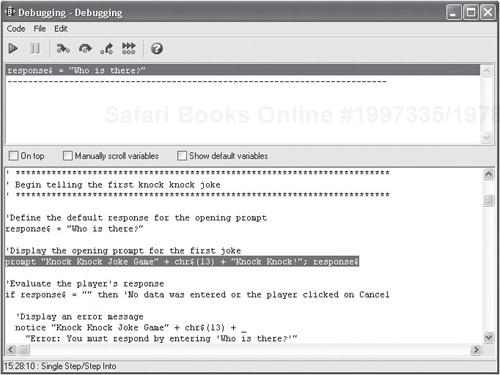
Figure 2.29. Use Just BASIC’s built-in debugger to keep an eye on the inner workings of a Just BASIC application as it executes.
Using the debugger, you can track the internal execution of any Just BASIC program on a line-by-line basis. In addition, you can keep an eye on the value of data as it is collected and processed by the application. By providing you with a fine-tuned, internal view of your application’s execution, application debuggers help you to search for and find the needle in the haystack that is causing problems in your application. Step by step instructions for using Just BASIC’s internal debugger are provided in Chapter 10, “Debugging Your Applications.”
Many programming languages, like REALbasic and Visual Basic .NET, generate a single executable file with an .exe file extension when you compile your application. To share your application, all that you have to do is distribute this executable file to your customers and users. However, in order to create standalone Just BASIC applications, you need to create a tokenized version of your application.
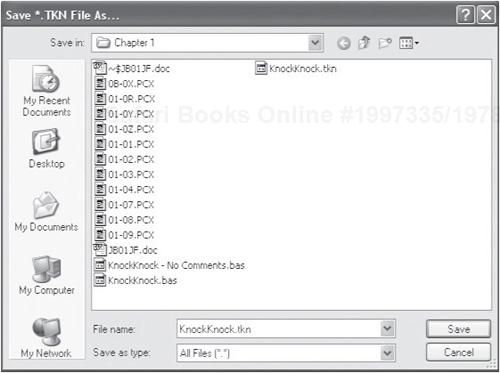
In order to create a tokenized copy of an application file, you must load the application into the code editor and then select the Make *.TKN File menu item located on the Run menu. Just BASIC responds by opening the Save *.TKN File As window, as shown in Figure 2.30. Just BASIC generates a filename for the tokenized file based on the current name of the BASIC file. If you want, you may change this name before clicking on Save to generate a tokenized copy of the application file.
Trick
Tokenized files run faster than non-tokenized files. Therefore, you might want to generate tokenized files for Just BASIC programs that you intend to run often within the Just BASIC code editor or that you plan on adding to Just BASIC’s Run menu.
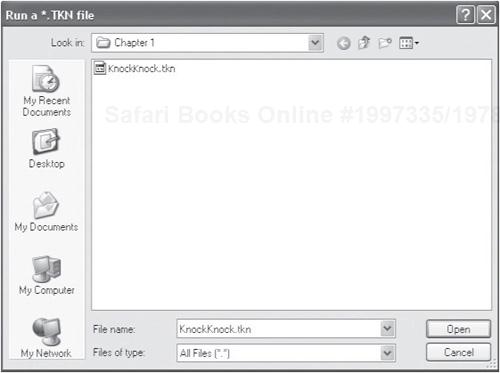
Once you have saved your tokenized file, you can run it within the Just BASIC code editor by clicking on the Run *.TKN File option located on the Run menu. In response, Just BASIC displays the Run a *.TKN file window, as demonstrated in Figure 2.31.
Once loaded, the tokenized application immediately begins executing. If you have added an entry to Just BASIC’s Run menu for the tokenized file, you can run it at any time by clicking on the Run menu and selecting it.
To distribute copies of your Just BASIC applications, you need to perform the following tasks.
Generate a tokenized file
Make a copy of Just BASIC’s runtime file and rename it to match the name assigned to the tokenized file
Collect any additional files required to support the execution of your application
Once you have finished creating and testing your Just BASIC application, you need to create a tokenized copy of your application file in order to distribute and run the application on another computer where Just BASIC may not be installed. For example, you might take the Knock Knock Joke game created in Chapter 1 and create a tokenized version of that file called knockknock.tkn.
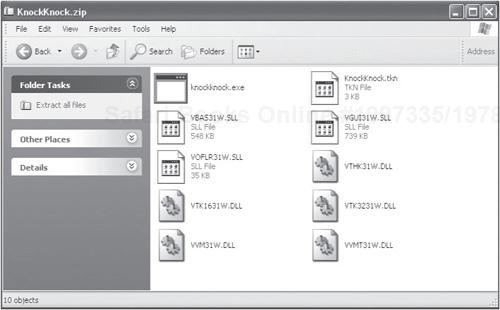
The next step in preparing to distribute your application is to make a copy of Just BASIC’s runtime file, JBRUN101.exe, and rename it to match the name of your tokenized file. In the case of the Knock Knock Joke game, you would assign knockknock.exe as the new name for the copy of Just BASIC’s runtime file.
In order to execute a Just BASIC program as a standalone application on other computers, you also need to assemble copies of the following Just BASIC system files.
VBAS31W.SLL
VGUI31W.SLL
VOFLR31W.SLL
VTHK31W.DLL
VTK1631W.DLL
VTK3231W.DLL
VVM31W.DLL
VVMT31W.DLL
You will find the files located in Just BASIC’s installation folder, which, unless you changed it when installing Just BASIC, should be C:Program FilesJust BASIC v1.01.
The last step in assembling your standalone application is to assemble a disk, CD-ROM, or other type of package that contains the tokenized file, the renamed copy of Just BASIC’s runtime file, and the Just BASIC system files listed above. Once you have finished putting together your package, as demonstrated in Figure 2.32, you are ready to begin distributing your application to your friends, users, and customers. Of course, if your application makes use of any other external files, such as a text or graphics file, you will need to add them to your distribution package as well.
Trick
One convenient and simple way to distribute your Just BASIC application is to create a Zip file containing your tokenized Just BASIC file along with the other files needed to run it as a standalone program. This way, all that your users and customers will need to do to run your program is to unzip it into a folder on their computer. WinZip also provides a self-extraction feature that allows you to create a Zip file that will unpack itself when the user opens it, allowing you to make things even easier for your users.
Another alternative that you may want to investigate is freeware and shareware software distribution programs that automate the software distribution and installation process. Examples of these types of programs include Setup2Go (http://www.dev4pc.com/setup2go.html) and Agentix Installer (http://www.aginstaller.com).
Now it is time to turn your attention back to the development of this chapter’s game project, the Legend of Mighty Molly. In this game, data collected from the player is used in the creation of a mad-lib style story. Unlike the Knock Knock Joke game, which used popup dialogs to interact with the player, this game uses the text window supplied as part of every Just BASIC application to print and collect information.
The design of the Legend of Mighty Molly game is pretty straightforward. The game relies mainly on the print, input, and cls commands to control the data collection process and the telling of the game’s story.
As you learned in Chapter 1, the print command can be used to display text strings on the mainwin window. The input command displays a text message prompt and collects the user’s response as input to your program. The cls command clears out any text displayed in mainwin.
Hint

The syntax for the input command is shown here:
input #Handle "String"; VariableName#Handle is an optional argument that when used specifies a filename or device. String is an optional placeholder representing a string that can be displayed. VariableName is the name of a variable that will be used to store any input entered by the user before the Enter key is pressed.
The Legend of Mighty Molly game will be created in eight steps, as outlined here:
Create a new BASIC file and document its purpose.
Display the game’s opening welcome screen.
Provide instructions to the player.
Display the game’s first question and collect the player’s input.
Display the rest of the game’s questions.
Tell the first part of the story.
Tell the rest of the story.
Clear the screen and prepare the game for termination.
Let’s begin the development of the Legend of Mighty Molly game by starting Just BASIC and creating a new BASIC file. Next, let’s document the purpose of the game by adding the following code statements.
' *************************************************************************
'
' Script Name: MightyMolly.bas (The Legend of Mighty Molly)
' Version:     1.0
' Author:      Jerry Lee Ford, Jr.
' Date:        March 1, 2007
'
' Description: This Just BASIC game displays a mad-lib styled story in
'              which the player input is used to tell a humorous story.
'
' *************************************************************************
Before continuing, save your new Just BASIC file, assigning it a name of MightyMolly.bas.
Now let’s add the code statements that are responsible for displaying a welcome screen for the game by adding the following statements to the program.
print
print
print
print
print
print
print "   W E L C O M E  T O  T H E  L E G E N D  O F  M I G H T Y" _
      + "   M O L L Y"
print
print
print
print
print"                         By Jerry Lee Ford, Jr."
print
print
print
print
print
print
print
print
print
input " Press Enter to continue."; input$
The last statement uses the input command to pause the execution of the application until the player presses the Enter key.
As straightforward as this game may be, it is still a good idea to provide the player with a little direction at the beginning of the game. To do so, add the following statements to the end of your program.
cls

print
print
print
print " Your help is needed to tell the story of the Legend of Mighty"
print " Molly. So, if you will, please answer a few simple questions."
print
print
input " Press Enter to continue."; input$
As you can see, the cls command is used to clear the screen and then the game’s instructions are presented using a series of print commands followed by the input command, in order to pause program execution until the player is ready to continue.
It is now time to begin prompting the player to provide the game with the data needed to tell its story. The code statements responsible for displaying the game’s first question are shown here:
cls

print
print
print
input " Type the name of your favorite vacation spot. > "; location$
The input command is once again used to pause the execution of the program and wait for the player to key in her input and then press the Enter key. The input provided by the player is then stored in a variable named location$ so that its value can be later displayed by the program.
The next set of statements to be added to your program is shown below. These statements are responsible for collecting the three remaining pieces of information needed by the game in order to tell its story. Note that separate variables are used to store each of the three inputs provided by the player. Once the program has everything it needs, it announces that it is ready to tell its story.
cls

print
print
print
input " Name something that scared you as a child. > "; creature$

cls

print
print
print
input " Name a piece of sports equipment. > "; weapon$
cls

print
print
print
input " Name a popular four-legged animal. > "; vehicle$

cls

print
print
print
input " Excellent answers. Please press Enter to begin the story."; input$
The next set of statements clears the screen and displays the first part of the game’s story. The input command is used to pause the program until the player has finished reading.
cls

print
print
print
print " Once upon a time, there was a small town on the edge of nowhere,"
print " called " + location$ + ". One day, not long ago, an evil "
print " " + creature$ + " appeared on the edge of town and began attacking"
print " the good citizens of " + location$ + ". Each evening, just before"
print " dawn, the " + creature$ + " reappeared. It was not long before the"
print " good people of " + location$ + " were afraid to leave their homes."
print
print
input " Press Enter to continue."; input$
The code statements shown next finish up the telling of the story by dividing its display into three parts, each of which is displayed a screen at a time.
cls

print
print
print
print " Word of this great tragedy soon reached good King William, lord"
print " and ruler of all the lands around " + location$ + ". This"
print " injustice must be stopped, proclaimed King William. To save the"
print " good people of " + location$ + ", King William called upon his"
print " greatest and bravest knight, Mighty Molly. For three days and"
print " nights, Mighty Molly rode upon her " + vehicle$ + " as she"
print " hurried to help the people of " + location$ + "."
print
print
input " Press Enter to continue."; input$

cls

print
print
print
print " On the evening of the fourth day, Mighty Molly arrived at the"
print " outskirts of " + location$ + ". There was no one in sight, for"
print " all the people were locked away in their homes, fearful of"
print " another visit by the " + creature$ + ". Suddenly and without"
print " warning, the " + creature$ + " attacked the mighty one from"
print " behind with a " + weapon$ + ". Without hesitation, Mighty"
print " Molly swung around and engaged the " + creature$ + " in a"
print " fierce battle that raged on throughout the night and into"
print " the next morning."
print
print
input " Press Enter to continue."; input$

cls

print
print
print
print " When daylight finally came, all was quiet and the people began to"
print " emerge from their homes. To their delight, there stood Mighty"
print " Molly over the dead body of the " + creature$ + ". The grateful"
print " people of " + location$ + " immediately declared Mighty Molly as"
print " their hero and held a great party in her honor."
print
print
input " The End."; input$
Now that the game’s story has been told, it is time for the program to terminate. Before doing so, let’s clear the screen with the cls command and then add the end command to the end of the program to ensure that the program is ready for termination.
cls

end
Hint

Although the game used the end command to identify the logical end of the program, the program does not actually terminate until the player closes the application window. In Chapter 3, you will learn how to associate the end command with a window’s closing in order to better coordinate the execution of the command with the actual end of the program.
Okay, that’s all there is to it. Assuming that you did not make any typos as you keyed in the code for the application, your new game should be ready to run. However, before you run it, take a few minutes to look it over. Take note of the sequential manner in which the program code executes, beginning with the first statement and then processing each statement that follows until the last statement is executed. In future chapters, you will learn how to create programs that employ loops, conditional logic, and subroutines in order to create more complex programming logic that can alter the execution flow of its statements based on the data that is processed.
In this chapter you learned about the different types of software tools used by programmers to develop new applications. In addition, you learned the ins and outs of working with the Just BASIC code editor. You learned how to work with Just BASIC’s code editor in order to customize its configuration settings. You also learned how to create and package standalone applications.
Before moving on to Chapter 3, why don’t you set aside a little time to improve the Legend of Mighty Molly by tackling the following list of challenges.
