
Chapter 9
Using Events
• Reacting to mouse events
• Using anonymous functions
• Trapping key events
This chapter introduces you to JavaFX events. The concepts that are required when working with events are key in producing rich, interactive applications. Events allow your application to respond to the actions of the user.
What Are Events?
An Events provide a way to interact with your users in JavaFX. As a developer, you can use many types of events to enable your users to interact with and react to your environment. Events can be fired as a result of the user interacting in some way with your environment, and you can capture or trap these events and write actions around the information you have gathered.
In this chapter you discover and utilize two common sets of events: mouse events (onMouse*) and key events (onKey*).
Mouse Events
A mouse event is the generic term for the action of any pointer-style input. The provider of this input does not necessarily have to be a physical mouse. Any device that moves a pointer across an environment will generate a mouse event. A mouse, stylus, track ball, track pad, and any other navigational tool will generate a mouse event if it moves your pointer around your JavaFX environment.
NOTE
Not all the mouse events will fire with input devices that are not a mouse. For example, on Mouse Wheel Moved will not be fired with a touch screen or stylus input.
The following mouse events are specific to nodes, which means you must listen for these events as they pertain to a specific node in your Scene. Therefore, you cannot just randomly detect that the onMousePressed event was fired generally on your Scene; instead, you have to detect if onMousePressed is fired on a specific node such as a button or a test box.
Here’s a list of the actions that you can trap using mouse events:
• onMouseClicked
• onMousePressed
• onMouseReleased
• onMouseDragged
• onMouseEntered
• onMouseExited
• onMouseMoved
• on Mouse Wheel Moved
While some of these actions may be named descriptively enough for you to figure out what action the listen to, some have similar and confusing names. Therefore, let’s clear up any confusion by describing what each action is before we dive into building code around them.
NOTE
Keep in mind that although these actions may be part of the node in the common profile, how you deal with them may differ depending on the profile.
• onMouseClicked This event is fired if a full mouse click is detected (the user presses and releases the mouse button).
• onMousePressed This event fires when the user presses the mouse button. The user does not have to release the button to fire this event like onMouseClick.
• onMouseReleased This event is the second half of the onMouseClick event. This event fires when a mouse button is released.
• onMouseDragged This event fires when a mouse button is held down and the mouse is moved. Trapping this event will also help you to track the x and y axis values for the drag.
• onMouseEntered This event is fired when the mouse pointer enters the node to which the event is attached.
• onMouseExited This event is fired when the mouse pointer exits the node to which the event is attached.
• onMouseMoved This event is fired when the mouse is moved within the borders of the given node.
• on Mouse Wheel Moved This event is fired each time the mouse wheel is clicked.
Some of these events may look redundant. For example, shouldn’t onMousePressed + onMouseReleased = onMouseClicked? Not necessarily. Let’s look at a few scenarios.
If you click a node, you will see the following events fired in order:
• onMousePressed
• onMouseClicked
Notice that no onMouseReleased is fired. JavaFX recognizes the completion of the onMousePressed event as the logical conclusion of an onMouseClicked event. However, if you move the mouse between the time you press the mouse button and release it (that is, perform an intentional or unintentional mouse drag), you will fire the following events in order:
• onMousePressed
• onMouseDragged
• onMouseReleased
In this case, no onMouseClicked event is fired. Because other events are fired between the press and the release, JavaFX does not fire an onMouseClicked event.
The best way to understand this is that onMouseClicked is a specific event that encapsulates a contiguous pair of onMousePressed and onMouseReleased events. If any events are fired between onMousePressed and onMouseReleased, the action is no longer considered an onMouseClicked event.
Why then does onMousePressed still fire in both scenarios? Because JavaFX cannot predict what will happen after the onMousePressed event. It cannot say whether the action will be an onMouseClicked or onMouseReleased event until the action is completed; therefore, the onMousePressed will always fire.
Now that you understand when each event should fire, let’s discuss how you trap them.
The onMouse* events are inherited through Node. Anything that inherits from Node will be able to trap these events. Therefore, all the shapes, buttons, labels, and text boxes that you can add to a Scene will trap these events and let you perform actions based on them.
TIP
Create a new, empty JavaFX script named Chapter9.fx to try the following examples.
You should have a new, empty file that looks like this:
/*
 * Chapter9.fx
 *
 * v1.0 - J. F. DiMarzio
 *
 * 6/15/2010 – created
 *
 * Using Events
 *
 */

package com.jfdimarzio.javafxforbeginners;

/**
 * @author JFDiMarzio
 */
Now, add a circle to the Scene. This circle will be the node we use to trap our mouse events. Finally, add a label to display the events. Your code should look like this:
TIP
For more information about creating circles, refer to Chapter 4.
/*
 * Chapter9.fx
 *
 * v1.0 - J. F. DiMarzio
 *
 * 6/15/2010 – created
 *
 * Using Events
 *
 */
package com.jfdimarzio.javafxforbeginners;

import javafx.stage.Stage;
import javafx.scene.Scene;
import javafx.scene.shape.Circle;
import javafx.scene.paint.Color;
import javafx.scene.control.Label;


/**
 * @author JFDiMarzio
 */

Stage {
      title : ″UsingEvents″
      onClose: function () {  }
      scene: Scene {
            width: 450
            height: 400
            content: [
                    Circle {
                        centerX: 100,
                        centerY: 100
                        radius: 100
                        fill: Color.BLACK
                    }
                    Label {
                        text: ″″;
                        layoutX:10;
                        layoutY:250;
                     }
               ]
      }
}
Set up a variable that your label can bind to. You will write out the contents of your events to this variable, which will be bound directly to the label’s text property:
var message : String = ″″;
You can now write an anonymous function to handle each mouse event. The purpose of the anonymous function is to immediately perform an action when the event is fired. The function will encapsulate all the logic you want to perform when a specific event is fired. In this example, your anonymous function will write the contents of the event to the message variable, which is bound to the label text.
The anonymous function will need to take in a MouseEvent as a parameter. Import the following package to use MouseEvent:
import javafx.scene.input.MouseEvent;
NOTE
Two instances of MouseEvent appear in different packages. There is another MouseEvent in the java.awt package. You will receive errors in this example if you import the wrong one.
Now you can set up a simple function to write the event to a variable, as seen in the following code sample:
function (event : MouseEvent) : Void{
          message = event.toString();
  }
Use this function in each of the mouse events you want to trap. The contents of the event will then be written out to the label on the screen.
You can start with the onMousePressed event of the circle node that you added to the Scene:
 onMousePressed: function (event : MouseEvent) : Void{
                message = event.toString();
                 }
The logic here is that when onMousePressed is triggered—that is, when the user presses the mouse button within the bounds of the circle node—the event is captured and written out to the message variable. This variable, which is bound to the label text, is written to the screen just below the circle.
Replicate this same anonymous function for the onMouseReleased and onMouseClicked events of the circle node. Your finished code should look like this:
/*
 * Chapter9.fx
 *
 * v1.0 - J. F. DiMarzio
 *
 * 6/15/2010 – created
 *
 * Using Events
 *
 */
package com.jfdimarzio.javafxforbeginners;

import javafx.stage.Stage;
import javafx.scene.Scene;
import javafx.scene.shape.Circle;
import javafx.scene.paint.Color;
import javafx.scene.control.Label;
import javafx.scene.input.MouseEvent;

/**
  * @author JFDiMarzio
  */
var message : String = ″″;

Stage {
      title : ″UsingEvents″
      onClose: function () {  }
      scene: Scene {
            width: 450
            height: 400
            content: [
                    Circle {
                        centerX: 100,
                        centerY: 100
                        radius: 100
                        fill: Color.BLACK
                        onMousePressed: function (event : MouseEvent) : Void{
                            message = event.toString();
                            }
                        onMouseReleased:function (event : MouseEvent) : Void{
                            message = event.toString();
                            }
                        onMouseClicked:function (event : MouseEvent) : Void{
                            message = event.toString();
                            }
                    }
                    Label {
                        text: bind message;
                        layoutX:10;
                        layoutY:250;
                    }
               ]
      }
}
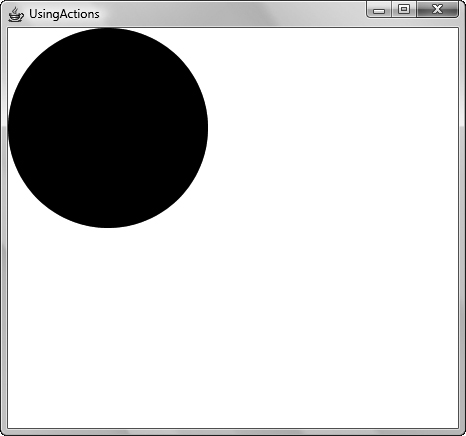
Run the code in the default profile. You will see a black circle on the screen like the one shown in Figure 9-1.
Now, move your mouse into the circle and click the mouse button. This will fire the onMousePressed event of the circle and write the following information to the screen:
MouseEvent [x=129.0, y=92.0, button=PRIMARY PRESSED
Release the mouse button without moving it. You should see the following information:
MouseEvent [x=129.0, y=92.0, button=PRIMARY CLICKED
This indicates that the onMouseClicked event has fired.
Let’s perform another test. Try pressing down the mouse button inside the circle, dragging the mouse a few pixels, and then releasing it. You should see the following information display:
NOTE
Both lines will not display at the same time; instead, they display sequentially.
MouseEvent [x=86.0, y=89.0, button=PRIMARY PRESSED]
MouseEvent [x=133.0, y=129.0,
            button=PRIMARY, dragX 63.0, dragY 27.0 RELEASED]
Notice that the x and y coordinates of the drag are recorded in the press and release. Using this information, you can tell how far an item was dragged, what direction it was dragged in, and where it was released.
Try adding the remaining mouse events to the script (shown next) and testing different scenarios. You should see a large amount of very useful information that you can trap and act upon in your scripts.
/*
 * Chapter9.fx
 *
 * v1.0 - J. F. DiMarzio
 *
 * 6/15/2010 – created
 *
 * Using Events
 *
 */

package com.jfdimarzio.javafxforbeginners;

import javafx.stage.Stage;
import javafx.scene.Scene;
import javafx.scene.shape.Circle;
import javafx.scene.paint.Color;
import javafx.scene.control.Label;
import javafx.scene.input.MouseEvent;

/**
 * @author JFDiMarzio
 */
var message : String = ″″;

Stage {
      title : ″UsingEvents″
      onClose: function () {  }
      scene: Scene {
            width: 450
            height: 400
            content: [
                    Circle {
                        centerX: 100,
                        centerY: 100
                        radius: 100
                        fill: Color.BLACK
                        onMousePressed: function (event : MouseEvent) : Void{
                            message = event.toString();
                            }
                        onMouseReleased:function (event : MouseEvent) : Void{
                            message = event.toString();
                            }
                        onMouseClicked:function (event : MouseEvent) : Void{
                            message = event.toString();
                            }
                        onMouseDragged:function (event : MouseEvent) : Void{
                            message = event.toString();
                            }
                        onMouseEntered:function (event : MouseEvent) : Void{
                            message = event.toString();
                            }
                        onMouseExited:function (event : MouseEvent) : Void{
                            message = event.toString();
                            }
                        on Mouse Wheel Moved:function (event : MouseEvent) :
                        Void{
                            message = event.toString();
                            }

                    }
                    Label {
                        text: bind message;
                        layoutX:10;
                        layoutY:250;
                    }
               ]
      }
}
Keep in mind that the onMouse* events are inherited from Node. The major implication of this is that Stage and Scene do not inherit from Node. Therefore, you can only trap these events as they occur within Node on the Scene. You cannot trap these events if they happen randomly within the context of your Scene.
Another type of event you can trap is a key event. The following section goes over how to trap and use key events.
Key Events
A key event, as the name suggests, is fired when the user interacts with the keyboard. Capturing these keyboard events can be very useful. For example, you could write a script that allows the user to move objects around the Scene with the arrow keys or to stop some animation using the ESC key. Either way, trapping key events can be very useful in your JavaFX scripts.
The key events are also inherited from Node. Therefore, like the onMouse* events, only nodes can trap key events. The three onKey* events are onKeyPressed, onKeyReleased, and onKeyTyped. When a user interacts with the keyboard (or keypad for mobile users), the events are fired in this order:
• onKeyPressed
• onKeyTyped
• onKeyReleased
Modify your script from the last section to trap these events. The code in your script should look like this when you are finished:
/*
 * Chapter9.fx
 *
 * v1.0 - J. F. DiMarzio
 *
 * 6/15/2010 – created
 *
 * Using Events
 *
 */

package com.jfdimarzio.javafxforbeginners;

import javafx.stage.Stage;
import javafx.scene.Scene;
import javafx.scene.shape.Circle;
import javafx.scene.paint.Color;
import javafx.scene.control.Label;
import javafx.scene.input.KeyEvent;

/**
 * @author JFDiMarzio
 */
var message : String = ″″;

Stage {
      title : ″UsingEvents″
      onClose: function () {  }
      scene: Scene {
            width: 450
            height: 400
            content: [
                    Circle {
                        centerX: 100,
                        centerY: 100
                        radius: 100
                        fill: Color.BLACK
                        focusTraversable: true;
                        onKeyPressed:function(event: KeyEvent):Void{
                           message = event.toString();
                        }
                        onKeyReleased:function(event: KeyEvent):Void{
                           message = event.toString();
                        }
                        onKeyTyped:function(event: KeyEvent):Void{
                           message = event.toString();
                        }
                    }
                    Label {
                        text: bind message;
                        layoutX:10;
                        layoutY:250;
                     }
               ]
      }
}
If you look carefully at the code, you will notice one slight difference in the properties of the Circle node. To get this example to function correctly, a property named focusTraversable needs to be set. The focusTraversable property lets the circle accept the focus of the Scene’s action. Without this property being set, JavaFX would not be able to tell what node you are interacting with when you type on the keyboard.
TIP
The focusTraversable property also allows focus to be passed between nodes. If you need a user to be able to move focus from node to node, set focusTraversable to true on both nodes.
Run this script using the Mobile profile. It should run as shown in Figure 9-2.
With the script running in the mobile emulator, press the number 2 on the keypad. You should see the following:
KeyEvent node [javafx.scene.shape.Circle] ,
               char [] , text [2] , code [VK_2]
KeyEvent node [javafx.scene.shape.Circle] ,
               char [2] , text [2] , code [VK_UNDEFINED]
KeyEvent node [javafx.scene.shape.Circle] ,
               char [] , text [2] , code [VK_2]
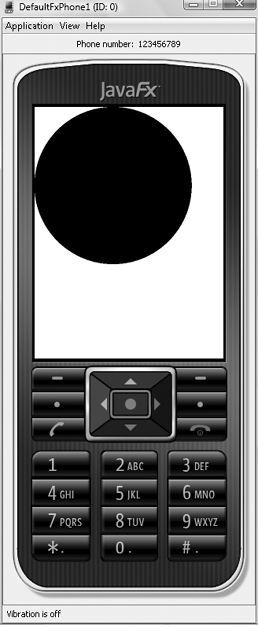
Figure 9-2 Trapping keys in the Mobile profile
Take notice of the char[] property of the KeyEvent. This property is only available on onKeyTyped. Therefore, if you are trapping just the char[] property, you will only see it on onKeyTyped. Now press the up arrow in the emulator and compare the outputs:
KeyEvent node [javafx.scene.shape.Circle] , char [] , text [Up] , code [VK_UP]
KeyEvent node [javafx.scene.shape.Circle] , char [] , text [Up] , code [VK_UP]
Notice that the directional arrows in the mobile profile do not fire the onKeyTyped event. They will only fire the onKeyPressed and onKeyReleased events.
TIP
In the event you cannot see the full event message printed on the screen of the mobile emulator, add the following line to your script. With this line in place, the event message will print out to the Output window in NetBeans:
System.out.println(message)
It is very important to note what events are fired and in what order. This will make your job easier when you are trying to trap and react to user input.
 Chapter 9 Self Test
1. Where are the onMouse* events inherited from?
2. When is onMouseEntered fired?
3. True or false? The onMouseReleased event only fires when the mouse is dragged.
4. True or false? Anything that inherits from Node can trap onMouse* events.
5. When events are used, what is the purpose of an anonymous function?
6. Which mouse event is fired when the mouse pointer exits the node to which the event is attached?
7. What three events are fired when the user interacts with the keyboard?
8. In what order are the key events fired?
9. What property will allow a node to accept focus?
10. True or false? The navigational buttons on a mobile phone will fire the onKeyTyped event.