
Chapter 7
Applying Effects and Transformations
• Applying effects to shapes and images
• Moving images in an application
• Rotating images and shapes
In Chapter 6 you learned how to write images to the screen using the FXDNode and ImageView nodes. In Chapter 4 you learned how to create different shapes and place them around your application. In this chapter you begin to apply effects and transitions to these images and shapes.
The first section of this chapter covers effects. JavaFX has a comprehensive list of effects you can apply to many objects within your scripts. These effects have a stunning impact on your applications and can be used to create almost any desired look or feel.
NOTE
As of the 1.3 release of JavaFX, effects were not available to the Mobile profile. Therefore, you can only apply effects if your application is to be run in the Desktop or Browser profile.
To begin this chapter, create a new, empty JavaFX script (following the instructions covered earlier in the book). Name the script Chapter7.fx and save it to the project you have been working in throughout this book.
You are going to set up this script to display the same FXZ file you used in Chapter 6. This allows you to experiment with applying effects to a multilayered image. You will find that there are several ways to apply effects. For example, many effects can be applied to a group of images collectively or to individual images separately. Working with a two-image FXZ file will enable you to apply effects to an individual image as well as to the group.
Set up your script file as follows:
/*
 * Chapter7.fx
 *
 * v1.0 - J. F. DiMarzio
 *
 * 5/20/2010 – created
 *
 * Applying Effects
 *
 */
com.jfdimarzio.javafxforbeginners;
import javafx.stage.Stage;
import javafx.scene.Scene;
import javafx.fxd.FXDNode;
import javafx.scene.Group;
import javafx.scene.effect.*;
import javafx.scene.image.ImageView;

var imagePath : String = "{__DIR__}images/butterfly.fxz";
var butterflyImage : FXDNode = FXDNode{
      url: imagePath;
};

/**
 * @author JFDiMarzio
 */
Stage {
    title : "Effects"
    scene: Scene {
        width: 800
        height: 600
        content: [
            SetImages(butterflyImage)
         ]
    }
}
function SetImages(image : FXDNode) : FXDNode {
              var butterfly  : ImageView;
              var background : ImageView;

              butterfly = (image.getNode("butterfly") as ImageView);
              background = (image.getNode("background") as ImageView);
              butterfly.translateX = -50;
              butterfly.translateY = -50;
          return image;
}
function ApplyEffects() : Effect{
         var effectToApply : Effect;
         effectToApply = null;
     return effectToApply;
}
This script may look a little confusing at first. However, it contains elements you have already learned about in earlier chapters.
The first section of the script contains two vars:
var imagePath : String = "{__DIR__}images/butterfly.fxz";
var butterflyImage : FXDNode = FXDNode{
      url: imagePath;
};
The first var holds the path to the FXZ file. The second var, butterflyImage, is the FXDNode of the ImageView group.
TIP
Notice that the vars have been typed using the : <type> notation. Using this notation is not required for the script to compile, but it’s a very good habit to get into.
Skipping over the middle of the script for a moment, let’s look at the last section of the script, which contains two functions. The first function is as follows:
function SetImages(image : FXDNode) : FXDNode {
         var butterfly  : ImageView;
         var background : ImageView;

         butterfly = (image.getNode("butterfly") as ImageView);
         background = (image.getNode("background") as ImageView);
         butterfly.translateX = -50;
         butterfly.translateY = -50;
    return image;
}
The first line of the function—the function definition—tells you that the function’s name is SetImages and that it takes a single parameter and returns an FDXNode. The parameter that the function accepts is named image and is of the type FXDNode. This definition allows you to pass your butterflyImage var into the function, manipulate it, and then pass it back to the script. This is exactly the kind of function you need to experiment with some effects.
The second function, shown next, is where you put all the code for your effects:
function ApplyEffects() : Effect{
var effectToApply : Effect;
effectToApply = null;
return effectToApply;
}
This function takes no parameters, but returns a value of Effect. Notice the var effectToApply, which is typed as an Effect. This var will be set to any effect you want to apply. That effect is then returned to the caller and rendered to the Scene. Throughout this chapter, you will use the ApplyEffects() function to apply different effects to the images.
Currently, the effectToApply is set to null, which applies no effect at all. As you progress through this chapter, you will replace the null with an effect to be applied.
NOTE
This design, where a common function is used to apply a specific effect to an image, may not be practical in a real working application. However, it lends itself very nicely to learning how effects work by separating the code.
The body of the function has much of the code you used in Chapter 6. The function takes the FXDNode that is passed into it and then creates three vars from it: one for the group, one for the butterfly, and one for the background. The butterfly image is moved –50 pixels along both the x and y axes and then returned to the script.
Finally, the middle of the script, where the Scene is, simply contains a call to the SetImages() function. When compiled, this script should produce an image like the one in Figure 7-1.
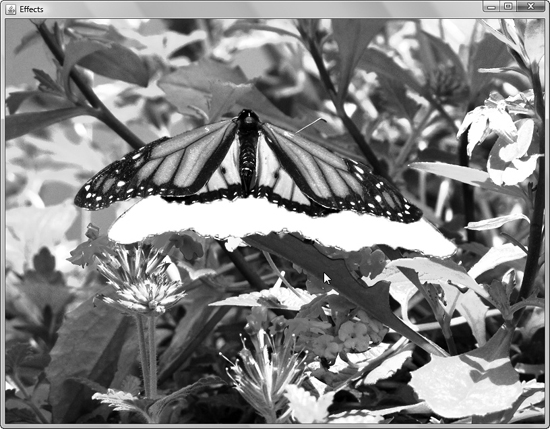
Figure 7-1 The image before effects are applied
This script, in its current state, will be the base you use for the rest of this chapter. All the effects and transformations you learn about in this chapter are demonstrated using this script. The first section of this chapter covers effects, which is followed by a discussion of transformations.
Effects
JavaFX is capable of rendering stunning and complex effects. Images and effects can be blended, blurred, and shadowed. Such effects can be very compelling and can be used to create applications that engage your users.
These effects can be applied to almost any node in JavaFX. All the standard effects available to you in JavaFX are in the javafx.scene.effect package. Import this package to begin working with JavaFX effects if you have not done so already:
import javafx.scene.effect.*;
TIP
To this point, you have explicitly stated which items in each package you want to import. However, the .* notation tells JavaFX to import all the items within a particular package. Therefore, the statement import javafx.scene.effect.* will give you access to all the effects in the effect package.
The first effect you will use is Bloom.
Bloom
The Bloom effect takes the areas of higher contrast in your image and makes them appear to glow by overrunning these areas of high contract and bleeding them into the surrounding image. The amount of Bloom applied to the node is controlled by the threshold parameter. The threshold parameter accepts a value between 0 and 1, with 0 being no effect at all.
Use the ApplyEffects() and SetImages() functions in the Chapter7 script to apply the Bloom effect to the background image of butterfly.fxz. Every ImageView node has an effect parameter. This parameter is set to the effect you want to apply to that ImageView.
TIP
You are working with an ImageView in this chapter because you had just worked with it in Chapter 6. However, ImageViews are not the only node you can apply effects to. Almost every node contains an effect parameter that you can apply an effect to.
Add the following line to the SetImages() function to apply an effect to the background image:
background.effect = ApplyEffects();
Because the ApplyEffects() function has a return value of Effect, it can be passed directly to the effect parameter of the ImageView. If you want to apply the effect to the butterfly instead of the background, you can easily do so by using butterfly.effect rather than background.effect.
The SetImages() function should now look as follows:
function SetImages(image : FXDNode) : FXDNode {
            var butterfly  : ImageView;
            var background : ImageView;

            butterfly = (image.getNode("butterfly") as ImageView);
            background = (image.getNode("background") as ImageView);
            butterfly.translateX = -50;
            butterfly.translateY = -50;
            background.effect = ApplyEffects();
         return image;
}
You can now edit the ApplyEffects() function to return the Bloom effect to the background. Add the following lines to the ApplyEffects() function:
  effectToApply = Bloom{
                    threshold: .5;
                  }
This sets effectToApply to the Bloom effect. The threshold is set to .5 to give you a good idea of what the Bloom effect can do. You can adjust the threshold to your liking to achieve the desired effect. Your ApplyEffects() function should now look like this:
function ApplyEffects() : Effect{
      var effectToApply : Effect;
      effectToApply = Bloom{
            threshold: .5;
      }
      return effectToApply;
}
The entire finished script is shown here:
/*
 * Chapter7.fx
 *
 * v1.0 - J. F. DiMarzio
 *
 * 5/20/2010 – created
 *
 * Applying Effects
 *
 */

package com.jfdimarzio.javafxforbeginners;

import javafx.stage.Stage;
import javafx.scene.Scene;
import javafx.fxd.FXDNode;
import javafx.scene.Group;
import javafx.scene.image.ImageView;
import javafx.scene.effect.*;

var imagePath : String = "{__DIR__}images/butterfly.fxz";
var butterflyImage : FXDNode = FXDNode{
      url: imagePath;
};
Stage {
    title : "Effects"
    scene: Scene {
        width: 800
        height: 600
        content: [
            SetImages(butterflyImage)
         ]
    }
}
function SetImages(image : FXDNode) : FXDNode {
              var butterfly  : ImageView;
              var background : ImageView;

              butterfly = (image.getNode("butterfly") as ImageView);
              background = (image.getNode("background") as ImageView);
              butterfly.translateX = -50;
              butterfly.translateY = -50;
              background.effect = ApplyEffects();
         return image;
}
function ApplyEffects() : Effect{
      var effectToApply : Effect;
      effectToApply = Bloom{
            threshold: .5;
      }
      return effectToApply;
}
Compile your script and run it to produce an image with the Bloom effect applied, as shown in Figure 7-2.
Next, you learn about the ColorAdjust effect.
ColorAdjust
As the name suggests, the ColorAdjust effect allows you to adjust the color of your node. In much the same way that you adjust the picture on your television, JavaFX lets you adjust your images. ColorAdjust contains parameters that allow you to adjust the contrast, brightness, hue, and saturation.
All the parameters for the ColorAdjust effect, with the exception of input, accept a numeric value. You can assign a value between –1 and 1 to each of the following: contrast, brightness, hue, and saturation. However, you do not necessarily need to assign a value to all the parameters. For instance, if you just want to adjust the contrast of an image, you only have to specify a value for the contrast parameter, and JavaFX will automatically assign a 0 to the others. (Note that JavaFX will not auto-assign a 0 to contrast because it has a default value of 1.)
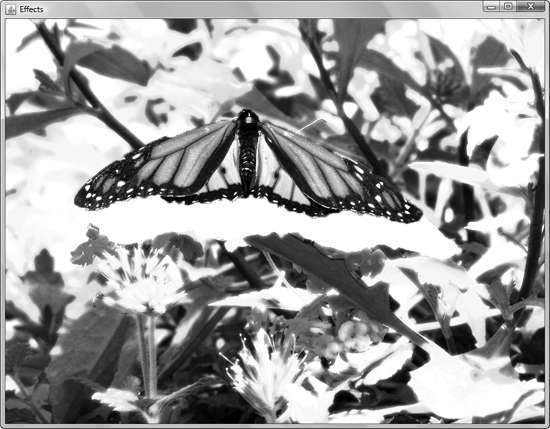
Figure 7-2 Background with the Bloom effect
For this example, you will assign .5 to each parameter and then assign the effect to the background. Add the following code to the ApplyEffects() function:
effectToApply = ColorAdjust{
      contrast : .5;
      brightness : .5;
      hue : .5;
      saturation : .5;
      }
The structure of the ColorAdjust effect should look familiar if you followed along with the previous example. Effects, as a whole, are not very complicated to apply once you have done it a couple times. Your complete ApplyEffects() function should look like this:
function ApplyEffects() : Effect{
      var effectToApply : Effect;
      effectToApply = ColorAdjust{
                           hue : .5;
                           saturation : .5;
                           brightness : .5;
                         contrast : .5;
                     }
      return effectToApply;
}
Compile your script and run it with the Desktop profile. You will see an image like the one shown in Figure 7-3.
Notice that the background colors have been adjusted and appear almost animated. However, the butterfly has not been affected. Experiment with assigning different values to each parameter—and to the butterfly and background independently.
The next effect you learn about is GaussianBlur.
GaussianBlur
GaussianBlur provides a very smooth blurring effect to a node. Behind the scenes, the effect works on something called the Gaussian algorithm. This algorithm works in a circular pattern from each pixel to smooth the appearance. Because this algorithm works in a circular pattern, the parameter you need to work with is the radius parameter, which controls how far out from each pixel the Gaussian algorithm is applied.
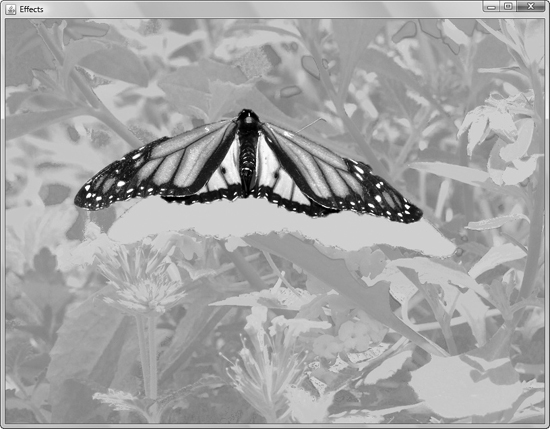
Figure 7-3 Background modified using ColorAdjust
You can specify a value from 0 to 63 for the radius of the GaussianBlur. A value of 0 would be little to no blur in the original image, whereas a value of 63 would be an extreme blur. The following code implements a GaussianBlur with a radius of 10:
effectToApply = GaussianBlur{
      radius: 10;
 }
Apply the GaussianBlur to your ApplyEffects() function as follows:
function ApplyEffects() : Effect{
      var effectToApply : Effect;
      effectToApply = GaussianBlur{
          radius: 10;
      }
      return effectToApply;
}
Run your completed script, which blurs the background with a radius of 10. The result is shown in Figure 7-4.
Notice that the background is slightly blurred, but still recognizable. Now change the radius to 60 and recompile the script. The results are shown in Figure 7-5.
GaussianBlur is particularly effective when you are trying to resize images. Occasionally an image can become distorted when it is resized, especially if the image is quite sharp before it is resized. Applying a very light GaussianBlur before resizing the image (in systems that do not do so automatically) can make the resized image less distorted.
You learn about the Glow effect next.
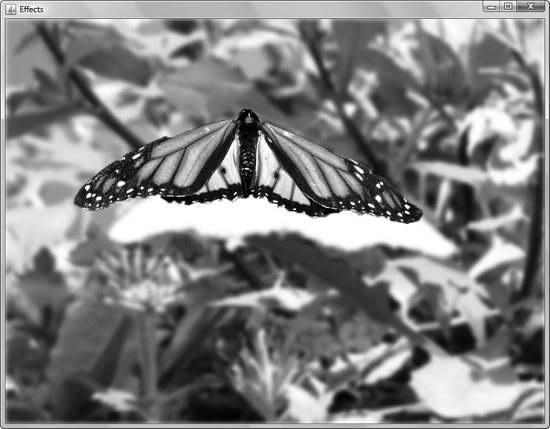
Figure 7-4 Background with a GaussianBlur radius of 10
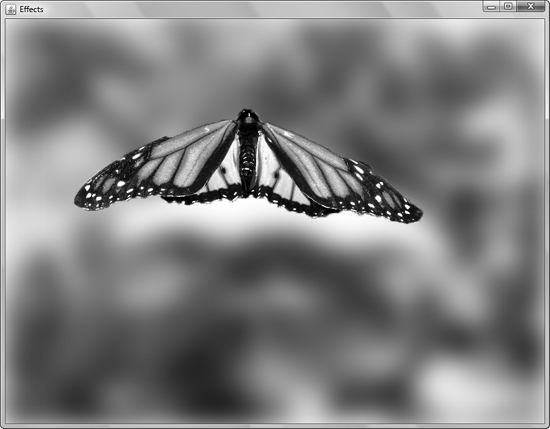
Figure 7-5 Background with a GaussianBlur radius of 60
Glow
The Glow effect, as the name suggests, makes your node appear to glow. The amount of glow applied to the node is controlled by the level parameter. The level of glow you can apply to a node ranges from 0 to 1. Assigning no level for the Glow effect will cause JavaFX to use a default of .3.
Earlier in this chapter you learned about the Bloom effect, which applied a Glow-like effect to your node. The difference between Bloom and Glow is in the way the glow is applied. Whereas Bloom only applies a glow to the higher contrast parts of an image, Glow works on the entire image.
The following code shows your ApplyEffects() function with a Glow level of .5:
function ApplyEffects() : Effect{
      var effectToApply : Effect;
      effectToApply = Glow{
            level: 1
      }
      return effectToApply;
}
Replace the ApplyEffects() function in your current script with this one. Your full script should now look like this:
/*
 * Chapter7.fx
 *
 * v1.0 - J. F. DiMarzio
 *
 * 5/20/2010 – created
 *
 * Applying Effects
 *
 */

package com.jfdimarzio.javafxforbeginners;

import javafx.stage.Stage;
import javafx.scene.Scene;
import javafx.fxd.FXDNode;
import javafx.scene.Group;
import javafx.scene.image.ImageView;
import javafx.scene.effect.*;

var imagePath : String = "{__DIR__}images/butterfly.fxz";
var butterflyImage : FXDNode = FXDNode{
      url: imagePath;
};

Stage {
    title : "Effects"
    scene: Scene {
        width: 800
        height: 600
        content: [
            SetImages(butterflyImage)
         ]
    }
}
function SetImages(image : FXDNode) : FXDNode {
         var butterfly  : ImageView;
         var background : ImageView;
         butterfly = (image.getNode("butterfly") as ImageView);
         background = (image.getNode("background") as ImageView);
         butterfly.translateX = -50;
         butterfly.translateY = -50;
         background.effect = ApplyEffects();
   return image;
}
function ApplyEffects() : Effect{
      var effectToApply : Effect;
      effectToApply = Glow{
            level: 1
      }
      return effectToApply;
}
Compile and run your script. Your background image should glow like the one shown in Figure 7-6.
The next effect you learn about is the DropShadow effect.
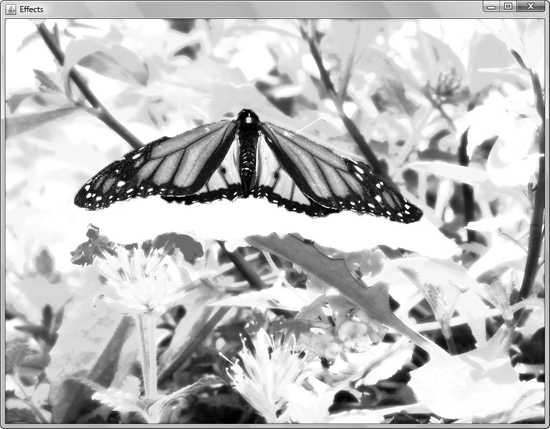
Figure 7-6 Background with a Glow of .5
DropShadow
The DropShadow effect creates a shadow under your node by replicating the node in a shadow color and offsetting the “shadow” image by a specific amount under your source node. Quite a few parameters are needed to configure DropShadow:
• radius Used like the radius parameter for GaussianBlur.
• height/width Can be used instead of radius; has the same effect.
• spread The opacity of the shadow. A value of 0 creates a very light, scattered shadow, whereas 1 produces a dark, sharp shadow.
• blurType The algorithm used to create the shadow. This can be set to Gaussian, ONE_, TWO_, or THREE_PASS_BOX.
• color The color of the shadow; defaults to BLACK.
Modify your ApplyEffects() function to create a DropShadow effect, as follows:
function ApplyEffects() : Effect{
      var effectToApply : Effect;
      effectToApply = DropShadow{
                          radius : 10;
                          offsetX: 10;
                          offsetY: 10;
                          spread: .2;
                          blurType : BlurType.THREE_PASS_BOX;
                     }
      return effectToApply;
}
Rather than apply this effect to the background as you have been doing, try applying it to the butterfly. Take a look at the full script to see how this effect is applied to the butterfly:
/*
 * Chapter7.fx
 *
 * v1.0 - J. F. DiMarzio
 *
 * 5/20/2010 – created
 *
 * Applying Effects
 *
 */
package com.jfdimarzio.javafxforbeginners;

import javafx.stage.Stage;
import javafx.scene.Scene;
import javafx.fxd.FXDNode;
import javafx.scene.Group;
import javafx.scene.image.ImageView;
import javafx.scene.effect.*;

var imagePath : String = "{__DIR__}images/butterfly.fxz";
var butterflyImage : FXDNode = FXDNode{
      url: imagePath;
};

Stage {
    title : "Effects"
    scene: Scene {
        width: 800
        height: 600
        content: [
            SetImages(butterflyImage)
         ]
    }
}

function SetImages(image : FXDNode) : FXDNode {
             var butterfly  : ImageView;
             var butterflyShadow : ImageView;
             var background : ImageView;

             butterfly = (image.getNode("butterfly") as ImageView);
             background = (image.getNode("background") as ImageView);
             butterfly.translateX = -50;
             butterfly.translateY = -50;
             butterfly.effect = ApplyEffects();
      return image;
}
function ApplyEffects() : Effect{
      var effectToApply : Effect;
      effectToApply = DropShadow{
                          radius : 10;
                          offsetX: 10;
                          offsetY: 10;
                          spread: .2;
                          blurType : BlurType.THREE_PASS_BOX;
                      }
      return effectToApply;
}
This script produces a shadow under the butterfly like the one shown in Figure 7-7.
The DropShadow effect works by creating a blurred copy of your original image. The copy is placed under the original image and then offset so you can see it. You can use the Shadow effect if you want to control this process yourself.
The Shadow effect creates a blurred, colored image based on your original. However, it does not re-add an unaltered copy of your image to the scene. You are literally just left with the shadow of your image. You will have to manually add another instance of your image to the scene to complete the effect.
Using the Shadow effect over the DropShadow effect has its advantages, though. For example, it can come in quite handy if you want to project the shadow onto a location detached from the original image.
The next effect you learn about is the InvertMask effect.
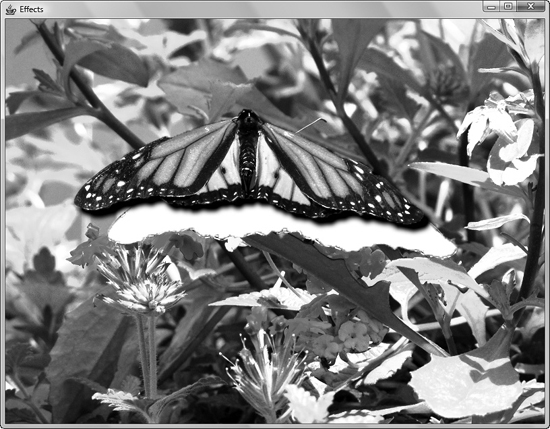
Figure 7-7 Butterfly with DropShadow
InvertMask
InvertMask is a simple effect that inverses the opacity of your node. That is, any part of your node that is transparent becomes opaque, and any part that is opaque becomes transparent. Alter your ApplyEffects() function as follows to apply the InvertMask effect to the butterfly:
function ApplyEffects() : Effect{
      var effectToApply : Effect;
      effectToApply = InvertMask{
      }
      return effectToApply;
}
Compile this into your script and run it. Notice in Figure 7-8 that you can now see the bounding box that was around the butterfly image.
You learn about the Lighting effect next.
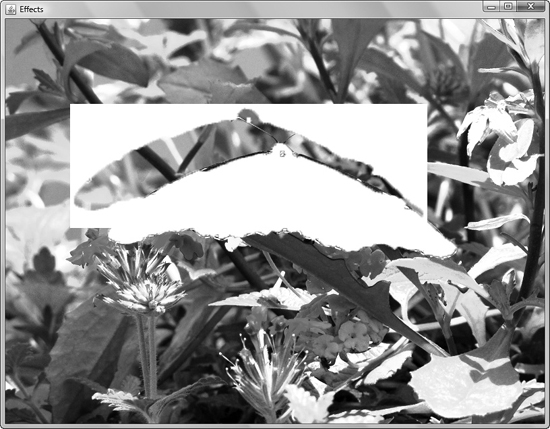
Figure 7-8 The InvertMask effect used on the butterfly image
Lighting
The Lighting effect is by far the most complex effect offered in JavaFX. Lighting can be used to add a dimension of realism to an otherwise flat object. Although Lighting is a complex effect to set up, it is very rewarding if used correctly.
The main parameter of the Lighting effect is Light, which represents the type of light from the javafx.scene.effect.light package. Three different types of light can be used and assigned to the Lighting effect:
• DistantLight
• PointLight
• SpotLight
NOTE
The relationship between Lighting and Light is that Lighting defines how Light is used by the effect.
Each of these Light types has its own set of parameters that controls the specific type of light.
DistantLight
DistantLight takes three parameters that configure and control the light. Here’s the value map of DistantLight:
DistantLight{
        azimuth : <angle of the light in degrees>
        elevation : <elevation of the light to the object in degrees>
        color : <Color of light>
};
Update your ApplyEffects() function to implement the Lighting effect using DistantLight. Set the azimuth of the light to 45, the elevation to 45, and the color to RED, as shown next. Do not forget to import the javafx.scene.paint.Color.* package to manipulate the color of the light.
 function ApplyEffects() : Effect{
       var effectToApply : Effect;
       effectToApply = Lighting{
           light : DistantLight{
               azimuth : 45;
               elevation : 45;
               color : RED;
          };
      }
      return effectToApply;
}
Compile your script and run it to apply a red-colored distant lighting effect to the butterfly. The result is shown in Figure 7-9.
PointLight
The value map of PointLight is as follows:
PointLight{
              x: <x position of light source in 3D space> ;
              y: <y position of light source in 3D space>;
              z: <z position of light source in 3D space>;
              color : <color of light>;
            };
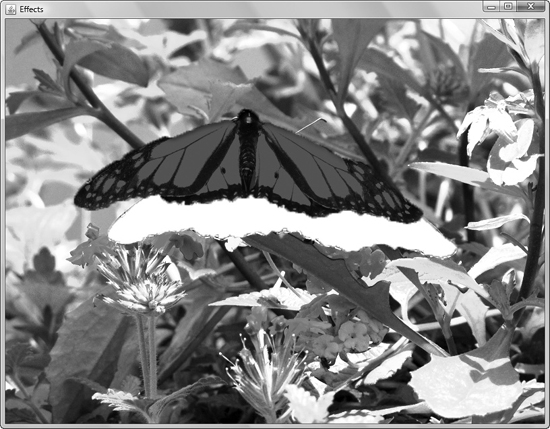
Figure 7-9 Butterfly with red DistantLight applied
Just as you did with DistantLight, edit your ApplyEffects() function to use a PointLight at position x150, y50, z50, as shown here:
function ApplyEffects() : Effect{
      var effectToApply : Effect;
      effectToApply = Lighting{
          light : PointLight{
              x: 150;
              y: 50;
              z: 50;
              color : YELLOW;
           };
      }
      return effectToApply;
}
Your image should look like Figure 7-10 after you compile and run your script.
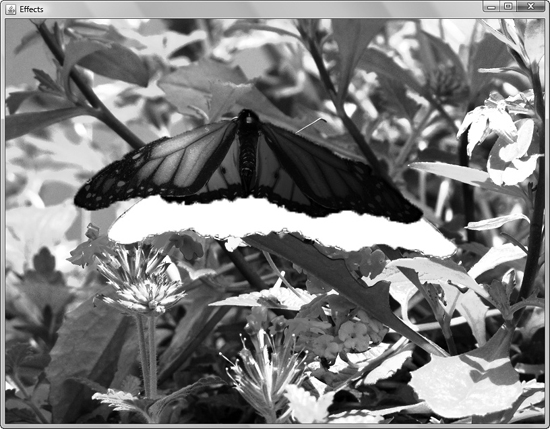
Figure 7-10 Butterfly with a yellow PointLight
SpotLight
SpotLight takes the same parameters as PointLight, but also adds a few others to guide where the light is pointing. These parameters are pointsAtX, pointsAtY, and pointsAtZ.
The following ApplyEffects() function will apply a SpotLight lighting effect to the butterfly:
function ApplyEffects() : Effect{
      var effectToApply : Effect;
      effectToApply = Lighting{
          light : SpotLight{
              x: 150;
              y: 50;
              z: 50;
              pointsAtX: 400;
              pointsAtY: 50;
              pointsAtZ: 0;
              color : WHITE;
            };
      }
       return effectToApply;
}
Compile your script; the image will look like the one shown in Figure 7-11.
Next, you learn about the SepiaTone effect.
SepiaTone
The SepiaTone effect is designed to emulate the look of older black-and-white film. Early film was tinted with Sepia to add color to the prints. This process can be emulated with the SepiaTone effect, which takes a level parameter to adjust the amount of effect applied to the node. The level can be a value between 0 and 1.
Take a look at the following full script; notice that the effect has been applied to the group image rather than just the butterfly:
/*
 * Chapter7.fx
 *
 * v1.0 - J. F. DiMarzio
 *
 * 5/20/2010 – created
 *
 * Applying Effects
 *
 */
package com.jfdimarzio.javafxforbeginners;

import javafx.stage.Stage;
import javafx.scene.Scene;
import javafx.fxd.FXDNode;
import javafx.scene.Group;
import javafx.scene.image.ImageView;
import javafx.scene.effect.*;

var imagePath : String = "{__DIR__}images/butterfly.fxz";
var butterflyImage : FXDNode = FXDNode{
      url: imagePath;
};
Stage {
    title : "Effects"
    scene: Scene {
        width: 800
        height: 600
        content: [
            SetImages(butterflyImage)
         ]
    }
}
function SetImages(image : FXDNode) : FXDNode {
            var butterfly  : ImageView;
            var butterflyShadow : ImageView;
            var background : ImageView;
            butterfly = (image.getNode("butterfly") as ImageView);
            background = (image.getNode("background") as ImageView);
            butterfly.translateX = -50;
            butterfly.translateY = -50;
            groupImage.effect = ApplyEffects();
       return image;
}

function ApplyEffects() : Effect{
      var effectToApply : Effect;
      effectToApply = SepiaTone{
            level: 1;
      }
      return effectToApply;
}
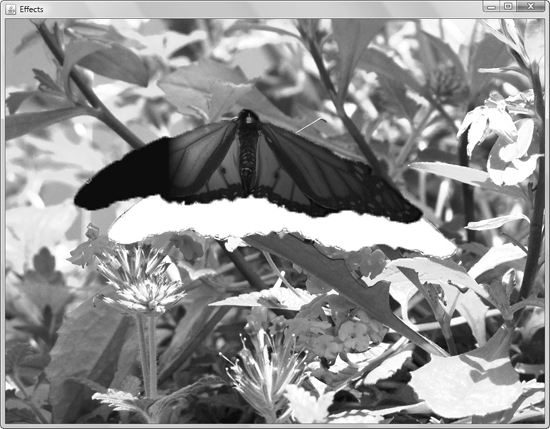
Figure 7-11 Butterfly with SpotLight
Figure 7-12 shows the results of this script.
In the next section of this chapter, you learn about transformations and how they differ from effects.
Transformations
A transformation does not change the node the way an effect does. The major purpose of a transformation is to move or shift the node along an axis. You have already been working with transformations in this chapter, even if you were unaware of it.
The three different kinds of transformations are xy transformations, rotations, and transformations of perspective. These transformation types are detailed next.
XY Transformations
In this chapter you have been working with a script that contains two ImageView nodes: background and butterfly. Take a look at the following SetImage() function. In this function, you move the butterfly ImageView –50 pixels on the x axis and –50 pixels on the y axis using transformations:
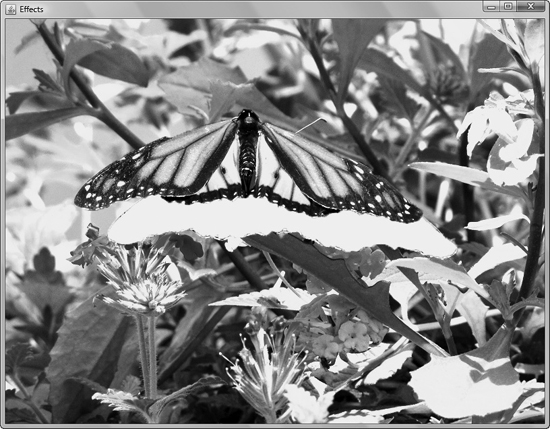
Figure 7-12 SepiaTone applied to the group image
function SetImages(image : FXDNode) : FXDNode {
            var butterfly  : ImageView;
            var butterflyShadow : ImageView;
            var background : ImageView;

           butterfly = (image.getNode("butterfly") as ImageView);
           background = (image.getNode("background") as ImageView);
           butterfly.translateX = -50;
           butterfly.translateY = -50;
           groupImage.effect = ApplyEffects();
    return image;
}
The ImageView node has attributes named translateX and translateY. These attributes are used to move the ImageView around the Scene.
Rotation
Rotating an ImageView is just as easy as moving it along an axis. The ImageView node has an attribute named rotate. Simply set the rotate attribute of the ImageView to the number of degrees you want to rotate the image. For example, take a look at the following SetImage() function, which rotates the butterfly image 45 degrees. The result is shown in Figure 7-13.
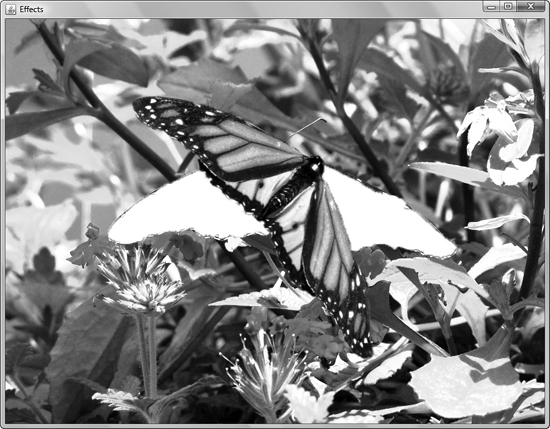
Figure 7-13 Butterfly rotated 45 degrees
Remove the Sepia effect from ApplyEffects() to return the butterfly to normal before you compile this example.
function SetImages(image : FXDNode) : FXDNode {
             var butterfly  : ImageView;
             var butterflyShadow : ImageView;
             var background : ImageView;

             butterfly = (image.getNode("butterfly") as ImageView);
             background = (image.getNode("background") as ImageView);
             butterfly.rotate = 45;
             butterfly.effect = ApplyEffects();
     return image;
}
Next you learn about Perspective Transform—a member of the Effects package that transforms the perspective of your node.
Perspective Transform
Perspective Transform alters the perspective of a node by giving you control over the x and y coordinates of each corner of the node.
Perspective Transform takes eight parameters for the x and y axes of the upper-left, upper-right, lower-left, and lower-right corners. Take a look at the following code for the ApplyEffects() function:
function ApplyEffects() : Effect{
      var effectToApply : Effect;
      effectToApply = Perspective Transform{
      ulx : 100;
      uly : 100;
      urx : 400;
      ury : 100;
      lrx : 400;
      lry : 550;
      llx : 100;
      lly : 350;
      };
      return effectToApply;
}
In this example, all the coordinates for each corner have been set. It takes a little practice to get the desired effect when using the Perspective Transform, and you will want to experiment with the different coordinates. The preceding code produces the result shown in Figure 7-14.
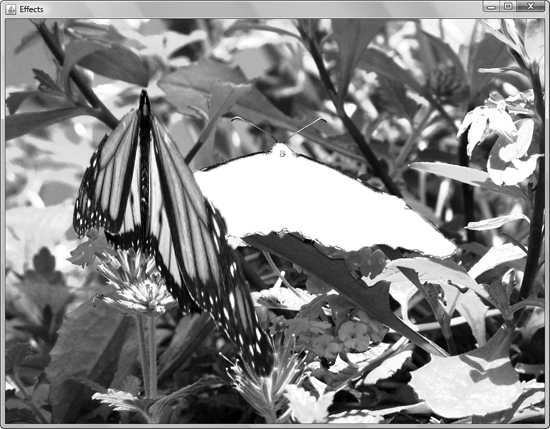
Figure 7-14 Butterfly with Perspective Transform
Try This Combining Multiple Effects
The saying “You can’t have too much of a good thing” is especially true of JavaFX effects. It is rare when working with an image that you will have to apply just one effect. Often, you will need to apply multiple effects to an image to get the desired look.
Using the skills you acquired in this chapter, create a new project with an image in it. Apply multiple effects to the image at the same time, and adjust the properties of these effects to create new and exciting images.
This concludes the chapter on effects and transformations. In the next chapter you will begin to tackle some basic animation.
 Chapter 7 Self Test
1. How do you assign a type to a var?
2. What effect adjusts only the higher contrast areas of your node to make them glow?
3. True or false? All the parameters of ColorAdjust default to 0 if they are not specified.
4. What parameter needs to be specified to create a GaussianBlur effect?
5. What is the difference between Glow and Bloom?
6. True or false? You do not need to specify both a radius and a height/width for a DropShadow effect.
7. Which effect takes all the opaque areas of your image and makes them transparent?
8. What are the three different lights that can be used in the Lighting effect?
9. What does the following code do?
butterfly.rotate = 45;
10. How many parameters need to be set to create a Perspective Transform effect?