
Chapter 8
Basic Animation
• Using Timelines
• Creating paths
• Using keyframes
This chapter introduces you to the world of basic JavaFX animation. Whether you want to create animated text and fly-ins or gain knowledge for creating games, basic animation is the place to begin.
You will need to master three basic topics when tackling basic JavaFX animation:
• Timelines
• Keyframes
• Paths
To begin this chapter, open NetBeans to the JavaFXForBeginners project you have been working on throughout this book. Create a new, empty JavaFX script file named Chapter8.fx. Based on previous chapters, the contents of this file should look as follows:
/*
 * Chapter8.fx
 *
 * v1.0 - J. F. DiMarzio
 *
 * 5/27/2010 – created
 *
 * Basic Animation
 *
 */

package com.jfdimarzio.javafxforbeginners;

/**
 * @author JFDiMarzio
 */

// place your code here
The first section of this chapter covers Timelines.
Timelines
All animation, whether it is “traditional” hand-drawn animation or computer-based animation, is controlled by timing. What actions occur and when, the length of time it takes to walk from one side of a room to another, and syncing the dialogue to a character’s mouth movements are all actions that are controlled by some sense of timing. The timing of the animation dictates when each action begins, when it ends, and how long it lasts.
Timing is critical to smooth animation. If there is too much time between each frame of animation, it will look slow and jerky to the user. If there is too little time between each frame, the animation will be too fast. This is why timing is so critical.
In JavaFX, the timing of animation is controlled by a Timeline. A Timeline takes in keyframes and outputs values that help you control your animation on the screen. The package that holds JavaFX Timelines is javafx.animation.Timeline.
The purpose of a Timeline is to break down frames of animation into “stops,” by time. This means that if you tell a Timeline where you want an object to be one second from now, and then five seconds from now, the Timeline will produce for you a value that will help your object move. The Timeline takes on the responsibility of producing a smooth increment of values that represent the movement of your object over the time you specify in your keyframes. This may sound a bit confusing now, but it will make a lot more sense when you see a Timeline in action.
A Timeline is broken down into a collection of keyframes. A keyframe is a point at which you want the action of your animation to change. For example, you are going to make an animation of a butterfly moving from the top of the screen to the bottom. Therefore, your keyframes will represent the start of your animation at the top of the screen as well as the end of your animation at bottom of the screen, as shown in Figures 8-1 and 8-2, respectively. The job of the Timeline is to fill in the space in between.
You are now going to animate the butterfly image used in the previous two chapters. You will make the butterfly image move down along the y axis. To begin, set up your images by calling both the background and the butterfly out of the butterfly.fxz file.
NOTE
For a refresher on how to call images from an FXZ file, review Chapter 6.
The following code sets up your image variables:
/*
 * Chapter8.fx
 *
 * v1.0 - J. F. DiMarzio
 *
 * 5/27/2010 – created
 *
 * Basic Animation
 *
 */

package com.jfdimarzio.javafxforbeginners;
import javafx.stage.Stage;
import javafx.fxd.FXDNode;
import javafx.scene.image.ImageView;
import javafx.scene.Group;

/**
 * @author JFDiMarzio
 */
/* Create image variables */
var imagePath : String = "{__DIR__}images/butterfly.fxz";
var butterflyImage : FXDNode = FXDNode{url: imagePath;}
var groupImage : Group = butterflyImage.getGroup("group1");
var butterfly  : ImageView;
var background : ImageView;
/* END Create */

/* Set images */
butterfly = (butterflyImage.getNode("butterfly") as ImageView);
background = (butterflyImage.getNode("background") as ImageView);
/* End Set */

/* Move butterfly to y0 */
butterfly.y = 0;
var y: Integer = 0;
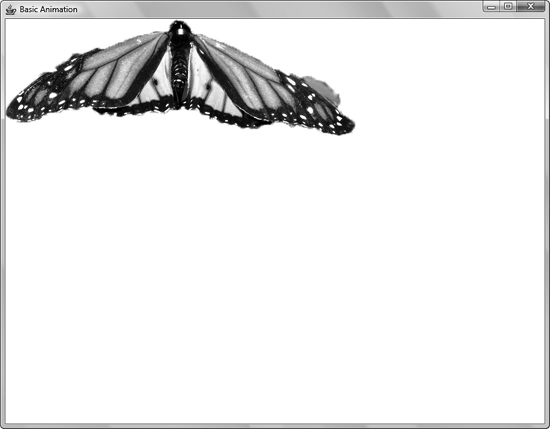
Figure 8-1 The first butterfly keyframe
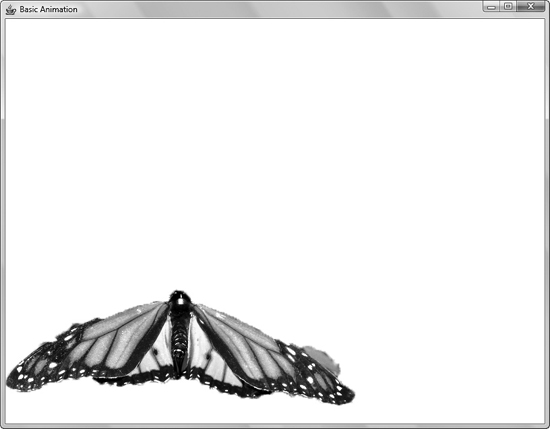
Figure 8-2 The second butterfly keyframe
If you have read Chapters 6 and 7, you will recognize this code. Therefore, this is a quick overview. The first section of code contains the variable declarations. The five variables here hold your images, path, and group. Notice that the imagePath variable holds the {__DIR__} constant pointer to the FXZ file. This imagePath is used to build the butterflyImage, which in turn is used to build the groupImage.
The second section of code is used to build the butterfly and background images. These images are pulled from the butterflyImage using the getNode() function. Next, the y axis location of the butterfly image is set to 0. This places the butterfly at the top of the screen to give it room to move down. Finally, an integer named Y is created to be used later by the Timeline.
Once your images are set, create a Scene and assign groupImage to the content:
import javafx.scene.Scene;

Stage{
  title: "Basic Animation"
  scene:
     Scene{
       width: 800
       height: 600
       content:[
        groupImage
      ]
    }
}
Now that the basic setup of the script is complete, you can begin to set up your Timeline. You will create a Timeline that moves the butterfly from the top of the screen (y:0) to the bottom (y:400) in two seconds. To start, create the Timeline shell:
Timeline{

}.play();
Notice the .play() call at the end of the Timeline. The function of this call is exactly as the name implies: It plays the Timeline to begin your action.
To use the Timeline, you will need to add a keyFrames collection to it. This collection will hold two keyframes. The first keyframe represents the butterfly at the top of the screen at zero seconds. The second keyframe represents the butterfly at the bottom of the screen after two seconds have elapsed. Here is a simplified example of keyFrames:
Timeline{
    keyFrames:[
        at (0s) { }
        at (2s) { }
        ]
}.play();
Now it is time to code the core of the Timeline. Within each keyframe you are going to move the butterfly by setting its translateY value. You are going to set translateY to 0 in the first keyframe, and to 400 in the second. The Timeline will do the rest for you. Here is the code:
import javafx.animation.Interpolator;

def frame = butterfly;
Timeline{
    keyFrames:[
        at (0s) { frame.translateY => 0}
        at (2s) { frame.translateY => 400 tween Interpolator.LINEAR}
        ]
}.play();
The “tween” notation in the second keyframe tells the Timeline to build all the values between 0 and 400 and assign them to translateY over the two seconds.
NOTE
In animation, the process of drawing all the images between two keyframes is known as tweening.
The completed script should look as follows:
/*
 * Chapter8.fx
 *
 * v1.0 - J. F. DiMarzio
 *
 * 5/27/2010 – created
 *
 * Basic Animation
 *
 */

package com.jfdimarzio.javafxforbeginners;
import javafx.stage.Stage;
import javafx.scene.Scene;
import javafx.fxd.FXDNode;
import javafx.scene.image.ImageView;
import javafx.animation.Timeline;
import javafx.animation.Interpolator;
import javafx.scene.Group;
/**
 * @author JFDiMarzio
 */

/* Create image variables */
var imagePath : String = "{__DIR__}images/butterfly.fxz";
var butterflyImage : FXDNode = FXDNode{url: imagePath;}
var groupImage : Group = butterflyImage.getGroup("group1");
var butterfly  : ImageView;
var background : ImageView;
/* END Create */

/* Set images */
butterfly = (butterflyImage.getNode("butterfly") as ImageView);
background = (butterflyImage.getNode("background") as ImageView);
/* End Set */

/* Move butterfly to y0 */
butterfly.y = 0;

def frame = butterfly;
Timeline{
    keyFrames:[
        at (0s) { frame.translateY => 0}
        at (2s) { frame.translateY => 400 tween Interpolator. LINEAR }
        ]
}.play();

Stage{
  title: "Basic Animation"
  scene:
     Scene{
       width: 800
       height: 600
       content:[
         groupImage
      ]
    }
}
Run this script and you will see the butterfly image move from the top of the screen to the bottom.
What if you want the butterfly to keep moving up and down indefinitely? This is easy to do. First, to make the butterfly move back up after it has reached the bottom, you set the autoReverse property of the Timeline to true. Then, to make the process repeat, set the repeatCount parameter, as shown in the following code:
The repeatCount parameter can be set to a definite number such as 2 or 450. You can also set the repeatCount parameter to the constant INDEFINITE to repeat indefinitely.
Timeline{
    repeatCount: Timeline.INDEFINITE;
    autoReverse:true;
    keyFrames:[
        at (0s) { frame.translateY => 0}
        at (2s) { frame.translateY => 400 tween Interpolator.LINEAR}
        ]
}.play();
This process is good for simple motions, but what if you want to move your butterfly in a more elaborate way? The next section of this chapter covers animating your images along a path.
Animating Along a Path
If you want to do a lot of math—and some tricky calculations—you can create a lot of movements with the animation style explained in the previous section. However, if you really want to do some complex animation, such as moving an object around the screen in a curving motion, you will want to use path animation, which is another method that JavaFX has for creating animation that allows you to move an object around a predefined path. In this section you learn how to create a path using knowledge you picked up in previous chapters. You then use this path to animate the butterfly.
The concept here is that you can create a path using lines, arcs, and points. JavaFX will then animate your image moving along this path.
To begin, set up your Chapter8.fx file as show here:
/*
 * Chapter8.fx
 *
 * v1.0 - J. F. DiMarzio
 *
 * 5/27/2010 – created
 *
 * Basic Animation
 *
 */
package com.jfdimarzio.javafxforbeginners;

import javafx.stage.Stage;
import javafx.scene.Scene;

import javafx.fxd.FXDNode;
import javafx.scene.image.ImageView;
import javafx.scene.Group;

/**
  * @author JFDiMarzio
  */

  /* Create image variables */
var imagePath : String = "{__DIR__}images/butterfly.fxz";
var butterflyImage : FXDNode = FXDNode{url: imagePath;}
var groupImage : Group = butterflyImage.getGroup("group1");
var butterfly  : ImageView;
var background : ImageView;
/* END Create */

/* Set images */
butterfly = (butterflyImage.getNode("butterfly") as ImageView);
background = (butterflyImage.getNode("background") as ImageView);
/* End Set */

/* Move butterfly to y0 */
butterfly.y = 0;

Stage {
      title : "MyApp"
      onClose: function () {  }
      scene: Scene {
            width: 800
            height: 600
            content: [ groupImage ]
      }
}
Similar to what you have seen before, this code grabs the same butterfly and background images you have been working with and displays them to the Scene. In the previous section you animated the butterfly image travelling up and down the y axis. For this example you are going to animate the butterfly moving around an abstract path.
The next step is to create the path you want your butterfly to travel along. You will use a Path node to create this path. The node accepts a group of elements to create a path from. You can easily create a group of elements that makes an abstractly shaped path. The following piece of code defines a small element array with some basic line-based shapes:
NOTE
Be sure to take note of the required packages in the following code.
import javafx.scene.shape.MoveTo;
import javafx.scene.shape.ArcTo;
import javafx.scene.shape.ClosePath;

/* Initial shape to move butterfly around */
def pathShape  = [
    MoveTo {x : 150.0, y : 150.0}
    ArcTo {x : 350.0, y : 350.0, radiusX : 150.0, radiusY : 300.0}
    ArcTo {x : 150.0, y : 150.0, radiusX : 150.0, radiusY : 300.0}
    ClosePath{}
];
There is nothing too complex or tricky about what is happening here. You have created a collection of elements named pathShape. The elements contained within pathShape are MoveTo, two instances of ArcTo, and ClosePath. The combination of these elements creates a path your butterfly can follow.
The MoveTo element does exactly what the name suggests: It moves you to a specific point on the Cartesian grid. In this case it moves you to x150, y150. You are specifying this as your first element to cleanly move the starting point of your path before you start “drawing.”
The next two elements draw arcs. The first ArcTo element draws an arc from the last position of the point (in this case, x150, y150, thanks to the MoveTo element). The second ArcTo draws another arc from the end point of the last arc. Finally, the ClosePath element “connect the dots” and closes your path (if it does not close organically).
Keep in mind, all you have right now is a collection of elements. You do not yet have a path. Luckily, a path can be created from a group of elements. You will pass this group of elements into the definition of a path, as shown in the following code. Again, take care to note the package that needs to be imported for Path:
import javafx.scene.shape.Path;

/* Path definition */
def butterflyPath : Path = Path{
    elements: pathShape
}
In this code, you pass the pathShape into the elements of the path. This tells JavaFX that you want to turn your group of elements into a Path node. The Path node takes care of all the work needed to create a node from the group of elements you defined. The JavaFX animation package can now take this Path node and use it to animate your butterfly:
import javafx.animation.transition.PathTransition;
import javafx.animation.transition.OrientationType;
import javafx.animation.Timeline;
import javafx.animation.transition.AnimationPath;

/* Animation */
PathTransition{
    repeatCount: Timeline.INDEFINITE
    duration: 10s
    orientation: OrientationType.ORTHOGONAL_TO_TANGENT
    node: butterfly
    path: AnimationPath.createFromPath(butterflyPath)
}.play();
To create your animation, you use a PathTransition class, which takes in a few familiar parameters. Like Timeline, PathTransition can accept parameters for autoReverse, repeatCount, duration, and an interpolator. However, it is the node, path, and orientation that you want to focus on for this animation.
The node is the object you want animated. In this case, the butterfly image from the image group. The butterfly is assigned to the node in the PathTransition class.
TIP
Because butterfly is a member of an image group, and the image group is being written to the content of the Scene, the animation of the butterfly will be displayed over the background.
The node will be animated along the path you created earlier. However, the path you created is a Path node, and PathTransition is expecting an AnimationPath. No need to worry, though: The createFromPath() function of AnimationPath will create an AnimationPath from a Path node. In the previous code sample, butterfly Path is passed into createFromPath() and the result is assigned to path.
Finally, the orientation parameter specifies the position of the node as it is animated along the path. If you do not specify an orientation, the image will remain in whatever orientation it is in when it is drawn to the screen. Therefore, in the case of the butterfly, it will remain in the “heads-up” orientation as it travels around your elliptical path. However, you can also specify an orientation of ORTHOGONAL_TO_TANGENT. This is a constant that tells JavaFX to change the orientation of the node as it moves along the path. This change in orientation gives the animation a more organic feel.
The full path animation script should look as follows:
/*
 * Chapter8.fx
 *
 * v1.0 - J. F. DiMarzio
 *
 * 5/27/2010 – created
 *
 * Basic Animation
 *
 */

package com.jfdimarzio.javafxforbeginners;

import javafx.stage.Stage;
import javafx.scene.Scene;
import javafx.scene.shape.MoveTo;
import javafx.scene.shape.ArcTo;
import javafx.scene.shape.ClosePath;
import javafx.fxd.FXDNode;
import javafx.scene.image.ImageView;
import javafx.animation.Timeline;
import javafx.scene.Group;
import javafx.animation.transition.PathTransition;
import javafx.animation.transition.OrientationType;
import javafx.animation.transition.AnimationPath;
import javafx.scene.shape.Path;

/**
 * @author JFDiMarzio
 */

 /* Create image variables */
var imagePath : String = "{__DIR__}images/butterfly.fxz";
var butterflyImage : FXDNode = FXDNode{url: imagePath;}
var groupImage : Group = butterflyImage.getGroup("group1");
var butterfly  : ImageView;
var background : ImageView;
/* END Create */
/* Set images */
butterfly = (butterflyImage.getNode("butterfly") as ImageView);
background = (butterflyImage.getNode("background") as ImageView);
/* End Set */

/* Move butterfly to y0 */
butterfly.y = 0;

/* Initial shape to move butterfly around */
def pathShape  = [
    MoveTo {x : 150.0, y : 150.0}
    ArcTo {x : 350.0, y : 350.0, radiusX : 150.0, radiusY : 300.0}
    ArcTo {x : 150.0, y : 150.0, radiusX : 150.0, radiusY : 300.0}
    ClosePath{}
];
/* Path definition */
def butterflyPath : Path = Path{
    elements: pathShape
}

/* Animation */
PathTransition{
    node: butterfly
    repeatCount: Timeline.INDEFINITE
    duration: 10s
    orientation: OrientationType.ORTHOGONAL_TO_TANGENT
    interpolate: true
    path: AnimationPath.createFromPath(butterflyPath)
    }.play();

Stage {
      title : "MyApp"
      onClose: function () {  }
      scene: Scene {
            width: 800
            height: 600
            content: [ groupImage ]
      }
}
Compile the preceding code and run it in the default profile. You will see the image of the butterfly animated around an elliptical path.
Try This Create a Path Animation
In the previous chapters, the “Try This” sections have focused on added functionality that may not have been directly covered in the chapter. However, the skills covered in this chapter are so important that this section will focus on enhancing these skills.
Create a new project and add an image or shape to it. Then, try creating your own path along which you will animate the image. Experiment with paths of different sizes and lengths. Adjust the speed of your Timelines to change the feel of the animation.
The more you are comfortable with the animation capabilities of JavaFX, the better your applications will be.
 Chapter 8 Self Test
1. Why is timing important to animation?
2. What controls the timer in JavaFX animation?
3. What does a Timeline take in as a parameter?
4. How do you start the Timeline?
5. True or false? The transition notation tells the Timeline to build all the values between the ones specified in your keyframes.
6. Which parameter sets the number of times a Timeline executes?
7. What is the purpose of ClosePath()?
8. A path is created from a group of what?
9. What function is used to create an AnimationPath from a Path node?
10. Which Orientation Type will change the orientation of the node as it moves along the path?