
Chapter 11
Custom Nodes and Overriding
• Implementing Node
• Creating a custom node
• Overriding default Node properties
JavaFX comes with many great tools. Throughout this book you have learned about shapes, effects, and swing components—to name a few. However, what if you find that the nodes in JavaFX do not quite fit what you need? There is another way to get exactly what you need from JavaFX: You can always make a node that does exactly what you need. This can be by overriding an existing node or by creating an entirely new one. In this chapter you learn about both methods for getting precisely what you need out of JavaFX.
First, let’s discuss overriding an existing node.
Overriding a Node
Before you can learn about overriding a node, a critical question needs to be answered. What is overriding?
Classes, such as Node and SwingComboBox, contain methods and properties. You as a developer can take these methods and properties and change their default actions to whatever you want. For example, let’s say you have a Dog class with a method called displayBreed(), as shown here:
public class Dog{
 public function displayBreed(){
      println("Chihuahua");
 }
}
You can extend this class and override the displayBreed() method to say something different, as follows:
public class MyDog extends Dog{
 override function displayBreed(){
      println("Elkhound");
 }
}
public class YourDog extends Dog{
}
In this example, a call to Dog.getBreed() would print the line “Chihuahua.” A call to YourDog.getBreed() would also print “Chihuahua.” However, because MyDog overrides the getBreed() method, a call to MyDog.getBreed() would print “Elkhound.”
Using overriding, you can create nodes with new or expanded functionality. In the following section you create a new SwingButton using overrides. To prepare for this exercise, create two new, empty JavaFX scripts. Name the first file Chapter11.fx. It should appear as follows:
/*
 * Chapter11.fx
 *
 * v1.0 - J. F. DiMarzio
 *
 * 6/23/2010 – created
 *
 * Custom Nodes and Overriding
 *
 */

package com.jfdimarzio.javafxforbeginners;

/**
 * @author JFDiMarzio
 */
Name the second file RoundButton.fx. It should appear as follows:
TIP
It is important to ensure both files are in the same package; this will make it easier to use RoundButton.fx inside Chapter11.fx.
/*
 * RoundButton.fx
 *
 * v1.0 - J. F. DiMarzio
 *
 * 6/23/2010 – created
 *
 * A Round Button using a SwingButton
 *
 */

package com.jfdimarzio.javafxforbeginners;

/**
 * @author JFDiMarzio
 */
You will be using both these files in the following section.
Creating a RoundButton
In this section you create a new node, called RoundButton, that extends the SwingButton and overrides it to create a round button. You will create a round button that has two “modes.” In one mode, the text of the button is a plus sign (+) and in the other mode the text is a minus sign (−).
To begin, open the RoundButton.fx file you created earlier. Create a RoundButton that extends SwingButton, as follows:
public class RoundButton extends javafx.ext.swing.SwingButton{

}
If you were to just stop here, you would have a fully functional SwingButton named RoundButton. You would be able to use this button in your script as you would any SwingButton.
This button works with so little code because you are telling it to extend the functionality of the SwingButton into RoundButton. Therefore, all the methods and properties of SwingButton will now be a part of RoundButton. In its current state, the round button looks and acts exactly like SwingButton.
However, for this example you want to create a button that is round. Therefore, you need to add code to the RoundButton class that will make the button round. In Chapter 10 you used the clip attribute to make a button round. You can apply the same technique here by overriding the clip attribute of SwingButton in RoundButton to always make the button round. Here’s the code:
javafx.scene.shape.Circle;

   override var clip = Circle {
       centerX: 18,
       centerY: 12
       radius: 8
      };
This code serves the same function as it did in Chapter 10. You are still using a circle as a clip region to make this button round. The difference is that, by overriding the clip attribute to make the button round, you don’t need code when you use button in your script. No matter how many times you use the button, or where you put it, it will always be round.
Next, you are going to create an entirely new attribute named buttonType. This new attribute would only appear in RoundButton. The purpose of this new attribute is to let the user choose whether the button text should be + or −. A buttonType of 1 would set the text of RoundButton to +, whereas a buttonType of 0 would set the text of RoundButton to −.
Set up a var named type. This var holds the value of buttonType when the user sets it:
var type:String = '-';
The buttonType attribute calls the type var and sets it accordingly:
      public var buttonType:Number on replace{
            if (buttonType == 1){
                 type = '+';
            }else{
                 type = '-';
            }
        };
Let’s take a look at this code. The code sets up a new public var named buttonType. Because the user will be setting this attribute to either 1 or 0, buttonType is typed as a Number. Although it is possible to have typed it as a Boolean, such a declaration would not make sense in this case. If the var were named isButtonTypePlusSign, that would be more useful as a Boolean. As it stands now, the buttonType should be a Number.
When the user does set buttonType, you want set the var type to either + or −. However, by default, a var cannot execute code. Variables only hold values; they do not execute code. You can force the attribute to execute code when its value is set by using the “on replace” trigger.
NOTE
The “on replace” trigger can hold a block of code that runs when the value in the associated attribute is set.
Within the block of code that the on replace trigger will execute, you can use an if…else statement. The if…else statement tests an expression for a true or false outcome. If the expression evaluates as true, one block of code will execute; if it does not, a different block will execute.
In this case, you are checking the value of buttonType in the if statement. If buttonType is 1, the expression evaluates as true and type is set to +. If buttonType is 0, the expression evaluates to false and type is set to −.
The final step in creating the RoundButton is to set the text attribute. Simply override the text attribute and bind it to type. This will ensure that whenever buttonType is set, the text attribute will change accordingly. When buttonType is set to 1, the text of the button will automatically be set to +. When buttonType is set to 0, the text of the button will automatically be set to −.
The finished script should look like this:
/*
 * RoundButton.fx
 *
 * v1.0 - J. F. DiMarzio
 *
 * 6/23/2010 – created
 *
 * A Round Button using a SwingButton
 *
 */

package com.jfdimarzio.javafxforbeginners;

import javafx.scene.shape.Circle;

/**
 * @author JFDiMarzio
 */

public class RoundButton extends javafx.ext.swing.SwingButton{
    var type:String = '-';

   override var clip = Circle {
       centerX: 18,
        centerY: 12
       radius: 8
      };

   public var buttonType:Number on replace{
            if (buttonType == 1){
                 type = '+';
             }else{
                 type = '-';
            }
        };

   override var text = bind type;
}
Unlike the other examples you have built in this book, you cannot compile and run this script as it is. What you have right now is a class that can be called from another script. This is the reason you created two empty script files at the beginning of this chapter. Let’s add some code to the second file, Chapter11.fx, to call and use the new RoundButton you’ve made.
Create a Stage and Scene in the Chapter11 script file as follows:
import javafx.stage.Stage;
import javafx.scene.Scene;

Stage {
      title : "Override Node"
      onClose: function () {  }
      scene: Scene {
            width: 200
            height: 200
            content: [   ]
      }
}
Now all you have to do is call your new RoundButton from the content of the Scene. This is very easy to do. You can call RoundButton just as you would any other node. In this example, call RoundButton and set buttonType to 1:
RoundButton{
                    buttonType:1;
                     layoutX:0
                     layoutY:0
                }
This will create a round button with + as the text. The full script looks like this:
/*
 * Chapter11.fx
 *
 * v1.0 - J. F. DiMarzio
 *
 * 6/23/2010 – created
 *
 * Custom Nodes and Overriding
 *
 */

package com.jfdimarzio.javafxforbeginners;
import javafx.stage.Stage;
import javafx.scene.Scene;

/**
 * @author JFDiMarzio
 */
Stage {
      title : "Override Node"
      onClose: function () {  }
      scene: Scene {
            width: 200
            height: 200
            content: [RoundButton{
                    buttonType:1;
                     layoutX:0
                     layoutY:0
                 }
                 ]
      }
}
NOTE
Some nodes, this RoundButton included, render differently on Mac and PC. Take this into consideration when comparing your results with those in the images in this chapter.
Compile and run this script. You will see a round button like the one shown in Figure 11-1.
To see one of the advantages of overriding an existing node to create your own, add a second button with a buttonType of 0, as follows:
 /*
  * Chapter11.fx
  *
  * v1.0 - J. F. DiMarzio
  *
  * 6/23/2010 – created
  *
  * Custom Nodes and Overriding
  *
  */

package com.jfdimarzio.javafxforbeginners;

import javafx.stage.Stage;
import javafx.scene.Scene;

/**
 * @author JFDiMarzio
 */
Stage {
       title : "Override Node"
       onClose: function () {  }
       scene: Scene {
            width: 200
            height: 200
            content: [RoundButton{
                     buttonType:1;
                     layoutX:0
                     layoutY:0
                 }
                RoundButton{
                     buttonType:0;
                     layoutX:0;
                     layoutY:20;
                 }
                 ]
      }
}

Compile and run this script to produce the two buttons shown in Figure 11-2.
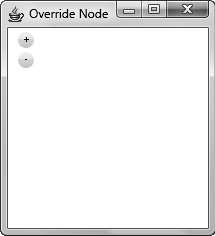
Figure 11-2 A second RoundButton
It becomes very easy now to add multiple instances of nodes. If you know you will be adding multiple instances of a node, it is best to use this technique.
But what if you want to add a node that is unlike anything currently offered to you in JavaFX? For this you need to create your own custom node.
Creating a Custom Node
What happens if you need a node that does not exist yet? That is, what if you want to do something in your application that would be much easier with a node that, unfortunately, is not available in JavaFX. This is a very real situation you will most likely run into over the course of your time programming in any language—JavaFX included.
When these situations arise, your best bet is to create your own node. JavaFX gives you an easy method for creating nodes that otherwise do not exist. You can create a node that will do exactly what you need it to do. Thus, you have complete control over this new node—what it will do, what it will look like, and how it will be used.
In the last section you created a class that extended SwingButton. In doing so, your new class inherited all the attributes and methods of SwingButton. However, now you want to make a node that is not only a button. Therefore, you can create a class that extends CustomNode, which will give you a clean node to begin building your class.
In this section you are going to create a new custom node that allows you to take notes. This node will have a text box for entering a note, a round button for adding the note, and a text area for displaying all the notes.
To begin, create a new, empty JavaFX script, as follows:
/*
 * Notes.fx
 *
 * v1.0 - J. F. DiMarzio
 *
 * 6/23/2010 – created
 *
 * A Custom Node that uses RoundButton
 * – SwingTextField, and Text
 *
 */

package com.jfdimarzio.javafxforbeginners;

/**
 * @author JFDiMarzio
 */
public class Notes extends CustomNode{

}
Notice that the Notes class extends CustomNode. This gives you a blank node to begin building on. Now let’s create a list of what we need to add to the Notes class to create a note-taking node:
• A variable to hold the note text
• A SwingTextField to enter the note text
• A RoundButton to add the note
• A Text node to display all the notes taken
The first item on the list is to create a variable to hold the note text. This will give the Text node something to bind to when displaying a list of notes. To begin, create a var named notetext:
public class Notes extends CustomNode{
    var notetext: String;
}
Now, create a SwingTextField that you will use to enter your notes:
javafx.scene.CustomNode;

public class Notes extends CustomNode{
    var notetext: String;
    var newNote : SwingTextField =  SwingTextField {
      columns: 10
      text: "Add new note"
      editable: true
        }
}
So far this has been pretty straightforward. However, now you need to tackle some work that has not been covered yet. How do you display this SwingTextField? CustomNodes do not hold Scenes and Stages in the way you are used to working with them. Rather, nodes are created and used in scripts.
All nodes have a create method. This method returns a node or group of nodes to whatever is calling (or creating) the node. For example, if you use a Text node in a Scene, the Scene calls the create method of the Text node. The create method does whatever work is needed to create the Text node and returns the created Text node to the Scene.
Therefore, to create your new Notes node, you will need to override the CustomNode’s create method to return your new group of nodes:
javafx.ext.swing.SwingTextField;

public class Notes extends CustomNode{
    var notetext: String;
    var newNote : SwingTextField =  SwingTextField {
      columns: 10
      text: "Add new note"
      editable: true
        }

    override function create():Node{
}
}
NOTE
Notice that the create() method is typed as :Node. This tells you that the result of create returns a node.
You will be returning a group of nodes through the create function because you are displaying more than one node to the screen. In fact, you are displaying three different nodes. Let’s start building the create method.
The create method needs to build all three nodes as well as supply the action for the RoundButton to add notes. This is a fairly easy process. First, create the Node group:
javafx.scene.Group;

    override function create():Node{
         return Group{
             content:[
            ]
        }
    }
Notice that the group contains a content attribute. All the nodes you want to return will go within this content. Start by adding your newNote SwingTextField:
    override function create():Node{
         return Group{
             content:[
                newNote,
            ]
        }
    }
Now, let’s create a RoundButton. This is the same RoundButton you created in the last section of this chapter. Because this button is used for adding notes, set the buttonType to 1; this will create a button with + as the text. Additionally, you need to create an anonymous function for the button’s action. The purpose of this function is to take the text of the SwingTextField and add it to the notetext variable being displayed:
    override function create():Node{
         return Group{
             content:[
                newNote,
                RoundButton{
                     layoutX: 150;
                     layoutY: 0;
                     buttonType:1;
                     action: function(){
                       notetext = "{notetext}
  {newNote.text}";
                     }
                }
        ]
   }
}
The only difference you see here with the implementation of the RoundButton is the addition of the action anonymous function. This function sets notetext to the current contents of notetext plus a newline character ( ) and the current text of the newNote text field. This displays each note entered on a new line, like this:
Note #1
Note #2
Note #3
Now, all you have to do is create a new Text node to display notetext. Simply create a Text node whose context is bound to notetext:
 Text{
       x: 0;
       y: 35;
       content: bind notetext;
 }
Binding the content of the Text node will ensure that when notetext is updated by the RoundButton, the latest updates are displayed directly to the Text node. So with very little effort you have created a new node that takes and displays notes. The final script for Notes.fx should appear as follows:
/*
 * Notes.fx
 *
 * v1.0 - J. F. DiMarzio
 *
 * 6/23/2010 – created
 *
 * A Custom Node that uses RoundButton
 * – SwingTextField, and Text
 *
 */

package com.jfdimarzio.javafxforbeginners;

import javafx.scene.CustomNode;
import javafx.scene.text.Text;
import javafx.scene.Node;
import javafx.scene.Group;
import javafx.ext.swing.SwingTextField;

/**
 * @author JFDiMarzio
 */

public class Notes extends CustomNode{
    var notetext: String;
    var newNote : SwingTextField =  SwingTextField {
      columns: 10
      text: "Add new note"
      editable: true
        }

    override function create():Node{
         return Group{
             content:[
                newNote,
                RoundButton{
                     layoutX: 150;
                     layoutY: 0;
                     buttonType:1;
                     action: function(){
                       notetext = "{notetext}
  {newNote.text}";
                     }
                 }

                 Text{
                    x: 0;
                    y: 35;
                    content: bind notetext;
                }
            ]
        }
    }
}
With the Notes.fx script completed, it is time to use it. Edit the Chapter11.fx file you used in the last section to display the Notes class rather than RoundButton. Your new Chapter11.fx script should look like this:
/*
 * Chapter11.fx
 *
 * v1.0 - J. F. DiMarzio
 *
 * 6/23/2010 – created
 *
 * Custom Nodes and Overriding
 *
 */

package com.jfdimarzio.javafxforbeginners;

import javafx.stage.Stage;
import javafx.scene.Scene;


/**
 * @author JFDiMarzio
 */

Stage {
    title: "Override Node"
    onClose: function () {
     }
     scene: Scene {
         width: 200
         height: 200
         content: [Notes {
            }
        ]
     }
}
Compile and run this script. You should see your custom node, as shown in Figure 11-3.
/*
 * Chapter11.fx
 *
 * v1.0 - J. F. DiMarzio
 *
 * 6/23/2010 – created
 *
 * Custom Nodes and Overriding
 *
 */
package com.jfdimarzio.javafxforbeginners;

import javafx.stage.Stage;
import javafx.scene.Scene;

/**
 * @author JFDiMarzio
 */
Stage {
    title: "Override Node"
    onClose: function () {
     }
     scene: Scene {
         width: 200
         height: 200
         content: [Notes {
            }
        ]
     }
}
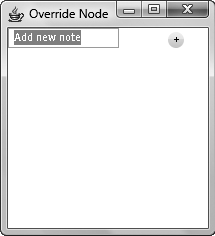
Figure 11-3 The custom Notes node
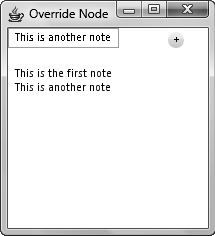
Figure 11-4 The Notes node with notes entered
This custom node is set up with a text field for you to enter notes in and a button to add the notes. Enter a few notes, hitting the + button after each note. You should see your notes stack up as shown in Figure 11-4.
Try This Create Your Own Shapes
In this chapter you used a mask to create a round button. For an added challenge, try this exercise to expand your knowledge. Create a new project and, using the skills you gained from this chapter, create different shapes of different nodes. Experiment with triangular buttons, rounded-corner text boxes, and other nontraditional shapes. Then, using the RoundButton example, create a custom node of your new shape and use it in a Scene.
In the next chapter you will learn how to embed music and videos in your scripts.
 Chapter 11 Self Test
1. What process lets you take methods and properties from one class and change their default actions and behaviors?
2. When you’re creating a class, what keyword forces your class to inherit the methods and properties of another?
3. In the following example, what will a call to YourDog.displayBreed print?
  public class MyDog extends Dog{
  override function displayBreed(){
  println("Elkhound");
  }
  }
  public class YourDog extends Dog{
  }
4. True or false? Ensuring that your files are all in the same package will make referencing them easier.
5. True or false? After inheriting from a class, only attributes you override are available to you in another class.
6. What trigger will execute when an attribute changes?
7. What statement will take an expression for a true or false result and then execute code accordingly?
8. True or false? You have to call a custom-created node from a script to use it.
9. What node do you inherit from to create a custom node?
10. What method of CustomNode do you override to return your node to the calling script?