
17. Basic Wireless Application Distribution Background and Setup
In previous chapters, we’ve talked about various methods of configuring devices. However, there’s a large part of the iOS universe beyond configuration: apps, including in-house enterprise applications and those that are available on the App Store. So in this and the next few chapters, we’ll explore wireless application distribution: what’s involved, what’s needed, and some strategies, both inside and outside of Mobile Device Management.
Background and Requirements for Wireless App Distribution
The idea seems simple enough: You have n iOS devices and m apps, and you want to install those apps onto the device. It’s a simple process via USB, but that solution doesn’t scale well. Using USB and the iPhone Configuration Utility (iPCU) gets old quick if you have more than a handful of devices.
Clearly, you want to be able to distribute those apps wirelessly; it’s the only way that makes sense.
First, you’ll need to be a member of the iOS Developer Enterprise Program. To do so, you’ll need to have a DUNS, or Dun & Bradstreet Number. (For information about DUNS, see http://en.wikipedia.org/wiki/Data_Universal_Numbering_System.) An Enterprise membership will cost you about $300 a year.
Keep in mind that we’re talking about creating and distributing in-house, aka enterprise, apps, not App Store apps. Because you can’t easily buy those, you’ll need to have iOS developers on staff or hire them to program your apps. (That seems obvious, but I’m old enough to remember when people were astonished that you needed a computer to use either the Internet or Windows 95. So, I try to assume that the obvious isn’t always obvious.)
Once that’s done, your developers (if they aren’t you) will have to go to the iOS Portal and create the various distribution certificates and provisioning profiles you’ll need. You may also have to register your iOS devices with Apple in the provisioning portal; you can perform a bulk upload of devices via a tab-delimited file. Remember that when you provision an in-house application, you provision it to the device. For that to happen, the device may have to be registered. (Chapter 4 includes more details about this.)
Obviously, you’ll need to have actual apps and their associated provisioning profiles (or a company profile for all your devices and apps) so that you have something to distribute. And finally, you’ll need a means to distribute them.
Now that you know the requirements and methods of wireless app distribution, why don’t we set up a simple distribution server? Fortunately, it’s not that hard to do.
App Distribution Server Requirements
First, obviously, you’re going to need a web server, and preferably one that is secure. I’m of the opinion that if your server will store data you even vaguely care about, and you don’t want the server turned into a malware zombie, take the extra time to make it secure. At the very least, use SSL and a userid/password combo. On the app side, thanks to the way Apple manages in-house app distribution, it’s really hard to hack an app to install on a device that you haven’t registered.
Obviously, all your iOS Enterprise Developer setup must be done, including acquiring distribution certificates, provisioning profiles, and so on. You’ll also need (just as obviously) an app in an .ipa format and an XML manifest (which I’ll get into in just a moment). Finally, you need to ensure that any device using this server to download and install apps can also get to http://ax.init.itunes.apple.com and http://ocsp.apple.com. The first site handles file size limitation if the device is connecting to the server via cellular network, and the second verifies the validity of the distribution certificate and the provisioning profile.
Preparing the App
There’s not much to explain here, but let’s go through the process anyway. So, I created an iPad app that does nothing. Well, it has text. (Seriously, what I know about Objective C, other than how to spell it, is that it’s based on C and has the word “Objective” in it.) But, we don’t care about what the app does, just how to set it up and distribute it. So we’ll use our do-nothing app.
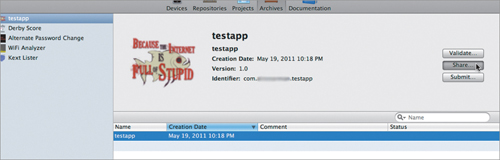
1. Archive the app so that it appears in the Organizer. (This is all in Xcode 4, by the way.)
2. Click the Share button (Figure 17.1).
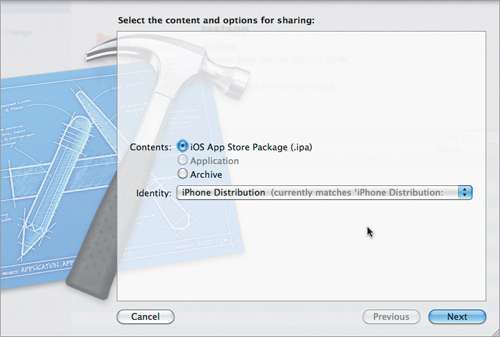
3. Make sure that Contents is set to iOS App Store Package (.ipa), and that your iPhone Distribution identity is enabled (Figure 17.2).
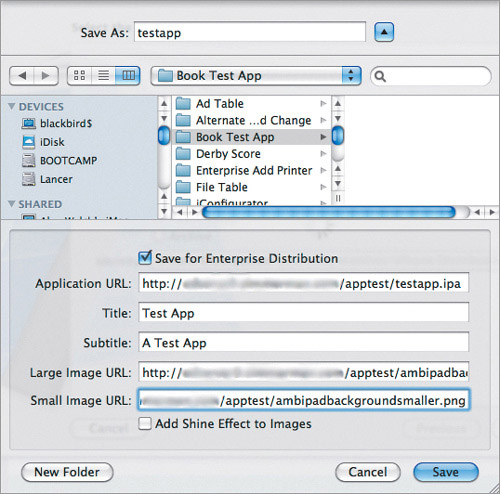
4. Make sure you enable the “Save for Enterprise Distribution” checkbox, and then click Next and save your app. This opens a new part of the save dialog (Figure 17.3) with fields for the application URL (the path to the .ipa file), the title and subtitle for the app URL, a link to a large (512 × 512 pixel) app image, and a link to a small (57 × 57 pixel) app image. There’s also an option to add a shine effect to the images.
Figure 17.3. Enterprise distribution save options
5. Click Save. When you’re done saving, you’ll see that two files were created: the app’s .ipa file, and a corresponding .plist file. The .plist file is just an XML file that contains the parameters you entered when you saved the app in the Xcode Organizer.
6. Copy the app and the .plist file to the desired location on your web server. See the following sample for an idea of what one .plist file looks like:
<?xml version="1.0" encoding="UTF-8"?>
<!DOCTYPE plist PUBLIC "-//Apple//DTD PLIST 1.0//EN" "http://www.apple.com/DTDs/PropertyList-1.0.dtd">
<plist version="1.0">
<dict>
<key>items</key>
<array>
<dict>
<key>assets</key>
<array>
<dict>
<key>kind</key>
<string>software-package</string>
<key>url</key>
<string>https://aserver.com/apptest/testapp.ipa</string>
</dict>
<dict>
<key>kind</key>
<string>full-size-image</string>
<key>needs-shine</key>
<false/>
<key>url</key>
<string>https://aserver.com/apptest/ambipadbackgroundlarge.png</string>
</dict>
<dict>
<key>kind</key>
<string>display-image</string>
<key>needs-shine</key>
<false/>
<key>url</key>
<string>https://aserver.com/apptest/ambipadbackgroundsmaller.png</string>
</dict>
</array>
<key>metadata</key>
<dict>
<key>bundle-identifier</key>
<string>com.bynkii.testapp</string>
<key>bundle-version</key>
<string>1.0</string>
<key>kind</key>
<string>software</string>
<key>subtitle</key>
<string>A Test App</string>
<key>title</key>
<string>Test App</string>
</dict>
</dict>
</array>
</dict>
</plist>
There’s really not much to the .plist. You’ve got the dict that describes the .ipa as a software package and passes the URL to the .ipa file. You’ve got the URLs to the two image files with the shine option settings. And finally, you’ve got some application metadata-like bundle-identifier, version, kind, and so on.
After you’ve saved the .ipa and the .plist files out of the Xcode Organizer and copied them to the desired location on your web server, you’re ready to build the page that will have the links needed to install the app on your iOS device.
Accessing the App Distribution Web Page
You really need only one thing here: the app URL. All the rest of your effort depends on how much work you want to do to make it look pretty.
The URL itself is a single line:
<a href="itms-services://?action=download-manifest&url=http://odserver3.zimmerman.com/apptest/testapp.plist"> Install Test App</a>
Notice that this URL doesn’t link to the .ipa file, but to the .plist file. That’s not a mistake, that’s how this works. Remember that the .plist file not only has the URLs for the .ipa file, but also for the image files you’ll need. Also, even though the href points to “itms-services,” the iTunes store isn’t involved.
That’s really all you need to allow a device to download this app: the one link and the files, of course. Once those are in place, people just navigate to the page and tap the URL to install the app.
Installing the App
As I said, the web page can be as pretty or as stark as your needs and environment dictate. All that has to be there is the correct link (Figure 17.4).
Figure 17.4. Simple page with app installation link

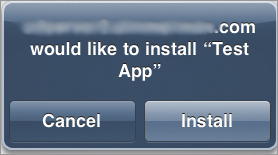
1. When you tap the link, a dialog appears stating that <server> would like to install <App name> (Figure 17.5).
Figure 17.5. Installation request dialog
2. Tap Install to start the download and installation. You’ll be taken to the device’s home screen, where you’ll see the customary loading icon (Figure 17.6).
Figure 17.6. Application loading

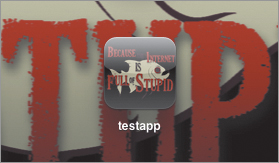
3. When the installation is completed, you’ll see a standard iOS app icon, ready to be tapped and opened (Figure 17.7).
Figure 17.7. Application installed
4. The first time you run the app, a dialog appears (Figure 17.8) asking if you really want to do that (something I appreciate, even though given the process, it’s probably unnecessary).
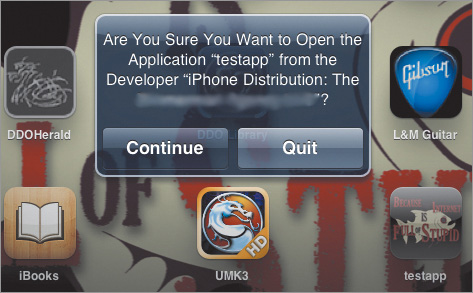
5. Tap Continue to start the app, and you’re off and running.
Wrapping Up
See? There’s really not much to the infrastructure here. Honestly, most of the work is in Xcode, and the server part of it is dead simple. In the next chapter, we’ll look at doing this using Mobile Device Management.