
9. Dynamic Sidebars and Widgets
• A user management plugin, which allows for user registration and gives me granular control over who can access what content. It lets me easily set up a group for each book so I can assign users to the books they have purchased.
• An e-commerce plugin specifically designed to connect to the user management plugin. This plugin lets me sell access to individual groups, thereby selling access to specific books.

Sidebars are probably my favorite feature to build into a WordPress theme. They provide the highest level of customization to the user admin, enabling him to easily add new widgets, rearrange elements, and more. They empower him to make significant changes to the layout of the theme with inherent WordPress functionality.
What you’re about to learn
• What sidebars and widgets are
• How to register sidebars
• How to add widgets
• How to create sidebar template files
• How to display dynamic sidebars
Sidebars and Widgets Defined
Sidebars and widgets are among the areas where WordPress needs to mature a bit. When theming for WordPress began, we utilized a very typical blogging design structure: the two-column layout. We’d put content on the left and a sidebar on the right. At that point, the term sidebar was very descriptive of its use. Today developers use sidebars and widgets in a variety of ways. Sidebars are placed throughout themes from headers to footers and everywhere in between.
In early 2012, I wrote an article calling for two major changes in the way sidebars are defined. First, we need to give sidebars a new name so we can refer to them intelligently and correctly. Second, we need to stop making them theme dependent.
Currently, it’s the web developer who defines (or registers) sidebars. When a sidebar is registered, the developer gives it a name and places widgets into it. Since the developer is in charge of naming and there’s no standard naming convention, the user admin risks losing all his widgets when he changes themes.
The solution I described in the article was to create widget locations that are a lot like menus. We’d allow the user admin to define widget holders and fill them with widgets. Then the developer would assign widget locations, which user admins could select to house their widget holders. For a more in-depth look at this recommendation, go to http://wdgwp/sidebars-defined.
For now, think of sidebars as widget holders. When a sidebar is registered, a widget holder appears in Appearance → Widgets. You can then drag your widgets into these holders. In the theme, you can call a WordPress function to display the sidebar by name. You’ll be in charge of defining the HTML markup structure for the sidebar and the widgets. This gives you more control over how and where these sidebars are defined.
There’s also a template page called sidebar.php that can house any amount of content but is meant to hold the output of the get_sidebar() function. You can define multiple sidebar template pages and call them as necessary.
Widgets are essentially WordPress plugins designed to create simple solutions for displaying dynamic content. Typical widgets include recent posts, recent comments, links, menus, and search boxes, among others. You can write your own plugins to create your own widgets. Remember that “widgets” is a term used throughout the Web and is not specific to WordPress. Clients and user admins will often request a Facebook widget on their site. You have to remember the difference between the two and recognize that you may in fact use a WordPress widget for a Facebook widget.
The text and HTML widget in WordPress is one of the more powerful in the list because it lets you enter anything you want. It’s easy to drop in a Facebook “Like” box, Twitter feed, or Flickr photo gallery.
Registering a Sidebar
Let’s jump back into our functions.php file for this one. Registering a sidebar is easy and consistent with everything we’ve already learned. The register_sidebar() function accepts the following parameters:
$args = array(
'name' => '', //Sidebar Display Name
'id' => '', //sidebar-slug
'description' => '', //description (usually of location or function)
'before_widget' => '', //HTML markup before the widget
'after_widget' => '', //HTML markup after the widget
'before_title' => '', //HTML markup before the widget title
'after_title' => '', //HTML markup after the widget title
);
Once you define the values of the above parameters, you need only pass them to the function like this:
register_sidebar( $args );
You can repeat the function above for as many sidebars as you need. However, the register_sidebars() (notice the pluralization) function lets us register several sidebars in one move. Registering multiple sidebars with a single function requires many of the parameters to be exactly the same, and this won’t work for our theme. Instead, we’ll repeat the register_sidebar(), passing different parameters as needed.
In Chapter 5, “Our First WordPress Website,” we outlined the location of five different sidebars:
• The advertisements in the header
• The sidebar on the right-hand side of the theme
• The area above the footer
• The footer text on the left
• The footer text on the right
This may seem like a lot of widgets for one theme, but the goal is to limit the number of elements that are hard coded or that require the user admin to know HTML. If you’re building a theme for yourself, your client, or your company, you’ll likely feel more comfortable maintaining more HTML elements.
Header Sidebar
The header sidebar is an easy way for the user admin to add advertisements to the header. Since this is a sidebar, the user admin will be able to add any widget to the header and will need to make sure he doesn’t break the theme. To create the first sidebar, insert the following code at the bottom of the functions.php file:
$j2theme_header_sidebar = array(
'name' => 'Header',
'id' => 'header',
'description' => 'Widgets placed here will display in the header to the
right of the logo',
'before_widget' => '',
'after_widget' => '',
'before_title' => '<h2>',
'after_title' => '</h2>',
);
register_sidebar( $j2theme_header_sidebar );
Notice the use of the prefix on the array name that is specific to the theme. This is a best practice for developers. We’re not adding values to the before and after widget parameters because we want to drop the widgets into a containing div with no additional code surrounding each widget or title.
Once you save this code, you’ll see a new sidebar in the Appearance → Widget section of the WordPress admin (Figure 9.1).
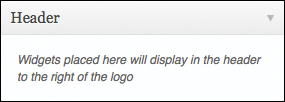
Figure 9.1. Header sidebar created in the WordPress admin.
Aside Sidebar
When registering the aside sidebar, pay close attention to the before and after widget parameters. Comparing this to output HTML makes it clear how these widgets will be generated:
$j2theme_aside_sidebar = array(
'name' => 'Aside',
'id' => 'aside',
'description' => 'Widgets placed here will go in the Right hand sidebar',
'before_widget' => '<div class="widget">',
'after_widget' => '</div><!-- class: widget -->',
'before_title' => '<h3 class="widgettitle">',
'after_title' => '</h3>',
);
register_sidebar( $j2theme_aside_sidebar );.
This code creates an aside sidebar in the admin directly below the header sidebar. The order in which the sidebars appear in the admin is dictated by the order in which they’re registered in the functions.php (Figure 9.2).

Figure 9.2. Aside sidebar created in the WordPress admin.
The HTML output from adding a recent posts widget to the aside sidebar is seen below. Notice that the output HTML is exactly as we had it in the register_sidebar() parameters.
<div class="widget">
<h3 class="widgettitle">Recent Posts</h3>
<ul>
<li><a href="http://localhost/j2-theme/hello-world" title="Hello
World">Hello World</a></li>
<li><a href="http://localhost/j2-theme/hello-world-again" title="Hello
World Again">Hello World Again</a></li>
<li><a href="http://localhost/j2-theme/hello-world-again-and-again"
title="Hello World, Again and Again">Hello World, Again and Again
</a></li>
<li><a href="http://localhost/j2-theme/goodbye-world" title="Goodbye
World">Goodbye World</a></li>
</ul>
</div><!-- class: widget -->
It’s important that the HTML is exactly as we created it in the template file, because we rely on the structure, class, and ID naming conventions to make sure the CSS correctly styles the content.
The next three widgets are very similar to the above two, but with changes in the parameter values.
Upper Footer Sidebar
The upper footer sidebar is shown in Figure 9.3.
$j2theme_upperfooter_sidebar = array(
'name' => 'Upper Footer',
'id' => 'upper-footer',
'description' => 'Widgets placed here will go in the upper footer area ',
'before_widget' => '<div class="widget">',
'after_widget' => '</div><!-- class: widget -->',
'before_title' => '<h3 class="widgettitle">',
'after_title' => '</h3>',
);
register_sidebar( $j2theme_upperfooter_sidebar );
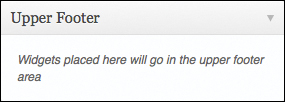
Figure 9.3. Upper footer sidebar created in the WordPress admin.
Left Footer Sidebar
The left footer sidebar is shown in Figure 9.4.
$j2theme_footer_lt_sidebar = array(
'name' => 'Left Footer',
'id' => 'left-footer',
'description' => 'Widgets placed here will go in the left column of the
footer',
'before_widget' => '',
'after_widget' => '',
'before_title' => '<h3 class="widgettitle">',
'after_title' => '</h3>',
);
register_sidebar( $j2theme_footer_lt_sidebar );
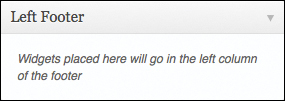
Figure 9.4. Left footer sidebar created in the WordPress admin.
Right Footer Sidebar
The right footer sidebar is shown in Figure 9.5.
$j2theme_footer_rt_sidebar = array(
'name' => 'Right Footer',
'id' => 'right-footer',
'description' => 'Widgets placed here will go in the right column of the
footer',
'before_widget' => '',
'after_widget' => '',
'before_title' => '<h3 class="widgettitle">',
'after_title' => '</h3>',
);
register_sidebar( $j2theme_footer_rt_sidebar );
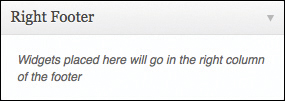
Figure 9.5. Right footer sidebar created in the WordPress admin.
Adding Widgets
Now that the sidebars are in place, we need to fill them with widgets. Feel free to use any widgets you want for testing purposes. Once you add the widgets to the sidebars, you can remove them, rearrange them, or save them simply by dragging them (Figure 9.6).
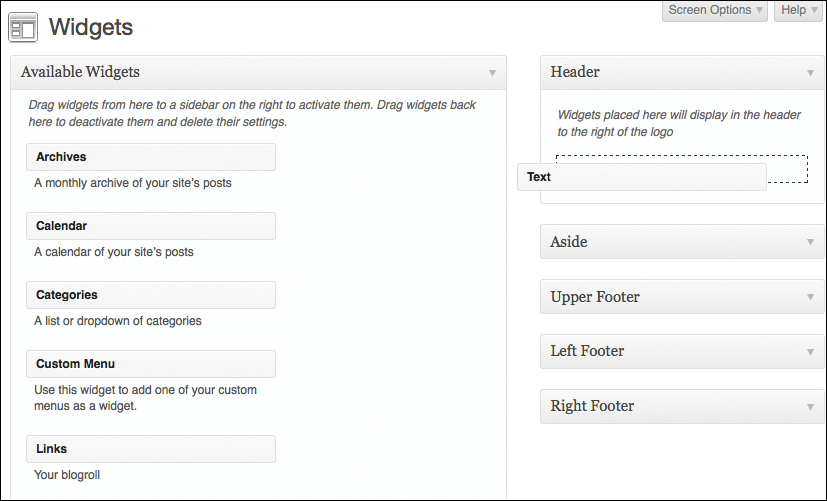
Figure 9.6. Adding widgets to the sidebars.
As of WordPress 3.4, you’ll be able to drag widgets into the Inactive Widgets area (Figure 9.7) to be reimplemented later. There’s also an Inactive Sidebars section that will make it easier to restore a sidebar if your new theme no longer supports it. This is a great step in the right direction for better widget utilization.
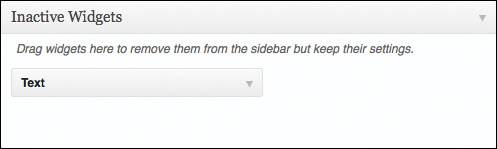
Figure 9.7. Inactive widgets area.
get_sidebar();
Having five sidebars to implement throughout the theme might get a bit confusing. To help alleviate that confusion, I’ve commented the template files pretty heavily. Look for the comments seen below to help you place the get_sidebar() functions throughout the template files:
<!-- Start get_sidebar() -->
<!—End get_sidebar() -->
Everything in between those comments, including the comments themselves, should be replaced with:
<?php get_sidebar(); ?>
The get_sidebar() function locates sidebar.php in the theme files and replaces the function with everything inside that file. Sidebar.php acts as the default sidebar and houses the aside sidebar. We’ll also create sidebar files with specific names for each sidebar location.
Take a second to create the following files:
• sidebar-header.php
• sidebar-upper-footer.php
• sidebar-lt-footer.php
• sidebar-rt-footer.php
We’ll call these files using the get_sidebar() function, but this time we’ll pass a parameter that matches the file name (after “sidebar-” and without .php). Utilize the following code to call the respective sidebars in the correct locations in all of the template files:
<?php get_sidebar( 'header' ); ?> <!-- sidebar-header.php -->
<?php get_sidebar( 'upper-footer' ); ?> <!-- sidebar- upper-footer.php -->
<?php get_sidebar( 'lt-footer' ); ?> <!-- sidebar-lt-footer.php -->
<?php get_sidebar( 'rt-footer' ); ?> <!-- sidebar-rt-footer.php -->
Now that we’re calling the sidebar template files correctly, we need to actually pull the dynamic sidebars into these files.
dynamic_sidebar()
In true WordPress development fashion, the call to pull in the dynamic sidebars is as easy as calling the dynamic_sidebar() function and passing it a parameter. The parameter we’re passing is the name of the sidebar that we chose when we registered it. Don’t pass the slug; use the full name of the sidebar:
<?php dynamic_sidebar( 'Header' ) ; ?> <!-- Place into sidebar-header.php -->
<?php dynamic_sidebar( 'Aside' ); ?> <!-- Place into sidebar.php -->
<?php dynamic_sidebar( 'Upper Footer' ); ?> <!-- Place into sidebar-upper-
footer.php -->
<?php dynamic_sidebar( 'Left Footer' ); ?> <!-- sidebar-lt-footer.php -->
<?php dynamic_sidebar( 'Right Footer' ); ?> <!-- sidebar-rt-footer.php -->
Once you’ve placed the dynamic_sidebar() functions into the correct sidebars, you’ll see the widgets appear throughout the WordPress website. You now have full control over the widget areas and these sidebars. Feel free to add, remove, or rearrange widgets at will.
What’s Next?
Chapter 10, “Single,” is all about the single.php template file, which is used for posts. We’ll create a loop made just for a single post item, pull in metadata, and even display comments and a comment form.