
7. Menus and Navigation
Before menus, dynamic navigation wasn’t fun. You’d typically list pages, then categories, and rely on their hierarchies and status to dictate the menus and the existence of nav items. It wasn’t easy to create custom navigation.
Today you can simply drag and drop nav items as you see fit. As a theme developer, you can define menu locations so the user admin can create menus and define where they will exist in the website. You can also customize the HTML that’s output when your menu is called in the theme. Effective use of menus in your theme will benefit the user admin greatly and make for a better product.
What you’re about to learn
• How menus and WordPress navigations function
• How to register menus
• Best practices for displaying menus and outputting HTML
• Site navigation management and editing
How Menus Work
As with every aspect of WordPress, there are two sides to every bit of functionality. User admins are in charge of creating the menus and filling them with nav items. You, as the developer, are in charge of defining menu locations and how the HTML will be output. Once the locations are defined, the user admin can place menus in your locations via a drop-down menu.
In Chapter 4, “WordPress Theming Basics,” we pulled a menu into our basic theme using the default settings. The lack of defined menu locations in our basic theme required us to call the menu by name. This in turn requires the user admin to know the name used in the call and use it correctly. Menu locations eliminate the possibility of errors for the user admin because he can name a menu however he wants, then later just assign it to a location in the theme.
Registering a Menu Location
You should have your static J2 Theme activated, which means you can’t actually see the Menus tab under Appearance because we have an empty functions.php file. As discussed in Chapter 4, you have to activate the menu function in WordPress. To save time, we’ll define our menu locations now as well.
The WordPress register_nav_menu() function simultaneously defines a single menu location to be used in the theme and turns on menu functionality. (You can read more about this function at http://wdgwp.com/register_nav_menu.) Below is an example of this function and how we plan to use it:
register_nav_menu( 'your-menu-handle', 'Your Menu Label' );
The first parameter is the menu handle; best practices call for all lowercase letters with words separated by hyphens. The second parameter is the label, which is what the user admin will see. It’s best to remain semantic and clear with your definitions.
We have three menu locations to define in our J2 Theme. Figure 7.1 shows the main nav in the header bar at the very top, the categories listed just above the main content, and another nav in the footer.
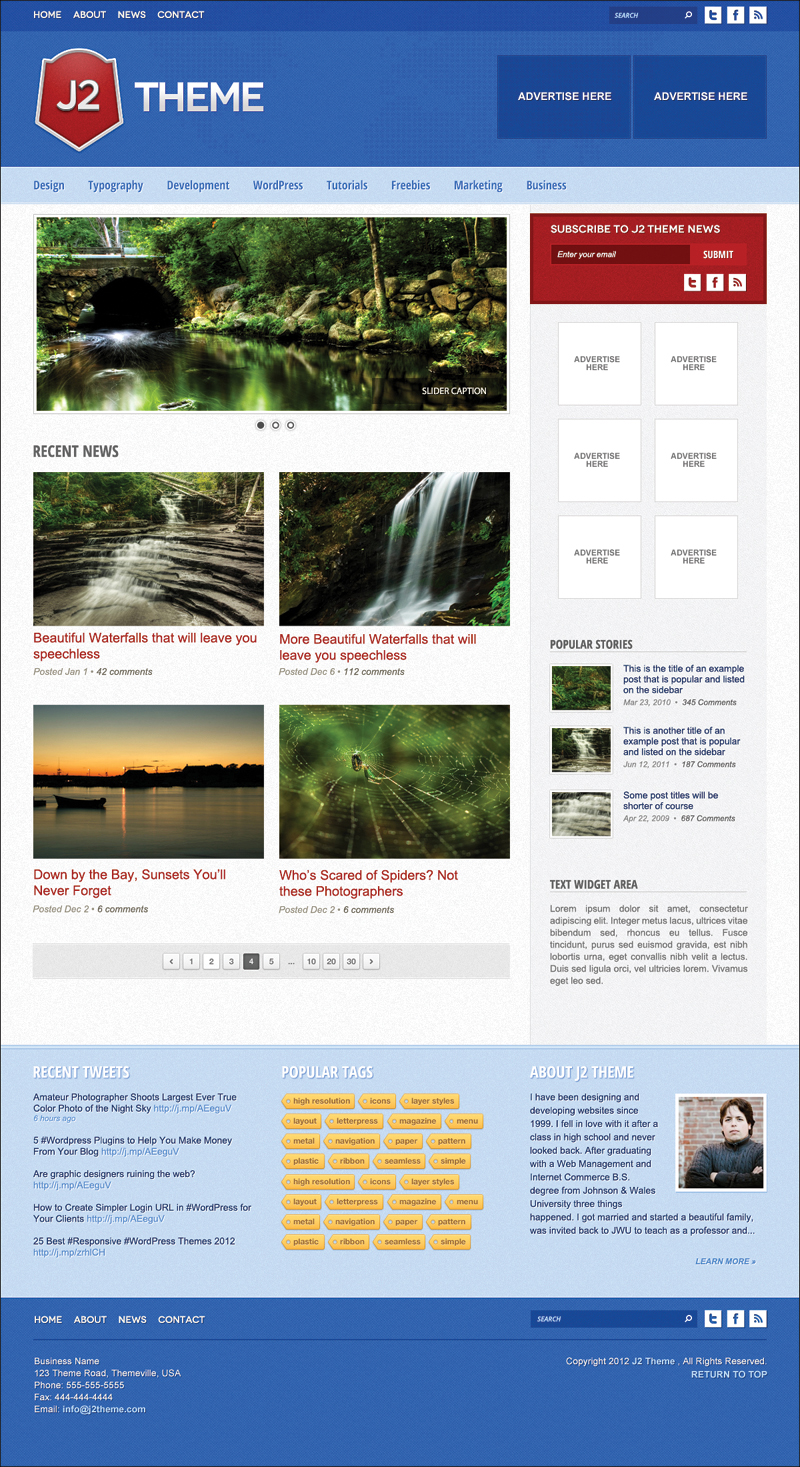
Figure 7.1. Theme home page.
Registering Multiple Menu Locations
The following code is a little different than what we’ve seen before because we’re declaring several locations at once. The register_nav_menus (notice “menus” is plural this time) function lets us pass an array in order to declare multiple locations at a time. (You can read more about this function at http://wdgwp.com/register_nav_menus.)
register_nav_menus(
array(
'main-nav-header-top' => 'Main Nav, Top of Header',
'sub-nav-header-bottom' => 'Sub Nav, Bottom of Header',
'footer-nav' => 'Footer Menu'
)
);
If you’re not a PHP pro, that’s OK—just know that an array is a datatype with multiple values. You can see the pattern in the code and make sense of it regardless of your development background.
When you place the above code directly into the functions.php file, you’ll see an immediate result in the WordPress admin. The menu functionality will be turned on and your locations will be available to fill with menus. You won’t see your menu Theme Locations yet, but they’ll appear once we create our first menu (Figure 7.2).
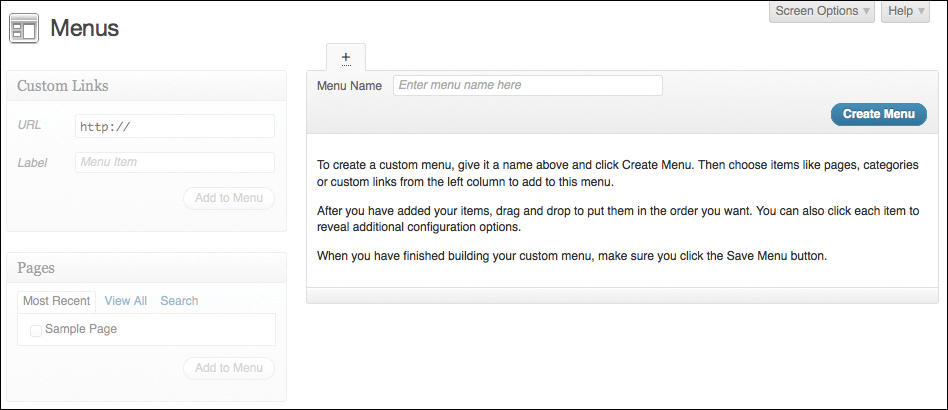
Figure 7.2. WordPress admin—menus.
With our menu locations in place, we can begin to appreciate the beauty of menus. They are theme independent, which means that a user admin can apply a lot of time to his menus with no risk of losing them when switching themes. The most that’s required of a user admin is to go back into the Menus tab and select the menu’s location from the Theme Location drop-down menu.
Creating a Menu
The next step is to create the actual navigation menu. Enter your menu name in the Menu Name field, then click the Save Menu button to the right (Figure 7.3). Once you do this, you’ll be notified of the creation of your menu and the menu locations will appear on the left.
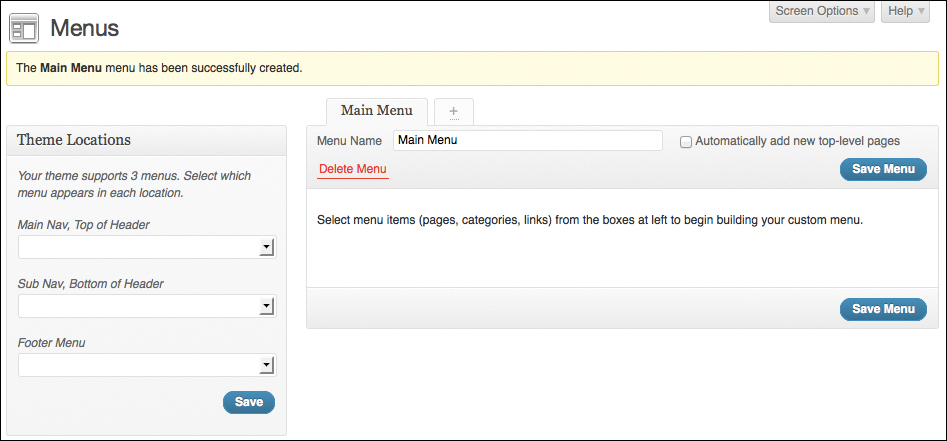
Figure 7.3. WordPress admin—menus with locations.
After we installed WordPress, we ran through the creation of content and built out some sample pages, posts, and categories, and even added some tags. This is all helpful now because there are several items to add to the menu. Nothing you do now will be set in stone; you can change your menus at any time, so feel free to create a temporary navigation at this point.
Once the menu exists, all you have to do is select nav items from the left to be added to the menu on the right. As you can see in Figure 7.4, I’ve selected several pages to be added to my Main Menu. I’ve also created a custom link, which in this case points to my Twitter page. Once I click the corresponding Add to Menu buttons these nav items will be listed on the right in my menu.

Figure 7.4. WordPress admin—adding nav items.
With these nav items in place you can simply drag and drop to rearrange them, as shown in Figure 7.5. You can also create nav hierarchies by placing nav items underneath one another. While you’re free to create great-great-grandchildren, it’s best to plan for a drop-down with no more than one additional drop-down. This would be a three-tier navigation. Later we’ll define the depth in which to display the nav items.
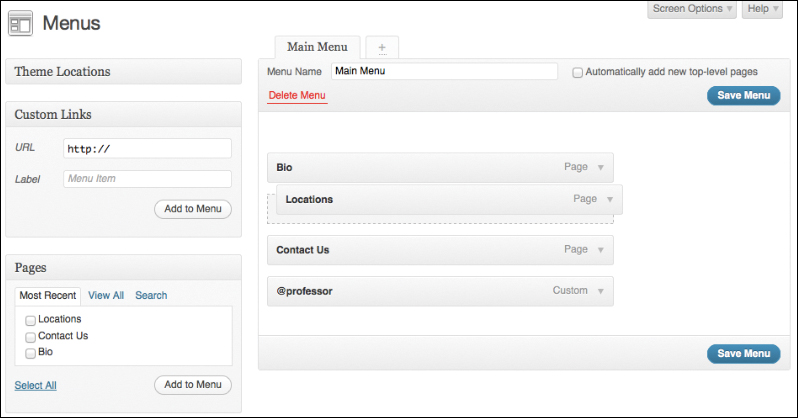
Figure 7.5. WordPress admin—dragging nav items.
By selecting Screen Options at the top, you can view additional options that let you open nav items in new windows, add specific CSS classes, and more.
The final step in the admin, before we actually output the HTML, is to assign menus to their respective locations. I’ve created an additional menu called Sub Menu and filled it with categories (Figure 7.6). Under Theme Locations you’ll see the three locations we defined earlier in our functions.php file. Each location has a drop-down menu with a list of menus we created on the right.
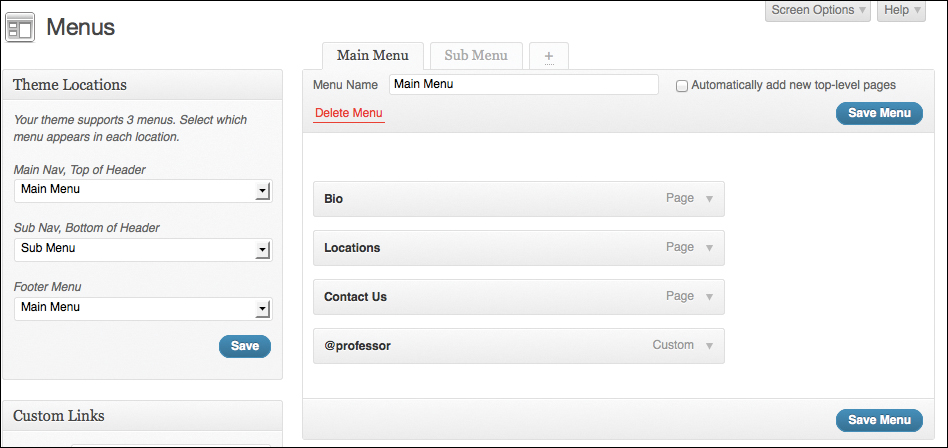
Figure 7.6. WordPress admin—adding theme locations.
Simply select the desired menu in the drop-down and click Save. In this example I’ll be using Main Menu twice: once in the header and once in the footer. Later I can define their specific HTML elements, depth, and more, which will allow the same nav items to appear differently to the user.
Theme Integration
So far we’ve turned on menu functionality, defined menu locations, created menus, and assigned them to their locations. However, we haven’t actually displayed anything on the site. The next step is to go into our theme files and replace the static HTML navigations with WordPress functions.
In the header.php file, you’ll see the following code:
<nav id="header-main-nav" class="alignleft widecol">
<ul>
<li><a href="#">Home</a></li>
<li><a href="#">About</a></li>
<li><a href="#">News</a></li>
<li><a href="#">Contact</a></li>
</ul>
</nav>
We’re going to replace this entire section of code with the wp_nav_menu() function that lets us call a specific menu, define HTML elements, classes, depth, and more. Like the register_nav_menus() function before, we’re going to pass an array of parameters to it. Below is a list of all the parameters and their basic meanings. (To learn more about this function, go to http://wdgwp.com/wp_nav_menu.)
$defaults = array(
'theme_location' => 'menu,
'menu' => ,
'container' => 'div',
'container_class' => 'menu-{menu slug}-container',
'container_id' => ,
'menu_class' => 'menu',
'menu_id' => ,
'echo' => true,
'fallback_cb' => 'wp_page_menu',
'before' => ,
'after' => ,
'link_before' => ,
'link_after' => ,
'items_wrap' => '<ul id="%1$s" class="%2$s">%3$s</ul>',
'depth' => 0,
'walker' =>
);
We’ll only be using a few of these parameters, but I suggest that you read through them to get a better understanding of what options you have and how you can go about building better, more dynamic menus. If you feel limited by these options, you do have the ability to create what’s called a custom walker, which lets you define every single aspect of the HTML output. (You can read about custom walkers at http://wdgwp.com/walker_class.)
The following code will replace the static HTML starting and ending with our <nav> tags. The first thing we’re doing is defining an array called main_menu_header_top that will hold all the parameters. Then we’ll call the wp_nav_menus() function and pass it to the array. This simply tells WordPress to perform the wp_nav_menus() function using the defined parameters to complete the task, and to output the HTML as we need it:
<?php
$main_menu_header_top = array(
'theme_location' => 'main-nav-header-top',
'container' => 'nav',
'container_class' => 'alignleft widecol',
'container_id' => 'header-main-nav',
'depth' => 1
);
?>
<?php wp_nav_menu( $main_menu_header_top ); ?>
Our parameters include:
• theme_location—the menu handle of the location we registered earlier
• container—the HTML element that will hold our nav
• container_class—the classes that should go on our <nav> tag
• container_id—the ID that’s assigned to our <nav> tag
• depth—how many children deep our navigation should go
These parameters let us build our navigation and define the HTML output as we need it. It’s all rather straightforward—just remember that with depth, if you want an unlimited number of children, set it to 0. We set our depth to 1, which means we’ll have up to one child per <li>, even if the menu in the admin has several levels of children.
The output HTML maintains the same structure we had in place, except that WordPress adds its own classes. You’re welcome to write a custom walker (as discussed earlier) to eliminate these extra classes if needed.
<nav id="header-main-nav" class="alignleft widecol">
<ul id="menu-main-menu" class="menu">
<li id="menu-item-15" class="menu-item menu-item-type-post_type menu-
item-object-page menu-item-15"><a href="http://localhost/j2-theme/
sample-page/">Bio</a></li>
<li id="menu-item-13" class="menu-item menu-item-type-post_type menu-
item-object-page menu-item-13"><a href="http://localhost/j2-theme/
locations/">Locations</a></li>
<li id="menu-item-14" class="menu-item menu-item-type-post_type menu-
item-object-page menu-item-14"><a href="http://localhost/j2-theme/
contact-us/">Contact Us</a></li>
<li id="menu-item-12" class="menu-item menu-item-type-custom menu-item-
object-custom menu-item-12"><a href="http://twitter.com/professor">
@professor</a></li>
</ul>
</nav>
From here on the Main Nav is dynamic and will reflect any changes made in the admin. We’ll be replacing the Sub Nav (just below the header and above the main content) and the Footer Nav with similar code, seen below.
Sub Nav WordPress Code
<?php
$sub_menu_header_bottom = array(
'theme_location' => 'sub-nav-header-bottom',
'container' => 'nav',
'container_class' => 'clear subnav',
'menu_class' => 'width100pad',
'depth' => 1
);
?>
<?php wp_nav_menu( $sub_menu_header_bottom ); ?>
Sub Nav Output HTML
<nav class="clear subnav">
<ul id="menu-sub-menu" class="menu">
<li id="menu-item-16" class="menu-item menu-item-type-taxonomy menu-
item-object-category menu-item-16"><a href="http://localhost/
j2-theme/category/articles/">Articles</a></li>
<li id="menu-item-17" class="menu-item menu-item-type-taxonomy menu-
item-object-category menu-item-17"><a href="http://localhost/
j2-theme/category/interviews/">Interviews</a></li>
<li id="menu-item-18" class="menu-item menu-item-type-taxonomy menu-
item-object-category menu-item-18"><a href="http://localhost/
j2-theme/category/tutorials/">Tutorials</a></li>
</ul>
</nav>
Footer Nav WordPress Code
<?php
$footer_nav = array(
'theme_location' => 'footer-nav',
'container' => 'nav',
'container_id' => 'footer-main',
'depth' => 1
);
?>
<?php wp_nav_menu( $footer_nav ); ?>
Footer Nav Output HTML
<nav class="menu-main-menu-container">
<ul id="menu-main-menu-1" class="menu">
<li class="menu-item menu-item-type-post_type menu-item-object-page
menu-item-15"><a href="http://localhost/j2-theme/sample-page/">Bio
</a></li>
<li class="menu-item menu-item-type-post_type menu-item-object-
page menu-item-13"><a href="http://localhost/j2-theme/
locations/">Locations</a></li>
<li class="menu-item menu-item-type-post_type menu-item-object-page
menu-item-14"><a href="http://localhost/j2-theme/contact-us/">
Contact Us</a></li>
<li class="menu-item menu-item-type-custom menu-item-object-custom
menu-item-12"><a href="http://twitter.com/professor">@professor
</a></li>
</ul>
</nav>
We have now successfully replaced all static navigations with dynamic WordPress menus. You can create more menus to be used in widgets or even directly in content with shortcodes (we’ll discuss shortcodes in later chapters).
Menus are powerful and easy to use. There are many uses for them, and I encourage you to continue investigating and experimenting with them as we continue through this theme build.
What’s Next
Now that our navigations are dynamic, we’re going to start building out the rest of the theme. In the next chapter, we’ll identify dynamic areas in the home page and replace them with WordPress template tags.