
11. Page

You’ll notice that the word “page” is used repetitively throughout this chapter. We’re going to look at how to create the base page template, page.php, as well as some additional custom page templates. Page templates are used to display page content and, if custom page templates are defined, the user admin will have more control over the design of his pages.
What you’re about to learn
• Page template best practices
• How to display page content
• How to create custom page templates
• How the user admin defines which template to use in the admin
Page Page Layout
A quick glance at Figure 11.1 shows just how similar the Page page template is to the single page template and the rest of the site. We still have the featured image at the top of the page, the title, and the main content. However, we don’t have the date, comments count, taxonomy, pagination, or author information. In fact, the comments functionality doesn’t exist on the page templates at all. If you’d like to allow commenting on your pages, you can call the comments_template() function as we discussed in Chapter 10, “Single.”
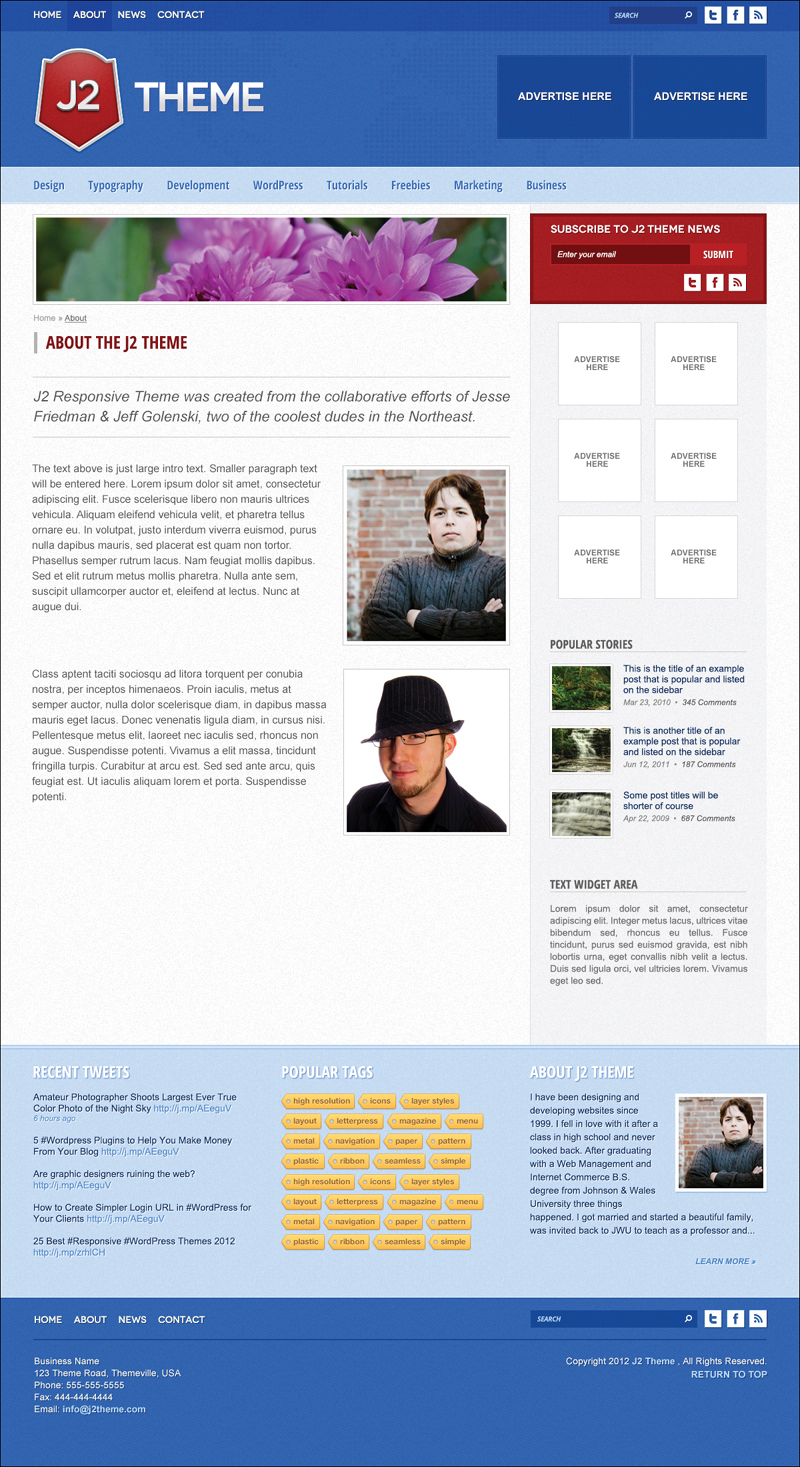
Figure 11.1. The Page page template.
We’re adding two new elements to the page template. The first is breadcrumb navigation that shows the path back to the home page from the current location. The second is a tag-line, which is actually powered by the excerpt.
By now you should have a pretty good idea of how we’re going to convert the static HTML to dynamic WordPress calls. Later in the chapter we’ll discuss creating additional custom page templates and empowering the user admin to choose between them.
Everything will be called in the same loop that we used in the single.php template.
The Loop
We’re not requiring anything new or custom for our loop, so at this point it will remain the same:
<?php if ( have_posts() ) : while ( have_posts() ) : the_post(); ?>
<! -- PLACE EVERYTHING FROM FEATURED IMAGE TO CONTENT -->
<?php endwhile; else: ?>
<p><?php _e( 'The page you're looking for could not be found.' ); ?></p>
<?php endif; ?>
Page Header
The page header contains the featured image, breadcrumb navigation, page title, and tagline (Figure 11.2). The featured image and title should be pretty straightforward for you by now. The breadcrumb navigation will require a specially made function and the tagline will require us to turn on the excerpt functionality for pages.
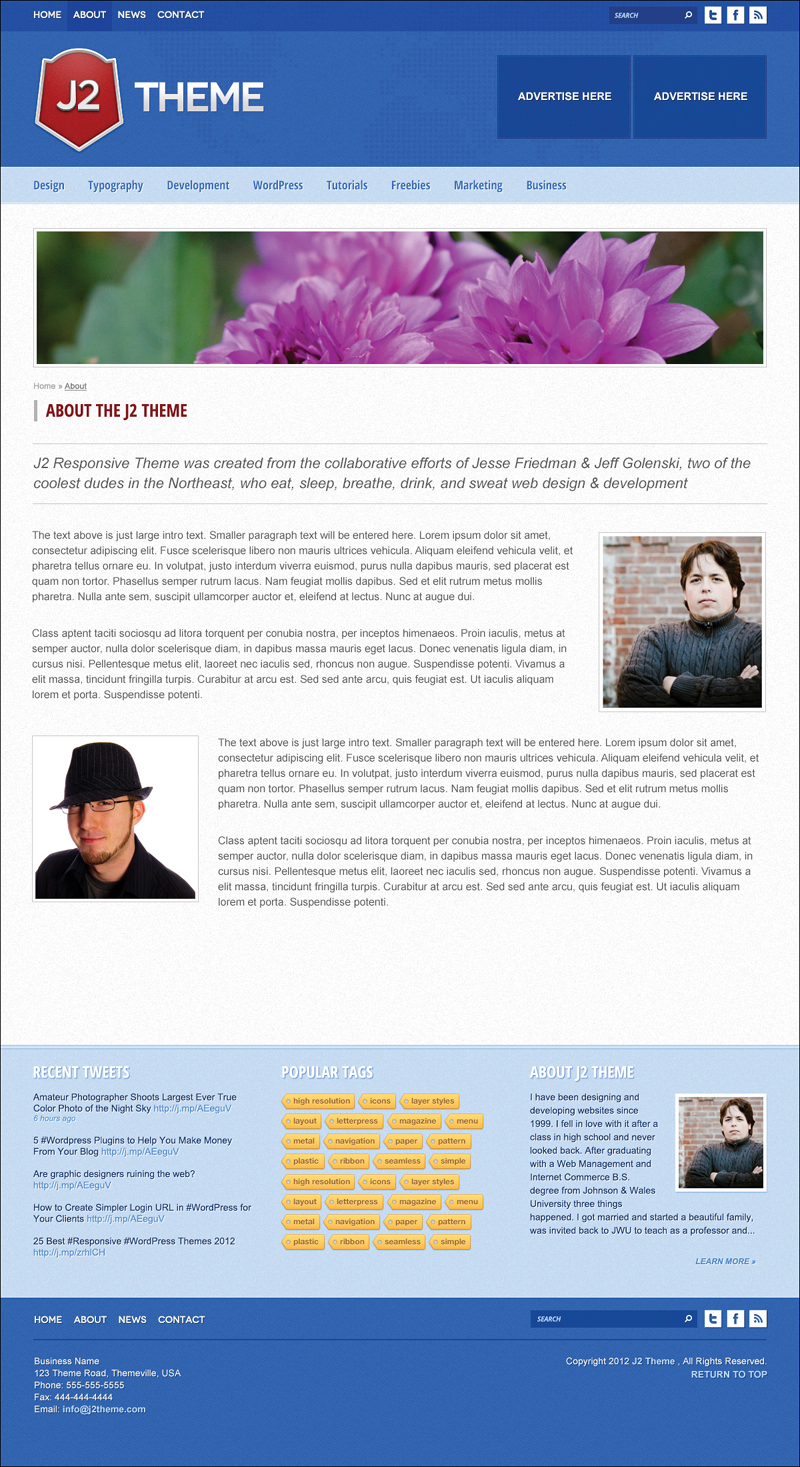
Figure 11.2. The Page page template header.
Featured Image
As we did in Chapter 10, “Single,” we’ll replace the basic the_post_thumbnail() call later when we learn more about featured images. For now, replace the featured image HTML with:
<?php the_post_thumbnail(); ?>
Breadcrumb Navigation
Breadcrumb navigation is especially helpful for users who arrive at your site on an interior page. Google serves up interior pages on Search Engine Results Pages (SERPs) now more than ever. Breadcrumb navigation provides a trail back to the home page that helps the visitor understand where he is in the site and shows him more helpful page links that he might have otherwise missed.
Typically we start with the home page, then list pages, child pages, grandchildren, and so on. So if we’re on my bio page, which is under my company profile About Us page, the breadcrumb navigation would display:
Home → About Us → Jesse Friedman
To do this we need to make sure that our pages are correctly organized in the admin, using page hierarchy. To create a child page, you’ll need to choose a parent page under the Page Attributes section on the Edit Page page, as seen in Figure 11.3.
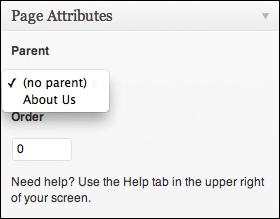
Figure 11.3. Adding a page parent.
When you add a parent page you can also choose the page order. This will come in handy when you work with sibling pages or use a page list to create navigation.
Once you add child pages you can see the page hierarchy coming into effect by going to the All Pages page in the admin (Figure 11.4).
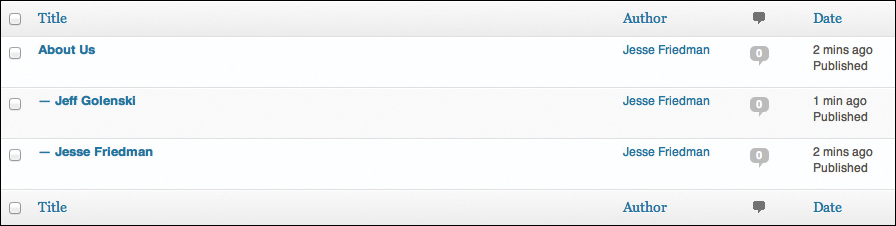
Figure 11.4. Page hierarchy.
The next part displays the current page title, its parent, their parents, and so on all the way back to the home page, and requires a decent amount of custom code. While it’s extremely satisfying to develop your own solution to a problem like this, sometimes it’s just better to not reinvent the wheel. The plugin appendix at the end of this book goes into detail about some of the better plugins out there; Breadcrumb NavXT is included in that list.
Installing Breadcrumb NavXT is really simple. Go to Plugins → Add New in the admin. Once there, type in “Breadcrumb NavXT” into the search box. This plugin has a high rating and has been downloaded over 500,000 times, plus it’s highly recommended by many developers. (As stated before, it’s important to do your plugin research prior to installing and activating.)
Once you install and activate the plugin, you can navigate to its Settings page by going to Settings → Breadcrumb NavXT, as shown in Figure 11.5.
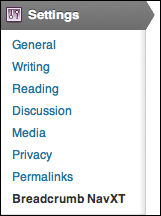
Figure 11.5. Breadcrumb NavXT Settings tab.
Once you configure the settings, the next step is to display the breadcrumb nav on the site. On the page.php template, locate the <nav></nav> tags in the <header> of the page content section and replace it with:
<nav class="breadcrumb">
<p><?php if( function_exists( 'bcn_display' ) ) {
bcn_display();
} ?></p>
</nav><!-- breadcrumb -->
The bcn_display() function is defined by the plugin; this is not a WordPress core function or Template Tag. The function_exists() function returns “true” or “false” depending on whether the function bcn_display actually exists and is callable by the code. If you don’t perform this check and call an undefined function, you’ll receive a fatal error, and the site will not load for the user. This is especially important when you’re calling something that’s defined by an outside source like a plugin. The call above outputs HTML <a> tags with the page titles and separators defined in the settings:
<nav class="breadcrumb">
<p><a title="Go to Home." href="http://localhost/j2-theme">Home</a>
» <a title="Go to About Us." href="http://localhost/j2-theme/
about-us/">About Us</a> » Jesse Friedman</p>
</nav><!-- breadcrumb -->
If you’re interested in writing your own function to display the breadcrumb navigation go to http://wdgwp.com/breadcrumb, where you’ll find some great articles and resources to walk you through the rest of the process.
Title
Replace the static title in the page template with the code below. It’s important to try and write this out every time you implement it: This will help you better remember the specific function names, and help you get used to writing PHP.
<?php the_title(); ?>
Use the above code to replace the <h1> tags in the <header> of the page content area.
Tagline
Below the title is a section where you can display a tagline or page excerpt. There are several ways to accomplish this, the best being to define custom meta fields in the page, similar to the custom post type. This discussion is outside the scope of this book, however, so for now you can just turn on excerpt function for pages and use that for the tagline. This still makes sense because the content entered here would still semantically be an excerpt.
The first thing to do is turn on the excerpt function for pages. This isn’t inherently built into WordPress, so we have to do it manually by going to the functions.php file. This will be very similar to turning on menus or widgets, as we’ve done before.
When adding to the functions.php file, try to comment as much as possible on what you’re adding and why. Clearly defining why you’re doing something a specific way will help others to understand your process and plan. Also, try to group elements with similar functionality together for easier consumption of the code later.
add_post_type_support( 'page', 'excerpt' );
The above function add_post_type_support accepts two parameters. The first is the post type we’re modifying and the second is the functionality we’re adding to that post type. In this case, we are adding excerpt support to pages. Seems simple enough, right? For more information on this function go to http://codex.wordpress.org/Function_Reference/add_post_type_support.
Once you add this to your functions.php file, you’ll see a new Excerpt content area available in the Edit or Add New pages in the admin (Figure 11.6). If it’s missing, go to Screen Options and turn it on. Now that we can add an excerpt we have to display it in the page template.
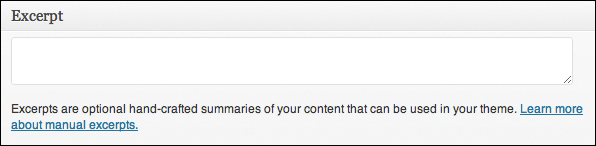
Figure 11.6. Excerpt content area.
Replace the following HTML:
<h2 class="tagline"><!-- THE EXCERPT --></h2>
with:
<?php if( get_the_excerpt() ) { ?>
<h2 class="tagline"><?php echo get_the_excerpt(); ?></h2>
<?php } ?>
This outputs the following HTML:
<h2 class="tagline">I'm a huge fan of WordPress</h2>
It’s vital to run the if statement before displaying anything to make sure that the user admin has added content to the excerpt area. We also have to echo the get_the_excerpt() function to disable the wpautop function, which automatically adds <p> tags around the content. We’re inserting content in between <h2></h2> tags, so having unnecessary <p></p> tags wrapping everything will be a problem. Go to http://codex.wordpress.org/Function_Reference/get_the_excerpt for more information on get_the_excerpt();.
Content
By now you should be intimately familiar with the the_content() function, which displays everything in the content editor and should be utilized the same way as in previous chapters:
<?php the_content(); ?>
Custom Page Templates
The default page template we just created in page.php will be used to display all page content (including hierarchical post types). Basically, anytime a user visits a page, the page.php template structure is used to properly display that content. You have the option to define additional page templates to give the user admin more control over page layout. In this theme we’ll also define a page template that has no sidebar and content that is “full width.”
In page.php you’ll see that the <aside></aside> tags are calling the aside sidebar. This is the same two-column layout we’ve used throughout the rest of the theme. For our full-width page template we’ll remove the <aside> altogether and have the content take over the entire width of the page, making it a single-column layout.
The HTML structure has been laid out for you in page-full-width.php. Open this file and run through the above lesson, replacing all the static HTML with our dynamic WordPress calls and functions.
Defining a Custom Page Template
Now that we have a new page template, we actually have to provide a way for the user admin to assign pages to it. Throughout this book we’ve seen WordPress define rules and regulations in the way that we define functions, theme files, and activate theme support. Defining a custom page template requires us to adhere to certain rules, too.
At the top of the page-full-width.php file, insert the following commented-out PHP code:
<?php
/*
Template Name: Full Width
*/
?>
Make sure that “Template Name: ” is exactly as you see it above. “Full Width” will be the title of our page template and it will be displayed to the user admin. You can define multiple page templates in your theme, just make sure you choose unique names for each of them.
Once you add this to the top of the page-full-width.php page template, you’ll see an option appear in the Edit or Add New page in the admin, seen in Figure 11.7. Every custom page template you define will show in this list.
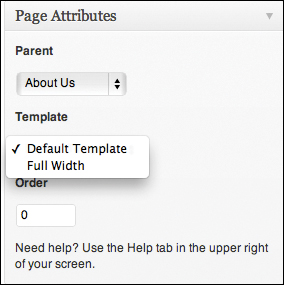
Figure 11.7. Choosing a page template.
It’s important to note that the page template will not alter the content of a page or even its inherent functionality. All we’re doing is redefining how the content will be displayed to the user. In the full-width page template we’re simply removing the aside and redefining the width of the main content area. This is a very simple change, but there is so much more that could be done.
Using Page Templates
Page templates can be used in a variety of ways. The main goal of a page template is to give the user admin control of the layout of a page. However, we can do so much more than that. We can use page templates to toggle functionality and more.
One issue with page templates is that you can’t pick and choose which elements of the templates to turn on. This is better suited for custom values or optional post settings. In other words, you can’t mix and match the ideas below, but this will at least get you off to a good start.
We can do some simple things like toggling comments (although this may be better done in the page settings) or author information.
Some of the more complex templates include:
Adding a photo gallery: Instead of using the featured image at the top, you can include a function or shortcode to pull in a photo gallery. You could always include this in the body of the text, but it’s nice to be able to alter the layout so you can better associate the page elements.
Providing a walk-through: If you’re selling services it can be helpful to create a path for visitors to walk through the services in a specific order. You can do this by adding Previous and Next buttons for sibling pages. For example, say you have a Services page and its child pages are ordered like this: Blogging, Social Media, SEO, and Web Design. When we’re on the Social Media page, we’ll see a link to Blogging and a link to SEO. The page template can call a function to find the previous and next sibling pages to create a walk-through.
Increasing conversion with a form: It’s simple enough to include a form in the body of the content on a page. However, removing an element that’s consistent throughout the site and replacing it with a form will make it more prominent. If you replace the featured image with a form at the top of a page using this page template, we’ll likely see increased conversion on that page.
Including recent posts or other queries: It may make sense to include a list of recent posts or other queries with your page content. You can define a page template to pull a list of the most recent posts in the News category for any pages that are about the company. This way you’re pairing static company information with dynamic posts.
Including Adsense or other ads: If you have a high-traffic page, you may want to include advertisements to increase revenue. This may not be desirable throughout your entire site, so setting up a page template that calls Adsense or another ad provider’s code above and below the content will be a good solution.
These are just a few examples of page templates. Some others that weren’t mentioned are simple HTML layout changes. We have two-column and single-column layouts, but maybe you need a three-column layout or want the sidebar above the content. There are hundreds of ways to configure your page layouts. It’s a good idea to limit the number of page templates to less than ten for consistency and simplicity.
What’s Next
We just discussed how to configure the page.php template page and create additional custom page templates. Next, we’ll build out the Archive and Search Results pages. These pages require some specific functions in order to work correctly. One thing we’ll pay close attention to is how to display the title of the archive or search result query so visitors have a better understanding of where they are.