
18. iPad Accessories
In this chapter, we use some optional accessories like cases, docks, keyboards, and adapters.
• Apple iPad Camera Connection Kit
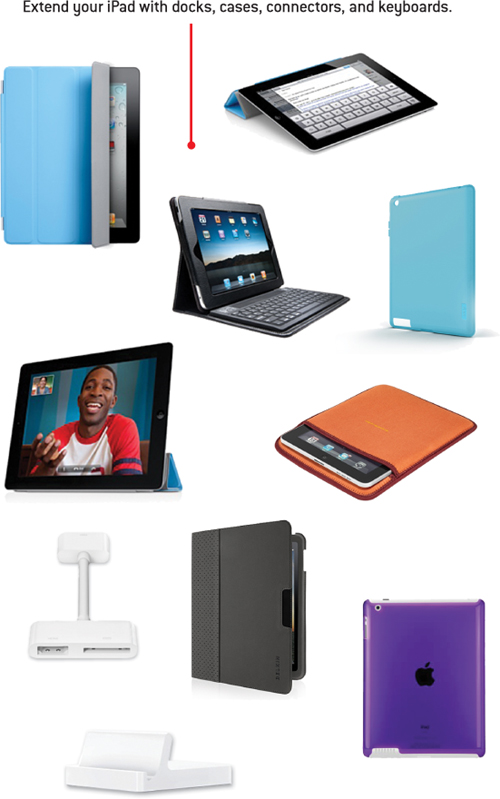
Many accessories available for your iPad perform a variety of tasks, protect it, or just make it look pretty.
You might already have some things that work with your iPad—Bluetooth headsets and keyboards, for instance. Let’s look at a variety of accessories to see how to use them.
Printing from Your iPad
Some time after the release of the first iPad, Apple added wireless printing to the iOS operating system. They call it AirPrint. You can print a web page or document directly from your iPad over your wireless network.
The one catch? It works only with a select few printers that have recently been released by HP. You can find an updated list of AirPrint printers at http://support.apple.com/kb/ht4356.
Assuming you have one of these printers and have set it up on your local network, here’s how you print, using the Pages app as an example.
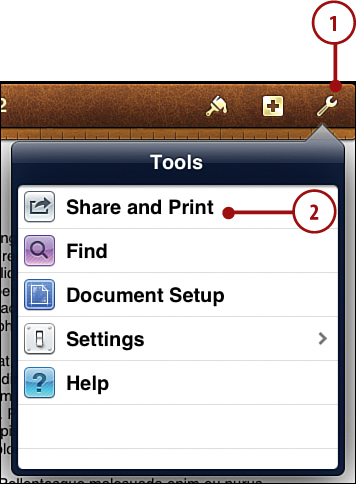
1. In Pages, with the document you want to print open, tap the Tools button.
2. Tap Share and Print.
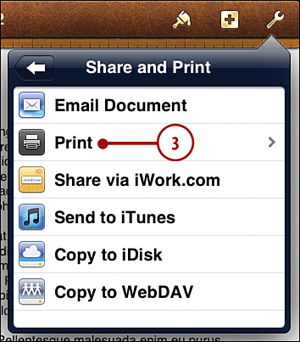
3. Tap Print.
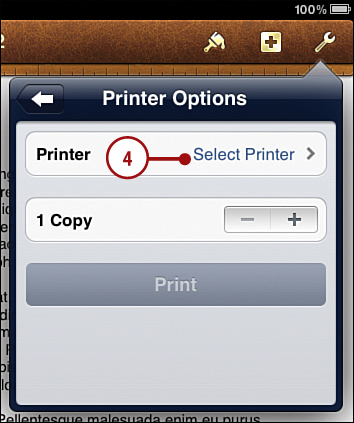
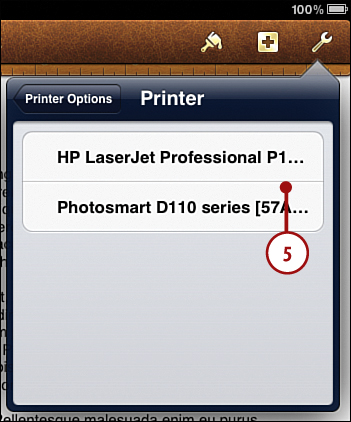
4. If you have never used this particular printer before, you’ll need to add it to the iPad’s list of printers. Tap Select Printer.
5. If the printer is on and has been configured to your network, it should appear in a list. Tap it to select it.
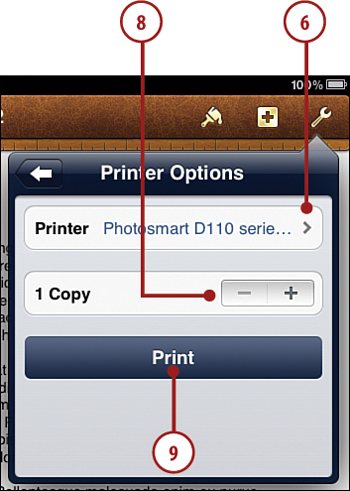
6. The printer will now appear in the button.
7. Tap Range to specify a range of pages to print, or leave it at All Pages.
8. Tap here to set the number of copies to print, or leave it at 1 Copy.
9. Tap the Print button to send to the printer.
At this point, your iPad will launch a special Printer Center app. You may not notice it unless you quickly double-press the Home button to bring up the Recents List. You will then see this Print Center app running.
10. Double-press the Home button to bring up the Recents List.
11. Tap the Print Center icon to bring up a status menu.
12. You can see the status of the printing process and other information.
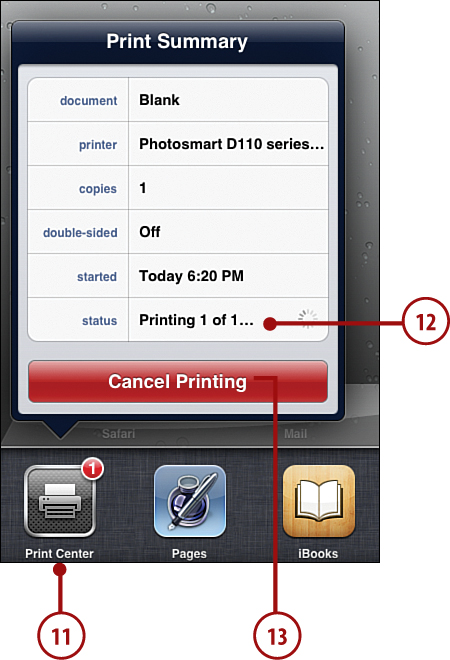
13. Tap Cancel Printing to stop printing.
Different for Other Apps
How you initiate printing differs from app to app. Using Safari, for example, you go to the same button at the top of the screen that you use for bookmarking a page. You see Print as one of the options. In the Photos app, it is the same button that enables you to email a photo, among other things.
Bypassing Apple’s AirPrint
Although only a few Wi-Fi printers support AirPrint, there is a way to cheat. Some enterprising third-party developers have come up with software for Macs that sets up a printer connected to the Mac as an AirPrint printer. You aren’t really printing directly to a printer—you are going through the Mac. Still, it may be a good option for some. Search on the web for the Macintosh software Printopia, FingerPrint, or AirPrint Activator.
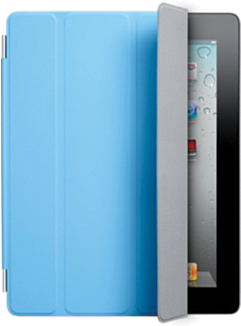
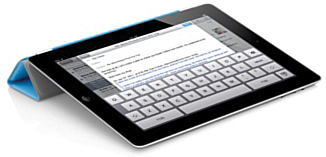
iPad Smart Cover
A cover is just a cover, right? But Apple didn’t make “just a cover” for the iPad. They made a “smart cover.” By using magnets, this cover sticks to the front of the iPad 2, and iPad 3rd generation without hiding the rest of the iPad’s design. And it is highly functional, acting as a stand as well. It does not, however, work with the original iPad.
1. The cover will align to the front of your iPad using magnets and protect the screen.
2. Unfold the cover and two things will happen: the lining will clean your screen slightly, and the iPad will automatically wake up from sleep.
(Courtesy of Apple Inc.)
3. Fold the cover all the way back to form a triangle and elevate one side of the iPad for typing.
(Courtesy of Apple Inc.)
4. Flip the iPad over, and it will lean against the triangle-configured cover to stand the iPad up for watching video or using FaceTime.

(Courtesy of Apple Inc.)
It Comes in Colors
You can get the Smart Cover in five colors in polyurethane and five colors in leather. Plus, with the magnets built into the iPad, there are sure to be third-party case makers that come out with even more styles in the future.
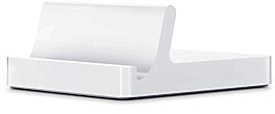
Apple iPad Dock
Although the iPad comes with a dock cable and charger, you might want to dock it in an upright position, rather than having it flat on a table. The iPad Dock from Apple enables you to stand the iPad up vertically while it’s either plugged in to a power outlet or docked with your computer. You can also use the iPad in this position and even pipe the audio into external speakers through the dock.
(Courtesy of Apple Inc.)
1. Plug the dock cable that came with your iPad into the back of the iPad Dock.
2. Plug the other end of the dock cable into the USB port of your computer.
3. Plug in the input cable from a set of computer speakers into the audio jack in the back of the iPad Dock.
4. Slip your iPad into the iPad Dock. A connection should establish between your computer and the iPad, just as if you used the cable by itself.
5. Run any audio-producing app, such as an iPod. Music should now go through your external speakers, rather than just the built-on speakers of the iPad.
Power Dock
You can also connect the dock cable to the power supply that came with your iPad. Then the iPad Dock acts as a power station. You can also use the iPad while charging, or you can put it in picture frame mode. Or it can run some nice speakers and act as a music system.
Not All Power Is the Same
Your iPad requires extra power to charge properly. With the power supply that came with your iPad, it should charge fully after about 4 hours. But with an iPhone power supply, or while hooked up to a full-power USB port on a computer, it takes twice that amount of time. Some low-power USB ports on computers won’t charge the iPad at all.
Apple Video Output Adapters
Apple sells several dock adapters that send video from the dock to a monitor, television, or projector. These are great for making presentations with your iPad or watching video on a larger screen.
Dock to VGA Adapter
The Apple iPad Dock to VGA Adapter attaches on one end to the dock port on the bottom of your iPad. The other end is a VGA port you attach to a VGA cable that can be attached to a monitor or projector.
Whereas the original iPad could show only movies, presentations, and slideshows, the iPad 2 and iPad 3rd generation can use this adapter to show almost anything that is on the screen.
1. Connect the Apple iPad Dock to VGA Adapter to the dock port on your iPad.
2. Connect the other end of the adapter to a standard VGA cable.

(Courtesy of Apple Inc.)
Use the Dock
You can also connect the Apple iPad Dock to VGA Adapter to the Apple iPad Dock if you plan to use it this way often.
3. Connect the other end of the VGA cable to a monitor or projector that accepts a VGA connection.
4. Use an audio mini jack to connect the headphone port of the iPad to the line in on the projector. The exact type of cable you need depends on what audio input the project takes.
5. Run the Videos app on your iPad.
6. Tap the Play button just as you normally would to play back the video on the iPad. The video should start playing on the projector, while you see a frozen frame on your iPad.
Other Cable Options
Apple also makes an Apple Component AV Cable that works basically the same way but will output to RGB and left/right audio for high-definition televisions. There is also an Apple Composite AV Cable that uses a single connector for video for older standard definition televisions. Both cables will output video from some apps, but will not mirror the screen.
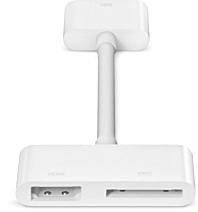
Digital AV Adapters
iPad 2 and iPad 3rd generation also have the ability to use a Digital AV Adapter. This is an HDMI connector that enables you to connect directly to televisions and newer projectors that have an HDMI port. In addition, you can connect HDMI and another dock cable at the same time, allowing you to keep your iPad charged.
1. Connect the Apple Digital AV Adapter to the dock port on your iPad 2 or iPad 3rd generation.
2. Connect the HDMI port on the adapter to an HDMI cable and connect that to a television or other device that supports HDMI.
(Courtesy of Apple Inc.)
3. Connect the dock port on the adapter to your iPad charger or computer by using the dock cable that came with your iPad. This is optional, but it keeps your iPad from running out of power while presenting.
4. Use your iPad as you normally would, and most things will display on the television as well as on the iPad’s screen. However, start watching a video, and the video itself will be presented without additional screen elements.
TV Compatibility
The video coming from the iPad is compatible with both 720p and 1080p HD televisions and video devices. It also includes audio over the HDMI cable. Many televisions support only 1080i, not 1080p. In that case, the video may be shown in 720p instead.
Apple Wireless Keyboard
If you have a lot of typing to do, and are sitting at a desk anyway, you can use Apple’s Bluetooth keyboard with your iPad. This is the same wireless keyboard that you would use with a Mac.
1. To connect to the Apple Wireless Keyboard, first make sure that you have good batteries in it.
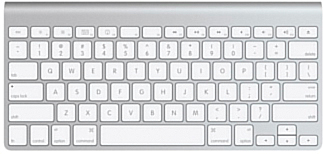
(Courtesy of Apple Inc.)
Choosing the Right Wireless Keyboard
If you have an older Apple wireless keyboard, it might not work with your iPad. The Apple Store warns that only “newer” keyboards can successfully connect to the iPad. Reports from people with older wireless keyboards indicate that this is true. However, you don’t need to stick with Apple’s wireless keyboard. Most Bluetooth keyboards work fine with the iPad. Search your favorite online store for all kinds of compact wireless Bluetooth keyboards. Check reviews to see if anyone has mentioned trying the model with an iPad.
2. Go to the Settings app on your iPad and tap on the General settings on the left.
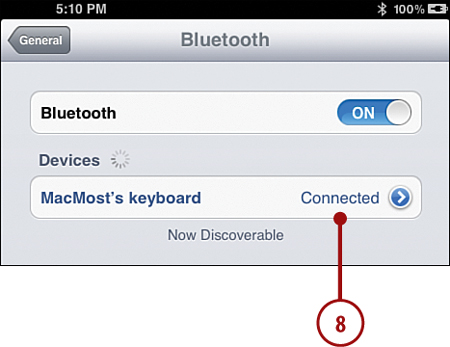
3. Tap Bluetooth to go to the Bluetooth settings.
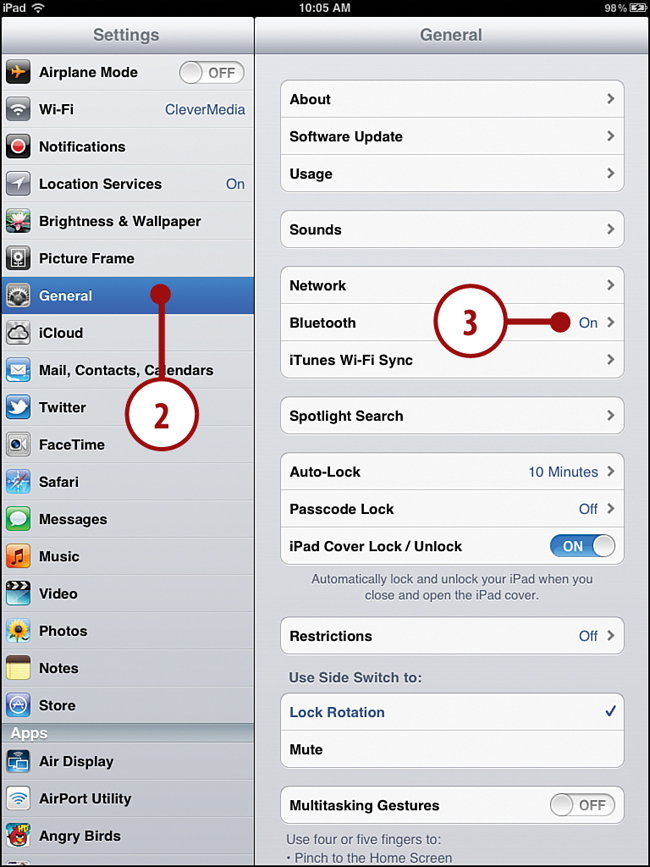
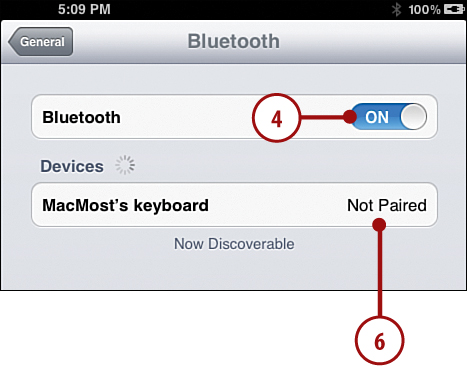
4. Make sure Bluetooth is turned on. Switch it on if not.
5. Turn on your Apple Wireless Keyboard by pressing the button on its right side. You should see a small green light turn on at the upper-right corner of the main face of the keyboard.
6. After a second or two, the keyboard should appear on your iPad screen. Tap where you see Not Paired on the iPad screen.
7. Look for a 6-digit number in the message displayed. Type that on your keyboard. Then press the Return key.
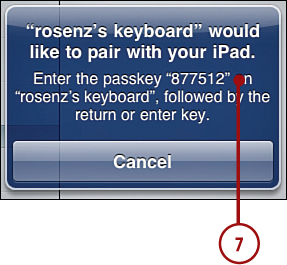
8. After the connection is established, you should see Connected next to the name of your keyboard.
9. After you connect, the iPad automatically uses the physical keyboard by default, rather than bringing up the on-screen keyboard. To use the on-screen keyboard again, you can either disconnect or power off your Apple Wireless Keyboard, or you can press the Eject button at the upper-right corner of the keyboard to switch to the on-screen keyboard at any time.
Wireless Versus Dock
You can also connect a keyboard to your iPad using the USB connector that comes with the iPad Camera Connection Kit. Not all keyboards work, however, as the keyboard needs to be a low-power model.
Power/Dock Accessories
A power user of any gadget usually acquires additional power chargers and cables. For instance, you might want to charge your iPad at home and at work. Remembering to carry the adapter with you everywhere you go usually doesn’t work out. Here is a list of items you might want to consider:
• Apple iPad 10W USB power adapter: A 10-watt adapter that charges the iPad at full speed, faster than a standard USB port. This adapter comes with a 6-foot-long cord, which makes it different than the one you get with your iPad. You get a dock cable along with it.
• Apple dock connector to USB cable: If you just want the dock cable to plug your iPad into a Mac or PC for syncing and slow charging. It is always good to have a spare one of these, as losing your one and only one means you can’t charge or sync your iPad. But if you have a recent iPhone or iPod, you already have another dock cable. But the older dock cables might not work with the iPad.

(Courtesy of Apple Inc.)
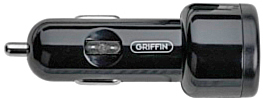
(Courtesy of Griffin)
• Car Charger: If you want to charge your iPad in your car, get a car charger. You can find several: The Griffin PowerJolt Car Charger, the Kensington PowerBolt Micro Car Charger, and the Incase Car Charger. Incase also makes a “combo” charger that works from both AC power and cars.
• Guitar Connection Cable: You can use a guitar or other musical instrument with the GarageBand app and some third-party apps. You need hardware to connect the guitar to your iPad; the Griffin GuitarConnect Cable for iPhone, iPod, and iPad does the trick. There is also the Apogee JAM Guitar Input device, which advertises higher quality input.
Protecting Your iPad
Instead of the Smart Cover, or in addition to it, you may want to get a protective case for your iPad. The problem here is not finding one, but choosing from the hundreds of models already available.
An example is the Belkin Slim Folio Stand for iPad 2. It is similar to the folding case for the original iPad. It protects the sides and back from scratches, and the cover folds over to protect the screen.
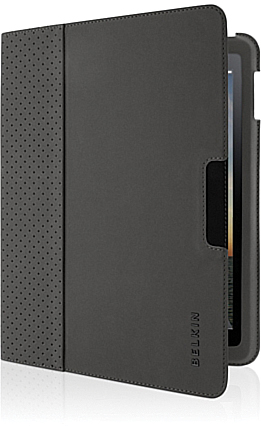
Belkin Slim Folio Stand
If you want something inexpensive and simple, the Keen iPad Sleeve is basically just a neoprene envelope for your iPad 2. This kind of case makes it easy to use your iPad without anything in the way, and protects it when you move from place to place.
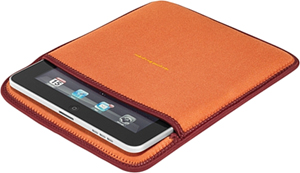
Keen iPad Sleeve
If you want something that stays on your iPad all the time, the iLuv Flex-Gel case is a good example of one that fits onto the back and protects the back and sides.
If you like that idea but don’t want to cover up the Apple logo on the back, then look at the Scosche snapShield P2. It is semi-clear plastic that tints the back of your iPad without completely obscuring it.
And finally, just to show you how functional cases can get, there is the Kensington KeyFolio, a case with a built-in Bluetooth keyboard. It basically turns your iPad into a laptop.
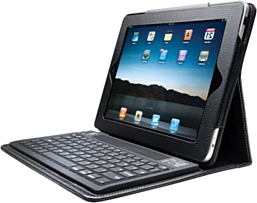
Kensington KeyFolio

iLuv Flex-Gel Case
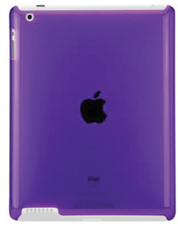
Scosche snapShield P2
When looking for a case, there are many things to consider. Don’t just look in a local Apple Store—it stocks only a few cases. Look online to discover a wide variety. Pick one that fits your needs and style.
Many of the newer cases might also cover the iPad plus the Smart Cover. This solves the problem of which to get: get both!
Size Matters
Remember that all three generations of the iPad are slightly different sizes. The difference between the original iPad and its successors is the most dramatic. Cases for the original iPad usually don’t match the iPad 2 and iPad 3rd generation, and vice versa. But there is also a slight difference between the iPad 2 and the iPad 3rd generation. Some cases will work with both, and some iPad 2 cases will not work with the 3rd generation. Check the manufacturer’s website before buying.
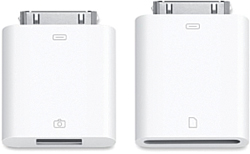
Apple iPad Camera Connection Kit
The Apple iPad Camera Connection Kit has two parts, both of which connect to your iPad via the dock port. The first part is an SD card reader. You connect one end to the iPad dock port and you plug a standard SD card, the type most cameras use, into the other end. The second part has a USB connection on the second end. You can connect a digital camera to your iPad using it.
Here is how to import photos directly from your camera or SD card.
1. Connect either the camera connector or the SD card reader to your iPad’s dock port.
(Courtesy of Apple Inc.)
2. Connect your camera using the USB cable that came with it, or slide the SD card into the card reader. If you are connecting a camera, you will most likely need to switch the camera on and into the same mode you use to transfer pictures to a computer.
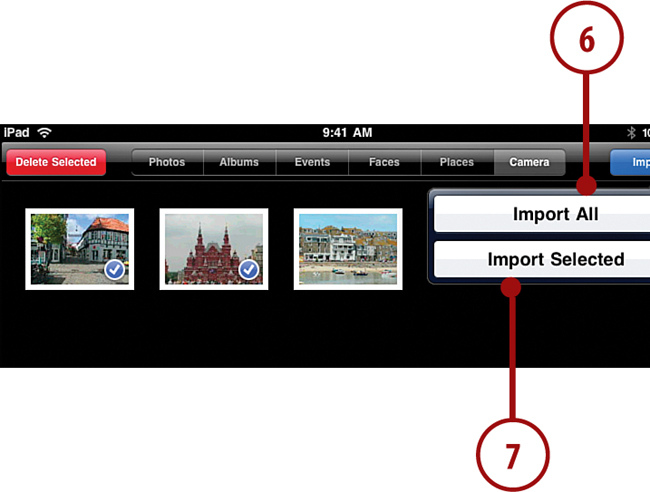
3. After a slight delay, the Photos app should launch and images on the camera or card should appear on your iPad’s screen. Tap the images you want to import.
4. Tap the Delete Selected button if you want to delete the images without ever importing them into your iPad.
5. Tap the Import button.
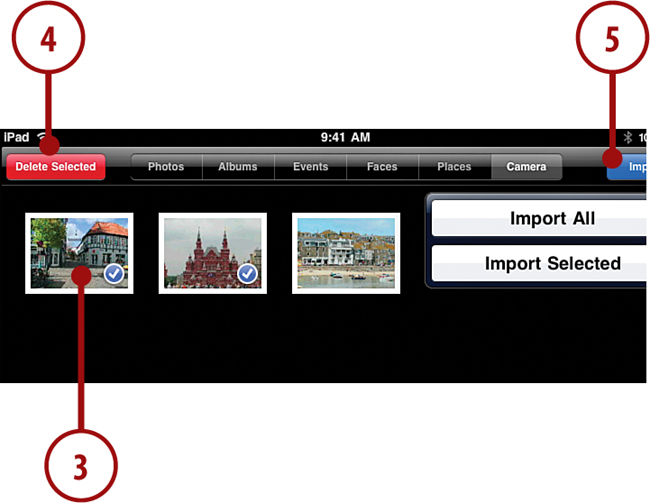
6. Tap Import All to import all photos. The images appear in a new album on your iPad.
7. Tap Import Selected to bring in only the selected photos.
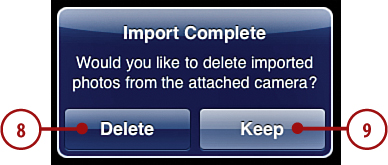
8. After importing the photos, you will be given the change to delete them from the camera or card. Tap Delete to remove them.
9. Tap Keep to leave the images on the camera or card.
More Than Just Cameras!
The Connection Kit does a lot more than just let you use cameras and SD cards. You can also connect USB headsets with the camera connector and use them as headphones and/or a microphone. You can connect low-power USB keyboards as well. The SD card reader can be used to transfer video and images, so you can use it to play stored movies from SD cards.