
3. Working with Master Pages
Lesson overview
• Edit master page properties
• Edit master page guides
• Add header and footer content
• Edit the page appearance
• Create and duplicate master pages
• Test your pages
Working with master pages in Adobe Muse allows you to control the appearance of pages; set up consistent areas of your pages, such as headers and footers; and maintain design consistency across the pages in your website.
Web design vs. print design
As you begin to design your pages in Adobe Muse, you’ll discover quickly that web design relies on many familiar print design concepts regarding text, graphics, color, and more. Soon thereafter, you’ll also realize that web design offers its own set of challenges and design parameters that aren’t as familiar. To help you navigate them, see the “print_vs_web.pdf” file in the Lessons > Lesson03 folder.
Building a master page
When you create a site in Muse, you start with a single master page, which contains repeating design elements, like a logo and navigation, that are automatically applied to other pages. Using a single master page, or even using a few master pages to target different site sections, makes it easier to create consistent pages and a cohesive site. For example, if you add content to the master page, such as a logo and a navigation menu, any page you apply the master to will contain those elements in the same positions. When you change a master page, all pages based on that master reflect those changes.
![]() Note
Note
If you have not already downloaded the project files for this lesson to your computer from your Account page, make sure to do so now. See “Getting Started” at the beginning of the book.
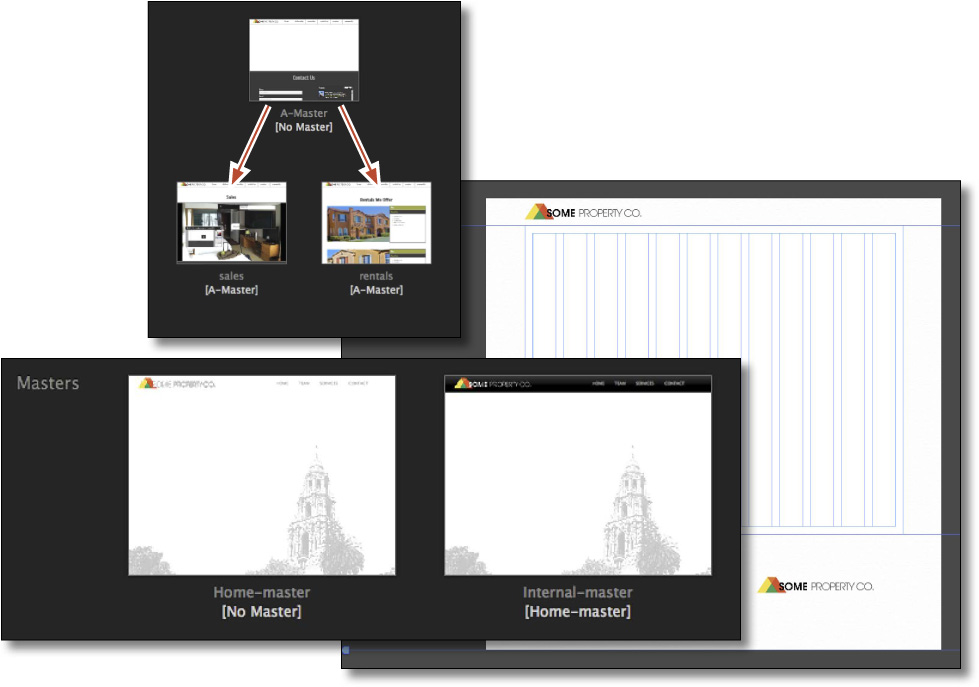
In Plan mode, the masters section, located below the site plan area, contains the default master page that every Muse site starts with, which is named A-Master. A master page is essentially a design that contains all of the common site elements that you use to maintain consistency across the pages in your website. Over the course of this lesson, you’ll learn how to create, duplicate, delete, apply, and add content to a master page in your site.
Editing the appearance of the page and browser fill
When you design for the web, you must consider not only the page design and contents, but also the area outside of the page area, called the browser fill in Muse. The browser fill is the area that surrounds your page when a visitor’s browser window’s width exceeds the width you specified for your page. Remember that Muse uses fixed layouts, so when viewed in a desktop browser, if a visitor resizes the browser window, your page won’t widen to fill it; it will just be centered by default. You can specify something to fill the space, such as a background color or an image, other than the default solid white color for the browser fill.
In this exercise, you’ll navigate and edit the default A-Master page.
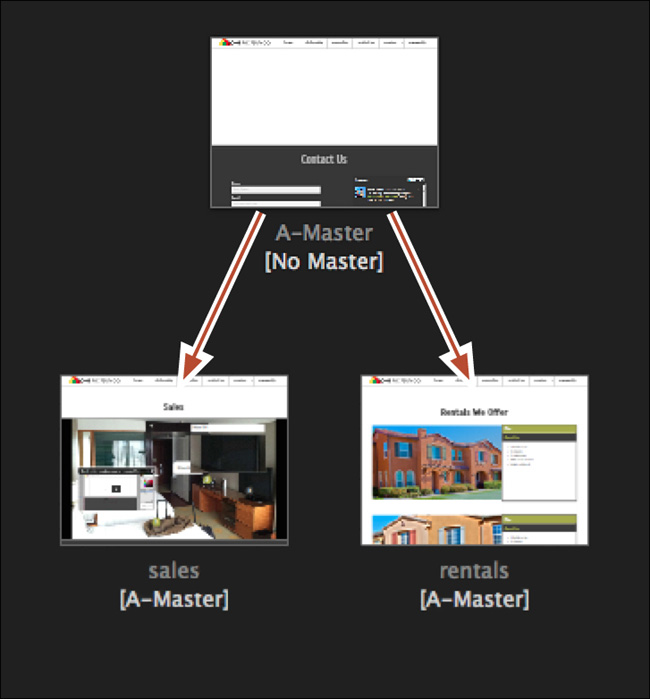
1. With your SPC (Some Property Company) site open in Plan mode, look at the page thumbnails in the site map. Below each thumbnail you see [A-Master], which indicates that the A-Master master page is applied to the thumbnail’s page. As a result, any elements on A-Master appear on the related page.
2. Double-click the A-Master thumbnail in the masters area at the bottom of the Application window to open the A-Master page.
The A-Master page opens as a new tab in the Document window in Design mode. As you saw in the first chapter, with a page or master page open the workspace shows many more features, including the Control panel, Toolbar, and panels.
3. Choose View > Fit Page In Window, and then choose View > Zoom Out twice.
The first step in creating your page design is adding content to the master page. In most cases, you’ll add header content, like a logo and nav bar, and footer content, like social media icons and more, because those elements should appear on every page.
4. Choose View > Show Guides. If you see View > Hide Guides, then the guides are already showing, which is what you want.
When you open a page or master page, Muse divides the Document window into a white page area and a single gray area outside of that white box. The white box is the page area, which contains the content for your page, and the browser fill around it. The browser fill can contain a single color, gradient, an image, or a combination of those, which appear behind the page area’s contents. The dark gray zone outside of the white area is beyond the edge of the browser and cannot be edited. Turning on the guides allows you to more easily see the page boundaries.

In the Control panel, notice the word Page on the left end of the panel. This is called the Selection Indicator. As you learned in Lesson 1, the Selection Indicator currently indicates that the page is selected and that most of the formatting options you change in the Control panel will affect the appearance of the page area. The Browser Fill menu in the Control panel is the exception to this rule.
Setting the browser fill appearance
The Browser Fill menu allows you to add a color and image to the background of the browser window, which resides behind the page area. Next, you’ll change the browser fill to match your design.
![]() Note
Note
You’ll learn more about creating and saving colors in Lesson 5, “Working with Shapes, Color, and Images.”
1. Click the Browser Fill link in the Control panel to see the fill options for the browser.
Here you can change the color of the browser fill or add a gradient, as well as add or adjust a background image.
2. Select the Gradient Fill Type to see a gradient appear in the browser fill.
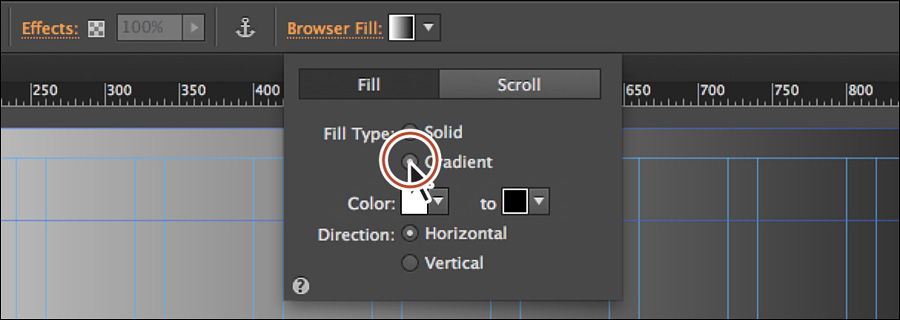
A gradient in Muse can consist of two colors with varying levels of opacity and can either be in a horizontal or vertical orientation. If you apply a gradient to the browser fill, notice that several other options disappear.
3. Select Solid for the Fill Type to see the Image option again, and then click the Add Image link to the right of the Image option. Navigate to the Lessons folder and in the images folder, select the image titled page-bg.png. Click Open.
4. Choose Tile from the Fitting menu (if necessary), and select the center point of the Position reference point indicator (![]() ).
).
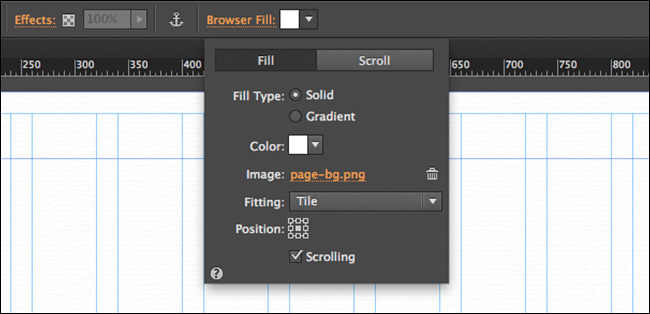
This step inserts a subtle image into the background of the browser window and appears behind the content of the page. You’ll typically create the background image in a separate application, such as Adobe Photoshop or Adobe Illustrator, and save it in an accepted web format (.jpg, .gif, or .png). You’ll learn more about image types in Lesson 5.
You have several tile options, including Scale To Fill, which is a great option for filling the background of the browser with the image without distorting the image.
Muse now inserts the image in the browser background at the same pixel dimensions as you created it, repeats it horizontally and vertically, and positions it in the center of the browser window, no matter the size of the browser window.
5. In the Browser Fill menu, deselect the Scrolling option.
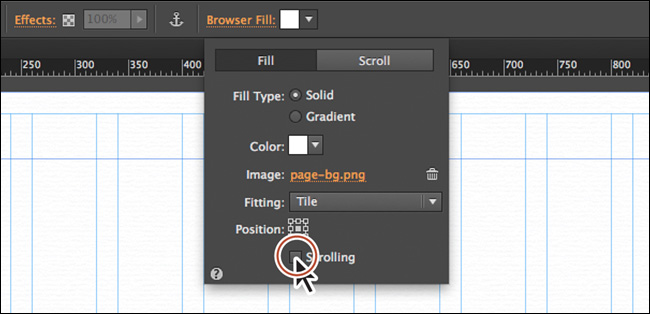
With Scrolling deselected, the background image stays in place if the user scrolls the page content using the scroll bars in the browser. The page content scrolls on top of the fixed background image. If you’d rather have the image scroll with the page, leave Scrolling selected. Also, you can switch to the Scroll tab of the Browser Fill menu and set the options to dictate how the background image fill scrolls including direction and speed in the Scroll options. You’ll learn more about Scroll effects in Lesson 8, “Applying Effects and Graphic Styles.”
6. Choose View > Preview Mode to preview the background image.
If scroll bars appear in the Application window, try scrolling the page to see the effect. If you don’t see scroll bars in the application, your screen resolution may be large enough to fit the entire page, and that’s OK. You can resize the Muse Application window to make it smaller and then you can see the scroll bars appear.
7. Click the Design mode link in the upper-right corner of the Application window, or click the the A-Master page tab, to return to the A-Master page in Design mode.
Editing the page appearance
Next, you’ll edit the appearance of the page area. As you did for the browser fill area, you can assign a background color and image for the page area along with other options to match your design. In addition, you can adjust the opacity of the page area to allow the browser fill to be visible behind it. To ensure that there is a high level of contrast between the page content and the background content, you can adjust the opacity, color, and other formatting options of the page area. By default, the page area has no fill or stroke (border). Let’s edit the page area appearance now.
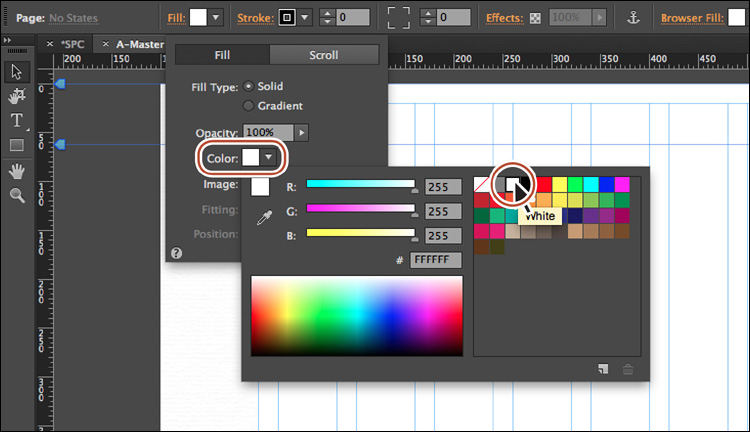
1. With Page showing in the Selection Indicator on the left end of the Control panel, click the Fill link in the Control panel to show the Fill menu.
2. In the Fill menu, click the Color option and then click the white swatch (small white square in the list of swatches) to apply a white fill to the page. You could also change each of the RGB color values to 255 to achieve white.
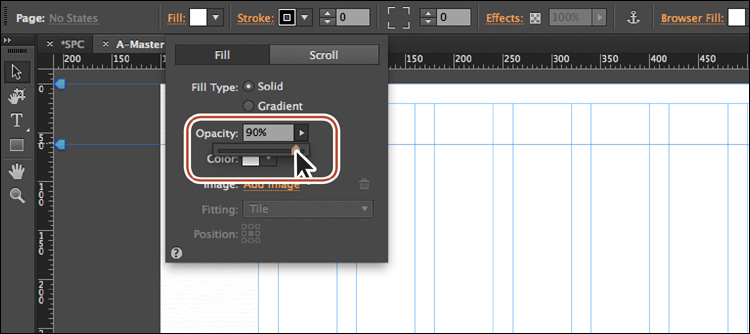
3. Click the arrow to the right of the Opacity value (100%) in the Fill menu and drag the slider to the left until 90 appears in the field. (You could also simply enter the value.) This makes the page area slightly transparent.
If you want to change the color fill of the page area or add a gradient fill, you can do so in the Fill menu as well.
The Fill menu also includes an option for a background image for the page area. The options are similar to the options for the browser fill, only the image would appear in the page area on top of the page fill color or gradient fill.
4. Click away from the Fill menu in the page area to hide the menu.
5. Choose File > Save Site.
Now that the page area is set, you can start to edit other properties for the master page.
Editing master page properties
In the previous lesson, you set up the site file and edited the properties for the Home page. Just as you can for a single page, you can also edit those same properties for a master page. The difference is that any page that has that master page applied will have the same properties as the master page by default. Setting page properties on a master page can save time because it lets you set properties across multiple pages simultaneously instead of editing them page by page.
Now, you’ll edit some of the master page properties for the A-Master page.
1. Choose Page > Page Properties with the A-Master page open in Design mode.
2. In the Page Properties For A-Master dialog box, with the Layout tab selected, change the Min Height value to 800.
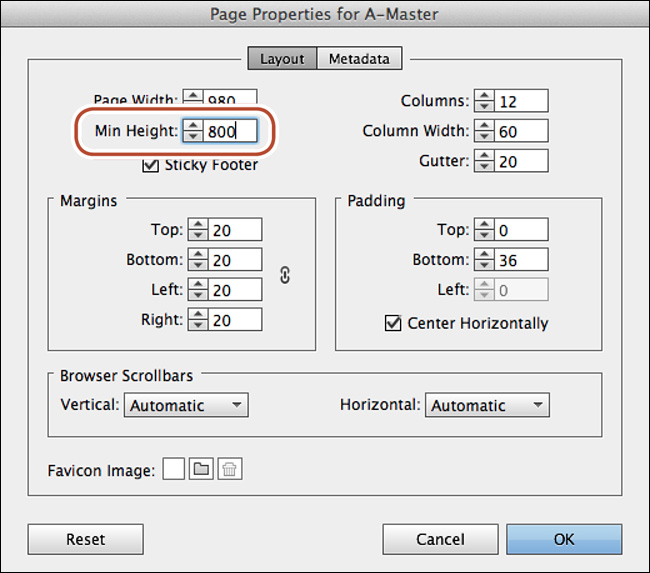
Because you set the Min Height on the Home page to 1300 in the previous lesson, and A-Master is applied to the Home page, the Home page Min Height overrides the A-Master Min Height. The Min Height setting increases the minimum height of all the pages with A-Master applied to them. Another option worth pointing out is Sticky Footer. Selected by default, Sticky Footer forces the footer to “stick” to the bottom of the browser window, even if the browser window is taller than the minimum height of the page (when the site is viewed on a large display).
![]() Tip
Tip
To edit the page properties for the A-Master page, you could also stay in Plan mode, right-click the A-Master thumbnail, and choose Page Properties to edit them.
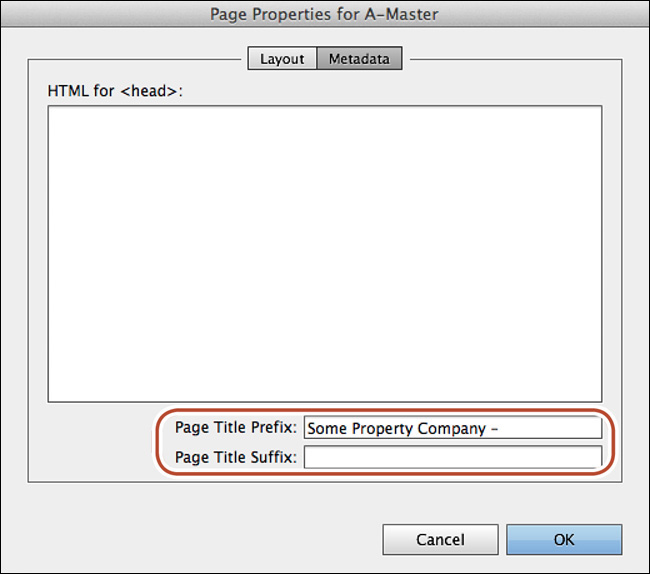
3. Click the Metadata tab at the top of the Page Properties dialog box.
The metadata options for the master page include an area for adding HTML content to the <head> section of the HTML file that is generated. You can also add a suffix and prefix to each page title that has the master applied to it.
![]() Note
Note
Clicking Reset in the Page Properties dialog box or choosing Page > Reset Page Properties will set the page properties to mirror the site properties and remove any page/browser fill changes you made.
4. Change the Page Title Prefix to Some Property Company – (with spaces before and after the dash). Each page with the A-Master page applied will now be affected. So the home page will have a title of Some Property Company – Home.
5. Click OK.
Editing the master page guides
Like other websites designed with HTML and CSS, individual pages in your Muse website can have varying heights based on the unique content on each page, but all can feature the same header and footer regions. These regions ensure that the header content, such as your logo, always remains in place at the top of the page and the footer content, such as copyright information, always displays directly below the page content regardless of the height of a given page. By adjusting the blue page guides on a master page in Design mode, you can easily specify consistent header and footer sizes across multiple pages.
Using the page guides on the master, you can control not only the size of the header and footer, but also set the padding on the top and bottom of the page (the distance between the browser window edge and the page edge), and the minimum height of the page (called the Min Height). You already saw some of these settings when you edited the page properties. The master page guides simply give you a visual way to edit those same properties.
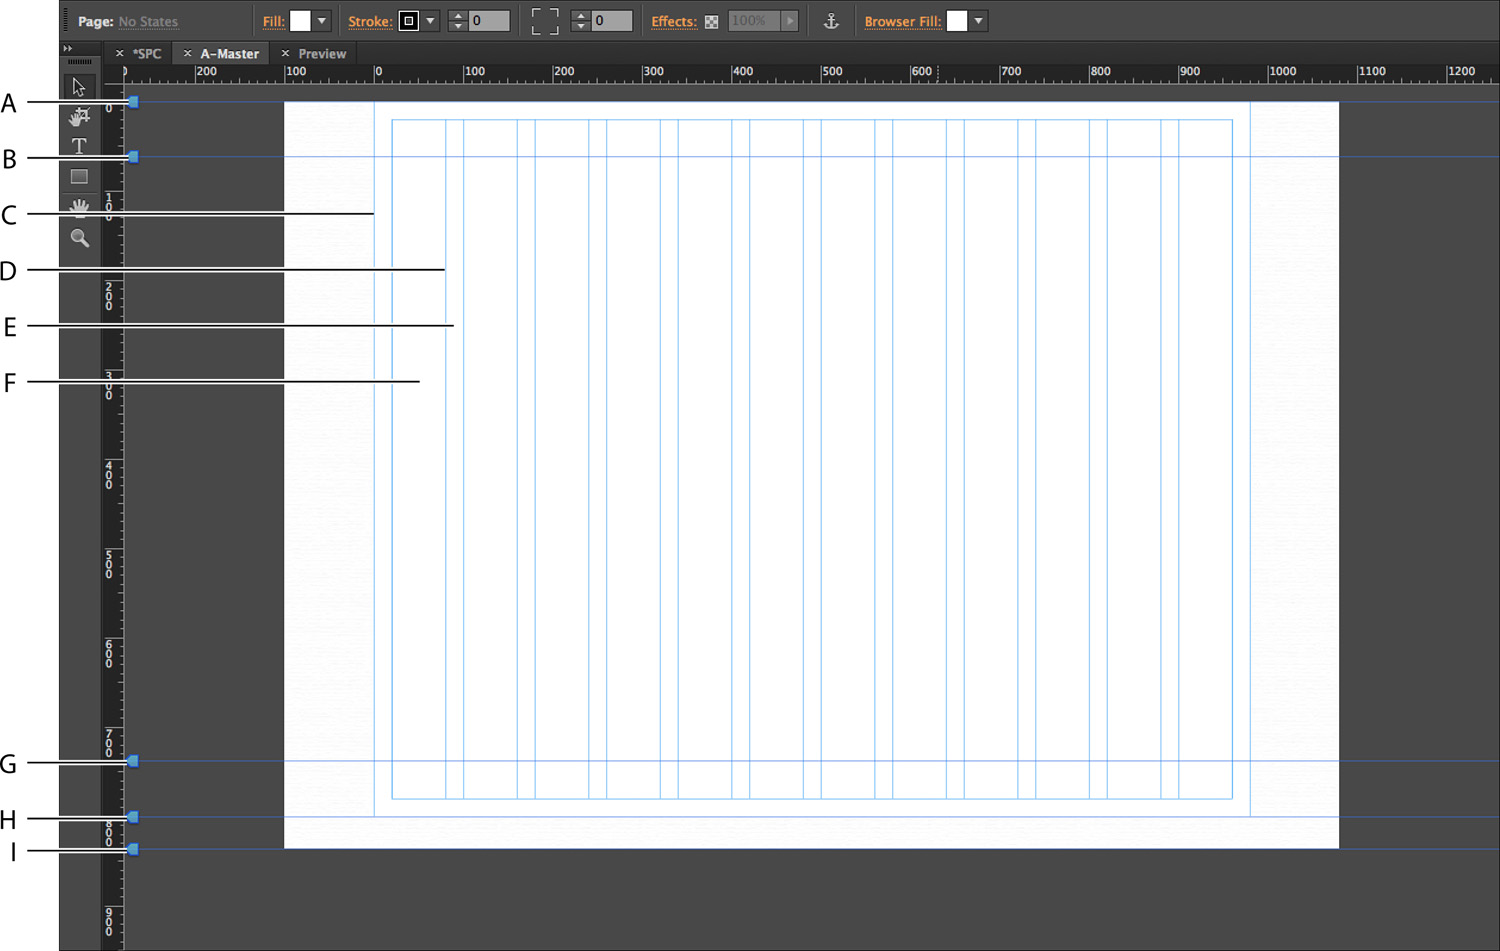
Here’s a quick guide to page guides:
A. Top of Page: Defines padding above the page and is the same as the Padding Top setting in the page properties.
B. Header: Delineates the bottom of the header area. Items inserted on a master page above the header guide appear at the top of the page and are locked (cannot be selected or edited) on the pages of the site.
C. Margin guides: Define a safe area of the page in which to lay out page content. Objects snap to the margin guides as you lay out your page. Margins, columns, and gutters in Muse are similar to margins and columns you use when designing layouts in Adobe InDesign.
D. Column guides: Divide the page area into columns of content.
E. Gutters: Specify the distance between columns.
F. Page area: Indicates where you can add the unique content for each page.
G. Footer: Delineates the top of the footer area. Items below the footer guide appear at the bottom of the page. Elements associated with the footer stay at the bottom of the page below the Footer guide regardless of content height, and elements placed in the footer on a master page are locked (cannot be selected or edited) on the pages of the site.
H. Bottom of Page: Defines the minimum page height. This is the same as the Min Height setting in the page properties. You set the minimum height in an earlier step when you edited the master page properties. This guide is a visual way to edit that value.
I. Bottom of Browser: Defines padding below the page and is the same as the Padding Bottom setting in the page properties.
The next exercise gives you some practice working with guides. You’ll add padding to the top of the A-Master page, which pushes the page area (the white box) down; then you’ll use this extra room to increase the header region enough to hold a larger logo and menu bar. Finally, you’ll adjust a few more guides toward the bottom of the page.
![]() Tip
Tip
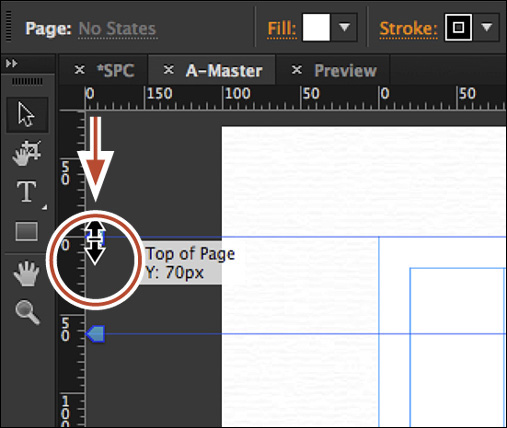
If 70px is difficult to achieve by dragging, another way to set the Top of Page options is to choose Page > Page Properties and set the Padding: Top value to 70.
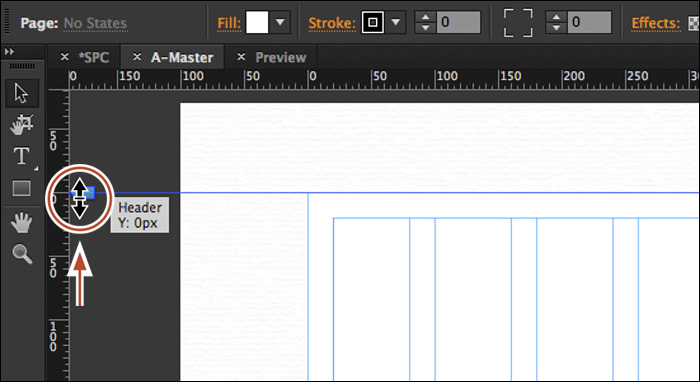
1. With A-Master page open in Design mode, locate the Top of Page blue guide handle off the left side of the page. Drag the handle down, noticing the measurement label as you do so. When the Y: value is approximately 70px, release the mouse. The Y: value is a pixel value that indicates how far from the top edge of the browser the page area starts.
![]() Note
Note
If you don’t see the master page guide handles, you may need to scroll over to the upper-left part of the page using the Document window scroll bars, or choose View > Show Header And Footer to display them again.
2. Off the left side of the page, click and drag the Header guide handle up until the Y: value shows 0 in the measurement label, and then release the mouse.
The Y: value, in this case, indicates how far from the top edge of the page area the Header guide is located. Setting it to 0 puts the Top of Page guide and the Header guide at the same vertical position so that the header area is above the page area.
Right now, there is a gap between the page area (white box) and the bottom of the browser window. If you wanted to see the browser fill beneath the page area, you would leave a gap.
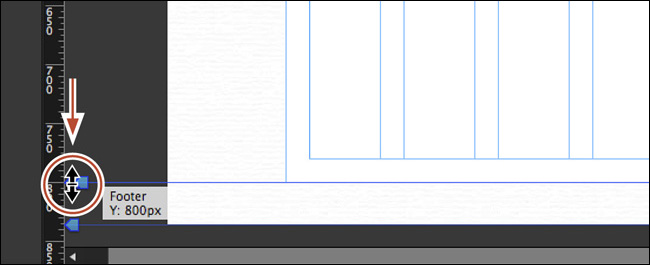
3. Click and drag the Footer guide down until the measurement label reads 800px (the Min Height of the page). You may need to scroll down the page.
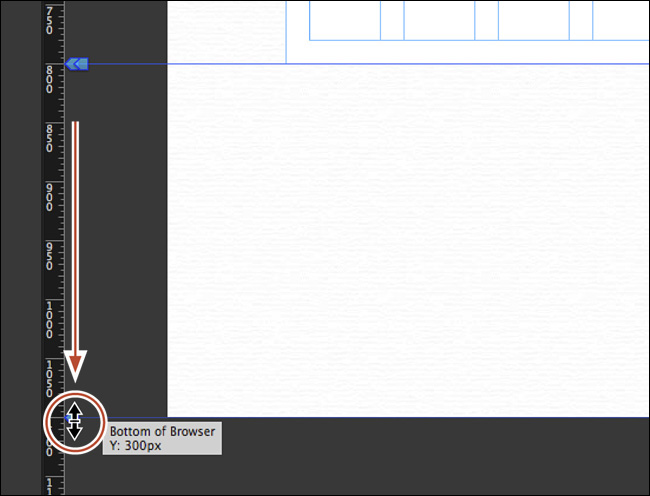
4. Drag the Bottom of Browser guide down until the measurement label shows a value of 300px.
![]() Tip
Tip
If 300px is difficult to achieve by dragging, another way to set the Bottom of Browser option is to choose Page > Page Properties and set the Padding: Bottom value to 300.
The Bottom of Browser guide gives you room to insert footer content below the page and measures the distance from the bottom of the page.
![]() Note
Note
Although you can edit the Header and Footer guides on master pages only, you can adjust all other page guides on individual pages in the site as well.
5. Choose File > Save Site.
With the key areas of the master page mapped out, next you’ll start adding content to it.
Adding a logo to the header
The header of most websites contains a variety of content: a company logo, a menu bar (also called a navigation or nav bar), possibly social media links, and more. For now, you’ll concentrate on adding a logo to the site’s header.
1. With A-Master still open in Design mode, choose View > Fit Page In Window, and then scroll up to see the header area above the Header guide.
Fitting the A-Master page in the Document window fits only the white page area in the window. For this site, that cuts off the header and footer areas so you needed to scroll.
2. Choose File > Place. Navigate to the images folder in the Lessons folder. Select the image called logo.png, and click Open.
Like Adobe InDesign, placing an image loads the Place Gun (![]() ) in Muse. With the Place Gun you click to place an image on the page at 100% its original size or click and drag to size the image as you place it.
) in Muse. With the Place Gun you click to place an image on the page at 100% its original size or click and drag to size the image as you place it.
3. Position the Place Gun in the page area and click to place the image onto the page.
When you place images, Muse, like InDesign, creates a link to the original image. It also creates an image frame and places the image within it. You can use the frame to crop the image, and you can move the image within the frame.
You’ll learn more about working with images in Lesson 5.
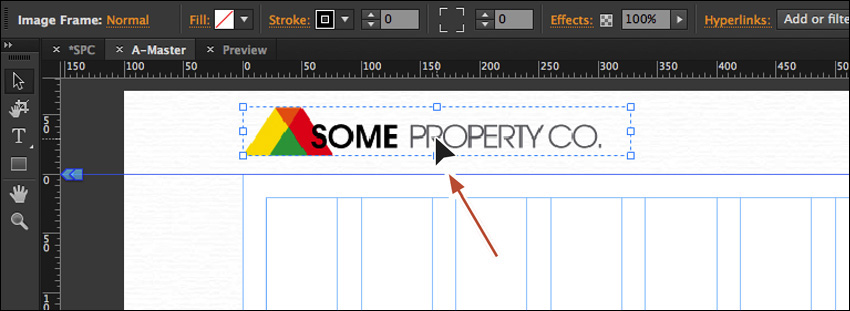
4. Select the Selection tool in the Toolbar and drag the image from its center to above the Header guide. Drag it close to the left edge of the page area. See the figure for placement help.
5. Click the Plan link in the upper-right corner of the Application window to show Plan mode again.
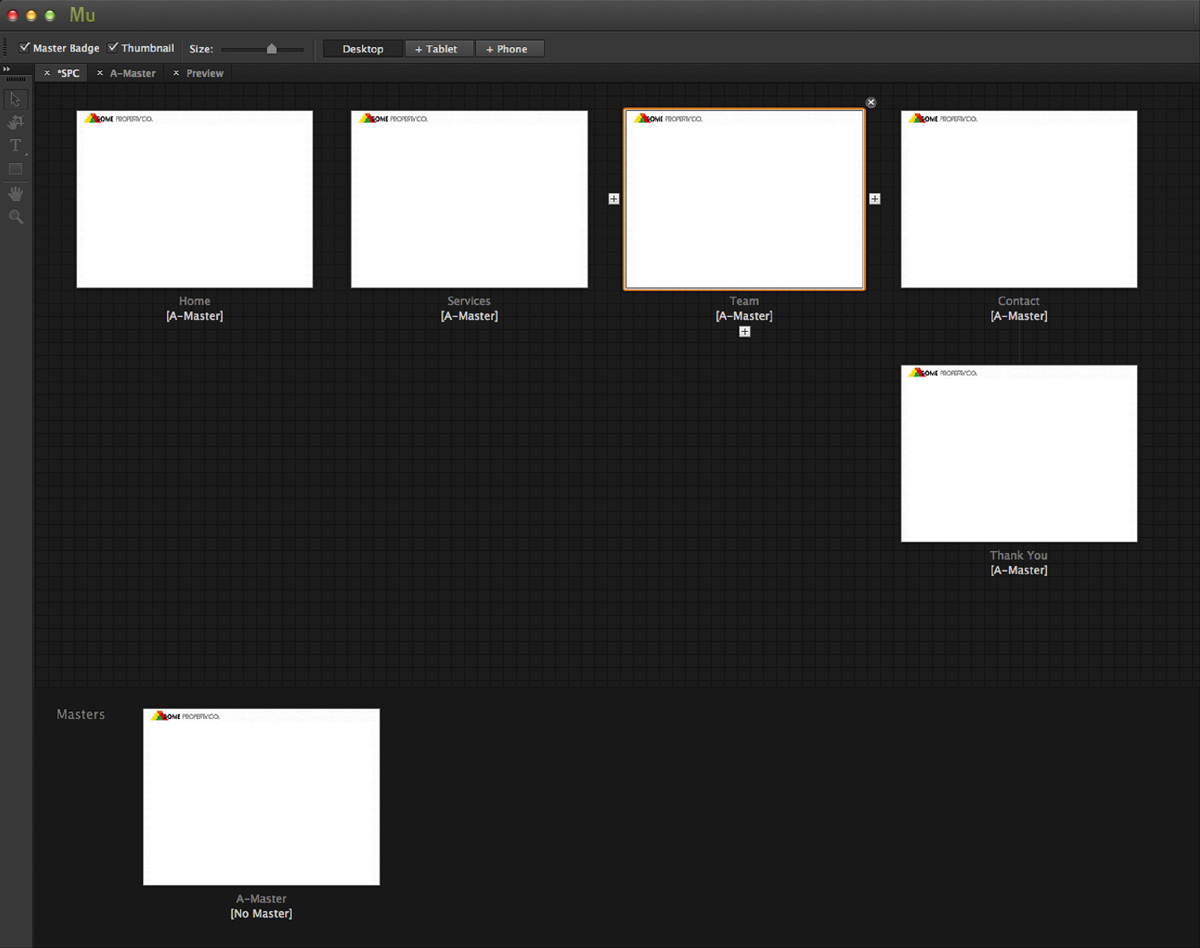
Notice that each page thumbnail now shows the content you added to the A-Master page, including the background image and logo.
6. Double-click the Home page thumbnail to open that page in Design mode.
If you try clicking the company logo in the header, you won’t be able to select or edit master content on your pages, and currently there is no way around that, as in InDesign.
7. Choose File > Close Page and click the A-Master tab at the top of the Document window to return to the page in Design mode.
With the A-Master page guides set and some of the header content in place, you’ll now add content to the footer of the page.
![]() Note
Note
If you don’t see the A-Master page in the Document window, click the A-Master tab below the Control panel to show the page.
Adding content to the footer
The footer for most sites contains a repeat of the main navigation or links to other useful information, such as contact details, brief information about the site, social media, or a statement of site ownership. Corporate sites often use the footer to provide links to driving directions, telephone number, a web form (like a contact form), or at least an email. Next, you’ll add a copy of the header logo to the footer.
1. On the A-Master page, with the Selection tool, click the logo in the header if it isn’t still selected, and then choose Edit > Copy. Choose Edit > Paste to paste the logo on the page.
![]() Tip
Tip
The Edit > Paste In Place command is a great way to paste a copy in the same location as the original.
2. Choose View > Zoom Out until you can see the area below the page (the area below the Footer guide).
3. Select the Selection tool and attempt to drag the logo into the footer area (below the Footer guide). The page will scroll automatically as you drag down.
Muse does not let you drag the logo into the footer in this case, because it considers the logo to be part of the page area. When you drag, the height of the page area simply increases instead. To associate content with the footer and be able to drag that content into the footer area, you need to assign it as a Footer Item. Assigning an item to the footer also means that you cannot select it on the pages and that it will move with the footer if the page height increases or shrinks.
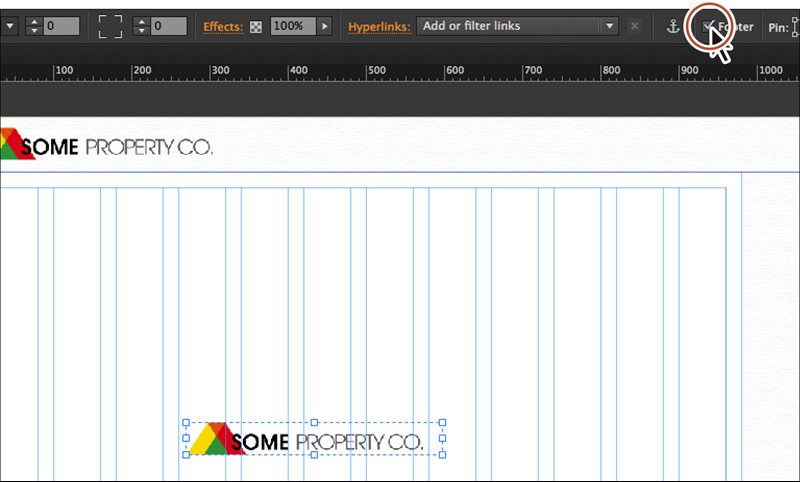
4. With the copied logo still selected, select the Footer option in the Control panel.
![]() Tip
Tip
You can also assign content to the footer by selecting the content on the page, right-clicking, and choosing Footer Item or by choosing Object > Footer Item.
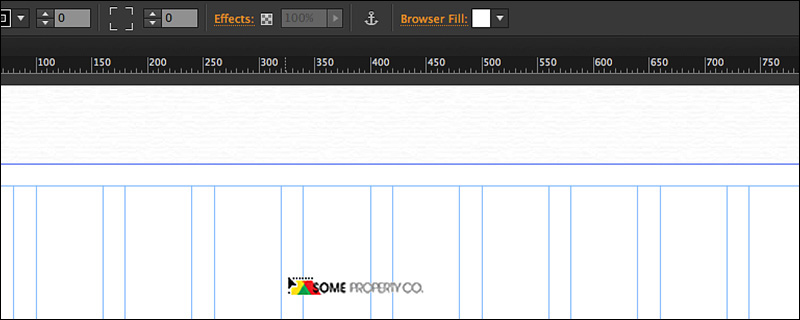
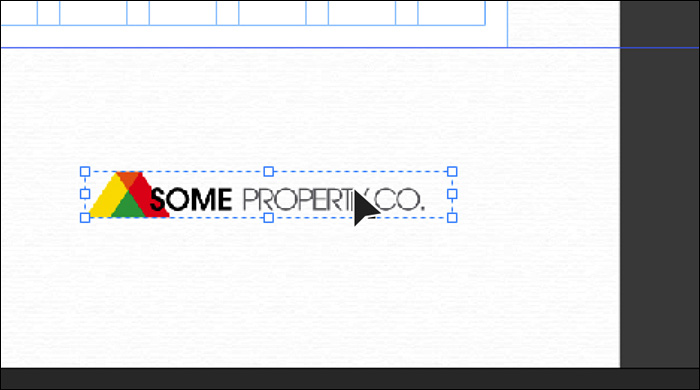
5. Drag the copied logo down below the right side of the page area, below the Footer guide. You’ll be adding more content to the footer in Lesson 5, but for now, leave the logo where it is.
6. Choose File > Save Site, and then choose File > Close Page to close the A-Master page and return to Plan mode.
Creating a new master page
Although a consistent, cohesive site design is important, that doesn’t mean every page should look exactly alike. Sometimes a group of pages within a site need their own identity. For example, you may want to design the individual product pages or customer feedback pages with a slightly different look and feel from the main pages. Muse lets you create multiple master pages for just this reason. You can either create a new, blank master page based on the site properties or even duplicate an existing master page and make some changes to the copy.
Next, you’ll create a new, blank master page that you may use later on, but first you’ll change the name of the existing A-Master.
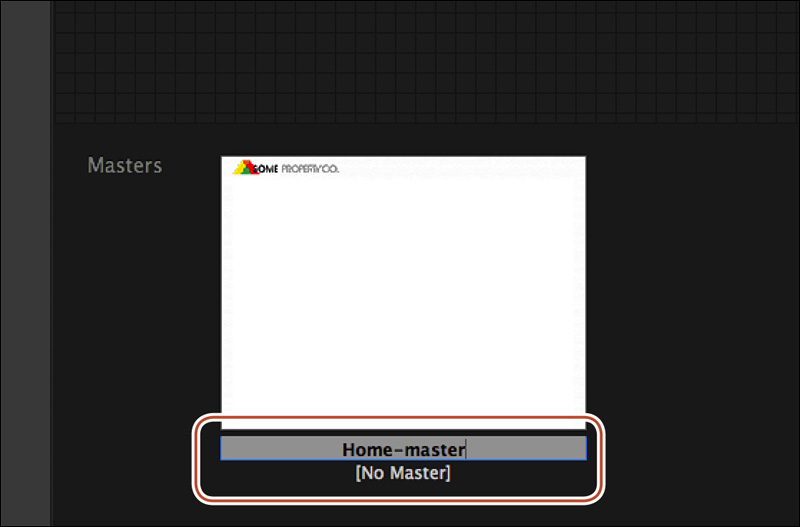
1. In Plan mode, double-click the A-Master page name beneath the master thumbnail and change the name to Home-master.
![]() Tip
Tip
Why put the word “master” in the master page name? When pages are open in Design mode, the page names appear in tabs at the top of the Document window. Having master in the name just makes it easier to differentiate, but you can name the pages however you like.
2. Choose Page > Add New Master Page.
Muse creates a new, blank master page in the Masters area with the same properties (width, column, and so on) as the current site properties (File > Site Properties). It also gives it a generic name like “A-Master,” which you could easily change.
![]() Tip
Tip
Another way to duplicate a master page is to hold down the Option (Alt) key while you drag a master thumbnail either between two master page thumbnails or just to the right of the master thumbnail farthest to the right. Release the mouse and then release the key when the blue drop zone appears, and you’ve made a copy.
You could also duplicate an existing master page if you want to start with the same page properties as the original by right-clicking a master page thumbnail, and choosing Duplicate Page. Doing so creates a new master that is an exact copy of the original master page.
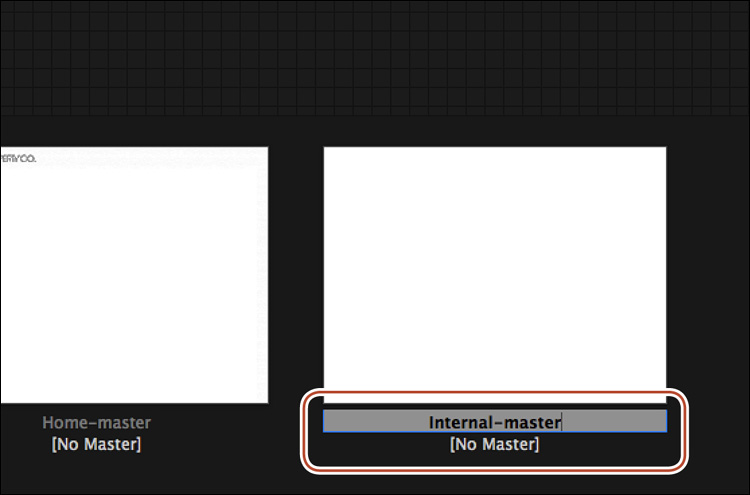
3. Name the new master page Internal-master by double-clicking the name beneath the page thumbnail or right-clicking the page thumbnail and choosing Rename Page.
![]() Tip
Tip
You can also easily reorder the master pages. This has no effect on the site; it can just be easier to either group similar master pages or put the most often used together.
4. Double-click the Internal-master page thumbnail to open the new master page in Design mode.
5. Choose Page > Page Properties. In the Layout tab, change the Min Height value to 800 and click OK.
6. Choose File > Save Site, and choose File > Close Page to close the Internal-master page.
Applying master pages
When you create a new master page, either a blank master or by duplicating an existing master page, that new master page isn’t applied to any of the pages in your site map. You can apply master pages to any number of pages, and even have a unique master page for each page if you really wanted.
![]() Tip
Tip
Another way to apply a master page is to right-click a page thumbnail in the site map and choose Masters > [name of the master to apply]. Using this method, you’ll also see the No Master option in the context menu. You can apply No Master to a unique page that you don’t want any master content on; the page will not be associated with any master page.
In the case of the SPC site, you will apply the Home-master page to the Home page to make the home page taller than the rest to start.
1. In Plan mode, if necessary, drag the Size slider in the Control panel above the site map, making sure that the page thumbnails still all fit in the sitemap area.
2. Drag the Internal-master thumbnail onto the Services page in the site map and release.

![]() Tip
Tip
You can also choose View > Zoom In or View > Zoom Out in Plan mode to change the magnification.
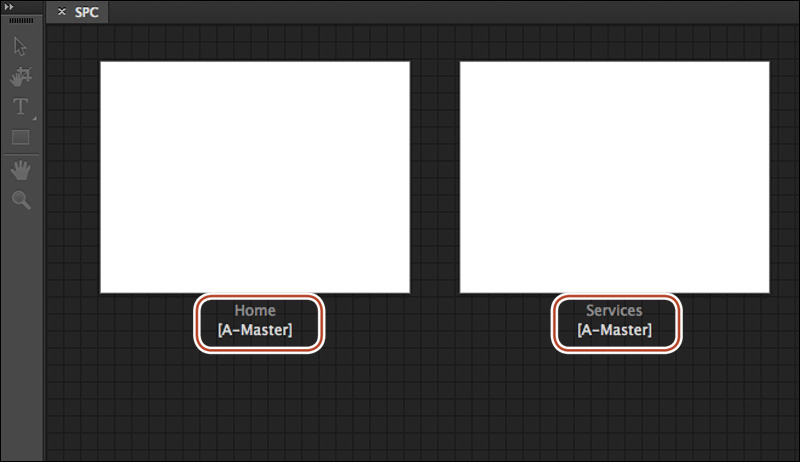
Notice that the text in brackets beneath the page thumbnail, called the master badge, changed from Home-master to Internal-master, indicating that the Internal-master page is applied to the page and that the Internal-master content is now on that page.
Now you’ll use another way to apply a master page.
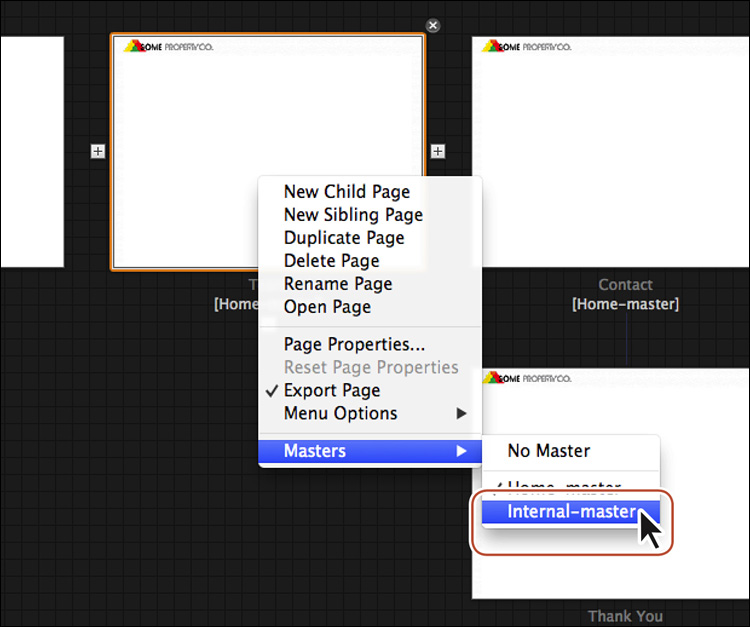
3. Right-click the Team page and choose Masters > Internal-master to apply the master page.
4. Apply the Internal-master page to the Contact and Thank You pages using either method.
5. In the Control panel, deselect Master Badge.
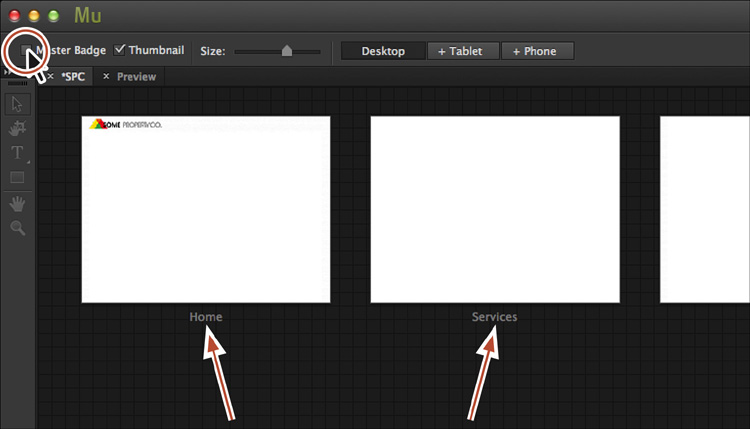
Notice that the master page names associated with the pages no longer appear beneath the page thumbnails. Sometimes, perhaps when you’re discussing the site map with a client or colleague, you want to look at the site map and just see the page thumbnails. Muse lets you show and hide the master badge for all pages.
![]() Note
Note
When you apply a different master page to a page in the site map, the previous master page content is removed from the page and replaced entirely by the new master page content.
6. Select Master Badge to show them again.
7. In the Control panel deselect Thumbnail, and you’ll see that the thumbnails turn into simple white boxes.
At times, you may also want to focus on the site map structure and not be distracted by a preview of the page in each thumbnail. You can also turn on and off the thumbnail preview.
8. Select Thumbnail again to see the previews once again.
You can also apply one master page to another master page. This allows you to base one master on another and can be very useful if a second master needs to share the same content and properties as the original, with a few changes.
9. Right-click the Internal-master thumbnail and choose Masters > Home-master.
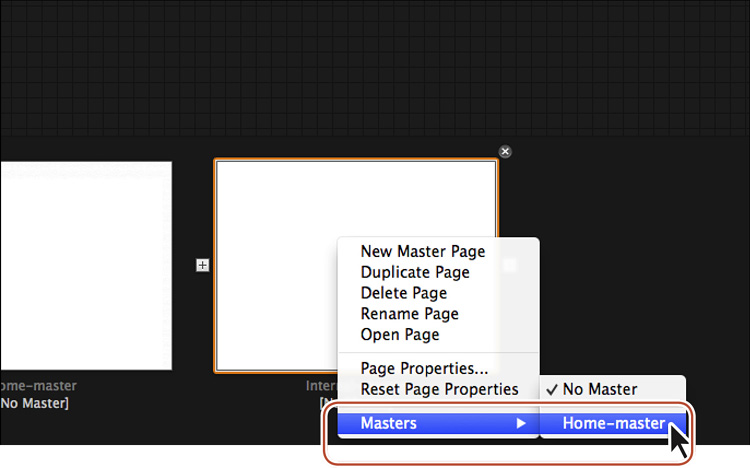
The name Home-master appears beneath the Internal-Master thumbnail in brackets, indicating that the Home-master page is applied. The Internal-master page thumbnail updates to display the same appearance as the Home-master page. It’s important to note that the content from the Home-master page can’t be edited on the Internal-master page. The Home-master master page is now linked to the Internal-master page, which means any changes made to Home-master will automatically also appear on the Internal-master master page.
10. Choose File > Save Site.
![]() Note
Note
If you were to open the Internal-master page in Design mode, you’d find that the page content, such as the header logo, is not editable. You could, however, change the page properties and other page settings, like browser fill and page fill.
Testing your pages
During the course of the exercises, you’ve previewed the file by selecting Preview mode. This allows you to test links, hide all hidden items, and navigate the site like visitors will. Although Preview mode is very useful, it does not show a few elements in the site, such as the page title and favicon.
To give you the full user experience, Muse lets you test a page or your entire site in a browser outside of the program. That’s what you’ll do next.
1. Choose File > Preview Site In Browser.
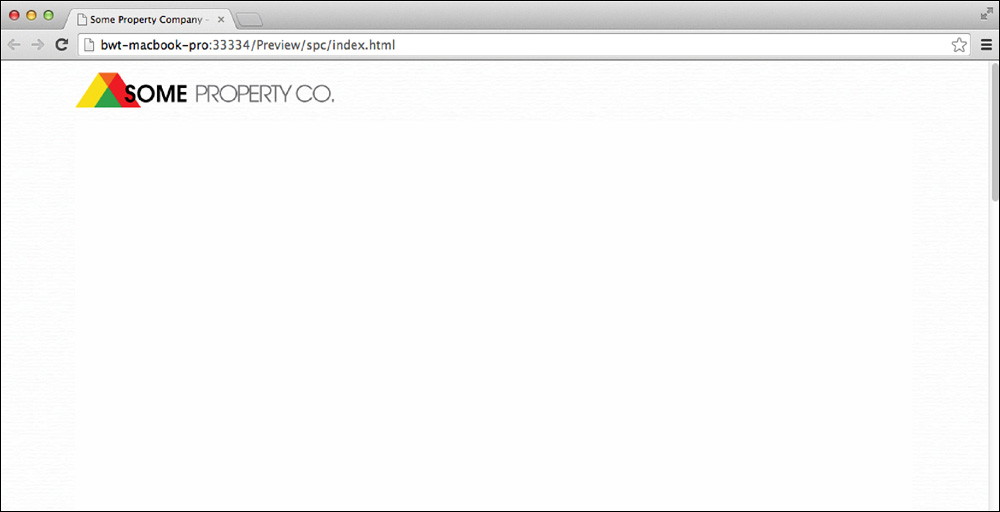
Preview Site In Browser allows you to navigate between pages for an overview of the site. Choosing Preview Page In Browser, the other alternative, allows you to see only the current page in the Document window or the first page of the site if there are no open pages. If you click any of the links in the page, they will not work because you are only previewing the appearance of that single page.
Unfortunately, there is no way to navigate to other pages, currently, but you’ll fix that in Lesson 7, when you add a nav bar.
2. Close the browser window, and return to Muse.
3. Close all open pages (including Preview), and make sure that Plan mode is displayed for the next lesson.
To close Preview, you can either click the X on the Preview tab or click the Preview tab and choose File > Close Preview.
Review questions
1. What are the benefits of using master pages?
2. What purpose do the Header and Footer page guides serve on the master pages?
3. Where on a page does a background image in the browser fill appear?
4. Name the two ways that you can apply master pages to pages in Plan mode.
5. How do you assign content that is not in the footer area to the footer?
Review answers
1. A master page in Muse contains content that is repeated on multiple pages in your site, like a menu or logo. Master pages can be used to more efficiently update a site, because common site elements are easy to locate and only need to be updated once. You can use one default master page throughout your website, or you can create multiple master pages and apply them individually to other pages or master pages.
2. The Header and Footer page guides define the areas where the header and footer content appear on the page. They also determine how large either of those areas is. Content that is placed on a master page and appears above the Header guide or below the Footer guide is locked on each page (cannot be selected or edited unless you’re editing on the master page that contains that content).
3. When you set a background image as the fill content using the Browser Fill menu in the Control panel, the image appears in the background of the browser window, behind the page area.
4. You can apply master pages to pages in your site by dragging a master page thumbnail in Plan mode onto a page thumbnail in the site plan area. You can also apply a master page to a page in the site map by right-clicking a page thumbnail in the site plan area and choosing Masters > [name of the master to apply].
5. Select the content on the page or master page and select Footer in the Control panel, right-click the content and choose Footer Item, or select the content and choose Object > Footer Item.