
Lesson 10. Modifying Data with Action Queries
Not only can you use T-SQL to select data, you can also use it to update data. T-SQL gives you the ability to update, insert into, and delete data from tables. In this lesson, you learn:
![]() How to use the
How to use the UPDATE statement to update table data
![]() How to use the
How to use the INSERT statement to insert data into an existing table
![]() How to use the
How to use the SELECT INTO statement to insert data into a new table
![]() How to use the
How to use the DELETE statement to selectively delete data from a table
![]() How to use the
How to use the TRUNCATE statement to remove all data from a table
The UPDATE Statement
As its name implies, an UPDATE statement updates table data. The format of the UPDATE statement is as follows:
UPDATE tablename SET column1=value1, [column2=value2....]
The example that follows updates the contents of the Customers table, changing the city to Venice Beach for all rows in which the city is Westlake Village:
UPDATE Person.Address
SET City = 'Venice Beach'
WHERE City = 'Westlake Village'
A valuable technique lies in the ability to update data in one table based on the values of data in another table. Here’s an example:
UPDATE Production.Product
SET Product.ListPrice =
ProductListPriceHistory.ListPrice
FROM Production.Product
INNER JOIN Production.ProductListPriceHistory
ON Product.ProductID =
ProductListPriceHistory.ProductID
WHERE GetDate()
BETWEEN ProductListPriceHistory.StartDate
AND ProductListPriceHistory.EndDate
This SQL statement updates the ListPrice in the Product table based on data in the ProductListPriceHistory table. To do this, it joins the two tables on ProductID. It only updates the ListPrice in the Product table where there are corresponding records in the ProductListPriceHistory table and where the current date is between the StartDate and EndDate field values. The results of executing this SQL statement are shown in Figure 10.1.
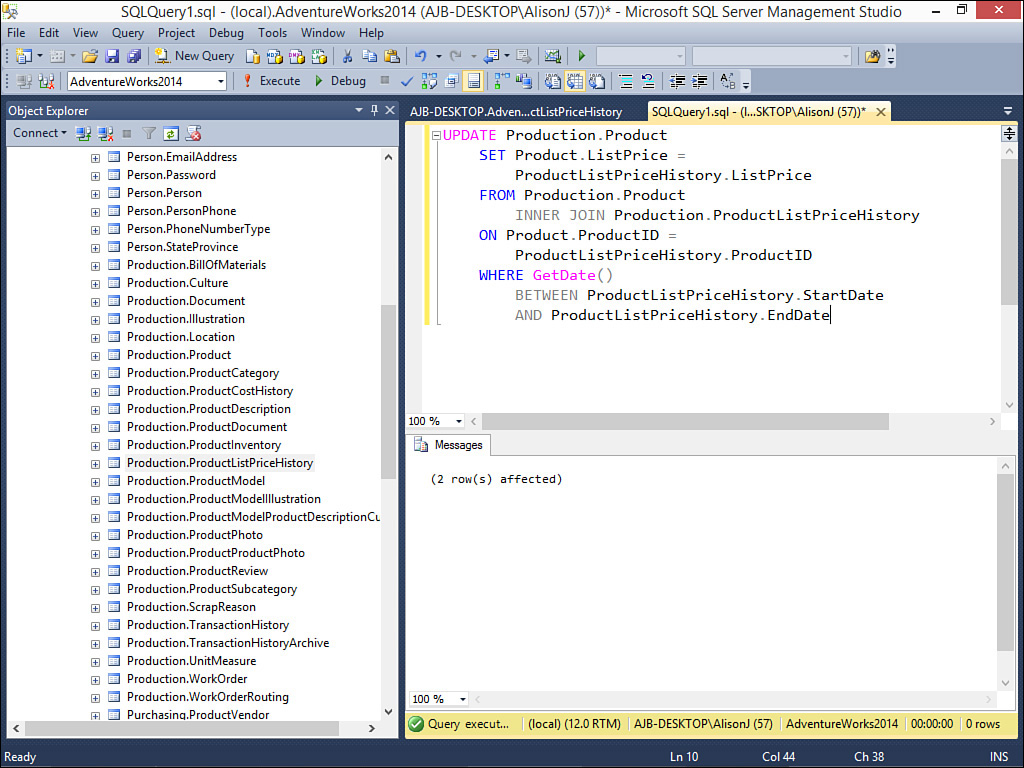
FIGURE 10.1 An UPDATE statement that updates the Product table based on values in the ProductListPriceHistory table.
The INSERT Statement
You use the INSERT statement to insert data into an existing table. The INSERT statement has the following format:
INSERT [INTO] table_or_view [(col1, col2...)] VALUES (value1, value2)
Here’s an example:
INSERT INTO Person.Address
(AddressLine1,
City, StateProvinceID,
PostalCode,ModifiedDate)
VALUES
('34 Elm Street',
'Venice Beach', 9,
90291, '1/26/15')
In this example, the designated values are inserted into the specified fields in the Address table.
If a column is not provided in the list of values being inserted, one of the following conditions must be true for the omitted column for the record to be inserted successfully:
![]() The column has an Identity property, in which case the next available identity value is used.
The column has an Identity property, in which case the next available identity value is used.
![]() The column has a default value, in which case the default value is automatically inserted into the field.
The column has a default value, in which case the default value is automatically inserted into the field.
![]() The column has a timestamp data type, in which case the current timestamp value is used.
The column has a timestamp data type, in which case the current timestamp value is used.
![]() The column allows nulls, in which case a null value is used.
The column allows nulls, in which case a null value is used.
![]() The column is computed, in which case the computed value is used.
The column is computed, in which case the computed value is used.
In addition to being able to specify values you want to insert into a record in a table, you can also insert data from another table. Here’s an example:
INSERT INTO
[Production].[TransactionHistoryArchive]
(TransactionID, ProductID,
ReferenceOrderID,ReferenceOrderLineID,
TransactionDate, TransactionType,
Quantity, ActualCost,
ModifiedDate)
SELECT TransactionID, ProductID,
ReferenceOrderID, ReferenceOrderLineID,
TransactionDate, TransactionType,
Quantity, ActualCost,
ModifiedDate
FROM Production.TransactionHistory
WHERE TransactionDate < '1/1/2014'
In this example, all records from the TransactionHistory table with a TransactionDate before 1/1/2014 are inserted into the TransactionHistoryArchive table. The results are shown in Figure 10.2.
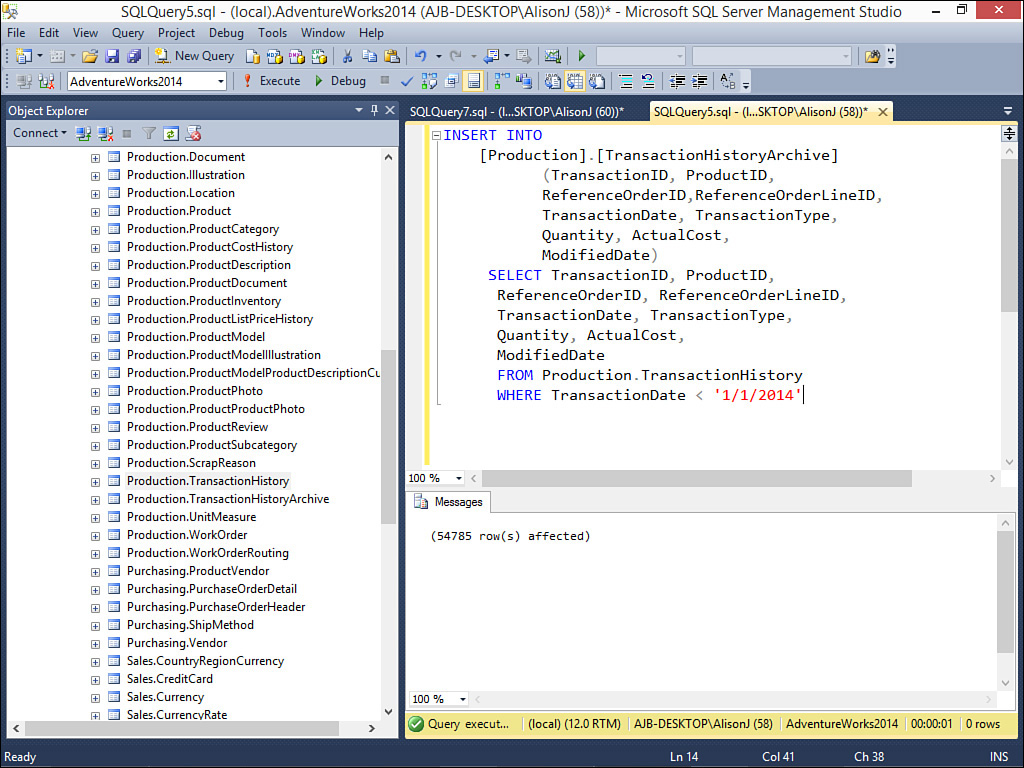
FIGURE 10.2 An INSERT statement that inserts records from the TransactionHistory table into the TransactionHistoryArchive table.
The SELECT INTO Statement
Whereas the INSERT statement inserts data into an existing table, the SELECT INTO statement creates a new table. Here’s an example:
SELECT
TransactionID, ProductID,
ReferenceOrderID,ReferenceOrderLineID,
TransactionDate, TransactionType,
Quantity, ActualCost,
ModifiedDate
INTO Production.TransactionsOld
FROM Production.TransactionHistory
WHERE TransactionDate < '1/1/2014'
In this example, all transactions with a TransactionDate before 1/1/2014 are inserted into a new table called TransactionsOld. The resulting table is shown in Figure 10.3.
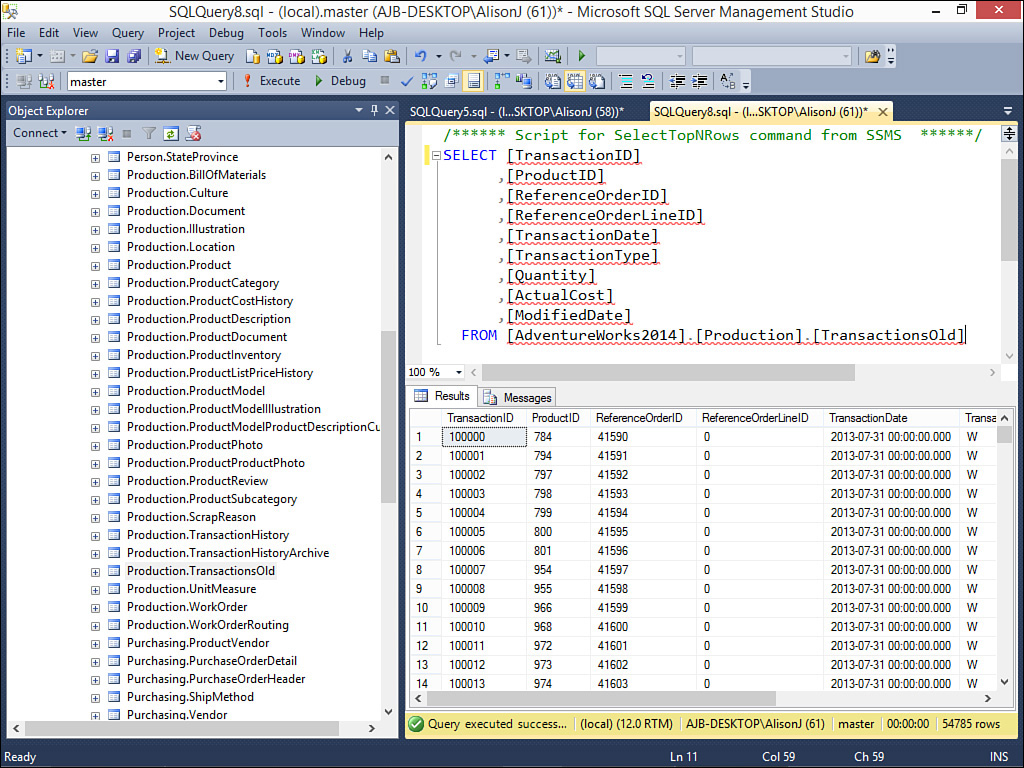
FIGURE 10.3 A SELECT INTO statement that inserts records from the TransactionHistory table into a new table called TransactionsOld.
The DELETE Statement
You use the DELETE statement to remove rows from a table. The format of the DELETE statement is as follows:
DELETE [FROM] table-name [WHERE search_conditions]
Here’s an example:
DELETE FROM Production.TransactionHistory
WHERE TransactionDate < '1/15/2014'
This example removes all rows from the TransactionHistory table in which the TransactionDate is before 1/15/2014. The results of executing the SQL statement are shown in Figure 10.4.

FIGURE 10.4 A DELETE statement that deletes records from the TransactionHistory table where the TransactionDate is prior to 1/15/2014.
The TRUNCATE Statement
The TRUNCATE statement removes all rows from a table. It executes more quickly than a DELETE statement that does not contain a WHERE clause. Unlike the DROP statement, which removes a table entirely, the TRUNCATE statement retains the structure of the table while deleting all of its data. It looks like this:
TRUNCATE TABLE Production.TransactionsOld
Summary
An important use of T-SQL lies in its ability to modify table data. Using T-SQL, you can insert, update, and delete table data. In this lesson, you learned the syntax to perform these important tasks.
Q&A
Q. Explain the difference between INSERT and SELECT INTO.
A. INSERT adds data to an existing table; SELECT INTO creates a new table containing the data you are inserting.
Q. Explain the difference between a DELETE statement and a TRUNCATE statement.
A. A DELETE statement allows you to selectively remove data from a table; the TRUNCATE statement unconditionally removes all rows from a table.
Q. Describe the difference between TRUNCATE and DROP.
A. TRUNCATE removes all data from the table while retaining the table structure; DROP removes the table from the database.
Workshop
Quiz
1. Name the five action keywords available in T-SQL.
2. You can insert data into a view (true/false).
3. What keyword do you use when inserting data into a new table?
4. What statement do you use to most efficiently remove all data from the Person.Person table?
Quiz Answers
1. INSERT, SELECT INTO, UPDATE, DELETE, TRUNCATE.
2. True. You can insert data into a view just as you can insert data into a table. The INSERT statement affects all tables underlying the view.
3. INTO.
4. TRUNCATE TABLE Person.Person.
Activities
Write and execute T-SQL that inserts all employees in the HumanResources.Employee table where SupervisorID is equal to 3 into a new table called tblEmployeesSpecial. View the table data to validate that your T-SQL code ran successfully. Insert additional data into the tblEmployeesSpecial table from the HumanResources.Employee table where the SupervisorID is equal to 4. View the table data to validate your T-SQL code. Update all the VacationHours amounts in the tblEmployeesSpecial table, increasing them by eight. Review the table data to make sure that your T-SQL code executed as expected. Delete all rows in the tblEmployeesSpecial table where the SupervisorID is equal to 3. Review the table data to ensure that all the rows with SupervisorID 3 are removed. Truncate the tblEmployeesSpecial table. Open it up and note that the data is unavailable. Finally, DROP the tblEmployeesSpecial table. Note that it is no longer displayed in the list of available tables.