
9. Working with Text, Lists, and Tables
Lesson overview
In this lesson, you’ll create several webpages from your new template and work with headings, paragraphs, and other text elements to do the following:
• Enter heading and paragraph text
• Insert text from another source
• Create bulleted lists
• Create indented text
• Insert and modify tables
• Spellcheck your website
• Search and replace text
This lesson will take about 2 hours and 30 minutes to complete. If you have not already done so, download the project files for this lesson from the Lesson & Update Files tab on your Account page at www.peachpit.com, store them on your computer in a convenient location, and define a new site based on the lesson09 folder as described in the “Getting Started” section of this book. Your Account page is also where you’ll find any updates to the lessons or to the lesson files. Look on the Lesson & Update Files tab to access the most current content.

Dreamweaver provides numerous tools for creating, editing, and formatting web content, whether it’s created within the program or imported from other applications.
Previewing the completed file
To get a sense of the files you will work on in the first part of this lesson, let’s preview the completed pages in a browser.
1. Launch Adobe Dreamweaver CC (2015.1 release) or later, if necessary.
If Dreamweaver is already running, close any open files.
2. If necessary, define a new site for the lesson09 folder, as described in the “Getting Started” section at the beginning of the book.
Name the new site lesson09.
3. If necessary, press F8 to open the Files panel. Select lesson09 from the site
drop-down list, and expand the site root folder.
Dreamweaver allows you to open one or more files at the same time.
4. Open the lesson09/finished folder.
5. Select contactus_finished.html. Press Ctrl/Cmd, and then select events_finished.html, news_finished.html, and tips_finished.html.
By pressing Ctrl/Cmd before you click, you can select multiple non-consecutive files.
6. Right-click any of the selected files.
Choose Open from the context menu.

All four files open. Tabs at the top of the document window identify each file.
7. Click the news_finished.html tab to bring that file to the top, and switch to Live view if necessary.

![]() Note
Note
Be sure to use Live view to preview each of the pages.
Note the headings and text elements used.
8. Click the tips_finished.html document tab to bring that file to the top.

Note the bulleted list elements used.
9. Click the contactus_finished.html tab to bring that file to the top.

Note how text elements are indented and formatted.
10. Click the events_finished.html tab to bring that file to the top.
Note the two HTML-based tables used. The design employs techniques that allow the tables to adapt to tablets and smartphones.
11. Drag the Scrubber to the left.

As the screen narrows, the media queries apply styles to reformat the content and layout. Note how the tables themselves drastically alter their appearance and structure to fit the smaller screens.
12. Choose File > Close All.
In each of the pages, there are a variety of elements used, including headings, paragraphs, lists, bullets, indented text, and tables. In the following exercises, you will create these pages and learn how to format each of these elements.
Creating and styling text
Most websites are composed of large blocks of text with a few images sprinkled in for visual interest. Dreamweaver provides a variety of means for creating, importing, and styling text to meet any need. In the following exercises, you will learn a variety of techniques for working with and formatting text.
Importing text
In this exercise, you’ll create a new page from the site template and then insert heading and paragraph text from a text document.
1. Choose Window > Assets to display the Assets panel. Select the Templates category icon ![]() . Right-click mygreen_temp, and choose New From Template from the context menu.
. Right-click mygreen_temp, and choose New From Template from the context menu.

![]() Tip
Tip
The Assets panel may open as a separate, floating panel. To save screen space, feel free to dock the panel on the right side of the screen, as shown in Lesson 1, “Customizing Your Workspace.”
A new page is created based on the site template.
2. Save the file as news.html in the site root folder.
3. If necessary, choose Window > Properties to display the Property inspector. In the Document Title field, select the placeholder text Add Title Here. Type Green News and press Enter/Return to complete the title.
4. In the Files panel, double-click green_news.rtf in the lesson09/resources folder.
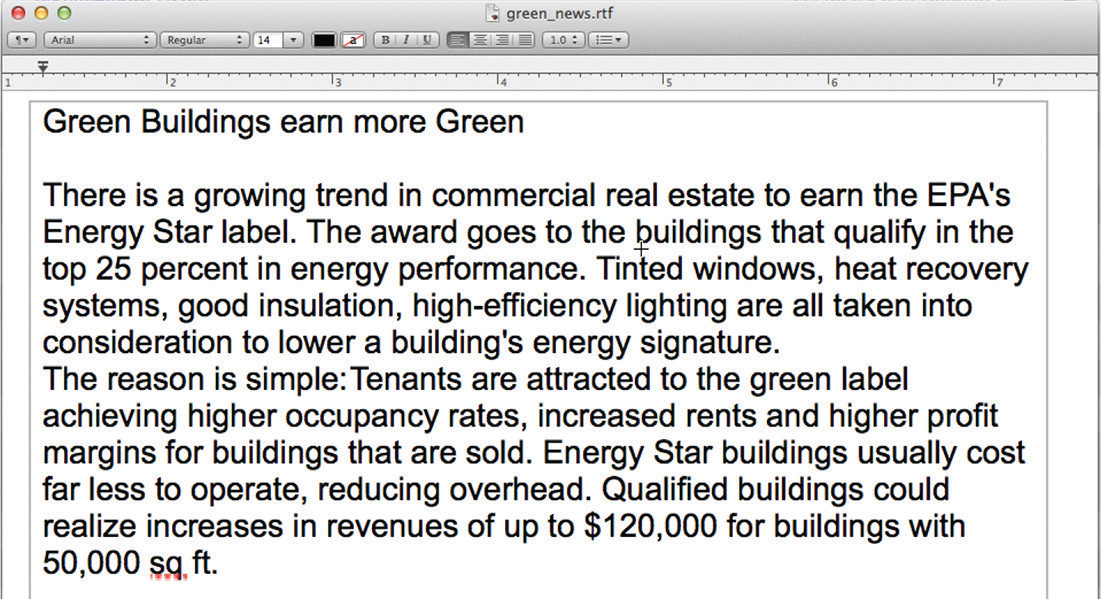
Dreamweaver automatically launches a program compatible to the file type selected. The text is unformatted and features extra lines between each paragraph. These extra lines are intentional. For some reason, Dreamweaver swaps out single paragraph returns for <br> tags when you copy and paste them from another program. Adding a second return forces Dreamweaver to use paragraph tags instead.
This file contains four news stories. When you move the stories to the webpage, you’re going to create semantic structures, as you did for the quotation placeholders. As explained earlier, semantic web design attempts to provide a context for your web content so that it will be easier for users and web applications to find information and reuse it, as necessary.
5. In the text editor or word-processing program, insert the cursor at the beginning of the text Green Buildings earn more Green. Press Ctrl+A/Cmd+A.
All the text is highlighted.
![]() Tip
Tip
When you use the clipboard to bring text into Dreamweaver from other programs, you must be in Design view if you want to honor the paragraph returns and other formatting.
6. Press Ctrl+C/Cmd+C to copy the text.
Close green_news.rtf.
Do not save any changes.
7. Switch back to Dreamweaver.
Switch to Design view.
Select the text Add main heading here.
Type Green News to replace it.

8. Insert the cursor in the placeholder heading Add subheading here.
9. Click the <h2> tag selector.
Press Delete.
10. Select the text Add content here.
11. Press Ctrl+V/Cmd+V to paste the text from the clipboard and swap out the placeholder text.

The text from green_news.rtf appears in the layout.
12. Save the file.
The four news stories were inserted as individual <p> elements. Although a human visitor would be able to distinguish where one story ends and another begins, there is no differentiation between them within the code. Adding semantic structures should be your goal whenever possible. This is encouraged not only to support accessibility standards but also to improve your SEO ranking at the same time.
Creating semantic structures
In this exercise, you will insert HTML5 <article> elements to contain the news stories.
1. If necessary, open news.html in Design view.
Click in the text Green Buildings earn more Green.
Select the p tag selector.
The entire <p> element is selected.
2. Hold the Shift key and click at the end of the text Energy Waster?
The first news story is selected.
3. Choose Insert > Article.

The Insert Article dialog appears. The dialog should default to the Wrap Around Selection mode. If it doesn’t, select the option from the Insert pull-down menu in the dialog.
This dialog allows you to add custom IDs and classes to your element. At the moment, we don’t have the need for one, so you can insert the new element as is.
4. Click OK to insert a new <article> element.

The new element appears in the tag selector interface wrapping the first news story.
5. Repeat steps 1–4 to create new <article> elements for the remaining three news stories.
When you’re finished, you should have four new <article> elements, one for each news story.
6. Save news.html.
Creating headings
In HTML, the tags <h1>, <h2>, <h3>, <h4>, <h5>, and <h6> create headings. Any browsing device, whether it is a computer, a Braille reader, or a cellphone, interprets text formatted with any of these tags as a heading. On the web, headings are used to introduce distinct sections with helpful titles, just as they do in books, magazine articles, and term papers.
You are using one <h1> element per page as the primary page title. Any other headings used on the page should descend in order from the <h1>. Since each news story has equal importance, they all can begin with a second-level heading, or <h2>. At the moment, all the pasted text is formatted as <p> elements. Let’s format the news headings as <h2> elements.
![]() Tip
Tip
If the Format menu is not visible, select the HTML mode of the Property inspector.
1. In Design view, select the text Green Buildings earn more Green. Choose Heading 2 from the Format menu in the Property inspector, or press Ctrl+2/Cmd+2.

The text is formatted as an <h2> element.
2. Repeat step 1 with the text Shopping green saves energy, Recycling isn’t always Green, and Fireplace: Fun or Folly?
All the selected text should now be formatted as <h2> elements. Let’s create a custom rule for this element to set it off from the other headings with a unique style.
3. Insert the cursor in any of the newly formatted <h2> elements.
Choose Window > CSS Designer to open the CSS Designer, if necessary.
4. Choose green_styles.css > GLOBAL.
Click the Add Selector icon ![]() .
.
A new selector appears that targets the <h2> element but contains all the Bootstrap classes styling the parent elements too. There’s no need for such a complex selector, so you should simplify these names whenever they appear.
![]() Note
Note
By default, each heading tag—<h1>, <h2>, <h3>, and so on—is formatted smaller than the preceding tag. This formatting reinforces the semantic importance of each tag. Although size is an obvious method of indicating hierarchy, it’s not a requirement; feel free to experiment with other styling techniques, such as color, indenting, borders, and background shading, to create your own hierarchical structure.
5. Edit the selector to say:
article h2
This name will target only <h2> elements used in the main content area.
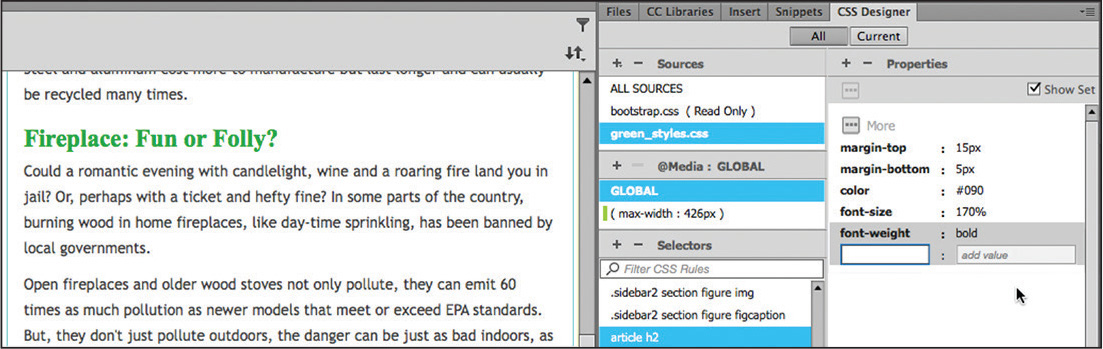
6. Create the following specifications:
margin-top: 15px
margin-bottom: 5px
color: #090
font-size: 170%
font-weight: bold
7. Save all files.
Adding other HTML structures
Descendant selectors are often sufficient for styling most elements and structures in a webpage. But not all the structural elements are available from the Insert menu or panel. In this exercise, you will learn how to build a custom HTML structure for a quotation and an attribution using the Quick Tag Editor.
1. Open news.html in Design view, if necessary.
2. In the Files panel, open quotes09.txt.

Since this is a plain-text file, Dreamweaver can open it. The file contains quotations you will insert in the pages that will be created in this lesson.
3. Select the text of the first quotation, excluding the author name.
Press Ctrl+X/Cmd+X to cut the text.
4. Switch to news.html.
Select the first quotation placeholder.
Press Ctrl+V/Cmd+V.

![]() Note
Note
When pasting text into existing HTML structures, it is important not to accidentally delete or damage these structures.
The quotation has replaced the placeholder.
5. Switch to quotes09.txt. Select and cut the author name, John Muir.
6. Switch to news.html. Select the Add Author Name placeholder text and paste the text.
John Muir has replaced the author name placeholder. Since there was only one quotation placeholder in the template, you’ll have to create the other quotation structures from scratch.
7. Switch to quotes09.txt. Select and cut the next two quotations and authors.
![]() Tip
Tip
In Design view, there may not be any visual indication of the cursor location, but you can see it if you use Split view.
8. In news.html, insert the cursor anywhere in the first quotation.
Click the blockquote tag selector. Press the right arrow key.

The cursor moves to a position in the code after the <blockquote> element.
9. Press Ctrl+V/Cmd+V to paste the new quotations and authors.

The text appears, but it is not styled properly.
10. Using the cursor and the tag selector interface, compare the structure of the three quotations, and note the differences.
The new quotations and author names appear in two separate p elements. Part of the styling problem is due to the missing parent blockquote element. Dreamweaver has no menu option for adding this specific tag, but you can use the Quick Tag Editor to build all types of custom structures in a pinch.
11. Select the second quotation, including the author name, Sidney Sheldon.
12. Press Ctrl+T/Cmd+T to activate the Quick Tag Editor.
![]() Tip
Tip
Press Ctrl+T/Cmd+T to toggle between modes in the Quick Tag Editor, if necessary.
The Quick Tag Editor appears. Since you have more than one element selected, it should default to Wrap mode.
13. Type blockquote and press Enter/Return twice to add the element as a parent to the two paragraphs.

The quotation text is now formatted properly, but the author name needs one more tweak: You need to change the tag applied to it. As with blockquote, there’s no menu option for the <cite> tag.
14. Insert the cursor in the author name, Sidney Sheldon. Select the tag selector for the <p> element. Press Ctrl+T/Cmd+T to activate the Quick Tag Editor.
The Quick Tag Editor appears. Since you have only one element selected, it should default to Edit mode. If the correct mode is not visible, press Ctrl+T/Cmd+T until it is.
![]() Note
Note
In HTML5, the cite element is used to identify the attribution of a quotation.
15. Press the Backspace key to delete “p” from the selected tag.
Type cite, and press Enter/Return twice to complete the change.

The author name now appears in a <cite> element and is styled identically to the other author.
16. Repeat steps 11–15 to create the blockquote structure for the third quotation in news.html.
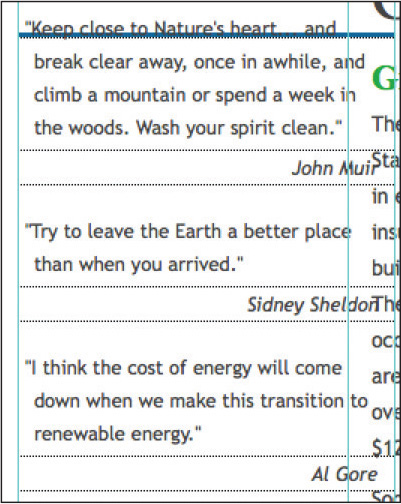
All three quotations are now structured properly in the first column.
17. Save and close news.html.
When you close news.html, Dreamweaver may prompt you to save green_styles.css. It is vital that you remember to save changes to the style sheet, especially when the file itself is not open. If you forget, you will lose any styling that was created in the previous exercises.
18. Click Save if necessary.
19. Close quotes09.txt. Do not save changes.
Closing the text file without saving the changes will preserve the original content in case you want to repeat this exercise later.
Creating lists
Formatting should add meaning, organization, and clarity to your content. One method of doing this is to use the HTML list elements. Lists are the workhorses of the web because they are easier to read than blocks of dense text; they also help users find information quickly.
In this exercise, you will learn how to make an HTML list.
1. Choose Window > Assets to bring the Assets panel to the front.
In the Template category, right-click mygreen_temp.
From the context menu, choose New From Template.
![]() Note
Note
The Template category is not visible in Live view. To create, edit or use Dreamweaver templates, you must switch to Design or Code view.
A new page is created based on the template.
2. Save the file as tips.html in the site root folder. Switch to Design view, if necessary.
3. In the Property inspector, select the placeholder text Add Title Here in the Document Title field. Type Green Tips to replace the text and press Enter/Return.
4. In the Files panel, double-click green_tips.rtf in the resources folder of lesson09.
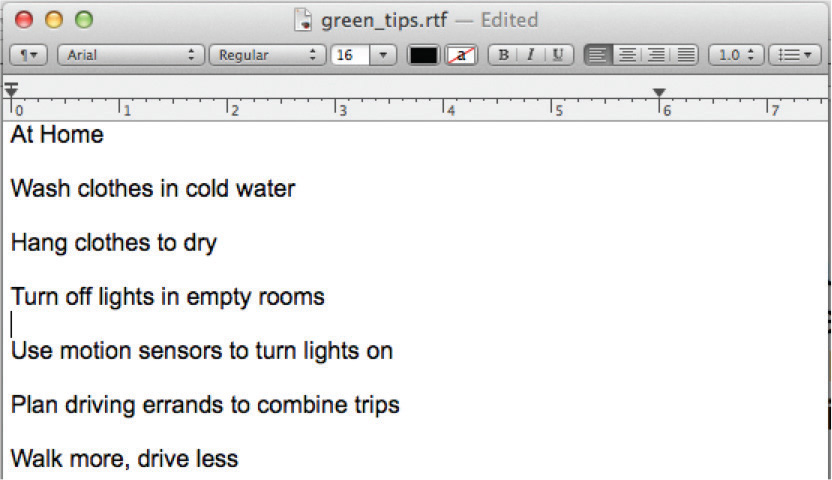
The file will open outside Dreamweaver. The content consists of three individual lists of tips on how to save energy and money at home, at work, and in the community. As in the news page, you will insert each list into its own <article> element.
5. In green_tips.rtf, press Ctrl+A/Cmd+A.
Press Ctrl+X/Cmd+X to cut the text. Close but do not save changes to green_tips.rtf.
You have selected and cut all the text.
6. Switch back to Dreamweaver.
Select Add main heading here.
Type Green Tips to replace it.
7. Select and delete the <h2> Add subheading here.
Select Add content here.
Press Ctrl+V/Cmd+V.

The text for all three lists appears.
8. Select the text starting at At Home and ending with Buy fruits and vegetables locally.
9. Choose Insert > Article.
Click OK in the Insert Article dialog.
The <article> element appears, wrapping the new list.
10. Select the text starting at At Work and ending with Buy natural cleaning products.
11. Choose Insert > Article.
Click OK in the Insert Article dialog.
12. In Dreamweaver, repeat steps 10 and 11 to create the third list and article structure.
All three lists now appear in their own <article> elements.
As you did with the titles of the news stories, apply HTML headings to introduce the list categories.
13. Apply <h2> formatting to the text At Home, At Work, and In the Community.

The remaining text is currently formatted entirely as HTML paragraphs. Dreamweaver makes it easy to convert this text into an HTML list. Lists come in two flavors: ordered and unordered.
14. Select all the <p> elements under the heading At Home.
In the Property inspector, click the Ordered List icon ![]() .
.

An ordered list adds numbers automatically to the entire selection. Semantically, it prioritizes each item, giving them intrinsic values relative to one another. This list doesn’t seem to be in any particular order; each item is more or less equal to the next one, so it’s a good candidate for an unordered list—used when the items are in no particular order. Before you change the formatting, let’s take a look at the markup.
15. Switch to Split view. Observe the list markup in the Code section of the document window.

The markup consists of two elements: <ol> and <li>. Note that each line is formatted as an <li> (list item). The <ol> parent element begins and ends the list and designates it as an ordered list. Changing the formatting from numbers to bullets is simple and can be done in Code or Design view.
Before changing the format, ensure that the formatted list is still entirely selected. You can use the <ol> tag selector, if necessary.
16. In the Property inspector, click the Unordered List icon ![]() .
.

![]() Tip
Tip
The easiest way to select the entire list is to use the <ol> tag selector.
![]() Tip
Tip
You could also change the formatting by editing the markup manually in the Code view window. But don’t forget to change both the opening and the closing parent elements.
All the items are now formatted as bullets.
If you observe the list markup, you’ll notice that the only thing that has changed is the parent element. It now says <ul>, for unordered list.
17. Select all the <p> formatted text under the heading At Work. In the Property inspector, click the Unordered List icon ![]() .
.
18. Repeat step 17 with all the text following the heading In the Community.
All three lists are now formatted with bullets.
19. In Dreamweaver, save and close tips.html.
Creating indented text
Some designers still use the <blockquote> element in Dreamweaver, and elsewhere, as an easy way to indent headings and paragraph text. Semantically, the <blockquote> element is intended to identify whole sections of text quoted from other sources as in Sidebar 1. Visually, text formatted this way will appear indented and set off from the regular paragraph text and headings. But if you want to comply with web standards, you should leave this element for its intended purpose and instead use custom CSS classes when you want to indent text, as you will in this exercise.
1. Create a new page from the template mygreen_temp.
Save the file as contact_us.html in the site root folder.
2. Switch to Design view, if necessary.
Enter Contact Meridien GreenStart to replace the placeholder text Add Title Here.
3. In the Files panel, open contact_us.rtf from the lesson09/resources folder.
The text consists of five department sections, including headings, descriptions, and email addresses for the managing staff of GreenStart. You will insert each department into its own <article> element.
4. In contact_us.rtf, select all the text and cut it.
Close the file and do not save the changes.
5. In Dreamweaver, enter Contact Meridien GreenStart to replace the placeholder heading Add main heading here.
6. Select and delete the heading Add subheading here.
7. Select the text Add content here and press Ctrl+V/Cmd+V to paste the content.

All the content cut from contact_us.rtf appears.
8. Format the text Association Management as a Heading 2.

As before, you need to wrap each content group in an <article> element.
9. Click the h2 tag selector.
Hold the Shift key and select the rest of the text for this section.
10. Select Insert > Article.
Press Enter/Return in the Insert Article dialog to create the element.

When the <article> element is created, the <h2> element formats in green as specified by the rule you created earlier.
11. Repeat steps 8–10 to structure and format the content for the Education and Events, Transportation Analysis, Research and Development, and Information Systems sections.
With all the text in place, you’re ready to create the indent styling. If you wanted to indent a single paragraph, you would probably create and apply a custom class to the individual <p> element. In this instance, we want to indent the entire <article> element to produce the desired graphical effect.
First, let’s assign a class attribute to the element. Since the class we want to use does not exist yet, you’ll have to create it manually. This can be done in any view. In Design view it’s best done in the Quick Tag Editor.
12. Insert the cursor anywhere in the Association Management <article> element. Click the <article> tag selector.
Press Ctrl+T/Cmd+T.
The Quick Tag Editor appears, displaying the <article> tag. The cursor should appear at the end of the tag name, but within the brackets.
13. Press the spacebar to insert a space.
The Code Hinting window appears, displaying the appropriate attributes for the <article> element.
14. Type class and press Enter/Return, or double-click the class attribute in the Code Hinting window.

Note how Dreamweaver automatically creates the attribute markup and provides a list of any existing class attributes as you type. Since the class you want to use doesn’t exist yet, you’ll type the entire name yourself.
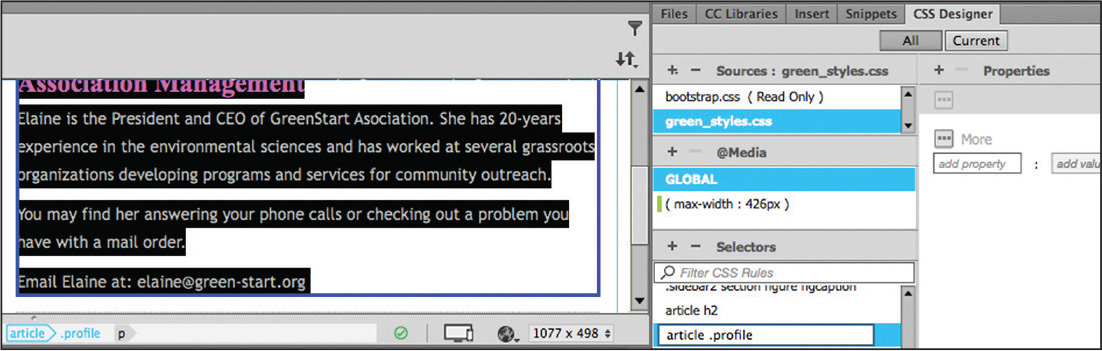
15. Type profile as the class name.
Press Enter/Return as necessary to complete the attribute and close the Quick Tag Editor.

![]() Note
Note
Typically you have to press Enter/Return twice to close the Quick Tag Editor.
16. Select the article.profile tag selector. Choose green_styles.css > GLOBAL in the CSS Designer.
17. Click the Add Selector icon ![]() .
.
A new selector name appears.
18. Edit the name to say:
article.profile
19. Enable the Show Set option, if necessary.
Enter the following property in the Properties window:
margin: 0px 25px 15px 25px
padding-left: 10px
As with margins, border specifications can be entered individually or all at once.
20. Enter the following specifications for the left and bottom borders:
border-left: solid 2px #CADAAF
border-bottom: solid 10px #CADAAF

Although the display is not as accurate as in Live view, you can still see the borders appear on the left and bottom of the article element. The borders help to visually group the indented text under its heading. In Live view the display is more accurate.
![]() Tip
Tip
When creating specifications manually, enter the property name in the field and press Tab. A value field will appear to the right. When Show Set is enabled, hinting may not appear in the values field.
21. Switch to Live view.
22. Insert the cursor anywhere in the Education and Events section.
Click the <article> tag selector.
The HUD appears focused on the article element.
23. In the HUD, click the Add Class/ID icon ![]() and type .profile in the text field.
and type .profile in the text field.

As you type, a hinting menu will show the matching class names. Feel free to select the name from the list.
24. Repeat steps 22 and 23 to apply the profile class to the remaining <article> elements.
Each section is indented and displays the custom border.
25. Save all files.
Whenever you add new components or styling to a site, you need to make sure the elements and styling work well on all screen sizes and devices.
Making it responsive
In this exercise, you will test the new profile elements at multiple screen sizes and adapt them as needed.
1. If necessary, switch to Live view.
2. Drag the Scrubber to the left to make the document window narrower.
Observe how the new components respond to the changing widths.

The .profile section looks fine until you get down to widths less than 450 pixels. At those sizes the left indent and border wastes too much space. You can fix this situation easily by simply adding alternate styling in the appropriate media query.
3. Restore the document window to its full width.
4. In the CSS Designer, choose green_styles.css > (max-width: 426px).
Create the following selector:
article .profile
![]() Note
Note
Insert the new rule in the custom media query you created in Lesson 8, if it is different than the one described in step 4.
5. Create the following properties in the new rule:
padding: 5px 0px
margin: 5px 0px
border-top: solid 10px #CADAAF
border-bottom: solid 4px #CADAAF
border-left-style: none

6. Save all files.
Repeat step 2 to test the new styling.

When the screen drops down to your custom media query, the .profile section expands nearly to the full width of the screen and drops the indents and the left border. Remember to test all new components at every screen size and orientation and make changes to the styling as needed.
Creating and styling tables
Before the advent of CSS, HTML tables were often used to create page layouts. Although tables are not good for page layout, they are very good, and necessary, for displaying many types of data, such as product lists, personnel directories, and timetables, to name a few.
Dreamweaver enables you to create tables from scratch, to copy and paste them from other applications, or to create them instantly from data supplied from other sources, such as database or spreadsheet programs, like Microsoft Access or Microsoft Excel.
Creating tables from scratch
Dreamweaver makes it easy to create tables from scratch. In this exercise, you will learn how to create an HTML table.
1. Create a new page from the mygreen_temp template.
Save the file as events.html in the site root folder.
2. Enter Green Events and Classes to replace the Title placeholder text in the Property inspector.
3. In Design view, select the Add main heading here placeholder heading and type Green Events and Classes to replace it.
4. Select the Add subheading here placeholder heading and click the h2 tag selector. Press Delete.
![]() Tip
Tip
Whenever you need to select complete elements, it’s a good practice to use the tag selectors.
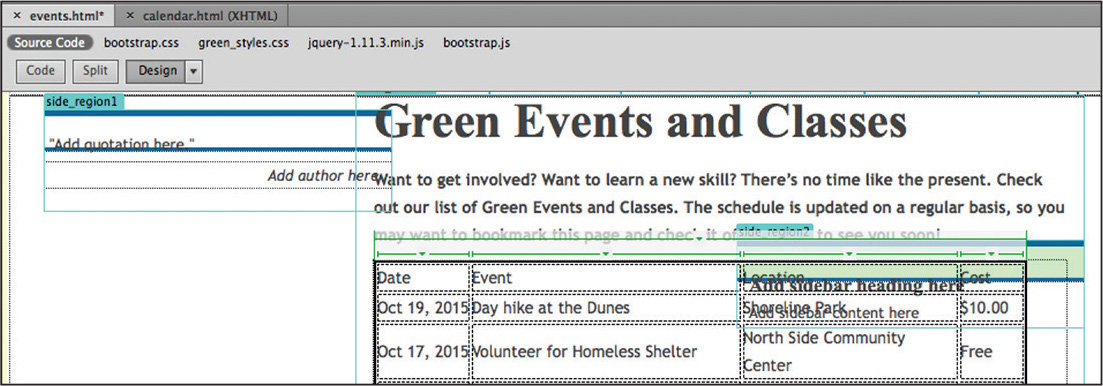
5. Select the text Add content here.
6. Type the following text: Want to get involved? Want to learn a new skill? There’s no time like the present. Check out our list of Green Events and Classes. The schedule is updated on a regular basis, so you may want to bookmark this page and check it often. Hope to see you soon!

7. Without moving the cursor position from step 6, choose Insert > Table.
The Table dialog appears.
Some aspects of the table may be controlled and formatted by HTML attributes, but others can be controlled entirely by CSS. Whenever possible, avoid using HTML to format tables. As with text formatting, HTML formatting is neither efficient nor flexible.
The only advantage HTML has is that the attributes continue to be well supported by all popular browsers, both old and new. When you enter values in this dialog, Dreamweaver still applies them via HTML attributes.
8. Enter the following specification for the table:
Rows: 2
Columns: 4
Width: 100%
Border thickness: 1
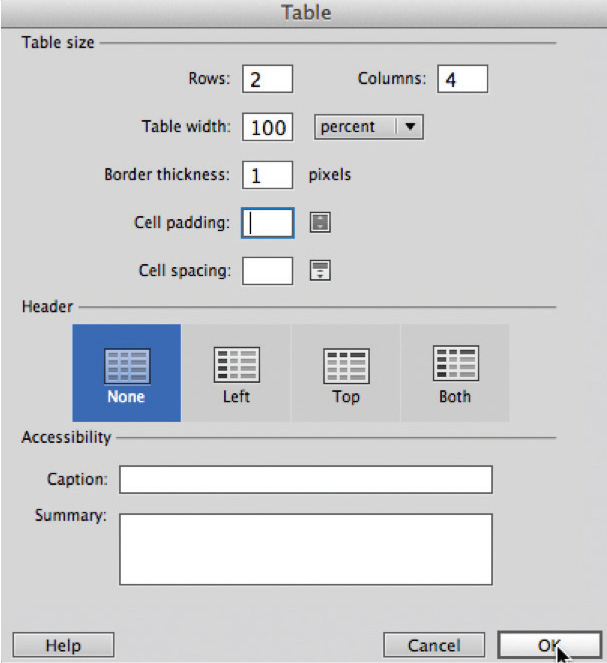
9. Click OK to create the table.
A four-column, two-row table appears below the main heading. Note that it fills the column from left to right. Let’s wrap it in an <article> element.
10. Select Insert > Article.

The Insert Article dialog appears. The Insert drop-down menu should default to Wrap Around Selection.
11. Click OK to create the <article> element.
The table is ready to accept input.
12. Insert the cursor in the first cell of the table.
Type Date and press Tab to move into the next cell in the first row.
![]() Tip
Tip
While in a table cell in Design view, pressing the Tab key moves the cursor to the next cell on the right. Hold the Shift key when pressing the Tab key to move to the left, or backward, through the table.
13. In the second cell, type Event and press Tab. Type Location and press Tab. Type Cost and press Tab.

The cursor moves to the first cell of the second row.
14. In the second row, type May 1 (in cell 1), May Day Parade (in cell 2),
City Hall (in cell 3), and Free (in cell 4).
When the cursor is in the last cell, inserting additional rows in the table is easy.
15. Press Tab.

A new blank row appears at the bottom of the table. Dreamweaver also allows you to insert multiple new rows at once.
16. Select the <table> tag selector at the bottom of the document window.

The Property inspector displays the properties of the current table, including the total number of rows and columns.
17. Select the number 3 in the Rows field.
Type 5 and press Enter/Return to complete the change.

Dreamweaver adds two new rows to the table.
The fields in the Property inspector create HTML attributes to control various aspects of the table, including table width, width and height of cells, text alignment, and so on. You can also add rows and columns to the table interactively using the mouse.
18. Right-click the last row of the table.
Choose Table > Insert Row from the context menu.

Another row is added to the table. The context menu can also insert multiple rows and/or columns at once.
19. Right-click the last row of the table.
Choose Table > Insert Rows or Columns from the context menu.

The Insert Rows or Columns dialog appears.
20. Insert 4 rows below the selection and click OK.
Four more rows are added to the table, for a total of 10 rows.
21. Save all files.
Copying and pasting tables
Although Dreamweaver allows you to create tables manually inside the program, you can also move tables from other HTML files or even other programs by using copy and paste.
![]() Note
Note
Dreamweaver allows you to copy and paste tables from some other programs, such as Microsoft Word. Unfortunately, it doesn’t work with every program.
1. Open the Files panel and double-click calendar.html in the lesson09/resources folder to open it.

This HTML file opens in its own tab in Dreamweaver. Note the table structure—it has four columns and numerous rows.
When moving content from one file to another, it’s important to match views in both documents. Since you were working in Design view in events.html, you should use Design view in this file too.
2. Switch to Design view, if necessary.
3. Insert the cursor in the table.
Click the <table> tag selector.
Press Ctrl+C/Cmd+C to copy the table.
4. Click the events.html document tab.
5. Insert the cursor in the table.
Select the <table> tag selector.
Press Ctrl+V/Cmd+V to paste the table.
The new table element completely replaces the existing table. This workflow will work in Design and Code views. But you must match views in both documents before you copy and paste.
6. Save the file.
Styling tables with CSS
Currently, the formatting for the table is a mixed bag. Some is being supplied by HTML defaults and some by the Bootstrap framework. Whenever CSS styles conflict with HTML attributes, CSS wins. In the following exercise, you will create CSS rules to override any HTML styling.
1. If necessary, insert the cursor in the table. Select the table tag selector.
2. In the CSS Designer, choose green_styles.css > GLOBAL.
Create a new selector:
article table
3. In the CSS Designer Properties window, deselect the option Show Set, if necessary.
4. In the Type category, click to open the font-family property.
Select Manage Fonts, and create the following custom font stack:
Arial Narrow, Arial, Verdana, sans-serif
5. Create the following specifications for the new rule:
font-family: Arial Narrow, Arial, Verdana, sans-serif
font-size: 90%
width: 95%
border-bottom: 3px solid #060
margin-bottom: 2em

![]() Tip
Tip
Table styling may not appear properly in Design view. Switch to Live view to see the full effect of your CSS.
The table displays a dark green border at the bottom, and the content has been reduced in size and styled with Arial Narrow.
You have applied styling to one aspect of the table properties, but there are plenty of things you still need to address within this element. It’s hard to see what’s actually happening using Design view. It’s a good idea to preview the page in Live view from time to time.
6. Save all files.
7. Switch to Live view and examine the page content.

In Live view everything looks better, but the data in the table appears a bit crowded, and if your screen is narrower than the one shown, the content may wrap to two lines. It could use some extra spacing and other highlighting. The rule article table you just created formats only the overall structure of the table. It can’t control or format the individual rows and columns. In the next exercise, you will turn your attention to the inner workings of the table.
Styling table cells
Just as for tables, column styling can be applied by HTML attributes or CSS rules. Formatting for columns can be applied via two elements that create the individual cells: <th> for table header and <td> for table data.
It’s a good idea to create a generic rule to reset the default formats of the <th> and <td> elements. Later, you will create custom rules to apply more specific settings.
1. Insert the cursor into the table.
In the CSS Designer, choose green_styles.css > GLOBAL.
2. Create a new selector:
article td, article th
![]() Note
Note
Remember that the order of the rules can affect the style cascade as well as how and what styling is inherited.
This simplified selector will work fine. Since td and th elements have to be in tables anyway, there’s really no need to put table in the selector name.
3. In the Properties window, select the Show Set option.
4. Create the following properties for the new rule:
padding: 4px
text-align: left
border-top: solid 1px #090
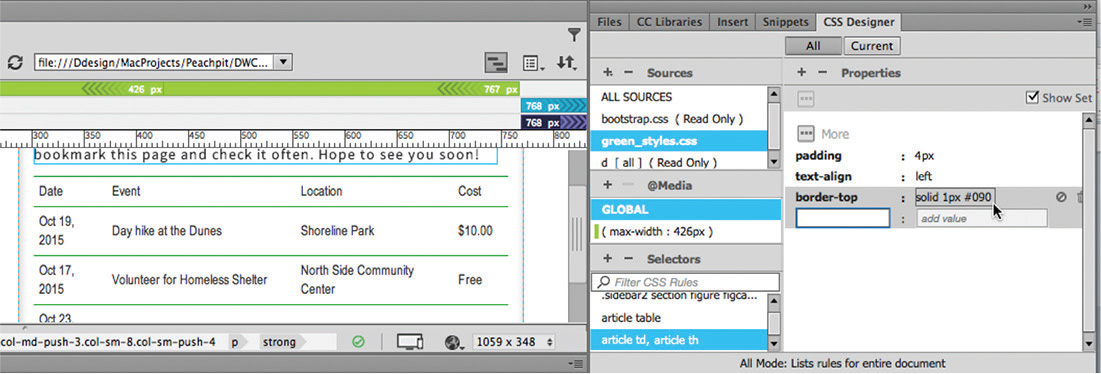
A thin green border appears above each row of the table, making the data easier to read. You may not be able to see the border properly unless you use Live view.
Long columns and rows of undifferentiated data can be tedious to read and hard to decipher. Headers are often used to help the reader identify data. By default, the text in header cells is formatted in bold and centered to help it stand out from the normal cells, but some browsers do not honor this default styling. So don’t count on it. You can make the headers stand out by giving them a touch of color of your own.
![]() Note
Note
The standalone <th> rule for the <th> element must appear after the rule styling th and td elements in the CSS or some of its formatting will be reset.
5. Choose green_styles.css > GLOBAL.
Create a new rule: article th
6. Create the following properties in the article th rule:
color: #FFC
text-align: center
border-bottom: solid 6px #060
background-color: #090

The rule is created, but it still needs to be applied. Dreamweaver makes it easy to convert existing <td> elements into <th> elements.
7. Insert the cursor into the first cell of the first row of the table. In the Property inspector, select the Header option. Note the tag selector.
![]() Note
Note
You cannot select more than one cell at a time in Live view.

The cell background is filled with green.
When you click the Header checkbox, Dreamweaver automatically rewrites the markup, converting the existing <td> tags to <th> and thereby applying the CSS formatting. This functionality will save you lots of time over editing the code manually. If you switch to Design view, you can also convert multiple cells at one time.
9. Click the second cell of the first row and drag to select the remaining cells in the first row. Or you can select an entire row at once by positioning the cursor at the left edge of the table row and clicking when you see the black selection arrow appear to the left of the row.
10. In the Property inspector, select the Header option to convert the table cells to header cells.

The whole first row is filled with green as the table cells are converted to header cells.
11. Save all files.
Controlling table display
Unless you specify otherwise, empty table columns will divide the available space between them equally. But once you start adding content to the cells, all bets are off—tables seem to get a mind of their own and divvy up the space in a different way. In most cases, they’ll award more space to columns that contain more data, but that’s not guaranteed to happen.
To provide the highest level of control, you’ll assign unique classes to the cells in each column. But first you have to create the CSS rules. You can create them one at a time or all at once. If the rules already exist in the style sheet it makes it easier to assign them to the various elements later.
1. Choose green_styles.css > GLOBAL. Create the following new selectors:
article .date
article .event
article .location
article .cost

![]() Note
Note
In HTML 4, rule names can’t start with numerals or punctuation characters. In HTML5, these restrictions have been mostly relaxed. But it’s probably still a good idea not to use such characters in your selector names.
Four new rules appear in the Selectors window but contain no styling information. Even without styling, the classes can be assigned to each column. Dreamweaver makes it easy to apply classes to an entire column.
2. In Design view, position the cursor above the first column of the table until you see a black arrow. Click to select the entire column.

3. Choose date from the Class menu in the Property inspector.

The cells in the first column should display th.date or td.date in the tag selector interface.
4. Repeat steps 2 and 3 to apply the appropriate classes to each column.
Controlling the width of a column is quite simple. Since the entire column must be the same width, you only have to apply a width specification to one cell. If cells in a column have conflicting specifications, typically the largest width wins. Since you just applied a class to the entire Date column, settings will affect every cell at once. This will make it easier to get the table to adapt to any screen.
![]() Note
Note
Even if you apply a width that’s too narrow for the existing content, by default a cell can’t be any smaller than the largest word or graphic element contained within it.
5. Add the following property to the rule article .date:
width: 6em
The Date column resizes, although the change may not be visible in Design view. The remaining columns automatically divvy up the space left over. Column styling can also specify text alignment as well as width. Let’s apply styling to the contents of the Cost column.
6. Add the following properties to the rule article .cost:
width: 4em
text-align: center
![]() Note
Note
The event and location will be used later in the lesson.
The Cost column resizes to a width of 4 ems, and the text aligns to the center. Now if you want to control the styling of the columns individually, you have the ability to do so. Note that the tag selector shows the class names with each element, such as th.cost or td.cost.
7. Save all files.
Inserting tables from other sources
In addition to creating tables by hand, you can also create them from data exported from databases and spreadsheets. In this exercise, you will create a table from data that was exported from Microsoft Excel to a comma-separated values (CSV) file. As with the other content models, you will first create an <article> element in which to insert the new table.
1. In Design view, insert the cursor anywhere in the existing Events table.
Select the <article> tag selector. Press the right arrow key.
The cursor moves after the closing </article> tag.
2. Without moving the cursor, choose File > Import > Tabular Data.
The Import Tabular Data dialog appears.
3. Click the Browse button and select classes.csv from the lesson09/resources folder. Click Open. Comma should be automatically selected in the Delimiter menu.
4. Select the following options in the Import Tabular Data dialog:
Table width: 100%
Border: 0

The table width will actually be controlled by the table rule created earlier, but HTML attributes will be honored in browsers or devices that do not support CSS. Because this is the case, make sure that the HTML attributes you use don’t break the layout.
5. Click OK.
A new table—containing a class (course) schedule—appears below the first. To conform to the structure you created for the first table, you should insert the new one into an <article> element.
6. Select the table tag selector for the new table.
7. Select Insert > Article.
Click OK to insert the <article> element.

The new table is inserted into the <article> element. Green lines appear between the rows, but the header cells are not styled the same as in the first table.
8. Select the first row of the Class schedule.
In the Property inspector, select the Header option.
The header cells now display in green with reversed text.
The new table has an extra column, and the text is wrapping awkwardly in the last three columns. You will fix this display by using the .cost class created earlier and by creating additional custom classes too.
9. Select the entire Cost column as you did in the previous exercise.
In the Property inspector, choose cost from the Class menu.
The two Cost columns are now the same width.
10. In the CSS Designer, right-click the rule article .cost.
Choose Copy All Styles from the context menu.

11. Create a new selector: article .day
Right-click the new selector and select Paste Styles from the context menu.

The new rule now has the same styling as the article .cost rule.
12. Repeat step 9 to apply the day class to the Day column in the Classes table.
Dreamweaver also provides an option for duplicating rules.
13. Right-click the rule article .cost.
Choose Duplicate from the context menu.
Enter article .length as the new selector.

14. Apply the .length class to the Length column in the Classes table, as in step 9.
By creating and applying custom classes to each column, you have the means to modify each column individually. We need to make two more rules: one to format the Class column and the other to format the Description column.
15. Duplicate the rule article .date. Enter article .class as the new rule name.
Change the width to 10em.
16. Duplicate the rule article .event.
Enter article .description as the new name.
17. Apply the .class class to the Class column.
Apply the .description class to the Description column.
All columns in both tables now have classes assigned to them.
18. Save all files.
Adding and formatting caption elements
The two tables you inserted on the page contain different information but don’t feature any differentiating labels or titles. To help users distinguish between the two sets of data, let’s add a title to each and a bit of extra spacing. The <caption> element was designed to identify the content of HTML tables. This element is inserted as a child of the <table> element itself.
1. Open events.html in Design view, if necessary.
2. Insert the cursor in the first table.
Select the <table> tag selector.
Switch to Code view.

By selecting the table first in Design view, Dreamweaver automatically highlights the code in Code view, making it easier to find.
3. Locate the opening <table> tag.
Insert the cursor directly after this tag.
Type <caption> or select it from the code-hinting menu when it appears.
4. Type 2015-16 Event Schedule and then type </ to close the element.

5. Switch to Design view.
The caption is complete and inserted as a child element of the table.
6. Repeat steps 1 and 2 for the Classes table.
Type 2015-16 Class Schedule.
Then, type </ to close the element.
7. Switch to Live view.

The captions are relatively small, and they’re lost against the color and formatting of the table. Let’s beef them up a bit with a custom CSS rule.
8. Choose green_styles.css > GLOBAL.
Create a new selector: article caption
9. Create the following properties for the rule article caption:
margin-top: 20px
padding-bottom: 10px
color: #090
font-weight: bold
font-size: 160%
line-height: 1.2em

The captions now appear sufficiently large and impressive above each table.
Formatting the tables and the captions with CSS has made them much easier to read and understand. Feel free to experiment with the size and placement of the caption and specifications affecting the tables.
Making tables responsive
The tables are finished and ready to go. They work fine for normal desktop displays and larger tablets, but the underlying page design is built to work seamlessly all the way down to smartphones. On the other hand, tables are notoriously ill-suited to smaller screens because they don’t naturally adapt to them. To understand this concept, let’s see how the current elements function on smaller screens.
1. If necessary, open events.html in Dreamweaver CC (2015.1 release) or later.
Design view doesn’t provide an accurate rendition of the tables. Live view is a better choice, but the best option is to view the page in a browser.
2. Choose File > Preview in Browser.
Choose your favorite browser from the list.
The page opens in the browser, displaying all the colors, fonts, background images, and other CSS specifications set by the style sheet. To see how the tables will react to a smaller screen, just resize the browser window.
3. Drag the right edge of the browser window to the left to make it narrower. Watch carefully how the tables respond, or don’t respond, to the changing environment.

As the screen becomes narrower, the media queries will kick in and reformat the page and components to adapt to the smaller screen. Since the table widths are set to 95%, they mostly scale down with the page. But at the smallest sizes, the text within the table is trying to fit by wrapping in very narrow columns.
We need to rethink the whole concept of table design and display. You need to change the basic nature of the elements that compose tables so you can display them in a completely different way. During this process, you may sometimes find it easier to work in the CSS Designer; at other times you may want to enter the settings directly in Code view. Feel free to use whichever method feels more comfortable to you.
4. In Dreamweaver, switch to Live view and open the CSS Designer, if necessary.
Click the custom media query in the VMQ you created in Lesson 7.
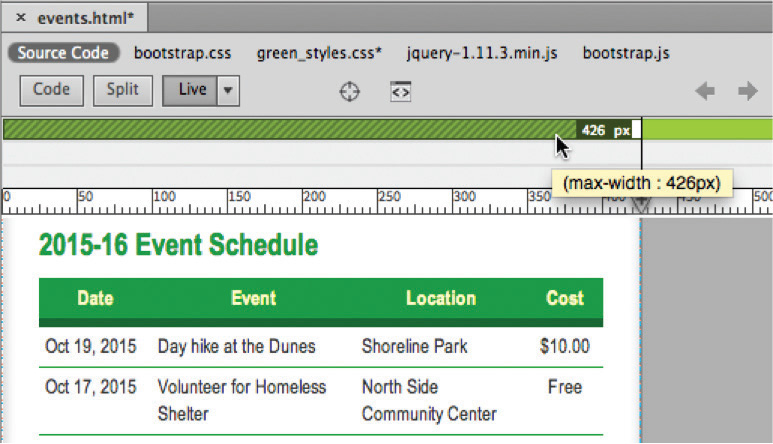
5. Choose green_styles.css > (max-width:426px) in the CSS Designer.
Your media query may differ from the one described. Choose the one you created in green_styles.css.
6. Create a new selector: article th, article td
7. Add the display: block property to the new rule.

The cells are now displayed vertically, stacking one atop the other.
This rule resets the default behavior of the table elements so that you can control their appearance on smaller screens. Some cells appear narrower than others because formatting is still being inherited from other parts of the style sheet. You’ll have to create additional rules to override these specifications.
![]() Note
Note
Be sure that all subsequent rules and properties are added only to the custom media query.
8. Create a new rule: article table
Give the new rule the following properties:
margin-right: auto
margin-left: auto
With the data stacking vertically, it doesn’t make much sense now to have a header row. We could set the header row to the display:none property to hide it, but that’s not recommended for accessibility standards. The next best thing would be to simply format it to take up no space.
9. Create a new rule: article th
Give the new rule the following properties:
height: 0
margin: 0
padding: 0
font-size: 0
border: none
overflow: hidden

The header rows disappear visually but are still accessible to visitors using screen readers or other assistive devices. But now that they are invisible, you have to address the fact that there are no headers describing the data being displayed.
For this purpose, we’ll resort to a new CSS3 property that can actually create labels based on the CSS class applied to the cell. Some of the latest CSS3 properties are not directly supported in the CSS Designer, but you can enter them manually in the Properties window or in Code view, and Dreamweaver may provide hinting support for them as well.
10. Create a new rule: td.date:before
11. Enable the Show Set option.
Enter the following property:value combo:
content: "Date: "

Notice that the label “Date:” appears in all the cells styled by the date class. You need to make a similar rule for each of the data elements.
12. Repeat steps 10 and 11 to create the following rules and properties:

Each data cell now shows the appropriate labels. CSS can also style the data and labels.
13. Create the following rule:
article .date,
article .event,
article .location,
article .cost,
article .class,
article .description,
article .length,
article .day
![]() Tip
Tip
Creating long selectors may be easier to do in Code view. You can access the green_styles.css file by clicking its name in the Referenced file interface at the top of the document window.
We typed this rule on multiple lines to make it easier to read, but you can enter it as one long string. As long as the styling for all the data cells is identical, you can combine all the selectors into a single rule, separated by commas. Remember to mind the punctuation and spelling carefully. Even a tiny error in the code can cause the formatting to fail. If you want the styling to be different in one or more of the elements, then create seven separate rules.
Next, let’s apply some styling to the labels themselves to help make them stand out more distinctly.
14. Apply the following properties to the new rule or in each of the separate rules:
width: 100%
padding-left: 30%
position: relative
text-align: left

![]() Note
Note
Although the formatting is identical for these classes at this point, you may want to adjust the styling for one or more items later. Making separate rules can add flexibility even though it adds to the amount of code that has to be downloaded.
The event and class entries are now indented, and all appear at the same width.
15. Create a new rule: td:before
Give the new rule the following properties:
width: 25%
display: block
padding-right: 10px
position: absolute
top: 6px
left: 1em
color: #060
font-weight: bold
white-space: nowrap

The labels now appear separately from the data and are styled in boldface and dark green. The only thing left to do now is to differentiate one record from the next. One way is to simply add a darker border between each table row.
16. Create a new rule: article tr
Give the new rule the following property:
border-bottom: solid 2px #060

Using a CSS3 selector will add a little more pizzazz to the table.
17. Create a new rule: tr:nth-of-type(even)
Give the new rule the following property:
background-color: #D4EAD4

![]() Warning
Warning
Advanced selectors like nth-of-type(even) may not be supported by older browsers.
This CSS3-based selector actually applies the background only on even rows of the table.
Both tables are now slickly styled and responsive to any changes in the screen size. Although they look good in Live view, don’t get complacent; it’s vital to test the design in a variety of browsers and mobile devices too.
18. Save all files. Preview the page in the default browser. Test the media queries and the responsive table styling by changing the size of the browser window.
Congratulations! You’ve learned not only how to insert HTML tables into your web pages but also how to make them adapt to almost any screen environment. It’s very likely that everything you tried in this exercise worked perfectly in both Dreamweaver and any browser you tested it in. But you have to remember that CSS3 is still fairly new and has not been fully adopted within the industry.
The good news is that most of the mobile devices we’re targeting should support the various settings used in this exercise. And you can be sure Dreamweaver will stay current with the latest updates.
Spellchecking web pages
It’s important to ensure that the content you post to the web is error free. Dreamweaver includes a robust spellchecker capable of identifying commonly misspelled words and creating a custom dictionary for nonstandard terms that you might use on a regular basis.
1. Open contact_us.html, if necessary.
![]() Note
Note
Spellcheck runs only in Design view. If you are in Code view, Dreamweaver will switch to Design view automatically. If you are in Live view, the command will be unavailable.
2. Switch to Design view.
Insert the cursor at the beginning of the heading Contact Meridien GreenStart.
Choose Commands > Check Spelling.

Spellchecking starts wherever the cursor has been inserted. If the cursor is located lower on the page, you will have to restart the spellcheck at least once to examine the entire page. It also does not check content locked in noneditable template regions.
The Check Spelling dialog highlights the word Meridien, which is the name of the fictional city where our GreenStart association is located. You could click the option Add To Personal to insert the word into your custom dictionary, but for now we will skip over other occurrences of the name during this check.

Dreamweaver’s spellchecker highlights the word GreenStart, which is the name of the association. If GreenStart were the name of your own company, you’d want to add it to your custom dictionary. However, you don’t want to add a fictional company name to your dictionary.
4. Click Ignore All again.
Dreamweaver highlights the domain for the email address [email protected].
5. Click Ignore All.

Dreamweaver highlights the word Asociation, which is missing an “s.”
6. To correct the spelling, locate the correctly spelled word (Association) in the Suggestions list and double-click it.
7. Continue the spellcheck to the end. Correct any misspelled words and ignore proper names, as necessary. If a dialog prompts you to start the check from the beginning, click Yes.

Dreamweaver will start spellchecking from the top of the file to catch any words it may have missed.
8. Click OK when the spellcheck is complete. Save the file.

It’s important to point out that spellcheck is designed to find only words that are spelled incorrectly. It will not find words that are used incorrectly. In those instances, nothing takes the place of a careful reading of the content.
Finding and replacing text
The ability to find and replace text is one of Dreamweaver’s most powerful features. Unlike other programs, Dreamweaver can find almost anything, anywhere in your site, including text, code, and any type of whitespace that can be created in the program. You can search the entire markup, or you can limit the search to just the rendered text in Design view or to just the underlying tags. Advanced users can enlist powerful pattern-matching algorithms known as regular expressions to perform sophisticated find-and-replace operations. And then Dreamweaver takes it one step further by allowing you to replace the targeted text or code with similar amounts of text, code, and whitespace.
In this exercise, you’ll learn some important techniques for using the Find and Replace feature.
1. Select the events.html document tab, if necessary, or open it from the site root folder.
There are several ways to identify the text or code you want to find. One way is to simply type it in the Find field. In the Events table, the name Meridien was spelled incorrectly as Meridian. Since Meridian is an actual word, the spellchecker won’t flag it as an error and give you the opportunity to correct it. So you’ll use find and replace to make the change instead.
2. Switch to Design view, if necessary. Insert the cursor in the Green Events and Classes heading. Choose Edit > Find and Replace.
The Find and Replace dialog appears. The Find field is empty.
3. Type Meridian in the Find field.
Type Meridien in the Replace field.
Choose Current Document from the Find In menu, and choose Text from the Search menu.

4. Click Find Next.

Dreamweaver finds the first occurrence of Meridian.
5. Click Replace.
Dreamweaver replaces the first instance of Meridian and immediately searches for the next instance. You can continue to replace the words one at a time, or you can choose to replace all occurrences.
6. Click Replace All.

If you replace the words one at a time, Dreamweaver inserts a one-line notice at the bottom of the dialog that tells you how many items were found and how many were replaced. When you click Replace All, Dreamweaver closes the Find and Replace dialog and opens the Search report panel, which lists all the changes made.
7. Right-click the Search report tab and select Close Tab Group from the context menu.
Another method for targeting text and code is to select it before activating the command. This method can be used in either Design or Code view.
8. In Design view, locate and select the first occurrence of the text Burkeline Mountains Resort in the Location column of the Events table.
Choose Edit > Find and Replace.
The Find and Replace dialog appears. The selected text is automatically entered into the Find field by Dreamweaver. This technique is even more powerful when used in Code view.
9. Close the Find and Replace dialog. Switch to Code view.
10. With the cursor still inserted in the Burkeline Mountains Resort text, click the <tr> tag selector at the bottom of the document window.
11. Choose Edit > Find and Replace. The Find and Replace dialog appears.

Observe the Find field. The selected code is automatically entered into the Find field in its entirety by Dreamweaver, including the line breaks and other whitespace. The reason this is so amazing is that there’s no way to enter this type of markup in the dialog manually.
12. Select the code in the Find field. Press Delete to remove it.
Type <tr> and press Enter/Return to insert a line break. Observe what happens.
Pressing Enter/Return did not insert a line break; instead, it activated the Find command, which finds the first occurrence of the <tr> element. In fact, you can’t manually insert any type of line break within the dialog.
You probably don’t think this is much of a problem, since you’ve already seen that Dreamweaver inserts text or code when it’s selected first. Unfortunately, the method used in steps 8 and 10 don’t work with large amounts of text or code.
13. Close the Find and Replace dialog box. Click the <table> tag selector.
The entire markup for the table is selected.
14. Choose Edit > Find and Replace. Observe the Find field.

This time, Dreamweaver didn’t transfer the selected code into the Find field. To get larger amounts of text or code into the Find field, and to enter large amounts of replacement text and code, you need to use copy and paste.
15. Close the Find and Replace dialog. Select the table again, if necessary.
Right-click the selected code and choose Copy from the context menu.
16. Press Ctrl+F/Cmd+F to activate the Find and Replace command.
Right-click the Find field, and choose Paste from the context menu.
The entire <table> selection is pasted into the Find field.
17. Insert the cursor into the Replace field, and press Ctrl+V/Cmd+V.
The entire selection is pasted into the Replace field. Obviously, the two fields contain identical markup, but it illustrates how easy it would be to change or replace large amounts of code.
18. Close the Find and Replace dialog. Save all files.
In this lesson, you created four new pages and learned how to import text from multiple sources. You formatted text as headings and lists and then styled it using CSS. You inserted and formatted two tables, added captions to each one, and styled them to make them responsive. And you reviewed and corrected text using Dreamweaver’s spellcheck and Find and Replace tools.
Optional self-paced exercise
At the end of the lesson, the four pages created are only partially completed. Before proceeding to the next lesson, go ahead and finish each page using the resources in the files quotes09.txt and sidebar2_09.txt, located in the resources folder. If you have any questions about how the content should be created or formatted, check out the finished files with the same names within the finished_files folder for lesson09. Be sure to save all your changes when you are finished.
Review questions
1. How do you format text to be an HTML heading?
2. Explain how to turn paragraph text into an ordered list and then an unordered list.
3. Describe two methods for inserting HTML tables into a webpage.
4. What element controls the width of a table column?
5. What items will not be found by Dreamweaver’s spellcheck command?
6. Describe three ways to insert content in the Find field.
Review answers
1. Use the Format field menu in the Property inspector to apply HTML heading formatting, or press Ctrl+1/Cmd+1, Ctrl+2/Cmd+2, Ctrl+3/Cmd+3, and so on.
2. Highlight the text with the cursor and click the Ordered List button in the Property inspector. Then click the Unordered List button to change the numbered list to bullets.
3. You can copy and paste a table from another HTML file or a compatible program. Or you can insert a table by importing the data from a delimited file.
4. The width of a table column is controlled by the widest <th> or <td> element that creates the individual table cell within the specific column.
5. The spellcheck command finds only words spelled incorrectly, not the ones used incorrectly.
6. You can type text into the Find field; you can select text before you open the dialog and then allow Dreamweaver to insert the selected text; or you can copy the text or code and then paste it into the field.