
11. Working with Navigation
Lesson overview
In this lesson, you’ll apply several kinds of links to page elements by doing the following:
• Creating a text link to a page within the same site
• Creating a link to a page on another website
• Creating an email link
• Creating an image-based link
• Creating a link to a location within a page
This lesson will take about 1 hour and 45 minutes to complete. If you have not already done so, download the project files for this lesson from the Lesson & Update Files tab on your Account page at www.peachpit.com, and store them on your computer in a convenient location, as described in the “Getting Started” section of this book. Your Account page is also where you’ll find any updates to the lessons or to the lesson files. Look on the Lesson & Update Files tab to access the most current content. Before you begin this lesson, define a new site based on the lesson11 folder using the method described in the “Getting Started” section at the beginning of the book.

Dreamweaver can create and edit many types of links—from text-based links to image-based links—and does so with ease and flexibility.
Hyperlink basics
The World Wide Web, and the Internet in general, would be a far different place without the hyperlink. Without hyperlinks, HTML would simply be ML (markup language). The hypertext in the name refers to the functionality of the hyperlink. So what is a hyperlink?
A hyperlink, or link, is an HTML-based reference to a resource available on the Internet or within the computer hosting a web document. The resource can be anything that can be stored on and displayed by a computer, such as a webpage, an image, a movie, a sound file, a PDF—in fact, almost any type of computer file. A hyperlink creates an interactive behavior specified by HTML and CSS, or by the programming language you’re using, and is enabled by a browser or other application.

An HTML hyperlink consists of the anchor <a> element and one or more attributes.
Internal and external hyperlinks
The simplest hyperlink—an internal hyperlink—takes the user to another part of the same document or to another document stored in the same folder or hard drive on the web server that hosts the site. An external hyperlink is designed to take the user to a document or resource outside your hard drive, website, or web host.
Internal and external hyperlinks may work differently, but they have one thing in common: They are enabled in HTML by the <a> anchor element. This element designates the address of the destination, or target, of the hyperlink, and can then specify how it functions using several attributes. You’ll learn how to create and modify the <a> element in the exercises that follow.
Relative vs. absolute hyperlinks
A hyperlink address can be written in two ways. When you refer to a target by where it is stored in relation to the current document, it is known as a relative link. This is like telling someone that you live next door to the blue house. If she were driving down your street and saw the blue house, she would know where you live. But those directions don’t really tell her how to get to your house or even to your neighborhood. A relative link frequently will consist of the resource name and perhaps the folder it is stored within, such as logo.jpg or images/logo.jpg.
Sometimes, you need to spell out precisely where a resource is located. In those instances, you need an absolute hyperlink. This is like telling someone you live at 123 Main Street in Meridien. This is typically how you refer to resources outside your website. An absolute link includes the entire uniform resource locator, or URL, of the target, and may even include a filename—such as http://forums.adobe.com/index.html—or just a folder within the site.
Both types of links have advantages and disadvantages. Relative hyperlinks are faster and easier to write, but they may not work if the document containing them is saved in a different folder or location in the website. Absolute links always work no matter where the containing document is saved, but they can fail if the targets are moved or renamed. A simple rule that most web designers follow is to use relative links for resources within a site and absolute links for resources outside the site. Of course, whether you follow this rule or not, it’s important to test all links before deploying the page or site.
Previewing the completed file
To see the final version of the file you will work on in this lesson, let’s preview the completed page in the browser.
![]() Note
Note
Before beginning this exercise, download the project files and define a new site based on the lesson11 folder using the instructions in the “Getting Started” section at the beginning of the book.
1. Launch Adobe Dreamweaver CC (2015.1 release) or later.
2. If necessary, press F8 to open the Files panel. Select lesson11 from the site list.
3. In the Files panel, expand the lesson11 folder.
4. In the Files panel, right-click aboutus_finished.html in the lesson11/finished folder.
Choose Preview in Browser from the context menu.

The aboutus_finished.html file appears in your default browser. This page features only internal links in the horizontal menu.
5. Position the cursor over the horizontal navigation menu. Hover over each button, and examine the behavior of the menu.
The menu is the same one created and formatted in Lesson 5, “Creating a Page Layout.”
6. Click the Green News link.
The browser loads the finished Green News page.
7. Position the cursor over the About Us link. Observe the browser to see whether it’s displaying the link’s destination anywhere on the screen.

![]() Tip
Tip
Most browsers will display the destination of a hyperlink in the status bar at the bottom of the browser window. In some browsers, this status bar may be turned off by default.
Typically, the browser shows the link destination in the status bar.
8. Click the Contact Us link.
The browser loads the finished Contact Us page, replacing the Green News page. The new page includes internal, external, and email links.
9. Position the cursor over the Meridien link in the second paragraph of the main content area.
Observe the status bar.
The status bar displays the http://google.com/maps link.
10. Click the Meridien link.

A new browser window appears and loads Google Maps. The link is intended to show the visitor where the Meridien GreenStart Association offices are located. If desired, you can even include address details or the company name in this link so that Google can load the exact map and directions.
Note that the browser opens a separate window or document tab when you click the link. This is a good behavior to use when directing visitors to resources outside your site. Since the link opens in a separate window, your own site is still open and ready to use. This practice is especially helpful if your visitors are unfamiliar with your site and may not know how to get back to it once they click away.
11. Close the Google Maps window.
The Contact Us page is still open in the browser. Note that each employee has a link applied to their email address.
12. Click an email link for one of the employees.

The default mail application launches on your computer. If you have not set up this application to send and receive mail, the program will usually start a wizard to help you set up this functionality. If the email program is set up, a new message window, similar to the one pictured in the screen shot, appears with the email address of the employee automatically entered in the To field.
![]() Note
Note
Many web visitors don’t use email programs installed on their computers. They use web-based services like AOL, Gmail, Hotmail, and so on. For these visitors, email links like the one you tested won’t work. The best option is to create a web-hosted form on your site that sends the email to you via your own server.
13. Close the new message window, and exit the email program.
14. Scroll down to the Education and Events section.
Click the events link.
The browser loads the Green Events and Classes page. The browser focuses on the table containing the list of upcoming events at the top of the page.
15. In the horizontal menu, click the Contact Us link.
The Contact Us page loads again.
16. Scroll down to the Education and Events section.
Click the classes link.
The browser loads the Green Events and Classes page again, but this time the browser focuses on the table containing the list of upcoming classes at the bottom of the page.
17. Click the Return to top link that appears above the class schedule. You may need to scroll up or down the page to see it.
The browser jumps back to the top of the page.
18. Close the browser and switch to Dreamweaver, if necessary.
You have tested a variety of different types of hyperlinks: internal, external, relative, and absolute. In the following exercises, you will learn how to build each type.
Creating internal hyperlinks
Creating hyperlinks of all types is easy with Dreamweaver. In this exercise, you’ll create relative text-based links to pages in the same site, using a variety of methods. You can create links in Design view, Live view, and Code view.
Creating relative links
Dreamweaver provides several methods for creating and editing links. Links can be created in all three program views.
1. Open about_us.html from the site root folder in Live view.
2. In the horizontal menu, position the cursor over any of the horizontal menu items. Observe the type of cursor that appears.

The pointer indicates that the menu item is structured as a hyperlink. The styling changes as you position the cursor over each link and then move it away. The links in the horizontal menu are not editable in the normal way. But this is something you can actually see only in Design view.
3. Switch to Design view.
Position the cursor over any item of the horizontal menu again.

The “slash” icon ![]() appears indicating that this section of the page is uneditable. The horizontal menu was not part of one of the editable regions you created in Lesson 8, “Working with Templates.” That means it’s considered part of the template and is locked with Dreamweaver. To add hyperlinks to this menu, you’ll have to first open the template.
appears indicating that this section of the page is uneditable. The horizontal menu was not part of one of the editable regions you created in Lesson 8, “Working with Templates.” That means it’s considered part of the template and is locked with Dreamweaver. To add hyperlinks to this menu, you’ll have to first open the template.
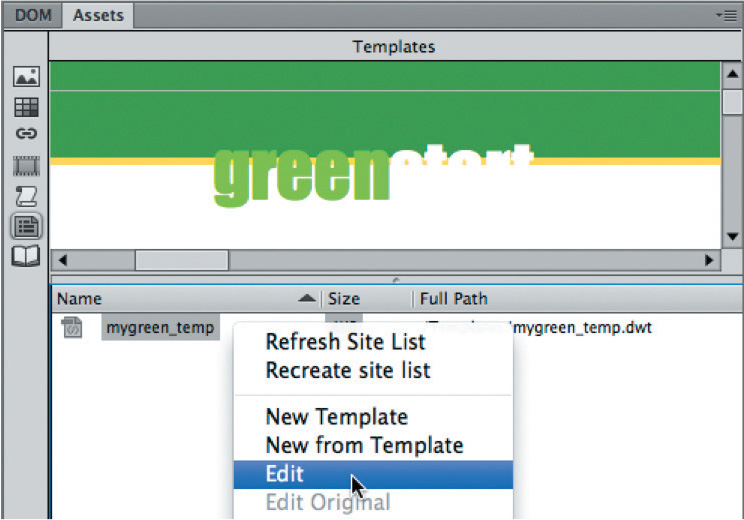
4. Choose Window > Assets. In the Assets panel Template category, right-click mygreen_temp, and choose Edit from the context menu.
5. Switch to Design view, if necessary.
In the horizontal menu, insert the cursor into the Green News link.
![]() Tip
Tip
When editing or removing an existing hyperlink, you don’t need to select the entire link; you can just insert the cursor anywhere in the link text. Dreamweaver assumes you want to change the entire link by default.
The horizontal menu is editable in the template.
6. If necessary, choose Window > Properties to open the Property inspector.
Examine the contents of the Link field in the Property inspector.

To create links, the HTML tab must be selected in the Property inspector. The Link field shows a hyperlink placeholder (#). The home page doesn’t exist yet, but the link can be created by typing the name of the file or resource into this field.
![]() Note
Note
The link won’t have the typical hyperlink appearance—a blue underscore—because of the special formatting you applied to this menu in Lesson 5.
7. In the Link field, click the Browse for File icon ![]() .
.

The Select File dialog appears.
8. Navigate to the site root folder, if necessary.
Select news.html from the site root folder. Click Open.
The link ../news.html appears in the Link field in the Property inspector.

You’ve created your first text-based hyperlink. Since the template is saved in a subfolder, Dreamweaver adds the path element notation (../) to the filename so that the link properly resolves once the template pages are updated. This notation tells the browser or operating system to look in the parent directory of the current folder. Dreamweaver then rewrites the link simply to "news.html" when the template is applied to a page that is modified automatically based on where the pages are saved. If necessary, you can type links in the field manually too.
9. Insert the cursor in the Home link.
The home page does not exist yet. But that doesn’t stop you from entering the link text by hand.
10. In the Link field, select the hash (#) symbol, type ../index.html to replace the placeholder and press Enter/Return.

At any time, you may insert a link by typing it manually just this way. But, entering links by hand can introduce a variety of errors that can break the very link you are trying to create. If you want to link to a file that already exists, Dreamweaver offers other interactive ways to create links.
11. Insert the cursor in the Green Events link.
12. Click the Files tab to bring the panel to the top, or choose Window > Files.
You need to make sure you can see the Property inspector and the target file in the Files panel.
13. In the Property inspector, drag the Point to File icon ![]() —next to the Link field—to events.html in the site root folder displayed in the Files panel.
—next to the Link field—to events.html in the site root folder displayed in the Files panel.

Dreamweaver enters the filename and any necessary path information into the Link field.
![]() Tip
Tip
If a folder in the Files panel contains a page you want to link to but the folder is not open, drag the Point to File icon over the folder, and hold it in place to expand that folder so that you can point to the desired file.
14. Modify the rest of the menu as shown using any of the methods you’ve learned:
Green Travel: ../travel.html
Green Tips: ../tips.html
Contact Us: ../contact_us.html
About Us: ../about_us.html
![]() Note
Note
The index.html and travel.html pages will be created later.
For files that have not been created, you will always have to enter the link manually. Remember that all the links added to the template pointing to files in the site root folder must include the ../ notation so that the link resolves properly. Remember also that Dreamweaver will modify the link as needed once the template is applied to the child page.
Creating a home link
Most websites display a logo or company name, and this site is no different. The GreenStart logo appears in the header element—a product of two background graphics, a gradient, and some text. Frequently, such logos are used to create a link back to the site home page. In fact, this practice has become a virtual standard on the web. Since the template is still open, it’s easy to add such a link to the GreenStart logo.
1. Select the GreenStart text in the <header> element.
The text component of the logo is highlighted. Dreamweaver keeps track of links you create in each editing session until you close the program. You can access these previously created links from the Property inspector.
![]() Note
Note
You can select any range of text to create a link—from one character to an entire paragraph or more; Dreamweaver will add the necessary markup to the selection.
2. In the Property inspector Link field, choose ../index.html from the drop-down menu.

This selection will create a link to the home page you will create later. The <a> tag now appears in the tag selector interface, and the logo has changed color to match the default styling of hyperlinks. Although you may want normal hyperlinks to be styled this way, the logo is not supposed to be blue. It’s a simple fix with CSS.
3. In the CSS Designer, choose green_styles.css > GLOBAL.
Create the following selector:
header h2 a:link, header h2 a:visited
This selector will target the “default” and “visited” states of the link within the logo.
4. Add the following properties to the rule:
color: inherit
text-decoration: none
![]() Note
Note
Design view will not render all the styling properly, but it will appear correctly in Live view and in a browser.

These properties will cancel the hyperlink styling and return the text to its original appearance. By using inherit for the color value, the color applied by the header h2 rule will be passed automatically to the text. That way, any time the color in the header h2 rule changes, the hyperlink will be styled in turn without any additional work or redundant code.
So far, all the links you’ve created and the changes you’ve made are only on the template. The whole purpose of using the template is to make updating pages in your site easy.
Updating links in child pages
To apply the links you’ve created to all the existing pages based on this template, all you have to do is save it.
1. Choose File > Save.

The Update Template Files dialog appears. You can choose to update pages now or wait until later. You can even update the template files manually, if desired.

Dreamweaver updates all pages created by this template. The Update Pages dialog appears, and displays a report listing the updated pages. If you don’t see the list of updated pages, click the Show Log option in the dialog.
![]() Note
Note
When you close templates or web pages, Dreamweaver may ask you to save changes to green_styles.css. Whenever you see these warnings, always save the changes; otherwise you could lose all your newly created rules and properties.
3. Close the Update Pages dialog.
Close mygreen_temp.dwt.

Dreamweaver prompts you to save green_styles.css.
4. Click Save.
The file about_us.html is still open. Note the asterisk in the document tab; this indicates that the page has been changed but not saved.
5. Save about_us.html and preview it in a browser.
Position the cursor over the Home and Green News links.

If you display the status bar in your browser, you can see the links applied to each item. When the template was saved, it updated the locked regions of the page, adding the hyperlinks to the horizontal menu. Child pages that are closed at the time of updating are automatically saved. Open pages must be saved manually or you will lose changes applied by the template.
![]() Tip
Tip
Thoroughly test every link you create on every page.
6. Click the Contact Us link.
The Contact Us page loads to replace the About Us page in the browser.
7. Click the About Us link.
The About Us page loads to replace the Contact Us page. The links were added even to pages that weren’t open at the time.
8. Close the browser.
You learned three methods for creating hyperlinks with the Property inspector: typing the link manually, using the Browse for File function, and using the Point to File tool.
Creating an external link
The pages you linked to in the previous exercise were stored within the current site. You can also link to any page—or other resource—stored on the web if you know the URL.
Creating an absolute link in Live view
In the previous exercise, you used Design view to build all your links. As you build pages and format content, you’ll use Live view frequently to preview the styling and appearance of your elements. Although some aspects of content creation and editing are limited in Live view, you can still create and edit hyperlinks. In this exercise, you’ll apply an external link to some text using Live view.
1. Open contact_us.html from the site root folder in Live view.
2. In the second <p> element in the MainContent region, note the word Meridien.
You’ll link this text to the Google Maps site.
3. Launch your favorite browser. In the URL field, type maps.google.com and press Enter/Return.
Google Maps appears in the browser window.
![]() Tip
Tip
For this exercise, you can use any search engine or web-based mapping application.
4. Type San Jose, CA into the search field and press Enter/Return.

![]() Note
Note
In some browsers, you can type the search phrase directly in the URL field.
![]() Note
Note
We’re using Adobe’s headquarters in place of the fictional city of Meridien. Feel free to use another search term.
San Jose appears on a map in the browser. In Google Maps, somewhere on the screen you should see a settings or share icon.
![]() Note
Note
The technique for sharing map links is implemented differently in various browsers and search engines and may change over time.
5. Open the settings interface as appropriate for your chosen mapping application.
Search engines and browsers may display their link-sharing and embedding interface slightly differently than the one pictured. Google Maps, MapQuest, and Bing usually offer at least two separate code snippets: one for use within a hyperlink and the other to generate an actual map that you can embed in your site.

Note how the link contains the entire URL of the map, making it an absolute link. The advantage of using absolute links is that you can copy and paste them anywhere in the site without worrying whether the link will resolve properly.
6. Select and copy the link.
7. Switch to Live view in Dreamweaver.
Select the word Meridien.
![]() Tip
Tip
Double-click to select text in Live view.
In Live view, you can select an entire element or insert the cursor within the element to edit or add text or apply hyperlinks, as desired. When an element or section of text is selected, a HUD will appear. The Text HUD allows you to apply <strong> or <em> tags to the selection, or (as in this case) to apply hyperlinks.
8. Click the Hyperlink icon ![]() in the Text HUD.
in the Text HUD.

Press Ctrl+V/Cmd+V to paste the link in the Link field.
Press Enter/Return to complete the link.

The selected text displays the default formatting for a hyperlink.
9. Save the file and preview it in the default browser. Test the link.
When you click the link, the browser takes you to the opening page of Google Maps, assuming you have a connection to the Internet. But there is a problem: Clicking the link replaced the Contact Us page in the browser; it didn’t open a new window as when you previewed the page at the beginning of the lesson. To make the browser open a new window, you need to add a simple HTML attribute to the link.
10. Switch to Dreamweaver.
Click the Meridien link in Live view.
The Element HUD appears. The Property inspector displays the value of the existing link.
11. Choose _blank from the Target field menu in the Property inspector.

12. Save the file, and preview the page in the default browser again. Test the link.
![]() Tip
Tip
You can access the Target attribute in the Property inspector in Live, Design, and Code views whenever a link is selected.
This time when you click the link, the browser opens a new window or document tab.
13. Close the browser windows, and switch back to Dreamweaver.
As you can see, Dreamweaver makes it easy to create links to internal or external resources.
Setting up email links
Another type of link doesn’t take the visitor to another page; rather, it opens the visitor’s email program. Email links can create automatic, pre-addressed email messages from your visitors for customer feedback, product orders, or other important communications. The code for an email link is slightly different from the normal hyperlink, and—as you probably guessed already—Dreamweaver can create the proper code for you automatically.
![]() Tip
Tip
The Email Link menu cannot be accessed in Live view. But you can use the menu in Design view or Code view or just create the links by hand in any view.
1. If necessary, open contact_us.html in Design view.
2. Select the email address ([email protected]) in the first paragraph underneath the heading and press Ctrl+C/Cmd+C to copy the text.
3. Choose Insert > HTML > Email Link.
The Email Link dialog appears. The text selected in the document window is automatically entered into the Text field.
4. Insert the cursor in the Email field and press Ctrl+V/Cmd+V to paste the email address, if necessary.

![]() Tip
Tip
If you select the text before you access the dialog, Dreamweaver enters the text in the field for you automatically.
5. Click OK. Examine the Link field in the Property inspector.
Dreamweaver inserts the email address into the Link field and also enters the mailto: notation, which tells the browser to automatically launch the visitor’s default email program.
6. Save the file and preview it in the default browser. Test the email link.

If your computer has a default email program installed, it will launch and create a new email message using the email address provided in the link. If there is no default email program, your computer’s operating system may ask you to identify one.
7. Close any open email program, related dialogs, or wizards.
Switch to Dreamweaver.
You can also create email links by hand.
8. Select and copy the email address for Elaine.
9. Type mailto: in the Property inspector link field.
Paste Elaine’s email address directly after the colon.
Press Enter/Return to complete the link.

10. Save the file.
The text mailto:[email protected] appears in the Text HUD link field in Live view. You can use the HUD to add links to images too.
Creating an image-based link
Image-based links work like any other hyperlink and can direct users to internal or external resources. You can use the Insert menu in Design or Code views or apply links and other attributes using the HUD interface in Live view.
Creating image-based links using the Element HUD
In this exercise, you will create and format an image-based link using the email addresses of each GreenStart employee via the Element HUD.
1. If necessary, open contact_us.html in Live view from the site root folder.
2. Select the image of Elaine in the Association Management section.
To access the hyperlink option, you must open the Edit HTML Attributes menu.

![]() Note
Note
Normally, an image formatted with a hyperlink displays a blue border, similar to the blue underscore that text links get. But the predefined Bootstrap CSS turns this styling off. In non-Bootstrap sites, you may want to create a similar rule.
3. In the Element HUD, click the Edit HTML Attributes icon ![]() .
.
The menu opens and displays options for the image attributes src, alt, link, target, width, and height.
![]() Tip
Tip
Make sure there is no space after the colon or the link will not work properly.
4. If the email address is still in memory from the previous exercise, simply enter mailto: and paste the address in the Link field.
Otherwise, enter mailto:[email protected] in the link field
after the colon.
Press the ESC key to close the HUD.

The hyperlink that is applied to the image will launch the default email program in the same fashion as it did with the text-based link earlier.
5. Select and copy the email address for Sarah.
Repeat steps 2–4 to create an email link for Sarah’s image.
6. Create image links for the remaining employees using the appropriate email address for each.
All the image-based links on the page are complete. You can also create text-based links using the Text HUD.
Creating text links using the Text HUD
In this exercise, you will create text-based email links as needed for the remaining employees.
1. If necessary, open contact_us.html in Live view.
2. Select and copy the email address for Sarah.
The Text HUD appears around the selected text.
3. Click the Link icon ![]() .
.
A link field appears. A folder icon displays on the right side of the link field. If you were linking to a file on the website, you could click the folder to target the file. In this case, we’re creating an email link.
4. Insert the cursor in the link field, if necessary.
Enter mailto: and paste Sarah’s email address and press Enter/Return.

5. Using the Text HUD, create email links for the remaining email addresses displayed on the page.
6. Save all files.
Targeting page elements
As you add more content, the pages get longer and navigating to that content gets more difficult. Typically, when you click a link to a page, the browser window loads the page and displays it starting at the very top. But it can be very helpful when you provide convenient methods for users to link to a specific point on a page.
HTML 4.01 provided two methods to target specific content or page structures: a named anchor and an id attribute. In HTML5, the named anchor method has been deprecated in favor of ids. If you have used named anchors in the past, don’t worry, they won’t suddenly cease to function. But from this point on, you should start using ids exclusively.
Creating internal targeted links
In this exercise, you’ll work with id attributes to create the target of an internal link. You can add ids in Live, Design, or Code view.
1. Open events.html in Live view.
2. Scroll down to the table containing the class schedule.
When users move down this far on the page, the navigation menus are out of sight and unusable. The farther down the page they read, the farther they are from the primary navigation. Before users can navigate to another page, they have to use the browser scroll bars or the mouse scroll wheel to get back to the top of the page. Adding a link to take users back to the top can vastly improve their experience on your site. Let’s call this type of link an internal targeted link.
Internal targeted links have two parts: the link itself and the target. Which one you create first doesn’t matter.
3. Click the Class table.
Click the article tag selector.
The HUD appears focused on the article element.
4. Open the Insert panel.
Select the HTML category.
Click the Paragraph item.

The position assist interface opens.
5. Click Before.
A new paragraph element appears in the layout, with the placeholder text
This is the content for Layout P Tag.
6. Select the placeholder text.
Type Return to top to replace it.

The text is inserted between the two tables, formatted as a <p> element. The text would look better centered.
7. In the CSS Designer, choose green_styles.css > GLOBAL.
Create a new selector: .ctr
8. Create the following property for .ctr:
text-align: center
9. Click the Add Class/ID icon ![]() for the selected
for the selected <p> element.
10. Type .ctr in the text field, or choose .ctr from the hinting menu and press Enter/Return.
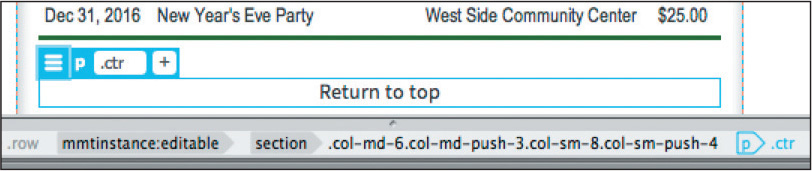
The Return to top text is aligned to the center. The tag selector now
displays p.ctr.
11. Select the text Return to top.
Click the Link icon ![]() and type #top in the Link field.
and type #top in the Link field.
Press Enter/Return to complete the link.

By using #top, you have created a link to a target within the current page. When users click the Return to top link, the browser window jumps to the position of the target. This target doesn’t exist yet. For this link to work properly, you need to insert the destination as high on the page as possible.
12. Save all files. Switch to Design view.
13. Scroll to the top of events.html.
Position the cursor over the header element.
The mouse icon indicates that this part of the page (and its related code) is uneditable, because the header and horizontal navigation menu are based on the site template. Putting the target at the very top is important, or a portion of the page may be obscured when the browser jumps to it. Since the top of the page is part of an uneditable region, the best solution is to add the target directly to the template.
Creating a link destination using an id
By adding a unique id to the template, you will be able to access it automatically throughout the site wherever you want to add a link back to the top of a page.
1. Open the template mygreen_temp.dwt from the Templates folder in
Design view.
2. Click in the text greenstart in the <header>.
Select the h2 tag selector.
In the Property inspector, type top in the id field and press Enter/Return.

The tag selector changes to h2#top; otherwise, the page shows no visible difference. The big difference is in how the page reacts to the internal hyperlink.
![]() Tip
Tip
When applying classes or ids, you can insert the cursor in the element or select the tag selector. The attribute will automatically be applied to the first containing element.
![]() Note
Note
An id can be created and applied to any HTML element. They don’t have to be referenced in the style sheet at all.
3. Save the file and update all template child pages. Close the template.
4. Switch to or open events.html, if necessary.
Save the file, and preview it in a browser.
5. Scroll down to the Class table.
Click the Return to top link.
The browser jumps back to the top of the page.
Now that the id has been inserted in every page of the site by the template, you can copy the Return to top link and paste it anywhere in the site you want to add this functionality.
6. In Dreamweaver, switch to Live view.
Select and copy the <p> element containing the text Return to top and its link.
7. Insert the cursor in the Class table.
Using the tag selector, select the <article> element.
Press Ctrl+V/Cmd+V to paste.

A new p.ctr element and link appear at the bottom of the page.
8. Save the file and preview it in the browser. Test both Return to top links.
Both links can be used to jump back to the top of the document. In the next exercise, you’ll learn how to create link targets using element attributes.
Creating a destination link in the Element HUD
There’s no need to add any extra elements to create hyperlink destinations when you can simply add an id attribute to a handy element nearby. In this exercise, you will use the Element HUD to add an id.
1. Open events.html in Live view.
Insert the cursor in the Events table.
Click the table tag selector.
The Element HUD and the Property inspector display the attributes currently applied to the Events table. You can add an id using either tool.
![]() Note
Note
When creating ids, remember that they need to have names that are used only once per page. They are case sensitive, so look out for typos.
2. Click the Add Class/ID icon ![]() .
.
Type a hash mark (#).
If any ids were defined in the style sheet but unused on the page, a list would appear. Since nothing appears, it means that there are no unused ids. Creating a new one is easy.
![]() Note
Note
If you add the id to the wrong element, simply delete it and try again.
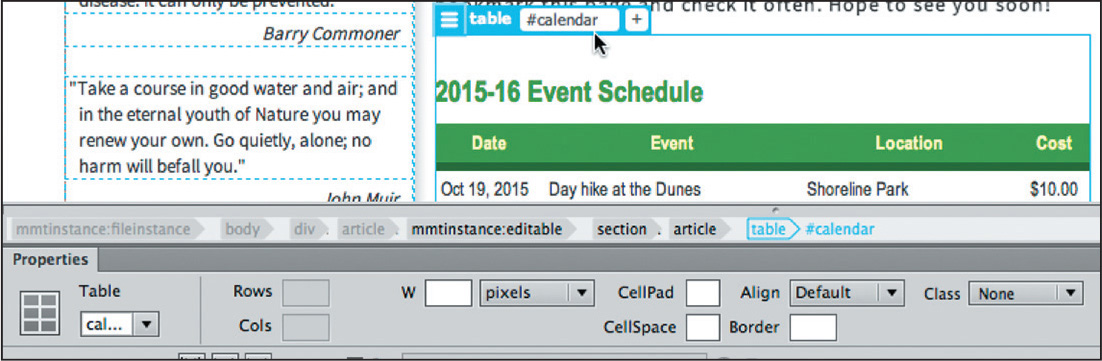
3. Type calendar and press Enter/Return.
The CSS Source HUD appears. We do not need the id in any style sheet.
4. Press ESC to close the HUD.
The tag selector now displays table#calendar. Since ids are unique identifiers, they are perfect for targeting specific content on a page. We also need to create an id for the Class table.
5. Repeat steps 1–4 to add the id #classes to the Class table.

The tag selector now displays table#classes.
6. Save all files.
You’ll learn how to link to these ids in the next exercise.
Targeting id-based link destinations
By adding unique ids to both tables, you have provided an ideal target for internal hyperlinks to navigate to a specific section of your webpage. In this exercise, you will create a link to each table.
1. If necessary, open contact_us.html in Live view.
Scroll down to the Education and Events section.
2. Select the word events in the first paragraph of the section.
![]() Tip
Tip
You can select single words by double-clicking them.
3. Using the Text HUD, create a link to the file events.html.

This link will open the file, but you’re not finished. You now have to direct the browser to navigate down to the Events table.
4. Type #calendar at the end of the filename to complete the link and press Enter/Return.

![]() Note
Note
Hyperlinks cannot contain spaces; make sure the id reference follows the filename immediately.
The word events is now a link targeting the Events table in the events.html file.
5. Select the word classes.
Create a link to the events.html file.
Type #classes to complete the link and press Enter/Return.

6. Save the file and preview the page in a browser.
Test the links to the Events and Class tables.
The links open the Events page and navigate to the appropriate tables.
Checking your page
Dreamweaver can check your page automatically for valid HTML, accessibility, and broken links. In this exercise, you’ll check your links and learn what you can do in case of a browser compatibility problem.
1. If necessary, open contact_us.html in Design view.
2. Choose Site > Check Links Sitewide.

A Link Checker panel opens. The Link Checker panel reports broken links to the files index.html and travel.html you created for nonexistent pages. You’ll make these pages later, so you don’t need to worry about fixing these broken links now. The Link Checker will find broken links to external sites, should you have any.
![]() Note
Note
The Link Checker may find some suspicious links in a Bootstrap JavaScript file. Ignore any of these errors.
3. Right-click the Link Checker tab, and choose Close Tab Group from the context menu.
You’ve made big changes to the pages in this lesson by creating the main navigation menu, links to specific positions on a page, to email, and to an external site. You also applied links to images. Finally, you checked your page for broken links.
Adding destination links to the same page (optional)
Using the skills you have just learned, open events.html and create destination links for the words Events and Classes that appear in the first paragraph.

Remember that the words will link to the tables on the same page. Can you figure out how to construct these links properly? If you have any trouble, check out the events_finished.html file for the answer.
Review questions
1. Describe two ways to insert a link into a page.
2. What information is required to create a link to an external webpage?
3. What’s the difference between standard page links and email links?
4. What attribute is used to create destination links?
5. What limits the usefulness of email links?
6. Can links be applied to images?
7. How can you check to see whether your links will work properly?
Review answers
1. Select text or a graphic and then, in the Property inspector, click the Browse for File icon next to the Link field and navigate to the desired page. A second method is to drag the Point to File icon to a file within the Files panel.
2. Link to an external page by typing or copying and pasting the full web address (a fully formed URL) in the Link field of the Property inspector or the Text HUD.
3. A standard page link opens a new page or moves the view to a position somewhere on the page. An email link opens a blank email message window if the visitor has an email application installed.
4. You can apply unique id attributes to any element to create a link destination.
5. Email links may not be very useful because many users do not use built-in email programs, and the links will not automatically connect with Internet-based email services.
6. Yes, links can be applied to images and used in exactly the same way text-based links are.
7. Run the Link Checker report to test links on each page individually or sitewide. You should also test them in a browser.