
Hour 1. Preparing Your System and iDevice for Development
What You’ll Learn in This Hour:
![]() The iOS hardware limitations you face
The iOS hardware limitations you face
![]() Where to get the tools you need to develop for iOS devices
Where to get the tools you need to develop for iOS devices
![]() How to join the iOS Developer Program
How to join the iOS Developer Program
![]() The need for (and use of) provisioning profiles
The need for (and use of) provisioning profiles
![]() What to expect during the first few hours of this book
What to expect during the first few hours of this book
The iOS device family opens up a whole realm of possibilities for developers: Multitouch interfaces, always-on Internet access, video, and a whole range of built-in sensors can be used to create everything from games to serious productivity applications. Believe it or not, as a new developer, you have an advantage. You are starting fresh, free from any preconceived notions of what is possible in a mobile application. Your next big idea may well become the next big thing on Apple’s App Store.
This hour prepares you for your first development project. You’re about to embark on the road to becoming an iOS developer, but you need to do a bit of prep work before you start coding.
Welcome to the iOS Platform
If you’re reading this book, you probably already have an iOS device, and that means you already understand how to interact with its interface. Crisp graphics, amazing responsiveness, multitouch, and hundreds of thousands of apps—this just begins to scratch the surface. As a developer, however, you need to get accustomed to dealing with a platform that, to borrow a phrase from Apple, forces you to “think different.”
IOS Devices
The iOS platform family currently consists of the iPhone, iPad, and iPod touch. The Apple Watch (watchOS) and Apple TV (tvOS) are similar platforms, but have unique user interfaces and require unique development approaches. As you work on the tutorials in this book, you’ll notice in many figures that I focus on iPhone-centric (specifically 4.7-inch screen) projects. This isn’t because I’m lacking love for larger devices; it’s because it is difficult to capture iPad and the “plus” model iPhone interfaces in a screenshot because they are so large. The good news is that if you want to develop a project on the iPad, you develop it on the iPad. If you want to develop it for the iPhone 6s+, you develop it for the iPhone 6s+. In almost all cases, the coding process is identical. In the few cases where it isn’t, I make sure that you understand what is different between the devices (and why). You’ll also find that each tutorial is available in an iPad and iPhone version on this book’s website (http://teachyourselfios.com), so you can follow along with a working application on whatever device you choose.
Note
Like Apple’s developer tools and documentation, I do not differentiate between the iPhone and iPod touch in the lessons. For all intents and purposes, developing for these devices is identical, although some capabilities aren’t available in earlier versions of the iPod touch (but the same can be said for earlier versions of the iPhone and iPad, as well).
Display and Graphics
The iOS devices offer a variety of different resolutions, but iOS provides a simple way of thinking about them. The traditional iPhone screen (before the iPhone 5 and 6), for example, is 320×480 points. Notice that I said points, not pixels. Before the release of the iPhone 4’s Retina display, the iPhone was 320×480 pixels. Now, the actual resolution of an iOS device is abstracted behind a scaling factor. This means that although you may be working with the numbers like 320×480 for positioning elements on a “small” device, like an iPhone 4s, the actual device may have more pixels than that. The iPhone 4(s), 5(s), and 6, for example, have a scaling factor of 2. This means that the iPhone 4s is really a (320×2) × (480×2) or 640×960 pixel resolution device. The iPhone 5 changed things a bit by using a longer 320×568 point (640×1136 pixel) screen, and the iPhone 6 upped the ante with a 375×667 point (750×1334 pixel) screen (see Figure 1.1).
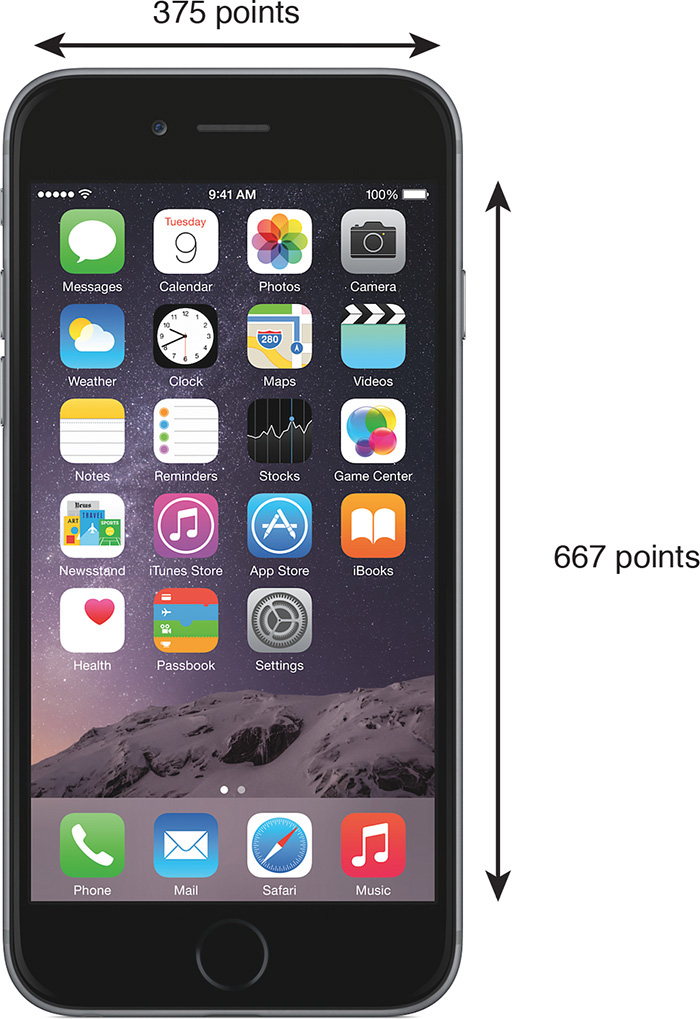
FIGURE 1.1 The flagship iPhone 6s screen is measured in points—375×667 (portrait), 667×375 (landscape)—but each point is made up of more than 4 pixels (2 horizontal, 2 vertical).
So, what about the gigantic iPhone 6+/6s+? It changes things even more, with a scaling factor of 3, meaning that each point on the screen represents 3 pixels. What size is the screen in points? 414×736 points. With a scaling factor of 3, that means it has 1242×2208 pixels, right? Not quite. The iPhone plus models have a resolution of 1080×1920—but an “internal” resolution of 1242×2208. In essence, you can treat it like it has the higher resolution, but it automatically scales things down to fit the 1080×1920 display.
With all of these pixels (even in the iPhone 5), it might seem like you will have tons of screen real estate. Keep in mind, however, that these pixels are displayed on a screen that is likely only an inch or two larger than your index finger.
The iPad family follows a similar pattern. The iPad 2 and first-generation iPad mini use screens with 768×1024 points and a scaling factor of 1. Retina display iPad Airs and Minis still have a 768×1024-point screen, but with a scaling factor of 2 and a resolution of 1536×2048 pixels. The iPad Pro sports a gigantic 1024×1366 point screen with a scaling factor of 2 (or 2048×2732 pixels).
We take a closer look at how scaling factors work when we position objects on the screen throughout this book. The important thing to know is that when you’re building your applications, iOS automatically takes the scaling factor into play to display your apps and their interfaces at the highest possible resolution (with rarely any additional work on your part).
The screen limits aren’t a bad thing. As you’ll learn, the iOS development tools give you plenty of opportunities to create applications with just as much depth as your desktop software—albeit with a more structured and efficient interface design.
The graphics that you display on your screen can include complex animated 2D and 3D displays thanks to the OpenGL ES and Metal implementation available on all iOS devices. OpenGL is an industry standard for defining and manipulating graphic images that is widely used when creating games, and Metal is an Apple-specific application programming interface (API) for accessing the 3D hardware with as little overhead as possible. Each year’s device revisions improve these capabilities with more advanced 3D chipsets and rendering abilities, but even the original iPhone has very respectable imaging abilities.
Application Resource Constraints
As with the HD displays on our desktops and laptops, we’ve grown accustomed to processors that can work faster than we can click. The iOS devices use a range of processors, from a ~400MHz ARM in the early iPhones to the multicore A9 in the current top-of-the-line iPhone and iPad devices. The “A” chips are a “system on a chip” that provide central processing unit (CPU), graphics processing unit (GPU), and other capabilities to the device, and this series is the first Apple-designed CPU series to be used in quite a while.
Because Apple has gone to great lengths to keep the iOS devices responsive, your device’s capability to multitask is limited. Starting in iOS 4, Apple created a limited set of multitasking APIs for very specific situations. In recent releases, the restrictions on these APIs have been loosened, but your application can never assume that it will remain running if iOS deems it to be a resource hog. iOS preserves the user experience above all else.
Another constraint that you need to be mindful of is the available memory. In the original iPhone, 128MB of RAM is available for the entire system, including your application. There is no virtual memory (slower storage space used as RAM), so you must carefully manage the objects that your application creates. In the latest models of the iPhone, Apple has provided 2GB, while the iPad Pro includes a full 4GB. This is great for us, but keep in mind that there are no RAM upgrades for earlier models.
Connectivity
The iPhone and iPad can always be connected to the Internet via a cellular provider (such as AT&T, Verizon, and Sprint in the United States). This wide-area access is supplemented with built-in WiFi and Bluetooth. WiFi can provide desktop-like browsing speeds within the range of a wireless hot spot. Bluetooth, in contrast, can be used to connect a variety of peripheral devices to your device, including a keyboard.
As a developer, you can make use of the Internet connectivity to update the content in your application, display web pages, and create multiplayer games. The only drawback is that applications that rely heavily on 3G, 4G, or LTE data usage may have a smaller audience due to the costs associated with data plans, and the popularity of WiFi-only models. Design your apps for WiFi, but support conservative use of cellular data if you can.
Input and Feedback
iOS devices shine when it comes to input and feedback mechanisms and your ability to work with them. You can read the input values from the capacitive multitouch (up to 11 fingers on the iPad) screen, force touch (pressure) on 2015 models, sense motion and tilt via the accelerometer and gyroscope, determine where you are using the global positioning system (GPS) (cellular-enabled devices required), see which way you’re facing with the digital compass, and understand how a device is being used with the proximity and light sensors. iOS can provide so much data to your application about how and where it is being used that the device itself truly becomes a controller of sorts—much like (but surpassing) devices such as the Nintendo Wii U and PlayStation DualShock 4 controllers.
iOS devices also support capturing pictures and video directly into your applications, opening a realm of possibilities for interacting with the real world. Already applications are available that identify objects you’ve taken pictures of and that find references to them online (such as the Amazon Mobile app) or perform real-time translation of printed text (Word Lens).
Finally, for each action your user takes when interacting with your application, you can provide feedback. This, obviously, can be visible feedback on the screen, or it can be high-quality audio and haptic feedback via vibration (iPhone only). As a developer, you can leverage all these capabilities (as you’ll learn in this book).
That wraps up our quick tour of the iOS platform. Never before has a single device defined and provided so many capabilities for a developer. As long as you think through the resource limitations and plan accordingly, a wealth of development opportunities await you.
Becoming an iOS Developer
Being an iOS developer requires more than just sitting down and writing a program. You need a modern Intel Macintosh desktop or laptop running Mavericks or Yosemite and at least 8GB of free space on your hard drive. The more screen space you have on your development system, the easier it is to create an effective workspace. You can even take Xcode into full-screen mode, removing all distractions. That said, I’ve worked perfectly happily on a 13-inch MacBook Air, so an ultra-HD multimonitor setup certainly isn’t necessary.
So assuming you already have a Mac running Yosemite or El Capitan, what else do you need? The good news is that there isn’t much more, and it won’t cost you a cent to write your first application and run it on your iOS device.
The Apple Developer Program
Despite somewhat confusing messages on the Apple website, there really is no fee associated with downloading the iOS SDK (software development kit), writing iOS applications, and running them on Apple’s iOS Simulator or on your personal device. The ability to run applications on your device without joining the Developer Program is new with Xcode 7, so if you’re attempting to use an earlier version, you’ll need to upgrade.
Limitations do apply to what you can do for free. If you want to have early access to beta versions of the iOS and SDK, you must join the Developer Program. If you want to distribute applications via the App Store or send them to colleagues for testing, you also need to pay the membership fee.
Perhaps you aren’t yet sure whether a membership is right for you. Don’t worry; you can join at any time. I recommend that you start with the free tools and upgrade if you want to take advantage of pre-release software or deploy a finished application to the App Store. The only thing you need for the free program is an Apple ID. If you don’t have one already, you can register a new ID at https://appleid.apple.com.
Note
Although you can run apps on your device with Xcode 7, it isn’t necessarily the easiest approach to development. Most everything we do in this book can be (and will be) run and tested using the iOS Simulator. Obviously, things such as motion sensor input and GPS readings can’t be accurately presented in the Simulator, but these are special cases and aren’t needed until later in this book.
If you choose to join the paid Apple Developer Program, there are two levels to consider: a standard program ($99) for those who will be creating applications that they want to distribute from the App Store, and an enterprise program ($299) for large (500+ employees) companies that want to develop and distribute applications in-house but not through the App Store. Most likely, the standard program is what you want.
The standard program is available for both companies and individuals. If you want to publish to the App Store with a business name, you are given the option of choosing a standard “individual” or “company” program during the registration.
Becoming a Paid Developer Member
To start, visit the Apple Developer Enrollment page (https://developer.apple.com/programs/enroll/), shown in Figure 1.2.

Scroll to the bottom of the page and click the Start Your Enrollment button, and then log in using your credentials. If you don’t have an ID, or you want a new ID to use solely for development, you can create a new Apple ID from the login page as well.
The registration process then walks you through the process of agreeing to Apple’s Developer terms, and collecting information about you or your company, development interests, and experience, as shown in Figure 1.3.
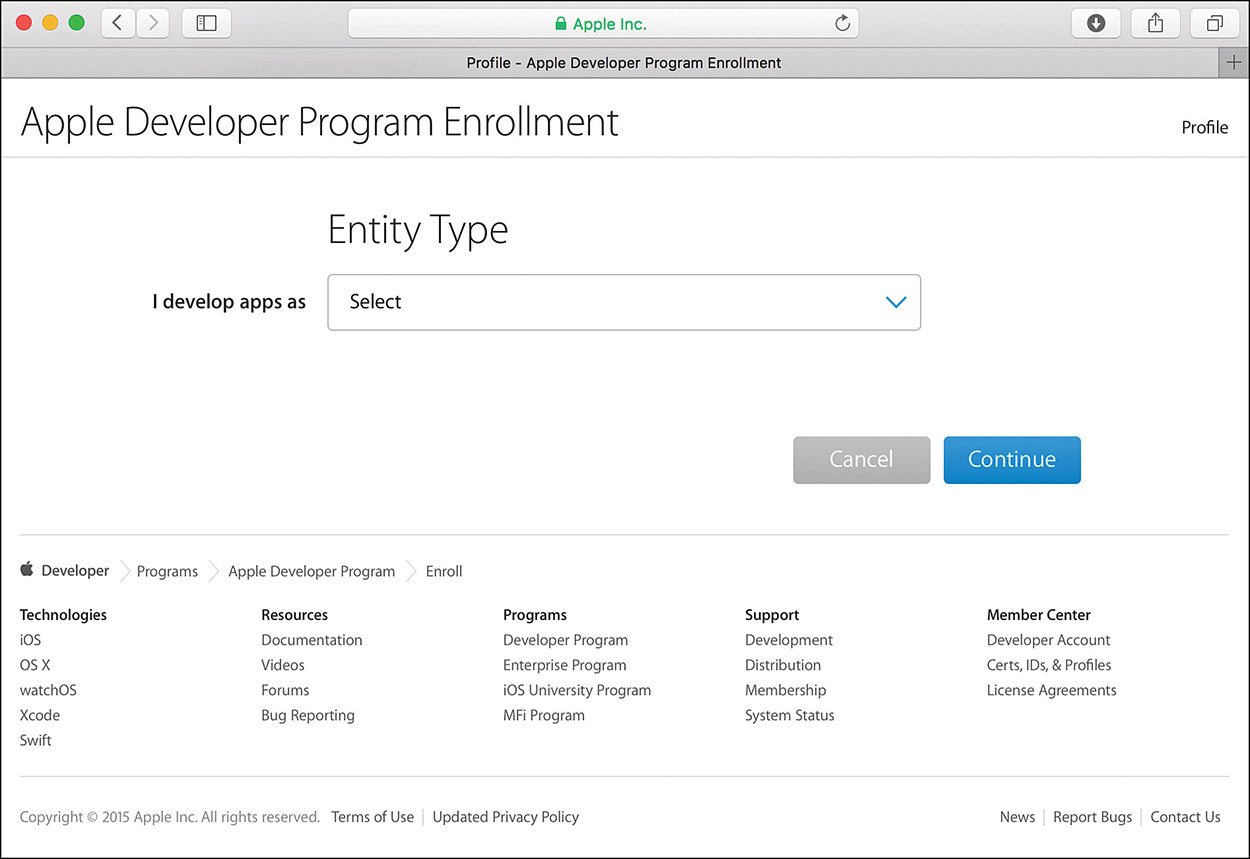
FIGURE 1.3 Walk through the registration process, providing information about you and your experience.
Click Continue to walk through the registration screens. At the end of the process, you are asked to complete the purchase of the program membership and enable automatic renewal, as shown in Figure 1.4.

FIGURE 1.4 Complete your purchase (buttons not visible) and become a paid member of the Apple Developer Program.
The Developer Program membership does not take effect immediately. When the App Store first launched, it took months for new developers to join and be approved into the program. Today, however, it might take a few hours or a day. Just be patient.
Installing Xcode
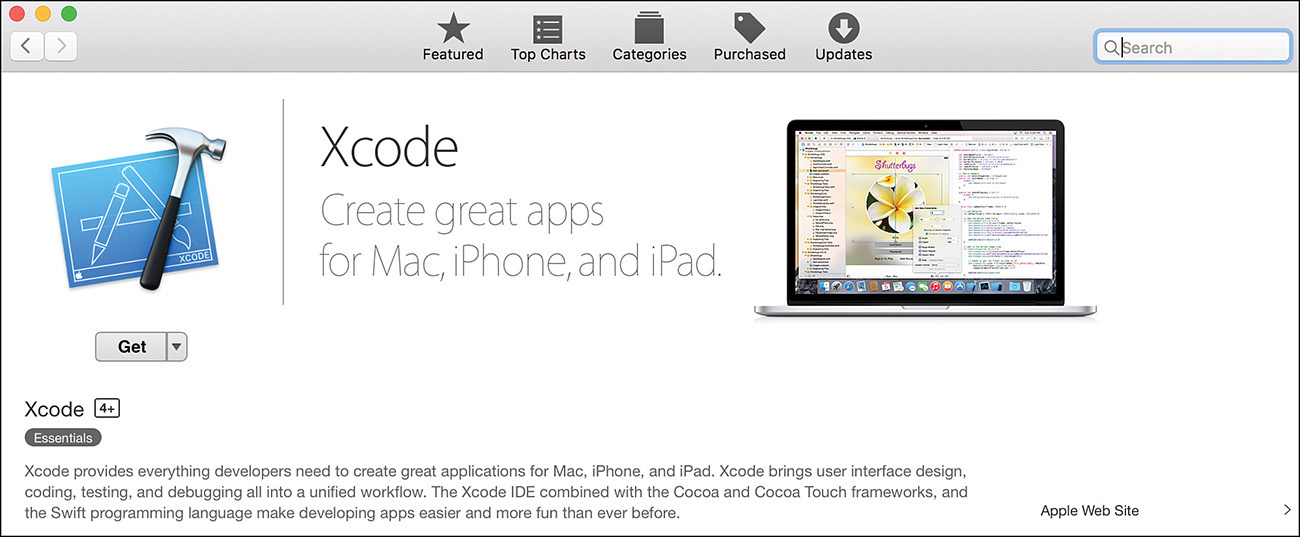
Thanks to the Mac App Store, downloading Xcode (the iOS development suite) is as easy as point and click. Open the App Store from your Dock, search for Xcode, and download it for free, as shown in Figure 1.5. Sit back while your Mac downloads the large (~3GB compressed) application.
If you’re interested in the cutting-edge beta releases of Xcode, you can download preview versions directly from the Developer Xcode site: https://developer.apple.com/xcode/.
When the download completes, you have either a disk image (if you downloaded a preview release from the iOS Developer site) or an application (if you downloaded from the Mac App Store). Open the disk image, if necessary, and copy the application to your Mac’s Applications folder. You can have multiple copies of Xcode installed, so feel free to install both the beta from the dev center and the current stable release from the Mac App Store.
Xcode is interesting in that it is both an application that provides a development environment and a wrapper around a collection of standalone tools (such as the iOS Simulator). These additional tools are launched from within Xcode. Xcode itself is started like any other application, by using the Finder or Launchpad (see Figure 1.6).

FIGURE 1.6 Your work will start with Xcode (which you can find in the Applications folder or Launchpad).
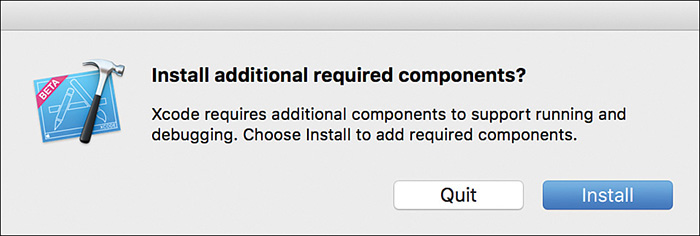
Once the Xcode application itself is installed, you might still need to install some additional software before you can use it. Launch Xcode from the Finder or Launchpad, and then wait for it to start. If it’s your first time using the application, you’ll likely be presented with a license agreement, and then Xcode will install updates and additional components to support iOS development (see Figure 1.7). If prompted, click Install to continue.
When the installation completes, you can exit out of Xcode by choosing Quit from the Xcode menu. Your development environment is now ready to go. Although we do not get into real development for a few more hours, we will be configuring a few options in Xcode in the next section, so make sure you’ve properly installed the software before proceeding.
Running an iOS App
Even after you’ve obtained an Apple developer membership, joined a paid Developer Program, and downloaded and installed the iOS development tools, you still cannot run any applications that you write on your actual device. Why? Because you haven’t created a development provisioning profile.
In many development guides, this step isn’t covered until after development begins. In my mind, after you’ve written an application, you’re going to want to run it on a real device immediately. Why? Because it’s just cool to see your own code running on your own iPhone or iPad.
What’s a Development Provisioning Profile?
Like it or not, Apple’s current approach to iOS development is to make absolutely certain that the development process is controlled—and that groups can’t just distribute software to anyone they want. The result is a rather confusing process that ties together information about you, any development team members, and your application into a provisioning profile.
A development provisioning profile identifies the developer who may install an application, an ID for the application being developed, and the “unique device identifiers” for each device that will run the application. This is only for the development process. When you are ready to distribute an application via the App Store or to a group of testers (or friends) via ad hoc means, you must create a separate “distribution” profile (paid developer memberships only). If you’re just starting out, this isn’t something you need right away.
Configuring Devices for Development
In the past, creating a provisioning profile for the sole purpose of development was a frustrating and time-consuming activity that took place in an area of the iOS developer site called the Provisioning Portal. Apple has dramatically streamlined the process in recent versions of Xcode, making provisioning as simple as adding your developer Apple ID to Xcode, then (literally), running your app.
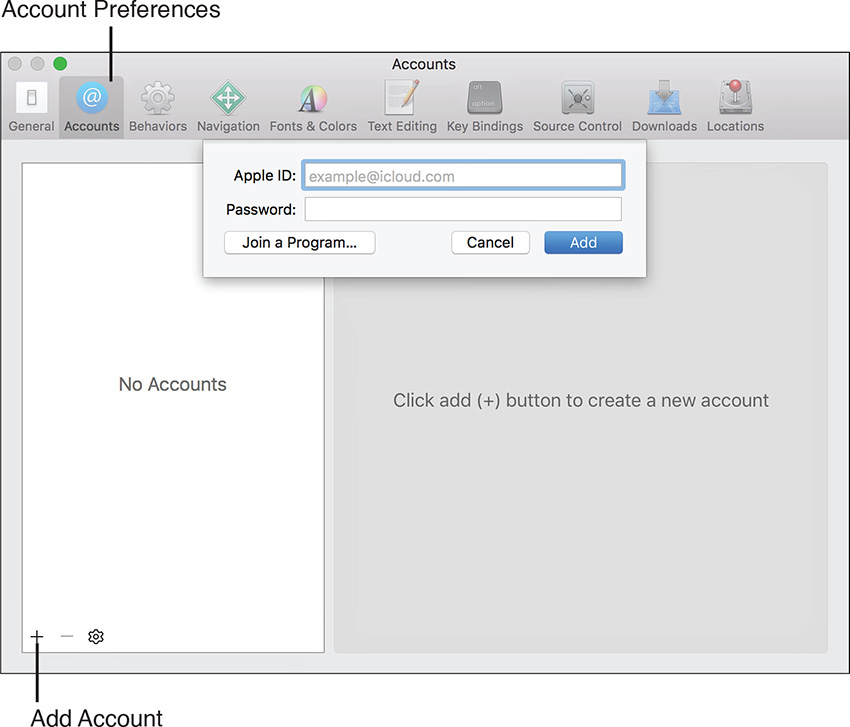
To begin, start Xcode and immediately load the Xcode preferences by choosing Xcode, Preferences from the Xcode menu. Within the Preferences window, click the Accounts button. Click the + button in the lower-left corner, and choose Add Apple ID from the menu that appears. When prompted, enter your Apple ID, as shown in Figure 1.8, and then click the Add button. Close the Preferences window when finished.
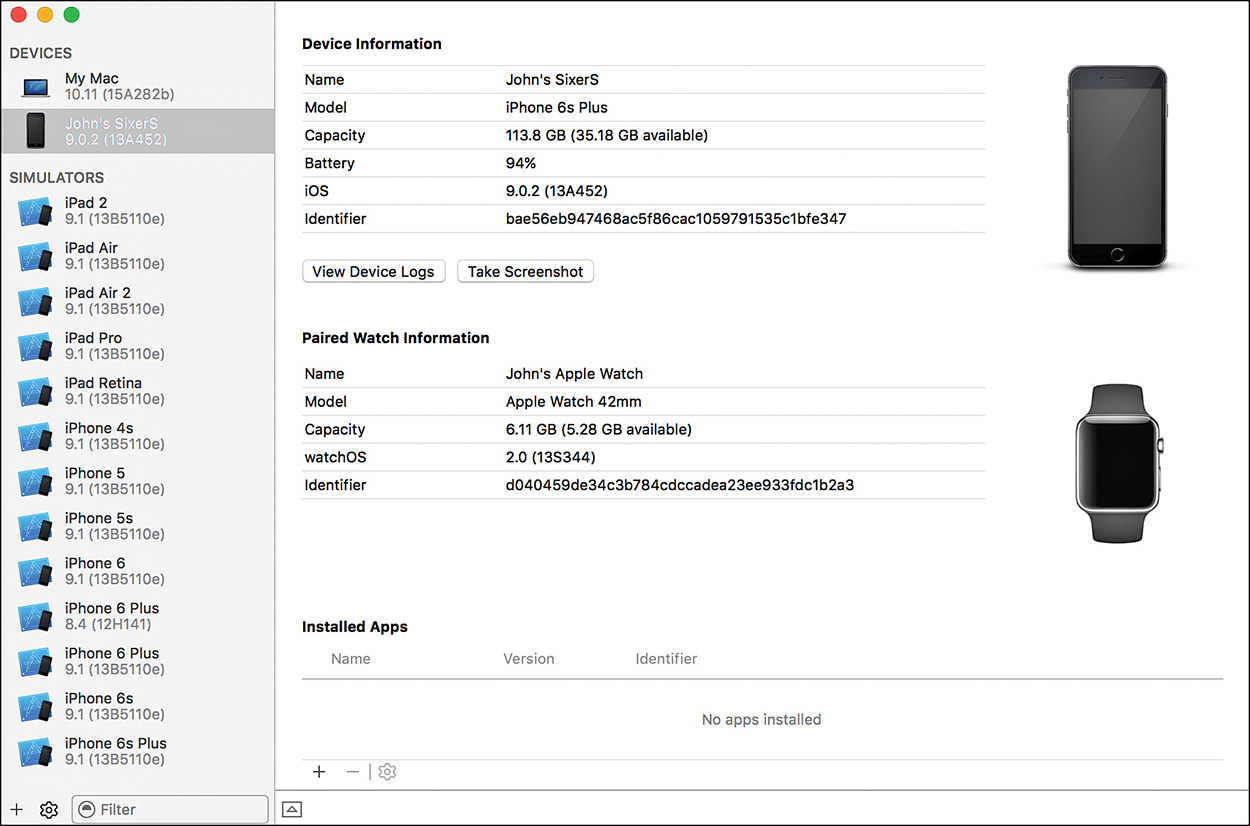
Next, make sure that your unlocked device is connected to your computer, and then choose Window, Devices from the menu bar. You should see your iOS device listed in the leftmost column of the window under the Devices heading, as shown in Figure 1.9. As long as your device is visible here, you should be ready to go! As soon as you attempt to run an application on your iDevice, Xode will automatically create all the provisioning profiles and certificates for you. If you don’t see your device, make sure you’re using an official Apple Lightning cable and the latest supported version of iOS.
Note
Only developers who have paid for a membership can access the member center and directly modify their provisioning profiles. Otherwise, you’ll use Xcode to auto-magically configure things for you and deploy to your personal devices.
Note
In case you’re wondering, Apple’s Mac Developer Program creates and maintains similar profiles for deploying to the Mac App Store. The biggest difference is that unlike with iOS apps, you are free to run your Mac apps on any machine you want. In the Mac Developer Program, your certificates are used for deploying to the Mac App Store and for testing Apple-hosted services like Game Center and iCloud integration. In iOS development, you need the appropriate certificates installed to run your software anywhere outside of the iOS Simulator.
Tip
After you have a single development machine configured, you can easily configure other workstations by exporting your signing identities and provisioning profiles. To do this, open the Xcode preferences (Xcode, Preferences) and click the Accounts icon on the toolbar. Click the gear icon at the bottom of the Accounts list, and choose Export Accounts. This option (and the corresponding Import Accounts selection) exports (and subsequently imports) all your developer profiles/certificates in a single package.
Launching the App
It seems wrong to go through a whole hour about getting ready for iOS development without any payoff, right? For a real-world test of your efforts, let’s actually try to run an application on your iOS device. If you haven’t downloaded the project files to your computer, now is a good time to visit http://teachyourselfios.com and download the archives.
If you feel adventurous, a tutorial is available on http://teachyourselfios.com that will teach you about the basics of Xcode source control, including how you can connect to a live repository of the latest versions of all the book’s sample projects.
Now let’s run that app:
1. Within the Hour 1 Projects folder, choose between iPhone and iPad versions of the project, and then open the Welcome folder. Double-click Welcome.xcodeproj to open a simple application in Xcode. When the project opens, your display should look similar to Figure 1.10. If it isn’t exactly the same, no biggie.
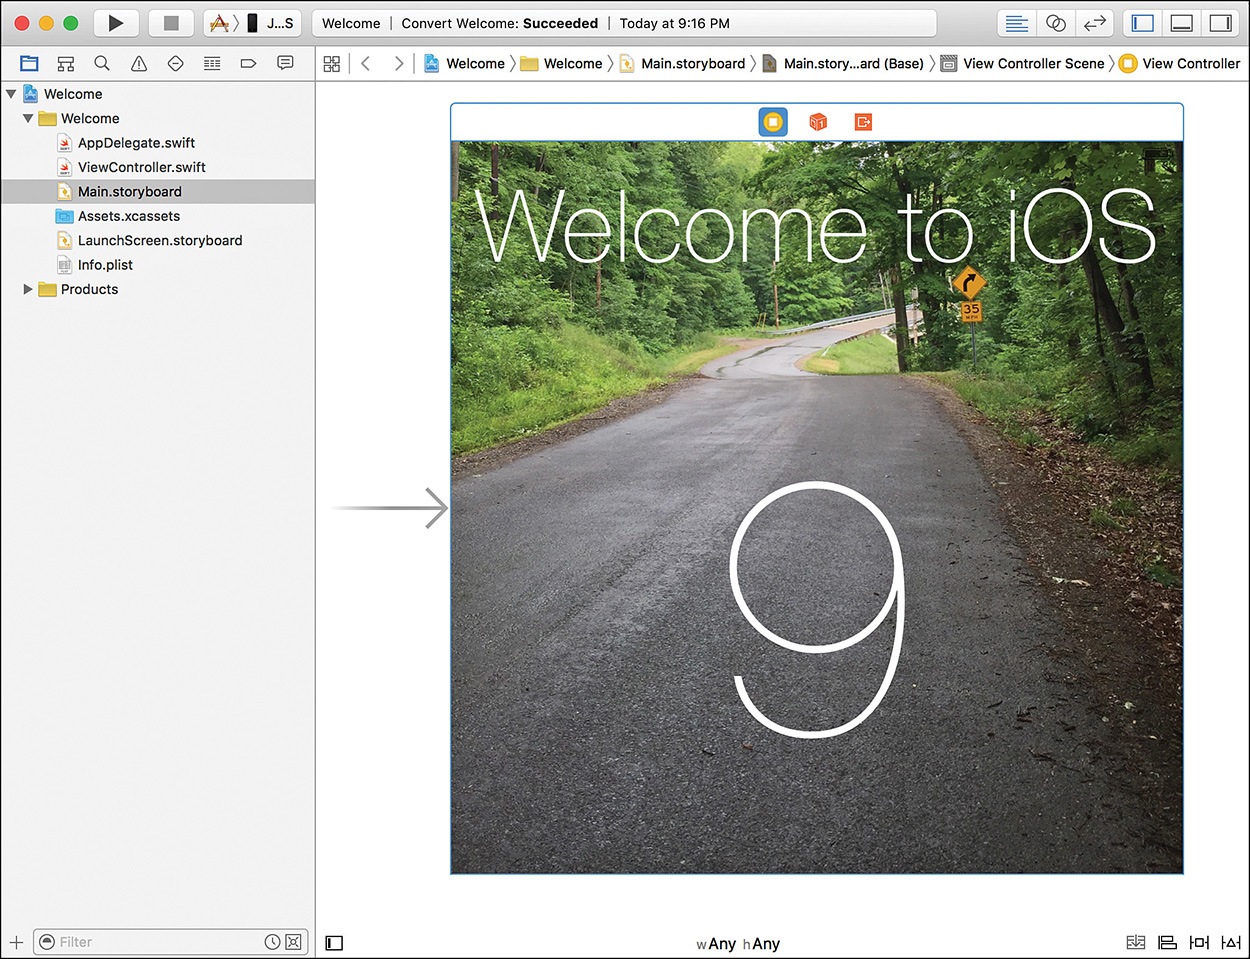
FIGURE 1.10 The opened project should look a bit like this. Don’t worry if it isn’t exactly the same.
Tip
When you open a project using a more recent version of Xcode than what was used to create the project, you may be prompted to upgrade the project - convert the code to the latest Swift syntax. If this happens, go ahead and tell Xcode to make the necessary changes. Chances are, nothing will change. I get this message with each new beta of Xcode that comes out and have yet to see any required changes to the iOS 9 projects in this book.
2. Make sure that your iOS device is plugged into your computer. Skip this if you don’t happen to have an iOS device available.
3. Using the right side of the pop-up menu in the upper-left corner of the Xcode window (called the Scheme menu), choose your iOS device, as shown in Figure 1.11. This tells Xcode that when the project is built it should be installed on your device, not run in the Simulator. If you don’t have a physical device handy, choose one of the Simulator options, depending on which version of the project you’re using.
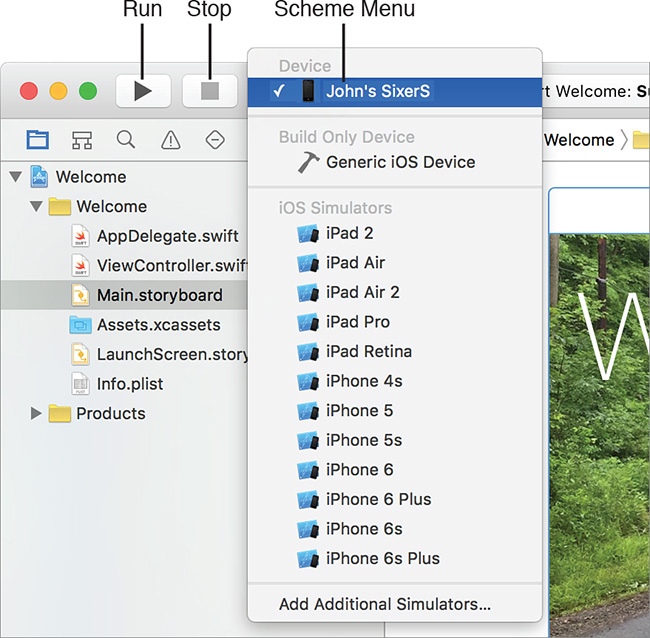
You’ll usually only see options for running an application on either a variation of the iPhone Simulator or the iPad Simulator. In Figure 1.11, you see all the available Simulator options. This occurs when you are using an iPhone-targeted app (because they run on both iPhones and iPads) or when an app is a universal application (more on that later in the book). In this case, the screenshot was captured using the iPhone version of the project so that you could see all the options.
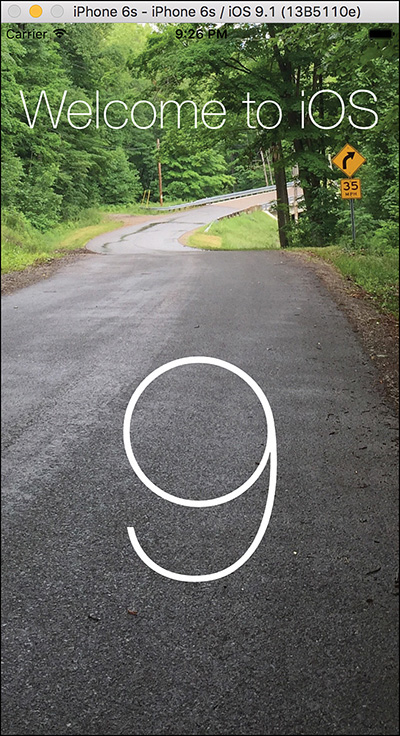
4. Make sure your device is unlocked, and then click the Run button in the upper-left corner of the Xcode toolbar. After a few seconds, the application should be installed and launched. Figure 1.12 demonstrates what it looks like running on a 4.7-inch iPhone (an iPhone 6).
5. Click Stop on the Xcode toolbar to exit the application. You can now quit Xcode. We’re done with it for the hour.
When you clicked Run, the Welcome application was installed and started on your iOS device. It remains there until you remove it manually. Just touch and hold the Welcome icon until it starts wiggling, and then delete the application as you would any other. Applications installed with your development certificate stop working when the certificate expires (120 days after issuance).
Tip
The first time you run an application on your device using a new Apple ID (or if something is amiss with your developer account), Xcode may prompt you with a warning about provisioning your device.
If you see such a warning, simply click Fix, and (hopefully) all warnings and errors will go away.
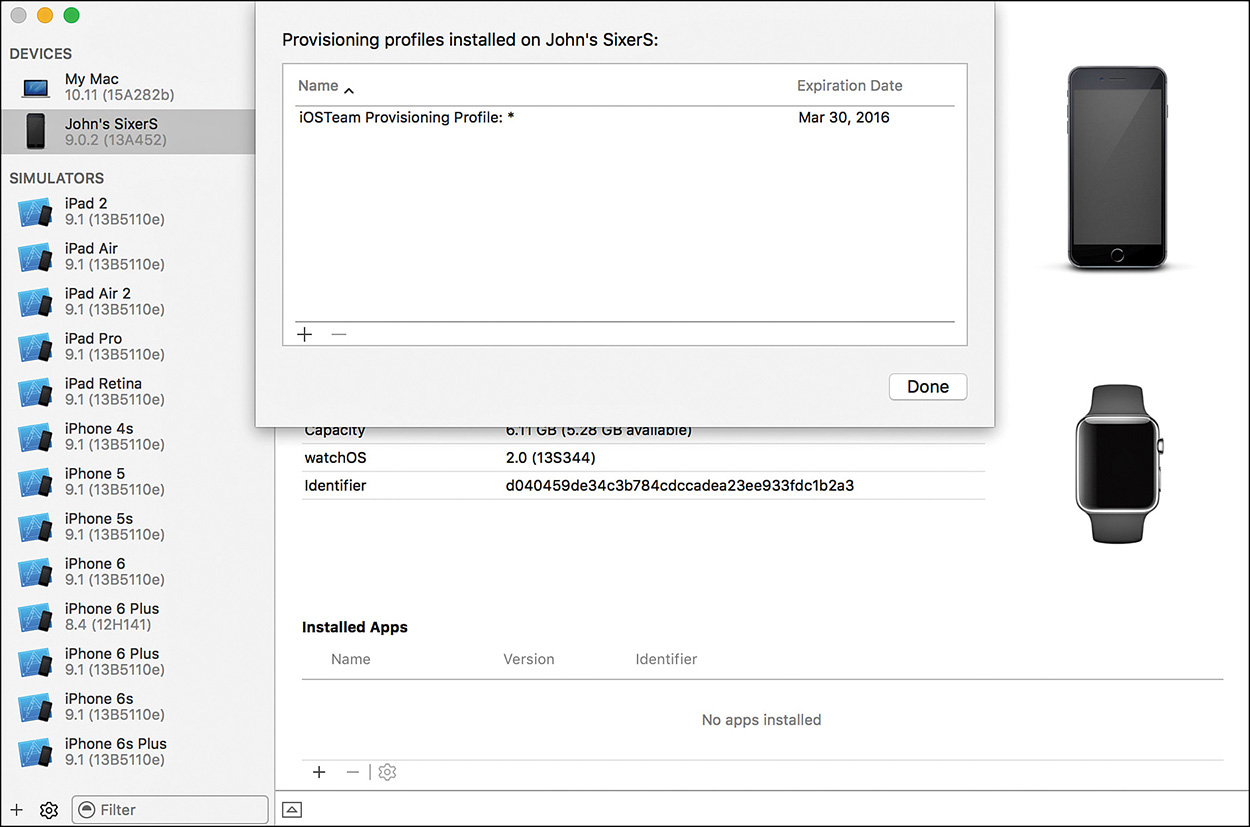
Viewing the Provisioning Profiles
Developer Technology Overview
Over the course of the next few hours, you are introduced to the technologies that you can use to create iOS applications. The goal is to get you up to speed on the tools and technology, and then you can start actively developing. This means you’re still a few hours away from writing your first app, but when you start coding, you’ll have the necessary background skills and knowledge to successfully create a wide variety of applications.
The Apple Developer Tools
In this hour, you downloaded and worked with the Xcode application. This, coupled with the iOS Simulator, will be your home for the duration of the book. These two applications are so critical and feature packed that we spend a couple more hours (Hour 2, “Introduction to Xcode and the iOS Simulator,” and Hour 5, “Exploring Interface Builder”) covering their capabilities and use.
It’s worth mentioning that almost every iPhone, iPad, iPod, and Macintosh application you run, whether created by a single developer at home or by a huge company, is built using the Apple developer tools. This means that you have everything you need to create software as powerful as any you’ve ever run.
Swift
Swift is the language that you’ll be using to write your applications. It provides the structure for our applications and controls the logic and decision making that goes on when an application is running.
If you’ve never worked with a programming language before, don’t worry. Hour 3, “Discovering Swift and the iOS Playground,” covers everything you need to get started. Developing for iOS in Swift is a unique programming experience, even if you’ve used other programming languages in the past. The language is unobtrusive and structured in a way that makes it easy to follow. After your first few projects, Swift will fade into the background, letting you concentrate on the specifics of your application.
Cocoa Touch
Swift defines the structure for iOS applications, and Cocoa Touch defines the functional building blocks, called classes, that can make iOS devices perform certain actions. Cocoa Touch isn’t a “thing,” per se, but a collection of interface elements, data storage elements, and other handy tools that you can access from your applications.
As you’ll learn in Hour 4, “Inside Cocoa Touch,” you can access literally hundreds of different Cocoa Touch classes and do thousands of things with them. This book covers quite a few of the most useful classes and gives you the pointers necessary to explore even more on your own.
Model-View-Controller
The iOS platform and Macintosh use a development approach called Model-View-Controller (MVC) to structure applications. Understanding why MVC is used and the benefits it provides will help you make good decisions in structuring your most complex applications. Despite the complicated-sounding name, MVC is really just a way to keep your application projects arranged so that you can easily update and extend them in the future. You learn more about MVC in Hour 6, “Model-View-Controller Application Design.”
Further Exploration
Xcode is the cornerstone of your iOS development experience. You will design, code, and test your apps in Xcode. You’ll provision your devices and even submit apps to the App Store, all through Xcode. Noticing my emphasis yet? Xcode. Xcode. Xcode. Although we’ll be spending time going through the Xcode features now, take a moment to watch Apple’s introductory videos to get a sense for what you’ll be seeing. To do this, open Xcode, and then choose Xcode Help from the Help menu.
The more you familiarize yourself with the tools, the quicker you’ll be able to use them to build production-ready applications.
Summary
This hour introduced you to the iOS platform, its capabilities, and its limitations. You learned about the different iOS devices’ graphic features, RAM sizes, and the various sensors that you can use in your applications to create uniquely “aware” experiences. We also discussed the Apple iOS developer tools, how to download and install them, and the differences between the various paid Developer Programs. To prepare you for actual on-phone development, you explored the (largely automated) process of creating and installing a development provisioning profile in Xcode and even ran an application on your device.
The hour wrapped up with a quick discussion about the development technologies that make up the first part of this book and form the basis for all the iOS development you’ll be doing.
Q&A
Q. I thought that iOS devices ranged from a minimum of 16GB of RAM in the low-end iPad and iPhone to 128GB on the high-end models. Don’t they?
A. The “memory” capabilities of devices that are advertised to the public are the storage sizes available for applications, songs, and so forth. It is separate from the RAM that can be used for executing programs. If Apple implements virtual memory in a future version of iOS, it is possible that the larger storage could be used for increasing available RAM.
Q. What platform should I target for development?
A. That depends on your goals. If you want to reach the largest audience, consider a universal application that works on the iPhone, iPad, and iPod touch. We explore this in a few projects later in this book. If you want to make use of the most-capable hardware, you can certainly target the unique capabilities of a specific device, but by doing so you might be limiting the size of your customer base.
Q. Why isn’t the iOS platform open?
A. Great question. Apple has long sought to control the user experience so that it remains “positive” regardless of how users have set up their device, be it a Mac, an iPad, or an iPhone. By ensuring that applications can be tied to a developer and by enforcing an approval process, Apple attempts to limit the potential for a harmful application to cause damage to data or otherwise negatively impact the user. With nearly 1.5 million active applications on the App Store, I think Apple must be doing something right.
a. Em
b. Pixel
c. Point
d. Pica
2. What is the individual developer membership cost per year?
a. $99
b. $199
c. $299
d. Free
3. For apps to run on your device, which of the following must be installed?
a. Provisioning profile
b. Provisioning center
c. Profile provision
d. Provisioning ID
4. Paid access to a Developer Program is needed to download which Xcode releases?
a. iOS
b. OS X
c. App Store
d. Beta
5. Which version of the iPad introduced video capture capability?
a. iPad 1
b. iPad 2
c. Retina iPad
d. iPad Air
6. Which iPhone model introduced a Retina display?
a. iPhone 4s
b. iPhone 4
c. iPhone 3GS
d. iPhone 5
7. The scaling factor on a modern iPad is what?
a. 1
b. 2
c. 3
d. 4
8. The iPhone 5 changed what about iOS development?
a. Screen height
b. Screen width
c. Pixel density
d. Pixel shape
9. The provisioning profile created automatically for you by Xcode is named what?
a. iOS Profile
b. iOS Team Provisioning Profile
c. App Provisioning Profile
d. Testing iOS Profile
10. The smallest amount of RAM contained in an iOS device was what?
a. 128MB
b. 512MB
c. 1024MB
d. 2048MB
Answers
1. C. Points are used, rather than pixels, when working with iOS device screens.
2. A. You’ll need to spend $99 to join the individual Developer Program to run apps on your iDevices and submit creations to the App Store.
3. A. A provisioning profile ties your device to your iOS developer account.
4. D. Paid developers can access and download Xcode beta releases before the general public.
5. B. The original iPad had no video capture capabilities. It wasn’t until the iPad 2 that Apple’s tablet could record video.
6. B. The iPhone 4 included the first Retina display in an iOS device.
7. B. All shipping iPads use a scaling factor of 2 for their displays.
8. A. The iPhone 5 threw app developers for a loop by introducing a new screen height.
9. B. Although running an app on your device can be as simple as plugging it in and clicking Run, behind the scenes Xcode will install the iOS Team Provisioning Profile to make everything work.
10. A. It’s hard to believe, but the original iPhone shipped with only 128MB of RAM!
Activities
1. Review the online developer membership information and download and install the developer tools. This is an important activity that you should complete before starting the next hour’s lesson (if you didn’t do so while following along in this hour).
2. Review the resources available in the iOS dev center. Apple has published several introductory videos and tutorials that supplement what you’ll learn in this book.