lighting people
essential skills
~ A knowledge and understanding of the application of studio lighting when photographing people.
~ An understanding of the practical use of light to create tonality, dimension and mood.
~ Through study, observation and pre-production an understanding of the resources and skills required to produce photographic images.
~ To develop ideas and produce references containing visual information gathered in completing the assignments.
~ To produce photographic images to the highest standard fulfilling the criteria in the assignment information.
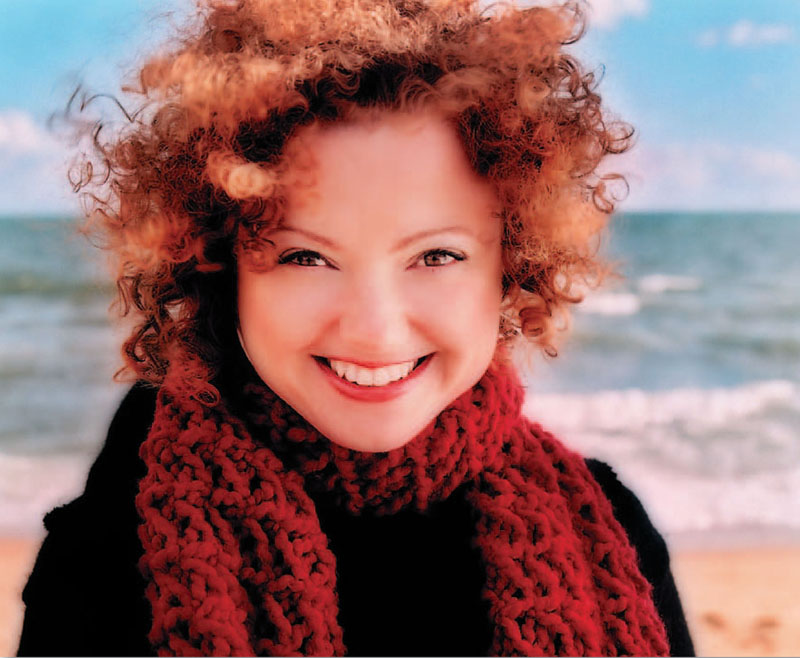
Kata Bayer
Introduction
Many different styles of portraiture lighting have evolved since the invention of photography. The approach taken to portraiture, in fact to any genre of photography, is limited only by your imagination. The technical boundaries to photography are at the point of being almost non-existent. When teaching or learning portraiture lighting it is important to understand people and how to light the human form, particularly the face. Portraiture relies heavily on the rapport built up, sometimes in a very short period of time, between the photographer and the subject. Whether the photograph is successful or not depends entirely on the photographer being able to capture the essence of the person in front of the camera. It is therefore essential the photographer has a thorough understanding of technique and lighting to make it seem to the subject that the actual photographic process is a very minor part of the whole experience. Nothing will alienate the subject more than being confronted with equipment they are not used to and a photographer who appears not to have the situation under control. Confidence in your abilities and a thorough understanding of your technique are ways to inspire and relax the subject of your portrait.
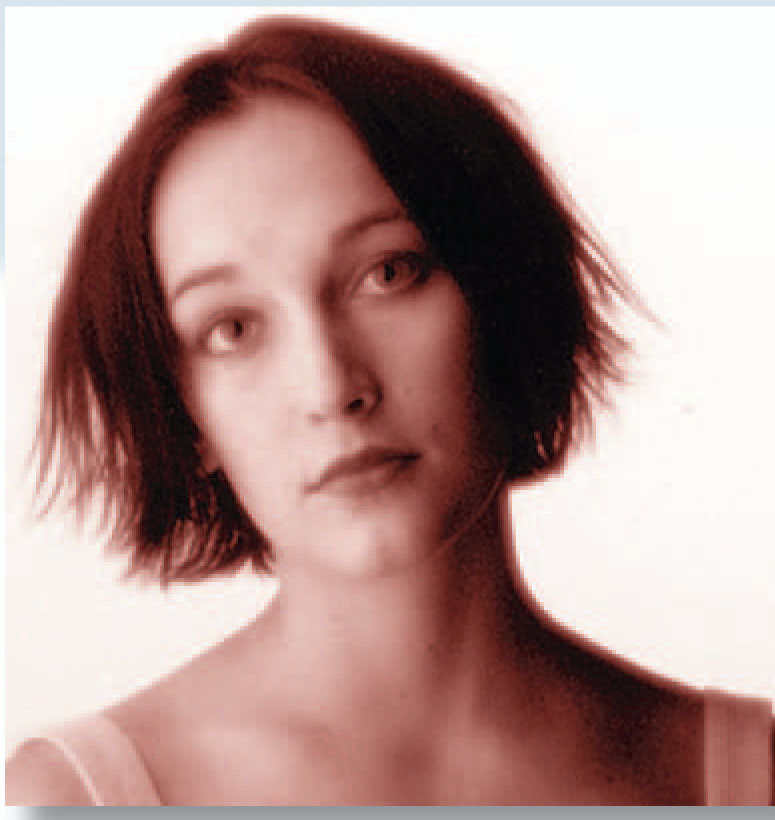
Mid Key - Hilary Walker
There are three ‘classical’ approaches to portraiture high key, low key and mid key. Portraiture in these categories is recognised by the difference in the variation and extremes of the tonal range throughout the image. In its simplest form the difference between the three categories is best understood by comparing the style of portraiture to exposure. In a subject with average reflectance ratios, a mid key could be compared to correct exposure, low key to underexposure and high key to overexposure. It is important to remember this is not how the result is achieved. With this visual in mind it will be easier to create the lighting required using lighting ratios coupled with exposure interpretation.
High key
In high key images light tones dominate. Dark tones are eliminated or reduced by careful selection of the tonal and subject brightness range of the subject matter. Soft diffused lighting from broad light sources is used to reduce all shadows. Backgrounds should be flooded with light and overexposed to reduce detail. Increasing exposure beyond ‘correct’ by up to two stops will ensure all tones are predominantly light. Hard edges and fine detail can be reduced by the use of a soft focus filter. When using black and white film skin imperfections can be reduced by using an orange or red filter. A bright background placed close to the subject will also soften their outline. Even though the quantity of light used to create high key is large the actual lighting ratio is small (1:1).
Low key
In a low key image dark tones dominate. Bright highlights punctuate the shadow areas creating the characteristic mood of a low key image. The position of the key light source for a typical low key image is behind the subject (or behind and to one side). This creates deep shadows. The strong back light creates specular highlights around the rim of the subject. Selective fill light is then used to increase the subject brightness range to a level giving average exposure. The decision concerning appropriate exposure usually centres around how far the exposure can be reduced before the highlights appear dull (underexposed). The shadow areas are usually devoid of detail when this action is taken unless a certain amount of fill is provided. The lighting ratio is relatively high compared to high key (8:1).
Mid key
In a mid key image there is no dominant tone. They are all relatively equal. There are no deep shadows and no extreme highlights. The lighting used is a mixture of both high key and low key (direct and diffuse). Back lighting can be used to create rim light around the subject and fill light to reduce and control shadow areas. An increase in ‘correct’ exposure of one stop more light would usually be required to achieve a mid key result. The lighting ratio is less than low key (4:1).
ACTIVITY 1
Through research of personal, library and www.resources locate the following images.
‘E. Gordon Craig’. 1913. Eduard J. Steichen.
‘Portrait of Mother’. 1924. Alexander Rodchenko.
‘Churchill’. 1941. Yousuf Karsh.
‘Piet Mondrian’. 1942. Arnold Newman.
‘Mother and daughter, Cuzco, Peru’. 1948. Irving Penn.
Categorise these portraits into low and mid key.
Find an example from these sources of a high key portrait.
Study the images and draw a considered lighting diagram for each.
Photocopy these and other examples and compile in your Visual Diary.
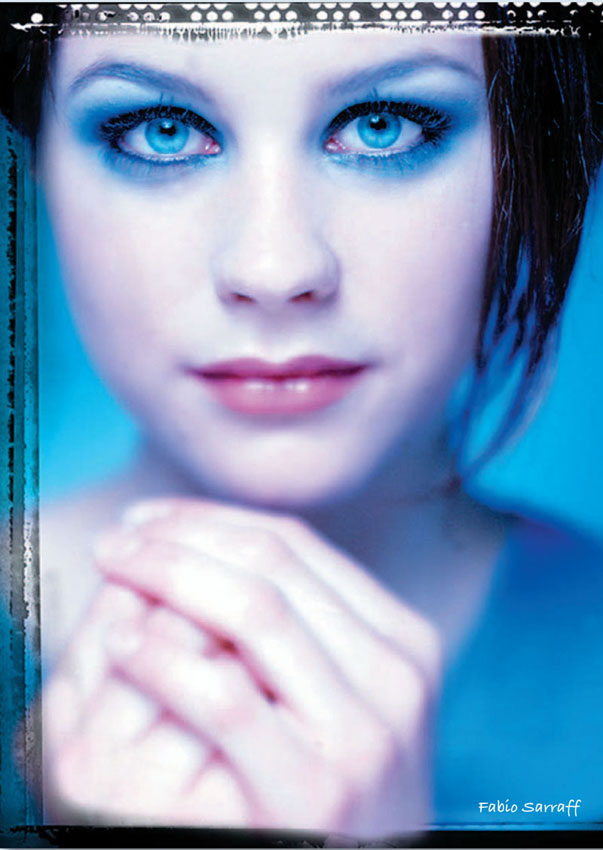
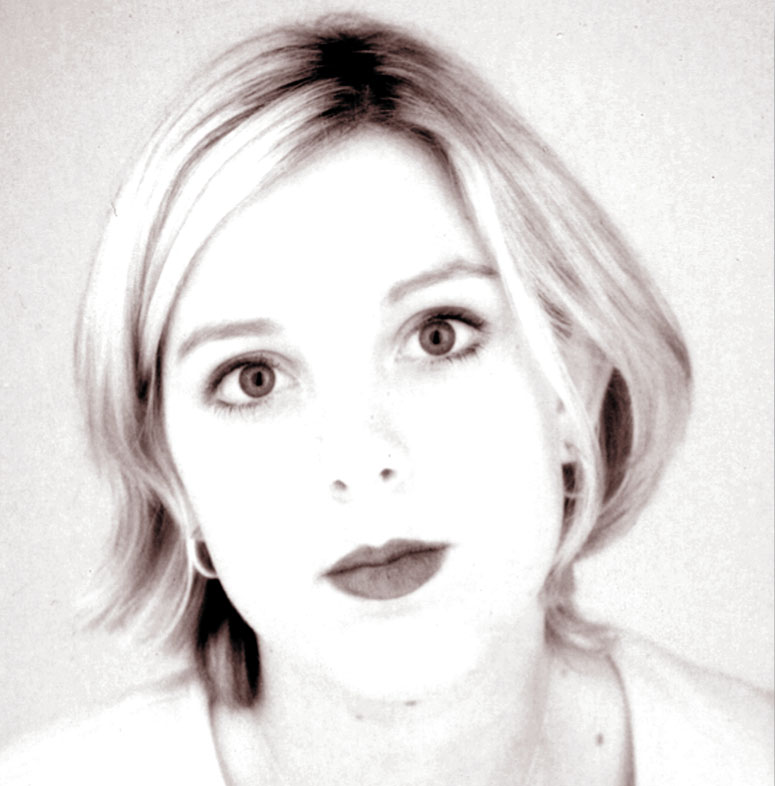
Assignment 1 ‘High key’
Image with a predominance of light tones. The result is achieved using a combination of diffuse even lighting, overexposure, selective filtration and some diffusion. This technique is artificially created and is often used in glamour, fashion and child portraiture. The lighting technique creates a shadowless, soft rendering of the face. The final image will primarily consist of dominant whites, some defining greys and few deep shadows. Make-up is used to retain detail in the lips and eyes and filtration to reduce skin imperfections.
Image 1
Place the subject approximately two metres from a white background. Soft diffuse light sources (reflective flash umbrellas) are placed on either side of the subject. Place large white reflectors next to each light at 90 degrees to the subject. This will reflect all light from the two front light sources back onto the subject. Take and record an incident meter reading from the subject of each light source ensuring there is a half stop difference between them. Viewed from camera the left light should read f11, the right f8.5 at 1/250 second.
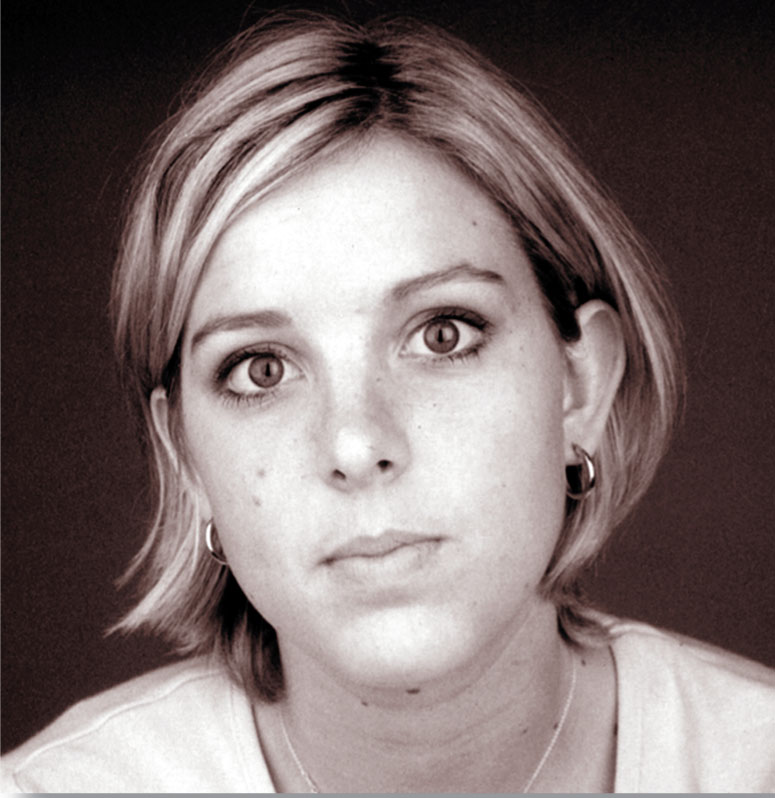
Image 2
Place two soft diffuse light sources (reflective flash umbrellas) in front of the white background, behind and to the side of the subject. Angle the lights at 45 degrees to the background. Place black cutters between the lights and the subject to reduce lens flare and to eliminate any direct light falling on the subject. Take and record an incident light meter reading of each light source from the white background ensuring that they are equal. The reading should be f11 at 1/250 second. This gives a lighting ratio of 1:1 between the foreground and the background.
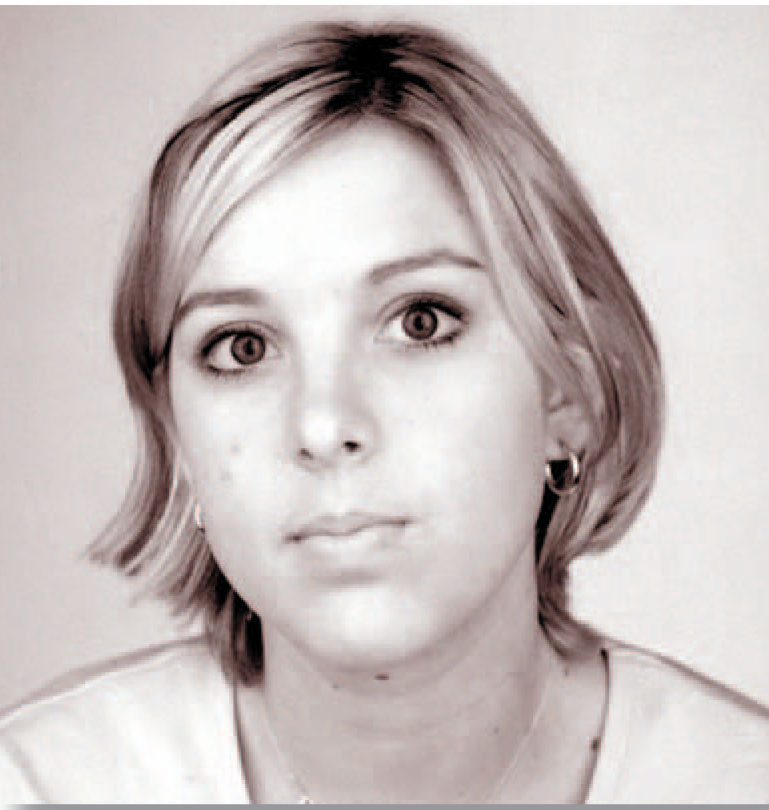
Image 3
Place a white reflector underneath the face of the subject. This will reduce any shadows under the chin, nose and eyebrows. Apply make-up to the eyes (eye liner), lips (dark red lipstick) and foundation to the face. Attach a diffusion filter to the lens. Take an incident meter reading from the subject to the camera and overexpose by two stops. This will give an exposure of f5.6 at 1/250 second. A red filter (plus appropriate exposure compensation) can be added at this stage if using black and white film.
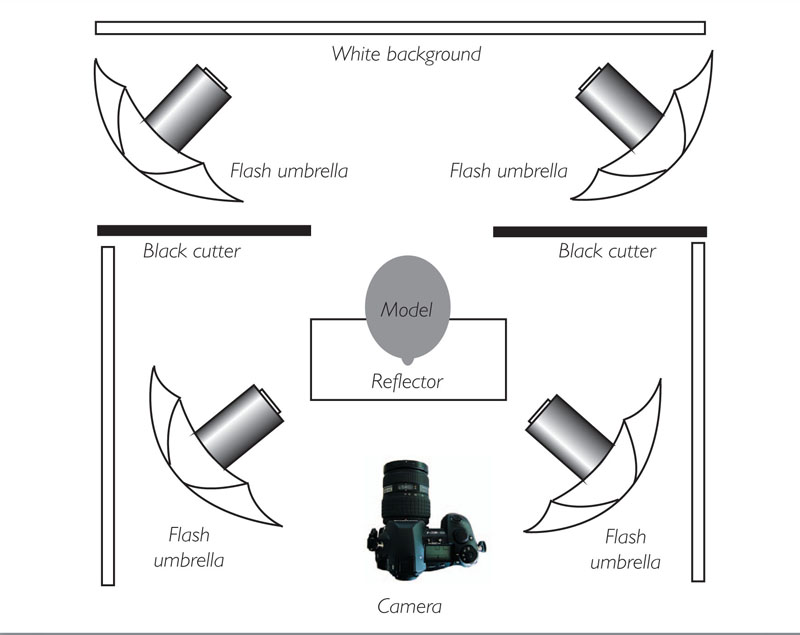
LIGHTING DIAGRAM
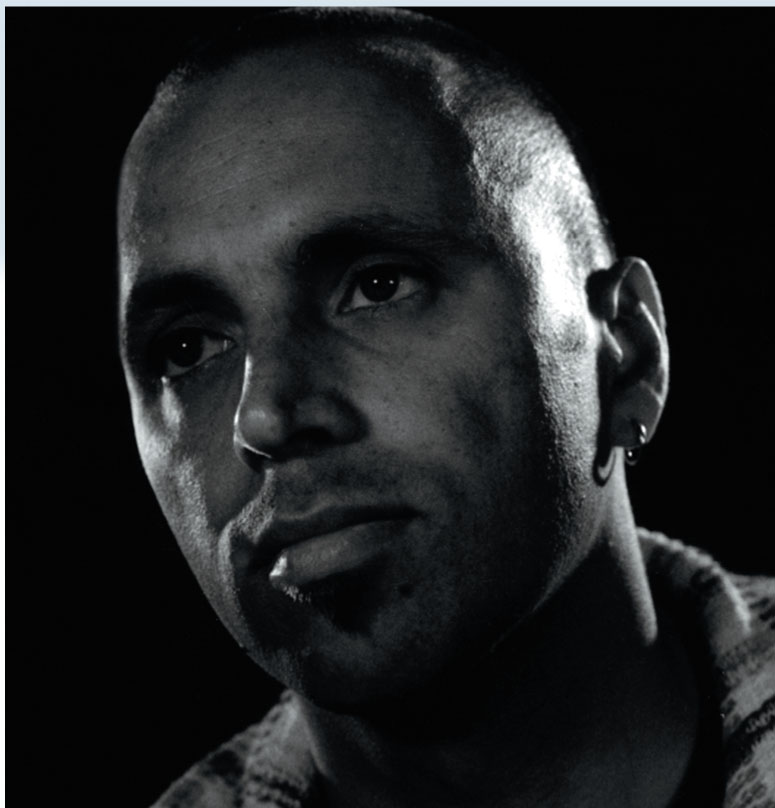
Assignment 2 ‘Low key’
Image with a predominance of rich dark tones with selected specular highlight areas. The result is achieved by a progressive build-up of light across the face to maximise texture, tonality and drama. This requires predominantly direct specular light sources. The nature and quality of this light must be precisely set and varies for each subject, dependent on face shape and form. The spotlights must be placed in relation to camera and subject position so the angle of incidence equals the angle of reflection in order to achieve specular highlights across areas of the face. See ‘Light’.
Image 1
Place the subject approximately two metres from a black background. As viewed from the camera, position a spotlight behind and to the left side of the subject. Adjust the spotlight to achieve an incident meter reading of the light from the subject of f8 at 1/30 second. Position a floodlight in front of and to the left side of the subject. Adjust the floodlight to achieve an incident meter reading of the light from the subject to equal that of the spotlight. Place a black cutter between the two lights to reduce lens flare. Record incident light meter readings.
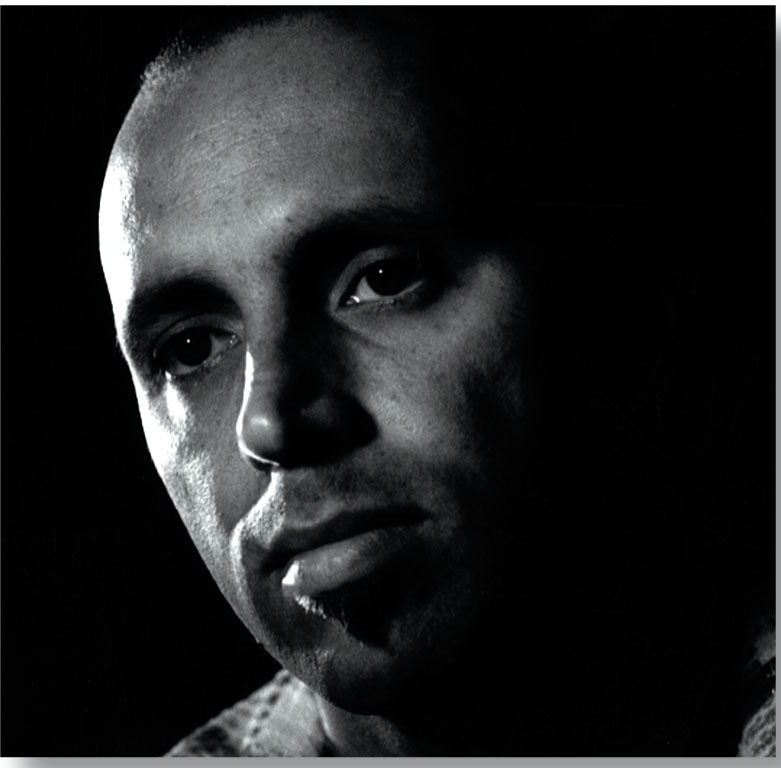
Image 2
Place a second floodlight in front of and to the right side of the subject. Adjust the floodlight until an incident light meter reading of the light from the subject of f5.6 at 1/30 second is obtained. This will provide fill light to the camera right side of the face and reduce nose and chin shadows. This will be a lighting ratio of 2:1 between the left and right sides of the face. Record incident light meter reading.

Image 3
Position a second spotlight behind and to the camera right side of the subject. Adjust the light to achieve maximum specular reflection to the camera right side of the face. Take an incident light meter reading of the spotlight from the subject to achieve a reading of f8 at 1/30 second. Place a black cutter between the lights on the right side of the subject to reduce lens flare. Take a reflected light meter reading of the camera left side of the face ensuring that no light from the rear spot lights affects the reading. This reading will be ‘correct’ for exposure. The shadows will underexpose and the highlights overexpose.
LIGHTING DIAGRAM

Assignment 3 ‘Mid key’
Image with a predominance of average tones, with no extreme of highlights or shadows. The result is achieved using large, soft, very diffuse even lighting, selective fill and over-exposure by one stop to obtain correct skin tones. This is by far the most commonly used form of portraiture lighting. It is relatively simple to set up compared to high and low key lighting and will produce good results with most subjects. It does, however, lack drama and mood and would not enhance subjects with great physical character or delicacy of form.
Image 1
Place the subject approximately two metres from a large diffusion screen (background). As viewed from the camera place a soft diffuse light source (flash soft box) in front of and to the left of the subject. Place a diffusion screen larger than the light source between the light source and the subject. The screen should be approximately one-third of the distance from the light to the subject. Take an incident light meter reading from the subject to the camera. A typical reading would be f11 at 1/250 second. The background remains unlit.
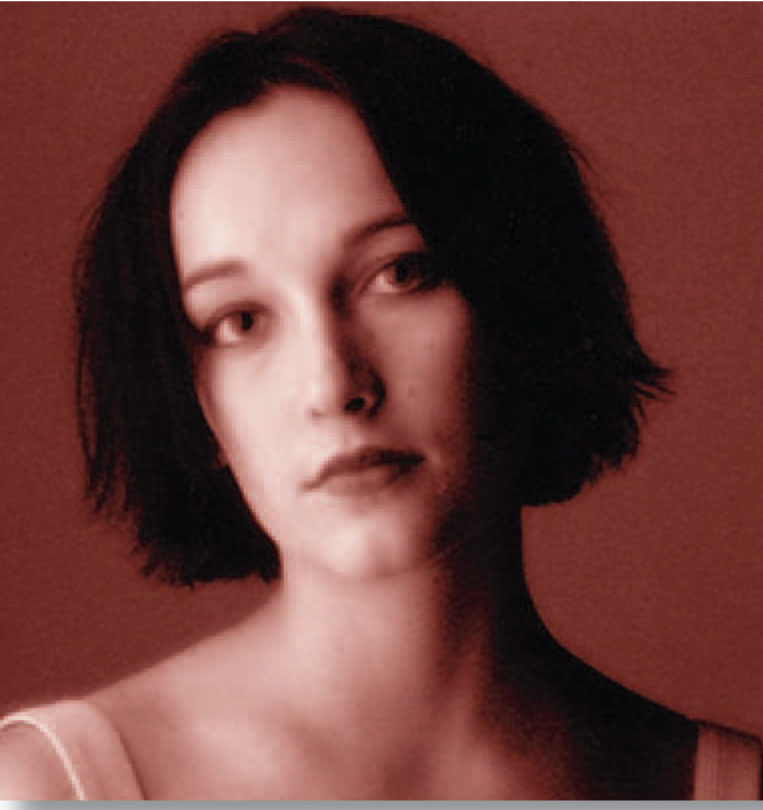
Image 2
Place a large (2m × 3m) white reflector in front of and to the camera right side of the subject. This will reflect light from the key light source back onto the right side of the subject. Adjust the distance of the reflector from the subject until an incident light meter reading from the subject to the reflector is one stop less than the key light. This should be f8 at 1/250 second. This is a lighting ratio of 2:1 between the left and right sides of the face and when used for exposure will overexpose the left side of the face to reduce any skin imperfections.
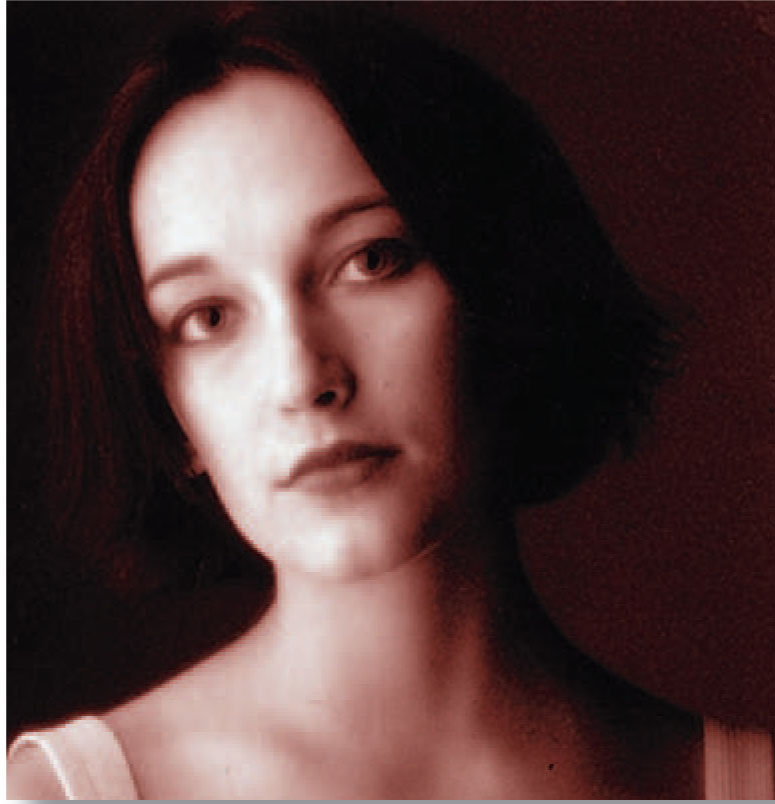
Image 3
Place behind the large diffusion screen in the background a large diffuse light source (flash soft box). Direct the light through the diffusion screen straight back at the camera. Adjust the light source so an incident light meter reading taken from the subject to the diffusion screen in the background is two stops more than the incident reading of the subject to camera (f8 at 1/250 second). This background reading should be f16 at 1/250 second. If the subject exposure is set to f8 at 1/250 second the background will appear white.
LIGHTING DIAGRAM

Pose
Jo Harkin
Making people look at ease in front of the camera is as much a skill to be learnt as the skill required to light and correctly expose. For some photographers the skill is acquired easily. For most it will take time and patience. It is important not only to make the subject feel at ease but also to be relaxed and confident. There are defined and classical approaches to ‘compositional pose’ that have evolved throughout the history of painting and photography. These are well documented and not difficult to reproduce. It is much harder to make people look ‘real’. The best equipment and lighting will not make the subject come alive. Only the rapport between the photographer and their subject can make that happen. If the subject looks awkward or ill at ease, wait. Walk away from the camera but continue to talk to your subject. Attach a long cable release or remote firing device to the camera. This will enable you to make exposures away from the camera and in mid conversation. The camera is often intimidating enough without the photographer standing behind it. Being relaxed can be infectious. Start with photographing people you know. As your confidence grows photograph people you don’t know. Professional ‘models’ perform easily for the camera. Subjects with little or no experience will have greater difficulty.