
VIDEOGRAPHY FOR THE WEB
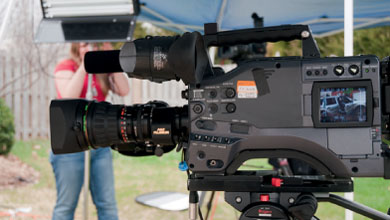
One of the quickest ways to destroy your video's credibility is through bad videography. If your camerawork distracts from the show's content, it can drive an audience away. Many producers of web video lack formal training in using a video camera or composing their shots for artistic impact. We will touch on guiding principles in this chapter to help those less familiar with the craft of videography. Even seasoned pros will find this information useful, because the computer or portable device screen has different rules than a television production.
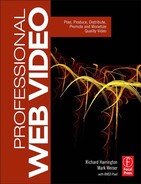
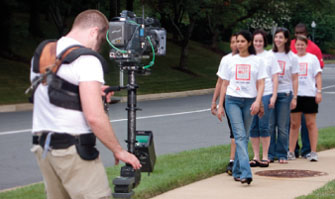
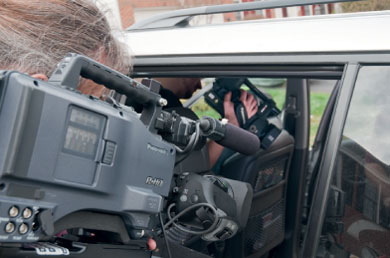
Web video crews are often lean and multitalented.
Before we jump into specifics, let's offer an easy-to-remember concept called the KISS methodology. Keep It Simple, Stupid—do not overextend your skills and try to shoot everything with a handheld camera unless you really know how. If you (or your talent) aren't great at doing repeated takes from different angles, simplify and shoot with multiple cameras. The goal with web videography is attractive camerawork that can be acquired quickly and consistently.
Camera Considerations
Choosing the right camera for your production is all about balancing the requirements of the job, the equipment available to you, and your budget. In this chapter, we're not going to attempt to talk you into buying a lot of gear. Rather, we'll focus on different equipment options that have worked well for our productions and share our rationale for using the gear.
With that said, you may be in a situation where you don't have a lot of options. With that in mind, we'll also address affordable “addons” that significantly improve production quality or save time. You'll also learn about additional gear options for when you're ready to upgrade.
Let's start by taking a look at essential features that your camera should offer. Although you can always get by with less, we find that cameras need a certain level of base performance (after all it's kind of hard to make a car with two flat tires and a missing battery climb a mountain).
Things To Look For
When you look at cameras, there are lots of features to choose from. In truth, there are only a few features that really impact the quality of video that you'll record. Here are the essentials that we always consider.
Sensor
Cameras utilize charge-coupled devices (CCDs) or complementary metal oxide semiconductor (CMOS) sensors to capture their images. Each technology has its strengths and weaknesses, and neither is considered superior to the other. Although each uses a different technology, their purpose is the same—to convert the image seen by the lens into an electronic signal that can be recorded to tape, disk, or drive.
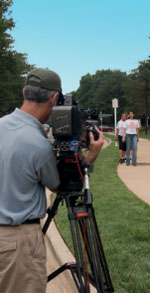
Three CCDs will help capture a better image.
Many consumer-oriented cameras only come with a signal sensor, which results in a significantly poorer picture than cameras that contain three chips. In cameras with three chips, a prism is used to split the light entering the lens into red, green, and blue components, and then each component is directed to a single chip solely dedicated to a specific color. Additionally, you'll see that sensors are often identified by size. A ⅔ -inch chip is twice as large as a ⅓ -inch one and generally will give you better image quality.
Connectivity
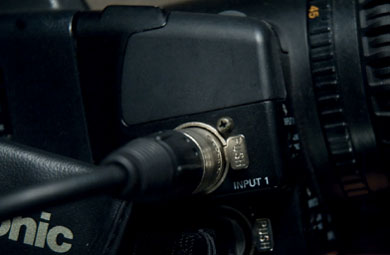
Many cameras come with multiple connection types, including USB2, HDMI, and FireWire. The one that works the best with the most current editing applications is FireWire. All Macintosh computers and most PCs include a FireWire port. If they don't have one, or you need additional ones, adding an expansion card is a simple matter and generally costs less than $75.
When you look at the camera body, you'll generally see one of two types of FireWire connections. The full-size connector is called a 6-pin port. The primary advantage of the 6-pin port is that it is a sturdier connection type. However, many smaller cameras use the 4-pin connection type. Although this connector saves space on smaller cameras, it is more prone to damage because it uses a smaller connector type. Be careful to avoid tension on your FireWire cables, especially if you are using a smaller, 4-port connection type.
Most cameras offer multiple connection types. Be sure to explore your options.
FireWire: A Technology with Many Names

If you are shopping for FireWire technology, you'll often see it referenced by two additional names. Sony frequently calls the technology i.Link, while others favor the generic IEEE 1394, which refers to the number given to it by the Institute of Electrical and Electronics Engineers. The technology is identical; what is at play here is a resistance to use the FireWire logo and name, which is closely associated with Apple, Inc., which co-developed the technology.
Adding to the confusion is that there is FireWire 400 and FireWire 800. The technology called FireWire 800 uses a 9-pin connection type and is much less common. It is generally used for higher speed hard drives and is not found on cameras.
Having a FireWire connection will let you load footage from your camera directly into your editing system. This works well for spot checks, chroma key tests, or sending the client a review clip. You generally do not want to rely on the camera for loading all of your tape, though, as the wear and tear can drastically shorten the life of tape-based cameras. A better option is to purchase an affordable feeder deck (even used is okay).
Other benefits of FireWire ports include the ability to harness direct to disk recorders and monitoring devices like Adobe's On Location software (which gives you the ability to calibrate your video camera for better results). Quite simply, you can't go wrong with a FireWire port, so make sure your camera has one.
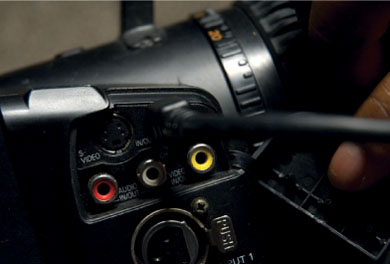
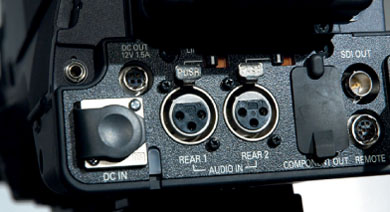
XLR Audio Inputs
While we focused on audio in our last chapter, it's important to look at the bridge between your audio gear and your camera. One audio connection type that is standard in the professional world is XLR. Video cameras use the common 3-pin XLR cable type, which is also called a balanced audio connector. This works well for professional microphones because they can reduce noise. XLR cables are both twisted and shielded, which helps cut down on interference. The presence or lack of XLR inputs is one of the key features separating consumer from prosumer and professional cameras.
What Is XLR?
The name XLR connector refers to its original manufacturer, Canon. It was originally called the “Cannon X” series. Canon then released a version that could “click” into place with a latch, called the “Cannon XL.” The final variation used a rubber compound to surround the contacts, which gave the abbreviation XLR.
High-Resolution Viewfinder
Don't overlook the viewfinder in the eyepiece. This is often just as important as the large flip-out viewfinder.
Keep Two Sets of Cables Handy
![]()
A mantra that we like to repeat often is this: 90% of all problems are cable problems. A bad cable can destroy your production. From pops in the interview to a flickering client monitor, a bad cable can do all sorts of damage.
Cables are cheap; reshoots are not. To avoid expensive problems, keep two sets of audio, video, and FireWire cables with your camera bag. And when a cable goes bad, toss it and replace it.
Many users find giant LCD full-color viewfinders to be attractive. The problem is that many of these viewfinders are very low resolution and often hide flaws in your video. Recently, higher-resolution color viewfinders are appearing on a broad range of cameras, while many professional video cameras still ship with a high-resolution viewfinder that shows a grayscale image.
Whether using a camera with a color or grayscale viewfinder, it is still a very good idea to use a high-resolution external reference monitor to check color and focus. If the reference monitor is not an option, then you can use the LCD as a last resort. But you will still want to learn to use the viewfinder to check important details.
The benefit of grayscale is that it is often easier to see things like exposure and focus when you remove the distraction of color. Additionally, many prosumer and professional cameras are adding focus assist features and even waveforms to their viewfinders. If your camera contains these features, be sure to read the documentation on how they work as this will help to ensure you capture the best image possible during your shoot.
Things to Avoid
Several camera manufacturers have been trying to integrate direct to web publishing features into their cameras. Other electronic manufacturers have started to put video cameras into cell phones and media players. Although these are features that are designed to help bring web video to more consumers, we find that they can truly get in the way of quality.
Direct to DVD/YouTube/WMV
Many cameras boast features that make your video ready for “instant” distribution. The problem is that the camera is heavily compressing the video. For best results, you want to capture video at the highest possible quality. You then edit the video together and make any improvements needed. The final step is compression with the intended target in mind. Most professionals in the digital photography world have addressed a similar issue by dumping JPEG acquisition in favor of the much more robust camera raw approach.
A simple rule of high-quality web productions is start high, finish low. You should avoid shooting heavily compressed files, because they do not offer you latitude when you are color correcting or compositing, plus they can take significantly longer to process on your computer. As broadband connection speeds continue to increase and server space becomes cheaper and cheaper, sites such as YouTube are changing their specifications to allow larger files to be hosted on their site. By capturing your video in a format that employs less compression, you will have the ability to scale your productions to meet changing delivery specifications.
Smart Phone and Flip Cameras
Several leading Smart phones and most of the Flip line of video cameras now offer high-definition (HD) recording capabilities at 720p. Although these types of cameras have seen vast improvements, they're still not well suited for web video use.
Why, you ask? Well, resolution is not everything when it comes to camera quality. We still recommend avoiding these types of cameras for anything beyond spontaneous shooting. The main reason for our opinion about these cameras is they lack any real manual image controls as well as professional audio and video connections.
They can produce nice images under ideal (outdoor daylight) lighting conditions, but as soon as you move indoors or the light fades, your image quality suffers. Again, cut corners on your camera, and you'll pay for it during the editing stage.
USB Video Conferencing Camera
Although it's easy to come by video cameras that are suited for instant messaging and videoconferencing, do not be tempted to use these. These cameras generally have poor focus controls as well as inferior lens quality. If you wanted your video to look like you shot it on a webcam in a basement, you wouldn't be reading this book.
Choosing an Acquisition Format
There are several competing tape and acquisition formats on the market. Many formats are tied to specific manufacturers, and you will hear competing claims of superiority as rival companies try to establish dominance. That's not to say that formats don't matter—they do in many cases. But let's start with the bigger question: Should you shoot standard- or high-definition video?
Standard-Definition Video
There are only a few compelling reasons left to shoot any type of video in standard definition (SD), the first being financial. SD video equipment is well established and readily available. As such, it still costs less to use an SD workflow. Cameras cost less, tape and storage media cost less, capture devices cost less, and so on. Because producing video for the web is generally a price-sensitive marketplace, standard definition is still a logical choice.
Plus, many of the shows on the market are delivered at 640 × 480 or 320 × 240. Both of these sizes can be easily generated by an SD video camera with minimal processing. It is important to note that SD just refers to a category and not a particular format. You will encounter several video formats that are all considered standard definition.

When using multiple cameras, try to match manufacturers and models.
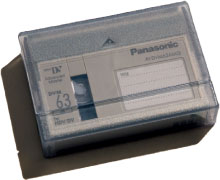
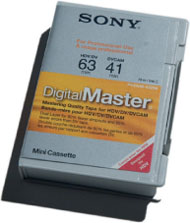
DV/DVCPRO/DVCAM
The digital-video (DV) format launched in 1994 was originally intended for use by prosumers and consumers. Many pros embraced it, however, because of its ease of use and price competitiveness. The format is very space efficient—it only requires 12 GB of storage for an hour of footage. It is also easy to load, as these cameras and decks use the FireWire protocol. It also supports both 4:3 and 16:9 aspect ratios, thus extending videography options.
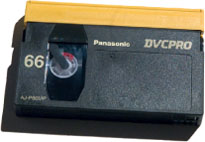
There have been some notable variants on the DV standard. Sony released the DVCAM format, which moves the tape 50% faster through the camera (resulting in fewer dropouts). Panasonic also developed the DVCPRO formats targeted at professional use. The tapes for DVCPRO are much thicker and sturdier, which works well for traditional tape-based editing.
The DV format works well for web video and is widely embraced because of its balance of cost and quality. The one area where DV footage is particularly problematic, though, is chroma keying. If you are looking to use blue or green screen technology with virtual sets, you should stay away from DV because it does not key well.
DVCPRO 50
The DVCPRO 50 format is an extension of DV technology and is available in many of Panasonic cameras. The DVCPRO 50 format uses dual encoders to double the bit rate of data being recorded. In tape-based cameras, this format uses the same tapes as the DVCPRO format but consumes tape twice as fast when recording. In addition to doubling the data being recorded, the format also uses a higher chroma subsampling, which produces better color fidelity and image quality. As such, DVCPRO 50 is much better suited for chroma keying. DVCPRO 50 also supports shooting both 4:3 and 16:9, which adds more flexibility to your productions.
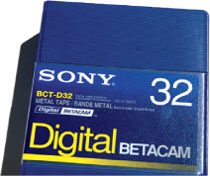
Betacam SP/DigiBeta/Betacam SX
Although it is a venerable format with a rich history, Sony's Betacam option don't see much action in the web video space. Some established video production companies utilize their legacy beta gear (which is a high-quality format). The significantly higher cost of the equipment, though, can quickly balloon a podcast's budget. As such, you should be wary of working with footage acquired on Betacam. Additionally, the technology is often considered “dead” by media pros because it is waning in popularity as digital (and more affordable) options become new standards. Sony has practically abandoned the format in that the company is not developing new products to sell and only carries one or two models of decks for each format.
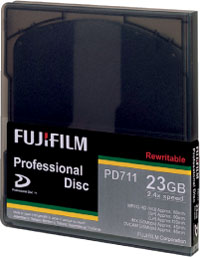
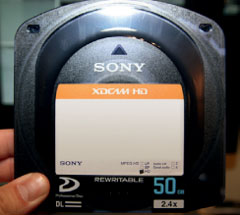
XDCAM
A much more viable format for those web video producers who prefer to work with Sony gear is the XDCAM format. XDCAM is an optical, disc-based system introduced in 2003. It acquires directly to affordable discs that often sell for less than $30. Each disc can hold between 45 minutes and 2 hours of content, depending on the acquisition approach taken with the camera. Because of the affordable media recording options and the relative ease of loading footage, the XDCAM format has proven popular with some web producers.
High-Definition Video
Although the production cost gap between standard-definition (SD) and high-definition (HD) video continues to close, it still exists. Working in HD still requires more robust hard drives, better monitors, more expensive cameras, and greater skill.
Acquiring video at high definition may seem contradictory when the goal is to deliver small, web-ready files at an affordable cost. With that said, many web video producers do just that. The decision to shoot HD video is really about future-proofing your footage.
Reasons to shoot for the web in HD include the following:
- The footage has residual value and will be used in future productions.
- The program is going to be distributed in multiple sizes and formats, including devices like Apple TV and TiVo HD digital video recorders.
- The project has additional distribution channels like broadcast or Blu-ray.
- You offer a premium subscription service with paid downloads for HD files.
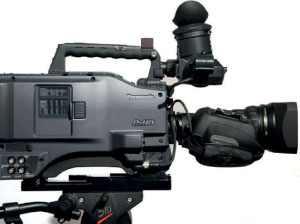
High-end HD cameras offer multiple video and audio connections.
It is essential to stress that working in HD adds cost to a project. We find that HD projects tend to cost 20% to 30% more to complete than SD projects. This is due in part to the aforementioned costs associated with gear. Additionally, you will spend more time on tasks like rendering for graphics and effects as well as see longer compression times when finishing the project. We are not saying you should avoid HD—the many affordable cameras and options on the market are very desirable—just be aware of the additional costs involved. There are many HD formats on the market; let's explore some of the most common.
DVCPRO HD
The DVCPRO HD format is primarily used by Panasonic cameras. It has gained significant popularity because of its balance of cost and performance. DVCPRO HD is used for tape-based acquisition as well as tapeless acquisition. The tapes are interchangeable with the DVCPRO and DVCPRO 50 format, but DVCPRO HD uses four times more tape than DVCPRO.

The newer P2-based cameras were first introduced in 2004 and utilize a solid-state flash memory card. A P2 card can record either SD or HD footage. The P2 postproduction workflow takes a little time to master, but using P2 cards works well for many web producers because you can plug them directly into a computer, transfer the files, and start editing. Although the cards are expensive, they can be reused nearly infinitely. This saves money on tape stock and eliminates the need for an expensive deck.
HDV/ProHD
The HDV format is a very popular format for entry-level HD. This inexpensive format compresses HD video using MPEG-2 compression (the same as DVDs) and then records it to tapes identical to the mini-DV format. This compression can create some workflow issues during postproduction and often requires extra steps. Nevertheless, because it is the least expensive way to move into HD production, many podcasters and video professionals have adopted it.
HDV was originally developed by JVC and Sony, which were later joined by Canon and Sharp. These companies manufacture several different models of cameras targeted at both consumers and prosumers. The format has also been extended by JVC and called ProHD. The main difference is that it can natively shoot 720p at 24 frames per second.
XDCAM HD
Sony's XDCAM format was discussed earlier in the chapter. Sony has extended it to offer an HD option. It is important to note that not all XDCAM cameras can shoot HD, so check your options when renting or buying a camera. Sony's XDCAM HD options offer different bit rates, so be sure to strike the right balance of file size and quality. You'll want to use the higher bit rates for more visually complex materials like fast-moving shots, outdoor scenic shots, and large crowds.
H.264/AVC
H.264 or AVC (Advanced Video Coding) is a video compression standard originally designed as a delivery format that some video cameras are now using as their recording format. It is also the default recording format for many very portable devices such as smart phones. You will often find that you must conform this format to a standard such as Apple Pro Res before you can work with your footage in an editing program such as Final Cut Pro. Some DSLR cameras also shoot video in this format. Currently, Adobe's Premiere Pro software can edit the files natively from some cameras.
AVCHD
This format was developed jointly by both Panasonic and Sony and now can be found in cameras made by Canon and JVC. It is based on H.264 compression standards and first appeared in many consumer cameras before finding its way into the prosumer market. It is used for both SD and HD recording. Recording media in these cameras has ranged from DVDs / Mini Discs to solid-state media such as SD and flash cards. Most video editing programs support AVCHD.
AVC-Intra
This is a format introduced by Panasonic that conforms to the H.264 standard and allows for high-quality HD production while harnessing advanced compression technology that yields dramatically smaller file sizes. Many of Panasonic's prosumer and professional camcorders now record in this format. All major video editing software now provides support for this format.
The Impact of Compression During Acquisition

Try to avoid heavy compression during the acquisition stage. Adding compression early on makes editing tasks much harder, as you'll need to transcode or render footage in order to edit it. Capture video at the highest quality you can afford, then compress after editing and color correction is complete.
Digital SLR Cameras
The latest entry into the camera market that has created a lot of buzz is video-capable Digital SLR cameras. Manufacturers have enabled high-definition video recording on cameras that were traditionally only used for photos. The key advantages here are removable lenses, great depth of field control, and lowlight performance.
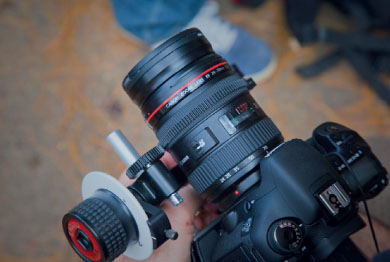
We highly recommend that web video producers pay attention to these cameras. Currently, the market leader is Canon, but you'll find models capable of shooting video from most camera manufacturers. With large imaging chips and a wide array of lens choices, you can now achieve cinema-like footage with a relatively inexpensive tool.
If you want to learn more about these cameras, we recommend the following resources:
- From Still to Motion: A Photographer's Guide to Creating Video with Your DSLR
- Creative COW's DSLR Forum—forums. creativecow.net/dslr
- Facebook HDSLR page—www.facebook.com/DSLRVideo
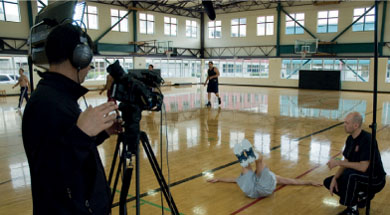
Interviewer Tips
Becoming a good interviewer is an acquired skill that takes training and practice. For the less experienced, here are a few helpful pointers:
- Edit in the camera. Encourage short answers and come back to topics again. Better to focus on good, tight answers than trying to cobble together six takes to make your point.
- Avoid enumeration or the phrase “Like I said before.” It is highly likely that you will use only part of the answer (such as step three, without steps one and two).
- Ask leading, open-ended questions, being sure to ask a single question only.
- Don't be afraid to stop and start over. Do not let an answer ramble on. Smiles and nods can let subjects know they have made their point and can stop talking.
Camera Support Options
Many budding videographers shoot their video without using a tripod. This is a terrible mistake, as few people should actually shoot their video handheld. Although handheld video can be used stylistically to great effect, it is rarely useful when it comes to video that is intended for the web. The slight (or not-so-slight) movement of the camera can result in pixelization or softening when the video is compressed for podcast.
Now some of you think you're better than this, so let's take a simple test. Stand up and extend your arm out directly in front of you with your palm raised (like you are a traffic cop stopping traffic). Now hold that position for 60 seconds without moving. Look at your hand. Is it twitching at all? Chances are, the answer is yes. It's not your fault—you're overworked, overcaffeinated, and suffer from a lack of rest (in other words, you are part of the modern workforce). Shooting smooth, handheld video is very difficult. Here are a few options for camera support that you can consider.
Tripod
It should go without saying, but use a tripod. There are several price points out there on tripods, depending on how tall you want the tripod to rise. The head of the tripod is also critical, as you'll likely need it to smoothly pan and tilt for your productions. A top-of-the-line fluid head can cost thousands of dollars by itself. Luckily, with the advent of DV prosumer cameras, there has been an influx of tripods with decent fluid heads at reachable price points. Pros use tripods all the time; they are a given. Simply put, use the best tripod you can afford!
Monopod
A monopod is good if you need a stable shot in situations with great mobility. Think of it as being halfway between shooting handheld and using a tripod. A monopod uses a single leg to stabilize a camera. You won't be able to let go of the camera and walk away, but the camera will still be much less shaky. A monopod is also a great option to reduce body strain when a tripod is impractical.
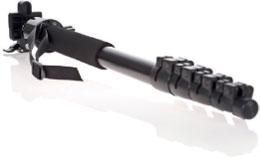
© Fotolia
Steadicam
The name Steadicam is often applied to several models of camera stabilizers. In fact, Steadicam is a brand name for a type of unit originally developed by cinematographer Garret Brown in 1972. The units are meant to help capture smooth video when walking or jogging with a camera. The operator generally wears a special vest, which has a metal support arm that is stabilized by a spring and counterbalance system. Through the years, many variations have been created. You can find out much more by visiting www.steadicam.com and looking at the different models. For videographers using consumer and prosumer cameras, the Steadicam Merlin offers a great number of features at an affordable price.
DLSR Rigs
One of the biggest challenges in shooting video using a DLSR camera is dealing with the form factor of the camera. For years, professional video cameras rested securely on shoulders. This allowed for some degree of stabilization when shooting. As cameras became smaller, the industrial designers gave thought to designing a camera that was meant to be held for extended periods of time.
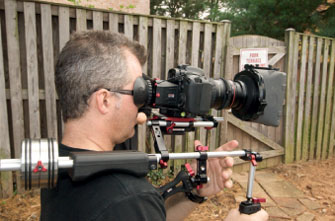
DSLR cameras don't share the same form factor, as they are designed to be held directly to the eye and freeze movement. When shooting video though, the viewfinder is disabled and only the rear LCD works. The form factor is just not ergonomic, and it leads to lots of unwanted camera shaking.
To compensate, numerous manufacturers are bringing camera support bodies for DSLRs to the market. These rigs range from simple bodies designed to assist with the grip of the camera to full-blown rigs capable of integrating accessories like focus controls, lens filters, and additional audio gear. Two of the companies with advanced rigs are Zacuto and Redrock Micro.
Other Stabilizers
There are many other camera support options on the market for almost any budget point. Here are a few worth looking at that can help stabilize your camera and give you better-looking video when not using a tripod:
- Frezzi Stable-Cam (www.frezzi.com)
- Fig Rig (www.services.manfrotto.com/figrig)
- Turtle X (www.easyrig.com)
- Glidecam (www.glidecam.com)
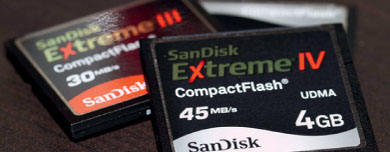
Tapeless Acquisition Strategies
Earlier we discussed Panasonic's P2, Sony's XDCAM formats, and DSLR. Both offer acquisition of video material without using tape. These are not the only solutions; there are hard drive units that can work with almost any camera that offers a FireWire port. But why forego tape and shoot directly to a magnetic or solid-state media? There are several potential reasons.
Benefits of Tapeless Acquisition
There are many benefits of tapeless acquisition that can impact the web video producer. The biggest is the speed at which you can move from shooting to editing. Eliminating the need to log and capture tape can save you a significant amount of time. You can begin editing your material as fast as you can transfer the media to an editing system (which is often 10 to 15 times faster than loading a tape).
Other benefits include that the tapeless media can be used again and again. Although media like P2 may seem expensive at first, value is achieved over time because you do not need to keep buying tape stock. You can also play back your footage quickly and review your shots right in the field, deciding to drop bad takes before ever going into an edit session.
Tapeless media can also make it easier to share your footage with others. We often make multiple copies of media so that several individuals can begin editing at once. We also find it simple to turn interview clips into MP3 files if we need to get material transcribed quickly (the process of turning interviews into a text log). This can be helpful if the material needs input from project participants who'd rather look at a paper log or searchable text file.

Drawbacks of Tapeless Acquisition
When tapeless acquisition first became a reality, the biggest drawbacks were the cost of the media and the complexities associated with moving media management to the field. For example, the first Panasonic P2 cards only held 4 GB of data and cost close to $1,000. To record 30 minutes of 720p video, you had to plunk down a minimum of $2,000 in cards and then have the equipment and skill to do data transfer in the field if you wanted to shoot more than a half hour of media.
Luckily, Moore's law has held true in the world of tapeless acquisition, and that same $1,000 will now get you an E series P2 card with 64 GB of storage, which means you could get close to three hours of 720p footage on one card. Sony's SxS cards have seen similar gain, and several models of prosumer cameras now use a standard SD card as their recording media, which means even less expensive recording media is available to the web video producer.
At this point, the only real argument for not using a tapeless workflow is if you are restricted to using legacy tape-based cameras because of budgetary constraints or if your client has placed contractual restrictions on you that require tape-based deliverables of the field footage.
Don't Edit Directly from Tapeless Media
Although you often can edit directly from a tapeless acquisition drive or disk, it's generally a good idea to transfer the media first to an editing hard drive. This will reduce wear and tear on the equipment and make it last longer.
So although the cost drawback of tapeless acquisition has become much less of an issue, we still find on many of our shoots the need for an additional person on set, often called the data assistant. This person fills a role similar to the person on film shoots who is in charge of reloading and handling the film needed by the cameras. Although this seems like an extra cost, this person does the same work as an editor used to do when loading footage from tape.
We cannot emphasize enough the need to have that individual on the set if you're working with disk or hard drive–based media. On our shoots, we generally make two backup copies of each card or disk. The first copy is loaded into the nonlinear editing system via an import command, which places the media on an editing hard drive. The second copy is a disk image, which we back up to a temporary hard drive. After the shoot, we transfer the footage to a RAID-protected hard drive array and eventually to Blu-ray discs if the client wants a set of “master tapes.”
Which brings up the next point. Without tape, you may have no backup. Be sure your tapeless media is redundant. You'll need to make a mirrored copy of your drive to keep your media ready to use. You'll also need to explore cheaper archive solutions like a protected disc array, DLT drive, or Blu-ray DVDs to create affordable archives that can be stored for long-term backup.
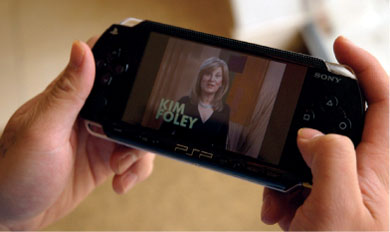
Shooting for Portability
When you are shooting video for the web, you need to remember that the computer and mobile device screen behaves differently than a movie or television screen. Although web video can be delivered to television sets with relative ease, odds are this is the device with fewest amount of viewers for your video. So keep the following in mind.
The Screen is Small
We tend to favor tighter shots; that is a conscious decision. Remember, video will likely be seen at a small size (some players are as small as 2 inches diagonally). Therefore, there are a few things you need to keep in mind when composing your shots. Tight shots work better than wide shots because much of the detail will be lost by the time your footage reaches the small screen.
Action Safe Is the New Title Safe
Traditionally, videographers have learned to frame their shots to protect both the action-safe and title-safe areas of the frame. In the world of TV broadcasting, monitors do not necessarily display the entire frame of video. For this reason, there are two cropped zones within the frame; both are equidistance on all sides from the edges of the full frame. The larger of the two zones is referred to as action safe, and the slightly smaller zone is called title safe.
The thinking is that when shooting or editing, if you keep the action inside the action-safe zone and any key information such as graphics and text inside the title-safe zone, then it will display properly on even the most restrictive of monitors. In the world of podcasting, you'll see the entire video clip. Because of this, we have basically done away with the concept of title safe and now just keep what we really want on viewers’ screens inside of action safe. This allows a little bit of padding (like a margin) but maximizes the smaller screen.
Avoid Shaky Video
Because your source video is going to get highly compressed before it is delivered to the web, it is important that your shots be as steady as possible. Video compression saves space by repeating pixels that don't change from frame to frame. As such, your video will be much clearer if it is a stable shot. Remember, shaky video doesn't compress well and results in muddy-looking video.
Recognize Lower Frame Rates
Web video and even podcasts can have reduced frame rates. Combine this with lower data rates and you want to avoid much camera motion. Lots of pans or zooms tend to break down during compression process. For this reason, we recommend favoring straight cuts rather than creating in-camera effects.
Evaluate Using 16 × 9
Shooting video in 16 × 9 aspect ratio has become quite popular. However, some web video is still delivered in the 4 × 3 aspect ratio. If you decide to shoot in the 16 × 9 format, you should protect your shots for center cut during postproduction. This concept is similar to the action-safe/title-safe concept described earlier, but in this case only a portion of the side of each frame will be trimmed during the edit or compression stages
Packing List for a Two-Camera HD Package
2 |
Panasonic HVX-200a camera |
6 |
5400-mah batteries |
2 |
Battery charger with AC adaptor |
2 |
Sharpie markers |
6 |
16-GB P2 cards |
1 |
Video adaptors and barrels bag |
1 |
Leatherman multitool |
1 |
Lens cloth |
1 |
Panasonic BT-LH80WU 7.9” HD LCD field monitor |
1 |
Slate and dry-erase markers |
2 |
25-foot BNC cable |
1 |
Anti-shine powder with applicators |
1 |
Makeup kit |
2 |
Sachtler tripod with plate |
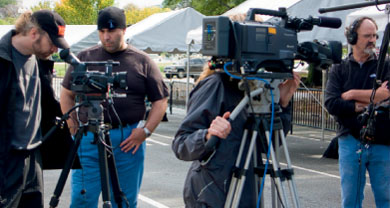
Shooting Multicamera Productions
More and more web video producers have discovered that multicamera shooting can speed up production and dramatically cut down editing time. This is because synchronized angles truly make editing easier. But when it comes to multicamera editing, there is no “fix it in post.” Screw up the technical details and you will have a difficult time putting the pieces together.
Camera Requirements
Choosing the right cameras is the most important detail for a multicamera shoot. This is both for aesthetic and technical matching purposes. The different camera angles need to smoothly cut together, or visual jarring can make your video hard to watch. Here are some details to look for when selecting cameras:
- Matched codec/format. Ideally, all your footage will have the same codec (compressor/decompressor). If you've mixed tape formats (like H.264 and AVCHD), you may need to convert the footage to match. You'll also want to be able to match frame rates so footage stays in sync.
- Number of audio inputs. Generally speaking, video cameras offer two to four inputs. Depending on your number of audio sources, more audio channels can really come in handy.
- Tapeless acquisition. By recording direct to disk or cards, it's easier to record for long periods without interruption. Make sure you have enough recording capacity to avoid having to stop for a “tape change.” This will help you avoid continuity breaks in the footage.
Matching Cameras
The closer your camera settings match, the more likely the footage will match when you go to edit it. You want the footage to match as closely as possible. This requires you to make adjustments to both aesthetic and technical properties. Be sure to look at the camera menu settings and attempt to tweak them so the cameras seem similar in appearance on a calibrated monitor.
Even though these cameras aren't identical, they are by the same manufacturer. They also can be set to shoot the same codec and frame rate.
Be sure to match the following aesthetic settings:
- Color settings
- Gamma settings
- Shutter speed
- Black level
You'll need to check several technical properties for each camera. You need each angle in a multiclip to be technically identical for the multicamera editing technology to work. With this in mind, be sure to match the following properties across each camera:
- Timecode. Use the same method, drop frame or nondrop frame, for each camera angle.
- Codec. If the cameras support different codecs settings, try to match them.
- Frame size. Be sure your frame sizes match; you don't want mix cameras that are recording 720p with others that are at 1080i.
- Frame rate. Be sure to check that you have a precise match for frame rates. Keep in mind that there are lots of different frame rates these days with HD.
Color Calibration Tools
To get your angles to match up, make sure at the outset that the cameras have a good black and white balance on the same subject in the same lighting. This is often a piece of cake when you're in a professional studio with a chip chart, but what about when you're in the field? We have two favorite tools that are affordable and portable, and can help you calibrate cameras in the field and double-check color balance in post.
- Qpcard (www.qpcard.se). A cheap and easy way to address color calibration between your angles is to use a calibration card when shooting. One of our personal favorites is the disposable QPcard. Priced at less than $5 per card, this is a great investment in accurate color. Simply use the adhesive strip to adhere one to your clapboard at the start of each day of shooting, and you'll have a great source for checking color balance in post. With a white, black, and neutral gray surface, it is easy to use the three-way color corrector when color correcting in Final Cut Pro. Using a new one each day may seem wasteful, but $5 spent per shoot is well worth hours saved on color correction. In most cases, it will only take three clicks per angle to calibrate across each camera.
- photovision one Shot (www.photovisionvideo.com). This pop-up target is a great addition to a camera bag. This calibration device offers a black, white, and gray stripe to color calibrate. The other side is a white flexi-fill that can be used as a reflector to help bounce light on set. What's great about it is that it is reusable and can fold to a small size to fit into a camera bag. Various sizes are available, from 6-inch targets to wear around your neck to 34-inch targets for large multicamera events.

Syncing Cameras
To edit between camera angles, you'll need to keep them in sync. This way as you cut from one angle to the next, you won't see a skip in the audio track. There are several ways to do this. The most professional method involves using time-code, whereas other approaches rely on audio or visual sync points.
Here's a quick rundown on how you can synchronize multiple angles:
- Slave cameras together. It's often possible to “jam” two or more cameras together. By taking the timecode from one camera and feeding it to the other, sync is possible.
- Time of day timecode. Some cameras let you set timecode to a clock. Be sure you've accurately set the clocks on all cameras to match.
- Use a clapboard. When picture and sound are recorded to two different systems, it makes it easy to synchronize, because there is a visual and audio cue point. The same holds true with multiple angles. Simply point all your cameras at the clapboard for the initial sync and to resync if any camera stops recording.
Once camera angles are synced, the editing process can go much more quickly.