
GREAT VIDEO NEEDS GREAT LIGHTING
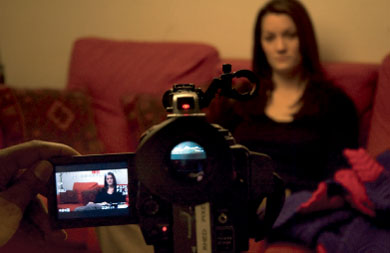
The key to great-looking web video is an understanding of light. While we're not going to send you back to high school physics, you do need to know some basics about light so you can control it. The truth is that cameras are nowhere near as sensitive as your eyes, so it takes extra effort.
If you take the time to learn how to light a scene, you can capture great-looking footage (even with less-than-professional cameras). It might mean choosing a location with good natural light, bouncing the available light where you need it, or creating your own environment using lighting instruments.
When it comes to web video, we realize you likely don't have the same luxuries as a TV commercial or feature film. There's probably not a lighting director or gaffer hanging around. You're going to need to know how to do it yourself if you want your productions to look professional.

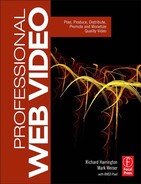
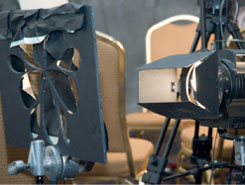
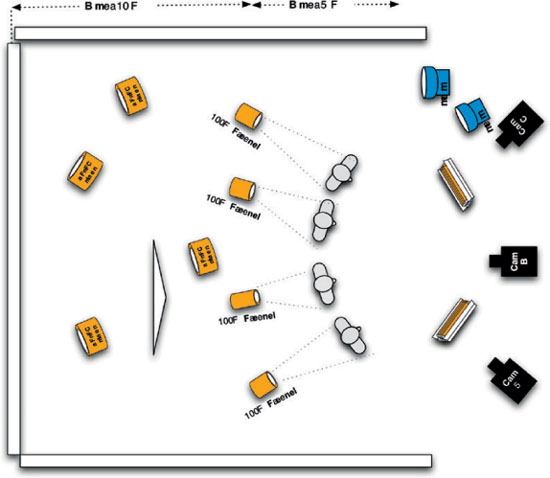
Only four lights were used to light this entire set. By getting the lights high toward the ceiling and shaping them with barn doors, a great deal of control was possible.
Lighting on a Deadline and Budget
When it comes to web video, you'll usually face constraints of both time and budget. Get too cheap with lighting, however, and the whole project will fall apart. If you shoot under poor lighting, your video will be grainy and possibly even out of focus.
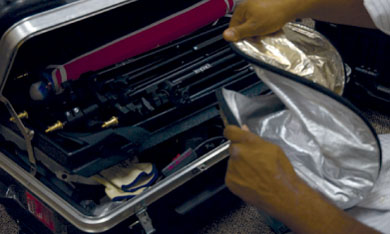
Our solution is to work in more of an electronic news gathering (ENG) style of production while striving to achieve the results of a fully crewed production. In other words, how can we go in the field with a one or two-person crew and successfully get what we need? This style of production is foreign to many video production professionals, but it is essential for success when producing video for the web. This means packing the right equipment (without overpacking) and learning how to work with what you have on location.
Because the size of your crew will be constrained, you'll need a crew that's multitalented. This means that a crew of two or three (and sometimes one) needs to be able to do the audio, lighting, and videography. A crew really needs to be flexible to make web video production viable in terms of budget. With this in mind, let's explore some specific lighting scenarios.
Lighting Considerations: Indoors
The good news is that you'll generally have greater control lighting an indoor shoot. This is because it's easier to control both the amount and quality of light on your set. When shooting outdoors, your primary light (the sun) keeps moving and even disappearing behind clouds or the horizon.
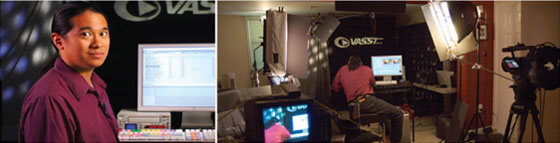
This room had skylights, fluorescent, and incandescent light in the same room (at it was designated the room for press conferences). talk about a challenge.
By building a basic lighting kit, you'll have the lights and accessories to control the look of your shots through creative lighting design. Entire books and courses have been devoted to the theory of light, but for our purposes let's take a look at the essential decision-making process. Once you get the basics, you'll see a quantum leap in the quality of your video.
Safety First
![]()
It's important that you're safety conscious with your equipment on a shoot. This means taking extra measures like using sandbags to secure lights as well as addressing power cables. We highly recommend using rubber mats or taping down all of your cables. Make sure the whole area is safe, because the last thing you want is someone tripping over your production gear and suing you. You can also pack a small set of safety cones (often available from sporting goods stores) to help mark out your equipment.
What Is the Lighting Situation on Your Set?
The first thing you should do when you get on location is to take a look around. Does your room have mixed lighting, such as sunlight from windows combined with overhead fluorescent lighting? Or is the light coming from a single source? Your first consideration should be to assess what kind of light is present on your set. What can you do with what you have? Is there anything good about the existing light?
Can You Control the Color Temperature on Your Set?
Ideally, there is no natural light coming from windows or skylights. Additionally, you'll have the ability to control the existing lights in the room. If this is the case, then the room is easier to light with the lighting fixtures in your kit. However, if you are in a room with windows, or lights that can't be shut off, then you will need to be prepared to modify or adapt to these conditions. This often means using colored gels or changing the settings on your camera to ensure a proper white balance. Otherwise your camera will take on an unwanted colorcast that can ruin the video.
What Is the Color Temperature on Your Set?
Light essentially has a visible color, and this is particularly true on camera. Think of a bright blue, sunny day or the warm, orange glow of a candle. In a basic sense, light takes on the following colors:
- Sunlight = Blue light
- Standard lightbulbs (tungsten) = Orange light
- Fluorescents = Greenish light
Problems can arise when your camera isn't set up for the light you have. Even worse is when different colors of light start to mix together. The human eye is particular when it comes to color. Getting your video out of balance is bothersome to the audience and makes your production look amateurish.
Which Corrective Action Should You Take?
Once you know what kind of light is present, you'll know what type of light to add to fix the room. A common scenario you'll face is being in a room with lots of windows. The video lights you'll bring may be tungsten lights, so you'll need to take some corrective action:
You may need to use colored gels on your lights to change their color temperature.
- Change the windows. One option is to cover all of the windows with a special gel called color temperature orange (CTO). This can be very effective, but it's time intensive and can get expensive.
- Change the lights. The other choice would be to place blue gel over your lights. Gelling the lights is usually the best decision when time and budget are tight. However, a full blue gel can substantially reduce the intensity of your lighting fixtures, so you'll need stronger lights.
- Go a different route. Because neither of these methods are great for time or budget, we recommend using specialized lights. Many newer fixtures use fully adjustable light-emitting diode (LED) lights. You can also find specialized fluorescent lights that can use both tungsten and daylight bulbs (more on both later in the chapter).
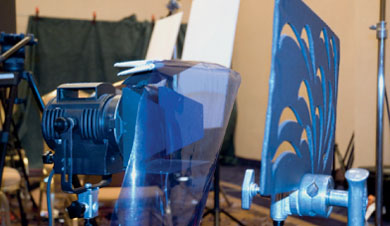
A receptacle tester cost less than $10 at a hardware store and offers a good way to test if an outlet has live power that is grounded.
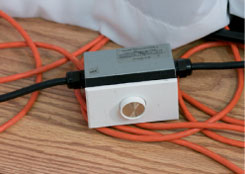
Do You Have Enough Power?
Without power you won't have lights. Seems like a simple concept, but we see people screw it up all the time. What happens if you blow a fuse? Can you access the circuit breaker? Are there enough outlets to power your lights? Do the outlets actually work? When lighting indoors, be mindful of the amount of power that your lights are drawing.
Let's keep it simple and look at a typical scenario for the United States. A standard current is 120 volts, and most single circuits are rated at 15 amps. If we remember basic physics watts = amps × volts, so 15 × 120 = 1,800. Therefore, a single circuit should be able to run at least 1,500 watts of lighting before the circuit breaker trips. Look at your lights and see how many watts they are rated for (this information is usually on the light, plug, or bulb).
But your lights may not be the only things drawing power on the circuit—it's usually impossible to tell how many outlets there are on a single circuit. Therefore, it makes sense to run several heavy-duty extension cords (often called stingers) from multiple outlets in the hope that you are spreading your power load over multiple circuits. Many older buildings have different wiring setups, and you should always check to make sure you don't overload a circuit, which could potentially be a fire hazard. Be sure you know where the electrical panel is so you can reset circuits as needed. After all, if a breaker is going to trip, it will usually wait until everything is set and you start to record your first shot.
Don't Use Auto White Balance

While you may be tempted to rely on an auto white balance feature on your camera, don't. The auto white balance can be overly sensitive to things like a passing cloud. Instead, just keep an eye on your monitor or viewfinder while shooting.
Lighting Considerations: Outdoors
Whereas shooting indoors allows you a certain level of lighting control, the only certainty about shooting outdoors is that it will bring challenges. Besides the difficulty of inclement weather, you have an unpredictable lighting source (the sun). Among the challenges you will be presented with when shooting outdoors are the following:
- Your light source is constantly moving.
- The color temperature of sunlight shifts throughout the day—remember to white balance your camera often.
- The light can change from hard direct light that casts strong shadows to even flat light and back again—all in a matter of seconds.
To counteract these curveballs Mother Nature might throw at you, you can make use of specialty equipment.
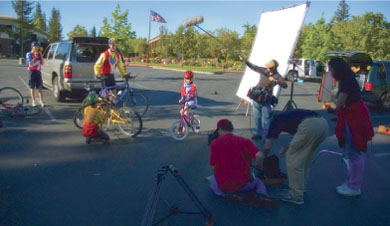
shooting under the sun requires additional control. Large reflectors can be used bounce the sun onto your subjects.
Reflectors Are for Indoors Too
You can use reflectors for indoor shooting too. They can bounce both sunlight and electrical lights. They often work quite well for interviews, as you can bounce light onto the subject's face (as opposed to pointing a bright light in the person's eyes).
Reflectors

Here we use foam core board bought at a local hardware store as a makeshift reflector. This is our tool of choice when flying to a shoot location because it can easily be found locally.
Unfortunately you can't change the position of the sun. But if you are dealing with direct sunlight you can use a reflector to redirect sunlight onto your subject or background. Reflectors are some of the cheapest pieces of equipment you can own and they are critical to outdoor shooting.
A reflector can be something as simple as a piece of white poster board. Many will make their own out of reflective material (such as Reflectix Insulation) and a piece of foam core. You'll also find reasonably priced reflectors made from fabric and a flexible frame (such as those made by Flexfill). You should invest in a few basic reflectors for your own lighting kit. Nothing works better for bouncing the sun.
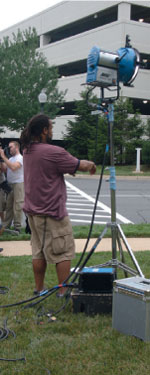
An HMI light is an important addition to an outdoor shoot. they are expensive to buy, but can be affordably rented.
HMI Lights
If you're shooting outdoors, one of the best tools you can use is HMI lighting. This type of lighting is unique in that it uses an arc lamp instead of an incandescent bulb (the letters stand for hydrargyrum medium-arc iodide). HMI lights are highly efficient and specialized fixtures. They can produce light with exactly the same color temperature as daylight (5,600° Kelvin).
HMI lights make daylight shooting very easy. Their color matches the sun, plus you don't need to use many of them to get results. A 200-watt HMI can produce light as intense as that of a 1,200-watt tungsten fixture (without needing nearly as much power).
There are two downsides to HMI lights for web video production:
- Size. HMI lights require an external ballast to work (which is essentially an external power converter). This ballast contributes to the bulk of transporting these somewhat fragile fixtures.
- Cost. A single 800-watt HMI fixture can cost in excess of $5,000, and replacement bulbs run around $250 each. We realize the thought of spending more on a light than on your camera can be shocking.
We typically rent HMI lights from local lighting houses, thus eliminating the need to transport them over long distances. The typical rental fee for a small HMI light is $65 to $200 per day. If shooting outdoors, we'll often add one HMI light to counterbalance for a disagreeable sun. On the positive side, you usually have an abundance of free light when shooting outdoors, so HMI lighting is really an “insurance policy” kind of choice.
Fixing It in Post?
Although we are big proponents of getting it right in the field, we are also realists. Sometimes corners will have to be cut in the field in order to accomplish the shot or stay on schedule. Knowing what can be done in an edit suite is helpful so the director or videographer can make judgment calls. It is often easy to tweak a slightly underexposed shot or increase the midtones to help separate the talent from the background.
Additionally, tools like Magic Bullet can be used to further enhance the look of the video during postproduction. Don't let your shoot deteriorate to utter crud, but be sure to know what you can and can't do with color correction. We try to light a podcast as right as possible, but if it means two lighting people and an extra $1,000 worth of lights, we'll sometimes make quality judgments. We recommend taking a test shot onto a laptop while in the field so you can fully understand the options you'll have with your footage.
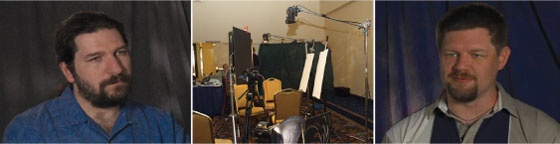
Lighting Considerations: Multicamera
It is becoming increasingly common to shoot web video with multiple cameras (a technique we'll explore more in the next chapter). This is a common solution because it can both speed up the acquisition stage (by eliminating the need for multiple takes) and accelerate editing (by simplifying camera syncing issues).
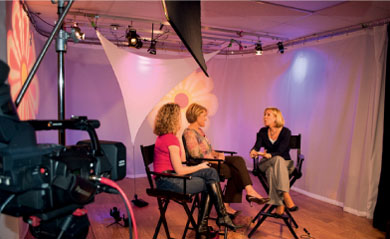
Consideration was given to light placement because there are three cameras on set. By hanging lights or keeping them high on stands, you have a wider angle for shooting.
Multicamera shoots likely happen indoors—if not, they happen outdoors. Because we've already touched on both, what's different you ask? It's important to design lighting setups that provide even lighting for all talent without having the lighting stands in the camera's field of view. Although this may sound easy, it gets much trickier to place lights when you have to accommodate multiple cameras. The most common approach is to hang the lights from a ceiling or a lighting grid. As this may not be available, you'll need to think closely when positioning your lights. Be sure to move the camera around and test your angles as you hang lights. Make sure there are no bad shadows or distracting stands or power cords in the shot.
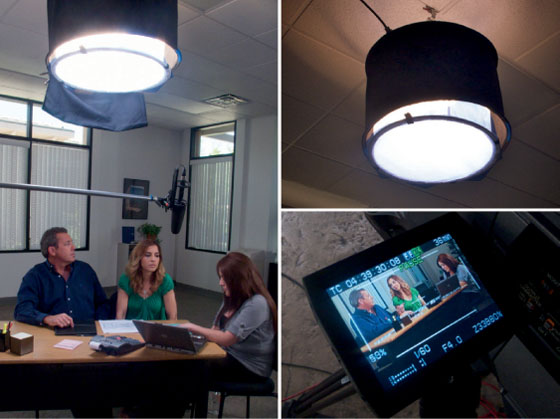
Hanging a large overhead light in the center of the set made it easy to fill in the scene and shoot from multiple angles with two cameras.
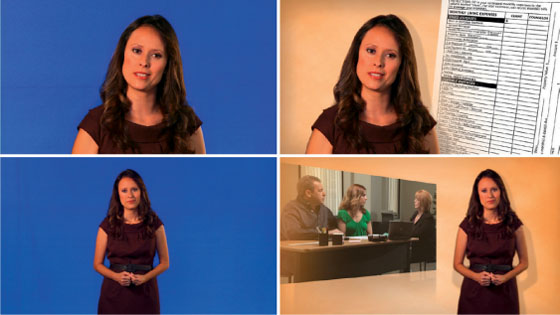
Lighting Considerations: Green or Blue Screen
The use of chroma (or color) keying software has gotten much easier in postproduction. The most common techniques involve shooting talent against a blue or green screen and then replacing that colored background with a new one. This process is a staple in filmmaking special effects and has made its way into web video as well.
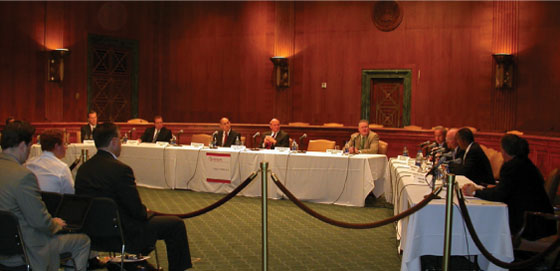
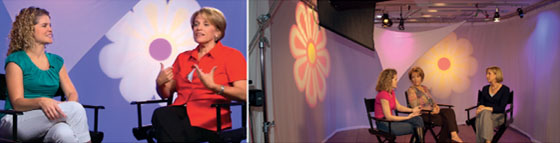
To spice up the hosted segments, we shot on a blue screen. Custom graphics could then be inserted as well as a virtual set. Footage courtesy the National Foundation for Credit Counseling, www.debtadvice.org.
To succeed with chroma key, you want to pay close attention to shooting and lighting.
When shooting chroma key footage, be sure to turn off all the Auto settings on your camera. This means no auto-exposure, auto–white balance, or auto-focus. If any of these are left on, the footage you are trying to key will constantly be changing as your subject moves. These constant fluctuations will make it harder for you to get good results. While you're changing settings, switch your camera to a progressive frame rate (such as 24p), as you'll get much cleaner edges on your keyed shots.
You'll have many choices when selecting a backdrop. Although you can simply go and purchase fabric at a fabric store, many will invest in higher-quality backdrops from a video or photography retailer. The most popular backdrops use polyester fabric stretched by a metal frame, which offers an easy-to-light surface that avoids wrinkles and shadows. These backdrops can be easily folded and transported. Muslin backdrops are also used, but they may require more attention to lighting to avoid wrinkles and bad keys.
Avoid MPEG, DV, and HDV for Keying

Many cameras shoot highly compressed video. This makes tasks like chroma keying much more difficult because of the lack of color information in the video. Consider using a higher-quality camera when shooting chroma key. If not, you'll have more work in the edit suite.

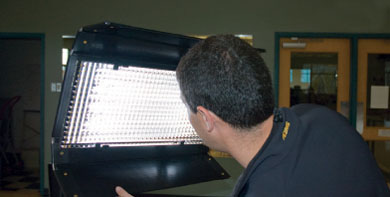
The location, a training classroom provided by the client. We shot on a blue screen (using Reflecmedia technology). The LED lights turn the background an even blue, which makes keying easy.
Here are a few practical tips for lighting and shooting a chroma key set:
- Even lighting. It is essential to minimize variation in colors for the backdrop. This means that you must evenly light the background to avoid hot spots. Diffused lighting (such as soft boxes or fluorescent lights) makes this easier.
- Spill is bad. Be sure your subject doesn't stand too close to the backdrop, otherwise you'll get shadows on the backdrop and color spill on the person.
- Keep your distance. Try to keep your camera as far away from the screen as possible. It's better to increase the distance, even if it means some blank edges are showing (you can always crop these out later).
- Avoid fast movement. A fast-moving subject creates motion blur. This is typically where keys become bad or obvious.
- Use shallow depth of field. If your camera supports it, lower your aperture. This will help make the background fall out of focus. This is an easy way to hide wrinkles, seams, and hot spots.
Invest in a Good Key
![]()
If you plan to shoot a lot of chroma key, you may invest in a dedicated chroma keying system. We use a Reflecmedia Chroma Key system frequently. This approach relies on an LED disc attached to the camera lens that reflects light on a special fabric containing millions of glass beads that reflect the lower-powered light and create an even-colored surface. Systems like this cost more, but they are popular for their ease of use and portability. The system saves us a lot of time and money during the editing stages.
Lighting Considerations: Available Light
Sometimes, you'll have no control over lighting at all (such as at a concert or theater performance). In this case, you need to make do with what's there and properly set your cameras. You'll need to experiment with settings for color temperature as well as adjust the camera's iris.
Because this may take some trial and error, it's a good idea to do a site survey before the job (and bring your camera). Go and look at the location and attempt to see what it will look like with the lights turned on. You can then make better decisions about how to handle the lighting, such as to go as is, or push to add some lights to the budget.
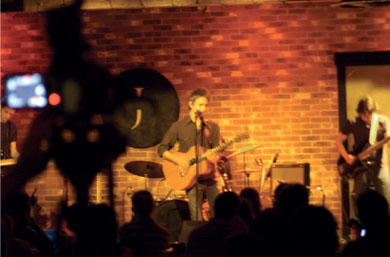
This concert by the Brindley Brothers was recorded at Jammin Java (www.jamminjava.com) using available light.
Recommended Lighting Instruments
When we talk to many web video producers starting out, they're hesitant to make an investment in lighting gear. We realize that buying a gear like a superfast computer and high-end camera seems like a good idea. You'll be able to use that high-end computer to waste time fixing poorly lit shots. And that camera? A great camera without proper lighting is like a jet plane with no fuel. Here's the good news. Your lighting gear will last for years if you take good care of it.
The type of lights you choose to use on your web videos will vary greatly depending on the style of production and your budget. When we build our lighting kits, we focus on performance, value, and flexibility. We often find we are shooting in the field; as such we need lights that are durable, perform well, and are easy to transport. With this in mind, here are a few recommendations.
Tungsten Lighting Kit
One of the first investments video pros make is in a good tungsten light kit. The most popular manufacturers of these kits are Arri, Mole Richardson, Lowell, and LTM (among others). You can often find a great starter priced around $1,500, and it will include the following:
- Three or four lights
- Stands to hold the lights in place and adjust their height
- Barn doors to shape the light
- Scrims to diffuse the light
- A travel case to protect the gear while in transport
Tungsten lights are mainstays in professional video production.
You can often find professional lighting dealers locally, or, of course, shop online. Although the brand names of the contents will vary, you generally want to get a kit that contains lights of different types and sizes.
A good kit will include an open face type light that can be fixed with a soft box or lantern to provide a broad light source. This is usually used as key (primary) light, especially when shooting interviews. This light will usually be rated for a 500- to 1,000-watt lamp.
Dimmers let you adjust the intensity of light without changing bulbs or fixtures.
The kit should also include several Fresnel lamps of varying intensity. Fresnel lamps contain a lens that allows you to control the spread of light from a spot to flood coverage. These versatile lights can be used to help fill in light on your subject, provide backlight for separation of foreground and background, and light elements of the background or set.
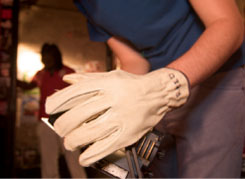
Wear heavy-duty gloves when handling hot lights.
Other items in our Tungsten kit include the following:
- Dimmers. Dimmers control the intensity of the lights with a slider or dial. Be sure your dimmer is rated to handle the wattage of your fixture. Although the dimmer you pick up at your home improvement store may work fine with your 100-watt backlight, using it with a 750-watt Fresnel will create a fire hazard.
- Gels. These include a variety of color correction gels, theatrical gels in multiple colors for creating dramatic lighting environments, along with pieces for diffusion and neutral density. You can often find these at music stores that cater to disc jockeys or at lighting stores.
- Leather work gloves. Tungsten lamps tend to get rather hot; don't get burned. A pair of heavy, leather work gloves can save your hands.
- Blackwrap. This is essentially heavy-duty aluminum foil that is coated black. It is used to wrap lights and prevent unintended light spills.
- Wooden clothespins and gaffer tape. These are used to hold gels and other lighting accessories in place.
- Extra stands. You want enough stands to support each of your lights plus a few extras always come in handy to hold reflectors or monitors.
Extra stands and a carrying case round out a good light kit.
Build a Lighting Kit
You can expect to spend between $1,000 and $4,000 when building a lighting (depending on the features you want). When ordering, be sure to pick up spare bulbs because they break and wear out with usage. You can often find used lighting gear for sale much cheaper.
QP Cards Make for Easy Color Matching
One essential piece of lighting equipment emits no light at all. We adhere a QP card on our clapboard. These adhesive cards are a small strip with white, neutral gray, and black. They are generally sold as a three-pack for around $12.
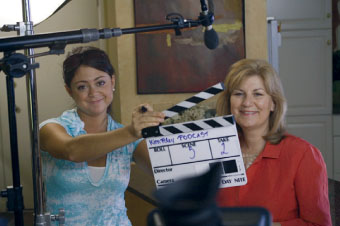
You take one out at the start of your shoot and stick it on your clapboard. This way every take will have a color reference strip. Then in your editing software, you utilize a three-way color corrector with a white, gray, and black eyedropper. This makes it easy to calibrate your camera angles in post and ensure accurate color balance.
Fluorescent Fixtures
Refillable Sandbags
![]()
If you go onto any professional video set, you'll see sandbags in use as a protective measure to secure light and audio stands. But traveling with 250 pounds of sandbags can get expensive (and heavy). Instead, try refillable sandbags, which travel light. When you get to your location you can fill them with sand, rocks, or whatever else can be found nearby. A popular model by Lindcraft is made of durable Cordura Nylon with a heavy-duty zipper with a hook-and-loop cover flap to keep it shut (www.lindcraft.com/product_details/
RS.html).
The use of portable fluorescent lighting fixtures has become popular among video professionals. Companies such as Lowell, Mole Richardson, Cool Lights, and Kino Flo make these fixtures. The reason for their popularity is that these lights offer several great features:
- They are a great source of even, soft light that is ideal for shooting interviews or lighting a chroma key backdrop.
- They run very cool, allowing them to be easily moved. They can run all day in a small room without turning it into an oven. This is important for keeping your talent and crew comfortable.
- Many of the lights are modular, meaning that you can change the number of bulbs used in the fixture. They can also be equipped with either daylight- or tungsten-balanced lamps. This is a great time-saver during setup because you don't have to gel the windows. The lights are essentially two setups in one fixture. We know that we walk into any shoot environment, change bulbs, and turn the lights up or dim them down. It truly is a flexible lighting system.
- Many of the light control features such as ballasts, barn doors, and dimmers are built directly into some models.
- Many manufacturers offer kits that come with airline-ready shipping cases. They also meet the weight requirements of airlines, which make them easy to travel with. Speaking of travel, you can also find universal models that can be used anywhere in the world, switching from 90VAC to 265VAC.
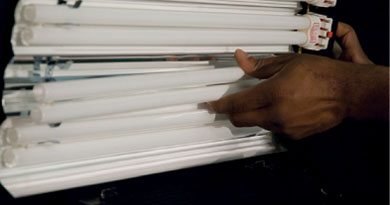
Bulbs can be easily changed in this Kino Flo light.
A fluorescent light can be found starting around $300 for a single light kit and up to $3,000 for multiple light kits with stands. Although this is an investment, the lights have proven their value over time for our productions.
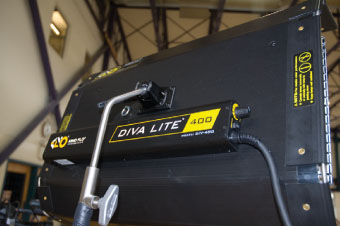
This Kino Flo light is self-contained with light controls built right into the unit.
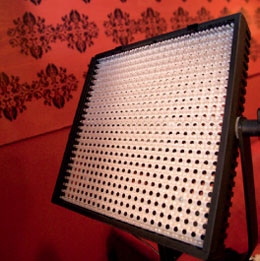
LED Lights
A new type of lighting technology has emerged in recent years, LED lighting. These fixtures use several light-emitting diodes (LEDs) as the source of light. Although LEDs have been around for years, it's only recently that they've become both cost effective and color accurate.
LED lights use a fraction of the power that traditional video lights pull. In fact, some of these lights can even run off AA batteries for an hour or more. These lights tend to be compact and lightweight (often not much bigger than a flashlight) yet put off a surprising amount of light. Other benefits include durability—unlike traditional lights, LEDs are very hard to break. They also run very cool, so your talent won't get too warm sitting under them.
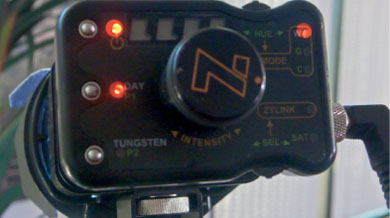
We really like our Zylight fixtures. they adjust to any color temperature within 1° Kelvin. We also switch them to Gel Mode to produce colored hues with adjustable saturation (which comes in handy for colorizing backdrops).
When shopping for LED lights, you'll find a huge range in prices and features. Many smaller LED lights can be found at around $100 to $150. Other brands that include several additional features (such as built-in dimmers and color temperature controls) can range between $700 and $1,400 per light.
Building a kit with these lights, you'll have a lot of options when it comes to pricing. We've either bought or used lights from Bescor, Cool Lights, Litepanels, Reflecmedia, Switronix, and Zylight. We really like these lights for travel, as they're so lightweight (airline baggage fees add up quick). If you're going to travel much, LED lighting should be a part of your lighting kit.
China Ball Lanterns

On the opposite end of the price scale are China Ball lanterns. These offer an easy and affordable way to illuminate a large area. The China Ball is a soft paper lantern that can attach to a standard light socket unit. The fixture can create soft natural light that produces pleasing skin tones.
Although prices vary, we often purchase ours from a website called Filmtools (www.filmtools.com). A kit needs the following items:
- Paper lantern. These range in size from 12 to 30 inches. The cost is usually $3 to $20, depending on the size.
- Practical light socket assembly. This is generally a medium socket with an on/off switch. The socket can handle up to 660 watts and terminates with a standard household connector. It costs approximately $6 per unit.
- Lightbulbs. Bulbs range between $5 and $20 for photo-quality bulbs. Be sure you do not exceed the recommended wattage of the fixture.
More on Lighting?
![]()
There are several excellent books and DVDs that focus on lighting techniques for video. Here are a few we recommend:
- Lighting for Digital Video & Television by John Jackman
- Motion Picture and Video Lighting by Blain Brown
- Video Shooter: Storytelling with HD Cameras by Barry Braverman
- Light It Right by Victor Milt and VASST
- The Power of Lighting by Bill Holshevnikoff
A China Ball lantern produces soft, even lighting that is very affordable.
These fixtures are very affordable and are also easy to travel with. Just be careful that you monitor their usage. Because the lanterns are made of paper (flammable), you should not leave them unsupervised on the set. To make them safer, consider adding a Lanternlock fixture (optional). This unit will fully expand the lantern and helps keep a hot bulb from setting the paper on fire. They run around $60 to $85 and can be added to increase the usefulness of a China Ball lantern.
Three-Point Lighting
Three-point lighting is the standard when it comes to lighting for film, video, or photography. This basic method, like the name implies, utilizes three light sources focused on the subject from different angles.
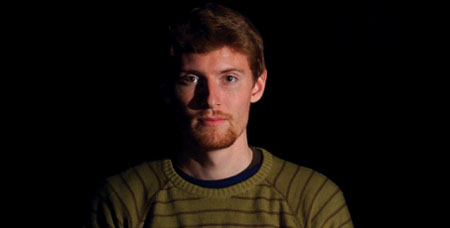
Key light. The key is your primary light source. Generally this is your most intense light, and it is placed between 15 and 45 degrees to the side of your subject. Using a broad soft source of light like that produced by a softbox or fluorescent fixture such as a Kino Flo is ideal when shooting interviews.
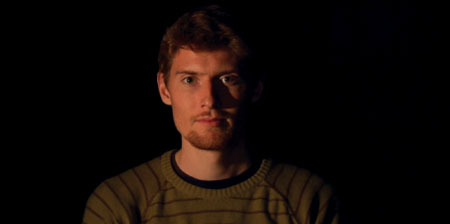
Fill light. The fill is your secondary light. It is placed opposite the key, and its primary function is to fill in the shadows cast by the key light. To what degree you utilize your fill light is a matter of creative judgment. Ideally you would use a smaller fixture as your fill light. But if your fill is the same size as your key, you can lessen its intensity by increasing the distance between the fill and your subject, using a dimmer, placing additional diffusion in front of your fill, or bouncing your fill light off a reflector.
Backlight. The backlight is your third and typically least intense light source. Its purpose is to highlight the edges of your subject, thus separating the subject from the background, which creates a three-dimensional look. Placement of the backlight is usually behind and above your subject.
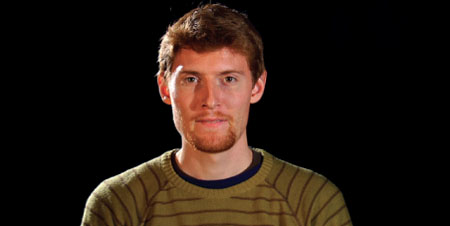
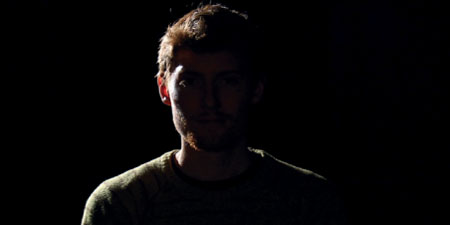
The final result. All three lights are combined for even and attractive lighting.
Once you understand the principles of three-point lighting, you are well on your way to understanding the art of lighting.
Two-Person Interview
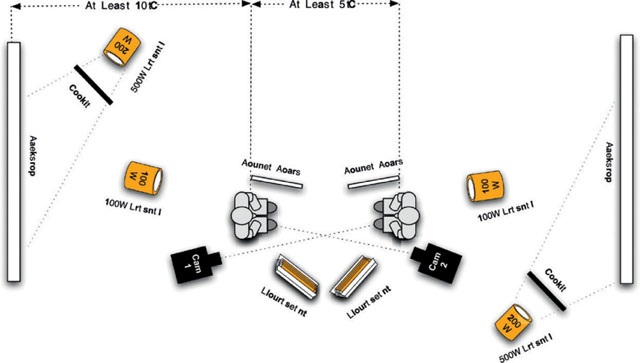
2 |
300-watt Fresnel w/barn door |
2 |
100-watt Fresnel w/ 2 barn doors |
8 |
Light stands |
1 |
Mathews grip head |
2 |
Reflector holder |
1 |
Gel and diffusion jelly roll |
4 |
300-watt dimmers |
4 |
Ground wire killers |
2 |
Tungsten/daylight reflector |
1 |
Spare lightbulb kit |
1 |
Gaffers tape roll |
1 |
Blackwrap roll |
1 |
Leather gloves |
6 |
C Stands with arms |
2 |
10-lb sandbag |
2 |
Six-port power strips |
3 |
10-foot three-port extension cord |
2 |
25-foot extension cord |
4 |
Backdrop support bar |
8 |
Medium steel spring clamp |
2 |
Muslin backdrops |
2 |
Kino Flo 200—2-bank kit w/ stands and bulbs |
2 |
White card stock (bounce card) |
Technical Training Set
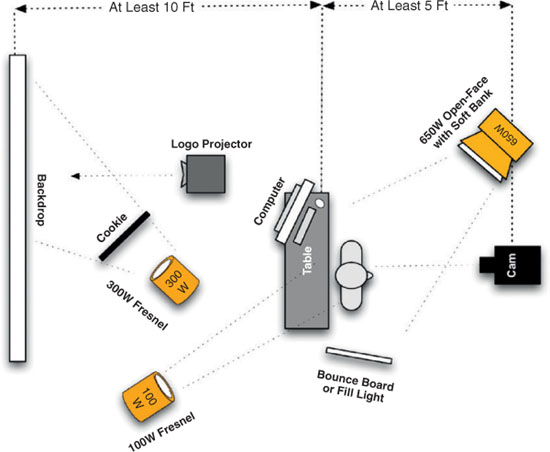
1 |
650-watt Fresnel |
1 |
Chimera soft box—small—speed ring |
1 |
300-watt Fresnel w/ barn door |
1 |
100-watt Fresnel w/ 2 barn doors |
4 |
Lighting stands |
1 |
Gel and diffusion jelly roll |
4 |
300-watt dimmers |
4 |
Ground wire killers |
1 |
Tungsten/daylight reflector |
1 |
Lightbulb box |
1 |
Kino Flo 400-1 bank |
2 |
White card stock (bounce card) |
6 |
C stands with arms |
2 |
10-lb sandbag |
2 |
Six-port power strips |
3 |
10-foot three-port extension cord |
2 |
25-foot extension cord |
1 |
Backdrop support bar |
1 |
Overhead projector |
1 |
Client logo gobo |
8 |
Medium steel spring clamp |
2 |
Muslin backdrops |
Multicamera Talk Show
1 |
Studio space 36’ × 14’ |
2 |
Kino Flo Diva Lites (400 w) |
4 |
Fresnel lights (100 watts to 200 watts) for backlight |
4 |
Light dimmers |
2 |
Leko lights (750 watts or more) with logo. |
4 |
Zylights (LED lights) for colorizing background |
These can be switched for 100-watt Fresnel lights with gels and dimmers. |
|
4 |
Directors’ chairs |
1 |
White triangle silk |
1 |
White curtain |