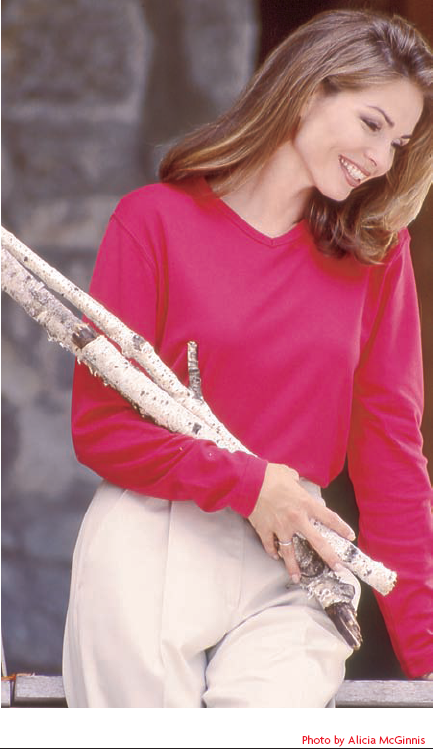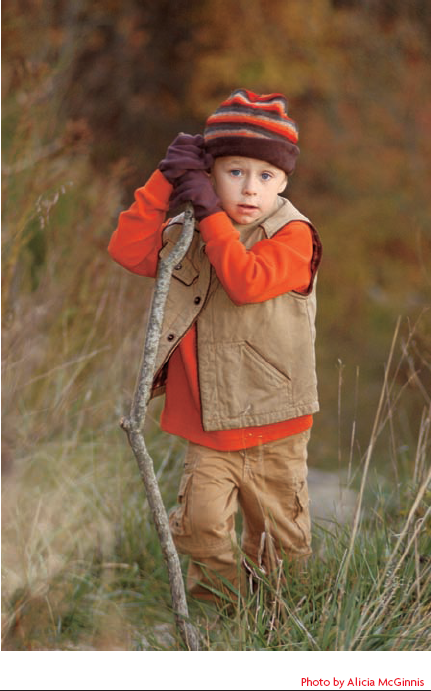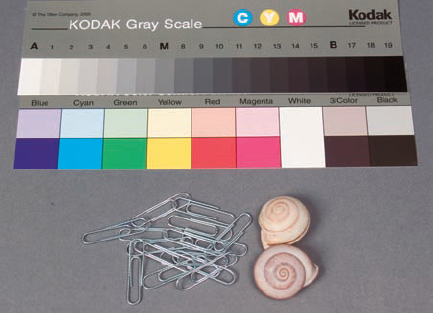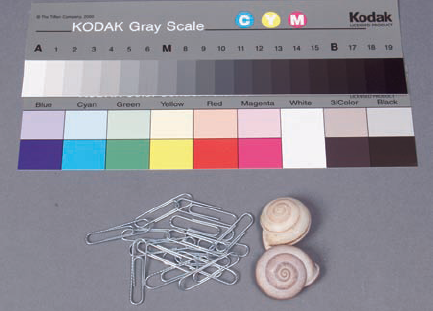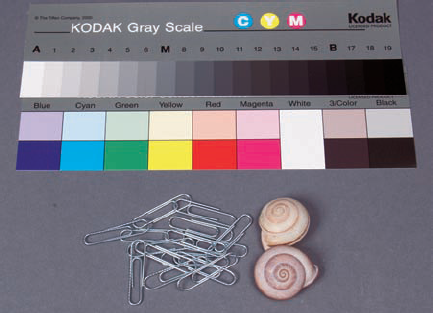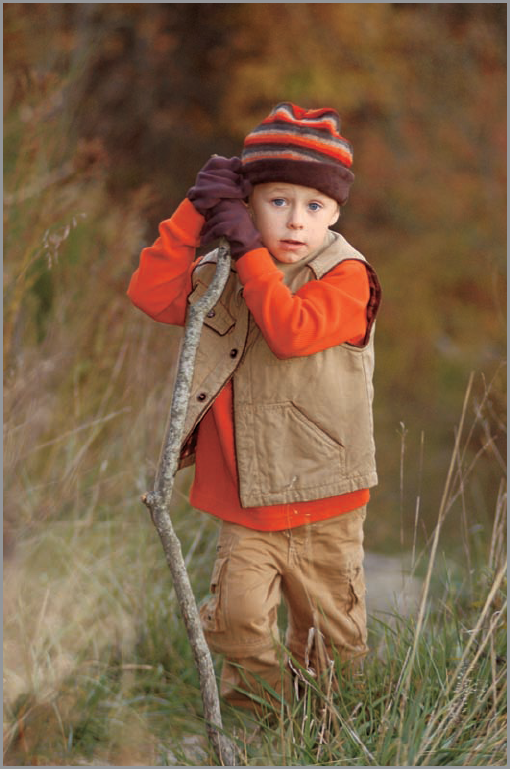
You could shoot images like those shown in figures 8-1 and 8-2 with either traditional film or digital photography — the results are essentially the same. It's unlikely that you could tell the difference between the film and digital images if they are both printed the same way, on the same paper, at the same size, and so on.
(In fact, one of these images was shot digitally and the other was shot on film and then scanned to create the image file used to layout this page. Can you tell which is which?)
It may be hard to tell the difference between film and digital when you look at the printed results, but there are significant differences in the way you work with film and digital photography mediums. Some of the differences are immediately evident, such as recording the image on a digital image sensor instead of film, and viewing and printing it with a computer instead of developing and printing it in a photo lab. No doubt, you're familiar with the obvious differences between film and digital, so this chapter skips the big stuff and focuses on some of the details of the digital photography medium that may not be apparent at first glance, but are important to understand if you want to master the medium and exercise creative control over your photographs.
Perhaps the biggest single difference between film and digital photography is the time it takes to see the image. With film, you usually finish shooting a whole roll of film before taking it to a lab for chemical processing, which takes hours, sometimes days. In contrast, most digital cameras display the image on the camera's LCD screen within seconds. Digital photographers know immediately whether they got the shot or not. No more waiting for days wondering whether or not the flash fired or if the ball was in front of Junior's face.
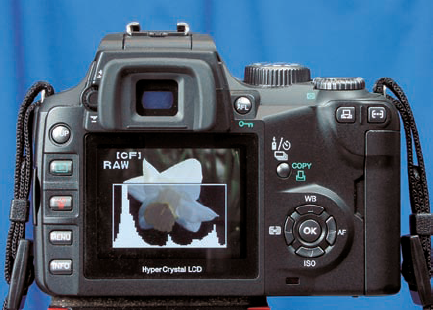
Being able to view a digital image immediately is a revolutionary advantage, but the small size and limited brightness of the camera's LCD screen severely restricts the photographer's ability to analyze the quality of that image. (See figure 8-3.) As a result, many digital photographers barely glance at the post-shot image on the camera's LCD or they turn off the display completely — and that's a serious mistake. Most higher-end digital cameras include several features that make the image display much more useful, despite its diminutive size. Using these tools can help you to evaluate the accuracy of your exposure.
To partially compensate for the small size of the preview screen, most of the better digital cameras include zoom and pan features that enable you to get a closer look at portions of the image. It's not an ideal way to perform a critical evaluation of each image, but it's sufficient for a quick check to confirm the focus or to see if your portrait subject blinked just as you pressed the shutter.
Most digital cameras have even more features to help you evaluate exposure.
The brightness of the image preview isn't a reliable indication of correct exposure because its apparent brightness varies dramatically depending on the ambient light levels. A preview image that looks too light when viewed in a dark room might be too dark to see clearly in bright sunlight. Consequently, you need to use a more objective tool to determine whether or not you got a good exposure.
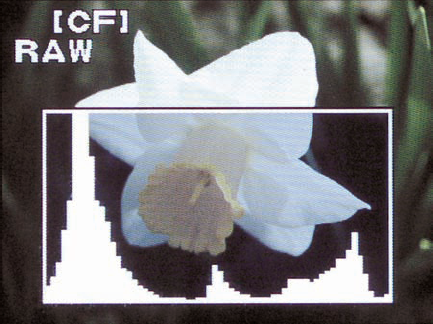
The first, and most important, tool for evaluating exposure is the histogram — an area chart showing the distribution of tonal values in the image. The base of the histogram represents a grayscale going from black on the left to white on the right. The relative number of pixels of the various brightness levels is plotted as height on the chart.
The histogram is usually superimposed over the image as shown in figure 8-4, although some cameras display the histogram separately and some even display separate red, green, and blue histograms. The histogram tells you at a glance whether or not your exposure falls within the image sensor's range.
Tip
To correct overexposure as indicated by highlight clipping, try reshooting with an exposure compensation of −1 EV or an equivalent change to your manual exposure settings. If the highlight clipping is extensive, you may need to make an even larger exposure adjustment.
Note
See Chapter 3 for more examples of histograms.
A good exposure of an average subject shows a tonal distribution that extends from left to right across nearly the full width of the histogram, but avoiding major spikes at either end. If the histogram shows a big peak at the left side of the chart, tapers out toward the middle, and shows nothing toward the right side, this indicates an underexposure (or a subject that is all dark gray to black). Conversely, a big peak on the right side of the histogram and little or nothing on the left indicates overexposure (or a subject that's nearly all white).
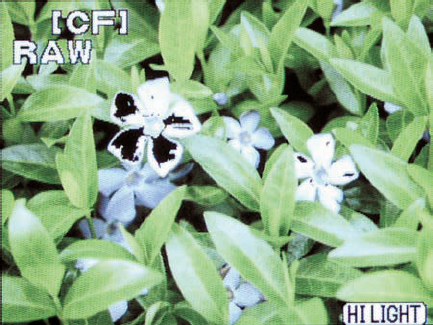
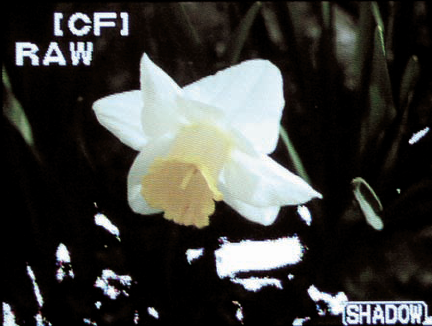
In addition to the histogram display, most digital SLR and better point-and-shoot digital cameras also offer optional displays that indicate highlight and shadow clipping. These displays alert you to possible exposure problems by showing you what portions of your image exceed the image sensor's range. These are the areas that will reproduce as bright white or solid black, with little or no textural detail.
The highlight clipping display, seen in figure 8-5, typically uses flashing black spots to indicate areas that are at or near the upper limit of the image sensor's exposure range. Highlight clipping that extends beyond a few small specular highlights, such as the reflection of the sun off a chrome bumper or water ripples, almost always indicates serious overexposure that should be corrected. Unless corrected, the overexposed areas will be blown out, totally lacking textural detail. And that's not something you can fix in Photoshop.
The shadow clipping display (figure 8-6) uses flashing white spots to indicate the darkest shadow areas — the parts of the image that are so dim that they reproduce as black. As a general rule, it's acceptable, even desirable to have some areas of solid black in an image, so a modest amount of shadow clipping doesn't necessarily indicate a bad exposure. However, if the shadow clipping is excessive, you can compensate by increasing the exposure some.
Tip
It's usually fairly easy to darken a light image as long as the highlights aren't blown out, but lightening a dark image often results in excessive noise in the shadow areas. Therefore, a good exposure strategy for many subjects is to try to make the image as light as possible without any highlight clipping.
The image sensors in digital cameras produce optimal results at a certain sensitivity level, which usually corresponds to the lowest available ISO setting. To expand the camera's useful working exposure range, the sensitivity of the image sensor can be adjusted by amplifying its signal. However, increasing the sensitivity also increases the noise that is recorded along with the image data.
Digital noise is a random pattern of colored dots that end up being embedded into the image. It looks very similar to the "grain" effect that is characteristic of higher-speed photographic films.
When working at their optimum ISO settings, the best digital cameras produce images that are almost totally noise-free. But as the ISO setting goes up, so does the visible noise in the images.
Note
Not all image sensors respond to changes in ISO in exactly the same way. The general tendency toward more noise at higher ISO settings is pretty much a fact of life in the digital world, but the specific amounts of noise at given ISO settings varies considerably among different makes and models of cameras.
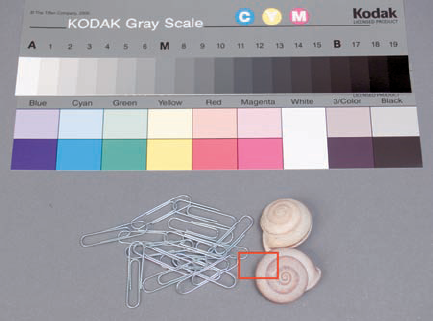
To demonstrate the effect of digital noise resulting from changes in ISO settings, I shot the series of test shots shown in figures 8-7 through 8-12. Figure 8-7 shows the full frame test subject with a small red rectangle indicating the portion of the image that is enlarged in the other figures. The ISO setting in figure 8-8 is 100; in figure 8-9, it's 200; in figure 8-10, it's 400; in figure 8-11, it's 800; and in figure 8-12, it's 1600. Hopefully, the book printing will retain enough detail for you to see the modest increase in noise from 8-8 to 8-10, and the more dramatic increase in 8-12.
Increasing the ISO always involves a tradeoff. Consider whether increasing the ISO in order to get an acceptable exposure at a lower light level is worth whatever negative impact the increased noise will have on the quality of your images. When increasing the ISO means the difference between getting the shot or missing it altogether, then it's probably worth most any amount of noise. Otherwise, you can minimize noise by working at the lowest possible ISO setting that allows you to get decent exposures at a given light level.
All digital cameras available today exhibit some increase in noise at higher ISO settings. However, some image sensors are noisier than others. Some sensors show a gradual noise increase as ISO levels increase, while others show an abrupt jump in noise levels at certain ISO settings. The only way to be sure how much noise your particular camera model produces at various ISO settings is to test it. Here's how:
Set up a test target consisting primarily of a solid-color background. It doesn't have to be a standard gray card like I used, but it'll be easier to see the noise on a fairly neutral color of a midtone value — not too dark, not too light, not too strong a color, and definitely not patterned or strongly textured. Add some small objects for contrast and to provide a sense of scale.
Light the test target. Use uniform lighting of medium intensity. If the light is too bright (such as direct sunlight) you may not be able to test your highest ISO settings without overexposing. If the light is too dim, you may not be able to test the lowest ISO settings without underexposing or using excessively long shutter speeds, which introduce their own problems.
Set the camera on a tripod and focus on the test target.
Set your camera for aperture-priority automatic exposure and select the highest available ISO setting. Then select the widest aperture that allows the automatically selected shutter speed to remain within the normal range without overexposing. Shoot the first test frame.
Change the ISO setting to the next lower value and shoot the next test frame, allowing the auto exposure system to adjust the shutter speed.
Repeat step 5 as needed to test all the available ISO settings your camera offers. Make sure that the shutter speed for the lowest ISO settings is less than 1 second. If necessary, adjust the aperture to keep the shutter speed faster than 1 second.
After you shoot tests at all the ISO settings, transfer the test images to your computer and open them in Photoshop or your favorite image editor. To see the noise clearly, zoom in to 100% or greater magnification. Try to examine and compare the same spot on the solid-color background of each image so you're seeing the difference in noise, not shadows or other variations in the image.
The problem of increased digital noise at higher ISO settings is generally associated with taking pictures at low light levels. That's because low-light photography is the situation in which you typically need the extra sensitivity of higher ISO settings in order to enable you to use shutter speeds fast enough for hand-held shots without excessive camera shake. You might think you can avoid the noise issue completely when you have a static subject and a tripod-mounted camera by sticking with a lower ISO setting and using a longer shutter speed to get the required exposure. The concept works, up to a point. However, exceptionally slow shutter speeds create their own problems with a different kind of digital noise.
Tip
Photoshop, and many other image editors and viewers, can display the EXIF metadata that most cameras embed in the image files to record the camera settings used to take each image. That includes the ISO setting, so you can use this information to determine which image was shot at which ISO. If you can't view the EXIF data, just remember that the filename with the lowest number corresponds to the highest ISO (assuming that you followed the steps I outlined).
The longer you leave the image sensor powered up and actively recording an image, the more likely it is to develop hot spots — random bright pixels that look like stars in a night sky (see figure 8-13). Hot spots are the result of heat build-up in the image sensor, and the longer the shutter is open and the image sensor under power, the bigger, brighter, and more numerous the hot spots become. Higher ISO settings generate more heat faster, so that tends to make hot spots worse, as does higher ambient operating temperatures.
Note
Figure 8-13 was created by shooting a 20-second time exposure in a darkened room with the lens cap on — essentially shooting total darkness so that only the sensor anomalies were recorded. The resulting hot spots were clearly visible when viewing the dark frame in Photoshop. However, they were too small to survive the translation to the printed page in this book, so I exaggerated the hot spots slightly in hopes of creating a useful illustration.
Tip
If your camera doesn't include an automatic noise reduction feature, you can do the same thing manually by shooting a dark frame at a matching shutter speed and then converting it to an inverse image and combining it with your primary image in your image editor.
Hot spots are seldom much of a problem at shutter speeds of one second or faster. However, as you move into the time exposure realm, hot spots rapidly make their presence known. The severity of the problem varies with ISO setting, ambient temperature, the characteristics of each camera model and the sensor it contains, how much time the sensor has to cool down between shots, and of course, shutter speed. A 15-second exposure with most cameras contains enough hot spots to require a great deal of retouching, especially if the subject contains large solid areas of black or dark colors that provide stark contrast for the bright hot spots. At 30 seconds, a glow may appear at one corner of the image, as if there were a light source at the edge of the frame.
The best way to deal with hot spots is to avoid shooting the long time exposures that produce them, so keep your time exposures as short as possible.
Some cameras have a noise reduction mode that attempts to counteract the effect of hot spots. When activated, the process is usually completely automated, but it goes something like this:
Note
It's easy to see how hot spots could cause problems for astronomers using digital image sensors to photograph the night sky. To avoid the problem, observatories use special image sensors that are chilled to extreme low temperatures to control the heat built-up.
You press the shutter release to shoot the image, which is usually a time exposure. The camera opens the shutter, times the exposure, closes the shutter, and records the image.
After the shutter closes, the camera records a second image of equal duration while the shutter remains closed. This creates a dark frame containing just the hot spots from the sensor, much like figure 8-13.
The camera's built-in image processing software combines the two frames so that the hot spots from the dark frame are reversed and added back to the main image, which cancels out most of the hot spot effect.
The good thing about this feature (if your camera has it) is that it's automatic and it works reasonably well for problems like cleaning up the dark backgrounds in night shots. The bad thing is that it's a time consuming process. If you take a 30-second time exposure, you have to wait while the camera makes a second 30-second exposure before you can do anything else with the camera.
Another difference between film and digital photography is the image processing that occurs in a digital camera. This is one area where film is faster. Here's what happens inside a film camera:
Opening the shutter to expose the film creates an instantaneous chemical reaction between the photosensitive components in the film emulsion and the light energy focused onto it by the lens.
The instant the shutter closes, ending the exposure, the latent image is securely stored on the film. Of course, the film requires chemical processing to develop that latent image, but the development process is a separate operation that is done later. The design of the camera and film cassette protects the film from accidental exposure to light until it can be processed.
To get ready for the next shot, the camera must advance the film to the next frame and re-cock the shutter, but that can be done in a tiny fraction of a second. Consequently, professional film SLRs can attain sequence shooting speeds of about 10 frames per second and maintain that speed through an entire roll of film.
In a digital camera, the process is a little different.
Like a film camera, the exposure starts when the shutter opens allowing light from the lens to strike the camera's image sensor. The reaction between the light energy and the photosensitive surfaces of the sensor is analogous to what happens with film.
That part of the exposure stops when the shutter closes, but that's where the similarity to film stops. In a digital camera, the light energy is converted to electrical energy and then to digital data instead of being chemically stored in the film emulsion.
The camera collects the data from the image sensor and stores it temporarily in the camera's buffer memory. While that is happening, the camera also resets the shutter and other mechanical parts.
The camera's built-in image processing software then goes to work on the image data, applying color correction and other adjustments to the image and converting it into a standard file format for storage. At the same time, the camera usually displays the image on its LCD screen for review by the photographer.
Finally, after the processing is complete, the camera writes the file to removable storage media such as a Compact Flash memory card. The files from modern multi-megapixel cameras are large, so writing the file to storage typically takes several seconds.
All the steps and processing that goes on in a digital camera takes several seconds from start to finish. Fortunately, you don't have to wait for the entire process to be completed before you and your camera can start the next exposure. The camera includes a memory buffer that has room for multiple images, and you start the next exposure as soon as the image data gets transferred from the sensor to that buffer. Still, it takes time, so a digital SLR that can shoot 5 frames per second is considered reasonably fast, and few of them can shoot more than 10 frames at that speed before filling the buffer.
The electrical impulses generated by light striking a digital camera's image sensor start out as meaningless gibberish. The camera's built-in image processing circuitry and software processes the image data and transforms it into a usable digital image. Then the image data is saved in one of several file formats and resolutions.
Some cameras support only one file format (usually JPEG) for all images, but most cameras let you choose one of several formats.
Camera Raw isn't really a single file format. Instead, it's one of several proprietary file formats linked to specific camera manufacturers. In general, each manufacturer creates and maintains its own Raw format, such as the NEF (Nikon), CRW and CR2 (Canon), and ORF (Olympus) formats. Most digital SLRs and higher-end consumer zoom cameras offer the option to save images in Raw format, but each one supports only their own Raw variant with no interplay between them.
Raw files get minimal processing in the camera, preserving as much raw data from the image sensor as possible. Many of the better image sensors record either 12-bit or 16-bit images, which enable them to capture more image information than can be stored in standard 8-bit image formats, such as JPEG. This gives Raw images greater exposure latitude and a much longer tonal scale.
The Raw format provides a way to bypass most automatic in-camera image processing, such as color balance, brightness and contrast, sharpening, and condensing the image into an 8-bit format, and move those operations to a separate program where the photographer has the opportunity to intervene. However, the proprietary nature of Raw files means that they require additional processing with special software to convert them to another format for general use. Each camera manufacturer supplies its own Raw processing software, but the Adobe Camera Raw plug-in for Photoshop, which can read and process Raw files from most of the popular digital cameras, is by far the most popular Raw processing program.
Most Raw file formats feature some form of lossless data compression to achieve smaller file sizes than uncompressed TIFF files without sacrificing image quality or introducing compression artifacts like JPEG compression does. However, the compression isn't as efficient as JPEG, so Raw files tend to be much larger.
Figure 8-14 shows an image saved as a Camera Raw file and then tweaked in Adobe Camera Raw before saving it in another format for publication. This afforded me the opportunity to adjust the color balance slightly instead of accepting the color balance preset that the camera imposed when it made the file conversions that follow.
The TIFF file format usually produces the largest image files of any of the common image file formats due to its lack of compression. For example, the image file used to produce figure 8-15 is roughly twice the size of a JPEG file of the same resolution and about 15 percent larger than a Raw file. Oddly, the TIFF file format is a widely accepted standard that includes provisions for lossless compression, but the compression option isn't normally implemented by the in-camera image processing software. The lack of compression means that there are no JPEG-like compression artifacts or lack of sharpness and detail. However, the in-camera processing does convert to an 8-bit image and applies the camera's preset color balance, contrast, and sharpening adjustments. Notice the difference in color between the TIFF image in figure 8-15, which uses the camera's preset white balance, and the slightly warmer custom color balance of the Raw image in 8-14.
TIFF files were once the high-quality alternative to JPEGs for digital camera images, but that role has been mostly taken over by Raw files. Consequently, TIFF files are not as common as they once were, but the option is still available on a lot of digital cameras.
Most digital cameras offer several different JPEG file format options, giving you a choice of different resolutions and compression settings. The JPEG format is a universal standard for image files, so saving your image as a JPEG file enables you to read, open, edit, print, or share the file with just about anyone anywhere.
Note
DNG (Adobe Digital Negative) is a relatively new Raw file format that isn't tied to a specific camera or sensor manufacturer. DNG is Adobe's attempt to create a universal file format for storing Camera Raw data from a variety of different cameras. Since its introduction, a few camera manufactures have added DNG support to their cameras, but as of this writing, the major players (Nikon and Canon) have not. For now, DNG is supported primarily by Adobe through their popular Photoshop program and its Adobe Camera Raw image processor add-in.
Like TIFF files, JPEGs get the same in-camera processing to convert the camera's raw image data to an 8-bit image and apply the camera's preset color balance, contrast, and sharpening adjustments.
The JPEG format features very efficient compression to minimize file sizes, and the compression ratios are adjustable. Even with minimal compression, the file size of a typical JPEG image file saved from a camera is barely more than half the size of a comparable TIFF file. Smaller file sizes mean you can store many more files on the same size memory card and writing those files to memory is faster.
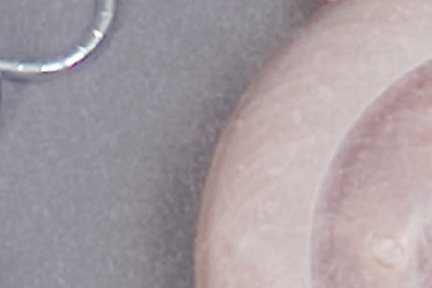
A typical JPEG image file with a minimal compression setting (figure 8-16), shows no obvious loss of quality compared to a comparable TIFF file (figure 8-15) — at least not in the initial file version.
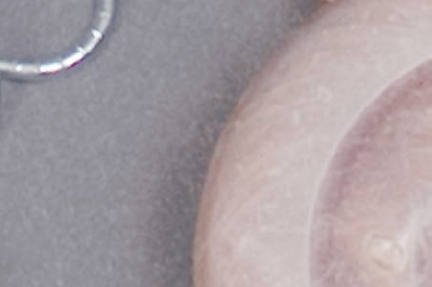
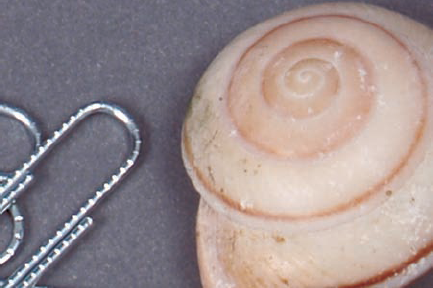
However, the JPEG file compression scheme does degrade image quality as the compression ratios get higher. Figure 8-17 shows an enlarged section of the full JPEG file in figure 8-16. Compare that to figure 8-18, which shows the same section of another JPEG file saved from the camera with slightly higher compression settings. The file size is about a fourth smaller, and the image still looks pretty good although there is a detectable loss of subtle shading in the spirals of the shell.
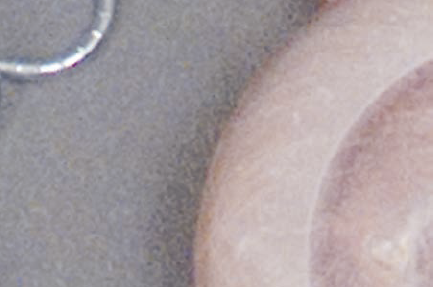
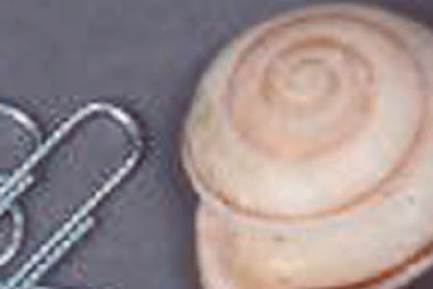
Now compare that to figure 8-19, which shows the same section of a JPEG file saved from the camera at a lower resolution and with a more aggressive compression ratio. All the more subtle textures on the shell are gone and there are ugly compression artifacts visible surrounding the paperclips. Ugh!
Tip
One of the problems with JPEG compression is that the data loss and artifacts are compounded if you open, edit, and resave JPEG files. If you save your digital camera files in the JPEG format and plan to edit them, open the file in your editor and immediately save it in the editor's native file format (PSD for Photoshop) or some other lossless or uncompressed format (such as TIFF). Do your edits on that file and save it. Then you can convert the edited file back to JPEG if you want. By using a lossless file format as an intermediary for your edits, you'll minimize the compression-artifact-compounding effect of resaving directly from the JPEG file.
Which is the best file format for saving digital images in my camera?
There is no one file format that is "best" in all circumstances. All but the very simplest digital cameras give you multiple file format options to choose from. Each file format has its advantages and disadvantages, and you need to select the one that best matches your particular needs.
Use the JPEG format for snapshots, where convenience is more important than the subtleties of the absolute best image quality. JPEG is a universal image file format that you can open, edit, and print with just about any computer software.
Use the JPEG format for maximum working speed. JPEG files are smaller, so the camera can write the files to the storage medium (memory card) faster. This is a significant consideration for cameras that must finish writing one image before you can take the next shot. It's less of an issue for higher-end dSLRs with buffer memory capable of holding several images. However, when that buffer is full, you can't take another picture until the camera clears space in its working memory by writing the image to the storage card. The smaller JPEG files mean that you're less likely to fill the buffer faster than the camera can clear it, and if you do, you won't have to wait as long before you can take the next shot.
Use the JPEG format combined with a lower resolution and higher compression when you need to maximize the number of images you can store on a memory card. The best way to make sure you can shoot lots of images is to have several spare memory cards available. However, if you're caught without a spare and need to maximize the number of images you can fit onto a card, selecting a lower resolution JPEG file format can allow you to keep shooting long after you would have run out of room for larger image files. You can save dozens of compressed JPEG images in the space required for just one Raw image file.
Use your camera's Raw file format for studio shots and other images where the utmost quality and control are essential.
Use the Raw format for difficult lighting situations such as high contrast or high dynamic range lighting. The Raw format retains more exposure data, which gives you more options manipulating the image later.
Use the Raw format for critical color balance control. Instead of having to commit to a white balance setting before you shoot, you can adjust the color after the shot, when you process the Raw file.
Use TIFF if you need to maintain maximum image quality in a standard file format that you can open and use in other programs without first processing the image in dedicated Raw software. TIFF is preferable to JPEG if you plan to open, edit, and resave the image repeatedly.
Use the Raw + JPEG combination (if your camera offers it) to record two image files of each shot. This gives you the convenience of the universal JPEG file format that you can open, view, print, and share anywhere; and also the Raw file if you need to go back to it to fine-tune the color balance or brightness range, or wto generate a higher-resolution version of the JPEG file. This the best of both worlds, but you pay for it with storage space. You're saving two files of each image, so you can't fit as many shots onto a memory card.
Which of the two pictures at the beginning of the chapter is the digital image and which one was shot on film?
If you can't tell the difference, it doesn't really matter. Both images were taken by the same photographer and neither one is significantly better or worse because it was shot on film or digital.
If you really must know, figure 8-2 is the digital image. Figure 8-1 is a scan from a color transparency. Ordinarily, you might expect the film image to have a slight advantage in overall resolution and sharpness. However, in this case, the 12-megapixel digital image from a high-end professional dSLR outperforms the medium-speed 35mm slide film slightly — not that it makes a visible difference after both images go through the four-color book printing process.
