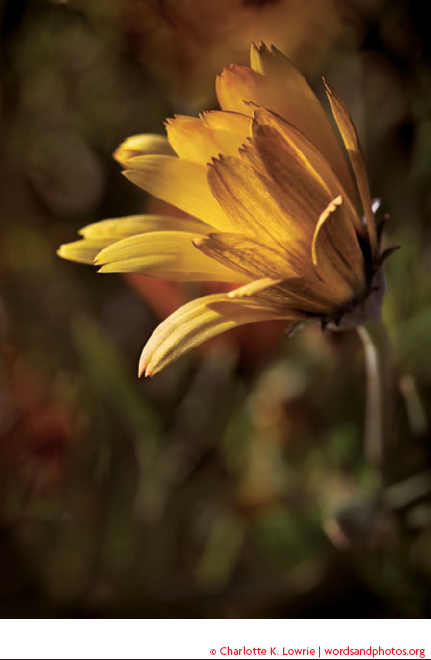
In many situations, the natural light on a subject is beautiful. In figure 9-1, lovely sunset light acted like a spotlight to bring out this blossom's color and texture. To create such a photograph, all you need to do is capture the image with your camera. Of course, you need an eye for good framing, focus, and composition, and you need to make sure you get a good exposure, too. The natural light itself needs no embellishment.
However, natural lighting isn't always available in sufficient quantity and quality to produce the kind of images a photographer envisions. When that's the case, the photographer must go beyond simply adjusting exposure settings to record the image with the camera and take an active role in controlling the light that illuminates the subject. Fortunately, a large assortment of lighting tools is available that enable the photographer to add light to the scene and to modify and manipulate both natural and artificial light to achieve the desired results.
The range of lighting tools available to photographers is as varied as the different lighting approaches that photographers can envision. From the keep-it-simple approach of supplementing window light with an inexpensive reflector panel, to the complex approach of building a lighting scheme from scratch in a studio equipped with multiple strobes, diffusers, gobos, softboxes, and strip lights, the vision of the digital photographer today is limited only by imagination and budget.
In this chapter, you find out how lighting tools can help you achieve the look you want in your images. Although most of the tools are typically found in the context of a photographic studio, many of them are equally useful outside the studio to supplement and enhance the ambient lighting on location.
The options for lighting in the studio open up a world of new and exciting opportunities for photographers. Unlike outdoor and most ambient-light scenes, the studio affords photographers the ability to control light and get predictable and reproducible results, whether shooting table-top and product photography, fashion and glamour, or portraits, such as the one in figure 9-2.
There are two basic categories of photographic lighting: continuous light systems and strobe or flash systems. As the name implies, continuous lights stay on continuously during a shooting session. Strobes, by contrast, emit a brief flash of light when activated. The technology is the same as the built-in flash unit in most cameras, but it's available on a larger scale.
The ultimate choice of system is yours, and it's best to check the latest systems and features at a local or online dealer before making a decision. Some dealers include setups of various lighting systems so that you can test-drive them before buying.
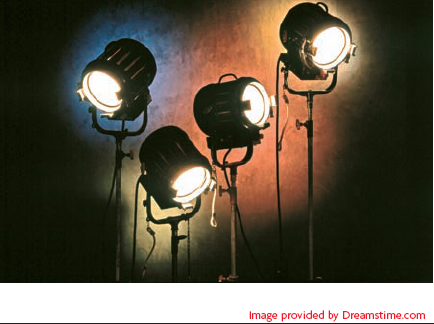
Historically, a lot of photographic lighting equipment (see figure 9-3) was adapted from equipment developed for use in stage lighting, and in the film and television industries where the lights must stay on continuously throughout a scene. Stage, film, television, and still photography share the same need for bright, controllable lights with predictable color, so it's no surprise that some of the equipment is the same. Over the years, several different kinds of lights have been adopted for use in stage, film, and photography, including incandescent lights (called hot lights), fluorescent lights (called cool lights), HMI lights, and even carbon arc lights (which are rarely used in a still photography studio).
As a group, continuous lights have several advantages and disadvantages when compared to strobes:
Because the light stays on continuously at full brightness, there's no difference between the light you see as you set up the shot and the light the camera sees during the exposure. This allows the photographer to make accurate assessments of light and shadow without worrying that the quality of the light might be different during the brief burst of light from a strobe system.
Your camera's onboard reflective meter and automatic exposure systems work normally with continuous lights. Unlike strobe systems, you don't need a separate flash meter or trial-and-error testing to determine the proper exposure.
You can use the same continuous lights for both still photography and film or video. (The momentary flash of light from a strobe is totally unsuitable for lighting several seconds of continuous action for video.)
You cannot conveniently vary the intensity of light output from a given lighting instrument. If you need a brighter light, you must generally switch to another light with a higher wattage bulb. For a dimmer light, you can add an accessory scrim or switch to a lower wattage lamp. In contrast, many strobes allow you to adjust the light output with a simple switch or dial. A few continuous lights have a similar feature, but most do not.
The light output of typical continuous lights tends to be less than that of strobes, so the range of available shooting apertures and shutter speeds is more limited.
It is more difficult to freeze subject motion with continuous light than it is with the brief flash of strobe light.
Continuous lights put a larger drain on the studio electrical system than strobes of comparable light output. The continuous lights must constantly convert electrical power into light, whereas strobe systems require much less electricity to recharge between their brief bursts of bright light.
Hot light systems are the most common form of continuous lights. They typically use incandescent lamps (tungsten or quartz-halogen) that are mostly bigger, brighter versions of common household lighting. Incandescent lights continually convert electrical power into light and heat — hence the term "hot" lights because over time, the lights, as well as the subjects, can become very hot.
Hot lights have been around for a long time, and they come in a wide variety of sizes, shapes, brands, and configurations. They can range from small units that use 100-watt bulbs up to huge 10,000-watt monsters, although 500-watt to 1000-watt bulbs are the typical range in a still photography studio.
Many of the hot light systems are small and light-weight and can be easily transported for location shooting. Some come in kits that offer an economical entry point for photographers who want to set up a small home studio without making a major investment.
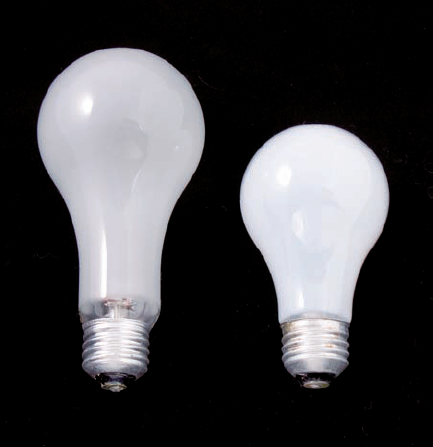
Perhaps the simplest form of hot light is the photoflood (shown in figure 9-4 beside a regular light bulb). As you can see, it looks like an oversized version of a standard household bulb. It will even fit into a standard screw-in lamp socket, (although it's not a good idea to do so because normal household lighting sockets aren't built to withstand the heat generated by the high-wattage photoflood bulbs). Other than size and wattage, the main difference between a photoflood and the bulb in the table lamp beside your couch is that the photoflood is designed to emit light at a standardized color temperature of about 3400 kelvin.
Lights that use photoflood bulbs are usually simple and inexpensive, which makes them popular for low-end starter lighting kits. However, the bulbs themselves tend to be bulky, fragile, and short-lived, so they're not the best choice for serious use where compact size and durability matter.
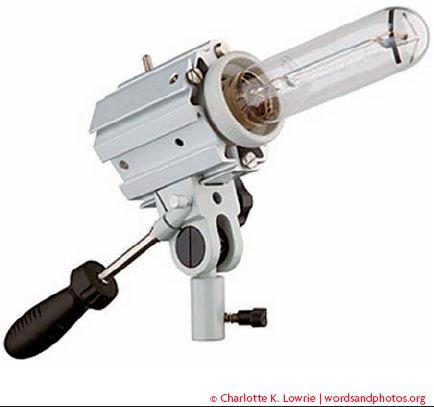
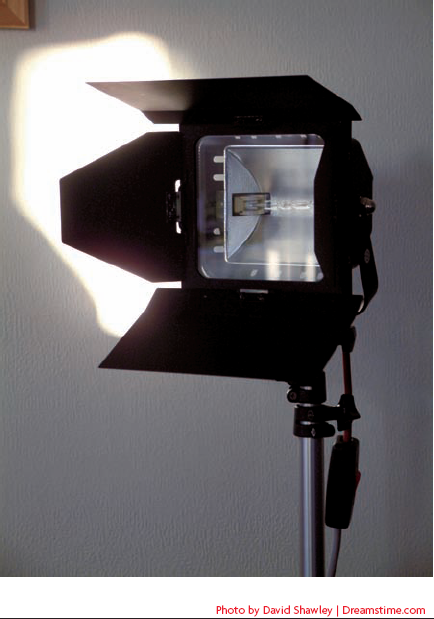
Most photographic hot lights use quartz-halogen bulbs. They're much more compact and durable than photofloods and they're available in higher wattages for higher light output. The lamps come in a variety of sizes and configurations. Some are bulb-shaped, like the one in figure 9-5, and others are tube-shaped, like the one in the light in figure 9-6.
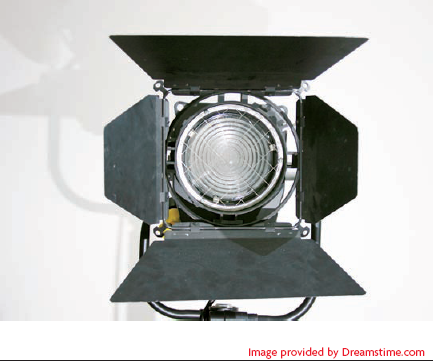
The lighting instruments that contain quartz-halogen bulbs also come in a wide variety of sizes and shapes. A tube-shaped bulb in a wide, shallow reflector, such as the one in figure 9-6 emits light over a wide area, and it's commonly referred to as a broad light. Figure 9-7 shows a different kind of light, called a fresnel (pronounced fur-nell), with a round reflector behind the bulb and a lens composed of concentric circles that help to focus the light into a spot and also soften it slightly.
There are many more different lighting instruments than can be shown on these pages. They go by a variety of names. Some of the names (such as scoop and ellipsoid) describe the shape of the reflector, and other names (such as Mole, Klieg, Omni, Tota, and Red-Head) are manufacturers and brand names that have come to be associated with a particular style of light.
Here are some of the advantages and disadvantages of hot light systems:
Hot lights tend to be more economical than strobe systems for small-scale starter kits. You can get a photoflood-based multi-light outfit that is adequate for lighting a small tabletop or headshot for less than the cost of a single small studio strobe head. However, as you get into bigger lights for more light output, the pricing is much closer.
Hot lights are available in a staggering variety of different configurations, including many specialty lights and accessories that aren't available for strobes. Hot lights benefit from generations of innovation in the stage, film, and video industries as well as their long use in still photography.
Hot lights get hot! This means a potentially less comfortable and safe shooting environment. You also must be careful to ensure that all the reflectors, umbrellas, softboxes, and other light modifiers that you use with hot lights are made from heat-resistant materials to avoid scorching.
Hot lights are the least efficient of the commonly used photographic lights at converting electrical power into light, so they put a larger drain on your electrical system than strobes and other lighting systems of comparable light output. A typical home or office electrical circuit can handle no more than one or two average hot lights. The more powerful lights require high-capacity electrical circuits.
Cool lights are fluorescent lights that are specially color balanced to provide acceptable color rendition for photography and video lighting. They're available in both daylight and tungsten color balance. Photographic fluorescent lights are called cool lights because they are a continuous light source that generates much less heat than hot lights, so the lights, the studio, and the subject all stay much cooler.
Like all fluorescent lights, cool lights use a ballast to create a rapidly pulsed light instead of a true continuously radiant light like a tungsten filament lamp, but the lights are engineered to minimize flicker, so it's not usually a problem.
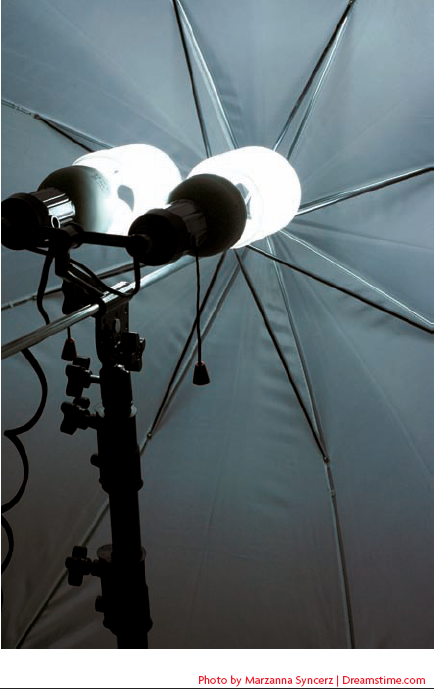
The smallest cool lights are compact fluorescent lamps with a standard Edison screw-in base. Their small size and ability to fit into a standard light socket make them inexpensive and convenient, but they aren't very powerful. Often, two or more lamps must be ganged together as shown in figure 9-8 to create the light output comparable to a small photoflood. Other cool lights are long tubes, like standard office lighting. A large rectangular light containing a bank of several cool light tubes can create a large soft light with a respectable light output.
Here are some of the other advantages and disadvantages of cool lights.
Cool lights are more efficient at converting electricity into light than hot lights, so they consume less power and generate less heat than an incandescent light of comparable light output. In other words, you get about 2.5 times more light per watt of electricity.
Cool lights are light weight and relatively inexpensive, partially because their components don't need to be as heat-resistant or carry as much electrical current as hot lights. They last much longer than incandescent lamps.
Cool lights offer relatively low light intensity compared to other light sources. Therefore, light levels are low and exposure times are long.
Cool lights tend to be very bulky, and they are available in only a relatively limited range of sizes, powers, and configurations.
Hydrargyrum Medium arc Iodide lights are commonly referred to simply as HMI lights. They are high-performance, continuous output lights with daylight color balance that were developed for the film and video industries. HMI lights have two to four times the light output of quartz or tungsten lights of comparable wattage, and generate less heat. They use a transformer and ballast similar to a fluorescent light, and because of that, early HMI lights had a pulsed flicker that created a problem for movie and video cameras at certain speeds and for some digital cameras with high-resolution scanning image sensors. However, newer flicker-free electronic ballasts have pretty much eliminated the problems.
The quality of the light put out by an HMI light is beautiful, but they're very expensive and require long warm-up times to reach full working output. Because of their high cost, you're not likely to see HMI lights in a photography studio. However, you might encounter them on a movie set or in a television studio. If you see a big bright light that looks like artificial sunlight rather than the orange light of a normal incandescent lamp, set your camera for daylight color balance and shoot away. Enjoy the opportunity, and be glad that someone else is footing the bill.
Unlike continuous lights, which radiate light continuously (or in a virtually continuous series of pulses), strobe lights emit a single brilliant flash of light that is synchronized to fire at the exact instant that the camera shutter opens to make the exposure. Everyone is familiar with the small onboard flash that is built into most cameras. Other photographic strobes and flashes are simply variations on that same technology. They range from small, battery-powered flash units that attach to the camera, to slightly larger AC-powered flash units, to large studio strobes such as the one shown in figure 9-9. The larger studio strobes have the power to light whole room sets and accept all sorts of accessories and light modifiers.
Flash and strobe lights store electrical power in a capacitor and then discharge the stored energy into a gas-filled tube to create the flash of light that exposes the image. The flash provides a brief (1/1000 second or faster), predictable, and adjustable burst of light at a predictable color temperature, usually in the range of 5500 to 5600K. The flash tube doesn't waste energy emitting light in between exposures, which makes it very efficient at converting electrical energy into light that is actually used to create an image in the camera. However, it also means that the photographer can't see the light from the flash prior to the exposure.
Because the flash of light from a strobe light must synchronize exactly with the opening of the camera's shutter, there must be an electronic control connection between the camera and the flash. For the camera's built-in flash, the controls are all internal, but an external flash connects to the camera through connections in the camera's hot shoe or through a PC sync cable that plugs into a socket on the camera body or lens.
Here are some of the advantages and disadvantages of flash and strobe lights in general:
Strobe and flash systems are generally much smaller and lighter than continuous lights of comparable light output. You get very high light output from a small package.
The power required to recharge the capacitor between flashes is low enough to allow some flash units to be powered by batteries, and an entire studio strobe system with enough power to light a room set can operate on a single, standard household electrical circuit.
The brief duration of the flash (often 1/2000 second or faster) can effectively freeze subject motion.
The effective light output of a flash or strobe can be varied by adjusting the duration of the flash, and the adjustment doesn't alter the quality or color temperature of the light. This allows studio strobes to be built with variable light output and portable flash units to work with automatic exposure systems.
Strobes stay cool because they flash only for a fraction of a second. When the flash tube fires, it emits heat along with light, but the duration of the flash is so short that there is usually no significant heat buildup. As a result, the lighting equipment and subject stay cool and there is little need to ensure that lighting accessories are heat resistant.
The inability to see the effect of the light prior to the exposure can make it very difficult to work with flash or strobe for critical lighting tasks. Most studio strobes include modeling lights to assist the photographer in previewing the lighting effect, but the modeling lights don't always accurately represent the light of the strobe, and modeling lights aren't available on most portable flash units. As a result, photographers who work with strobe must work to develop their visualization skills from experience with their equipment.
The time required to recharge strobe units between flashes makes them unsuitable for video and also for rapid-fire sequences of still images.
Standard light meters can't measure the short duration of the light from a flash. You need a special flash meter for accurate exposure readings. Because the camera's normal auto-exposure system is based on readings from its built-in reflective light meter, that doesn't work with most flash units either. Although many cameras are capable of automatic exposure control with flash, the feature works only with special dedicated flash units that are engineered to work with the specific camera models.
The need to synchronize the flash with the camera's shutter means that the camera must be connected to the flash via the camera's hot shoe, a cable, or one of several kinds of optical slave or wireless remote control. If the connection is interrupted, the flash doesn't fire and you miss the shot.
Flash units must be synchronized to ensure that the flash fires while the shutter is fully open during an exposure. This can restrict your choice of shutter speeds. Typically, the sync speed is 1/125 or slower, although some camera/flash combinations can sync at faster shutter speeds. Shooting with flash at a higher shutter speed can leave part of the image dark, or unexposed.
The brief, intense flash of light can startle and distract human and animal subjects. It can cause portrait and snapshot subjects to blink, and disrupt wedding ceremonies and other events. A flash can even be dangerous if it momentarily blinds or disorients a subject.
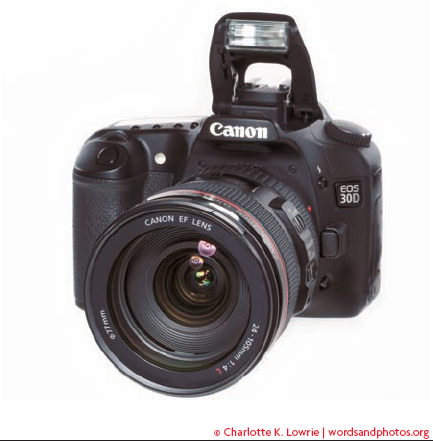
The portable flash unit is one of the handiest of all lighting tools. Whether it's built into the camera body or an accessory flash (hot-shoe mounted or hand-held unit), most portable flash units operate on battery power. In the case of a built-in flash, such as the one pictured in figure 9-10, the flash is powered by the camera battery. Hot-shoe-mounted flash units and hand-held flash units are powered by batteries in the flash unit, or by a separate power pack. Some portable flash units can also operate on AC power to conserve battery power when you're working within range of a wall outlet.
Note
Flash and strobe are two different terms for the same technology. Although the terms can be used interchangeably, most photographers tend to use flash to refer to small, battery-powered, portable flash units such as the camera's built-in flash and accessory flash units that can be mounted on the camera's hot shoe. The term strobe typically refers to larger, more powerful, studio lighting instruments that are normally plugged into a wall outlet for AC power.
Most portable flash units include some sort of automatic exposure control system that adjusts the light output of the flash as needed to achieve proper exposure. The specifics of the exposure control mechanisms vary in the different brands and models of cameras and flash units, but most of them fall within the following general categories:
Built-in flash: The camera's built-in flash is integrated with the camera's own automatic focus and automatic exposure systems, which work together to control the flash output for proper exposure of the primary subject (the one the camera is focused upon). In low light conditions, the camera may fire a series of preflashes that not only helps reduce red-eye in subjects, but also helps the camera determine distance and focusing information. Some camera models offer features such as flash exposure compensation, flash exposure bracketing, and automatic balancing of flash and ambient exposure.
Note
See Chapter 10 for more information on using portable flash and examples of some flash techniques.
Non-Dedicated flash: This is a separate accessory flash unit that is designed to work on a variety of different camera models. It is usually significantly more powerful than the camera's built-in flash, and it typically offers features such as a tilt and swivel head to facilitate bounce flash techniques. The flash unit connects to the camera via the camera's hot shoe or a simple PC sync cable. The flash unit typically contains its own auto exposure system in the form of a sensor that measures the light reflected from the subject and controls exposure by adjusting the duration of the flash. To use this type of flash, you put your camera in manual exposure mode, set the shutter speed to the camera's sync speed, and set the ISO and aperture to match the corresponding settings on the flash unit. The flash unit handles the exposure calculations. Because the camera is in manual exposure mode, this kind of flash is sometimes called a manual flash, although that term seems more appropriate for a flash with no exposure automation.
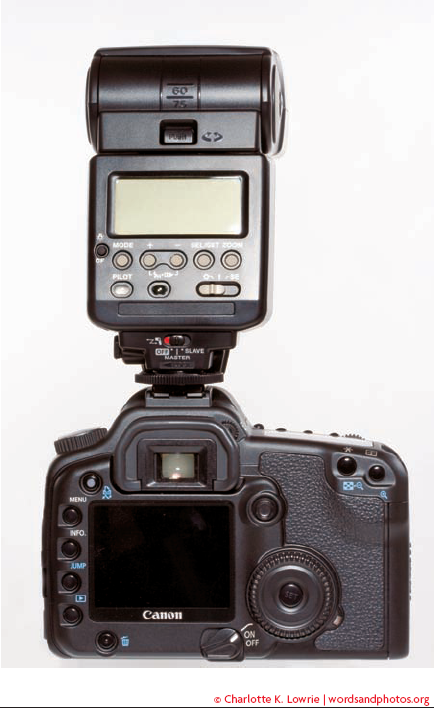
Dedicated flash: These flash units are called dedicated because their design is dedicated to a specific camera brand. In fact, the flash usually carries the same brand name as the camera, although some third-party flash units are available for the most popular camera brands such as Canon and Nikon. Like the non-dedicated flash, it is typically much more powerful than the camera's built-in flash, includes a tilt and swivel head, and may offer additional features such as an auto-focus assist lamp. The flash connects to the camera's hot shoe or a special sync cable that, like the flash itself, is dedicated to the specific camera brand and model. The dedicated flash, such as the one shown in figure 9-11, integrates with the camera's automatic focus and exposure systems much like the built-in flash. In effect, it becomes a more powerful extension of, or replacement for, the built-in flash. A dedicated flash is sometimes called a TTL flash because it links to the camera's Through The Lens (TTL) exposure system.
Flash power for portable flash units is described by a guide number, which was originally developed as a tool to help photographers manually calculate and set flash exposure. The guide number is given in feet (or meters) at a given ISO, usually ISO 100. The higher the guide number, the more powerful the flash. You can use the guide number, along with a little math, to determine the correct aperture to use.
You calculate the exposure by dividing the guide number by the flash-to-subject distance to determine the correct f-stop. For example, if your subject is 20 feet from the flash and the flash unit's guide number is 120 ft. at ISO 100, then the equation would be:
| 120 (guide number) / 20 (distance in feet) = f−6 |
Most flash units today have their own built-in automatic exposure systems, or they connect to the camera's Through The Lens (TTL) metering system, so you won't need to use the guide number to calculate exposures manually. However, the guide number remains a useful reference point for comparing the light output of different flash units and for quickly calculating maximum flash distances.
Built-in and dedicated portable flash units in higher-end cameras often offer an impressive range of features. Methods and naming conventions for these features vary by camera manufacturer, but they include:
Flash exposure compensation. As with exposure compensation, flash exposure compensation allows you to reduce or increase the exposure by setting a negative or positive compensation amount. Generally, the compensation is set in increments of 1/3 stops up to plus/minus 2 stops. This feature allows you to compensate for flash exposure errors due the unusually high or low subject reflectance, adjust flash exposure for creative control, and balance flash and ambient light levels for flash fill when you're shooting in bright light and want to reduce shadows on a subject's face.
Tip
Dedicated flash units should be used only on the specific camera brand(s) and models for which they were designed. The flash unit communicates with the camera through a series of electrical contacts in the hot shoe connector, and different camera manufacturers use different voltages to send signals through the various contacts. A voltage mismatch can cause serious damage to the sensitive electronics in the camera or flash.
Flash exposure lock. This feature allows you to set the flash exposure for a specific object in the frame. Generally, you focus on the area where you want to lock the flash exposure, press and hold a button, which fires a preflash to calculate exposure and retain it in memory. Then you recompose the image and shoot the picture.
Red-eye reduction. One of the most vexing problems with flash photography is the appearance of a red glow in a subject's eyes as the light from the flash reflects off the back of the retina. The problem occurs only when the flash is positioned very close to the lens and the subject's pupils are open wide because of a low ambient light level. The red-eye reduction feature fires a low preflash light that helps to narrow the subject's pupil and thus lessen the occurrence of red pupils in the final image. Although it helps some, the red-eye reduction feature is seldom 100 percent effective. For optimum results, ask the subject to look at the camera during the red-eye reduction flashes. Better yet, increase the separation between the lens and the flash by using an accessory flash instead of the camera's built-in flash.
Remote flash triggering. Some newer portable flash units are designed to work with remote triggering systems that enable you to set up multiple flash units that are fired simultaneously from a central control point at the camera. Some remote triggering systems are simply optical sensors that fire a slave flash when the sensor detects the pulse of light from the master flash unit. Others are wireless remote devices that use infra-red or radio-frequency transmitter/receivers to trigger and control the flash units. Some of the more advanced dedicated flash units can retain a measure of exposure automation control over the remote units. So with a few light stands, an umbrella or two, and multiple flash units, you can simulate studio lighting on location without schlepping around the studio flash heads and power pack.
One interesting segment of the market for flash lighting equipment is the small, low-power AC-powered flash units. A typical example of this kind of flash unit has a screw-in base, just like a household light bulb or a photoflood, and it's compact enough to fit into most of the same light fixtures and sockets. Each flash unit includes a built-in optical slave sensor to fire the flash when it detects the pulse of light from a master flash unit attached to the camera. You can also get versions that you can connect to the camera with a PC sync cord and some self-contained units that don't have to be screwed into a separate light socket.
These AC-powered flash units are quite inexpensive compared to other photographic lighting equipment, so it's not surprising that they form the basis of some low-cost, entry-level lighting kits. You can also purchase the flash units separately and use them as replacements for photoflood bulbs to convert low-end hot light kits to flash. As you might expect of a product of such small size and low cost, AC-powered flash units have a limited feature set, including:
Tip
Flash exposure compensation is ideal when you want to add a small pop of light. Just use a negative flash compensation setting to reduce the flash exposure to the point that it just supplements the ambient light by opening up shadows and adds a sparkle to the eyes.
Many of the units do not include modeling lights, which makes it difficult to anticipate the lighting effect without trial-and-error testing.
Most of them offer relatively low light output. While they're generally a little more powerful than the typical built-in flash unit in a camera, they don't usually match the light output of a middle-of-the-road accessory flash unit, much less a small studio strobe. Still, they offer adequate power for some limited uses.
The light output isn't adjustable and the flash units don't offer any exposure automation. All exposure calculations and adjustments are strictly manual.
Each AC flash is a sealed, self-contained unit. The flash tube and modeling light (if it has one) are not replaceable, so when any component fails, you must replace the entire unit. Given the low cost of each one, that's not too much of a concern.
Despite their low cost, small AC-powered flash units aren't very attractive as a general-purpose primary lighting tool. However, they're handy to have around for specialty applications (such as copy stand lighting, or an ID photo station) and as supplemental lights that you can hide in tight spaces on a room set or architectural interior.
Tip
A sync cord is a small cable that attaches to a socket on the camera body or to the camera's hot shoe and links the camera to the flash unit so that when the shutter is released, the flash fires. A synch cord allows you to take the flash unit off the camera to achieve better lighting effects. The sync cord for a non-dedicated flash is usually just a simple two-conductor wire with a standard PC connector plug on one end and the appropriate plug for the flash on the other. Depending on the brand of flash, the plug might resemble a household electrical plug, a headphone plug, or one of several other configurations. A sync cord for a dedicated flash is more complex with multiple contacts and conductors to carry the various control circuits between the camera and flash.
Tip
Be sure to set your flash to the zoom setting that is appropriate for the lens that you're using. For example, if you're using a wide-angle lens, set the flash to the wide-angle setting if it doesn't automatically detect the lens that's mounted on the camera. If you don't, your images may be bright in the center and dark around the edges of the frame. The flash zoom setting does not affect the intensity or duration of flash, but it does affect the spread of the light from the flash.
Full-fledged studio strobe light systems come in two basic configurations. The traditional workhorse of the photographic studio consists of one or more separate flash heads, connected to a power pack that powers and controls all the heads. The other configuration is called a monolight, which I cover in the next section.
The individual flash heads of a power pack and head strobe system each contain a flash tube and modeling light in a lightweight unit that is easy to position on a light stand. The flash head usually accepts interchangeable reflectors and a variety of accessories such as barn doors, snoots, umbrellas, and softboxes. Each flash head is connected to the power pack by a cable, and the power pack is connected to a wall outlet (or battery pack) for electrical power and to the camera for shutter synchronization.
A typical power pack supports one to four flash heads, although some can handle more. The power pack contains the actual flash generator, plus controls for distributing the power from the power pack among the flash heads and for varying output of the flash and modeling lights. Because the controls for all flash heads are located on the pack, you can easily adjust all the flash heads from a single location.
Power pack and head systems range from around 400 watt/second to 4800 watt/second, and a typical studio strobe system is around 1200 - 2000 watt/second. The power rating is the maximum output from the power pack, and that power is divided among the flash heads. Even after distributing the power to four flash heads, the light output from each head of a typical studio strobe system easily exceeds the output of all but the most powerful portable accessory flash units, and studio strobes usually recycle much faster than battery-powered accessory flash units.
Tip
If your flash pictures have a dark spot at the bottom of the frame, the problem may be an oversized lens. Large lens hoods, super telephoto lenses, very large-aperture lenses, and very wide lenses can all partially obstruct the light from built-in flash units.
The modeling light is another important feature of most studio strobe systems (both power pack and monolight). The modeling light is a relatively low-power continuous light mounted in the flash head along with the flash tube. At 50-150 watts or so, the modeling light isn't bright enough to use as the primary light to make an exposure and it doesn't generate too much heat, but in a dark room, it's enough to allow the photographer to position and aim the flash head and preview the light and shadow it creates on the subject. The better strobe systems control the light output of each modeling light so that it varies in proportion to the light output of the corresponding flash tube. Proportional modeling lights make it much easier to preview and evaluate lighting ratios and other nuances that you can't see with non-proportional modeling lights that show only the light positions.
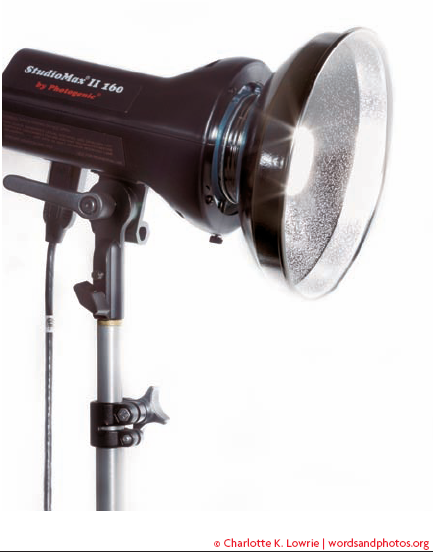
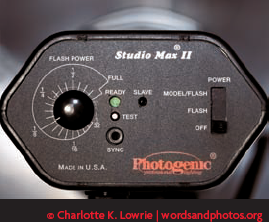
A monolight is a studio strobe system that combines a flash head and power pack in one compact unit. This makes the flash head heavier, but more efficient, since there is no power loss to resistance in a long cable between the flash head and the flash generator, as there is in a power pack and head system. The efficiency of monolights, such as the one shown in figure 9-12, are one of the reasons they are becoming increasingly popular in photographic studios.
Note
The power of studio strobe systems is rated by the electrical capacity of the power pack — measured in watts per second. The rating allows for rough comparisons of different systems, but it does not reflect a measurement of the actual light output of the system, which depends on the efficiency of the flash tube, cabling, and reflectors, among other factors. Although you can safely assume that a 1000-watt/second system will produce more light than a 100-watt/second system; there may be substantial differences in the actual light output from two different 1000-watt/second systems.
The flash head portion of a monolight usually accepts interchangeable reflectors and accessories just like its counterpart in a power pack and head system. In fact, many of the accessories are often interchangeable between monolights and separate flash heads from the same manufacturer.
Because each monolight contains its own power pack, it plugs directly into a power source with a power cord. Like power pack and head systems, most monolights feature controls that enable you to vary the light output of the flash tube and modeling light, but since those controls are located on the head, you need to move around to each light to make adjustments instead of making all the adjustments from one central location.
To avoid having sync cords strung from light to light all over the studio, most monolights include a built-in optical sensor to fire the slave strobe automatically when the sensor detects a pulse of light from the main light. That way, only one monolight needs to be connected to the camera for synchronization with the shutter.
Monolights range in power from under 100 watt/ second to 1500 watt/second or more. Typical units are usually in the range of 300-600 watt/second, but if your needs are modest, you might get by with 160 watt/second units. The total power rating of a set of four typical monolights is roughly comparable to the power rating of a typical power pack and head system that supports four heads.
The range of tools for photographic lighting is impressively broad and potentially overwhelming. However, each tool serves a specific purpose for shaping, modifying, containing, blocking, reflecting, or redirecting light. Some lighting kits include basic tools such as reflectors and umbrellas so that you can begin shooting as soon as you unpack the kit. But over time, you'll want to add other tools to the system to get more precise lighting results.
Most lighting instruments start out with a point source light from a relatively small light bulb or flash tube that emits light in all directions. The way that light is constrained, directed, focused, filtered, or diffused as it travels from the bulb to the subject can harness an inefficient scattering of light and give it the efficiency and punch of a focused spot beam or spread and diffuse it into a soft light that seems to wrap around the subject.
Tip
Many dealers also sell used lighting equipment, and this can mean big savings for you, whether you're buying a whole lighting system or shopping for a used flash head and other components to add to an existing system. Be sure to buy spares. Having a spare flash head for the system is as important as having a backup camera body and lens.
Light shaping starts with construction of the lighting instrument itself and the bowl shaped reflector that helps catch light that would be wasted spilling out to the sides and back of the light head and redirecting it toward the subject. A deep bowl reflector with a shiny interior confines the light to a narrower field than a shallow dish reflector with a white interior. Lenses and mechanisms that adjust the bulb position in the reflector further shape the light in spot lights. There are hundreds of different lighting instruments available, but most photographers work with just a few on a regular basis.
Tip
Perhaps the most-used lighting accessory of all is the basic light stand. It's a simple device — just a collapsible three-leg base supporting a telescoping center pole. It allows you to easily position the lighting instrument attached to the top of the stand. When looking for a light stand, be sure to get one that is heavy enough to support the weight of your lighting instruments and attachments, and make sure the clamps on the center pole are strong and easy to use. Check the diameter (3/8″ or 5/8″) of the stud on the top of the light stand to ensure that it matches the mounting base of your lights.
The simplest of all lighting tools is the reflector. Any surface that reflects light can be used as a reflector, from a polished silver mirror to a simple piece of white foamboard or card stock. Reflectors come in sizes ranging from a few inches to a few feet across and may be composed of rigid panels, semi-rigid foldable panels, or the popular collapsible metal hoops that support stretched fabric reflective surfaces. As if that definition weren't broad enough, many people loosely apply the term reflector to any similarly shaped panel, whether its purpose is to reflect, block, absorb, or diffuse the light. Hence the popular five-in-one "reflector" kit shown in figure 9-13. The collapsible hoop supports transluscent diffuser material, and the reversible zippered cover provides white, silver, and gold reflectors, plus a black absorber panel. Although they all redirect light in some way, their effects and effectiveness are very different from each other.
Silver reflectors: A silver reflector is used to redirect the light from a source in another direction with minimal change in the intensity and quality of the light source itself. A polished mirror surface can maintain essentially the same quality and light intensity as the original light source. The more common silver fabric reflector has a matte surface that scatters the light some, which makes the light a little softer and contributes to a loss of approximately one f-stop of light compared to the original light.
Note
See Chapter 10 for more information on using reflectors, including examples.
Direct sunlight bounced off a silver reflector tends to be too harsh for portraiture and most other subjects, unless you're going for a relatively hard light effect. On the other hand, the efficiency of a silver reflector is perfect for bouncing light from a more diffuse source such as an overcast sky to fill shadow areas of the subject.
Gold reflectors: A gold reflector is essentially the same as a silver reflector except that its golden color tints the reflected light, which adds warmth to the subject. You can use the gold reflector to counteract the excess blue in the reflection of the light from a north sky, or to simulate the golden glow of sunset lighting. The gold color also reduces the intensity of the reflected light slightly compared to a silver reflector. How much depends on how dark the gold color is and how shiny or matte the surface.
White reflectors: Like silver reflectors, white reflectors redirect the main light source. However, unlike the silver reflector, the white reflector has a white matte surface that diffuses any light that strikes it, transforming even a hard point-source light into a soft diffuse light. The white reflector reflects light over its entire surface, so the reflector becomes a secondary light source. White reflectors are much less efficient than silver reflectors — with a loss of approximately two f-stops or more.
White reflectors do a great job of simultaneously softening and subduing a strong harsh light, such as direct sunlight, and making it suitable for a fill light for an outdoor portrait. On the other hand, a white reflector isn't usually efficient enough to function well when reflecting a dull light such as an overcast sky.
Black absorbers: An opaque black panel is the opposite of a reflector. Instead of reflecting light, it absorbs most of the light that strikes its surface. You use it to control unwanted reflections. For example, placing a black panel just outside the frame on the shadow side of a portrait head can significantly reduce the amount of light that's reflected into the shadows — a handy trick when you need to increase the contrast of an image.
Another common use for an opaque black panel is to create portable open shade conditions wherever you want. You can mount the black panel on a light stand, and then position it between the subject and the sun so that it creates a pool of shade for your subject. The effect simulates shooting the subject on a porch or under the overhang of a building. In this case, the black panel functions as a kind of gobo (go-between) commonly called a shade.
Diffusers: A diffuser is a white translucent panel, which looks a lot like a standard white reflector but works very differently. A diffuser is a surface that diffuses and reduces the intensity of light when you place it in the path of the light that is falling on the subject. A diffuser can transform a hard, point-source light, such as direct sunlight, into a soft, diffuse light.
Note
See Chapter 10 for an example of using a diffuser to soften direct sun.
Here is a list and short description of the most common lighting system tools and accessories.
Acetate or gel: A transparent colored sheet that modifies the color of light. Commonly referred to as a gel, which is an abbreviation of gelatin filter. Gels are normally mounted on studio lights using frames that attach to the light and hold the gel a few inches away from the light to reduce problems with overheating. Small gels can be affixed directly to the flash head of accessory flash units.
Barn doors: An adjustable attachment for a light consisting of one or two pairs of hinged black panels that attach to the front of the reflector and can be folded at various angles to control spill. See figure 9-14.
Boom: A horizontal extension arm added to the top of a light stand to allow the light affixed to the end of the boom to be cantilevered out and over a subject or set. A boom arm typically includes a counterweight on the opposite end of the arm and a mechanism to adjust and lock the angle of the boom.
Cookie: Cookie is short for cucoloris. It's a device, usually a perforated metal sheet that attaches to a focusing spotlight to produce a light and shadow pattern, such as leaves, across a subject or background. Cookies are sometimes motorized to create a moving shadow pattern to simulate light passing through snow or rain.
Effects light: Any light that is used to create an effect, such as a hair light in a portrait, rather than light the overall scene.
Flag: A device used to block light and create a shadow or control spill. Flags can be any opaque material, such as foam-core, cardstock, or metal, and are usually black. Flags are frequently rectangular objects that are clamped or taped to a light stand, much like a flag on a flagpole, hence the name.
Gobo: Short for "Go Between," gobo can refer to any of a number of lighting tools that are placed between a light source and the subject to block or control the light. In common usage, gobo refers to a large panel that is placed some distance from the light and contains cutout holes that create an interesting light and shadow pattern in the scene. Gobos often create the effect of light shining through doors, windows, and Venetian blinds, such as the example in figure 9-15.
Honeycomb: A lighting accessory that attaches to the front of the reflector on a light and consists of a grid of hexagonal cells that resemble a honeycomb (see figure 9-16). A honeycomb grid restricts the spread of the light and increases its directionality.
Projection spot: A lighting instrument that features projection optics to create a focused light output. Often used to cast the image of a gobo or cookie onto a background or subject.
Scrim: A device, usually made of wire or fiberglass screening, that attaches to a light like a gel filter to reduce the light intensity with minimal diffusion.
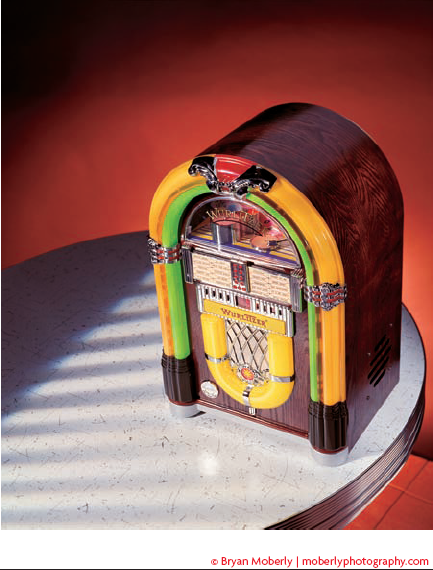
Seamless paper: Long rolls of heavy-weight paper that are used to provide a nonreflective background. The rolls of paper are over eight feet wide and available in white, black, and a variety of colors. By mounting the roll on stands or hanging it from the wall and then unrolling the paper down the wall and across the floor so that it transitions from floor to wall in a smooth curve, you can provide a seamless background look like the background in figure 9-17.
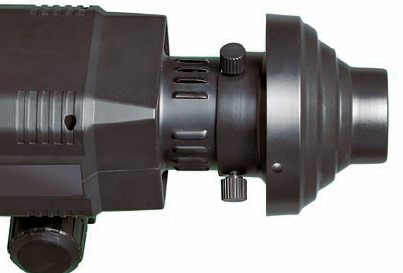
Snoot: A lighting accessory shaped like an inverted cone that attaches to a light in place of the normal reflector and constricts the light into a small spot. See figure 9-18.
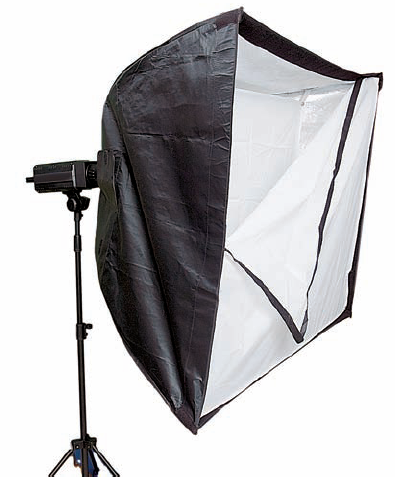
Softbox: A lighting accessory shaped like a large box that has one or more layers of diffusion material and baffles to create a soft lighting effect. (See figure 9-19.) The softbox attaches to the light source like a big reflector that contains layers of diffusion to soften light. Softboxes come in a variety of sizes and shapes and may have white, silver, or gold baffles. They are usually made of heat resistant fabric supported by metal or fiberglass rods in the corners. Like an umbrella, the goal of the softbox is to transform the raw light of a flash head or other light into a soft light. Because the light shines through a softbox instead of bouncing off it indirectly, the light tends to be more directional than the light from an umbrella.
Spill: Light from any source that falls on anything other than the subject at which it is pointed. Spill light can sometimes be useful in filling shadows or backgrounds, but it can also be a problem, creating unwanted reflections and causing lens flare. It can be controlled with flags, barn doors, or gobos.
Spot: A lighting instrument that is capable of confining its light output to a small spot, usually by means of a focusing system with reflectors or lenses or both. In some cases, a light that is fitted with a deep reflector and honeycomb attachment or a snoot can successfully function as a spot.
Strip light: A light with a reflector that is much longer than it is wide, and thus puts out a long, narrow strip of light.
Tent: A lighting technique that surrounds and covers a subject with diffusion material and then lights the subject by shining light through the diffusion material to create a soft, shadowless light. The tent includes an opening through which the camera lens fits. Tents also reduce unwanted reflections from shiny subjects. Figure 9-20 shows an unusual subject posed inside a prefab tent called a lite cube. It's a pop-up tent composed of white fabric stretched on metal hoops, like the collapsible reflectors. Another panel (with a shooting slit for the lens) attaches to the open front when you need a fully enclosed tent.
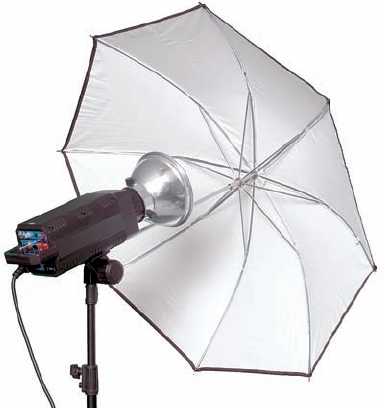
Umbrella: A lighting accessory shaped like an umbrella that mounts on a light so that the light shines into or through the umbrella to spread or diffuse light and create a soft lighting effect.
Note
See Chapter 14 for examples of tent lighting.
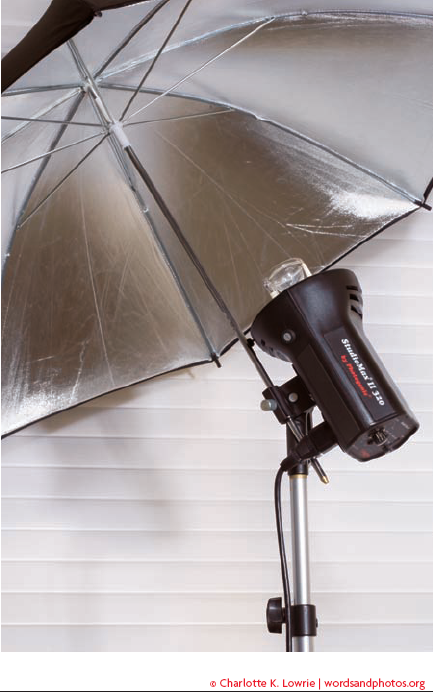
(See figure 9-21.) The umbrella opens and closes with the same mechanism as a rain umbrella. The umbrella shaft attaches to the light so that the light shines into the concave interior of the umbrella. Normally, the light head points away from the subject so that the subject is lit by the light bouncing off the umbrella's inner surface. The umbrella becomes a large, dish-shaped reflector. Umbrellas come in a variety of sizes and may have white, silver, or gold reflective surfaces. Some umbrellas are translucent to allow them to function as diffusers rather than reflectors. Like a softbox, the goal of the umbrella is to transform the raw light of a flash head or other light into a soft light. Because the light bounces off a curved surface in an umbrella instead of shining through a softbox, umbrella light tends to spread out more and be less directional than the light from a softbox.
Lighting tools are all about controlling light, and one of the key things you need to control is how much light reaches the subject — in other words, the brightness of the light. Obviously, you need enough light on the subject to achieve a good exposure, but there's more to it than that. You also need to control relative brightness of different portions of scene — highlights and shadows, modeling to define form, and so on.
Light intensity varies with the distance from the light source. The closer you are to the light source, the brighter the light. Conversely, light intensity falls off as distance from the source increases.
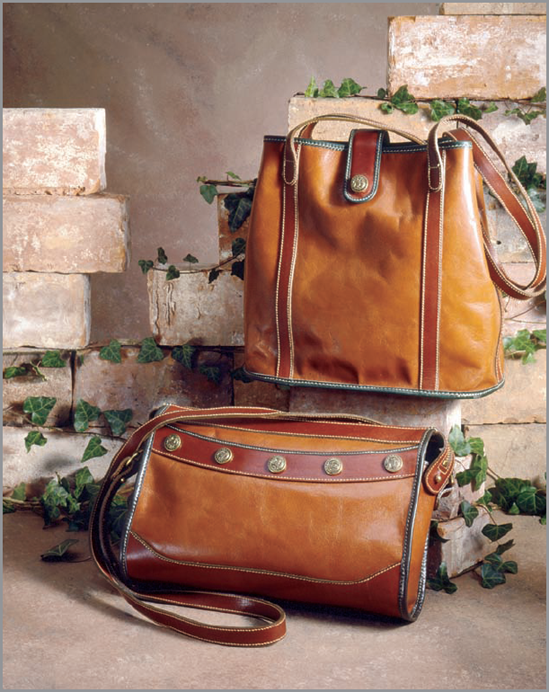
You can see the effect of light falloff over distance in figure 9-22. The mainlight source is just outside the frame on the right, and naturally, the light is brightest on the right side of the bags. The light falls off noticeably across the face of the bags, and the leather gets darker the farther you go to the left.
The phenomenon of light fall as distance from the light source increases happens at a consistent and predictable rate, as explained by a principle of physics called the Inverse Square Law, which states that the intensity of light is inversely proportional to the square of the distance from the source.
So, if you double the distance from the light source, the light intensity is reduced to one-forth (the distance times two is two, two squared is four, and the inverse of four is one-fourth). The same formula works in the opposite direction. If you reduce the distance from the light source by half, the light intensity increases by a factor of four (the distance divided by two is one-half, one-half squared is one-fourth, and the inverse of one-fourth is four).
The diagram in figure 9-23 may help you visualize how this works. Light spreads out as it travels farther from the source. The amount of light energy striking a given square at some distance from the source spreads out to cover four squares at double that distance from the source, which means that each square gets only one fourth of the light energy at the doubled distance.
Have you got all that?
To put it in photographic terms, doubling the distance between the light source and subject reduces the brightness by two stops, and halving the distance between the light source and subject increases the brightness by two stops. In other words, any time you change the light to subject distance by a factor of two, you change the brightness of the light on the subject by two stops.
Of course, if you increase or decrease the distance by some other amount besides double or half, the Inverse Square Law still applies, but the math gets a little more complicated. For example, to make a one-stop change in the light intensity, you change the distance from the source by a factor of 1.4, and so on.
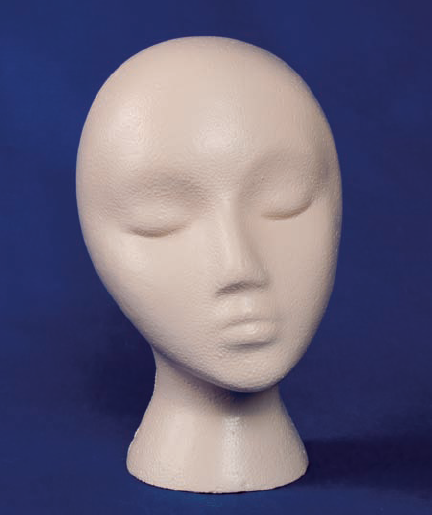
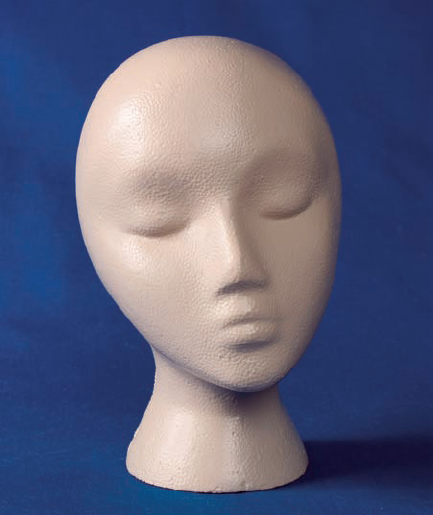
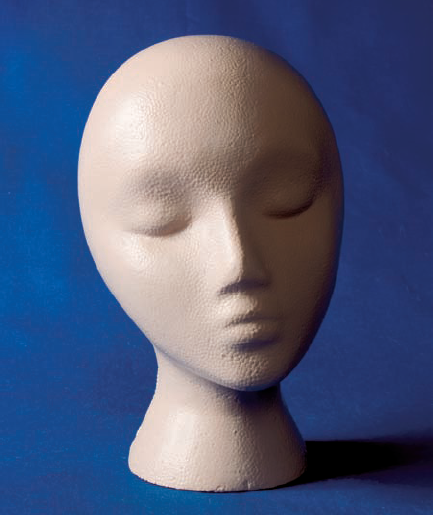
The difference in brightness between the highlights and shadows in a scene or subject is called the light ratio. A high ratio creates greater contrast. The ratio describes in f-stops the difference between highlights and shadows. So doubling the lighting ratio equates to a one-stop change between highlights and shadows. Here are some examples of lighting ratios.
1:1 ratio — A flat lighting where the subject is evenly lit with essentially no dominant shadows. The exposure on both the highlight and shadow sides meter essentially the same. Figure 9-24 shows a test subject with flat lighting. Notice how it lacks much of the modeling that defines the three-dimensional form in the higher light ratio examples that follow.
Tip
Speaking of laws of physics, here's a useful one that helps deal with reflections. Just remember that the angle of incidence equals the angle of reflectance. In plain language, that means that light reflections follow the same rules as a bank shot on a pool table. Light bounces off a surface at an angle that is the exact mirror image on the angle at which it struck that surface. To use this to identify which light is causing a troublesome reflection, stand at the camera position and sight from the camera to the reflection. Note the angle that the reflection left the surface and visualize the mirror image of that angle. That angle points directly at the light that is the source of your problem reflection.
2:1 ratio — There is a one f-stop difference between the highlights and shadows. Shadows are visible but very light. Figure 9-25 shows the test subject lit with a 2:1 ratio. This is the minimum light ratio that shows effective modeling to define the form.
4:1 ratio — The highlights are four times or two f-stops lighter than the shadows. With this ratio, the shadows are dark but still show texture and detail. In figure 9-26, you can see the strong three-dimensional modeling that the 4:1 ratio provides.
8:1 ratio — In this ratio, the highlights are eight times or three f-stops lighter than the shadows. This is a contrasty ratio in which either highlight or shadow detail may be lost. The 8:1 light ratio shown in figure 9-27 starts getting into the realm of excessive contrast. The starkness of the shadows begins to hide, rather than enhance, the form.
Is it true that tungsten, or hot lights, create color temperature problems?
Color temperature has traditionally been a challenge with hot lights. The problem is that their light output and color balance change slightly as the line voltage fluctuates or the lamps age. Also, there's often a noticeable color variation between different types of lamps, such as photofloods compared to quartz-halogen lamps. However, the slight color shifts aren't as much of a problem with digital cameras as they were with film because you can shoot Raw and/or set a custom white balance. Shooting Raw gives you the opportunity to compensate for any color inconsistency during processing, and setting a custom white balance at the beginning of each shooting session offsets any color shift from the nominal standard for tungsten light and ensures that your colors will be accurate and neutral.
How do I decide how many lights or flash heads I need to get started?
You can begin with just a single light and one or more reflectors of various sizes. You can achieve some good results with a one-light setup, but it's limiting, and using a single light effectively actually takes more skill than using multiple lights. Many lighting kits come with two lights, and that is sufficient for the main light and a fill light. I'd say that two lights is a minimum starter kit, with three being preferable. Most standard portrait lighting schemes use four lights (main, fill, hair, background), so that's probably the recommended base inventory of lights.
A specular highlight, sometimes called a hot spot, is a pinpoint reflection of the light source reflected from a shiny surface, such as a chrome car bumper, the rim of a glass, or ripples of water. Specular highlights render as pure white and are not factored into the lighting ratio of the scene.
How do you build a lighting scheme in the studio? Where do you start?
Well, you don't just turn on a bunch of lights and start moving them around randomly until you stumble onto something that works. Instead, you need to build the lighting scheme methodically, one light at a time.
It helps to start by visualizing the finished effect you want to achieve, and then you place each light where it needs to be to contribute to that effect. I usually start by emulating some natural lighting situation that I've observed somewhere, and then I adapt and improve upon that basic lighting situation as needed.
When it comes to placing the individual lights, I usually start with the primary light — the one that will define the shape of the main subject — and then add other lights. The process goes something like this:
Turn on the main light and position it to create the light and shadow pattern that defines the subject's form or other feature that you want to accentuate. Move the light around some to try different angles and effects. With just one light, you'll be able to see the effect of the main light in stark contrast.
Add a fill light to open shadows and reduce overall contrast ratio of the main subject to acceptable levels. More often than not, this means adding a large soft light from near the camera position. Be careful not to overpower the main light.
Add another light (or lights) as needed to fill in the background and illuminate the rest of the scene. Sometimes your fill light will provide all the general illumination you need on the background. Other times you may need one or more separate lights dedicated to lighting the background. As you add background lights, pay attention to any unintended effects they may have on the main subject lighting.
Add accents and details as needed. This is when you add finishing touches such as a hair light or kicker on a portrait.
Refine and adjust the lighting as needed. You may need to adjust one or more of the lights to fine-tune their position slightly, or you may need to bring in some barn doors or flags to knock out a reflection or control some spill.
This is just one approach. Other approaches are equally valid. For example, you might choose to start with the fill light first to establish an overall light level on the set. Then you could add the main light to accent the primary subject and bring it out of the background with a punch of brightness and contrast.
The important thing is to have a plan for developing your lighting scheme and to build the lighting systematically according to that plan.
