
Composing and sending email messages
Sending attachments
Reading and replying to messages
Working with received attachments
Understanding the Inbox display
Outlook's email features are sophisticated and comprehensive. Underneath all that power, however, are the fundamental tasks of composing, sending, and reading messages. These basics are the subject of this chapter.
This section explains the basics of composing and sending email messages.
Outlook provides a lot of flexibility when it comes to creating and formatting email messages. Often, however, all you want to do is to quickly create and send a basic message. Here's how:
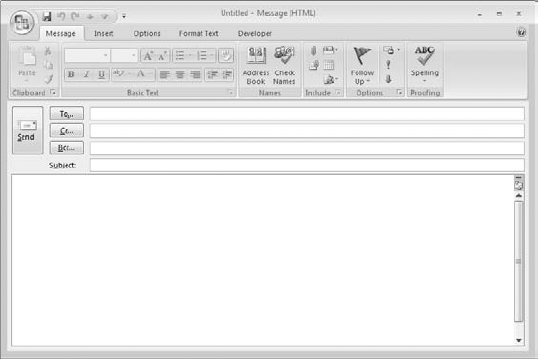
If the Mail pane is displayed, click the New button on the toolbar or press Ctrl+N to create a new, blank email message. If another pane is displayed, click the down arrow to the right of the New button and select Mail Message from the list. The new message appears as shown in Figure 4.1.
Type the recipient's address in the To field, or click the To button and select a recipient from your address book.
Type the message subject in the Subject field.
Type the body of the message in the main section of the message window.
Click the Send button.
That's all there is to it. Depending on Outlook's Send/Receive options, your message will be sent immediately or will be placed in the Outbox to be sent the next time a send/receive is performed. If you want to be sure the message is sent immediately, press F9.
You can also create a new email message using settings other than the defaults by selecting New Mail Message Using from the Actions menu. Then, from the next menu:
To create a message based on stationery, select one of the recently used stationeries that are listed (if any) or select More Stationery to select from all available stationery. Stationery is covered in detail in Chapter 5.
To create a message in a format (HTML, Rich Text, or plain text) other than the default, select the desired format. Message format options are covered in detail in Chapter 5.
An email message can have multiple recipients, and each recipient can be one of three types:
To: The main message recipient(s). Every message must have at least one recipient in the To field.
CC (Carbon Copy): Generally you use CC when a person needs to be aware of the content of the message but is not a primary recipient—that is, does not need to respond or take action. All recipients of a message can see who is in the CC list.
BCC (Blind Carbon Copy): Like CC but the names and email addresses of BCC recipients are not visible to any other recipients of the message.
By default, the reply to address that is part of every email message you send is the reply address that you specified when you set up the email account. There may be situations when you want replies to a message that you send directed to a different email address. To do so:
Click the Direct Replies To button in the More Options section of the Options ribbon. Outlook will open the Message Options dialog box.
Under Delivery Options, make sure the Have Replies Sent To option is checked.
Enter the desired reply address in the adjacent box, or click the Select Names button to choose from your address book.
Click OK.
You can type recipients directly into the To, CC, and BCC fields. To enter more than one recipient in a field, use a semicolon as a separator between addresses.
Outlook's autocomplete feature is by default turned on for all recipient fields. As you start entering an address or name, Outlook displays suggestions based on what you have entered in the past. The suggestions come from a list of names and email addresses that you have entered previously. Outlook will narrow the list as you enter more of the name or address. If the recipient you want is displayed, select it by clicking. You can also highlight it with the up and down arrow keys and press Enter. Otherwise just continue typing in the full name or address.
When Outlook is first installed the autocomplete list is empty so it may seem to not be working. As you continue to use Outlook, however, it will become a useful tool. Names that you use less frequently will move to the bottom of the list and eventually disappear.
Any recipients who are listed in your address book can be added to an email message with a few clicks. If you refer back to Figure 4.1 you can see that the email window has To and CC buttons next to the corresponding fields. If the BCC field is visible it will have an adjacent BCC button. Click any of these buttons to open the Select Names dialog box, shown in Figure 4.2.
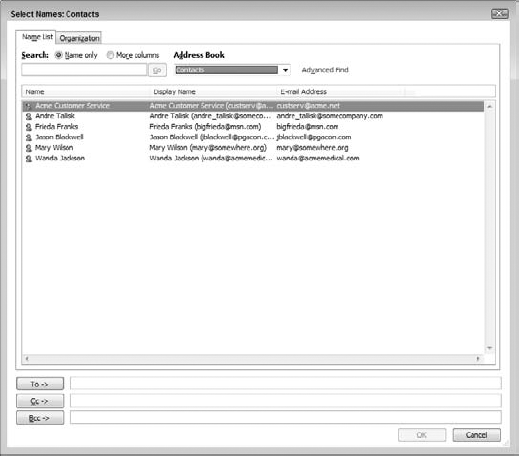
If you have more than one address book you should select it in the Address Book list. The default address book, which is adequate for many Outlook users, is called Contacts. The entries in the selected address book are displayed in an alphabetized list. Then, add recipients to your message as follows:
Select a single recipient by clicking it. Select multiple recipients by holding down Ctrl while clicking.
Add the selected recipient(s) to the To, CC, or BCC field by clicking the corresponding button.
Add the selected recipients to the active field by pressing Enter. The active field is the one corresponding to the button you clicked—To, CC, or BCC—to display the Select Names dialog box.
Add a single recipient to the active field by double-clicking the recipient in the list.
To remove a recipient from the To, CC, or BCC field, click it—the entire name will become highlighted—and press Del.
When you are finished adding recipients, click the OK button to return to the message.
The Select Names dialog box lets you search for recipients by name or other information. Look at the upper-left corner of the Select Names dialog box (refer back to Figure 4.2). If you select the Name option and start typing in the box, Outlook will automatically highlight the first contact in the list that matches what you have typed so far. If there are no matches the highlight moves to the end of the list.
If you select the All Fields option, enter the desired search text in the box and click the Go button. Outlook will display any contacts that have a match in any of their fields, such as Company or Mailing Address. You learn about Outlook contacts and the various kinds of information that can be stored in Chapter 10.
An attachment is a file that you send along with an email message. When the recipient receives the message he or she can save the file to disk and open it. Attachments can be a very useful way to pass documents around—whether it's sending photos of the kids to other family members or distributing a Word document to your colleagues for review.
There are several concerns with attachments that you need to be aware of. One has to do with file size. Most email accounts limit the size of attachments that can accompany an email message. The limit varies between different accounts but 10MB is a common figure. Even if your account allows you to send large attachments, the recipient's account may not allow them to receive them.
The other concern I will mention has to do with security. Certain types of files have the potential to harm your computer by introducing a virus or by other means. Outlook and other email client programs block potentially harmful attachments based on the filename extension, which indicates the type of file. For example, executable program files use the .EXE extension and these are blocked by Outlook.
One approach to dealing with both of these concerns is to use a file archiving utility to compress your files into a ZIP or other kind of archive. This not only reduces the file size but also hides the extensions of files that might be blocked on the receiving end.
What kinds of files can you send and receive as attachments? Any image file is okay, including those with the .JPG, .GIF, .PNG, and .TIF extensions. So are text files (.TXT extension), XML files (.XML extension), and most Microsoft Office documents: Word (.DOC and .DOCX extensions), Excel (.XLS and .XLSX extensions), and PowerPoint (.PPT and .PPTX extensions). ZIP archives (.ZIP extension) are okay too.
You may want to review the section on attachment security in Chapter 20 if you will be sending and/or receiving a lot of attachments. The remainder of this section shows you how to add attachments to a message.
When you are composing an email message, you attach a file as follows:
If necessary, click the Message tab to display the Message ribbon.
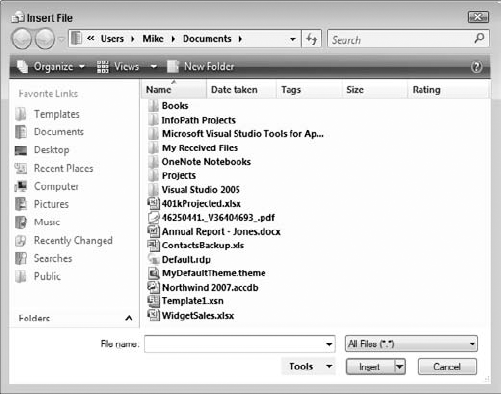
Click the Attach File button (with a paper clip icon). Outlook opens the Insert File dialog box as shown in Figure 4.3. The initial display is the files in your My Documents folder.
If necessary, use the dialog box to navigate to the folder containing the file.
Click the name of the file to attach. To attach multiple files from the same folder, hold down the Ctrl key while clicking.
Click the Insert button.
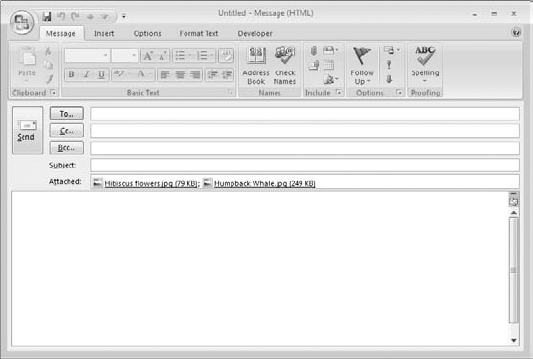
Once you have attached one or more files, the message will display an Attached line in the header, as shown in Figure 4.4. The attached files are listed here along with the file size. If you change your mind and want to remove a file, click its name in the Attached box and press Delete.
If you have started to compose a message and decide to complete it later, you can save a copy in the Drafts folder by clicking the Save icon—it looks like a diskette—on the Quick Access toolbar at the top left of the message window. You can also select Save from the menu that is displayed by clicking the Office button (the round icon in the top-left corner of the message window).
When you are ready to continue working on the message, open the Drafts folder by clicking it in the navigation pane, then double-click the message to open it. You can now complete and send the message as usual.
By default, Outlook saves copies of open items, including messages you are composing, every three minutes.
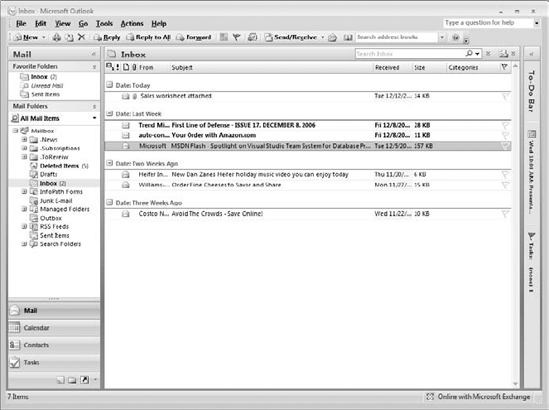
When Outlook receives an email message it is placed in your Inbox folder, as shown in Figure 4.5. By default, messages are sorted by the time and date they were received. You can see that the sender, the subject, the time/date received, and the message size are displayed. Please also note the following:
A message that you have not yet read is displayed in bold type with a closed envelope icon—for example, the top message in the figure. A message that has been read is displayed in normal type with an open envelope icon—the bottom message in the figure.
If the message includes one or more attachments, a paper clip icon is displayed.
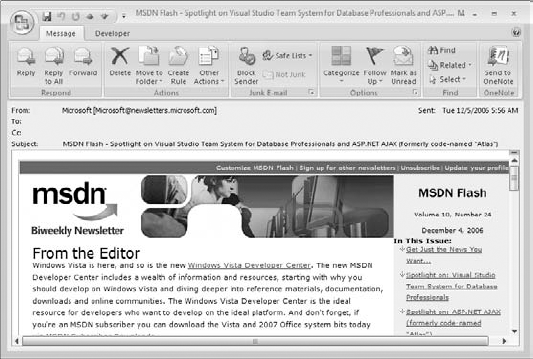
To read a message, double-click it in the Inbox. The message will open in its own window, as shown in Figure 4.6.
While you have an email message open, you can carry out the following actions:
Print the message by clicking the Print button on the Quick Access toolbar.
Close the message and delete it by clicking the Delete button on the ribbon. Outlook moves the message to the Deleted Items folder.
Close the message without deleting it by clicking the X icon at the right end of the title bar.
Other actions that you can take with an email message are covered later in this chapter.
You can also move the message from the Inbox to another folder. This is useful when you want to organize received email messages. You learn more about working with Outlook folders in Chapter 18. The basic steps for moving an open message are as follows:
Click the Move to Folder button on the message window ribbon.
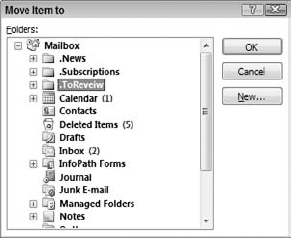
Select Other Folder from the menu. Outlook displays the Move Item To dialog box as shown in Figure 4.7.
Click the destination folder. Or, to create a new folder, click the New button. Details on creating a new folder are presented next.
Click OK. The message is closed and moved to the specified folder.
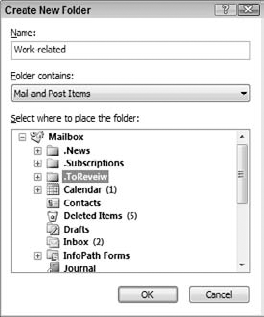
When you are moving an email message to another folder, you are given the opportunity to create a new folder. When you click the New button in the Move Item To dialog box, Outlook opens the Create New Folder dialog box, shown in Figure 4.8. Then:
Enter the name for the new folder in the Name box.
Make sure that Mail and Post Items is selected in the Folder Contains list.
Click the location for the new folder in the list. The new folder will be created as a sub-folder to the item you select here.
Click OK to close the dialog box and return to the Move Item To dialog box. The new folder will be selected in the list.
Click OK to complete moving the mail message.
Messages that have not been read are displayed in bold font and with a closed envelope icon. When you open a message it is marked as read and will be displayed in normal font with an open envelope icon. You can control how a message is flagged. Perhaps you opened a message and then were called away—you might want to mark it as unread so you will be sure to look at it again later.
If the message is open, simply click the Mark as Unread button on the ribbon. If no message is open you can select a message in the Inbox (or whatever mail folder you are in) and then:
Select Edit, Mark as Read to mark the message as read.
Select Edit, Mark as Unread to mark the message as unread.
Select Edit, Mark All as Read to mark all messages in the folder as read.
Outlook's reading pane lets you view the contents of a message without opening it. When the reading pane is displayed, it shows the contents of whatever message is selected in the Inbox (or whatever other mail folder you are working in). This is shown in Figure 4.9.
The reading pane can be displayed at the bottom of the screen or along the right edge. To control the display of the reading pane, select View, Reading Pane and then select Right, Bottom, or Off.
Normally, viewing a message in the reading pane will not mark it as read—this requires opening the message. However, you can tell Outlook to mark messages as read when they are viewed in the reading pane as follows:
Select Options from the Tools menu to open the Options dialog box.
Click the Other tab.
Click the Reading Pane button to open the Reading Pane dialog box.
Put a check in the box next to the Mark Items as Read When Viewed in Reading Pane option.
Click OK twice to close all dialog boxes.
When you are viewing a message that you have received, there are several other actions you can take with the message. Each of these actions corresponds to a button on the Message ribbon:
Create Rule: Lets you create a rule for handling similar messages. Rules are covered in Chapter 9.
Block Sender: Adds the message sender to your Blocked Senders list and moves the message to the Junk E-mail folder. You'll find more details on dealing with junk email in Chapter 8.
Safe Lists: Adds the sender or the sender's domain to your safe list. See Chapter 8 for more details.
Categorize: Assign the message to an Outlook category. See Chapter 17 for more information on using categories.
Follow Up: Flag the message for follow-up and/or create a reminder associated with the message.
Related: Find other messages from the same sender or that are related by subject or content.
Replying to and forwarding messages are two very useful things you can do with email using Outlook. When a mail message is open you have three buttons in the Respond section of the ribbon:
Reply: Creates a new message addressed to the person who sent you the original message. The new message contains the entire original message, and the subject of the new message is "Re:" followed by the subject of the original message.
Reply to All: Same as Reply except the new message is also addressed to any other people the original message was sent to.
Forward: Creates a new, unaddressed message. The new message quotes the entire original message and the subject is "FW:" followed by the subject of the original message.
At this point the new message is ready for editing. You can add your own text to the body of the message, add or remove recipients (you must add at least one recipient when forwarding), add attachments, and so on. When you're finished, click Send.
Another message forwarding option is to select Forward As Attachment from the Actions menu. A new email message is created with the original message attached as a separate file rather than being inserted into the body of the new message.
Outlook lets you save attachments to disk and also lets you view attachments without opening them in their native application. The viewing option is available for many attachment types, including most image files, Word documents, and Excel workbooks.
When a received message includes one or more attachments, it will have a small paper clip icon displayed in the Inbox. There are two ways to save attachments. The first method lets you save attachments without opening the message:
Select the message in the Inbox (or whatever mail folder you are working in).
Select File, Save Attachments from the menu.
On the next menu, select the attachment to save. Outlook opens the Save Attachment dialog box.
Navigate to the folder where you want the attachment saved.
Edit the attachment filename, if desired. Warning: do not change the extension!
Click Save.
Repeat these steps, if necessary, for other attachments.
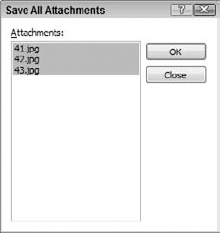
If the message has more than one attachment, the menu that Outlook displays in step 3 also has a Save All Attachments command. Selecting this command opens the Save All Attachments dialog box, as shown in Figure 4.10. Note that all attachments are listed and selected. Then:
If you want to save just some of the attachments, select them by clicking and Ctrl+Clicking (to select more than one individual attachment) or Shift+Clicking (to select a group of adjacent attachments).
Click OK. Outlook displays the Save All Attachments dialog box.
Select the folder to save the attachments in. You cannot edit attachment names—they will be saved under their original names.
Click OK.
The other way to save attachments can be used when the message is open or displayed in the reading pane:
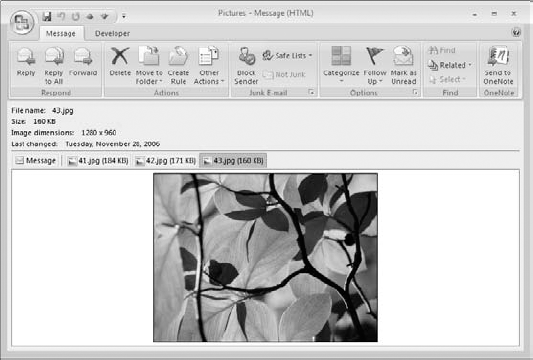
When a message that you receive includes one or more attachments, they will be listed below the message head (both in the reading pane and when the message is open). You'll also see a Message button next to the attachment names.
Click an attachment name to view the attachment.
Click the Message button to return to the message.
Figure 4.11 shows these elements along with an attachment that is being viewed.
Opening an attachment in its native application is usually done by saving the attachment to disk, as described earlier, and then starting the application and opening the file as usual. You can, however, open an attachment directly from Outlook by following these steps:
Open the message or display it in the reading pane.
Right-click the attachment name.
Select Open from the context menu.
Depending on the file type, Outlook may display a warning dialog box asking whether you want to open or save the file. Click Open.
The attachment will be opened in its native application.
The reason for the cautionary dialog box in step 3 is security. Some kinds of files, such as Word documents and Excel workbooks, have the potential to contain malicious macro code that could harm your system. This code is harmless unless the file is opened, so you may want to save it to disk first and run a virus scan before opening it.
If you do open an attachment this way, you can work with it in the application as you normally would, including saving to disk.
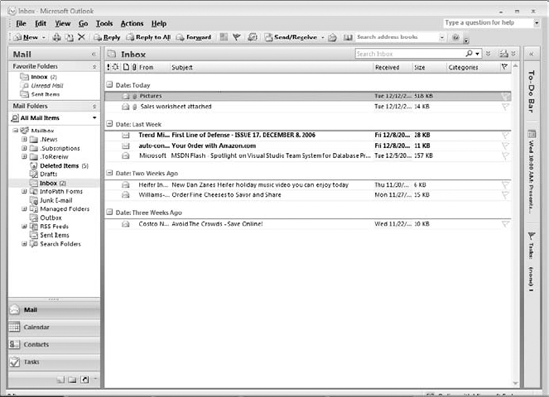
The Inbox, or any other Outlook folder that contains email messages, provides you with a lot of information about the messages it contains. The display is arranged in columns, or fields, with each field identified at the top of the display. You can customize this display by adding, removing, and rearranging columns. That topic is discussed in Chapter 19. For now it's important for you to understand the meaning of the fields in the default Inbox display. They are, from left to right in the default display (see Figure 4.12), as follows:
Importance (exclamation point icon): A red exclamation point is displayed in this field if the sender marked the message as having high importance. Nothing is displayed for normal importance.
Reminder (bell icon): A bell is displayed in this field if the message has been associated with a reminder.
Read (page icon): Displays a closed or open envelope for unread and read messages, respectively. Also displays various icons for special messages such as alerts and meeting requests.
Attachment (paper clip icon): Displays a paper clip icon if the message includes one or more attachments.
From: The name or email address of the message sender.
Subject: The message subject.
Received: The time and date the message was received.
Size: The size of the message and any attachments.
Categories: If the message has been assigned to a category, the category name and icon are displayed here.
Follow-up (flag icon): Displays a flag indicating the follow-up status of the message. A clear flag indicates no follow-up status. Various colored flags indicate other follow-up statuses such as due tomorrow or due next week. A checkmark indicates complete.
You can sort the messages in the Inbox by any of the fields that are displayed. Simply click the field heading to sort by that field in ascending order; click a second time to sort in descending order. If the field heading is wide enough it will display an upward or downward pointing arrow to show you that the messages are sorted by that field in ascending or descending order, respectively. For example, in Figure 4.12 you can see that the messages are sorted by the Received field in descending order.
This chapter explained the fundamentals of sending and receiving email messages. It also covered sending attachments and dealing with attachments that you receive. Finally, it provided a quick overview of the Inbox display.
There's a lot more to email, more options and flexibility that give you complete control over your messaging. These are covered in Chapter 5.