
JavaScript can add rich interactivity to any web page, interactivity that once was available only with conventional applications. For example, take a look at your computer's desktop. Chances are you have one icon that you can click and drag to anywhere you want. That's a level of interactivity that users want, and it would be impossible to supply that interactivity on a web page without JavaScript or plugins like Flash, Silverlight, and so on.
In this lesson, you learn how to:
You then apply this information by writing a drag-and-drop script.
For drag-and-drop, the most important piece of information you need is the mouse pointer's coordinates. But you actually need this information represented in two different ways. First you need to know the mouse pointer's coordinates in relation to the page; without them you don't know where to drag the item to.
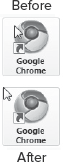
You also need to know the mouse pointer's position in relation to the HTML element you want to drag. This is important because you want to maintain the mouse pointer's position on the element while you drag it to a new location. Without this information, clicking and dragging an element would result in the element's top left corner snapping to the mouse pointer, as shown in Figure 24-1.
Let's start by getting the mouse pointer's location in relation to the page.
To get this information, look once again to the event object in both the standards and Internet Explorer (IE) event models. Thankfully, both event models are in lockstep when it comes to this type of information. You won't have to expand the functionality of the eventUtility object at all, as the properties have the same names and uses.
There are actually two sets of coordinates relating to the mouse pointer that you can retrieve from an event object. The first set is the pointer's location in relation to the entire screen. You get this information by using the screenX and screenY properties, like this:
eventUtility.addEvent(document, "click", function(event) {
alert("X Coordinate is: " + event.screenX); // pointer's
horizontal position
alert("Y Coordinate is: " + event.screenY); // pointer's vertical
position
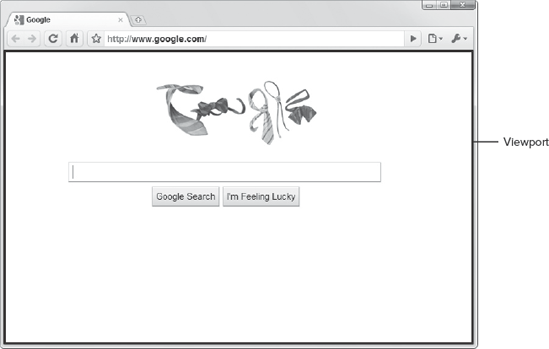
});This information can be useful, but it isn't suited well for drag-and-drop. The screen is a fixed size, so regardless of where your mouse moves on the screen, you're limited to only the dimensions of the screen when using screenX and screenY. Most of all, the screenX and screenY coordinates are in relation to the entire screen, which isn't information you want. A better solution is to use a set of coordinates that are in relation to the client area, the part of the window that displays the document (also called the viewport). Figure 24-2 outlines this area.
You can get this information by using the clientX and clientY properties, like this:
eventUtility.addEvent(document, "click", function(event) {
    alert("X Coordinate is: " + event.clientX); // pointer's horizontal
position
    alert("Y Coordinate is: " + event.clientY); // pointer's vertical
position
});
Like the screen coordinate system, the client coordinate system is a fixed size (the size of the viewport). For example, clicking the top-left corner of the viewport always results in a clientX value of 0 — regardless of whether the page is horizontally scrolled. The clientX and clientY coordinates are in relation to the viewport, not the document, but you can obtain two more pieces of information to combine with the client coordinates to accurately get the pointer's position: the document.body.scrollTop and document.body.scrollLeft properties.
The scrollTop and scrollLeft are properties of all element objects, and they get the vertical or horizontal position of the scrollbar for the element. When used on the body object, these properties return the amount of pixels the scrollbars have been scrolled. When the scrollbar is at the top (or to the left for horizontal scrollbars), the position is 0.
To get the mouse pointer's accurate position in the document, you combine the client coordinates with the body's scroll positions, like this:
var x = event.clientX + document.body.scrollLeft;
var y = event.clientY + document.body.scrollTop;
Every element has a set of properties that allow you to get position and size information for that element. They aren't part of any W3C standard, but every major browser has implemented them since they were first introduced in IE4. They are:
offsetLeft: Gets the left position of an element relative to its nearest positioned ancestor.offsetTop: Gets the top position of an element relative to its nearest positioned ancestor.offsetWidth: Gets the width of an element relative to its nearest positioned ancestor. The value returned by this property also includes the element's padding, margin, and border width.offsetHeight: Gets the height of an element relative to its nearest positioned ancestor. The value returned by this property also includes the element's padding, margin, and border width.
These four properties are extremely helpful when you need to know the position and dimensions of an element as it is rendered by the browser. For the purposes of drag-and-drop the only properties you'll need to look at are offsetLeft and offsetTop.
To find the mouse pointer's coordinates in relation to an element, you use the element's offsetLeft and offsetTop properties and then subtract the event object's clientX and clientY properties, like this:
eventUtility.addEvent(document, "click", function(event) {
    var eSrc = eventUtility.getTarget(event);
    var x = event.clientX + document.body.scrollLeft;
    var y = event.clientY + document.body.scrollTop;

    var relativeX = eSrc.offsetLeft - x;
    var relativeY = eSrc.offsetTop - y;
});
In this code, the eventUtility object gets the event target by using the getTarget() method and assigning the returned value to eSrc. Then two variables, relativeX and relativeY, are created and assigned their respective values by the offset coordinates' being calculated with the mouse pointer's coordinates. Again, these relative coordinates are important because it is necessary for accurately emulating the behavior users are accustomed to seeing in their operating systems.
With these two sets of coordinates, you are well on your way to having all the pieces to writing a drag-and-drop script. There's just one more piece to the puzzle: events.
Drag-and-drop is a series of operations governed completely and totally by the mouse. The user clicks an item and moves the mouse while keeping the mouse button pressed. When the mouse button is released, the item is "dropped" at the mouse pointer's location. To make drag-and-drop work on a web page you have to handle at least three mouse-related events:
mousedown: Fires when the mouse button is pressed while the mouse pointer is over an object.mouseup: Fires when the mouse button is released while the mouse pointer is over an object.mousemove: Fires when the mouse pointer is moved over an object.
The mousedown event initiates the drag process, the mousemove event is used to move the element in sync with the mouse pointer (dragging), and the mouseup event ends the drag process and drops the element at the pointer's location.
So let's put all this knowledge to work and try it out.
In this lesson, you learn about the event object's clientX and clientY properties and an element's offsetLeft and offsetTop properties. In this section you learn how to use them in creating a drag-and-drop script.
For this lesson, you need a text editor; any plain text editor will do. For Microsoft Windows users, Notepad is available by default on your system or you can download Microsoft's free Visual Web Developer Express (www.microsoft.com/express/web/) or Web Matrix (www.asp.net/webmatrix/). Mac OS X users can use TextMate, which comes as part of OS X, or download a trial for Coda (www.panic.com/coda/). Linux users can use the built-in VIM.
You also need a modern web browser. Choose any of the following:
Internet Explorer 8+
Google Chrome
Firefox 3.5+
Apple Safari 4+
Opera 10+
Create a subfolder called Lesson24 in the JS24Hour folder you created in Lesson 1. Store the files you create in this lesson in the Lesson24 folder.
Start by typing the following HTML:
<html>
<head>
    <title>Lesson 24: Example 01</title>
    <style type="text/css">
    .draggable {
        position: absolute;
        cursor: move;
    }

    .box {
        width: 100px;
        height: 100px;
    }

    .navy {
        background-color: navy;
    }

    .green {
        background-color: Green;
    }
    </style>
</head>
<body>
<div class="navy box draggable"></div>
<div class="green box draggable"></div> <script type="text/javascript" src="eventutility.js"></script> <script type="text/javascript"> </script> </body> </html>
This is the basis of your web page. It has a style sheet containing four CSS classes:
draggable,box,navy, andgreen.The
draggableclass sets the element's position toabsolute, making it possible for an element with this class to be moved anywhere in the page. It also changes the mouse pointer to the move symbol. This is a visual cue for the user so that she knows the element is movable. This class is used to make an element draggable. The JavaScript you write will determine whether the element uses this class, and the user will be able to drag it to anywhere on the page.The
boxclass is purely for presentation. When applied to an element, it renders the element as a square with 100-pixel sides.The
navyandgreenclasses, too, are purely for presentation. They change the element's background color to navy and green, respectively.In the
<body/>of the page are two<div/>elements. The first uses thenavy,box, anddraggableclasses to render the element as a navy box with an absolute position. The second uses thegreen,box, anddraggableclasses.Now you want to add some JavaScript. The first little bit is the
mouseHandler()function, which you use to handle a variety of events. The new code is in bold:<html> <head> <title>Lesson 24: Example 01</title> <style type="text/css"> .draggable { position: absolute; cursor: move; } .box { width: 100px; height: 100px; } .navy { background-color: navy; } .green { background-color: Green; }</style> </head> <body> <div class="navy box draggable"></div> <div class="green box draggable"></div> <script type="text/javascript" src="eventutility.js"></script> <script type="text/javascript">
function mouseHandler(event) {var eSrc = eventUtility.getTarget(event);var type = event.type;var x = event.clientX + document.body.scrollLeft;var y = event.clientY + document.body.scrollTop;switch (type) {case "mousedown":if (eSrc.className.indexOf("draggable") > −1) {}break;case "mouseup":break;case "mousemove":break;}}eventUtility.addEvent(document, "mousedown", mouseHandler);eventUtility.addEvent(document, "mouseup", mouseHandler);eventUtility.addEvent(document, "mousemove", mouseHandler);</script> </body> </html>With this code, some of the pieces start coming together. Event handlers for the
mousedown,mouseup, andmousemoveevents are set up for the document object, and themouseHandler()function handles all three events.The first statement in the function creates four variables. The first is
eSrc, the event target. Next istype, the event type. Next are thexandyvariables to contain the mouse pointer's coordinates.Because this function handles multiple events, you need to determine what event took place. A
switchstatement uses the event type, and acaseblock is written for each of the three events.When the user causes a
mousedownevent to fire, you use theindexOf()string method to determine if the target has a CSS class ofdraggable. You want to drag only those elements with this CSS class, so all the code to initiate the drag-and-drop sequence will be placed inside theifcode block.To facilitate the drag-and-drop process, create an object outside the
mouseHandler()function calleddragObj. Its responsibility is to initialize the element for dragging, as well as to contain information regarding the state of the dragging process. Add the following code:<html> <head> <title>Lesson 24: Example 01</title> <style type="text/css"> .draggable { position: absolute; cursor: move; } .box { width: 100px; height: 100px; } .navy { background-color: navy; } .green { background-color: Green; } </style> </head> <body> <div class="navy box draggable"></div> <div class="green box draggable"></div> <script type="text/javascript" src="eventutility.js"></script> <script type="text/javascript">var dragObj = {setDragObj : function(el, mouseX, mouseY) {this.el = el;this.relativeLeft = el.offsetLeft - mouseX;this.relativeTop = el.offsetTop - mouseY;},dragTo : function(x, y) {this.el.style.left = x + this.relativeLeft + "px";this.el.style.top = y + this.relativeTop + "px";},dragging : false,el : null,relativeTop : 0,relativeLeft : 0};function mouseHandler(event) { var eSrc = eventUtility.getTarget(event); var type = event.type; var x = event.clientX + document.body.scrollLeft; var y = event.clientY + document.body.scrollTop; switch (type) { case "mousedown": if (eSrc.className.indexOf("draggable") > −1) { } break; case "mouseup": break; case "mousemove": break; } } eventUtility.addEvent(document, "mousedown", mouseHandler); eventUtility.addEvent(document, "mouseup", mouseHandler); eventUtility.addEvent(document, "mousemove", mouseHandler); </script> </body> </html>This
dragObjobject has four properties:The
dragObjobject also has two methods:setDragObj(): Accepts the element to drag and the mouse pointer's x and y coordinates as arguments. This method initiates all the data needed to drag an element. It sets theelproperty to the element that will be dragged, and it sets therelativeLeftandrelativeTopproperties by taking the element's offset coordinates and subtracting the mouse pointer's coordinates.dragTo(): Accepts a set of coordinates as arguments, and uses the element'sstyleobject to set itsleftandtopproperties to the sum of the supplied coordinates and the relative coordinates. The stringpxis appended to each value. It's always a good idea to add the unit when setting an element's size and position. A standards-compliant browser will not resize or position the element without the unit.
Now use
dragObjto facilitate the drag-and-drop sequence. Add the following bold code:<html> <head> <title>Lesson 24: Example 01</title> <style type="text/css"> .draggable { position: absolute; cursor: move; } .box { width: 100px; height: 100px; } .navy { background-color: navy; } .green { background-color: Green; } </style> </head> <body> <div class="navy box draggable"></div> <div class="green box draggable"></div> <script type="text/javascript" src="eventutility.js"></script> <script type="text/javascript"> var dragObj = { setDragObj : function(el, mouseX, mouseY) { this.el = el; this.relativeLeft = el.offsetLeft - mouseX; this.relativeTop = el.offsetTop - mouseY; }, dragTo : function(x, y) { this.el.style.left = x + this.relativeLeft + "px"; this.el.style.top = y + this.relativeTop + "px"; }, dragging : false, el : null, relativeTop : 0, relativeLeft : 0 }; function mouseHandler(event) { var eSrc = eventUtility.getTarget(event); var type = event.type;var x = event.clientX + document.body.scrollLeft; var y = event.clientY + document.body.scrollTop; switch (type) { case "mousedown": if (eSrc.className.indexOf("draggable") > −1) {dragObj.dragging = true;dragObj.setDragObj(eSrc, x, y);} break; case "mouseup":dragObj.dragging = false;break; case "mousemove":if (dragObj.dragging) {dragObj.dragTo(x, y);}break; } } eventUtility.addEvent(document, "mousedown", mouseHandler); eventUtility.addEvent(document, "mouseup", mouseHandler); eventUtility.addEvent(document, "mousemove", mouseHandler); </script> </body> </html>The first new lines of code go inside the
ifblock in themousedowncase. You set thedraggingproperty ofdragObjtotrue, and you call thesetDragObj()method to get the element ready to drag.Next you add one line of code under the
mouseupcase; you set thedraggingproperty tofalse.Then, in the
mousemovecase, you determine ifdragObj.draggingistrue. If the user is holding down the mouse button while it's over an element with the CSS class ofdraggable, thendragObj.draggingwill betrue. If it istrue, you want to call thedragTo()method to move the element to the current mouse pointer's coordinates.When the user releases the mouse button,
dragObj.draggingwill befalse, and the element will stop moving when themousemoveevent fires.Save this file as
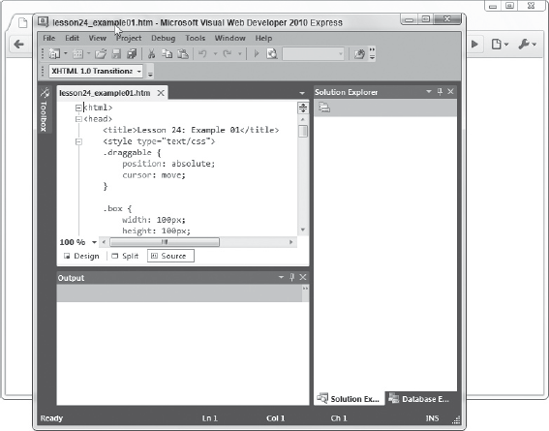
lesson24_example01.htm, and open it in any browser. Drag the green box to another location on the page, and then do the same for the navy box.One thing you may notice is that the navy box is always behind the green box. In traditional drag-and-drop implementations, whatever item is currently being dragged should be the topmost item on the screen. For example, drag your text editor window and your browser windows over each other, and you'll see that the window you're currently dragging is over the other window, as shown in Figure 24-3.
You can add the same functionality to your drag-and-drop script by modifying an element's
z-indexCSS property.In order to make this work as easily as possible, add a
zIndexproperty todragObjand give it an initial value of1, as shown in the following bold code:<html> <head> <title>Lesson 24: Example 01</title> <style type="text/css"> .draggable { position: absolute; cursor: move; } .box { width: 100px; height: 100px; } .navy { background-color: navy; } .green {background-color: Green; } </style> </head> <body> <div class="navy box draggable"></div> <div class="green box draggable"></div> <script type="text/javascript" src="eventutility.js"></script> <script type="text/javascript"> var dragObj = { setDragObj : function(el, mouseX, mouseY) { this.el = el; this.relativeLeft = el.offsetLeft - mouseX; this.relativeTop = el.offsetTop - mouseY;this.el.style.zIndex = this.zIndex++;}, dragTo : function(x, y) { this.el.style.left = x + this.relativeLeft + "px"; this.el.style.top = y + this.relativeTop + "px"; }, dragging : false, el : null, relativeTop : 0, relativeLeft : 0,zIndex : 1}; function mouseHandler(event) { var eSrc = eventUtility.getTarget(event); var type = event.type; var x = event.clientX + document.body.scrollLeft; var y = event.clientY + document.body.scrollTop; switch (type) { case "mousedown": if (eSrc.className.indexOf("draggable") > −1) { dragObj.dragging = true; dragObj.setDragObj(eSrc, x, y); } break; case "mouseup": dragObj.dragging = false; break; case "mousemove": if (dragObj.dragging) { dragObj.dragTo(x, y); } break; } } eventUtility.addEvent(document, "mousedown", mouseHandler); eventUtility.addEvent(document, "mouseup", mouseHandler);eventUtility.addEvent(document, "mousemove", mouseHandler); </script> </body> </html>
This new code also adds a line to
setDragObj(), setting thestyle.zIndexproperty to an incremented value of thedragObj.zIndexproperty.Resave the file and refresh your browser. Now drag the two boxes around on the page. You'll see that whichever box you drag becomes the topmost box –– as with the drag-and-drop feature of your operating system.
To get the sample code files, you can download Lesson 24 from the book's website at www.wrox.com.
Note
Please select Lesson 24 on the DVD to view the video that accompanies this lesson.