
In early versions of browsers, forms were generally the only means by which a web application could interact with the user. The user could input data into a variety of form controls and send that data to the server, and a server-side application would return a web page that incorporated the data in some way. In many cases a server-side application would have to validate every field in a form, and notify the user of any errors when responding to a form submission. This experience could be frustrating for the user, as sometimes one or more fields would be cleared of any data the user had entered.
Forms are still an important part of any web application that requires input from the user, but today's Web is far more sophisticated than that of yesteryear. With JavaScript, you can validate some form fields before any information is sent to the server — providing a much better experience for the user.
Over the course of the next few lessons, you learn how to script a variety of form controls. But first let's look at some basics of scripting forms with JavaScript.
A form in an HTML page is denoted by the <form/> element, and a single web page can have any number of forms. Quite naturally, the document object has a forms property — a collection of all <form/> elements found in the document. Like all array-like objects, document.forms has a length property, and you can access each form by specifying the index at which a form exists within the document, like this:
var firstForm = document.forms[0];
This code gets the first form found in the document, and in most cases this is sufficient because the majority of web pages contain only one form. Problems can arise, however, if your page does contain more than one form, and the order in which they're defined in the HTML varies from page to page.
For this reason, you can access any form by using the value set in the <form/> element's name attribute. The following code displays the HTML of a form with a specified name of theForm:
<form name="theForm"></form>
To find this form in the DOM, you can simply use the form's name as a property of the document object, like this:
var theForm = document.theForm;
This approach is not part of the W3C DOM standard, but it has been incorporated in every JavaScript-supporting browser since Netscape 2.0. It is the clearest way to access a form with JavaScript, and you can be assured that this approach will not go away.
Once you have a <form/> element object, you have the ability to submit the form by calling the submit() method, or you can clear the form or reset the form control elements to their default values with reset(). The <form/> element object also has an elements property, which is a collection of all elements contained within the form.
Probably the most frequently used property is the onsubmit event handler. It maps to the <form/> element's onsubmit attribute. Handling the submit event allows you to validate form fields and cancel the form's submission to the server if an error is found. So if you ask for a user's e-mail address and he or she provides the answer "Use the Force, Luke," you can identify the invalid data and prohibit the user from submitting the form until his or her data validates.
Warning
Calling the submit() method does cause the submit event to fire.
Of course, the use of form validation implies the use of form control elements. Let's look briefly at the various form controls and some common properties their DOM objects expose.
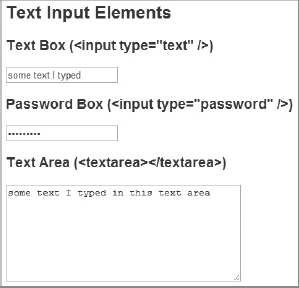
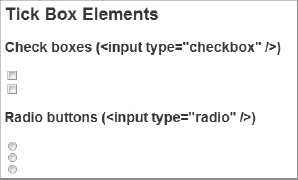
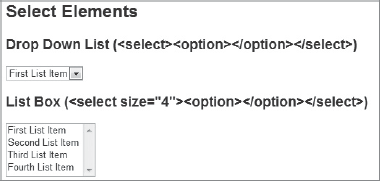
There are several elements commonly used to allow input from the user. Figures 26-1, 26-2, 26-3, and 26-4 show them grouped by functionality.
The majority of form controls are created via the <input/> element, and the type attribute determines what function that <input/> element performs. In the coming lessons you'll look at each of these categories and learn how to use JavaScript to access them in the DOM. But first let's look at a few properties and methods common to form controls.

All form control elements have a name attribute, and thus their DOM objects have a name property that maps to that attribute. The value of this property is to provide a unique name for the element so that you can easily access them within the DOM. Also, the name property is part of the information sent to the server when the form is submitted. So nearly every element within a form will have a name property.
Chances are that an element has a value attribute if the element in question is used to get data from the user. The corresponding DOM object for that element also has a value property, which gets and sets the value associated with the element. If the form control is a textbox (an <input/> element with type text), the value of that control is the text contained within the textbox. The actual value of an element varies according to the particular form control, so you'll see how the value is determined for each control in the coming lessons.
Nearly every element in an HTML page can have an ID attribute. Because of this, those elements that do have an ID attribute can be retrieved via the document.getElementById() method — including form control elements. So it's possible to retrieve a form control element with getElementById() without doing anything with the form it resides in. But what if you need to find the form that particular element is in afterward? You use the form property, which returns the <form/> element object the control resides in.
When you do a lot of form processing, you find yourself writing generic functions that you can use on any form to manipulate data or the DOM objects of the controls within the form. In such functions, the type property can be very helpful in determining what part a control plays within the form. The type property maps directly to the HTML element's type attribute.
There are times when you want to disable a form control element; doing so prohibits the user from using the control. This can be helpful in validating a form by prohibiting the user from clicking the submit button before all required fields are filled in. You disable or enable an element by using the disabled property and assigning it a Boolean value; true disables the element and false enables it.
All form control element objects have the focus() and blur() methods, and they are related to concepts applied not only in web pages but in computer science in general.
In the real world, when you focus on an object, you give that object your attention. It may be a coffee mug or a light switch, but whatever it is, it has your attention. Typically, when an item has your focus, your actions are sent to that object. If you're looking at a coffee mug, chances are you are going to reach for it and take a sip. Or if you're looking at a light switch, it's a good indication that you're thinking of switching it on or off.
In JavaScript, focus() works much as it does in the real world. When you give a window in your operating system focus, every keystroke you make goes to that window. When you give a textbox in a web page focus, the keystrokes you make put text inside the textbox. So calling focus() on an element causes the browser to focus on that element.
Blur is a concept that is just the opposite of focus. If something is blurred, it does not have your (or the browser's) attention, and thus any keystroke you make will not be sent to an element that is blurred. So calling blur() on an element doesn't visibly blur that element on the screen, but it removes focus from that element.
These two methods are also linked to two events: focus and blur. An element fires these events when focus is given to and taken away from the element, respectively.
In this lesson, you are briefly introduced to forms and common properties and methods of form controls.
For this lesson, you need a text editor; any plain text editor will do. For Microsoft Windows users, Notepad is available by default on your system or you can download Microsoft's free Visual Web Developer Express (www.microsoft.com/express/web/) or Web Matrix (www.asp.net/webmatrix/). Mac OS X users can use TextMate, which comes as part of OS X, or download a trial for Coda (www.panic.com/coda/). Linux users can use the built-in VIM.
You also need a modern web browser. Choose any of the following:
Internet Explorer 8+
Google Chrome
Firefox 3.5+
Apple Safari 4+
Opera 10+
Create a subfolder called Lesson26 in the JS24Hour folder you created in Lesson 1. Store the files you create in this lesson in the Lesson26 folder.
Type the following HTML:
<html>
<head>
    <title>Lesson 26: Example 01</title>
</head>
<body>
<form name="theForm" action="" onsubmit="trySubmit(event)">
    <input type="submit" value="Submit" />
</form>
<script type="text/javascript" src="eventutility.js"></script>
<script type="text/javascript">
function trySubmit(event) {
    if (confirm("Do you want to stop submission?")) {
        eventUtility.preventDefault(event);
    }
}
</script>
</body>
</html>
Save this as
lesson26_example01.htm. The page consists of one<form/>namedtheForm. It has anonsubmitevent handler set to thetrySubmit()function. Notice that a variable calledeventis being passed to the function. This ability was not mentioned in Lesson 17, but it's worth mentioning now.When assigning an event handler using an HTML attribute, you can pass the event object to the handling function by using the word
event. This gives you access to the event object in the handling function because, by default with HTML attribute event handlers, the event object isn't passed to the function. You must pass it yourself if you want access to that object.The
trySubmit()function accepts the event object as an argument. It asks the user if he or she wants to cancel the form submission. If the user clicks OK, the submission is stopped. If the user clicks Cancel, the form submits (although it really doesn't send data to any server).It isn't clear if
trySubmit()actually works, so add the bold line in the following code:<html> <head> <title>Lesson 26: Example 01</title> </head> <body> <form name="theForm" action="" onsubmit="trySubmit(event)"> <input type="submit" value="Submit" /> </form> <script type="text/javascript" src="eventutility.js"></script> <script type="text/javascript">alert("Page Loaded");function trySubmit(event) { if (confirm("Do you want to stop submission?")) { eventUtility.preventDefault(event); } } </script> </body> </html>
The call to alert() happens as the page loads into the browser. So when the user clicks the submit button, alert() won't execute if the form submission is cancelled. But if the form is allowed to submit, the browser will reload the page and call alert() again.
To get the sample code files, you can download Lesson 26 from the book's website at www.wrox.com.
Note
Please select Lesson 26 on the DVD to view the video that accompanies this lesson.