
You've probably heard the old saying "it's far better to give than to receive" many times. When it comes to e-mail messages, I think you'll agree that this idea surely applies. For as the strategies for dealing with e-mail covered in the previous two chapters make plain, being inundated with e-mail messages day after day is one of the largest challenges to personal productivity that any knowledge worker faces.
Although being on the receiving end of way too much e-mail is consistently a number one personal productivity concern, you need to realize that an inability to efficiently and effectively compose and send out e-mail messages can also negatively impact your workflow as well. This is all the more true if your job relies heavily on e-mail as a primary means of communicating and keeping in touch with your clients and coworkers.
The focus of this chapter is on the ways you can be as effective in composing and sending out e-mail messages as you are in fielding the ones you receive. To that end, this chapter covers both the dos and don'ts for composing new e-mail messages, along with strategies for the most effective ways to track the messages you send out.
Nothing wastes quite as much e-mail processing time as having to wade through a rambling e-mail message, which at the end leaves you as puzzled about its subject matter as you are about the response that the sender wants from you. Therefore, to avoid putting this same burden on a client or coworker, you should endeavor to make sure that all your e-mails are concise and to the point.
This means that you need to think a bit about what you need to communicate and how best to say it. Before sitting down to draft a new message, you probably should consider the following things:
What's the purpose of the e-mail? Is it to introduce yourself, give your recipient some important information, seek some sort of permission from him or her, set up some sort of one-time or ongoing communication, or some other function?
Who's the intended recipient of the e-mail? Is it a coworker, team member, boss, client, or someone else? Given your relationship with the intended recipient, how will you strike the appropriate writing tone in your message?
What kind of response, if any, do you want or expect? If you expect a reply, how will you make it clear what the alternatives are and the significance you place on receiving a response from your recipient?
When you do need the response? If there's a deadline involved, especially a tight one, how will you communicate this fact and its importance?
If you take the time to think through these kinds of issues before you begin to write, chances are good that you'll end up with not only a more focused message but also one that gets a much better reception and quicker response.
The importance of the subject line in an e-mail message cannot be overstated. The subject line is your recipient's first clue as to the nature of the message and its relative importance. In many e-mail programs (including Outlook, when Messages with AutoPreview is the not the current view), the subject line is the only piece of information other than the identity of the sender that is displayed in the list of new messages received.
This means that the subject lines of your e-mail messages need to effectively summarize the gist of the message in as few words as possible. Make sure when composing the subject line that you neither over- nor undersell the message, because if the subject line sounds too much like marketing hype, the recipient will likely treat the message as spam. Likewise, if the subject line is too nondescript, you run the risk of having the recipient pass it over in favor of the other hundred new messages competing for his or her attention.
Make every effort to create a subject line for your new message that immediately communicates the overall point of the message. And, if possible, make sure that the subject captures both the essence of the topics you're covering and your intention in covering them. For example, instead of the more generic subject line "Fall Team Meeting" to announce an upcoming, regularly scheduled team meeting, try something a little more informative, such as "Fall Team Meeting Invite & Line Up."
The best use you can make of abbreviations in your business e-mail messages is to avoid them altogether, with the possible exception of the most commonly used and well-accepted business acronyms (GNP, MPG, and the like). As far as I'm concerned, all the imo ("in my opinion"), eom ("end of message"), thx ("thanks"), and ttyl ("talk to you later") types of e-mail abbreviations should be avoided at all costs, along with every single emoticon known to humankind [:-(].
Warning
Although such abbreviations may seem innocuous enough to you and appear to be real typing timesavers, they can all too easily send the wrong message to your readers (namely that you're either too lazy or don't care enough about them to take the time to spell out your words and phrases). Moreover, unless you're communicating with a co-worker or client with whom you regularly use abbreviations such as btw ("by the way") or imho ("in my humble opinion") in your messages, you can't be sure that your reader correctly understands them (btw can be taken as an abbreviation for "between," and as for imho, I won't even go there!).
Imho (oops!), abbreviations belong in text messages alone, if only because of the severe limitations placed on text entry by the inadequate design of far too many cell phone and PDA keyboards and the economic ramifications of exceeding the contractual restrictions placed on messaging by cell phone carriers themselves.
Even when avoiding the use of any and all e-mail abbreviations, you can, of course, still compose e-mail messages that are concise and to the point. Often the best way to do this is to present the ideas that you want to get across in the body of the message in a kind of outline form rather than in the paragraph form you'd use in the text of a regular card or letter.
In creating outline points, you generally try boil down your individual thoughts and ideas so that they're expressed in one or two lines of text, tops. This makes it particularly easy for your recipients to scan and take in the point you're making, especially online.
When considering the points to include in your message, be sure that they cover all the relevant information you feel your recipient needs to have. Also, be sure your points include all pertinent dates, times, and places and, if you need some sort of confirmation or feedback, be sure to include that point as well.
The first time a client asked me the meaning of the Cc: and Bcc: lines that appear in an e-mail message header, I gave him the correct answer — carbon copy and blind carbon copy — without knowing for sure whether my assumptions were correct.
Somehow, the idea that these terms straight out of the era of carbon-paper and typewriters would find their way over to electronic mail messages didn't seem right to me, although I was sure that the electronic equivalents of carbon copy and blind carbon copy worked in the exact same manner as their much earlier paper counterparts.
Just as with copies of a typed memo created with carbon paper, the original recipient of the message (that is, the person to whom the original message is addressed on the To: line) can see all the names (with e-mail address) listed on the Cc: line in an Outlook e-mail message (as can each carbon-copied recipient). And, as with typewriter carbon copies, the original recipient can see none of the names (and e-mail addresses) listed on the Bcc: line in an Outlook message (nor can the other blind-copied recipients).
Tip
When you want to send a completely blind message so that no one is listed as the original recipient on the To: line, enter the e-mail addresses for all your recipients on the Bcc: line of the new message.
Despite the similarities between paper and electronic carbon copies and blind carbon copies, there's a huge difference as well. For example, when you send a message with a bunch of recipients listed on the Cc: line of a message and one of them decides to reply to your message using the Reply All (rather than the simple Reply command), Outlook sends copies of the reply to not only you but also every one of the carbon-copied recipients (which can amount to a great many replies clogging up your company's e-mail system if you copied hundreds of coworkers). However, when you send the same message with all the non-original recipients listed on the Bcc: line instead, if one of them clicks the Reply All button to send you a reply, no one other than yourself as the sender and your original recipient on the To: line receives that reply.
Note
Sending blind e-mail copies both protects the anonymity of your non-original recipients and ensures that they don't have to deal with replies from other copied recipients. This means that you want to use blind carbon copies on the Bcc: line rather than carbon copies on the Cc: line of the message whenever the privacy of your non-original recipients is any kind of an issue. Beyond that, using blind copies to prevent the possibility of involving your other (non-original) recipients in any replies you receive to a message from others shows a certain amount of respect for their time and their efforts to achieve and maintain their own work/life balance.
E-mail attachments have both upsides and downsides. The big upside of e-mail attachments is that they provide an easy means of sharing additional information you want your recipients to have without adding additional text to the body of the e-mail message itself. This confers the benefit of enabling you to keep the text of your e-mail message short, sweet, and to the point.
One large downside of e-mail attachments is that, depending on the type of information in the attachment files (graphics and video being among the worst), they can really bulk out your e-mail message. Depending on your recipients' Internet service provider and e-mail service, some of your messages with attachments may exceed the maximum size allowed for download, thus making it impossible for these folks to receive even your basic e-mail message.
Tip
To help keep the size of your Inbox under control, you may want to look into purchasing an Outlook add-in such as Attachment Save from Sperry Software, Inc. This software program automatically removes attachments from your incoming e-mail and saves them in whatever folder you specify on your hard drive. The message still retains the paperclip icon indicating that a file or files were attached to the e-mail message, which is convenient because the icon can then act as a link to the attachment file saved elsewhere on your hard drive. For more information about this add-in product or to purchase it, go to www.sperrysoftware.com/outlook/attachment-save.asp.
Another significant downside to e-mail attachments is that because they've traditionally been carriers of all sorts of nasty computer viruses, many companies block the opening of certain types of files (especially executable files of all types — .exe, .com, and .bat files). As a result, your recipients may end up being unable to open the files that you take the time and spend the bandwidth to send. It's always best to check beforehand when dealing with a new client to see what e-mail attachment policies are in place before you start adding attachments.
When you know that sending attachments with an e-mail message is okay, you will want to use the following guidelines in doing so:
Attach the files before you compose the message: To avoid embarrassing yourself by sending the e-mail message without the attachment file described in its text, always attach the file first and then compose the message text.
Briefly describe the attachment: When describing the attachment, be sure to let your recipients know the file format (and, if it's not a well-known file type such as a Word
.docor Excel.xlsfile, what software program opens it).Compress larger attachment files: You need to compress any file you want to attach to an e-mail that's a megabyte or larger (as files with graphics and videos can sometimes be) even when you're sure that the file does not exceed your recipient's maximum.
One really simple method for saving time in composing new e-mail messages is to create your own e-mail signature that Outlook automatically inserts into any new message you create. These signature blocks can include a complimentary closing (such as "Sincerely" or "Yours Truly") and identify you as the message sender; they can also include standard contact information.
To get an idea of how easily you can create your own e-mail signature for new messages, follow along with the steps for creating my standard business e-mail signature in Outlook 2003:
Choose Tools

Outlook opens the Options dialog box.
Click the Mail Format tab and then click the Signatures button near the bottom of the dialog box.
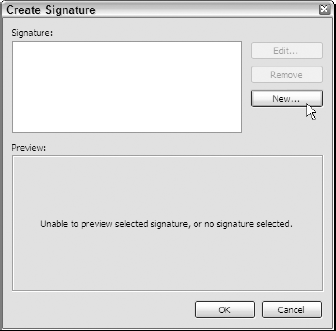
Outlook opens the Create Signature dialog box similar to the one shown in Figure 9-1. Note that if you're using Outlook 2007, it opens a slightly different dialog box, this one called Signatures and Stationary dialog box (see Figure 9-3). This dialog box enables you to create your new signature right within its confines.
Click the New button.
Outlook opens the Create New Signature dialog box in Outlook 2003 and the New Signature dialog box in Outlook 2007.
Type the name for your new signature in the text box and then click the Next> button in the Create New Signature dialog box or the OK button in the New Signature dialog box.
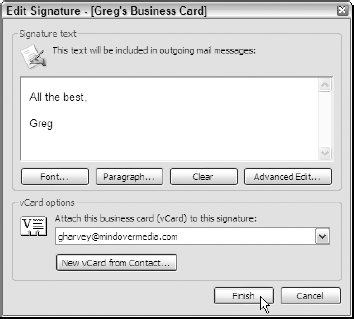
Outlook opens the Edit Signature dialog box shown in Figure 9-2 in Outlook 2003 and returns you to the Signature and Stationary dialog box shown in Figure 9-3 in Outlook 2007, where you can enter and edit the stock text you want to appear in the message.
Type the standard text that you want to appear in the new signature in the list box (this can include a standard salutation as well as a closing) and then use the various font and formatting buttons to format this text.
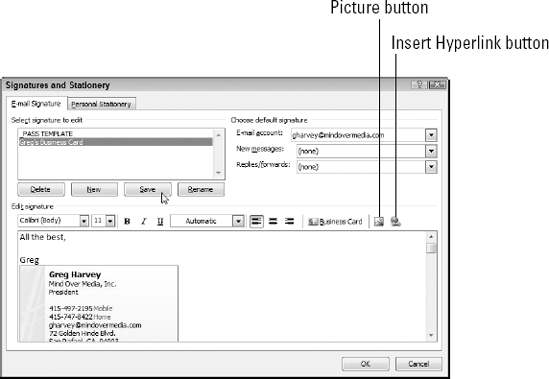
When creating a new signature, you can attach or insert your contact information in the form of a virtual business card if you want. (When creating a signature for Outlook 2007, you can also insert a picture stored in a separate graphic file by clicking the dialog box's Picture button or a link to a Web site by clicking its Insert Hyperlink button — again, see Figure 9-3.)
(Optional) To automatically attach a vCard to each new message as part of your signature in Outlook 2003, click the New VCard from Contact button. To automatically display the contact information on your vCard in each new message in Outlook 2007, click the Business Card button.
In Outlook 2003, the Select Contacts to Export as VCards dialog box opens. In Outlook 2007, the Insert Business Card dialog box opens.
If using Outlook 2003, click your name in the contact list to select it and then click the Add button before you click OK; if using Outlook 2007, just click the OK button.
In Outlook 2003, the program adds your e-mail address to the Attach This Business Card (vCard) to this Signature combo box. In Outlook 2007, the program displays a facsimile of the business card with all its contact information in its Edit Signature list box.
In Outlook 2003, click the Finish button to close the Edit Signature dialog box and then click OK to close the Create Signature dialog box. In Outlook 2007, click the Save button before you click the OK button.
Outlook returns you to the Mail Format tab of the Options dialog box.
In Outlook 2003, choose the name of the signature you just created from the Signature for New Messages drop-down menu and then click the Apply button followed by the OK button. In Outlook 2007, simply click the OK button.
Outlook closes the Options dialog box.
After creating a new signature and selecting it as the one to use for new messages, Outlook automatically inserts its text (and graphics, if you assigned them) into each new message you create. Before you start using your new signature on a regular basis, however, you may want to send yourself a test message to see how the signature appears in a new e-mail. That way, you can ensure that the signature contains all the information you want your recipients to have and that all of its information is correct.
Note that you can also have Outlook automatically insert this signature into all messages you reply to and forward (or another signature that you've created) in Outlook 2003 by selecting it on the Signature for Replies and Forwards drop-down list on the Mail Format tab of the Options dialog box. In Outlook 2007, you need to click the Signatures button on the Mail Format tab of the Options dialog box and then select the signature from the Replies/Forward drop-down list in Signatures and Stationary dialog box.
My last words of wisdom regarding e-mail productivity have to do with ways to successfully and automatically track some of the more important e-mail messages you send out. Many times with important messages, especially those requiring a response within a short timeframe, it's crucial to have verification that your recipients have not only successfully received the message but also have, in fact, opened and (presumably) read it.
Short of sending your recipients additional e-mails asking whether they got your original message and have looked at it, you can have Outlook automatically request that both a delivery and read receipt be sent to you.
Note
Outlook enables you to automatically request delivery and read receipts either for all new messages that you send or just for the individual message you're composing. Because you don't need these kinds of receipts for messages that don't require any response or don't have information about important deadlines and because such requests can all too easily be misinterpreted and cause resentment through the implication that you don't trust your e-mail recipients to open and read your messages, I strongly suggest that you don't ever turn on the Read Receipt and Delivery Receipt settings in the Tracking Options dialog box. Instead, only turn these options on for the particular message you're composing in the Message Options dialog box, as explained in the upcoming section.
To track when the e-mail messages you send are received or read by your recipient, follow these steps:
Open a new message (Ctrl+Shift+M) and then click the Options button on the Outlook 2003 toolbar or (in Outlook 2007) click the Options tab on the Ribbon in the Untitled Message window.
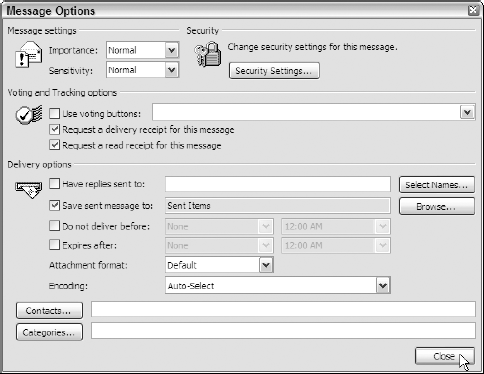
Outlook 2003 opens the Message Options dialog box, similar to the one shown in Figure 9-4.
Click the Request a Delivery Receipt for This Message check box (simply called Request a Delivery Receipt in Outlook 2007) to select it when you want Outlook to send you verification of your recipient's receipt of the message.
Click the Request a Read Receipt for This Message check box (simply called Request a Read Receipt in Outlook 2007) to select it when you want Outlook to send you verification of your recipient's opening of the message.
In Outlook 2003, click the Close button to close the Message Options dialog box and return to the Untitled Message window, where you can compose and then send the new message. In Outlook 2007, you simply click the Message tab in the Untitled Message window and use its options to compose and send the message.
Tip
If you're composing an e-mail message that requires your recipients to give you some sort of thumbs-up or thumbs-down response on a particular issue, use the Voting Buttons option to make voting on the issue super simple. When you select Voting Buttons, your recipients can quickly make their opinions known on an issue by clicking the vote text that appears in the message's Info bar and then clicking the appropriate response on its drop-down list. Outlook will send you an e-mail with their responses (which recipients can edit or just send back by clicking a simple button). To add voting buttons to a new message, click the Options button in Outlook 2003 or the Options tab in Outlook 2007. Then, click the Use Voting Buttons check box (Outlook 2003) or button (Outlook 2007) and select the types of choices you want to present to your recipients (Approve/Reject, Yes; No, or Yes; No; Maybe) on the drop-down list.
By default, Outlook processes all delivery receipts that you attach to messages you send on their arrival so that you can verify the date and time your recipient received the message. The program also automatically displays an alert dialog box when you receive a message with a delivery request asking for your confirmation to send that receipt to the message sender.
If you want, you can modify these and other Outlook tracking options by opening the Tracking Options dialog box, similar to the one shown in Figure 9-5. To open this dialog box, click Tools

The additional tracking options that you might want to modify in the Tracking Options dialog box include the following:
After Processing, Move Receipts To: Select this check box to have Outlook automatically move all read and delivery receipts sent to you (see the For All Messages, I Send Request option below) to the Mail folder listed in the text box immediately beneath it. By default, Outlook moves these receipts to the Deleted Items folder unless you change the name of the folder displayed in this text by either entering a new name or using the associated Browse button to select it.
Delete Blank voting and Meeting Responses After Processing: Select this check box to have Outlook automatically move the voting and meeting responses that you receive to the Deleted Items folder.
For All Messages, I Send Request: Select the Read Receipt check box to have Outlook generate a read receipt request for each message you send, indicating when your message is read. Select the Delivery Receipt check box to have the program generate a delivery receipt request that indicates the date and time when you message is delivered.
Use This Option to Decide How to Respond to Request for Read Receipts: By default, Outlook selects the Ask Me Before Sending a Response option button so you always have the choice whether or not to send a read receipt back to the sender. Select the Always Send a Response option button to have Outlook automatically send back a read receipt requested for any message you receive. Select the Never Send a Response option to automatically prevent the program from ever sending a read receipt requested for any message you receive.