Chapter 11. Using Web Parts
Microsoft SharePoint 2013 Web Parts are modular page components that can be used by page authors to add sophisticated, predefined functionality to webpages. For example, you can use Web Parts to add an image or paragraph to the Home page of your site to tell users more about your site. However, Web Parts are not limited to simple page content. If you add a Note Board Web Part to a page on your site, users can enter comments or view the comments made by other users. Using Web Parts, page authors can add incredible functionality to their pages without having to worry about complex web programming requirements.
Web Parts make it possible for users to add configurable components to pages on a SharePoint site that extend the functionality of the site. Some are simple and are used to only add simple content to a page. This includes the Image Viewer and the Content Editor Web Parts, which you use to add images and static text, respectively, to a page.
The most complex Web Parts perform advanced computations; others can perform searches, query lists, and filter data. Additionally, SharePoint 2013 also introduces the concept of App Parts, which extend the security model of traditional Web Parts. App Parts can be used to interface with external systems. Additionally, all views into lists and libraries now make use of App Parts; this is because lists and libraries are now implemented as Apps.
Web Parts on a page
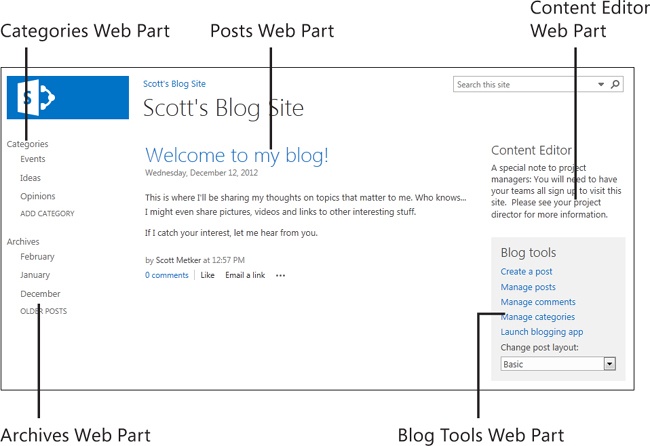
The accompanying screenshot shows the Home page of a blog site. You can see that most of the content on the page is presented within Web Parts. Web Parts are a critical part of the SharePoint world, and make up much of the dynamically rendered content required for social network–enabled applications such as blogs, on which users can post and interact with data.
Adding Web Parts to a wiki page
Web Parts can be added whenever you add a page on your SharePoint 2013 site; however, the process is slightly different based on whether you are editing a wiki page or a Web Part page. In both cases, you can determine where you want to insert the Web Part; however, you have a little more flexibility in terms of author layout (and less administrative control over structure) when using wiki pages. With wiki pages, users can layout content by using rich-text style tools, and they can insert items virtually anywhere within the text.
Add a Web Part to a wiki page
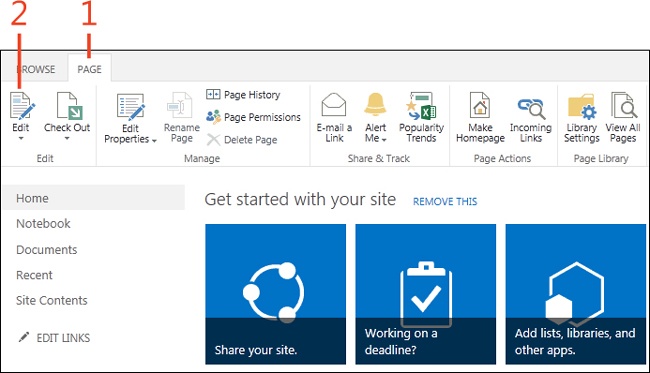
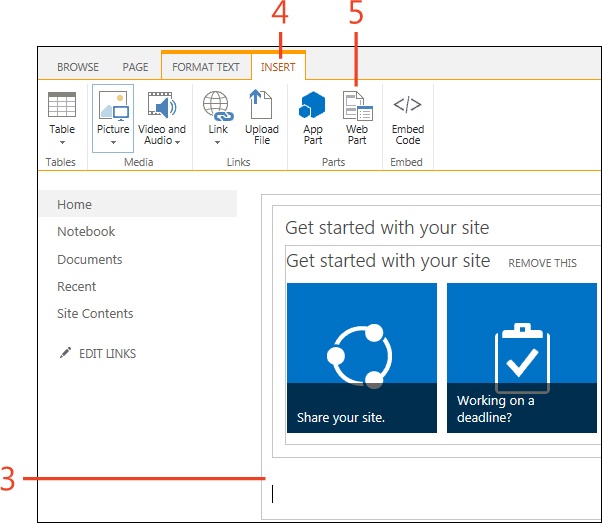
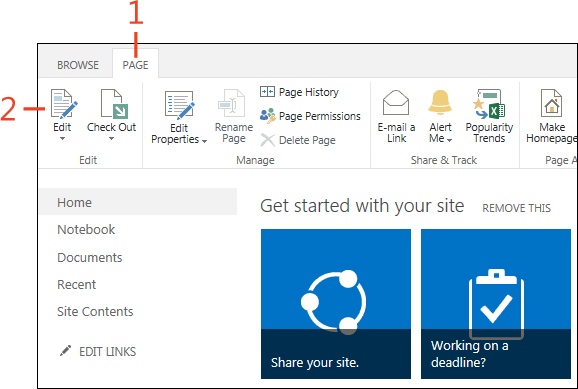
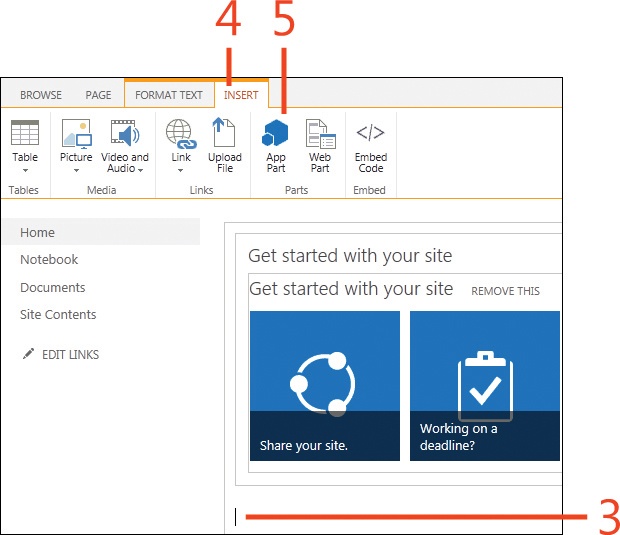
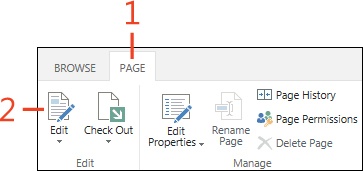
From a wiki page on a SharePoint site, on the ribbon, click the Page tab.
In the Edit group, click the Edit button.
Find a place in the text on the page and click to place your cursor where you want to insert the Web Part.
On the ribbon, click the Insert tab.
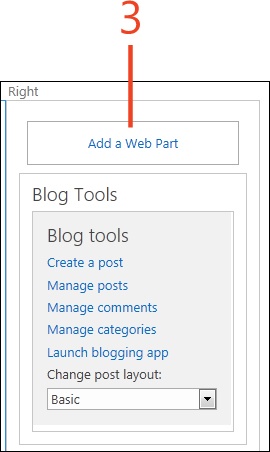
In the Parts group, click the Web Part button.
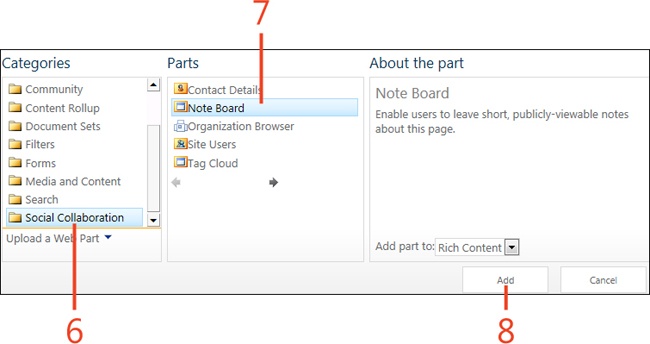
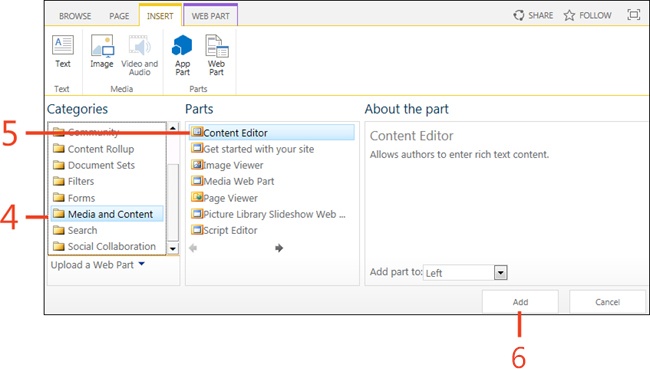
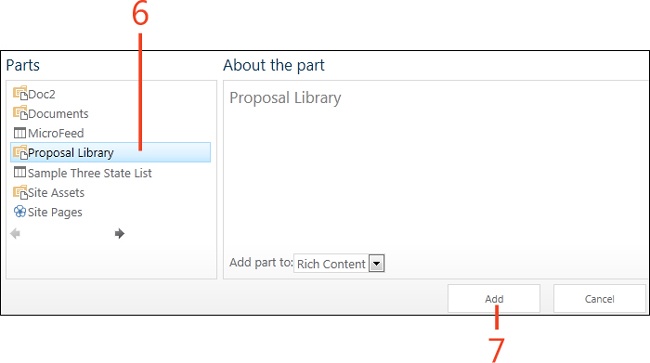
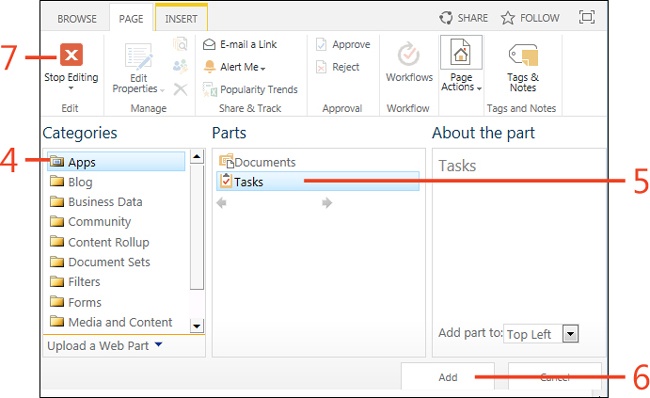
In the Add A Web Part window that appears, in the Category section, select a category by which to filter the list of Web Parts.
In the Parts section, select a Web Part.
Click Add.
The Web Part is added to the page at the point where you placed your cursor.
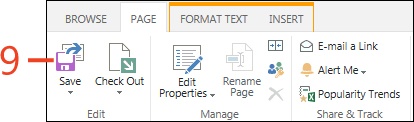
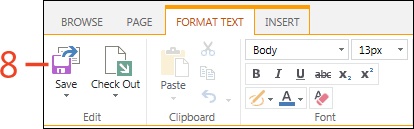
Click Save to save your page.
Adding Web Parts to a Web Part page
With SharePoint 2013 Web Part pages, Web Parts can be placed only in specific zones on the page, which makes them useful for scenarios in which administrators need to maintain a tighter control over the look and feel of a site. Users click the Add A Web Part link within available Web Part zones to specify generally where the control should be rendered.
Add a Web Part to a Web Part page
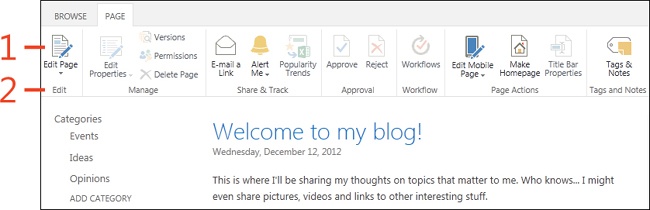
On the page that you want to modify, on the ribbon, click the Page tab.
In the Edit group, click the Edit Page button.
On the page, find an available Web Part zone and click the Add A Web Part link.
In the Add A Web Part window that appears, in the Category section, select a category by which to filter the list of Web Parts.
In the Parts section, select a Web Part.
Click the Add button.
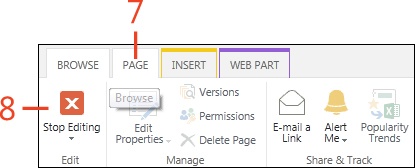
On the ribbon, click the Page tab.
Click Stop Editing to save your results.
Adding an App Part to a page
With the focus on Apps in SharePoint 2013, each new document library or list is created as a separate application within the site. As a result, if you want to expose a view into a list or document library on the Home page (or any other page) of your site, you will need to make use of the new App Part to show this data.
Add a list to a page
On the ribbon tab, click the Page tab.
In the Edit group, click the Edit button.
Find an insert point on the page and click to place your cursor at this location.
On the ribbon, click the Insert tab.
In the Parts group, click the App Part button.
In the Parts section of the Add An App Part window that appears, click the name of the App Part that matches the list that you want to add.
Click the Add button.
Click the Save icon to save your page changes.
Editing Web Part properties
Many settings on a Web Part can be modified by the page author after the Web Part has been placed on the page. For example, the author can select how the Web Part is framed on the page and how much space is allocated for display of the Web Part. Some Web Parts, such as the Image Viewer Web Part, require that the user specify additional information such as the location of the image to be displayed.
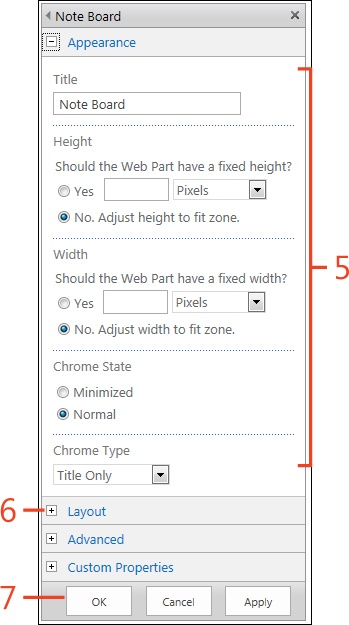
SharePoint provides a standardized tool panel that you can access for viewing and editing the properties for each Web Part. It includes some common properties shared by all Web Parts, such as the Appearance pane, with which you can provide a display title for the Web Part and define its display size in pixels. Additionally, some Web Parts have additional custom fields that you can use to tailor the behavior of the Web Part.
Edit Web Part properties
On a page containing a Web Part that you want to configure, on the ribbon, click the Page tab.
In the Edit group, click the Edit icon.
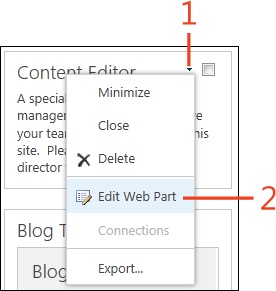
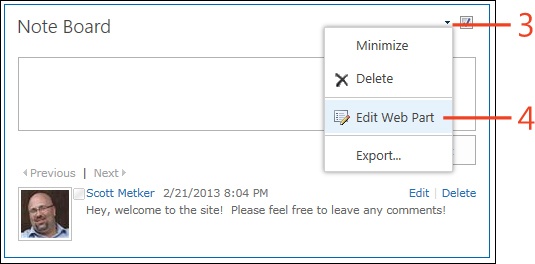
Locate the Web Part that you want to configure and then, in the upper-right corner, click the Options drop-down arrow.
On the menu that appears, click Edit Web Part.
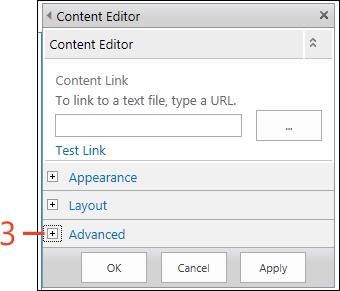
In the Web Part properties dialog box, enter or change any of the visible properties.
Expand other sections in the dialog box by clicking the corresponding Expand buttons (the plus signs) next to the section headings.
Click OK to save your settings.
Working with personalized Web Parts on pages
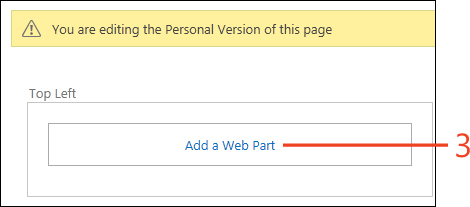
Users can also personalize SharePoint 2013 pages, which is particularly powerful when combined with predefined Web Parts. If personalization is enabled on a site, you can add your own Web Parts to a page that are only visible to your account. Thus, users can quickly add items such as links, task reminders, and RSS feeds to their Home page on a site.
After you have personalized a page by adding your own Web Parts, you can switch between your personal view and the view shared by all users by using a few simple menu commands.
Add a Web Part to a personalized page
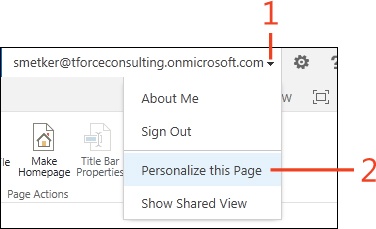
On a Web Part page, in the upper-right corner of the SharePoint window, click your user name.
On the menu that appears, click Personalize This Page.
Find a Web Part zone on the page and click the Add A Web Part link.
In the Add A Web Part window that appears, in the Category section, select a category by which to filter the available Web Parts.
In the Parts section, select a Web Part.
Click Add.
On the ribbon, click Stop Editing to save the personalized page.
Switch from personal and shared views
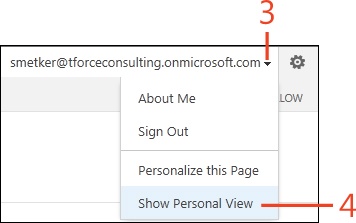
On a site on which you have already personalized the display, in the upper-right corner of the SharePoint window, click your user name.
On the menu that appears, click Show Shared View to display the shared view of the page as viewed by all users.
Click your user name to open the menu again.
On the menu, click Show Personal View to return to your personalized view of the page.

Targeting Web Parts for an audience
Sometimes, you might not want all of the users of your site to see the same Web Parts. SharePoint provides an option called audience targeting by which you can specify that certain page components be displayed to selected users and groups. This option is accessed via the Web Part properties dialog box.
When choosing a target audience, you will need to choose from one of the following groups:
Global audiences. Global audiences are populated by audience rules that are set up by your administrator and can be based on organizational reporting relationships as well as other calculations.
Distribution/security groups. Distribution and security groups are based upon list memberships of the user profile service as well as windows security groups imported from the user profile service.
SharePoint groups. SharePoint groups are defined on the local site and can be administered by site collection administrators and other users who have been given permission.
Tip
On sites for which you don’t have full administrative privileges, the SharePoint Groups option would be the simplest to administer because you can specify that members of a local group have visibility to a Web Part.
Target web parts for an audience
On a page that you are editing, select a Web Part and then, in the upper-right corner, click the Options drop-down arrow.
On the menu that appears, click Edit Web Part.
In the Web Part properties dialog box, expand the Advanced section (click the plus sign).
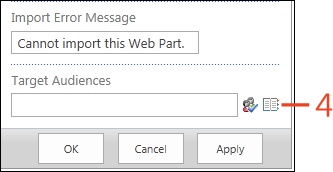
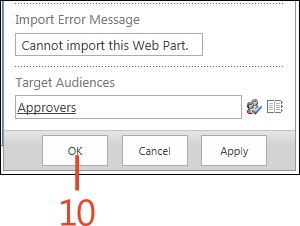
Scroll to the bottom of the Advanced section and click the Browse icon and click the Browse icon for the Target Audience field.
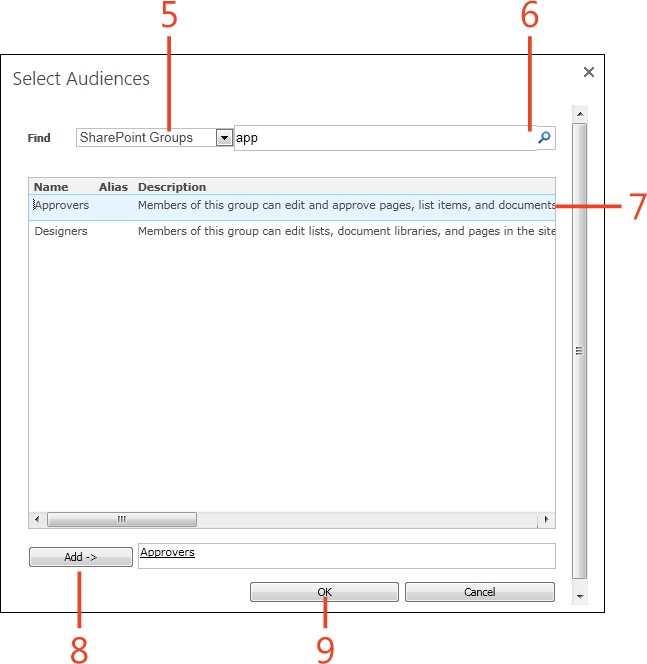
In the Select Audiences dialog box, choose a group type on which to query. Select from Global Audiences, Distribution/Security Groups, or SharePoint Groups.
In the Search box, type a search expression to locate a matching group and then click the Search button (the magnifying-glass icon).
Select the appropriate group.
Click the Add button to add the group to the Target Audiences text box.
Click OK to close the Select Audiences dialog box.
In the Web Part properties dialog box, click OK.