Chapter 6. Managing errors and exceptions
After completing this chapter, you will be able to:
You have now seen the core C# statements that you need to know to perform common tasks such as writing methods; declaring variables; using operators to create values; writing if and switch statements to run code selectively; and writing while, for, and do statements to run code repeatedly. However, the previous chapters haven’t considered the possibility (or probability) that things can go wrong.
It is very difficult to ensure that a piece of code always works as expected. Failures can occur for a large number of reasons, many of which are beyond your control as a programmer. Any applications that you write must be capable of detecting failures and handling them in a graceful manner, either by taking the appropriate corrective actions or, if this is not possible, by reporting the reasons for the failure in the clearest possible way to the user. In this final chapter of Part I, you’ll learn how C# uses exceptions to signal that an error has occurred and how to use the try, catch, and finally statements to catch and handle the errors that these exceptions represent.
By the end of this chapter, you’ll have a solid foundation in all the fundamental elements of C#, on which you will build in Part II.
Coping with errors
It’s a fact of life that bad things sometimes happen. Tires are punctured, batteries run down, screwdrivers are never where you left them, and users of your applications behave in an unpredictable manner. In the world of computers, hard disks become corrupt, other applications running on the same computer as your program run amok and use up all the available memory, wireless network connections disappear at the most awkward moment, and even natural phenomena such as a nearby lightning strike can have an impact if it causes a power outage or network failure. Errors can occur at almost any stage when a program runs, and many of them might not actually be the fault of your own application, so how do you detect them and attempt to recover?
Over the years, a number of mechanisms have evolved. A typical approach adopted by older systems such as UNIX involved arranging for the operating system to set a special global variable whenever a method failed. Then, after each call to a method, you checked the global variable to see whether the method succeeded. C# and most other modern object-oriented languages don’t handle errors in this manner; it’s just too painful. Instead, they use exceptions. If you want to write robust C# programs, you need to know about exceptions.
Trying code and catching exceptions
Errors can happen at any time, and using traditional techniques to manually add error-detecting code around every statement is cumbersome, time consuming, and error prone in its own right. You can also lose sight of the main flow of an application if each statement requires contorted error-handling logic to manage each possible error that can occur at every stage. Fortunately, C# makes it easy to separate the error-handling code from the code that implements the primary logic of a program by using exceptions and exception handlers. To write exception-aware programs, you need to do two things:
Write your code within a try block (try is a C# keyword). When the code runs, it attempts to execute all the statements in the try block, and if none of the statements generates an exception, they all run, one after the other, to completion. However, if an error condition occurs, execution jumps out of the try block and into another piece of code designed to catch and handle the exception—a catch handler.
Write one or more catch handlers (catch is another C# keyword) immediately after the try block to handle any possible error conditions. A catch handler is intended to capture and handle a specific type of exception, and you can have multiple catch handlers after a try block, each one designed to trap and process a specific exception; you can provide different handlers for the different errors that could arise in the try block. If any one of the statements within the try block causes an error, the runtime throws an exception. The runtime then examines the catch handlers after the try block and transfers control directly to the first matching handler.
Here’s an example of code in a try block that attempts to convert strings that a user has typed in some text boxes on a form to integer values, call a method to calculate a value, and write the result to another text box. Converting a string to an integer requires that the string contain a valid set of digits and not some arbitrary sequence of characters. If the string contains invalid characters, the int.Parse method throws a FormatException, and execution transfers to the corresponding catch handler. When the catch handler finishes, the program continues with the first statement that follows the handler. Note that if there is no handler that corresponds to the exception, the exception is said to be unhandled (this situation will be described shortly).
try
{
    int leftHandSide = int.Parse(lhsOperand.Text);
    int rightHandSide = int.Parse(rhsOperand.Text);
    int answer = doCalculation(leftHandSide, rightHandSide);
    result.Text = answer.ToString();
}
catch (FormatException fEx)
{
    // Handle the exception
    ...
}
A catch handler employs syntax similar to that used by a method parameter to specify the exception to be caught. In the preceding example, when a FormatException is thrown, the fEx variable is populated with an object containing the details of the exception.
The FormatException type has a number of properties that you can examine to determine the exact cause of the exception. Many of these properties are common to all exceptions. For example, the Message property contains a text description of the error that caused the exception. You can use this information when handling the exception, perhaps recording the details to a log file or displaying a meaningful message to the user and then asking the user to try again.
Unhandled Exceptions
What happens if a try block throws an exception and there is no corresponding catch handler? In the previous example, it is possible that the lhsOperand text box contains the string representation of a valid integer but the integer it represents is outside the range of valid integers supported by C# (for example, “2147483648”). In this case, the int.Parse statement throws an OverflowException, which will not be caught by the FormatException catch handler. If this occurs and the try block is part of a method, the method immediately exits and execution returns to the calling method. If the calling method uses a try block, the runtime attempts to locate a matching catch handler for this try block and execute it. If the calling method does not use a try block or there is no matching catch handler, the calling method immediately exits and execution returns to its caller, where the process is repeated. If a matching catch handler is eventually found, the handler runs and execution continues with the first statement that follows the catch handler in the catching method.
Important
Notice that after catching an exception, execution continues in the method containing the catch block that caught the exception. If the exception occurred in a method other than the one containing the catch handler, control does not return to the method that caused the exception.
If, after cascading back through the list of calling methods, the runtime is unable to find a matching catch handler, the program terminates with an unhandled exception.
You can easily examine exceptions generated by your application. If you are running the application in Microsoft Visual Studio 2013 in debug mode (that is, on the Debug menu you selected Start Debugging to run the application) and an exception occurs, a dialog box similar to the one shown in the following image appears and the application pauses, helping you to determine the cause of the exception:

The application stops at the statement that caused the exception and you drop into the debugger. You can examine the values of variables, you can change the values of variables, and you can step through your code from the point at which the exception occurred by using the Debug toolbar and the various debug windows.
Using multiple catch handlers
The previous discussion highlighted how different errors throw different kinds of exceptions to represent different kinds of failures. To cope with these situations, you can supply multiple catch handlers, one after the other, such as in the following:
try
{
    int leftHandSide = int.Parse(lhsOperand.Text);
    int rightHandSide = int.Parse(rhsOperand.Text);
    int answer = doCalculation(leftHandSide, rightHandSide);
    result.Text = answer.ToString();
}
catch (FormatException fEx)
{
    //...
}
catch (OverflowException oEx)
{
    //...
}
If the code in the try block throws a FormatException exception, the statements in the catch block for the FormatException exception run. If the code throws an OverflowException exception, the catch block for the OverflowException exception runs.
Catching multiple exceptions
The exception-catching mechanism provided by C# and the Microsoft .NET Framework is quite comprehensive. The .NET Framework defines many types of exceptions, and any programs you write can throw most of them. It is highly unlikely that you will want to write catch handlers for every possible exception that your code can throw—remember that your application must be able to handle exceptions that you might not have even considered when you wrote it! So, how do you ensure that your programs catch and handle all possible exceptions?
The answer to this question lies in the way the different exceptions are related to one another. Exceptions are organized into families called inheritance hierarchies. (You will learn about inheritance in Chapter 12.) FormatException and OverflowException both belong to a family called SystemException, as do a number of other exceptions. SystemException is itself a member of a wider family simply called Exception, and this is the great-granddaddy of all exceptions. If you catch Exception, the handler traps every possible exception that can occur.
Note
The Exception family includes a wide variety of exceptions, many of which are intended for use by various parts of the .NET Framework. Some of these exceptions are somewhat esoteric, but it is still useful to understand how to catch them.
The next example shows how to catch all possible exceptions:
try
{
    int leftHandSide = int.Parse(lhsOperand.Text);
    int rightHandSide = int.Parse(rhsOperand.Text);
    int answer = doCalculation(leftHandSide, rightHandSide);
    result.Text = answer.ToString();
}
catch (Exception ex) // this is a general catch handler
{
    //...
}
Tip
If you want to catch Exception, you can actually omit its name from the catch handler because it is the default exception:
catch
{
    // ...
}
However, this is not recommended. The exception object passed in to the catch handler can contain useful information concerning the exception, which is not easily accessible when using this version of the catch construct.
There is one final question you should be asking at this point: What happens if the same exception matches multiple catch handlers at the end of a try block? If you catch FormatException and Exception in two different handlers, which one will run? (Or, will both execute?)
When an exception occurs, the runtime uses the first handler it finds that matches the exception, and the others are ignored. This means that if you place a handler for Exception before a handler for FormatException, the FormatException handler will never run. Therefore, you should place more specific catch handlers above a general catch handler after a try block. If none of the specific catch handlers matches the exception, the general catch handler will.
In the following exercises, you will see what happens when an application throws an unhandled exception, and then you will write a try block and catch and handle an exception.
Start Visual Studio 2013 if it is not already running.
Open the MathsOperators solution, which is located in the Microsoft PressVisual CSharp Step By StepChapter 6Windows XMathsOperators folder in your Documents folder.
This is a version of the program in Chapter 2 that demonstrates the different arithmetic operators.
On the Debug menu, click Start Without Debugging.
Note
For this exercise, ensure that you actually run the application without debugging, even if you are using Windows 8.1.
The form appears. You are now going to enter some text in the Left Operand box that will cause an exception. This operation will demonstrate the lack of robustness in the current version of the program.
In the Left Operand box, type John; in the Right Operand box, type 2; click the + Addition button; and then click Calculate.
This input triggers Windows error handling. If you are using Windows 8.1, the application terminates and you are returned to the Start screen.
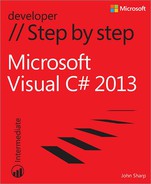
If you are using the Windows 7 version of the code, you should see the following message box:
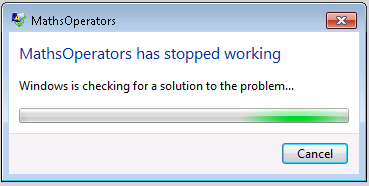
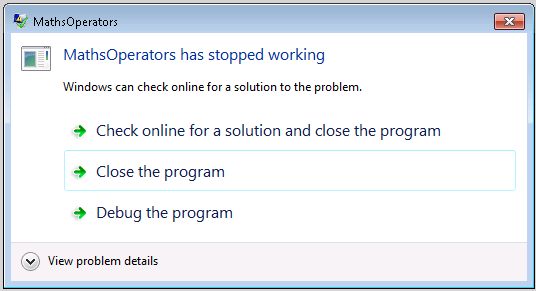
After a short while, this is followed by another dialog box that reports an unhandled exception:
If you click Debug, you can launch a new instance of Visual Studio over your program in debug mode, but for the time being, click Close Program.
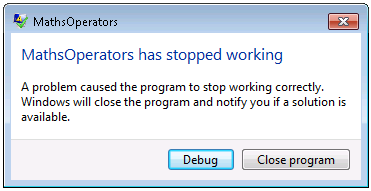
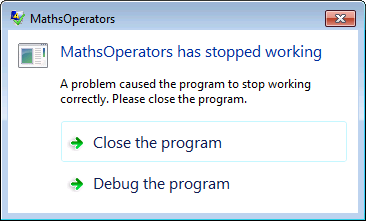
You might see one of the following versions of this dialog box depending on how you have configured problem reporting in Control Panel:
If either of these dialog boxes appear, click Close The Program.
Additionally, you might be presented with a dialog box displaying the message “Do you want to send information about the problem?” Windows can gather information about failing applications and send this information to Microsoft. If this dialog box appears, click Cancel.
Now that you have seen how Windows traps and reports unhandled exceptions, the next step is to make the application more robust by handling invalid input and preventing unhandled exceptions from occurring.
Return to Visual Studio 2013.
On the Debug menu, click Start Debugging.
When the form appears, in the Left Operand box, type John; in the Right Operand box, type 2; click the + Addition button;, and then click Calculate.
This input should cause the same exception that occurred in the previous exercise, except that now you are running using debug mode, so Visual Studio traps the exception and reports it.
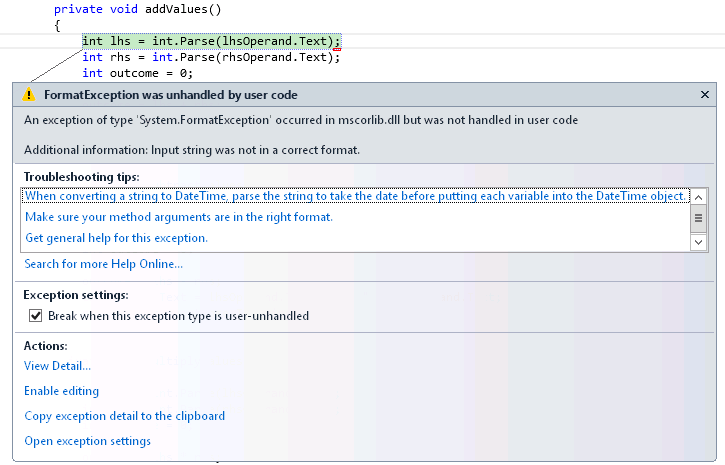
Visual Studio displays your code and highlights the statement that caused the exception together with a dialog box that describes the exception. In this case, it is “Input string was not in a correct format.”
You can see that the exception was thrown by the call to int.Parse inside the addValues method. The problem is that this method is unable to parse the text “John” into a valid number.
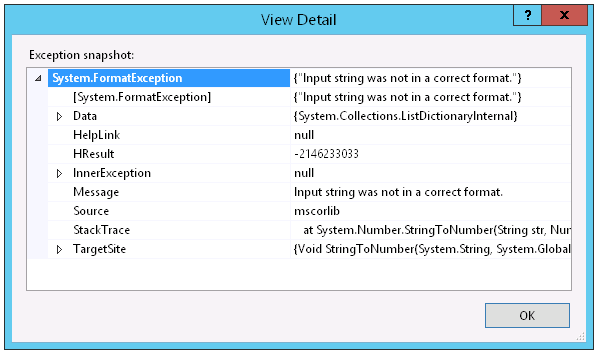
In the exception dialog box, click View Detail.
Another dialog box opens in which you can view more information about the exception. If you expand System.FormatException, you can see this information:
Tip
Some exceptions are the result of other exceptions raised earlier. The exception reported by Visual Studio is just the final exception in this chain, but it is usually the earlier exceptions that highlight the real cause of the problem. You can drill into these earlier exceptions by expanding the InnerException property in the View Detail dialog box. Inner exceptions might have further inner exceptions, and you can keep digging down until you find an exception with the InnerException property set to null (as shown in the previous image). At this point, you have reached the initial exception, and this exception is typically the one that you need to correct.
Click OK in the View Detail dialog box and then, in Visual Studio, in the Debug menu, click Stop Debugging.
Display the code for the file MainWindow.xaml.cs in the Code and Text Editor window, and locate the addValues method.
Add a try block (including braces) around the statements inside this method, together with a catch handler for the FormatException exception, as shown in bold type here:
try
{
    int lhs = int.Parse(lhsOperand.Text);
    int rhs = int.Parse(rhsOperand.Text);
    int outcome = 0;
    outcome = lhs + rhs;
    expression.Text = lhsOperand.Text + " + " + rhsOperand.Text;
    result.Text = outcome.ToString();
}
catch (FormatException fEx)
{
    result.Text = fEx.Message;
}
If a FormatException exception occurs, the catch handler displays the text held in the exception’s Message property in the result text box at the bottom of the form.
On the Debug menu, click Start Debugging.
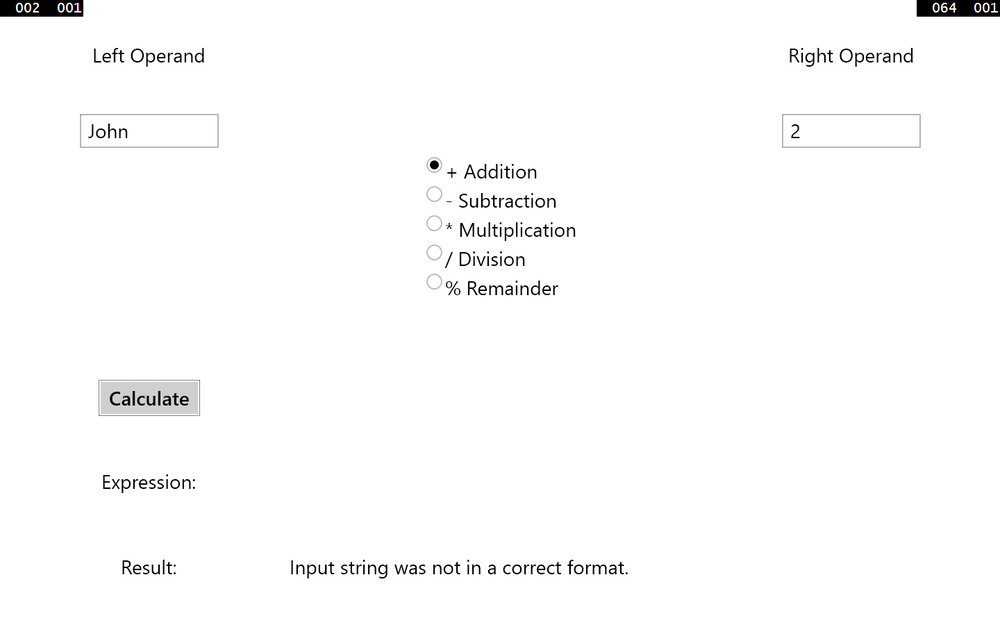
When the form appears, in the Left Operand box, type John; in the Right Operand box type 2; click the + Addition button; and then click Calculate.
The catch handler successfully catches the FormatException, and the message “Input string was not in a correct format” is written to the Result text box. The application is now a bit more robust.
Replace John with the number 10; in the Right Operand box type Sharp; and then click Calculate.
The try block surrounds the statements that parse both text boxes, so the same exception handler handles user input errors in both text boxes.
In the Right Operand box, replace Sharp with 20, click the + Addition button, and then click Calculate.
The application now works as expected and displays the value 30 in the Result box.
In the Left Operand box, replace 10 with John, and then click the – Subtraction button.
Visual Studio drops into the debugger and reports a FormatException exception again. This time, the error has occurred in the subtractValues method, which does not include the necessary try/catch processing.
On the Debug menu, click Stop Debugging.
Propagating exceptions
Adding a try/catch block to the addValues method has made that method more robust, but you need to apply the same exception handling to the other methods: subtractValues, multiplyValues, divideValues, and remainderValues. The code for each of these exception handlers will likely be very similar, resulting in you writing the same code in each method. Each of these methods is called by the calculateClick method when the user clicks the Calculate button. Therefore, to avoid duplication of the exception handling code, it makes sense to relocate it to the calculateClick method. If a FormatException occurs in any of the subtractValues, multiplyValues, divideValues, and remainderValues methods, it will be propagated back to the calculateClick method for handling as described in the section Unhandled Exceptions earlier in this chapter.
Display the code for the file MainWindow.xaml.cs in the Code and Text Editor window, and locate the addValues method.
Remove the try block and catch handler from the addValues method and return it to its original state, as shown in the following code:
private void addValues()
{
    int leftHandSide = int.Parse(lhsOperand.Text);
    int rightHandSide = int.Parse(rhsOperand.Text);
    int outcome = 0;
    outcome = lhs + rhs;
    expression.Text = lhsOperand.Text + " + " + rhsOperand.Text
    result.Text = outcome.ToString();
}
Find the calculateClick method. Add to this method the try block and catch handler shown in the following example in bold:
private void calculateClick(object sender, RoutedEventArgs e) { try { if ((bool)addition.IsChecked) { addValues(); } else if ((bool)subtraction.IsChecked) { subtractValues(); } else if ((bool)multiplication.IsChecked) { multiplyValues(); } else if ((bool)division.IsChecked) { divideValues(); } else if ((bool)remainder.IsChecked) { remainderValues(); } } catch (FormatException fEx) { result.Text = fEx.Message; } }When the form appears, in the Left Operand box, type John; in the Right Operand box, type 2; click the + Addition button; and then click Calculate.
As before, the catch handler successfully catches the FormatException, and the message “Input string was not in a correct format” is written to the Result text box. However, bear in mind that the exception was actually thrown in the addValue method, but it was caught by the handler in the calculateClick method.
Click the –Subtraction button, and then click Calculate.
This time, the subtractValues method causes the exception, but it is propagated back to the calculateClick method and handled in the same manner as before.
Test the * Multiplication, / Division, and % Remainder buttons, and verify that the FormatException exception is caught and handled correctly.
Return to Visual Studio and stop debugging.
Note
The decision as to whether to catch unhandled exceptions explicitly in a method depends on the nature of the application you are building. In some cases, it makes sense to catch exceptions as close as possible to the point at which they occur. In other situations, it is more useful to let an exception propagate back to the method that invoked the routine that threw the exception and handle the error there.
Using checked and unchecked integer arithmetic
Chapter 2 discusses how to use binary arithmetic operators such as + and * on primitive data types such as int and double. It also instructs that the primitive data types have a fixed size. For example, a C# int is 32 bits. Because int has a fixed size, you know exactly the range of value that it can hold: it is –2147483648 to 2147483647.
Tip
If you want to refer to the minimum or maximum value of int in code, you can use the int.MinValue or int.MaxValue property.
The fixed size of the int type creates a problem. For example, what happens if you add 1 to an int whose value is currently 2147483647? The answer is that it depends on how the application is compiled. By default, the C# compiler generates code that allows the calculation to overflow silently and you get the wrong answer. (In fact, the calculation wraps around to the largest negative integer value, and the result generated is –2147483648.) The reason for this behavior is performance: integer arithmetic is a common operation in almost every program, and adding the overhead of overflow checking to each integer expression could lead to very poor performance. In many cases, the risk is acceptable because you know (or hope!) that your int values won’t reach their limits. If you don’t like this approach, you can turn on overflow checking.
Tip
You can turn on and off overflow checking in Visual Studio 2013 by setting the project properties. In Solution Explorer, click YourProject (where YourProject is the actual name of the project). On the Project menu, click YourProject Properties. In the project properties dialog box, click the Build tab. Click the Advanced button in the lower-right corner of the page. In the Advanced Build Settings dialog box, select or clear the Check for Arithmetic Overflow/Underflow check box.
Regardless of how you compile an application, you can use the checked and unchecked keywords to turn on and off integer arithmetic overflow checking selectively in parts of an application that you think need it. These keywords override the compiler option specified for the project.
Writing checked statements
A checked statement is a block preceded by the checked keyword. All integer arithmetic in a checked statement always throws an OverflowException if an integer calculation in the block overflows, as shown in this example:
int number = int.MaxValue;
checked
{
    int willThrow = number++;
    Console.WriteLine("this won't be reached");
}
Important
Only integer arithmetic directly inside the checked block is subject to overflow checking. For example, if one of the checked statements is a method call, checking does not apply to code that runs in the method that is called.
You can also use the unchecked keyword to create an unchecked block statement. All integer arithmetic in an unchecked block is not checked and never throws an OverflowException. For example:
int number = int.MaxValue;
unchecked
{
    int wontThrow = number++;
    Console.WriteLine("this will be reached");
}
Writing checked expressions
You can also use the checked and unchecked keywords to control overflow checking on integer expressions by preceding just the individual parenthesized expression with the checked or unchecked keyword, as shown in this example:
int wontThrow = unchecked(int.MaxValue + 1);
int willThrow = checked(int.MaxValue + 1);
The compound operators (such as += and –=) and the increment, ++, and decrement, ––, operators are arithmetic operators and can be controlled by using the checked and unchecked keywords. Remember, x += y; is the same as x = x + y;.
Important
You cannot use the checked and unchecked keywords to control floating-point (noninteger) arithmetic. The checked and unchecked keywords apply only to integer arithmetic using data types such as int and long. Floating-point arithmetic never throws OverflowException—not even when you divide by 0.0. (Remember from Chapter 2 that the .NET Framework has a special floating-point representation for infinity.)
In the following exercise, you will see how to perform checked arithmetic when using Visual Studio 2013.
Return to Visual Studio 2013.
On the Debug menu, click Start Debugging.
You will now attempt to multiply two large values.
In the Left Operand box, type 9876543; In the Right Operand box, type 9876543; click the * Multiplication button; and then click Calculate.
The value –1195595903 appears in the Result box on the form. This is a negative value, which cannot possibly be correct. This value is the result of a multiplication operation that silently overflowed the 32-bit limit of the int type.
Return to Visual Studio and stop debugging.
In the Code and Text Editor window displaying MainWindow.xaml.cs, locate the multiplyValues method, which should look like this:
private void multiplyValues()
{
    int lhs = int.Parse(lhsOperand.Text);
    int rhs = int.Parse(rhsOperand.Text);
    int outcome = 0;
    outcome = lhs * rhs;
    expression.Text = lhsOperand.Text + " * " + rhsOperand.Text;
    result.Text = outcome.ToString();;
}
The statement outcome = lhs * rhs; contains the multiplication operation that is silently overflowing.
Edit this statement so that the calculation value is checked, like this:
outcome = checked(lhs * rhs);
The multiplication is now checked and will throw an OverflowException rather than silently returning the wrong answer.
On the Debug menu, click Start Debugging.
In the Left Operand box, type 9876543; in the Right Operand box, type 9876543; click the * Multiplication button; and then click Calculate.
Visual Studio drops into the debugger and reports that the multiplication resulted in an OverflowException exception. You now need to add a handler to catch this exception and handle it more gracefully than just failing with an error.
On the Debug menu, click Stop Debugging.
In the Code and Text Editor window displaying the MainWindow.xaml.cs file, locate the calculateClick method.
Add the following catch handler (shown in bold) immediately after the existing FormatException catch handler in this method:
private void calculateClick(object sender, RoutedEventArgs e)
{
    try
    {
        ...
    }
    catch (FormatException fEx)
    {
        result.Text = fEx.Message;
    }
    catch (OverflowException oEx)
    {
        result.Text = oEx.Message;
    }
}
The logic of this catch handler is the same as that for the FormatException catch handler. However, it is still worth keeping these handlers separate rather than simply writing a generic Exception catch handler because you might decide to handle these exceptions differently in the future.
On the Debug menu, click Start Debugging to build and run the application.
In the Left Operand box, type 9876543; in the Right Operand box, type 9876543; click the * Multiplication button; and then click Calculate.
The second catch handler successfully catches the OverflowException and displays the message “Arithmetic operation resulted in an overflow” in the Result box.
Return to Visual Studio and stop debugging.
By default, the Visual Studio Debugger only stops an application that is being debugged and reports exceptions that are unhandled. Sometimes it is useful to be able to debug exception handlers themselves, and in this case, you need to be able to trace exceptions when they are thrown by the application prior to them being caught. You can easily enable this functionality. On the Debug menu, click Exceptions. In the Exceptions dialog box, select the Thrown column for Common Language Runtime Exceptions, and then click OK:
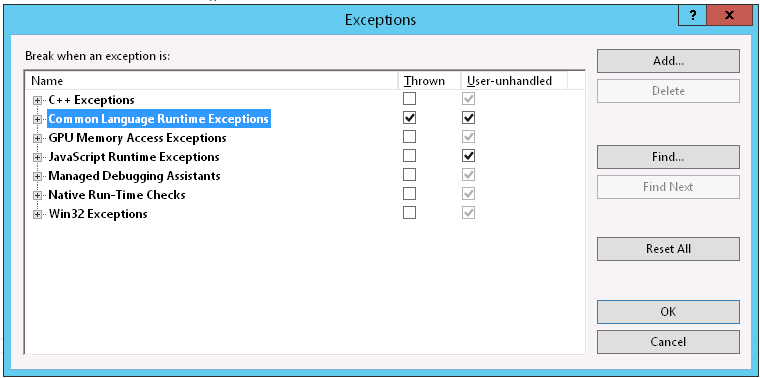
Now, when exceptions such as OverflowException occur, Visual Studio will drop into the debugger, and you can use the Step Into button on the Debug toolbar to step into the catch handler. If you don’t want to catch all Common Language Runtime (CLR) exceptions in this way, you can be more selective. If you expand the Common Language Runtime Exceptions node, you can see the different categories of exceptions that can occur (they are organized by namespace). If you expand any namespace, you can see the individual exceptions that are available, and you can select each of them individually.
Throwing exceptions
Suppose that you are implementing a method called monthName that accepts a single int argument and returns the name of the corresponding month. For example, monthName(1) returns “January”, monthName(2) returns “February”, and so on. The question is, what should the method return if the integer argument is less than 1 or greater than 12? The best answer is that the method shouldn’t return anything at all—it should throw an exception. The .NET Framework class libraries contain lots of exception classes specifically designed for situations such as this. Most of the time, you will find that one of these classes describes your exceptional condition. (If not, you can easily create your own exception class, but you need to know a bit more about the C# language before you can do that.) In this case, the existing .NET Framework ArgumentOutOfRangeException class is just right. You can throw an exception by using the throw statement, as shown in the following example:
public static string monthName(int month)
{
   switch (month)
   {
      case 1 :
          return "January";
      case 2 :
          return "February";
      ...
      case 12 :
          return "December";
      default :
          throw new ArgumentOutOfRangeException("Bad month");
   }
}
The throw statement needs an exception object to throw. This object contains the details of the exception, including any error messages. This example uses an expression that creates a new ArgumentOutOfRangeException object. The object is initialized with a string that populates its Message property by using a constructor. Constructors are covered in detail in Chapter 7.
In the following exercises, you will modify the MathsOperators project to throw an exception if the user attempts to perform a calculation without specifying an operator.
Note
This exercise is a little contrived, as any good application design would provide a default operator, but this application is intended to illustrate a point.
Return to Visual Studio 2013.
On the Debug menu, click Start Debugging.
In the Left Operand box, type 24; in the Right Operand box, type 36; and then click Calculate.
Nothing appears in the Expression and Result boxes. The fact that you have not selected an operator option is not immediately obvious. It would be useful to write a diagnostic message in the Result box.
Return to Visual Studio and stop debugging.
In the Code and Text Editor window displaying MainWindow.xaml.cs, locate and examine the calculateClick method, which should look like this:
private int calculateClick(object sender, RoutedEventArgs e)
{
    try
    {
        if ((bool)addition.IsChecked)
        {
            addValues();
        }
        else if ((bool)subtraction.IsChecked)
        {
            subtractValues();
        }
        else if ((bool)multiplication.IsChecked)
        {
            multiplyValues();
        }
        else if ((bool)division.IsChecked)
        {
            divideValues();
        }
        else if ((bool)remainder.IsChecked)
        {
            remainderValues();
        }
    }
    catch (FormatException fEx)
    {
        result.Text = fEx.Message;
    }
    catch (OverflowException oEx)
    {
        result.Text = oEx.Message;
    }
}
The addition, subtraction, multiplication, division, and remainder fields are the buttons that appear on the form. Each button has a property called IsChecked that indicates whether the user has selected it. The IsChecked property is a nullable Boolean that has the value true if the button is selected or false otherwise (you learn more about nullable values in Chapter 8). The cascading if statement examines each button in turn to find which one is selected. (The radio buttons are mutually exclusive, so the user can select only one radio button at most.) If none of the buttons is selected, none of the if statements will be true and none of the calculation methods is called.
You could try to solve the problem by adding one more else statement to the if-else cascade to write a message to the result text box on the form, but a better solution is to separate the detection and signaling of an error from the catching and handling of that error.
Add another else statement to the end of the list of if-else statements and throw an InvalidOperationException as follows, in bold:
if ((bool)addition.IsChecked)
{
    addValues();
}
...
else if ((bool)remainder.IsChecked)
{
    remainderValues();
}
else
{
    throw new InvalidOperationException("No operator selected");
}
On the Debug menu, click Start Debugging to build and run the application.
In the Left Operand box, type 24; in the Right Operand box, type 36; and then click Calculate.
Visual Studio detects that your application has thrown an InvalidOperation exception, and an exception dialog box opens. Your application has thrown an exception, but the code does not catch it yet.
On the Debug menu, click Stop Debugging.
Now that you have written a throw statement and verified that it throws an exception, you will write a catch handler to handle this exception.
In the Code and Text Editor window displaying MainWindow.xaml.cs, add the following catch handler shown in bold immediately below the existing two catch handlers in the calculateClick method:
...
catch (FormatException fEx)
{
    result.Text = fEx.Message;
}
catch (OverflowException oEx)
{
    result.Text = oEx.Message;
}
catch (InvalidOperationException ioEx)
{
    result.Text = ioEx.Message;
}
This code catches the InvalidOperationException that is thrown when no operator button is selected.
On the Debug menu, click Start Debugging.
in the Left Operand box, type 24; in the Right Operand box, type 36; and then click Calculate.
The message “No operator selected” appears in the Result box.
Note
If you drop into the Visual Studio Debugger, you have probably enabled Visual Studio to catch exceptions as they are thrown, as described earlier. If this happens, on the Debug menu, click Continue. Remember to disable Visual Studio from catching CLR exceptions as they are thrown when you have finished this exercise!
Return to Visual Studio and stop debugging.
The application is now a lot more robust. However, several exceptions could still arise that are not caught and will cause the application to fail. For example, if you attempt to divide by 0, an unhandled DivideByZeroException will be thrown. (Integer division by 0 does throw an exception, unlike floating-point division by 0.) One way to solve this problem is to write an ever larger number of catch handlers inside the calculateClick method. Another solution is to add a general catch handler that catches Exception at the end of the list of catch handlers. This will trap all unexpected exceptions that you might have forgotten about or that might be caused as a result of truly unusual circumstances.
Note
Using a catchall handler to trap the Exception exception is not an excuse to omit catching specific exceptions. The more definite you can be in your exception handling, the easier it will be to maintain your code and spot the causes of any underlying or commonly recurring issues. Only use the Exception exception for cases that are really… well, exceptional. For the purposes of the following exercise, the “divide by zero” exception falls into this category. However, having established that this exception is a distinct possibility in a professional application, good practice would be to add a handler for the DivideByZeroException exception to the application.
In the Code and Text Editor window displaying MainWindow.xaml.cs, add the following catch handler to the end of the list of existing catch handlers in the calculateClick method:
catch (Exception ex)
{
    result.Text = ex.Message;
}
This catch handler will catch all hitherto unhandled exceptions, whatever their specific type.
On the Debug menu, click Start Debugging.
You will now attempt to perform some calculations known to cause exceptions and confirm that they are all handled correctly.
In the Left Operand box, type 24; in the Right Operand box, type 36; and then click Calculate.
Confirm that the diagnostic message “No operator selected” still appears in the Result box. This message was generated by the InvalidOperationException handler.
In the Left Operand box, type John, click the + Addition button, and then click Calculate.
Confirm that the diagnostic message “Input string was not in a correct format” appears in the Result box. This message was generated by the FormatException handler.
In the Left Operand box, type 24; in the Right Operand box, type 0; click the / Division button; and then click Calculate.
Confirm that the diagnostic message “Attempted to divide by zero” appears in the Result box. This message was generated by the general Exception handler.
Experiment with other combinations of values, and verify that exception conditions are handled without causing the application to fail. When you have finished, return to Visual Studio and stop debugging.
Using a finally block
It is important to remember that when an exception is thrown, it changes the flow of execution through the program. This means that you can’t guarantee a statement will always run when the previous statement finishes because the previous statement might throw an exception. Remember that in this case, after the catch handler has run, the flow of control resumes at the next statement in the block holding this handler and not at the statement immediately following the code that raised the exception.
Look at the example that follows, which is adapted from the code in Chapter 5. It’s very easy to assume that the call to reader.Dispose will always occur when the while loop completes (if you are using Windows 7 or Windows 8, you can replace reader.Dispose with reader.Close in this example). After all, it’s right there in the code.
TextReader reader = ...;
...
string line = reader.ReadLine();
while (line != null)
{
    ...
    line = reader.ReadLine();
}
reader.Dispose();
Sometimes it’s not an issue if one particular statement does not run, but on many occasions it can be a big problem. If the statement releases a resource that was acquired in a previous statement, failing to execute this statement results in the resource being retained. This example is just such a case: when you open a file for reading, this operation acquires a resource (a file handle), and you must ensure that you call reader.Dispose to release the resource (reader.Close actually calls reader.Dispose in Windows 7 and Windows 8 to do this). If you don’t, sooner or later you’ll run out of file handles and be unable to open more files. If you find file handles are too trivial, think of database connections, instead.
The way to ensure that a statement is always run, whether or not an exception has been thrown, is to write that statement inside a finally block. A finally block occurs immediately after a try block or immediately after the last catch handler after a try block. As long as the program enters the try block associated with a finally block, the finally block will always be run, even if an exception occurs. If an exception is thrown and caught locally, the exception handler executes first, followed by the finally block. If the exception is not caught locally (that is, the runtime has to search through the list of calling methods to find a handler), the finally block runs first. In any case, the finally block always executes.
The solution to the reader.Close problem is as follows:
TextReader reader = ...;
...
try
{
    string line = reader.ReadLine();
    while (line != null)
    {
        ...
        line = reader.ReadLine();
    }
}
finally
{
    if (reader != null)
    {
        reader.Dispose();
    }
}
Even if an exception occurs while reading the file, the finally block ensures that the reader.Dispose statement always executes. You’ll see another way to handle this situation in Chapter 14.
Summary
In this chapter, you learned how to catch and handle exceptions by using the try and catch constructs. You saw how to turn on and off integer overflow checking by using the checked and unchecked keywords. You learned how to throw an exception if your code detects an exceptional situation, and you saw how to use a finally block to ensure that critical code always runs, even if an exception occurs.
If you want to continue to the next chapter, keep Visual Studio 2013 running, and turn to Chapter 7.
If you want to exit Visual Studio 2013 now, on the File menu, click Exit. If you see a Save dialog box, click Yes and save the project.