
Apply and Edit Themes
</objective> <objective>Make Presentations Aesthetic
</objective> <objective>Add Pictures
</objective> <objective>Add Picture Effects
</objective> <objective>Compress Pictures
</objective> </feature>ON THE CD:
The sample presentation and all other files with which you need to work can be found on the CD in the Makeover 03 folder.
Many schools all over the United States and other countries use PowerPoint to make their respective subjects interesting. Thus, if the class is learning photosynthesis in the science class, the teacher shows them a PowerPoint presentation on the subject. More often than not, these presentations are created by the teachers or by the students as a school project.
School presentations created in PowerPoint face unique problems. First of all, resources usually are not available to hire professional designers to create artwork. Even if the designers could be hired, it might not be a good thing to do because teachers and students learn so much about PowerPoint while they are creating these presentations. In addition, the object of creating presentations sometimes is to help build team spirit.
Another aspect of school presentations is that they are rarely sold, or even shown to audiences other than the students and teachers. This in turn makes them a great platform on which to experiment—and sometimes these experiments can go awry. We’ve often seen school presentations that use a different background for every slide!
The makeover for this chapter is a typical school presentation. In this chapter, we take an existing school project presentation on the Egyptian civilization and make it more aesthetic.
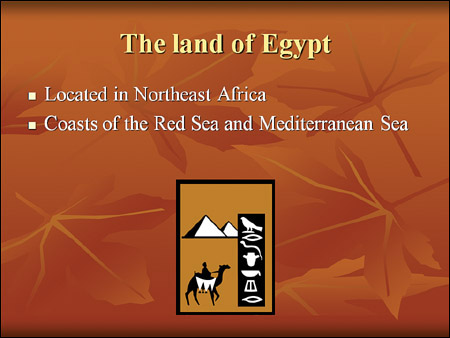
The pre-makeover presentation uses some clip art that is neither consistent nor contemporary. The slide background, fonts, and layout look like they were created in PowerPoint 4 or 95—more than a decade ago. Looks like the creators of this presentation took their “Egyptian civilization” topic a little too seriously and made the presentation look positively ancient!
Figure 4.1 shows you the “before” sample slides. They were created in an older version of PowerPoint, and then some edits were made in PowerPoint 2007.
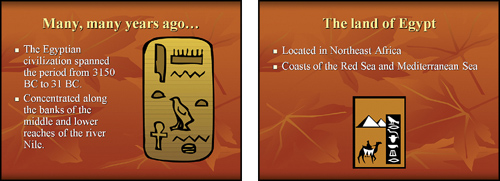
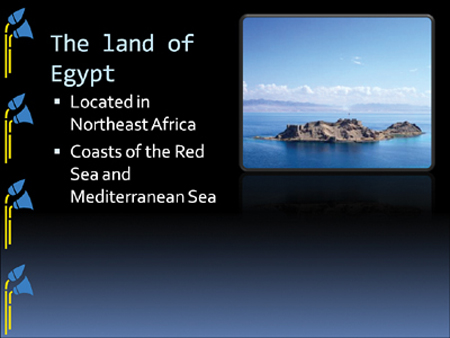
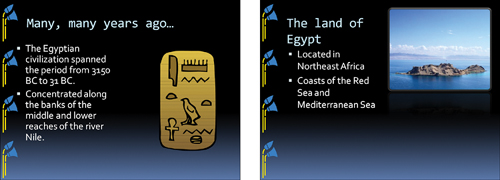
Figure 4.2 shows the “after” sample slides with a few changes that made a huge impact.
Before you start this makeover, do a little research and find out which colors the ancient Egyptians used. We searched a few online resources, looked at several printed books, and decided that a black background with some turquoise blue and golden yellow would look the best.
Based on these observations, we chose an existing PowerPoint 2007 theme and edited the theme to create the look we wanted. You’ll learn more about this process as you progress through this chapter.
Let’s start by applying a new theme:
Open the
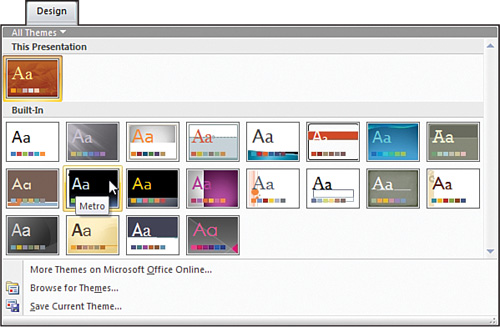
egypt_00.pptxpresentation from theMakeover 03Stepsfolder on the CD.Click the Design tab on the Ribbon, and click the down arrow in the Themes group to open the Theme gallery, as shown in Figure 4.3.
Select the theme called Metro by clicking it. This theme now is applied to the entire presentation. Save your presentation.
Although this theme does look contemporary, it still needs an Egyptian look. That’s simple enough to do.
If you look closely, you’ll find that every slide has a thin, white border on the left side. We’ll get rid of this border and replace it with a suitable Egyptian ornamental border. So, where do you get a border? That’s quite easy—search for some ornamental designs on Microsoft’s Office Online site or design your own border, if you know how to create your own designs in a graphics program.
To make things easier for you, we included a border design in the Makeover 03Pictures folder of the CD; the design is in a file called border.emf.
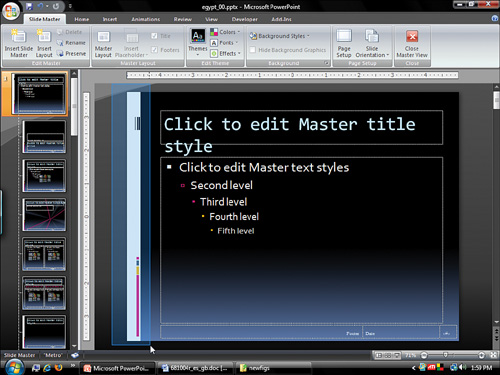
Click the View tab on the Ribbon, and click the Slide Master button to get into Slide Master view, as shown in Figure 4.4.
Select the first (larger) thumbnail in the left pane to select the Slide Master, and then place your cursor a little outside the slide area in the top left of the main workspace. Now drag your cursor all the way to the bottom of the slide (see Figure 4.5) so that you select every element in the white border. Press the Delete key on your keyboard. If you find that some of the border elements were not deleted, select them individually and delete them.
You might find that the first layout thumbnail below the Slide Master (the Title Slide Layout) still has that white border. Select that layout in the left pane, and remove the border for this layout (as explained previously for the Slide Master).
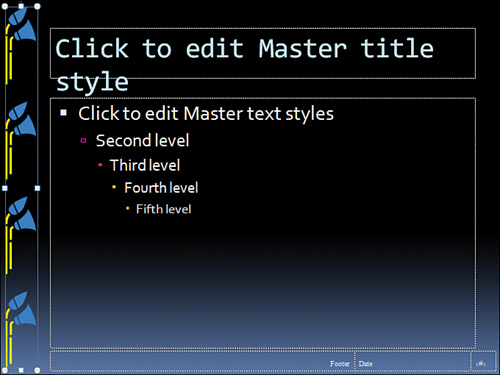
Select the first (larger) thumbnail in the left pane again to select the Slide Master. Now click the Insert tab on the Ribbon, and click the Picture option. This brings up the Insert Picture dialog box. Navigate to the Pictures subfolder in the
Makeover 03folder (see Figure 4.6), and select theborder.emfgraphic. Click Insert to get back to the Slide Master.By default, the border is placed in the center of the slide. Drag the border to the left, and resize or reposition as required. Figure 4.7 shows the border after we finished placing and resizing it.
Select this border, copy it, and paste it into the Title Slide Layout (which is the one immediately below the large Slide Master thumbnail in the left pane).
Click the Slide Master tab on the Ribbon, and click the Close button.
Save your presentation.


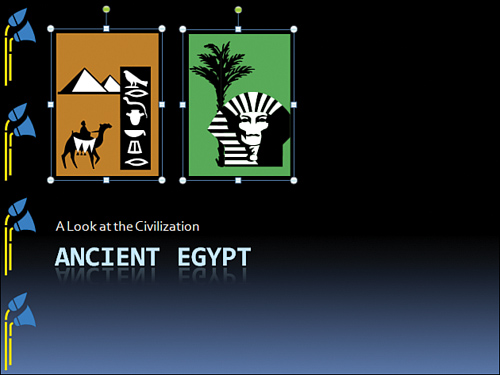
We know that we want to add better pictures to the slides. However, I do like the graphics on Slides 3 and 5 and want to retain them. When you look closely, they look almost like a set.
The first edit here is to move these graphics from their existing slides to the first slide. If you are following the makeover step by step, continue using your saved presentation. If you just stepped in, you can use the eqypt_01.pptx presentation from the Makeover 03Steps folder on the CD.
Select the graphic on slide 3, and press Ctrl+X to cut it. Click slide 1, and paste the graphic by pressing Ctrl+V. Do the same thing with the graphic on slide 5. Reposition both graphics on slide 1 so that they appear as shown in Figure 4.8.
Select both graphics, and click the Picture Tools Format tab on the Ribbon. Click the down arrow in the Picture Styles group, as shown in Figure 4.9, and select the Reflected Bevel, Black option.
Save the presentation.
We now will add some pictures to the slides. Then we can add effects to those pictures. If you are following the makeover step by step, continue using your saved presentation. If you just stepped in, you can use the egypt_02.pptx presentation from the Makeover 03 folder on the CD. Then, go straight to slide 4.
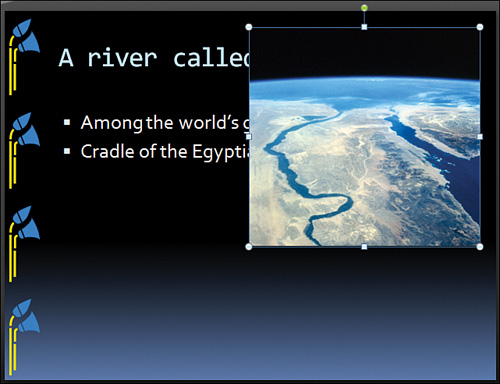
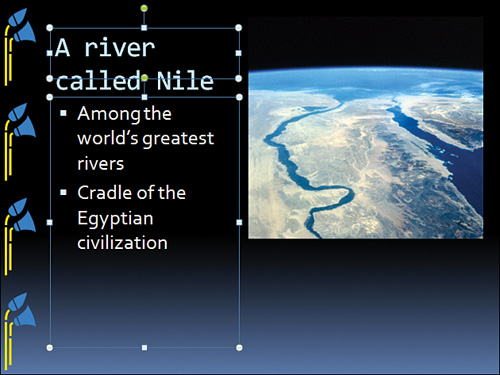
Click the Insert tab on the Ribbon, and choose Picture to open the Insert Picture dialog box. Navigate to the Pictures subfolder in the
Makeover 03Stepsfolder on the CD. Select the0380045.jpgpicture, and click Insert to get back to the slide.Resize the picture so that it covers a quarter of the slide area, and drag it so that it anchors to the top-right of the slide, as you can see in Figure 4.10.
You’ll find that the picture now covers nearly half the text area (refer to Figure 4.10). To rectify that issue, we’ll have to select the title and text boxes, and then resize them by dragging the handles on the right side toward the center so that they fit on the left side of the slide, as you can see in Figure 4.11.
Tip
As much as possible, avoid resizing title and text boxes. However, when you have to do it, never drag the boxes around; instead, resize them by dragging the handles in from the right side of the boxes. Never drag from the top or the left side of the boxes to resize because that alters those important margins in the slide. The human eye is very perceptive of the left and top margins, but quite forgiving with changes in the bottom and right margins.
Select the picture, and then click the Picture Tools Format tab on the Ribbon. Bring up the Picture Styles gallery, as shown earlier in this chapter in Figure 4.9, and select the Reflected Bevel, Black option.
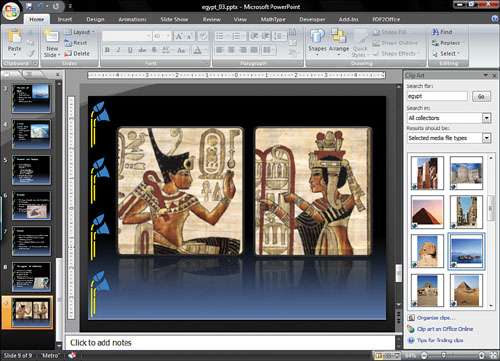
There are a few more pictures in the
Makeover 03Picturesfolder on the CD that you can insert in the remaining slides. In addition, make sure you resize the pictures and text boxes as required.Add effects to all inserted pictures.
Save your presentation.
We had a few extra pictures that went well with the subject of this presentation. We added them to an extra slide at the end of this presentation (see Figure 4.12). These pictures have been provided courtesy of PhotoSpin.com. Check out their site for many more photos, illustrations, fonts, and the so on.
We also inserted a few images from PowerPoint’s Clip Art task pane (see the following Tip).
It’s easy to add pictures to your PowerPoint presentations. And it’s even easier to insert photos that have been shot with multi-megapixel digital cameras that create 5 megabyte images! When you insert these images, however, the file size of the presentation can balloon miserably!
Fortunately, there is a quick fix. If you are following the makeover step by step, continue using your saved presentation. If you just stepped in, you can use the egypt_03.pptx presentation from the Makeover 03Steps folder on the CD.
Follow these steps:
Go to any slide that includes a picture. Select the picture.
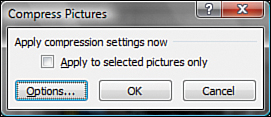
Click the Picture Tools Format tab on the Ribbon, and click the Compress Images option to bring up the Compress Pictures dialog box, as shown in Figure 4.13.
Make sure the Apply to selected pictures only check box is not checked, and then click the Options button to bring up the Compression Settings dialog box, as shown in Figure 4.14.
Match the compression settings to those you see in Figure 4.14, and click OK. Click OK again to apply the settings.
Save your presentation.

The finished presentation, egypt_04.pptx, is on the Makeover 03Steps folder on the CD.
You’ll notice that even after compression, the file size has reduced by a mere 1 KB! That’s because PowerPoint 2007 automatically performs basic compression when you save a file. Most of the time, this automatic compression works very well, but if you want to do the compression manually, you know how you can do that by following the steps explained in this chapter.