


YOU WILL LEARN HOW TO:
<objective>Work with Custom Animation
</objective> <objective>Use the Selection and Visibility Pane
</objective> <objective>Add Background Music
</objective> <objective>Make Your Presentation Loop
</objective> </feature>ON THE CD:
The sample presentation and all other files with which you need to work can be found on the CD in the Makeover 08 folder.
When you’re exhibiting at a tradeshow, your presentation must command attention. After all, you want people to stop and watch it.
Stand-alone presentations are different from the typical, speaker-led presentation for obvious reasons: they do stand alone, and they don’t need to support a speaker. In fact, in many ways, they are the speaker.
One way to grab the eye of a passerby is to kick up the animation. Make that stuff move! While lots of motion might be inappropriate during a typical presentation, in a tradeshow-type loop, it’s more than appropriate—it’s vital!
To increase the impact of this presentation, we inserted graphics and other visuals, used minimal text, and added sophisticated animation. Finally, we added background music to pump up the impact and create a full media effect. Make sure your booth has speakers!
This makeover is based on a more complete makeover by designer Julie Terberg, who also is the technical editor for this book. We had to scale it down for space considerations, so to get the full benefit of her work, we encourage you to take a look at the complete file—and others—in Julie’s online portfolio at http://www.terbergdesign.com.
Open the original presentation, loop_00.pptx, by clicking Office Button, Open. This file can be found on the CD in the Makeover 08Steps folder.
The original presentation is a typical, bulleted slide presentation. While that’s fine for draft content, we want to use bold, eye-grabbing graphics for the tradeshow loop. Thus, we’ll start a completely new file, rather than spend time trying to bend this original to our needs. You can see the “before” and “after” looks in Figures 9.1 and 9.2.

Here’s a list of what we did to create a new starting file:
First, we created a new theme color set. The red and the steel are based on colors in the logo; navy blue was added to give us a complementary color to work with.
We positioned the title placeholder and created a subtitle placeholder on the Title and Content and Title Only layouts. Then we deleted extraneous layouts.
We created a Theme Font set, using Agency FB for the heading font to give the file a techno feel and Trebuchet MS for body text (which we won’t really need in this abbreviated makeover).
We formatted the title font as white. We will place a red rectangle beneath it to frame the title, but because we want to animate those rectangles, we need to add them to the individual slides and not to the Slide Master or Slide Layouts. In fact, most of our objects will be added directly to the slide, so our Slide Master looks pretty empty!
Finally, we specified small caps for the title text so that we wouldn’t have to worry about the letters overlapping the bottom edge of the framing rectangle.
At this point you have a white background on the slides, and because there’s no text or anything else, you cannot really see the fonts or the colors. That’s precisely why we did not provide a figure to look at!
However, you can open the loop_01.pptx from the Makeover 08Steps folder on the CD, and explore the Theme Fonts and Theme Color choices.
Our first step is to make sure the product logo is big and bold and that it captures attention. We’ll add some rectangles to the slide to help frame the logo; then we’ll animate the entire logo to make sure it’s noticed.
To follow along in this makeover, you can apply the tradeshowloop.thmx theme to a new, blank presentation, or you can open the loop_01.pptx presentation from the Makeover 08Steps folder on the CD.
Tip
To apply a new theme to a blank presentation, just double-click the tradeshowloop.thmx file on the CD, and save the resulting PowerPoint files as a new presentation.
Apply a blank Slide Layout to the first slide by clicking the Home tab on the Ribbon and then clicking Slides, Layout, Blank.
To create shapes to frame the logo, follow these steps:
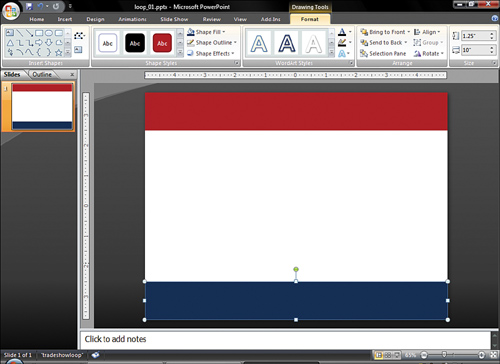
On the Home tab, go to the Drawing group and click Shapes, Rectangle. Click and drag the width of the slide to create a rectangle.
On the Drawing Tools Format tab, type
1.25into the Height size box, and then press Enter to make the rectangle 1.25” tall.Choose Shape Outline, No Outline. Select and drag the rectangle so that it anchors to the top part of the slide (see Figure 9.3).
Press Ctrl+C to copy the rectangle and Ctrl+V to paste. On the Drawing Tools Format tab, choose Shape Fill, Dark Blue Accent 2. Drag the blue shape to the bottom of the slide (see Figure 9.3).
We want to animate the product logo in two pieces, so we’ll have to insert it onto the slide, size it, copy it, and crop each piece.
You can copy the logo from the Slide Master in the loop_00.pptx file, but we also included the logo image file on the CD for your convenience.
To insert the logo onto the slide, click the Insert tab on the Ribbon, click Picture, and then choose the sendmail-logo.png file in the Makeover 08Pictures folder on the CD. Click Insert to add it to the slide.
After the logo is on the slide, follow these steps:
Press the Shift key while you click and drag one corner of the logo with your mouse until it’s approximately 7.25” wide so that it covers a large part of the slide’s width. Pressing Shift constrains the proportions so the logo doesn’t become distorted.
Press Ctrl+C to copy the logo, and then press Ctrl+V to paste the copy onto the slide.
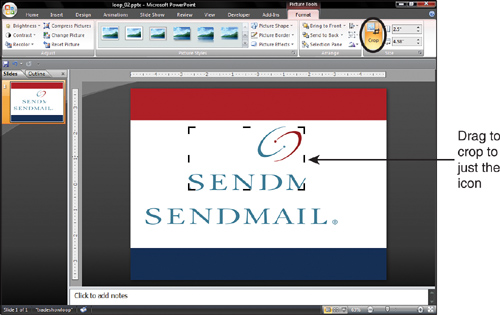
Select one of the logos; then, on the Picture Tools Format tab, click the Crop button and click and drag one of the black handles to crop the image to include just the text. Repeat for the other logo, dragging each edge to crop out the text and leave just the icon (see Figure 9.4).
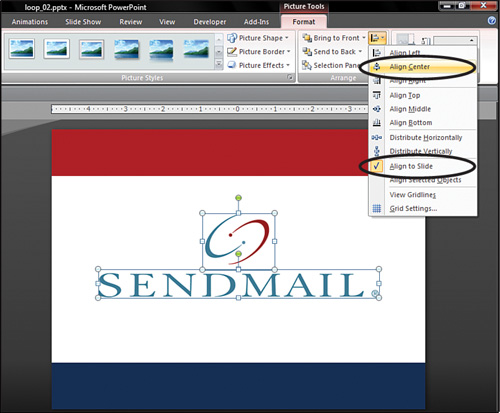
Select both the logo text and the logo icon, and click the Picture Tools Format tab; then, in the Arrange group, click Align to Slide (see Figure 9.5). This tells PowerPoint that you want the objects to be positioned relative to the slide edges.
To align the selected items with the center of the slide, on the Picture Tools Format tab on the Ribbon, in the Arrange group, click Align Center (see Figure 9.5 again).
Save the presentation.
If you are following the makeover step by step, continue using your saved presentation. If you just stepped in, you can use the loop_02.pptx presentation from the Makeover 08Steps folder on the CD.
Now all we have to do is animate the logo pieces! Here’s how:
Click the Animations tab, and then click Custom Animation. The Custom Animation pane opens.
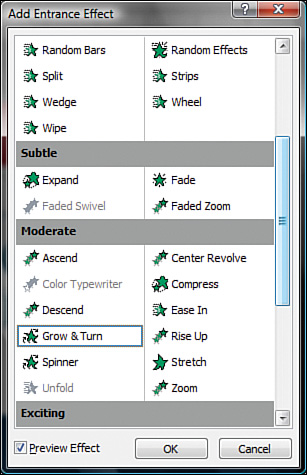
Select the logo icon, and in the Custom Animation pane, choose Add Effect, Entrance, More Effects to bring up the More Effects dialog box. In the Moderate category, select Grow & Turn (see Figure 9.6). Click OK to close the dialog box.
In the Custom Animation pane, select the animation and change the Start setting to With Previous.
Repeat steps 2 and 3 for the logo text image. In step 2, choose Expand (in the Subtle category) instead of Grow & Turn.
Now let’s make the dots in the logo glow:
Draw a small circle over the red circle in the logo icon. (You might want to zoom to 400% while you do this part. Use the convenient zoom slider on the status bar.) The default circle has an outline, but the circle will be so small on the slide you won’t be able to tell it’s a different color than the fill. If you want, go to the Drawing Tools Format tab on the Ribbon, choose Shape Outline, and select Dark Red, Accent 1 so the outline and fill match.
On the Home tab of the Ribbon, go to the Editing group and click Select, Selection Pane. Then double-click the word Oval in the pane and type
Red Circleto rename the object.Select the red circle on the slide, and on the Custom Animation pane, choose Add Effect, Entrance, Appear. Change the Start setting to After Previous (see Figure 9.7).
With the red circle still selected on the slide, choose Add Effect and then Emphasis, More Effects, Grow/Shrink (see Figure 9.7). Change the Start setting to With Previous, the Size setting to Custom 400%, and the Speed setting to Very Fast.
Note
When you select an object on the slide, the first button in the Custom Animation pane will be Add Effect. If you select the animation effect in the Custom Animation pane, that same button will read Change. It will be Change because you must choose an existing effect in the pane to modify the animation, but if you select the object on the slide, you can add more animation effects to it.
Again, with the circle selected on the slide, choose Add Effect, then Exit, More Effects, Fade. Change the Start setting to With Previous and the Speed setting to Very Fast.
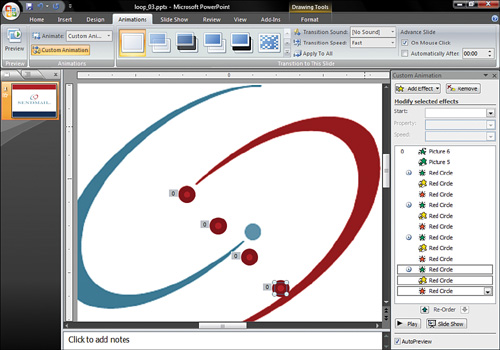
Press Ctrl+C to copy the circle, and then press Ctrl+V three times to add three more animated circles. Your slide and custom animation pane should look similar to Figure 9.8 now.
Select one of the copies of the red circle and rename it to
Blue Circlein the Selection and Visibility pane (refer to step 2). Change the Shape Fill and Shape Outline colors (on the Drawing Tools Format tab, in the Shape Styles group) to Blue-Gray Accent 3.Paste two copies of the animated blue circle onto the slide.
Align the three red circles on top of the red circle in the logo, and then align the three blue circles on top of the blue (teal) circle on the logo.
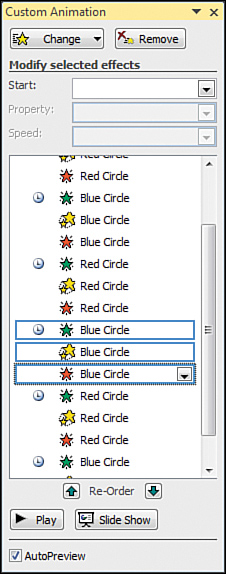
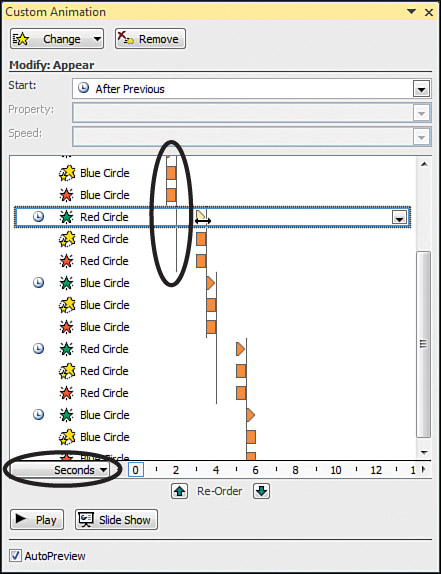
In the Custom Animation pane, press the Shift key and click to choose the last three Blue Circle animations. Click the Re-Order up arrow to move this set of animations so that they occur just after the first set of red circle animations. Move another set of blue animations to occur after the second set of red animations. When you finish, your Custom Animation pane should look like the one shown in Figure 9.9.
Right-click an animation in the pane and choose Show Advanced Timeline.
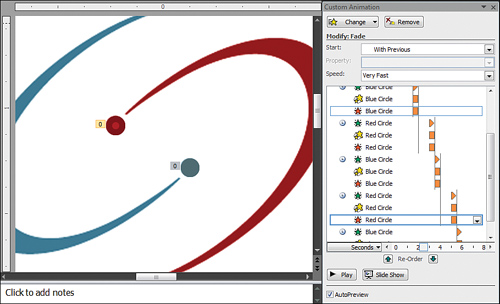
Click and drag the orange triangle for the second red circle entrance animation to add a one-second delay between its appearance and the end of the previous animation. Drag its associated emphasis and exit animations to the same start point. Repeat for the last red circle (see Figure 9.10).
Click the Play button at the bottom of the Custom Animation pane to preview the animation sequence you created.

Using the Advanced Animation Timeline
Right-click any animation in the Custom Animation pane and choose Show Advanced Timeline to see a graphic representation of the animation sequence for the slide.
The Advanced Timeline shows how your objects are animating. Drag the edge of the timeline to make it wider. You also can click the Seconds button and choose Zoom In to see the timings more closely.
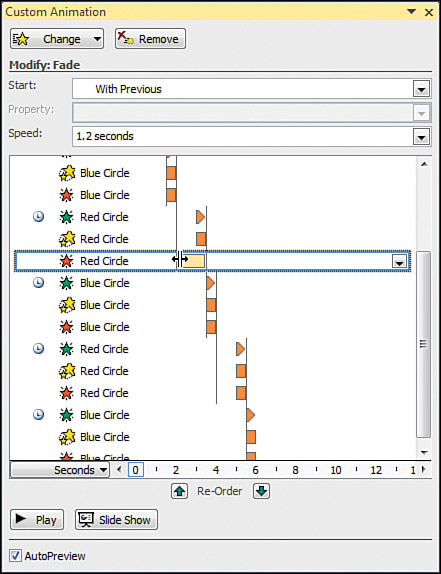
Clicking and dragging on any of the orange timing shapes (think of sliders) lets you move it on the timeline, effectively creating or eliminating delays between objects (see Figure 9.11).
Clicking and dragging the left or right edge of any of the orange bars in the timeline lets you change the duration of the animation (see Figure 9.12).
The black vertical lines you see in the Advanced Timeline are created when you set an animation to Start After Previous. The line marks the “previous” animation and prevents you from moving the start point for subsequent animations before that line (refer to Figure 9.11).
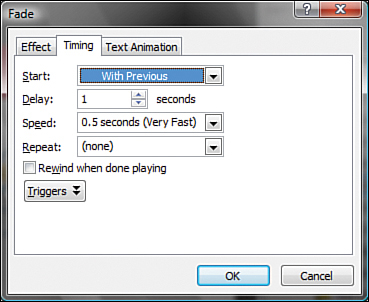
If you prefer to work by the numbers, you can double-click any animation in the Custom Animation pane to open the Effect Options dialog box. On the Timing tab, type the delay time and speed (duration) you want to use (see Figure 9.13).
One of the main messages of this presentation is that 4,500 customers depend on Sendmail, but this message is buried on a bulleted list slide in the original presentation. We’ll create a slide to highlight that statement and set up the next couple of slides.
If you are following the makeover step by step, continue using your saved presentation. If you just stepped in, you can use the loop_03.pptx presentation from the Makeover 08Steps folder on the CD.
Because some of the graphics we need are already on slide 1, we’ll duplicate the slide instead of starting from scratch, and then add more graphics. Follow these steps:
Select slide 1 in the Slides pane, press Ctrl+D to duplicate the slide. Click the Fit Slide to Current Window button on the status bar so that you can see the entire slide in the workspace (see Figure 9.14).
With slide 2 selected in the Slides pane, click the Home tab, go to the Slides group, and click Layout, Title Only. Title and subtitle placeholders will appear on the slide.
Type the message into the title and subtitle placeholders (see Figure 9.15). Change the font color of the word Sendmail to red (on the Home tab, in the Font group, click the Text Color drop-down arrow, and choose the red color in the Theme Colors section) to make it stand out. You might need to change the font size of the subtitle placeholder to 42 (on the Home tab, in the Font group, click the Font Size drop-down arrow).
Select all the logo pieces and click the Home tab on the Ribbon; then, in the Drawing group, click Arrange, Group. This removes all animation from the logo.
On the Home tab of the Ribbon, in the Drawing group click Shapes, and then click Line. Click and drag to draw a vertical line near the left edge of the slide. This helps anchor the title text. You can see the position of the line in Figure 9.16.
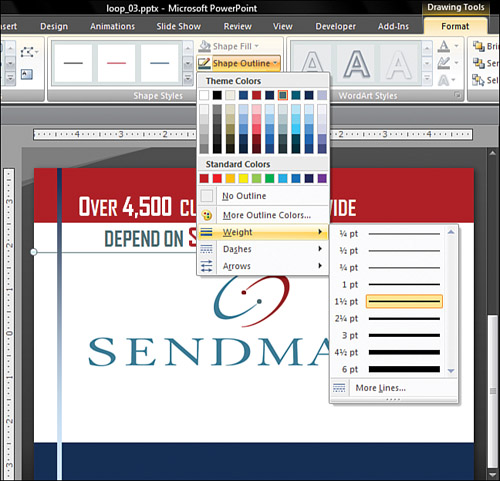
With the line selected, click the Drawing Tools Format tab; then, in the Shape Styles group, click Shape Outline, Weight, More Lines. This opens the Format Shape dialog box. Click Line Style on the left, and then type
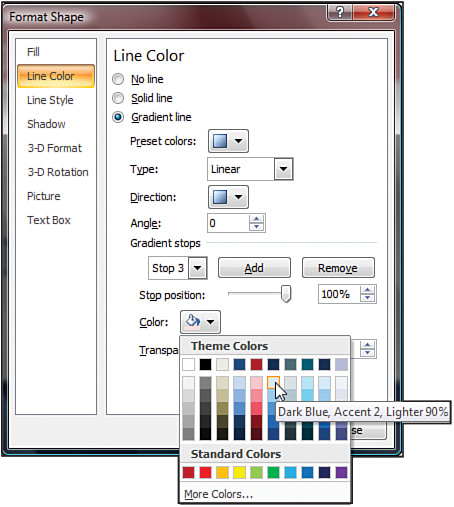
7in the Line Width box.Click the Line Color option in the Format Shape dialog box and choose Gradient Line.
In the Direction list box, choose Linear Down, and change the Angle setting to
0. Select Stop 1 in the Gradient stops section, and change its color to Dark Blue Accent 2. Change the Gradient stop to Stop 3 and change its color to Dark Blue Accent 2 Lighter 90% (see Figure 9.16).Select Stop 2 in the Gradient stops section, and click the Remove button to delete the middle gradient color. This allows us to set only the beginning (stop 1) and end (stop 2) colors of the gradient and let PowerPoint do the rest of the work!
On the Home tab of the Ribbon, in the Drawing group, click Shapes, and then click Line. Click and drag from the left edge to the center of the slide to draw a small horizontal line to anchor the subtitle. On the Drawing Tools Format tab of the Ribbon, use the Shape Outline settings to give it a 1.5 pt weight and a Blue-Gray Accent 3 color (see Figure 9.17).
Save your presentation.

Our slide has a linear look, so we’ll keep the animation linear as well. We’ll slide the blue rectangle off the bottom and slide the red rectangle off the left; we’ll then move the logo diagonally to the upper-right corner.
If you are following the makeover step by step, continue using your saved presentation. If you just stepped in, you can use the loop_04.pptx presentation from the Makeover 08Steps folder on the CD.
Follow these steps:
Select the blue rectangle at the bottom of slide 2, and in the Custom Animation pane, choose Add Effect, Exit, More Effects, Fly Out. Change the Start setting to With Previous and the Speed setting to Fast.
Select the red rectangle at the top of the slide, and in the Custom Animation pane, choose Add Effect, Motion Path, Left. Change the Start setting to With Previous and the Speed setting to Fast.
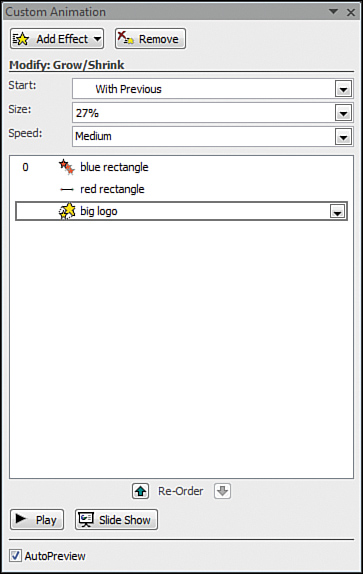
Select the logo and choose Add Effect, Emphasis, Grow/Shrink. Change the Start setting to With Previous and the Size setting to Custom 27% (See Figure 9.18). Press Tab or Enter on your keyboard to apply the new percentage setting.
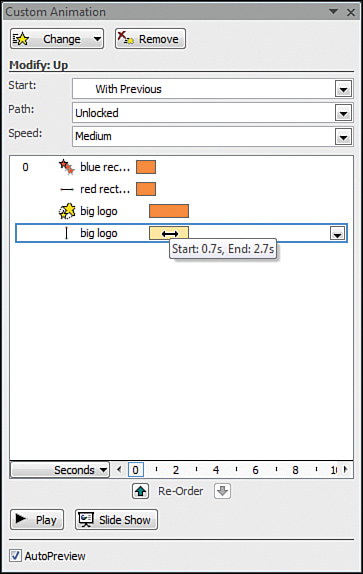
Select the logo on the slide and choose Add Effect, Motion Path, More Motion Paths, Up. Change the Start setting to With Previous. Select the handle on the end of the red arrow indicating the end of the motion path, and drag it to the upper-right corner of the slide (see Figure 9.19).
If necessary, right-click any animation in the Custom Animation pane and choose Show Advanced Timeline. Drag the logo emphasis and motion path animations bars in the Custom Animation pane so they begin at .7 seconds—before the red and blue rectangles complete their animations (see Figure 9.20).
Save your file.

Tip
Renaming objects in the Selection and Visibility pane really helps you understand what’s animating and when.
If you are following the makeover step by step, continue using your saved presentation. If you just stepped in, you can use the loop_05.pptx presentation from the Makeover 08Steps folder on the CD.
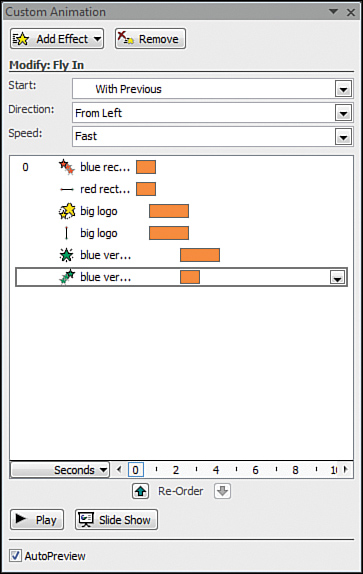
Select the vertical line on the left side of the slide, and in the Custom Animation pane, choose Add Effect, Entrance More Effects, Fade. Change the Start setting to With Previous and drag the animation bar in the pane so that it begins about half a second before the logo animation completes (see Figure 9.21).
With the vertical line selected on the slide, choose Add Effect, Entrance More Effects, Fly In. Change the Start setting to With Previous, the Direction to From Left, and the Speed setting to Fast (see Figure 9.21).
Save your file.
If you are following the makeover step by step, continue using your saved presentation. If you just stepped in, you can use the loop_06.pptx presentation from the Makeover 08Steps folder on the CD.
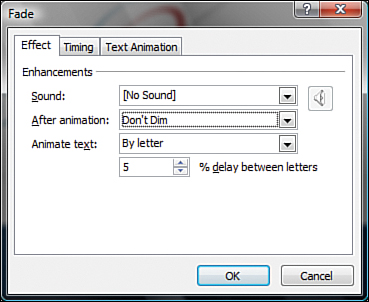
Select the title placeholder (“Over 4,500 customers worldwide”) and add a Fade entrance animation. Change the Start setting to With Previous and the Speed setting to Very Fast. Double-click the animation effect in the Custom Animation pane to open the Fade dialog box. Choose to animate the text By letter, with a 5% delay between letters (see Figure 9.22).
Repeat step 8 for the subtitle (“depend on Sendmail”). Drag the animation bar in the timeline so that it begins when the previous text box finishes its animation (see Figure 9.23).
Click the Play button at the bottom of the Custom Animation pane to see how your animation looks so far. Save your file.
If you are following the makeover step by step, continue using your saved presentation. If you just stepped in, you can use the loop_07.pptx presentation from the Makeover 08Steps folder on the CD.
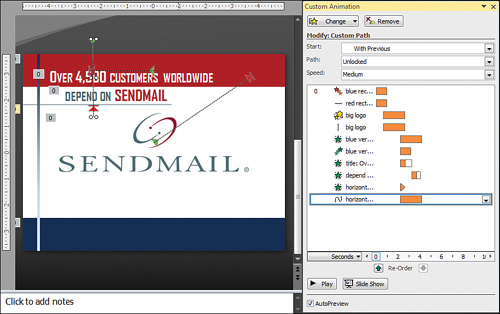
Select the horizontal line under the subtitle on slide 2, and add an Appear entrance animation with a Start setting of With Previous. Drag the animation bar in the timeline so that it begins at the same time as the title placeholder (see Figure 9.24).
Select the horizontal line on the slide and choose Add Effect, Motion Paths, Draw Custom Path, Freeform. Click above the slide to begin the path, click below the line on the slide, and then double-click the line to end the path. This creates a “bounce” effect that emphasizes the subtitle. Change the Start setting to With Previous (refer to Figure 9.24).
Click the Play button at the bottom of the Custom Animation pane to see what your animation looks like so far. Save your file.
Finally, we want to add a small logo to sit in the corner of the slide. We must do this because although we want the logo to appear on all the slides, we don’t want a big animating logo to occur on each one!
If you are following the makeover step by step, continue using your saved presentation. If you just stepped in, you can use the loop_08.pptx presentation from the Makeover 08Steps folder on the CD.
Copy and paste the big logo on slide 2; then, on the Picture Tools Format tab, click the Size dialog launcher. Check the Lock Aspect Ratio check box, and then type
1.9575in the Width box. (This value is the size of the logo [7.25”] times the Grow/Shrink percentage [27%].)In the Custom Animation pane, right-click the motion path animation effect for the small logo and choose Remove. Choose the Emphasis animation effect, click the Change button, and then click Entrance, Appear.
Rename the small logo using the Selection pane on the Home tab of the Ribbon.
Drag the small logo into the appropriate place on the upper-right corner of the slide. (It doesn’t have to be exact.) Use the Re-Order button on the Custom Animation pane to move this animation so that it occurs just as the motion path for the big logo ends (see Figure 9.25).
Click the Play button at the bottom of the Custom Animation pane to see how your animation looks so far.
Save your file.

So we don’t have to worry about placing the small logo exactly where the big logo ends, we’ll add an exit animation to the big logo. We’ll do something similar for the red rectangle at the top of the slide.
If you are following the makeover step by step, continue using your saved presentation. If you just stepped in, you can use the loop_09.pptx presentation from the Makeover 08Steps folder on the CD and continue with these steps to complete the animations.
Select the big logo and choose Add Effect, Exit, Disappear. Change the Start setting to With Previous, and use the Re-Order buttons so that this animation occurs next after the small logo animation (see Figure 9.26).
Copy and paste the red rectangle onto the slide. Choose its animation effect in the timeline and click Change, Entrance, Appear. Use the Re-Order buttons to move the animation up in the timeline, and drag the animation bar so that it occurs at the end of the original rectangle’s animation. Nudge the copy so that it is positioned near where the original red rectangle will be at the end of its animation.
Rename the rectangle to #2 Red Rectangle using the Selection and Visibility pane (accessed on the Home tab of the Ribbon by choosing Select, Selection Pane).
Select the original red rectangle on the slide and choose Add Effect, Exit, Disappear. Change the Start setting to With Previous and use the Re-Order buttons to move the animation up in the timeline so that it occurs when the short red rectangle appears (see Figure 9.26).
Select the short red rectangle and click the Home tab on the Ribbon; then click Arrange, Send to Back so that this object doesn’t cover other objects on the slide.
Click the Play button at the bottom of the Custom Animation pane to see what your animation looks like so far. Save your file.

Customer lists, as you saw in slide 2 of the original presentation, can be boring. To eliminate this boredom, we’ll create some slides to really show off who our customers are.
If you are following the makeover step by step, continue using your saved presentation. If you just stepped in, you can use the loop_10.pptx presentation from the Makeover 08Steps folder on the CD.
To begin, we’ll make a copy of the slide and remove the animation from the existing graphics. Follow these steps:
Select slide 2 in the Slides pane, and press Ctrl+D to duplicate the slide.
On slide 3, select the original red rectangle that’s as wide as the slide, and press the Delete key to delete it. Shorten the remaining red rectangle so that it doesn’t hang off the left edge of the slide. Delete the large logo from the middle of the slide.
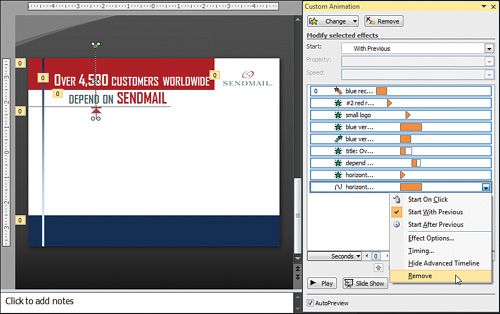
Shift+click the first and last animation effects in the Custom Animation timeline to select all animations; then, click the Remove button at the top of the Custom Animation pane to remove all animation (see Figure 9.27).
Click the Insert tab on the Ribbon and then click Picture to add the corporate logo for each of the financial services companies listed on the original slide. These are in the
Makeover 08Picturesfolder on the CD.Make the blue rectangle at the bottom of the slide a bit thinner (about 1”), shorten it so that it stops at the vertical line, and move it toward the top of the slide. Copy the title placeholder and type
Financial Services. Position the text box on the blue rectangle (see Figure 9.28).Because customers really are people, add the picture of the woman at the laptop (
2_2501308.jpgin theMakeover 08Picturesfolder on the CD). Resize it to about 2” tall and add a 6-point red outline.Tip
Be aware of copyright laws. Royalty-free does not necessarily mean no cost. In addition, just because you can download a picture or other media from the Internet doesn’t mean you have the right to use it in your presentation. Microsoft Office Online offers completely free photos and sounds for use in your presentation, but if you frequently need photography or music, look into purchasing stock photo and music CDs or subscription packages. The photos of people in this makeover were provided by PhotoSpin (http://www.photospin.com).
Shift+click to select the picture, the blue rectangle, and the Financial Services text, and choose Arrange, Align, Align Middle to vertically center all three pieces (see Figure 9.28). Then choose Arrange, Group to group them. The Align tools are available on the Home tab, the Drawing Tools Format tab, or the Picture Tools Format tab of the Ribbon.
Save your file.

If you are following the makeover step by step, continue using your saved presentation. If you just stepped in, you can use the loop_11.pptx presentation from the Makeover 08Steps folder on the CD and continue with these steps.
Now for the animation! If the Custom Animation pane isn’t already visible, click the Animations tab on the Ribbon and then click Custom Animation to open it. Then follow these steps:
Make sure you are on slide 3. Select the Financial Services group and in the Custom Animation pane, choose Add Effect, Motion Paths, More Motion Paths, Down. Click and drag the white handle at the end of the path (where the red arrowhead is) to drag it down off the slide. Change the Start setting to With Previous.
Right-click the downward motion path and choose Reverse Path Direction so that the group looks as if it’s entering the slide from the bottom.
Select the Financial Services group on the slide and choose Add Effect, Entrance, Fade. Set the Start setting to With Previous. Now the group will fade in as it moves upward onto the slide (see Figure 9.29).
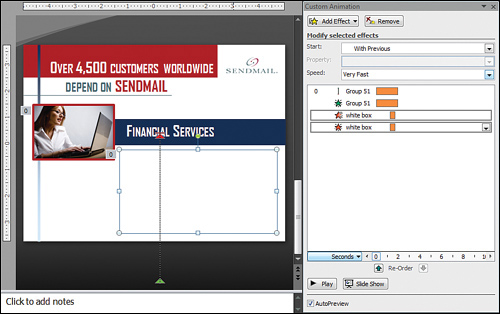
To cover the client logos and make it look as if the Financial Services group is revealing the logos as it wipes up, add a white rectangle to the slide and animate it. To do so, follow these steps:
Click the Home tab, go to the Shapes group, and click Rectangle. Click and drag on the slide to create a rectangle that’s big enough to cover the logos. On the Drawing Tools Format tab, change the Shape Fill to White, and choose Shape Outline, No Outline. Then click the arrow next to Send to Back and choose Send Backward so that the box doesn’t overlap the picture of the woman as it animates.
With the white box selected on the slide, choose Add Effect, Exit, More Effects, Wipe. Change the Start setting to With Previous. Drag the animation bar in the Advanced Timeline so that it begins at 1.3 seconds.
Tip
To learn more about the Advanced Timeline, refer to the sidebar “Using the Advanced Animation Timeline,” earlier in this chapter.
Again, with the white box selected on the slide, choose Add Effect, Exit, More Effects, Fade. Change the Start setting to With Previous, and change the Speed setting to Very Fast.
Tip
You can combine two or more animations of the same type to create a new animation. In this instance, we used two exit animations (Wipe and Fade), and then timed them to occur at the same time.
We can call this slide finished, but it would be better to have the Financial Services banner exit off the slide; after all, it sets up a nice transition to the next slide.
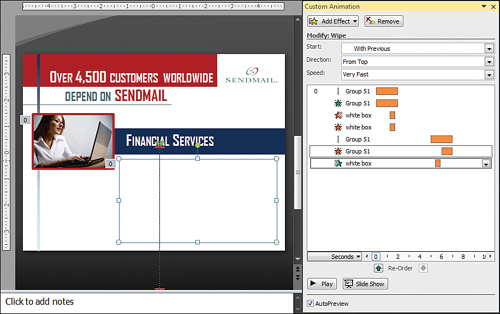
Select the Financial Services group, and in the Custom Animation pane, choose Add Effect, Motion Paths, More Motion Paths, Down. Click and drag the red handle at the end of the path to drag it down off the slide so that it’s the same size as the existing motion path. Change the Start setting to With Previous. Drag the animation effect in the Custom Animation timeline so that it begins at 5 seconds (see Figure 9.30).
Select the Financial Services group on the slide, and in the Custom Animation pane, choose Add Effect, Exit, Fade. Change the Start setting to With Previous and the Speed to Fast. Drag the animation bar in the Custom Animation timeline so that it begins at 6 seconds (see Figure 9.30).
Select the white box on the slide, and in the Custom Animation pane, choose Add Effect, Entrance, Wipe. Change the Start setting to With Previous and the Direction setting to From Top. Drag the animation bar in the Custom Animation timeline so that it begins at 5.4 seconds (see Figure 9.30).
Click the Play button at the bottom of the Custom Animation pane to see what your animation looks like so far. Save your file.
Now that we’ve completed one customer slide, it will be easy to copy and modify that slide to create another.
If you are following the makeover step by step, continue using your saved presentation. If you just stepped in, you can use the loop_12.pptx presentation from the Makeover 08Steps folder on the CD and continue with these steps.
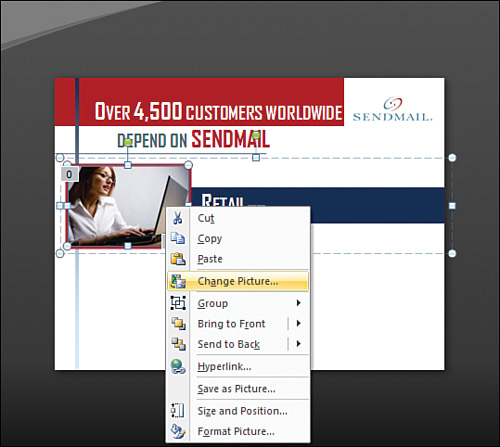
Make a copy of slide 3 by selecting it in the Slides pane, and pressing Ctrl+D. Now, change the Financial Services text to
Retail.Right-click the picture of the woman and choose Change Picture (see Figure 9.31). This opens the Insert Picture dialog box. Select the picture of the man (
7_2502031.jpgin theMakeover 08Picturesfolder on the CD), and click Insert.Select the picture of the man on the slide, and on the Picture Tools Format tab, click the Size dialog launcher. Make sure the Lock aspect ratio option is selected; then type
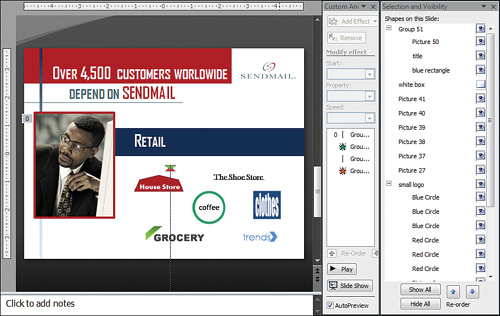
2.75in the Width box. Drag the picture to the left so that it overlaps the vertical line on the edge of the slide a little.On the Home tab in the Editing group, choose Select, Selection pane. Hide the white box by clicking the eye icon in the Selection and Visibility pane. Now delete the financial services companies’ logos and replace them with the retail companies’ logos (see Figure 9.32). These logos are in the
Makeover 08Picturesfolder on the CD.Use the Re-Order buttons on the Selection and Visibility pane to move the white box above the logos you just added. Move the Retail group banner so that it is the top layer at the top of the list (see Figure 9.32). You also could use Arrange, Bring to Front on the Home or Drawing Tools Format tabs of the Ribbon. Make the white box visible again by clicking the eye icon.
Save your file.
Basic text is too boring for a tradeshow loop, so we’ll add some punch to these short phrases.
If you are following the makeover step by step, continue using your saved presentation. If you just stepped in, you can use the loop_13.pptx presentation from the Makeover 08Steps folder on the CD.
The objects on slide 2 already are animated, so we can save some time by basing slide 5 on slide 2. Follow these steps:
Select slide 2 in the Slides pane, and press Ctrl+D to duplicate the slide. In the Slide pane on the left, drag the duplicated slide to the bottom of the pane, so that this is slide 5.
Delete the large logo from the middle of the slide. In addition, delete the red rectangle that extends the entire width of the slide.
Type
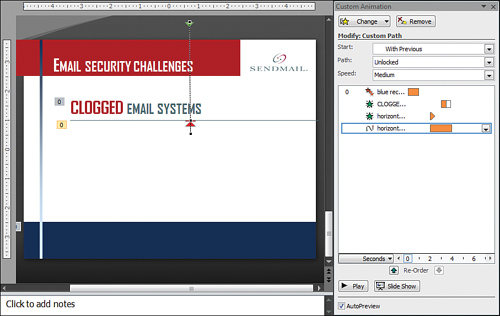
Email security challengesin the title placeholder to replace the existing title text. TypeClogged email systemsin the subtitle placeholder. Select the word “Clogged” and use the Font color tool on the Home tab of the Ribbon to highlight the text by making it red (the Accent 1 color).Move the subtitle placeholder below the horizontal line. Then move the horizontal line below the subtitle placeholder. With the line still selected, drag the end of the line to make it long enough to reach the right edge of the slide. This anchors the text so that it is not floating around in the middle of the slide (see Figure 9.33).
If the Custom Animation pane isn’t open, click the Animations tab of the Ribbon, and then click Custom Animation. Select the animation effects for the #2 red rectangle, the small logo, the title placeholder, and the blue vertical line in the Custom Animation pane, and delete those animations by right-clicking and selecting Remove.
Select the horizontal line on the slide, right-click the motion path, and choose Edit Points. Drag the green arrow end of the motion path so that it extends off the top edge of the slide (see Figure 9.33).
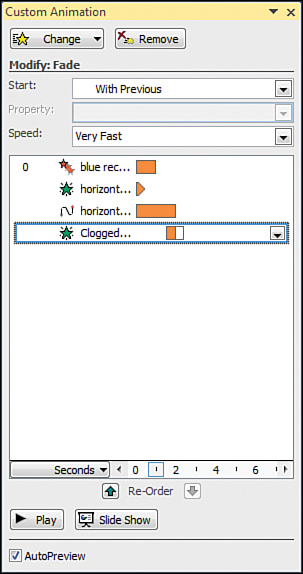
In the Custom Animation pane, drag the orange bars for the horizontal line animations to the beginning of the timeline so that there is no delay. Drag or use the Re-Order buttons to move the subtitle animation to the last in the list. (This makes it easier to follow the animation sequence.) Drag the animation bar for the subtitle box so that animation begins at 1.5 seconds (see Figure 9.34).
Now that you’ve set up animation for one text and line combination, you can use those as the basis for other text that will animate the same way.
If you are following the makeover step by step, continue using your saved presentation. If you just stepped in, you can use the loop_14.pptx presentation from the Makeover 08Steps folder on the CD.
Press Shift+click to select the line and subtitle text box. While still pressing Shift, also press Ctrl and drag the line and subtitle text box downward. This creates copies of the objects while keeping them aligned with the originals.
Change the text to
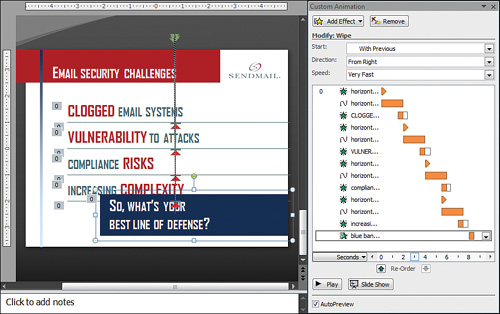
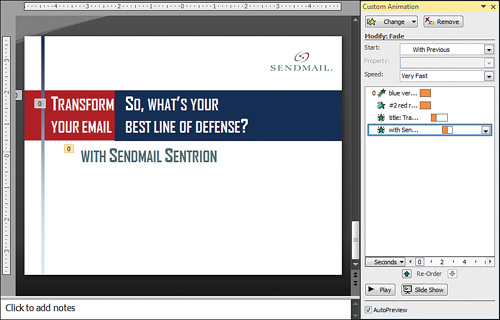
Vulnerability to attacks. Adjust the start end of the motion path (refer to step 6 in the previous step sequence) and tweak the animations so that they occur in sequence. Repeat forCompliance risksandIncreasing complexity(see Figure 9.35).Copy the title placeholder and change the text for the tagline to the following:
So, what’s your best line of defense?Shorten the blue rectangle and make it a bit wider so that the text fits inside it. Group the text and rectangle (see Figure 9.36).Add a Wipe entrance animation to the blue tagline banner. Change the Start setting to With Previous, the Direction setting to From Right, and the Speed setting to Very Fast. Drag the animation bar so that the animation begins as the animation for the last text box ends (see Figure 9.37). You can rename the group Blue Banner in the Selection pane on the Home tab of the Ribbon to make it easier to see in the Custom Animation pane.
Click the Play button at the bottom of the Custom Animation pane to see how your animation looks so far. Save your file.

Because the text on slide 5 has been building, we don’t need to leave the tagline visible for too long—a couple seconds is plenty, and then the objects can exit from the slides. To add exit animations, follow these steps.
If you are following the makeover step by step, continue using your saved presentation. If you just stepped in, you can use the loop_15.pptx presentation from the Makeover 08Steps folder on the CD.
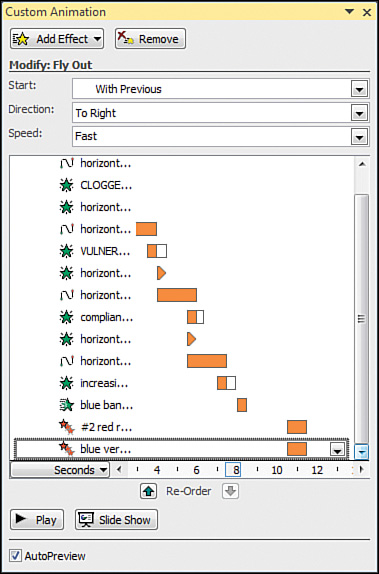
Select the red rectangle on the slide on slide 5, and apply a Fly Out exit animation. Change the Start setting to With Previous and the Speed setting to Fast. Drag the animation bar so that this animation begins about 2 seconds after the previous animation ends, at about 10.5 seconds (see Figure 9.37).
Select the vertical line on the slide and apply a Fly Out exit animation. Change the Start setting to With Previous, the Direction setting to To Right, and the Speed setting to Fast (see Figure 9.37).
Select the blue tagline banner on the slide, and apply an Up motion path animation. Click and drag the stop (red) end of the motion path upward toward the top of the slide to adjust the end position of the animation. Press the Shift key while you do this to keep the path vertical. Change the Start setting to With Previous and the Speed setting to Fast.
Add a rectangle to the slide, and then give it a white fill color and no outline using the tools on the Drawing Tools Format tab of the Ribbon. Apply a Wipe entrance animation, and then change the Start setting to With Previous, the Direction setting to From Left, and the Speed setting to Fast. Adjust its size and position so that it covers the four text boxes (see Figure 9.38).
Click the Home tab, and in the Editing group, choose Select, Selection Pane. Name the rectangle you drew in the previous step
white box. Use the Re-Order buttons to rearrange the objects so that they appear in this order: blue banner, blue vertical line, title, #2 red rectangle, white box. This ensures that the white rectangle appears below the exiting objects—but still above the text boxes it’s supposed to cover (see Figure 9.38).Click the Play button at the bottom of the Custom Animation pane to see how your animation looks so far. Save your file.

The final slide in the draft presentation encourages people to transform the way they network by using Sendmail Sentrion. Showing a picture of the product is more interesting than just displaying some text.
If you are following the makeover step by step, continue using your saved presentation. If you just stepped in, you can use the loop_16.pptx presentation from the Makeover 08Steps folder on the CD.
The objects on slide 5 are animated, so we can save some time by basing slide 6 on slide 5. Follow these steps:
Select slide 5 in the Slides pane, and press Ctrl+D to duplicate the slide.
Delete the white box, the four text boxes, and the lines from the slide.
Remove the animation from the blue banner and position the banner where its animation ends. To do this, click the Drawing Tools Format tab, and then click the Size group dialog launcher. On the Position tab, change the Vertical setting to
1.3”.Tip
It’s difficult to determine the endpoint of an object’s motion path animation. The free Motion Path Tools add-in from Microsoft PowerPoint MVP Shyam Pillai will help you overcome this limitation of PowerPoint. Download it from http://skp.mvps.org/mptools.htm.
Change the text in the title placeholder to
Transform the way you protect your email network, and add the textwithSendmail Sentrionin the subtitle placeholder. (You might need to resize the font in the subtitle placeholder to 42 pt.) Press Shift+Enter to add a line break between the words “you” and “email” in the title placeholder.Increase the height of the red rectangle to 1.58” to match the height of the blue rectangle. Align the two rectangles and text boxes (see Figure 9.39). Drag the red rectangle so it spans the width of the slide.

Now we can add some animation to the text and objects we just created. Follow these steps:
Right-click the red rectangle’s animation in the Custom Animation pane, and click Remove to remove the exit animation. Select the red rectangle on the slide and click Add Effect, Entrance, Wipe to add a wipe animation. Specify Start With Previous, Direction From Left, and Speed Fast. Drag the animation effect bar to the beginning of the timeline so it begins at 0.0 seconds.
The blue vertical line exited from the previous slide, so we’ll make it enter onto this slide from the same side. Select the Vertical Line animation effect in the Custom Animation pane. Click the Change button, and then choose Entrance, More Effects, Fly In. Change the Start setting to With Previous, the Direction setting to From Right, and the Speed setting to Fast. Drag the animation bar to the beginning of the timeline so it also begins at 0.0 seconds.
Select the title placeholder (“Transform...”) and apply a Fade entrance animation. Specify the Start setting as With Previous and the Speed setting as Very Fast. Double-click the effect to open the Fade effect options dialog box and choose to Animate Text By Letter. Type
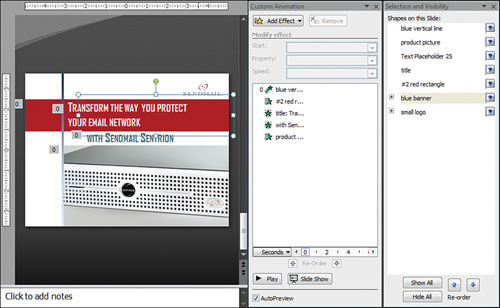
5for the percent delay between letters. Drag the animation bar so that this animation begins at 1.0 seconds, when the previous animations end. Repeat this step for the subtitle placeholder, dragging it to a start time of 2.0 seconds (see Figure 9.40).Add the product picture to the slide by clicking the Insert tab on the Ribbon, then Picture, and choosing
sentrion.pngon theMakeover 08Picturesfolder on the CD. Apply a Wipe entrance animation. Set the Start setting to With Previous and the Speed setting to Fast. Drag the picture to the lower-right corner of the slide.Select the blue vertical line, title, and subtitle placeholders, and drag them to the right until the line touches the edge of the photo.
Use the Selection and Visibility pane to move the blue banner behind the red rectangle and the picture below the vertical line (see Figure 9.41).
Now we want to apply exit animations to all objects to return to a blank white slide. To do so, follow these steps:
Select the blue banner and apply a Disappear exit animation. Set the Start setting to With Previous, and drag the effect so that it begins about 2 seconds after the previous animation ends (around 5.2 seconds).
For the remaining exit animations, set the Start setting to With Previous and the Speed setting to Fast.
For the red rectangle, use Fly Out with a Direction setting of To Right.
For the blue vertical line, use Fly Out with a Direction setting of To Left.
For the picture, use Wipe with a Direction setting of From Top.
For the logo, use Fade.
We want the subtitle placeholder to exit the opposite of its entrance animation, so use Fade with Speed set to Very Fast. Double-click to open the Effect Options, choose Animate Text By Letter, and type
5for the percent delay between letters (see Figure 9.42)Click the Play button at the bottom of the Custom Animation pane to see how your animation looks so far. Save your file.

Because we want our tradeshow loop to actually look like a loop, we’ll copy slide 1 and paste it to use as the basis for our last slide.
If you are following the makeover step by step, continue using your saved presentation. If you just stepped in, you can use the loop_17.pptx presentation from the Makeover 08Steps folder on the CD.
In the Slides pane, select slide 1 and press Ctrl+D to duplicate it; then follow these steps:
Drag the duplicate slide so it’s the last one in the Slides pane.
Delete the logo, including the text part of the logo and the six small circles.
Add Wipe entrance animations to both the red and blue rectangles. Set the Start setting to With Previous and the Speed setting to Fast. The Direction should be From Right for the red and From Left for the blue.
Now set the slide transitions so that the presentation moves automatically from one slide to the next. To do so, follow these steps:
Click the Animations tab, and click Custom Animation to open the pane, if it’s not already open. Right-click in the pane and choose Show Advanced Timeline.
Starting with slide 1, scroll to the bottom of the Custom Animation pane and hover over the last animation to see how long the animation takes to complete.
Using the animation time as a rough guide, input appropriate slide transition times in the Automatically After box on the Animations tab of the Ribbon (see Figure 9.43). We used the following times:
slide 1, 00:06
slide 2, 00:04.5
slide 3, 00:07
slide 4, 00:07
slide 5, 00:12
slide 6, 00:06.5
slide 7, 00:01
Finally, click the Slide Show tab, and then click Set Up Slide Show to open the Set Up Show dialog box. Check the Loop Continuously Until ‘Esc’ option so that the presentation will play in a continuous loop.
Save your file.

Background music is good to include on standalone presentations. PowerPoint can’t perfectly synchronize animations or slide transitions with music, but it does a good job playing a background track.
IndigoRose provided the background music file for this makeover. You can find more royalty free music on the CD.
If you are following the makeover step by step, continue using your saved presentation. If you just stepped in, you can use the loop_18.pptx presentation from the Makeover 08Steps folder on the CD.
To add music to the presentation, follow these steps:
Copy the
HaveMercy.mp3file from theMakeover 08Stepsfolder on the CD to the same folder as your open presentation.Tip
Before you insert any sound or movie files within your presentation, copy the media files to the same folder as the presentation so that PowerPoint can remember where the file is located. This is especially important if your media files are on a CD, thumb drive, network folder, or external hard disk. Even if the media files are located in the same computer as the presentation, it’s a good idea to copy them to the same folder in case you want to share the presentation. Then, all you will need to do is copy the whole folder to share your presentation—this also ensures that the sounds and movies will work everywhere without broken links.
On slide 1, click the Insert tab, click the arrow beneath the Sound icon, click Sound From File, choose the
HaveMercyMedium.mp3file that you copied in the previous step, and click OK.Caution
The only sound file that can be embedded into PowerPoint is a WAV file. Before you insert a WAV into your presentation, click Office Button, PowerPoint Options, Advanced, and then input
50000in the Link Sounds with File Size Greater Than box to embed WAVs nearly 50MB in size.All other sound file types are linked. (For example, the MP3 music we just added to our presentation will be linked.) To help keep the links intact, copy the sound files into the same folder with your presentation before inserting them. In addition, be sure to include both the PowerPoint file and the sounds if you move the presentation to another computer!
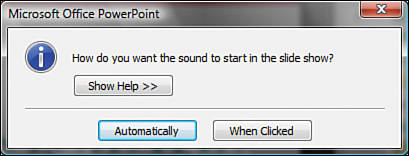
PowerPoint opens a message box asking if you want to play the sound Automatically or When Clicked. Choose Automatically (see Figure 9.44).
Select the sound icon on the slide, and then click the Sound Tools Options tab. Choose Loop Until Stopped, and then choose Play Sound: Play Across Slides. You also can click Hide During Show (see Figure 9.45), or you can drag the icon off the edge of the slide so that it doesn’t show during the presentation.
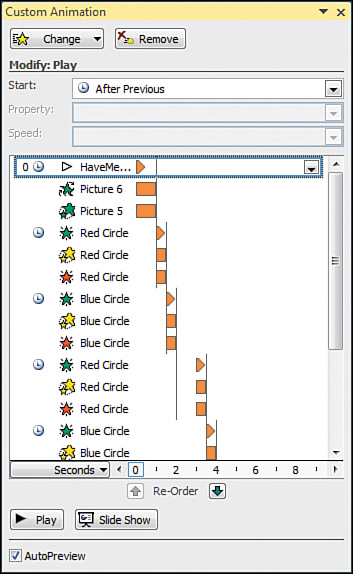
Click the Animations tab, and click Custom Animation to open the pane, if it’s not already open. You will see the sound animation at the bottom of the Custom Animation pane. Drag it to the top (see Figure 9.46).
Play the show to see it in all its glory, and be sure to turn up the speakers! To play the slide show full-screen, press F5 on your keyboard or click the Slide Show tab on the Ribbon and choose From Beginning. You also can click the Slide Show button on the Custom Animation pane or click the Slide Show icon on the Status bar.

You can play the completed presentation by opening the loop_19.pptx presentation from the Makeover 08Steps folder on the CD.