
Use DEVONthink’s Web Server
The Server version of DEVONthink has a built-in web server that lets you share your database live on a network. This is useful for giving yourself (or other family members) access to your data from other computers in your home, or for running an internal website that provides shared information for all the employees of a small company. It also makes it possible to add new information to your database from a web browser. Although the web server was present in DEVONthink Pro Office, the version in DEVONthink Server has been redesigned with a new look and feel, improved security, and granular per-user and per-database access controls.
I want to emphasize, though, that this is not a full-blown database server, and it’s not suitable for running a public website. Compared to standalone servers, DEVONthink lacks many standard logging, performance, and customization features. So it’s good at what it does—but just bear in mind that what it does is limited.
To set up the web server, follow these steps:
Go to DEVONthink 3 > Preferences > Server (Figure 84).
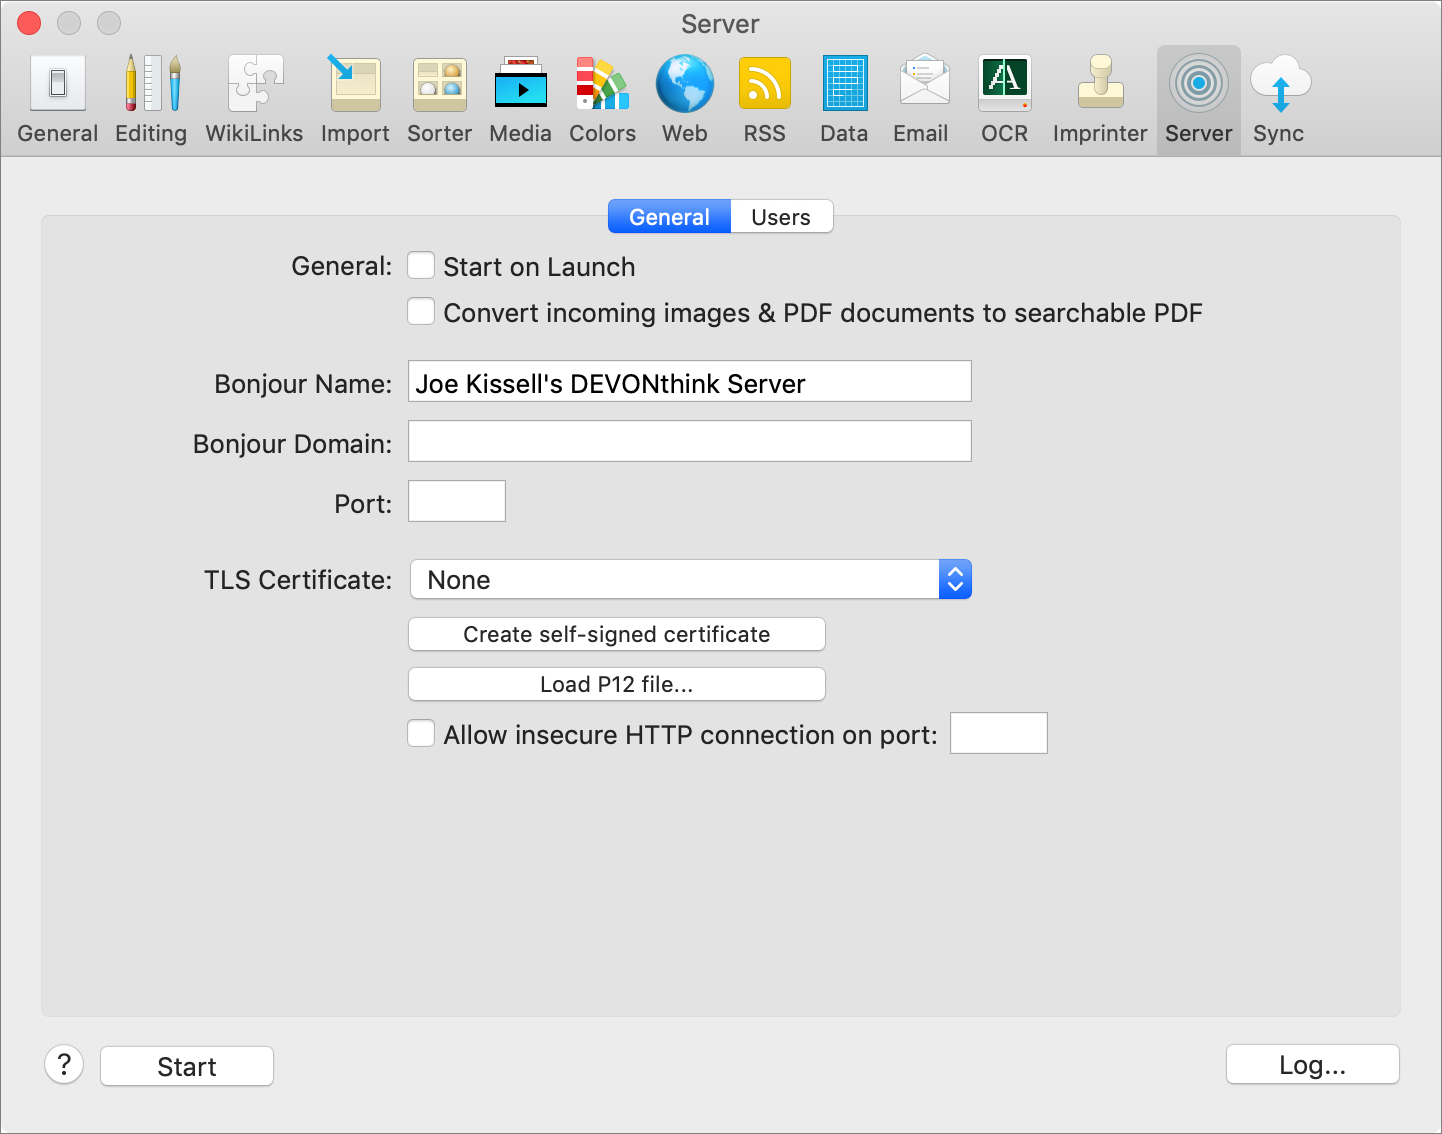
Figure 84: Set up DEVONthink’s web server here. On the General tab, edit any or all (or none) of the following fields to taste:
General: Check Start on Launch if you want to activate the web server automatically when you open DEVONthink. Check “Convert incoming images & PDF documents to searchable PDF” if you want DEVONthink to perform OCR on all images and PDFs uploaded via the web interface.
Bonjour Name: Enter the name your DEVONthink web server will have on the local network.
Bonjour Domain: If your local network contains more than one Bonjour domain (an unusual situation), enter the domain name at which your database will be reachable (to enable proper generation of relative links). Most people can ignore this setting.
Port: Enter the number for the port on which the server should listen (if blank, DEVONthink chooses a random, high port number such as 60149).
TLS Certificate: These controls enable DEVONthink to communicate via an encrypted HTTPS connection. If you already have a TLS certificate for your Mac installed (for example, one obtained from Let’s Encrypt), you can choose it from the pop-up menu. If you don’t have an externally managed certificate, however, click “Create self-signed certificate” to make your own and select it, all in one step. (Self-signed certificates are just as secure as those provided by certificate authorities, but visitors to your site may receive a warning that the connection may not be private because the certificate is not trusted.) If you have a P12 file rather than a TLS certificate, click “Load P12 file,” navigate to the file, and click Choose.
Allow insecure HTTP connection on port: If, despite having HTTPS enabled, you want to enable insecure, HTTP connections, check this box.
On the Users tab, set up accounts and permissions for each person who will connect to DEVONthink via the web server:
Click the plus
 button, type a name, and press Return.
In the Password field, enter the password that user will type to log in. (A password is mandatory; if this field is left blank, the user will be unable to log in.)
For each database (including the global Inbox), select the checkbox(es) for the activities that user is permitted to do via the web interface: Read, Download, Add, Write, Organize, and Delete.
Click Start. (You can also choose Tools > Start Server, which is useful when the Preferences window is closed.)
The web server starts, and DEVONthink displays, at the bottom of the window, the address at which it can be reached—in both Bonjour format and as a numeric IP address (such as
http://iMac.local:60150,http://172.16.85.1:6015).
The web server is now running. To turn it off later, click Stop, choose Tools > Stop Server, or quit the app.
To visit your database, open a web browser (on the same Mac, an iOS device, or another computer on your network), enter the address DEVONthink gave you in step 3, and enter the username and password for one of the users you set up in step 2. You should then see something like Figure 85.

Because the controls available on this webpage are so simple and largely self-explanatory, I’ll refrain from detailing each one. But I do want to point out just a few key features (which are dependent on the permissions of the currently logged-in web sharing user):
Uploading and downloading: Remote users can add new documents to the database (tagging them in the process) and retrieve entire files in their original formats.
Creating and editing: Remote users can add bookmarks, plain text notes, formatted notes, and Markdown documents to the database (again, including tags) from the browser, and can edit existing documents in those formats. Remote users can also add feeds and groups.
Search: Use the full-featured Search field on the right side of the toolbar to search either the current database or all databases.
Organization: You can move, copy via drag and drop, and rename documents. You can also use the actions
 pop-up menu on the toolbar to apply labels or star ratings, or to mark them as (un)flagged/(un)read/(un)locked.
In addition, the browser interface has buttons to delete and refresh, switch between Standard and Widescreen views, change the language between English and German, hide or display the sidebar and inspector (which includes a See Also view), or log out.
If you’re wondering about another favorite feature, chances are it’s simply not there—sorry! The web server is great for basic access, but it makes no attempt to replicate all of DEVONthink’s functionality.