Chapter 2: Getting the Most Out of Your Gear
One of the most common questions you will ask yourself when you are deciding whether to get into wedding photography is, “What gear do I need to purchase to get started?” Obviously, you need basic tools such as a camera and a lens to make photographs. But can any camera and lens work or do you need special equipment to get the job done? With so many brands, options, and choices available, it can be overwhelming to decide what gear to buy. The answer to that question lies in your dedication to wedding photography and whether it is a full-time career or a weekend or part-time job. My wedding photography gear, shown in Figure 2-1, might seem like a lot to some but will look sparse to others. As with most tools, there are differences in price and capability, and the final decision on what gear to use should be something you are comfortable with. As you grow as a photographer, you will add new gear and sell or retire old gear. It pays to be familiar with the advances in the system you use, be it Canon, Nikon, or another camera manufacturer.
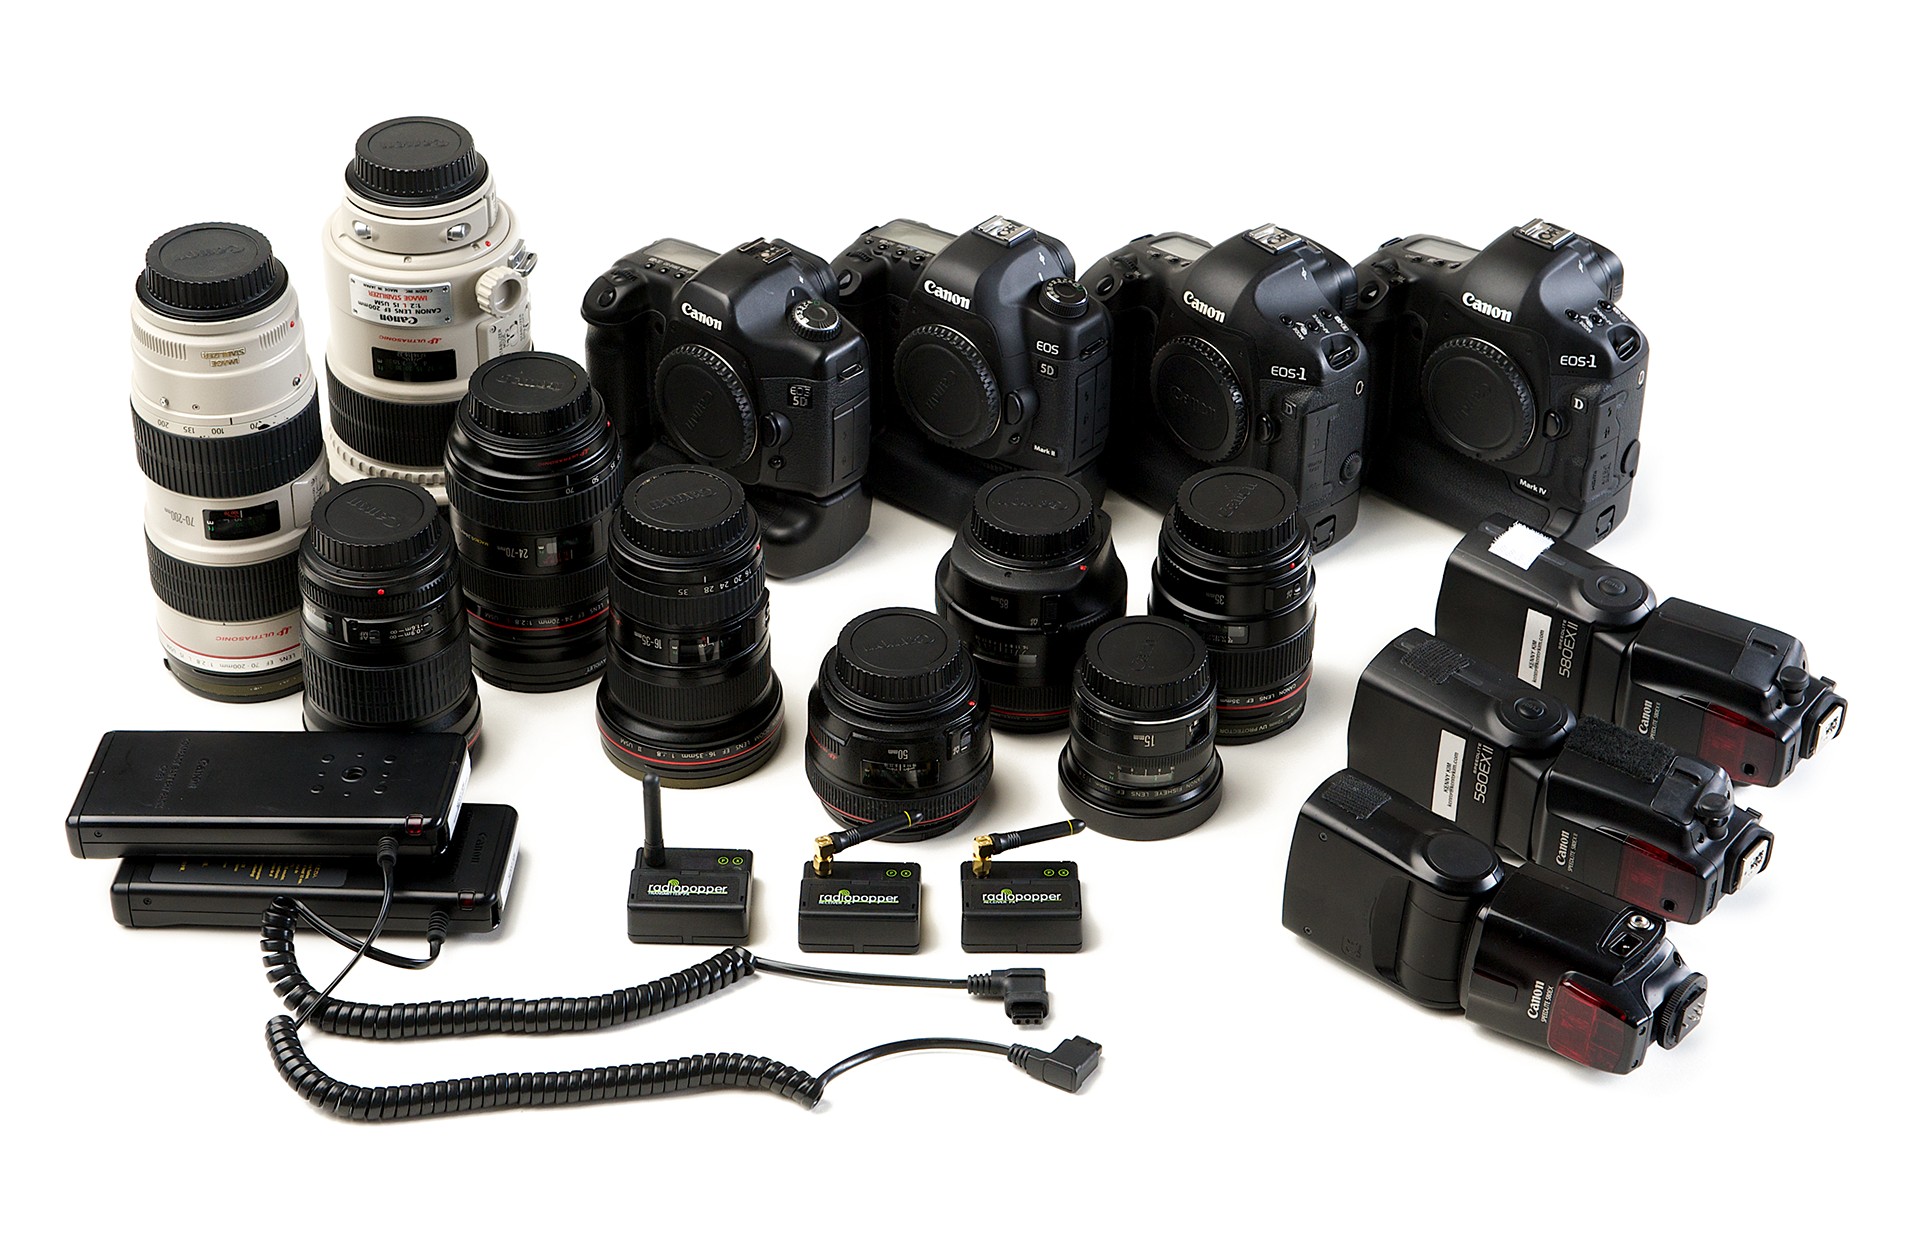
2-1
ABOUT THIS PHOTO Cameras, lenses, flash units, batteries, and radio triggers are all part of my wedding photography gear.
Camera
There are a great many cameras on the market and it seems like there are more coming out every month. When it comes to picking a camera for wedding work, here are some things to keep in mind:
• Megapixels. Digital cameras use a sensor to capture the image instead of film, and then the image is stored on a memory card. The megapixels refer to the number of image sensor elements on the sensor, and the more megapixels, the greater the resolution of the images. The megapixel count was more important when digital cameras first became mainstream and it seemed like the megapixels were doubling every six months. A camera with 10 megapixels or more is absolutely sufficient for photographing weddings (and most other types of photography).
• Full-size versus cropped sensor. There are two sizes of sensors in digital cameras: those that are the same size as a traditional 35mm piece of film (full size) and those that are smaller or cropped. Neither one is inherently better or worse than the other, but there are some things to know about using a cropped sensor. Because the cropped sensor is smaller than the full-frame sensor, it records less of the image compared to a full-frame sensor with the same lens. This means that the wide-angle lenses don’t seem as wide, and the telephoto lenses seem to have a greater reach. The simple solution to figuring out what the effective focal length is for a cropped sensor is to multiply the focal length by the crop factor. For example, if your camera sensor has a crop factor of 1.5x, a 50mm lens acts like a 75mm lens, a 20mm acts like a 30mm lens, and a 200mm acts like a 300mm lens. Not all cameras have a 1.5x crop factor, so check your camera manual for the specification for your cameras.
• High ISO/low noise capability. The newer cameras have better high ISO/low noise capabilities than ever before, which means you can use ISOs of 1600 and 3200 with confidence and without having to worry too much about digital noise, as shown in Figure 2-2. This is really helpful for wedding photography, especially when you are shooting indoors in darker churches and buildings when using a flash is not allowed.
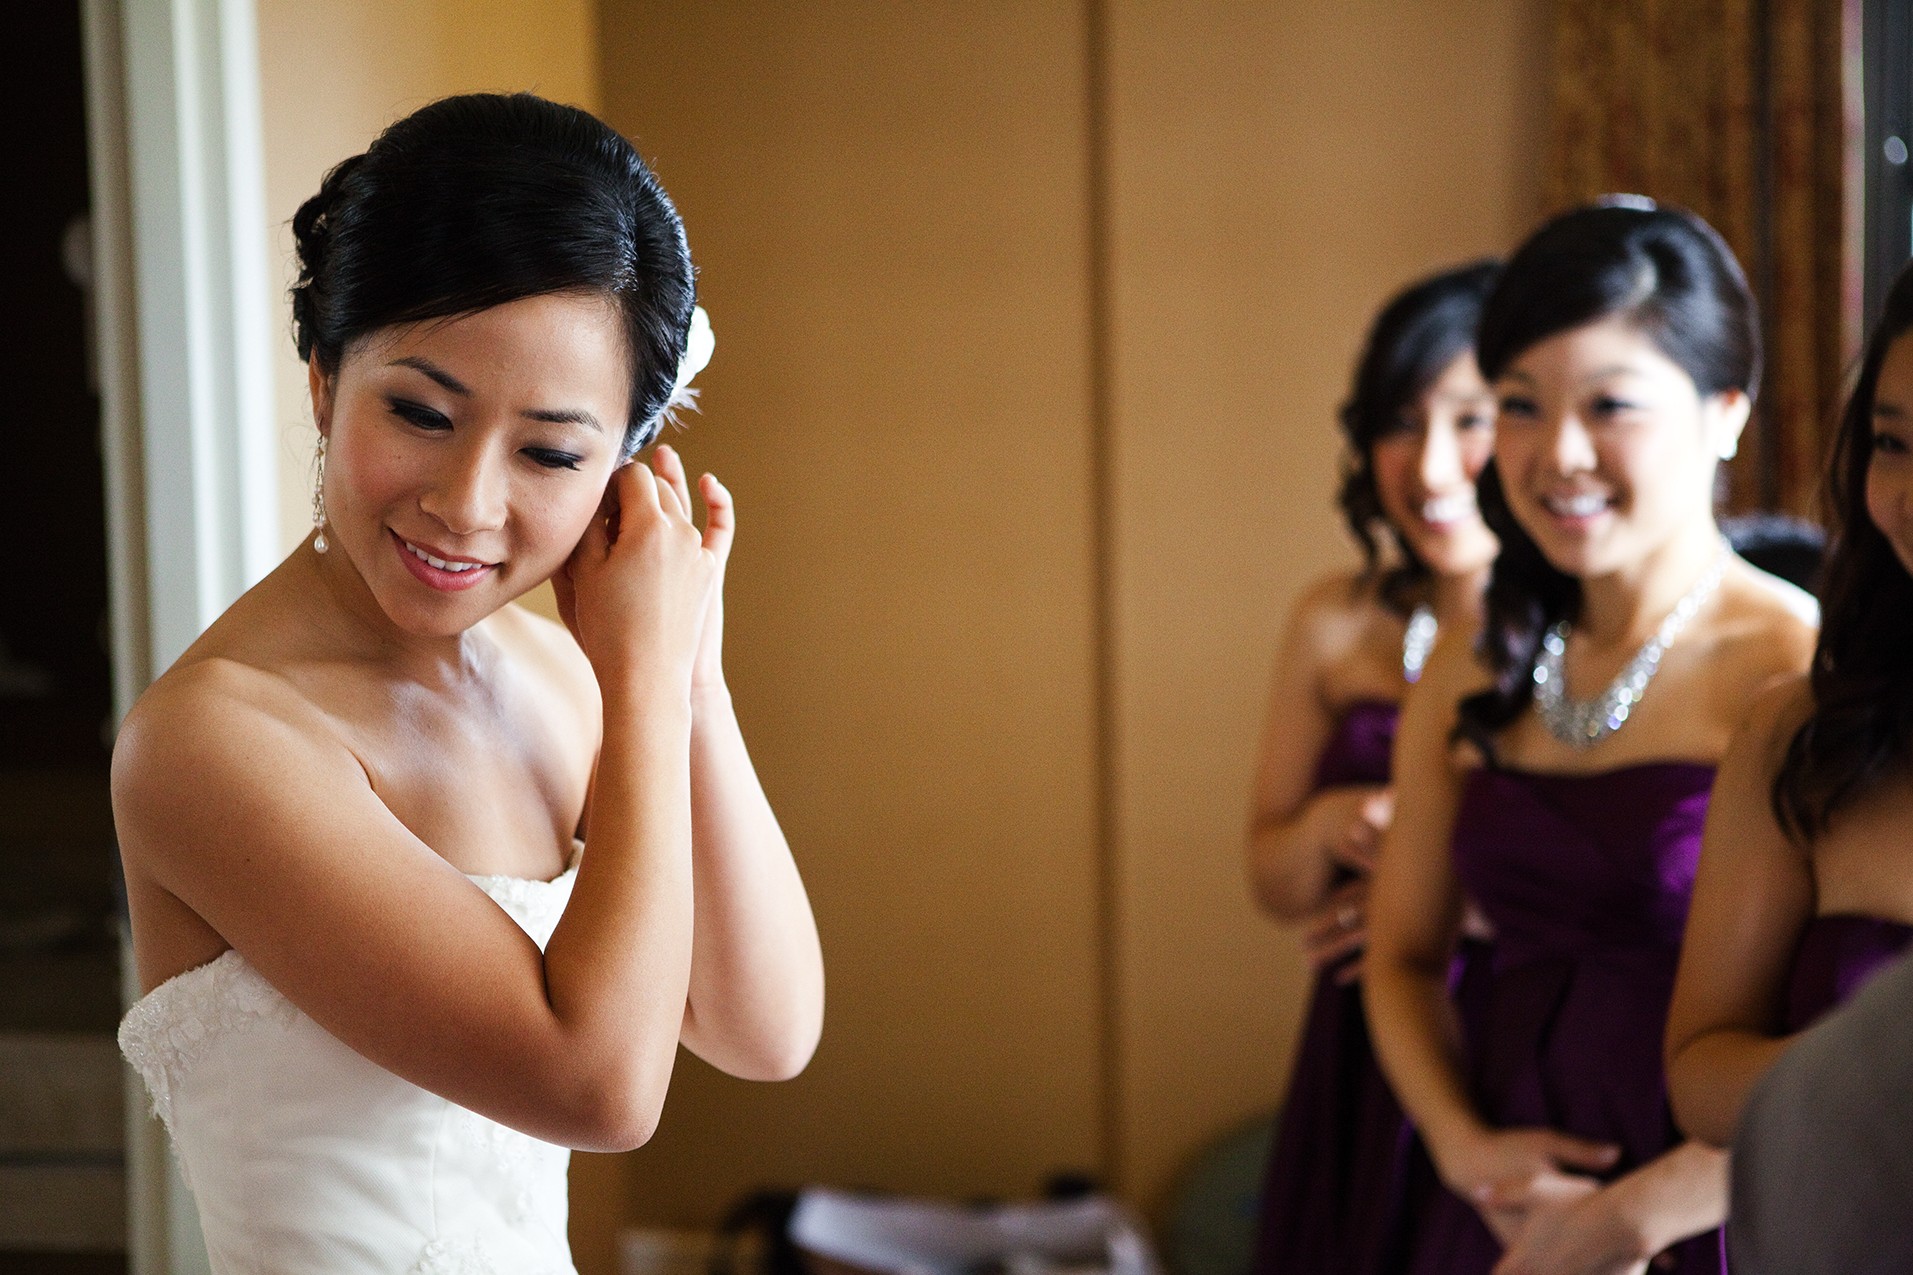
2-2
ABOUT THIS PHOTO Photographing the bride getting ready without using a distracting flash can mean using very high ISOs like I did in this image where I needed to use ISO 3200, but there is still very low noise. Taken at ISO 3200, f/2.8, 1/250 second.
• Rugged construction. Cameras are tools, and while you should clean them and take care of them, they still need to stand up to a fair amount of use and abuse. The better the camera is built, the longer it will last. For example, the professional series of Canon cameras includes cameras such as the Canon Mark 1D Mark III, with weather sealing and magnesium alloy construction, which is lighter than but just as rigid as aluminum making it really durable.
• Autofocus capability. Autofocus is really useful but only when it actually works. Some cameras have better autofocus capabilities than others, and it is something to check out when considering a camera. Many times the autofocus will work great in bright light but have problems when trying to focus in low light.
Renting a camera before buying it can help you to decide how well the camera works in a variety of lighting environments. Check out www.lensprotogo.com as a good source for online rental of gear.
• Vertical grip/extra battery pack. Many cameras have the capability to use an extra grip and battery pack, which makes the camera body larger, as shown in Figure 2-3. While the extra expense and the extra size and weight might make you pass on this accessory, it really is very helpful to have. The extra battery power means that there is less chance you will run out of battery power during the shoot.
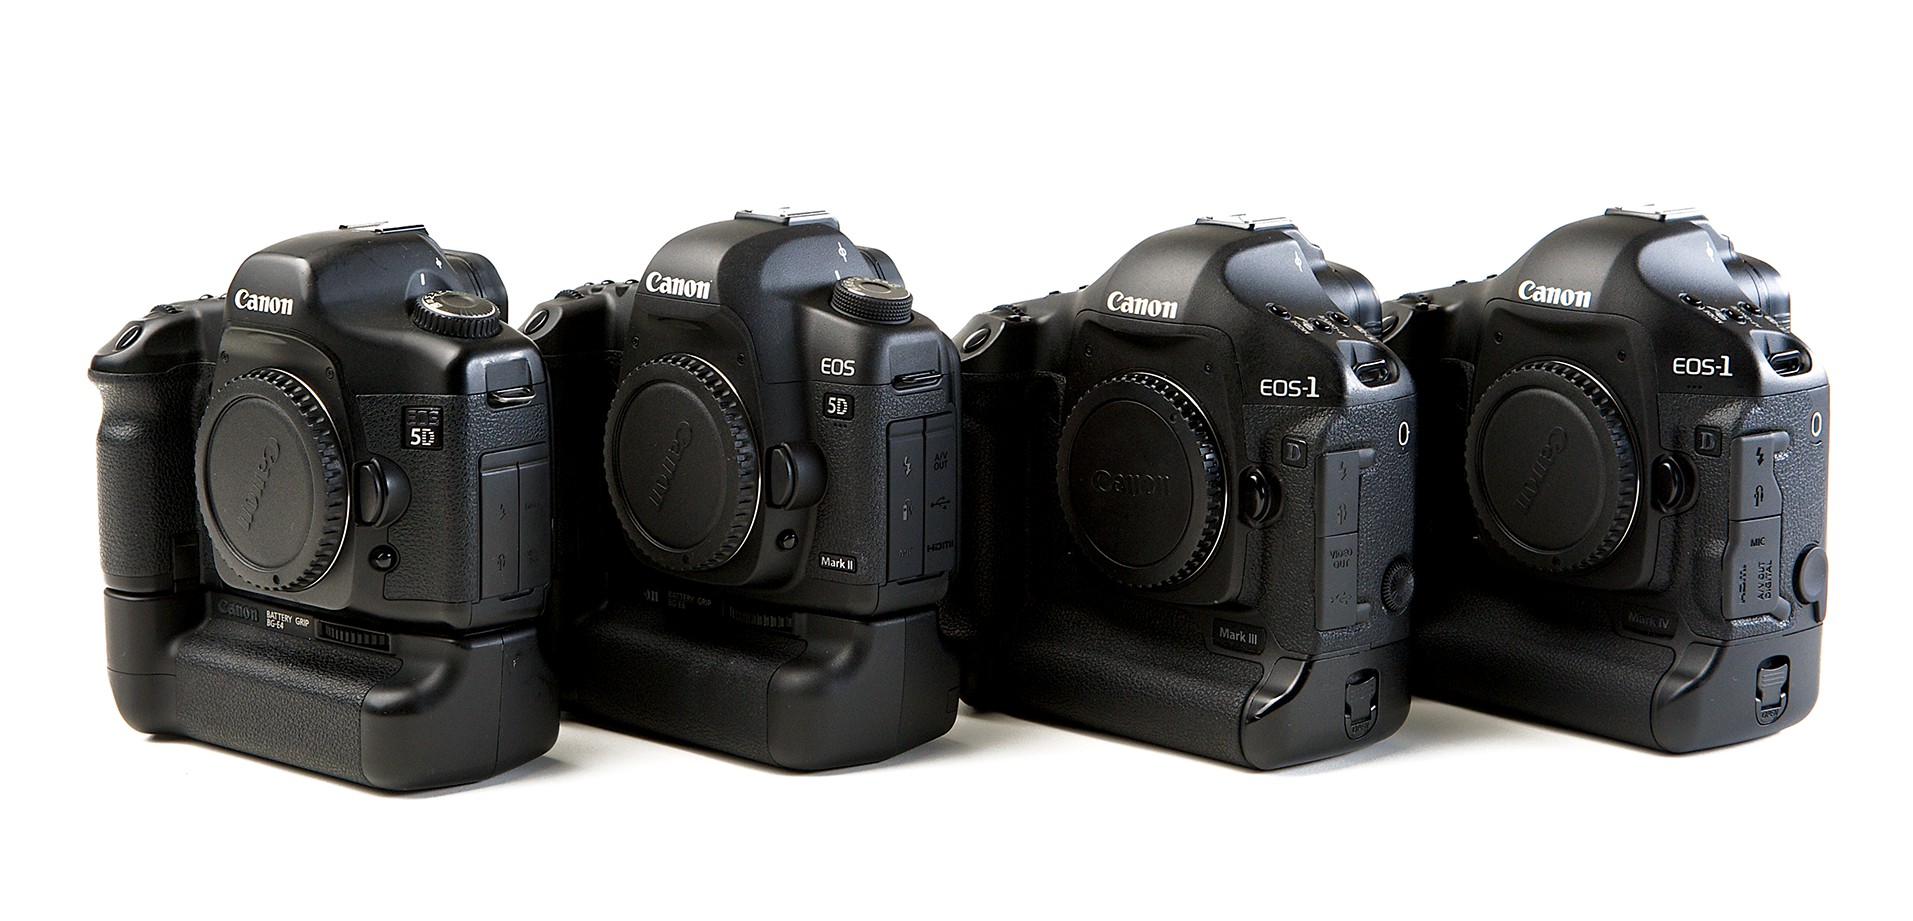
2-3
ABOUT THIS PHOTO You can see that the extra battery/vertical grip on the two Canon EOS 5D cameras makes them the same size as the two EOS 1D and gives them roughly the same battery life.
There are no second chances when shooting a wedding. There is only one opportunity to get the first look or that ring exchange, so it is imperative that your camera is in good working order; and while all cameras can have problems, the professional lines of cameras from the top camera manufacturers cost more but are built better and, therefore, are more reliable. This gives you the peace of mind that your camera will be in good working order when you need it. Full-time wedding photographers always carry a second camera body, and many even have a third backup body just in case something goes wrong.
Camera manufacturers know that the pros demand a product that must be reliable and be able to take a few knocks and still continue working. Weddings often have a large number of guests to work around and a variety of locations to shoot in, and your gear needs to stand up to the heavy use and possibly abuse. When shooting in a crowd, as shown in Figure 2-4, you will want to make sure your equipment can handle the knocks.
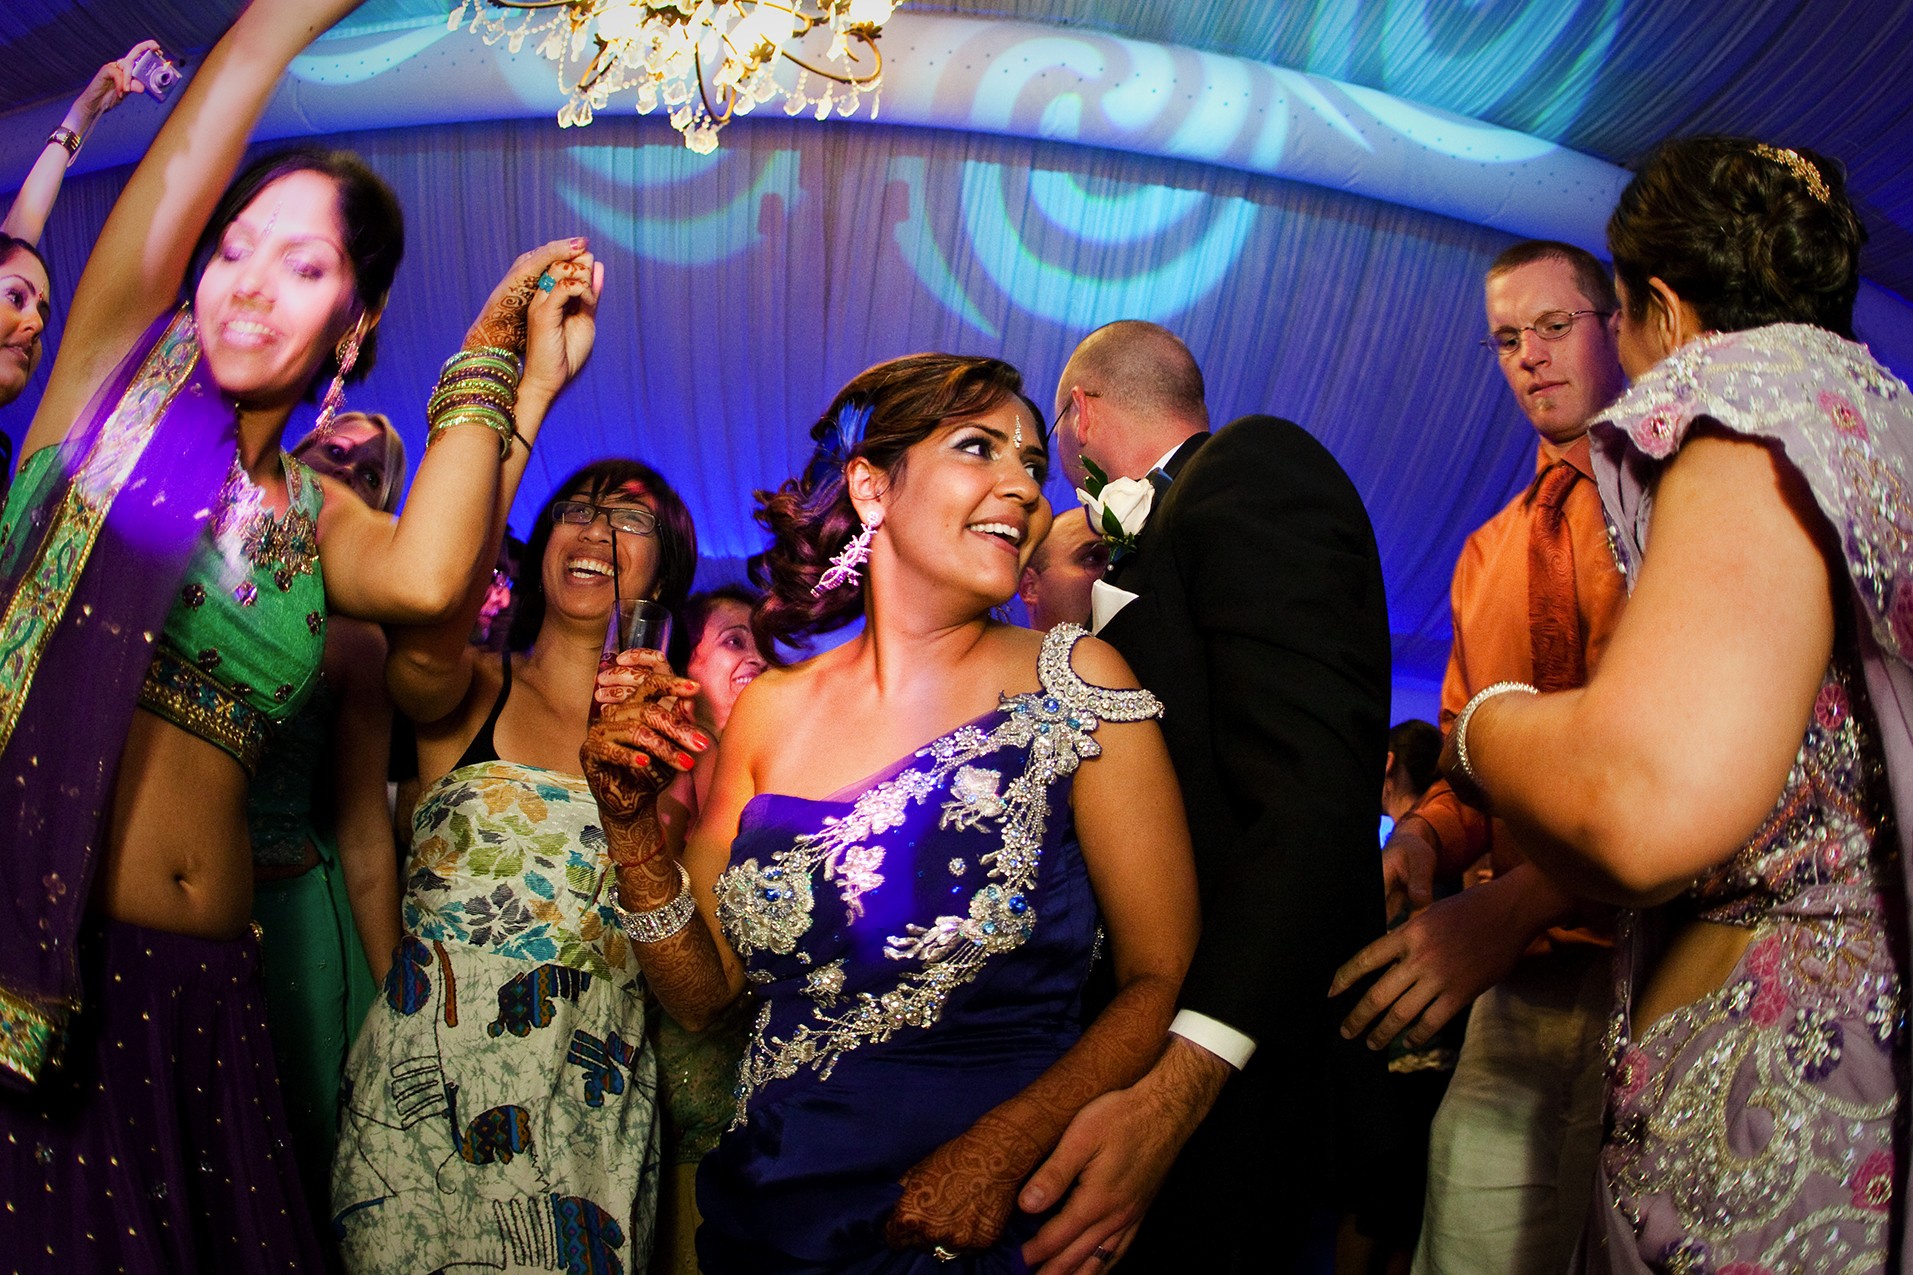
2-4
ABOUT THIS PHOTO When you are shooting right in the thick of things, a pro camera body is something that you can rely on. Taken at ISO 2500, f/2.8, 1/140 second.
That isn’t to say that consumer cameras aren’t up to the challenge, but they are not designed to be as tough as the professional models. For example, weddings often take place outdoors, and to get the shot, your camera is exposed to the elements. In Figure 2-5, water and sand were present, two things that can do real damage to a camera if it is not sealed against the elements like professional cameras are. Many consumer-level cameras simply are not able to hold up through the different locations and environments that a wedding photographer shoots in every weekend of the year.

2-5
ABOUT THIS PHOTO When shooting outdoor weddings, your gear can be exposed to the elements, like it was here at this wedding in the Bahamas right on the water. Taken at ISO 800, f/2.8, 1/200 second.
Just as you should dress professionally, you should also use professional-level equipment to capture the essential shots you need. At today’s weddings, even some of the guests bring professional gear. You will want to make sure your equipment is up to par with theirs, if not better.
Lenses
It is really important to invest in good lenses or “good glass.” While camera technology seems to improve year after year and there always seems to be a newer and better camera to buy, a great lens can last a lifetime.
The first feature of a lens to look at is the focal length. The focal length is important because it determines the angle of view of a lens. The greater the focal length, the narrower the angle of view, which means less of the area in front of the camera will be in the scene. Alternatively, things that are far away, or seem to be taking up very little area in front of the camera, appear to be closer when viewed through a lens with a long focal length. In practical terms, the bigger the number, the closer things appear. To photograph items that are far away, it takes a longer focal length, while getting a wide view requires a shorter focal length.
Lenses are divided up by the focal lengths they cover, from the wide angles to the telephoto views. None is better or worse than any other, but you need to use the right lens for the situation to get the best results.
Wide-angle lenses
Wide-angle lenses are those where the focal length is wider than 50mm on a full-frame sensor or 35mm on a cropped sensor. This allows you to capture much larger scenes, as shown in Figure 2-6. Wide-angle lenses work great when you need to get everything in the same frame, but there are some drawbacks because they can cause distortion in your images.
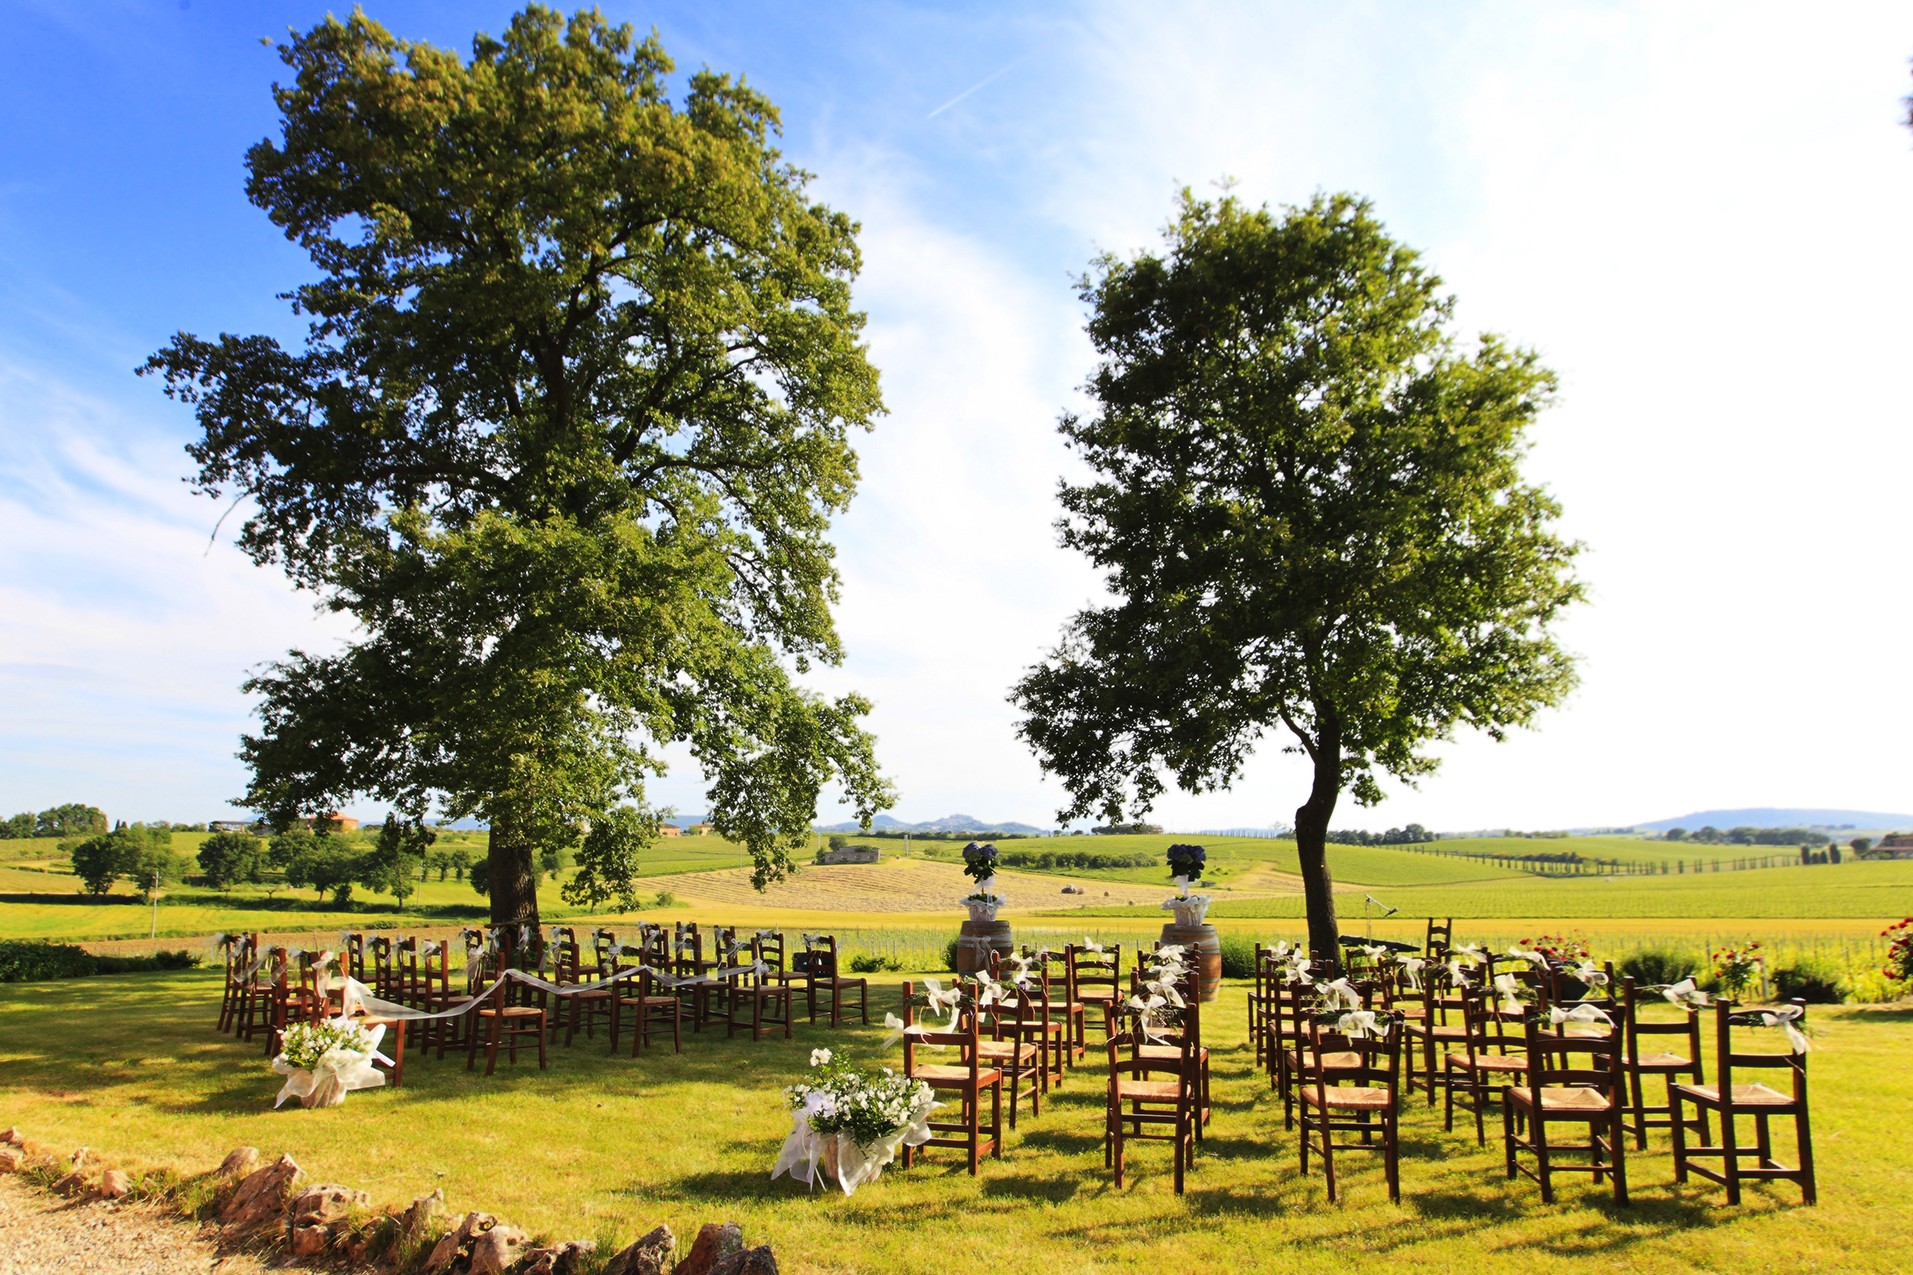
2-6
ABOUT THIS PHOTO Capturing the whole wedding location in a single frame takes a wide-angle lens. Taken at ISO 200, f/8.0, 1/320 second.
There are two distinct types of distortion to watch out for when using wide-angle lenses. The first is that objects that are in the foreground, that is, closer to the lens, can appear to be disproportionately bigger than objects that are in the mid-ground or background; and the things in the background, like the couple in Figure 2-7, can seem very far away. This is called wide-angle distortion or extension distortion. The second is that as objects get close to the edge of the frame, they can seem to curve, when in reality they are straight, which is called barrel distortion. Today’s wide-angle lenses are built to minimize this distortion as much as possible, but it does still exist. Fisheye lenses are extreme wide-angle lenses where the image distortion is very noticeable. The curving of the edges of the frame is part of the look when using a fisheye lens and care needs to be taken that you don’t cause an unwanted distortion to the subject.

2-7
ABOUT THIS PHOTO A wide-angle lens can make your location look very large, because objects in the background appear to be very far away. Taken at ISO 1600, f/2.8, 1/125 second with a 16-35mm Canon lens set to 35mm.
Even with the distortion problems that can occur, a wide-angle lens is really important when you are photographing a wedding because it is usually the only way to get the whole scene into a single image, and most clients will want that type of shot.
Normal lenses
Normal lenses are those that capture the scene in front of the camera roughly the same way that the human eye views the scene. This is about 50mm focal length on a full-frame sensor and 35mm on a cropped sensor. The advantage to shooting at these focal lengths is that the scene will seem to have the correct perspective and look normal to the viewer. In Figure 2-8, the groom and his groomsmen look very natural when shot with a normal focal length as they pose on the stairs. There is no distortion on the sides of the image, and everyone looks exactly the way they did when the shot was taken.
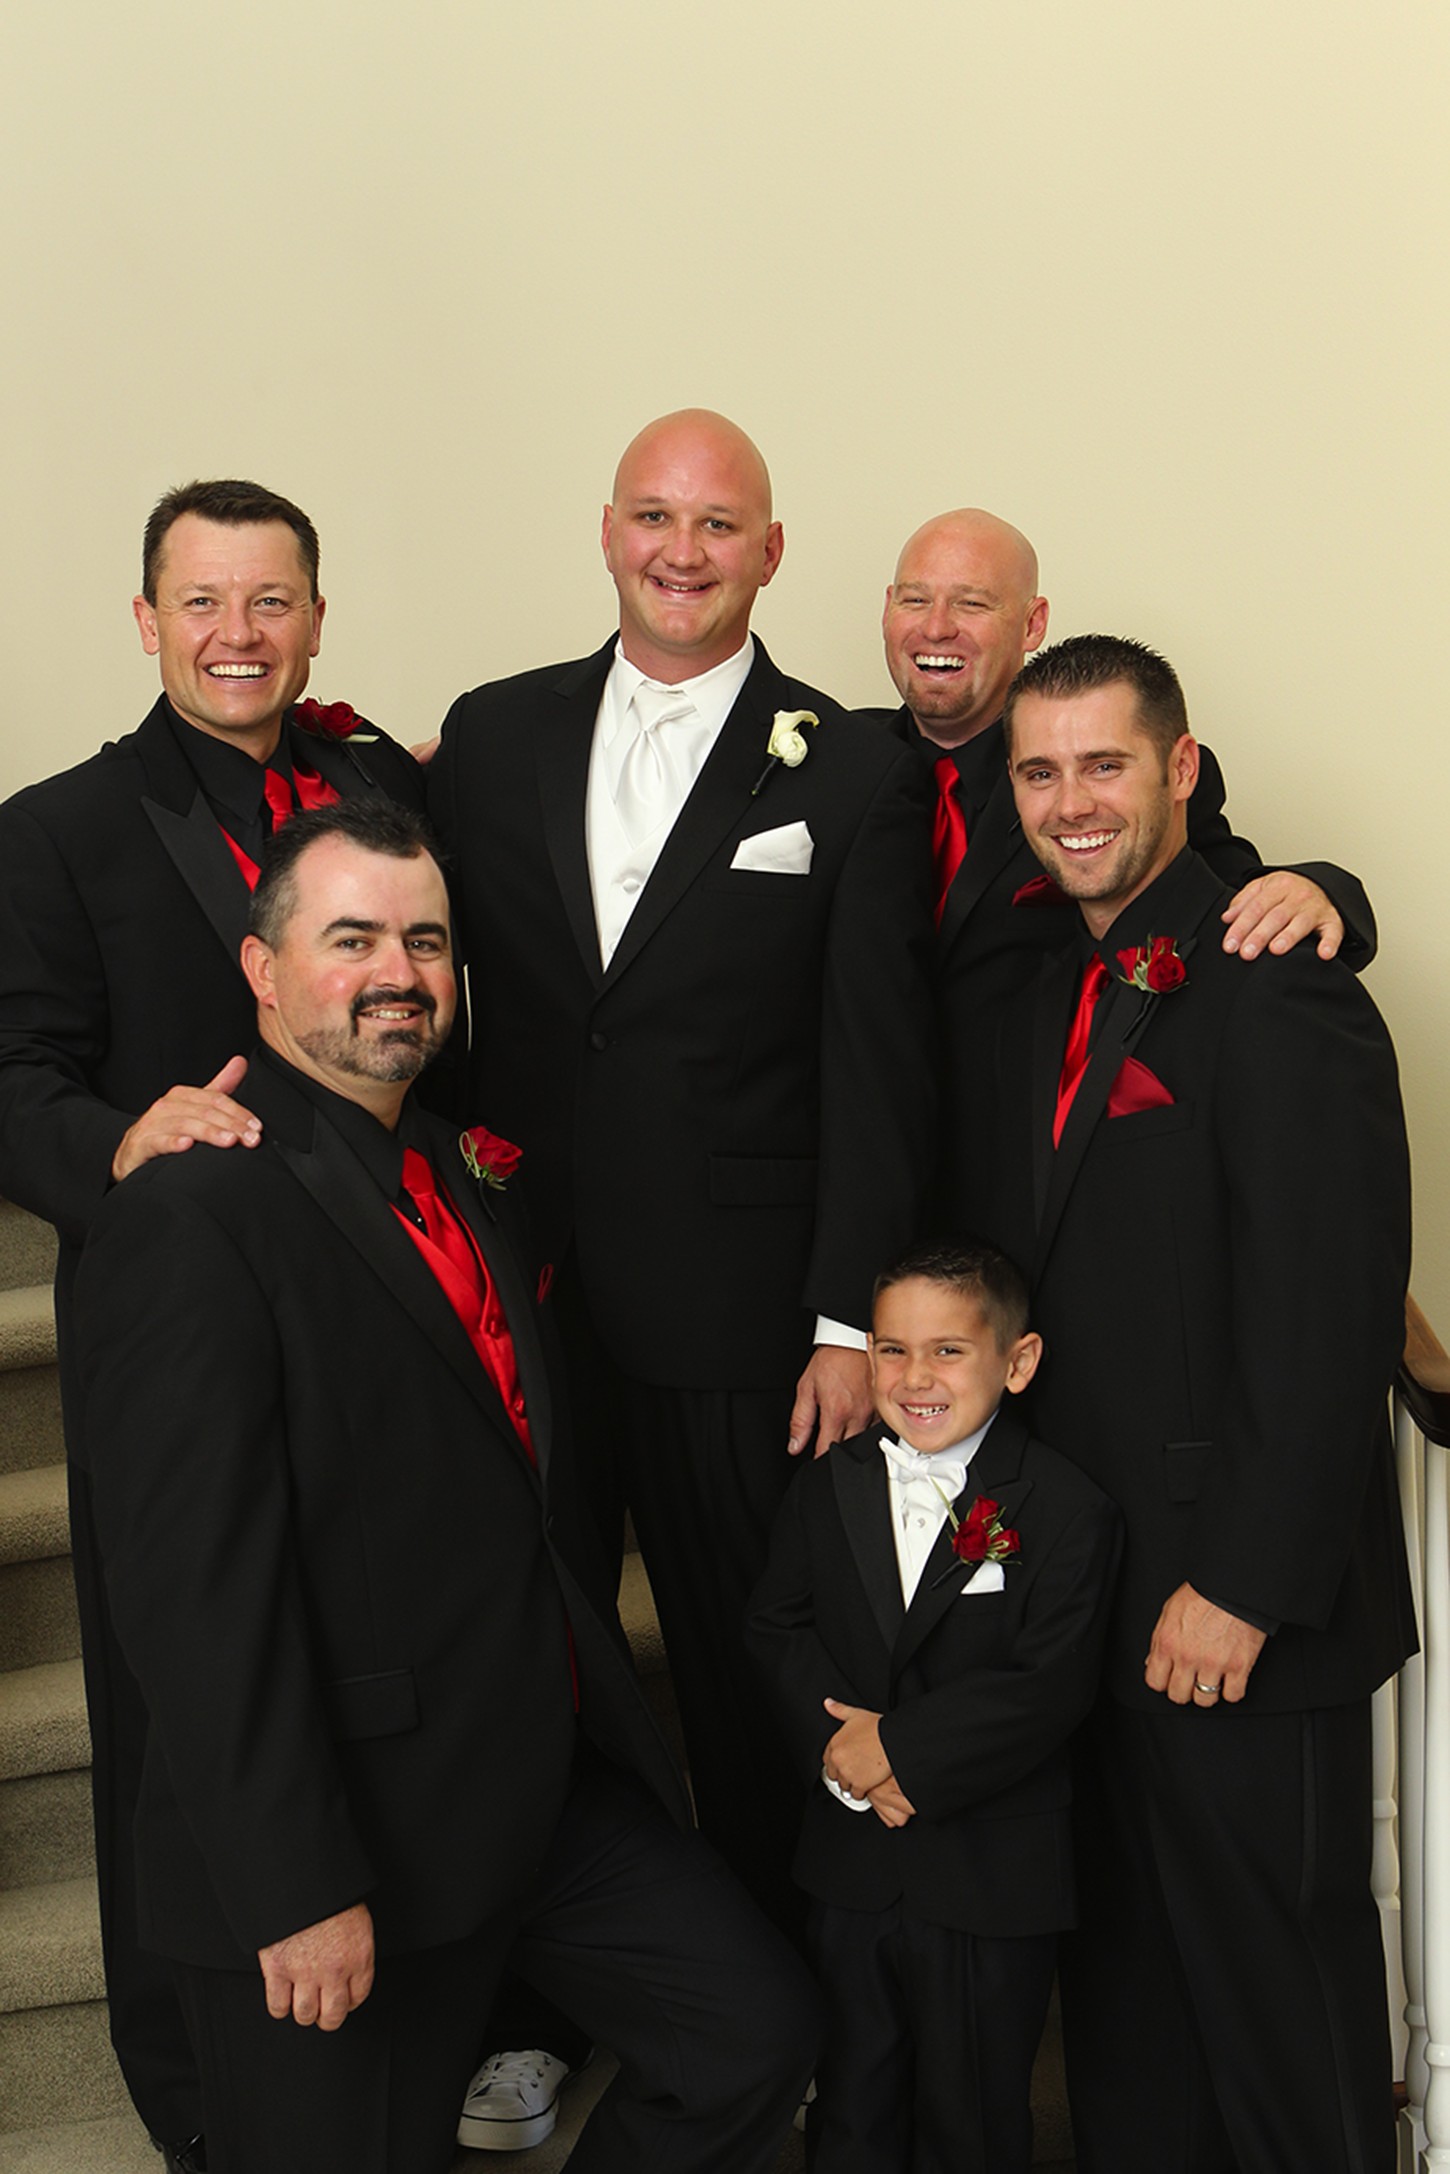
2-8
ABOUT THIS PHOTO I shot this great group shot using a 24-70mm f/2.8 lens at 42mm, which is roughly the same view as the human eye. If you were standing in my location, this is how the people would look. Taken at ISO 800, f/4.5, 1/160 second.
Telephoto lenses
With telephoto lenses, you can get in close and fill the frame with the subject without having to physically intrude into the moment. In Figure 2-9, I was able to get in close, capturing a great moment without invading it. Telephoto lenses have focal lengths that are longer, in some cases much longer than normal lenses.
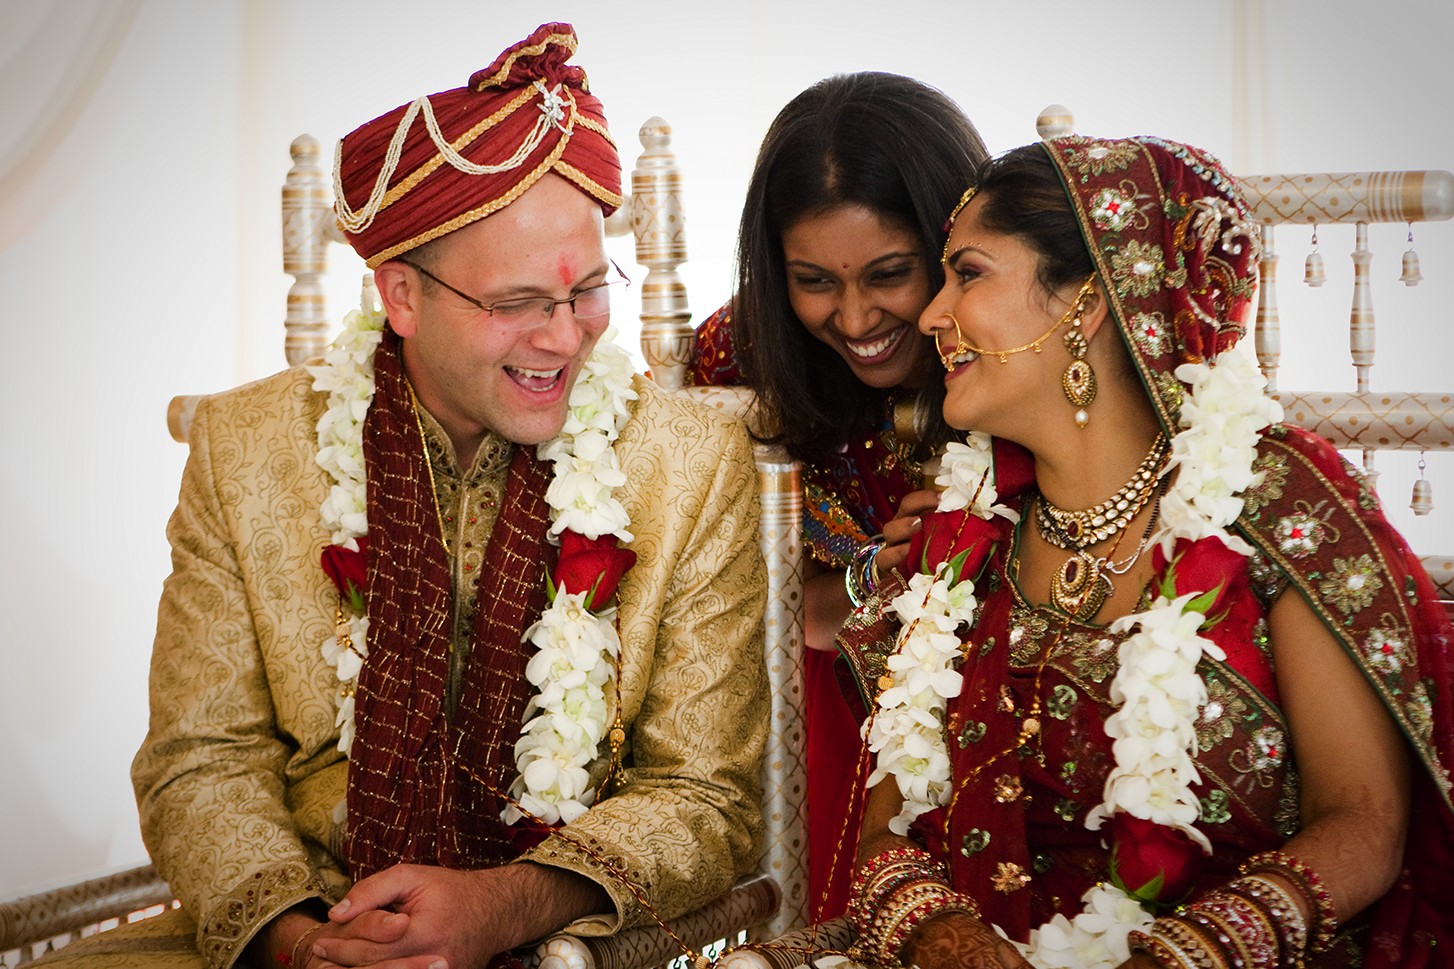
2-9
ABOUT THIS PHOTO Being able to capture the emotion on the faces of the subjects is important, and being able to do it without intruding is where a telephoto lens comes into play. Taken at ISO 1600, f/2.8, 1/125 second with a 70-200mm lens.
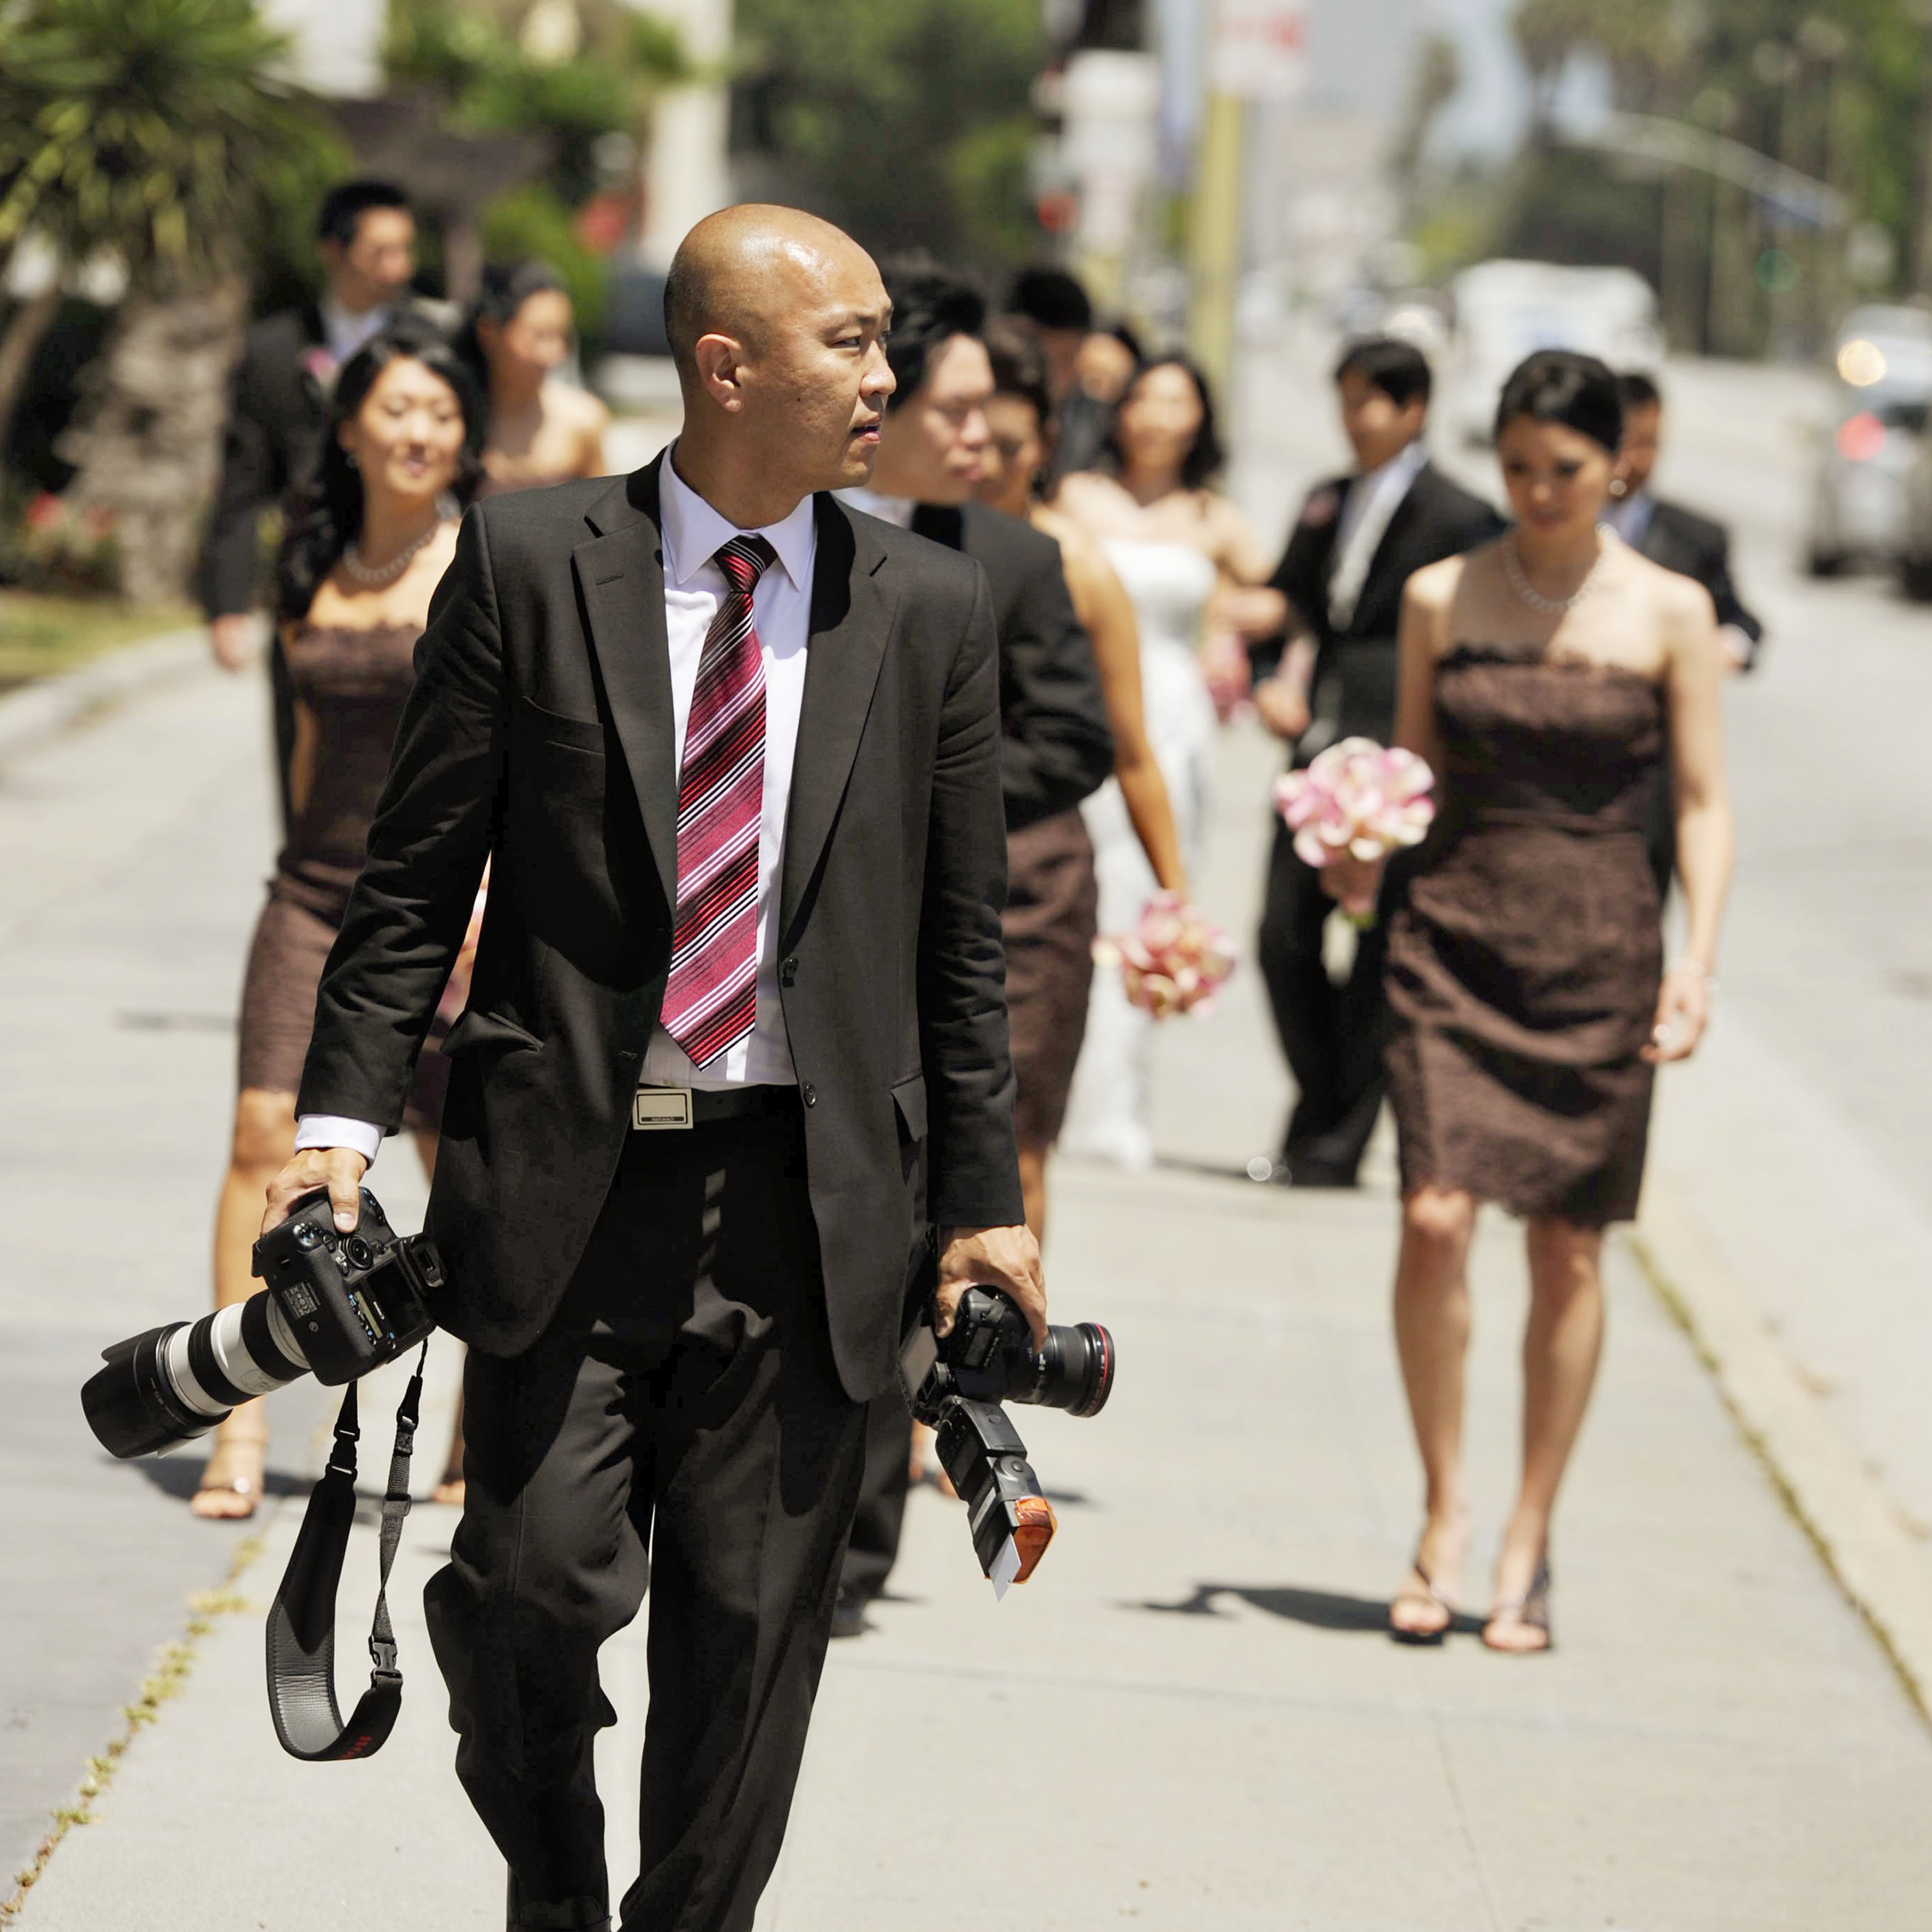
Telephoto lenses can cause some distortion by compressing the scene. Items in the background seem much closer to the foreground. This compression can cause areas that should be wide open to appear a little cramped. Look at the couple in Figure 2-10, who were captured as they walked down a path, and notice how close the tree behind them seems; in reality, it was much farther away. This is known as compression distortion.
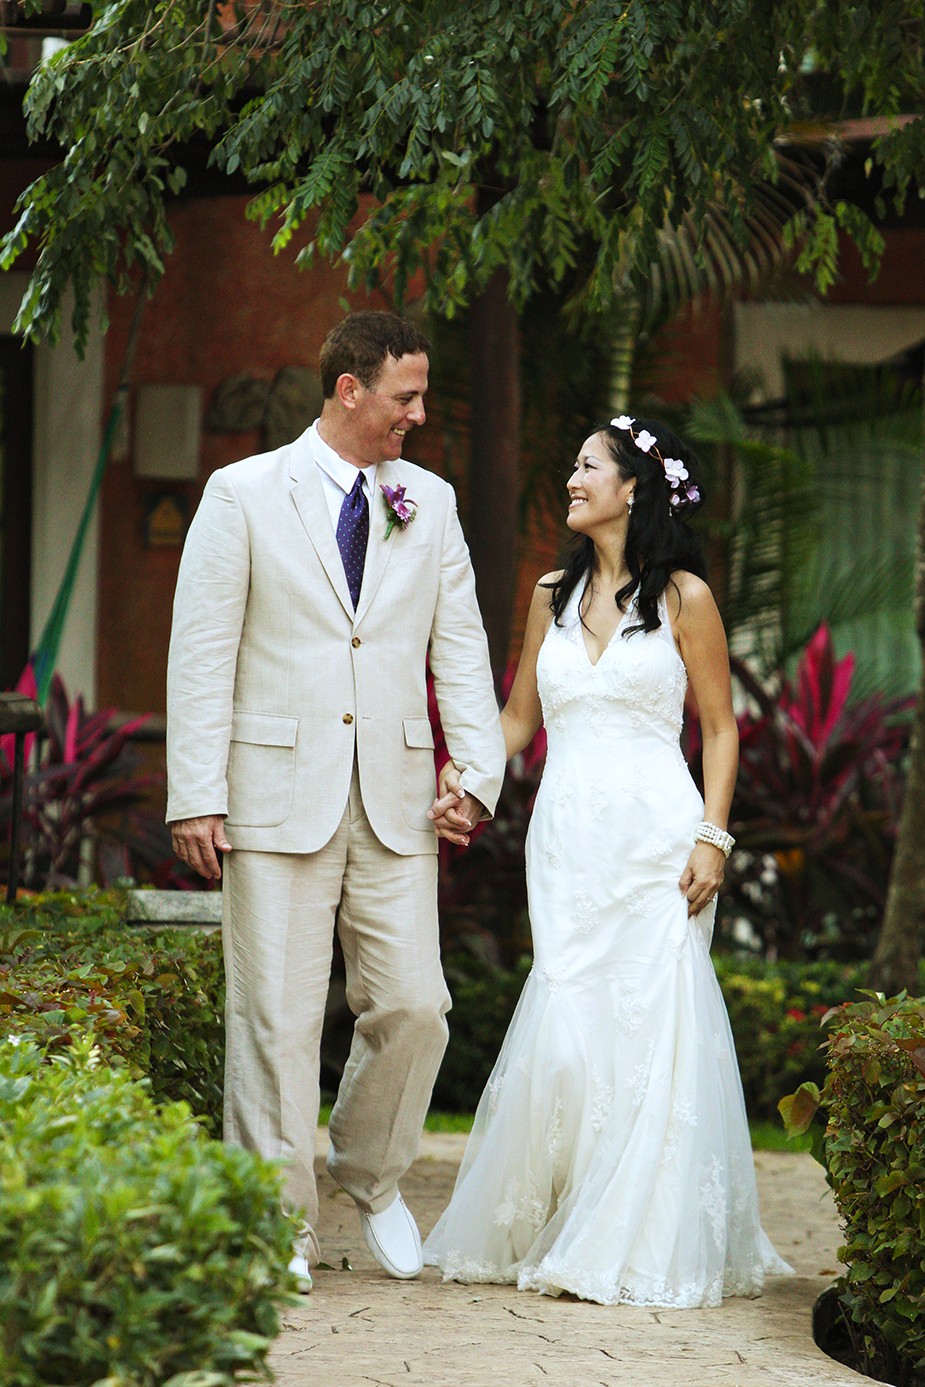
2-10
ABOUT THIS PHOTO The couple captured with a telephoto lens, which caused some compression, as they walked down a path. Taken at ISO 2000, f/3.5, 1/200 second with a 70-200mm lens set to 200mm.
Fixed focal length
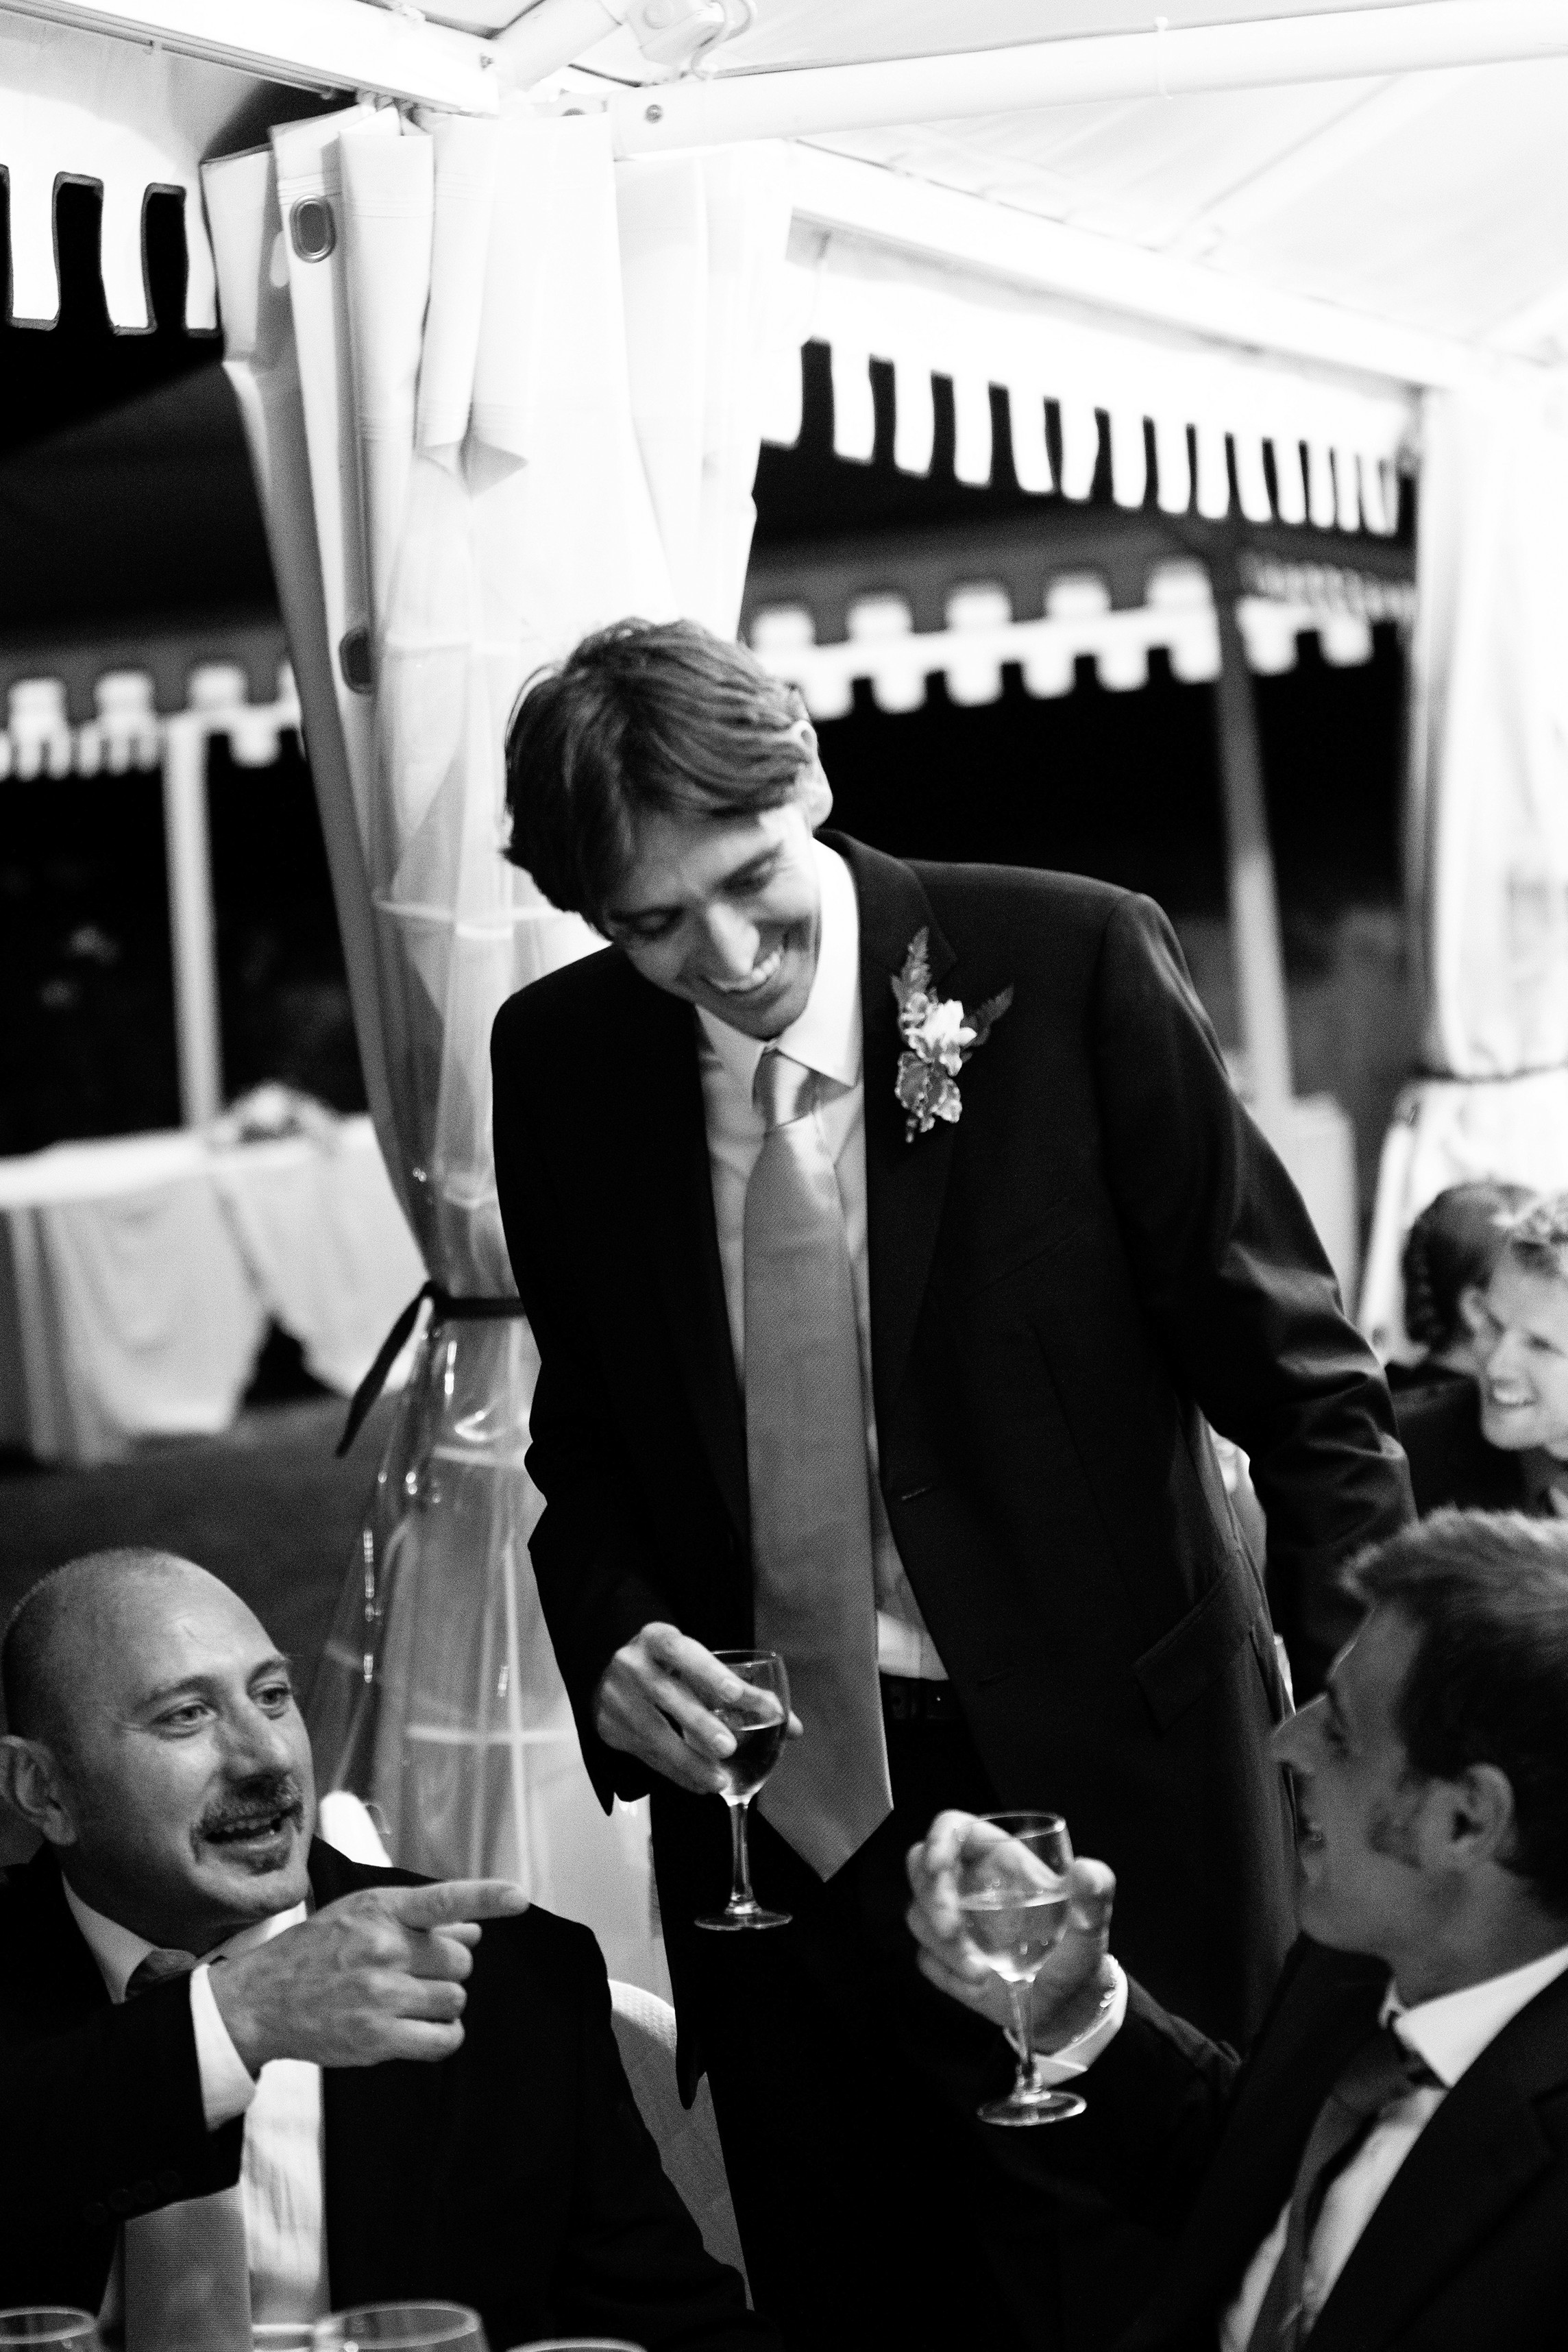
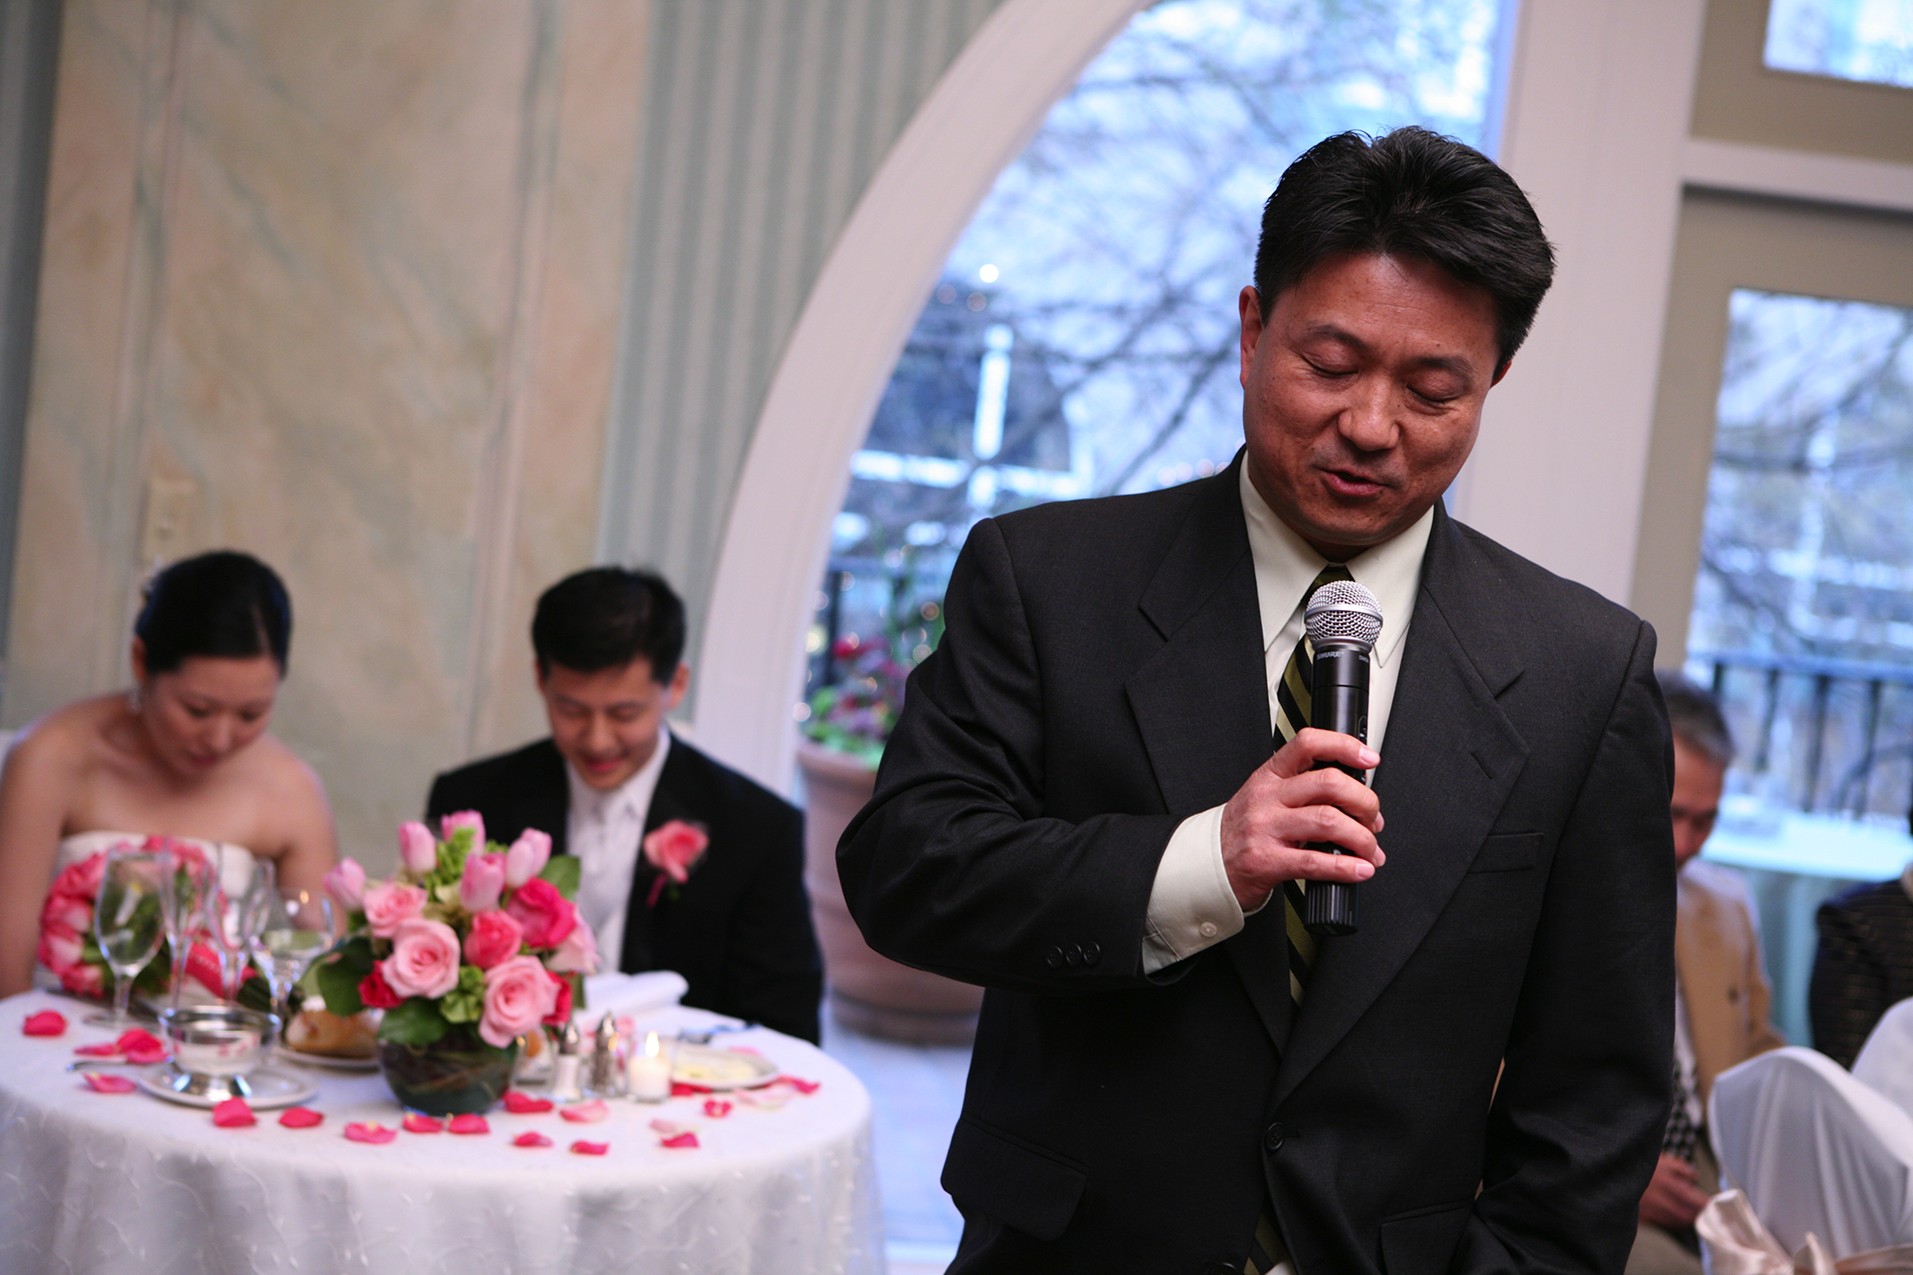
These are lenses that have a single focal length, and while they don’t offer the versatility of a zoom lens, there are still good reasons to have a couple of these in your wedding camera bag. The first reason is that they can have a maximum aperture that is greater than any zoom lens, which allows them to be used in much darker areas. Because of this, they can also have a very shallow depth of field, making them great for creative blurring, as shown in Figure 2-11. Another plus is that fixed focal-length, or prime lenses, as they are also known, can be cheaper than a zoom equivalent, but not always.
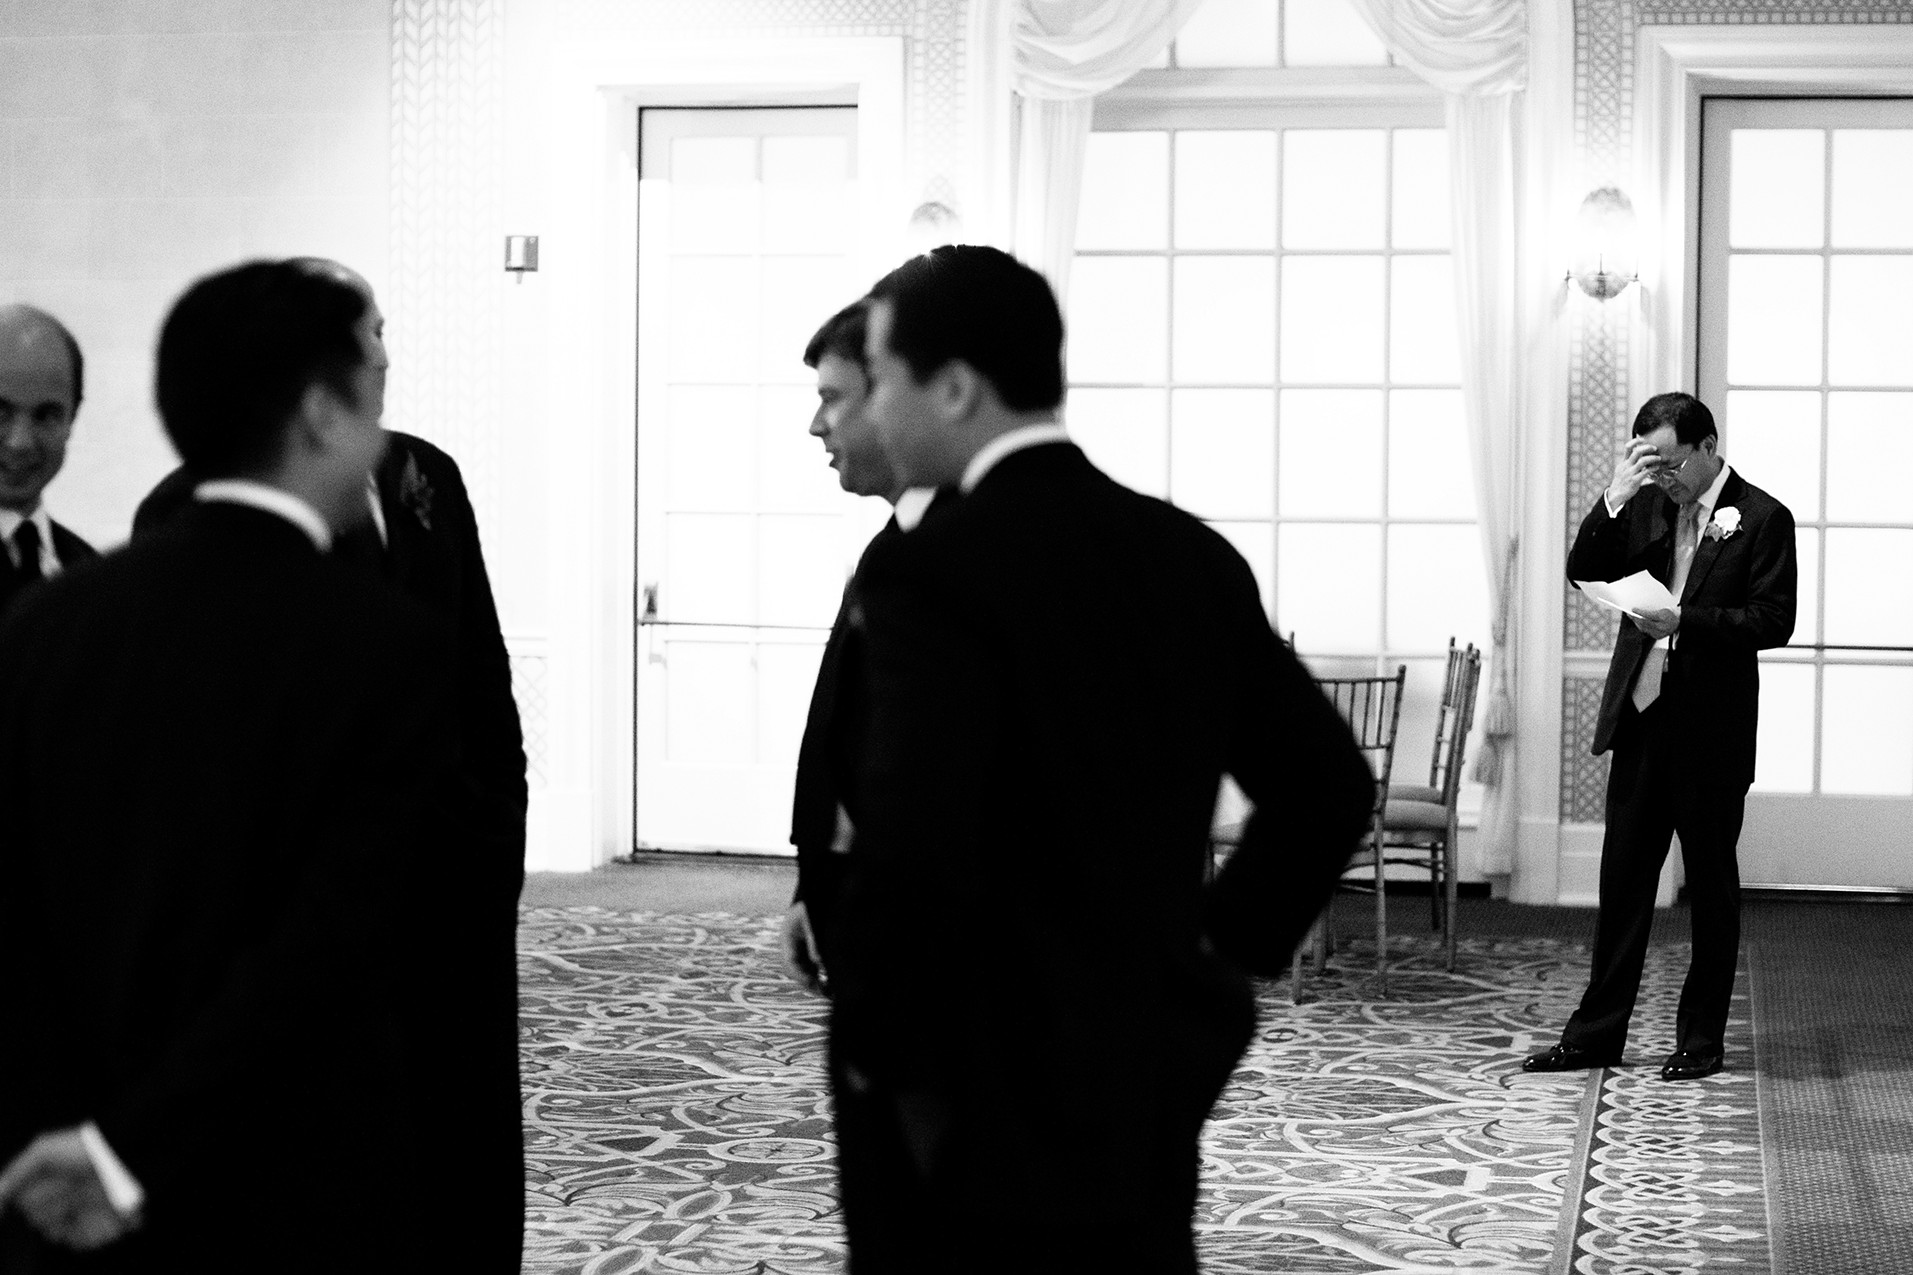
2-11
ABOUT THIS PHOTO The sharp focus and shallow depth of field are possible with a 50mm f/1.2 lens used at f/1.8. This allowed me to make sure that the focus of the photo was the man preparing his speech on the right as opposed to the group of men on the left. Taken at ISO 2500, f/2.8, 1/320 second.
Zoom lenses
Zoom lenses are really great because they allow you to cover a wide range of focal lengths without having to change anything on your camera. Zoom lenses are great tools for wedding photographers because you can capture the same scene in different ways very quickly and without having to actually move.
The three zoom lenses I use are shown in Figure 2-12 and are as follows:
• Canon 16-35mm L f/2.8
• Canon 24-70 f/2.8 L USM
• Canon 70-200mm L IS f/2.8
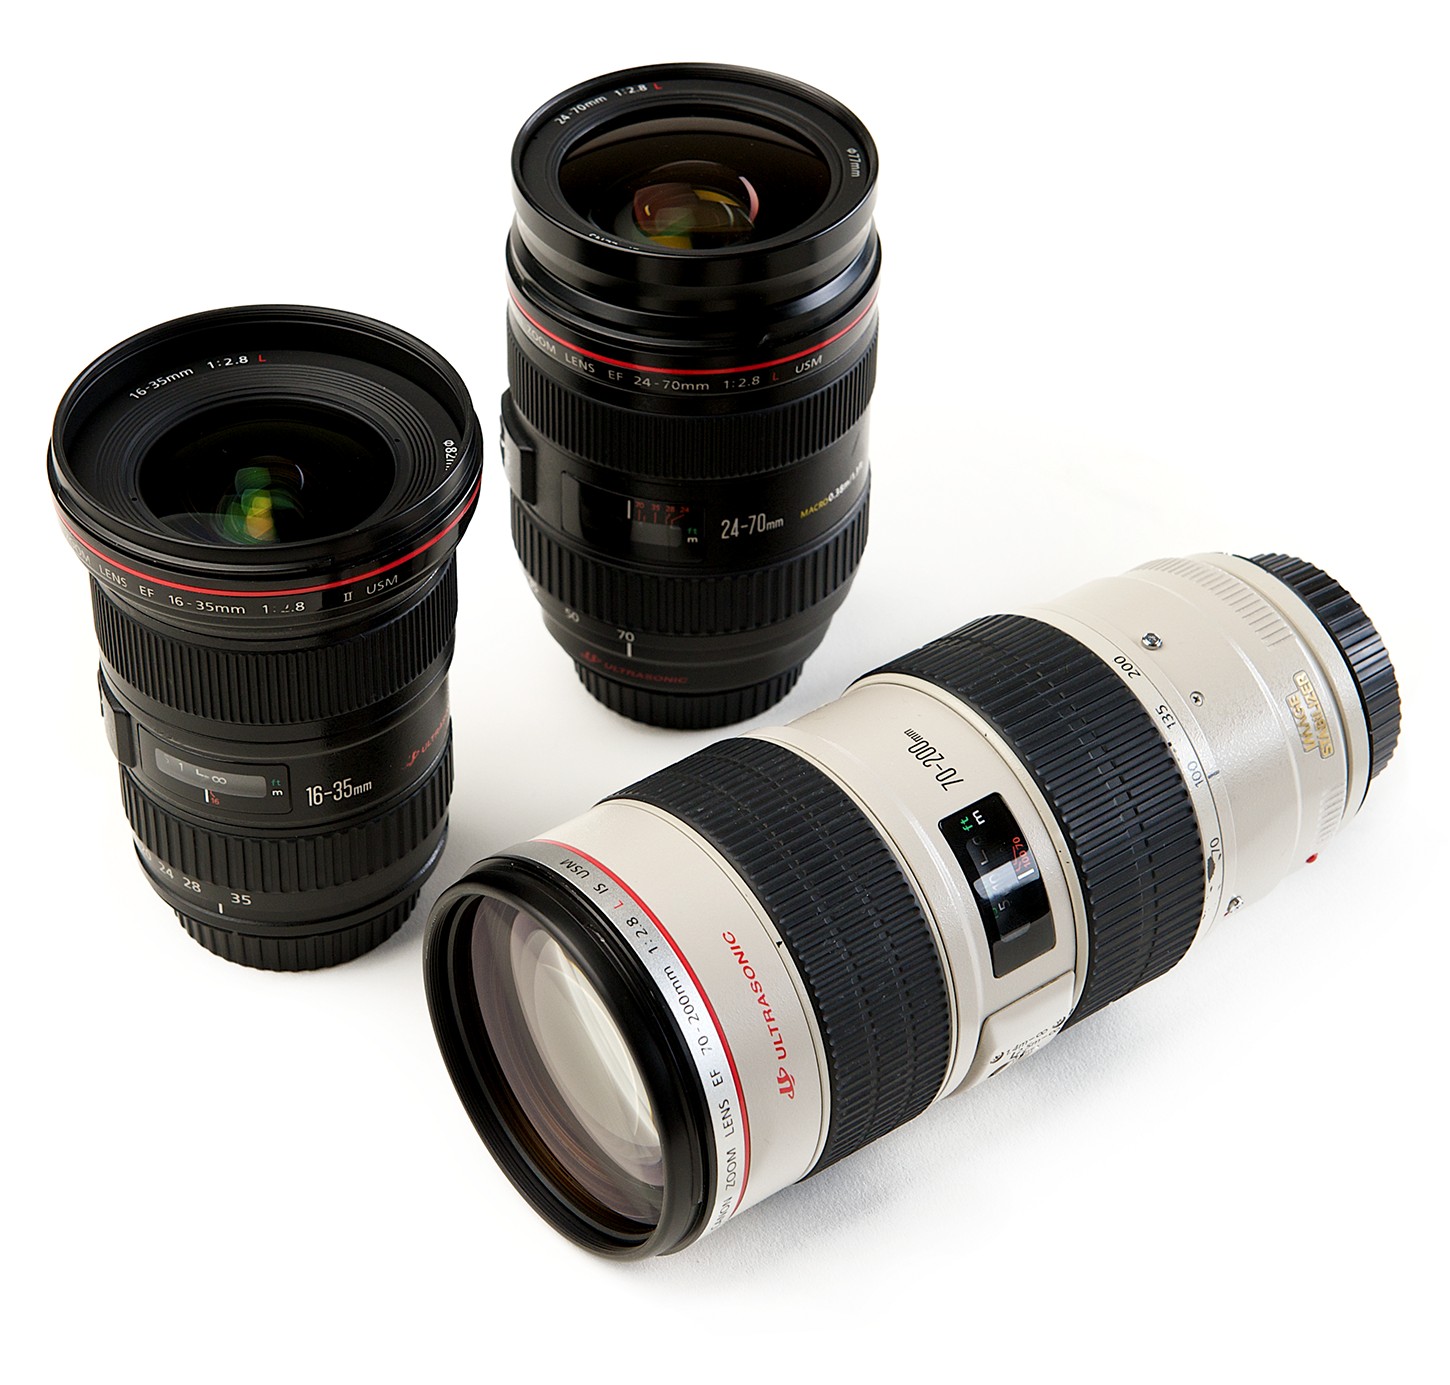
2-12
ABOUT THIS PHOTO The three main zoom lenses in my wedding camera bag.
Combined, these lenses give me a focal length range from really wide at 16mm to telephoto at 200mm, and because they are all constant aperture lenses, my maximum aperture for all the focal lengths is f/2.8. Although they cost significantly more than some other lenses, having the f/2.8 maximum aperture makes a big difference in helping you obtain professional-quality results with your photographs.
Constant aperture versus variable aperture lenses
Zoom lenses come in two very different types, and it is important to know which one you have and are using because it can drastically change the exposure settings. With constant aperture zoom lenses, it doesn’t matter what focal length is being used; the maximum aperture stays the same. These constant aperture zoom lenses are usually considered professional-quality lenses and come with a larger price tag, but there are two big advantages to using them. The first advantage is that the aperture doesn’t change when you are zooming in or out, meaning that your exposure settings won’t change when you change focal lengths (as long as the light doesn’t change). I was able to set the exposure settings for Figure 2-13, and because it was a constant aperture zoom lens, I was able to zoom in and out until my composition was what I wanted without worrying about the exposure settings changing. The second advantage is that these zoom lenses usually have a wider maximum aperture than the variable aperture counterparts, so they are better for low-light situations, and you have more control over the depth of field.

2-13
ABOUT THIS PHOTO When photographing the bride on the stairs, I set the camera to manual mode and used the zoom on the 24-70mm lens to compose the image. Because the lens has a constant aperture, the opening in the lens didn’t change as I adjusted the focal length, allowing me to concentrate on the composition. Taken at ISO 1250, f/2.8, 1/160 second.
The variable aperture lenses are those lenses where the maximum aperture changes as the lens changes focal lengths. So as the lens zooms in close, the maximum aperture gets smaller, meaning that you need to adjust your exposure settings constantly if shooting in manual mode. (If you are shooting in any mode other than manual, the camera will adjust the exposure settings.) The advantages to these lenses are their price — they are considerably cheaper than their constant aperture counterparts — and their size — they are much smaller than the constant aperture counterparts. If this is the type of lens you have and are using, then you need to pay close attention to your exposure settings as you zoom in and out.
Lighting Tools
As a photographer, one thing you always have to think about is finding a good light source. Without good light, no matter how good your gear is, you are not going to get great results. There are times when you need to create the light or at least modify the light in the scene to get a proper exposure or to even out the light that is already there. This is when a few flashes can really save the day. Even in a very dark room, a few properly placed flashes can get results like the image shown in Figure 2-14, where the cake came out looking good enough to eat.
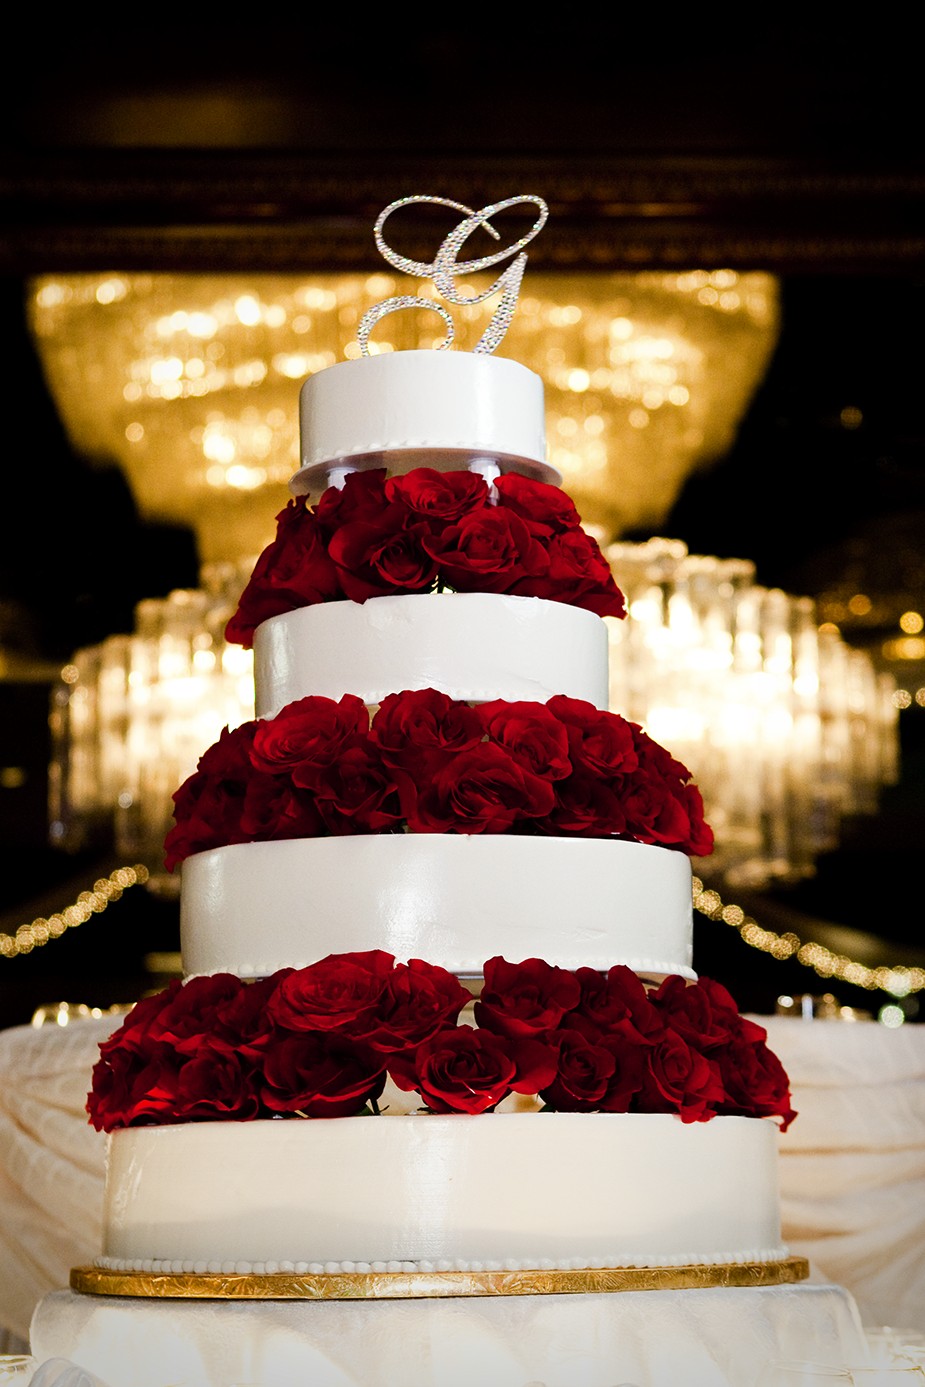
2-14
ABOUT THIS PHOTO Even though the reception room was almost pitch black, I was able to evenly light this wedding cake using multiple flashes, and it would have been impossible to get the photo any other way. Taken at ISO 1600, f/3.5, 1/50 second.
My entire lighting kit, shown in Figure 2-15, isn’t very big, but it is powerful and best of all, it is portable, so I can use it quickly and efficiently. The kit includes a number of flash units that can be used on or off camera, a selection of light modifiers for the flashes, some extra battery packs, and a set of radio triggers called radiopoppers that allow the flashes to be used off camera easily. I also carry a few small light stands that allow me to place the off-camera flashes where they can do the most good.
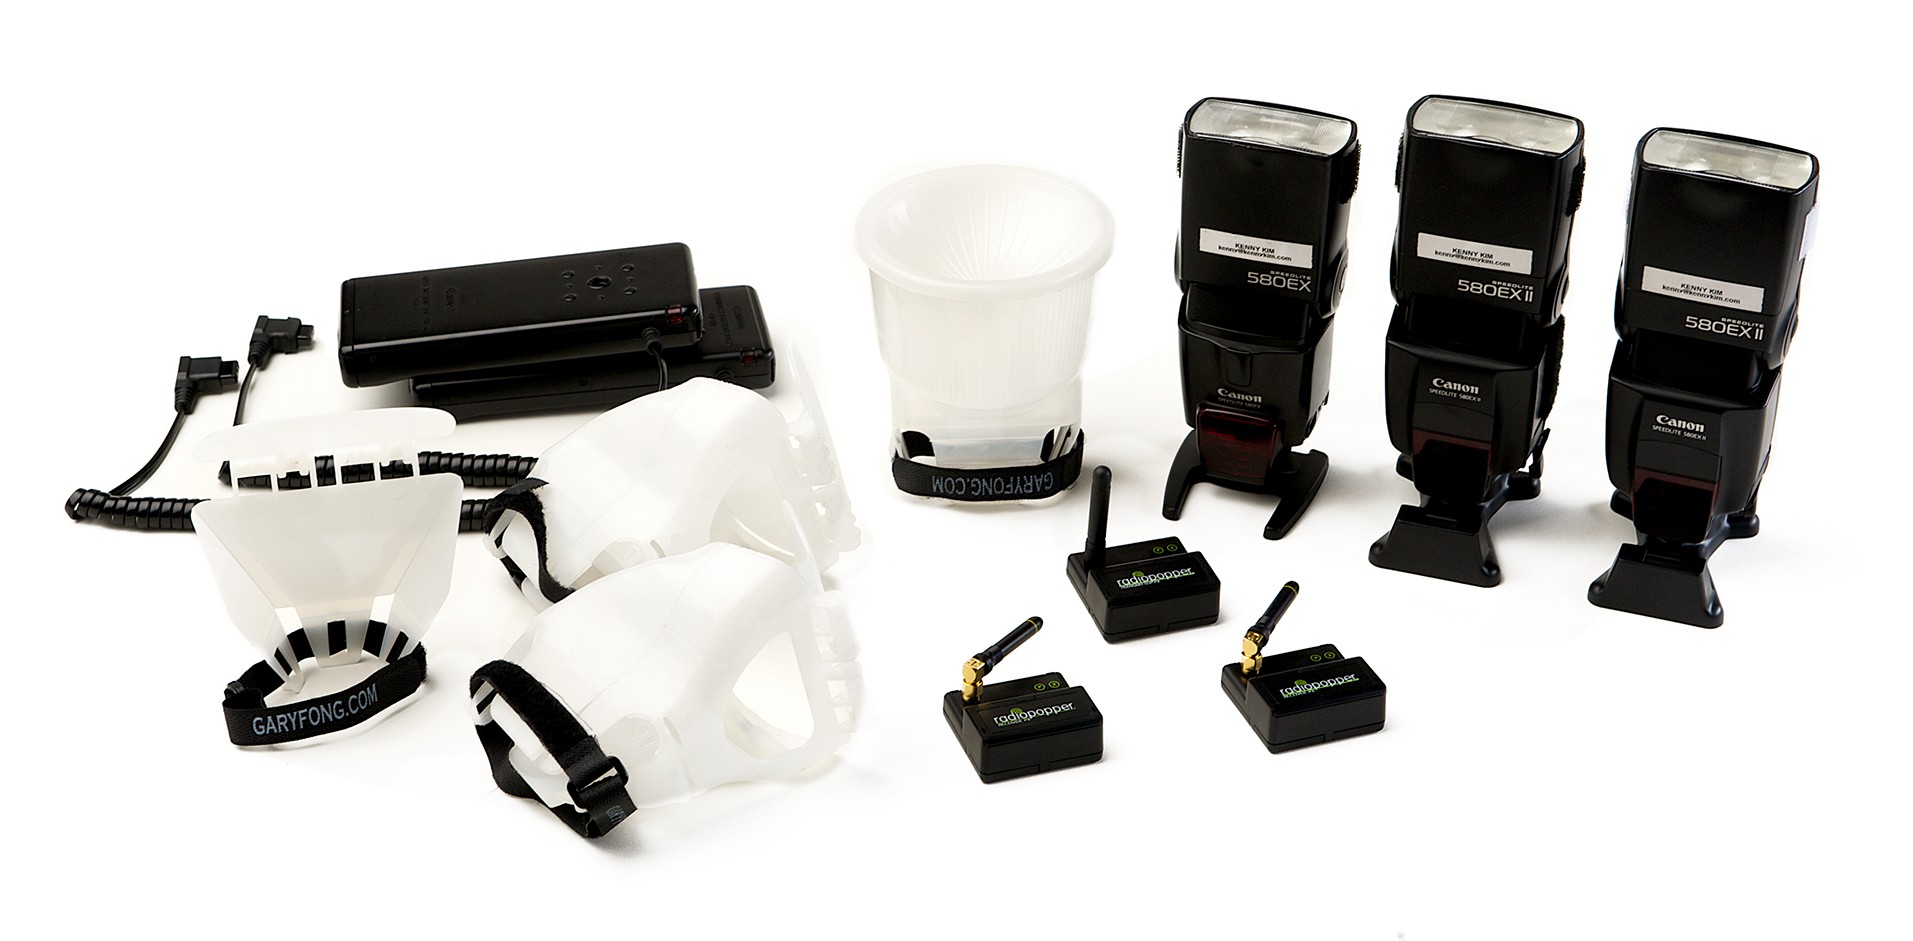
2-15
ABOUT THIS PHOTO The Canon Speedlites along with a variety of light modifier tools, extra battery packs, and a set of radiopopper flash triggers.
Flash
One of the easiest ways to add a little light when needed is with a flash. That’s when the flash units come into play. Every camera manufacturer makes a dedicated flash unit for its system, for example the Canon Speedlite system or the Nikon Speedlights. These flash units are compact and powerful, a great combination for use on location. Most of the flash manufacturers also have external battery packs available for their flash units. For example, I use the Canon CP-E3 battery packs with the Canon Speedlites. These battery packs allow for faster recycling time for the flashes (meaning the time between flashes is reduced). Also, because the battery packs have a lot more power, I can shoot an entire wedding without needing a fresh set of batteries. Each manufacturer has a range of flash units to pick from that differ in power, size, features, and price. Here are a few things to consider when choosing a flash:
• Power. Not all flashes are created equal. To determine the power of the flash, you need to look at the guide number. The guide number is the measurement of how powerful a flash is taken by measuring the illumination using a standard set of criteria. The important part is that the higher the guide number, the more powerful the flash. The more powerful the flash, the more options you have when using it.
• Size. These flash units are tiny compared to the studio type of lights, making them easy to pack and carry on location.
Even when you are using battery packs, it is still good practice to have an extra set of batteries as a backup.
• Features. Look for a flash that has the ability to rotate the flash head and adjust the power (flash output) manually. This gives you the most use out of the flash. Many of the cheaper flash units don’t have an adjustable flash head, making them impossible to aim or adjust.
• Price. Flashes can be rather expensive, but you are better off getting a better flash for more money than getting a cheaper flash that will need replacing when the limitations in power or features become a problem.
The real power of the flash unit is that it can be used both on the camera and as an off-camera light when mounted on its own light stand and triggered by a master flash on the camera or a remote trigger. This flexibility allows you to add the light exactly where it is needed and gives you control over how much light is used in the photograph. Using a single flash to help balance out the light in Figure 2-16 made for a better image, and the gentleman giving the toast and the background are both properly exposed.
2-16
ABOUT THIS PHOTO Using a flash here helped to balance out the bright light that was coming in through the windows behind the speaker. Taken at ISO 640, f/3.5, 1/80 second.
Using one accessory flash on your camera might help add light to the overall scene, but to really take your photos to the next level, you need a little more control. With three flash units — two off-camera for extra fill where needed and one on the camera for a little extra light and to trigger the two off-camera units — you can really control the placement of the light.
Light modifier tools
The biggest drawback with using accessory flash units comes from their size: Because they are small, they produce a very small hard light that is not very flattering for wedding portraits. This is where some light-shaping tools can really help to make that small hard light into something a little more flattering. In Figure 2-17, a diffuser was used on the flash to create a softer light and a more pleasing portrait.
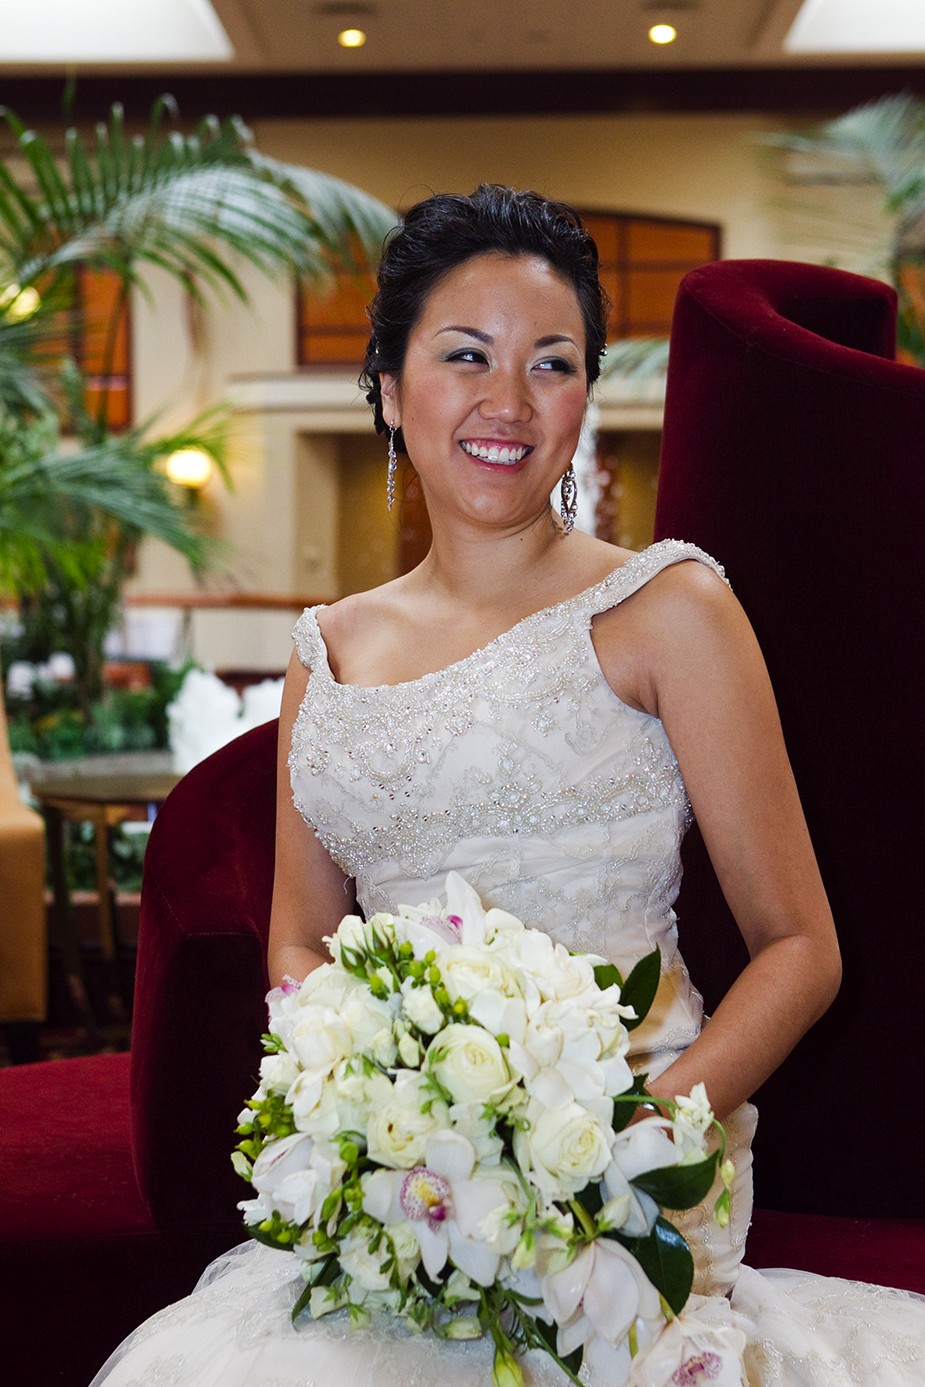
2-17
ABOUT THIS PHOTO Creating a softer, bigger light from your flash really helps with portraits because the softer light is much more flattering. This was taken at ISO 1250, f/4, 1/160 second.
The rise in use of small flash units has created a large market for small flash modifiers. These are tools that change the size and quality of the light produced by the small flash. The basic concept is the same with all of them as they try to turn a small hard light source into a bigger, more flattering light source.
The good news is that there are many options available for modifying the light produced from small flashes, including small softboxes from LumiQuest, such as the Soft box LTp, which is 120 square inches of surface area (making it over 40 times larger than the flash head). These modifiers can be easily attached to the flash using a hook and loop type fastener and when not in use can fold flat. Other options are the light modifying tools created by photographer Gary Fong, including the Lightsphere and the Whaletail modifiers. These tools produce a more pleasing light by diffusing the flash, but they are also compact and don’t add much size or weight to the flash unit.
One of the goals of all light modifiers is to take a small hard light and create a bigger, softer light. Keep in mind that given that modifying the light output usually involves covering the flash head, you might have to increase the power to get the right amount of light into the scene.
Using the same flash units for all your flashes means that any modifier you buy will work on all the flash units you have.
Accessories
You have your camera, lenses, flash units, and a set of light modifiers, and you are all ready to go out and shoot a wedding. However, there are a few more pieces of equipment that can really make the whole process much easier. These include light stands for placing off-camera flash units where you need extra light and a set of radio triggers so that the flashes fire no matter where they are. Finally, it is important to have a bag to carry all your gear in.
• Light stands. One important accessory is a set of lightweight light stands. These allow you to place your flash units where you want them and they can do the most good. Figure 2-18 shows two of my speedlites mounted on a set of lightweight stands. When it comes to picking out light stands, look for ones that can fold up easily and don’t take up much space. Because these are not going to be holding up studio lights, just the much smaller and lighter flash units, they really don’t have to be very heavy duty.
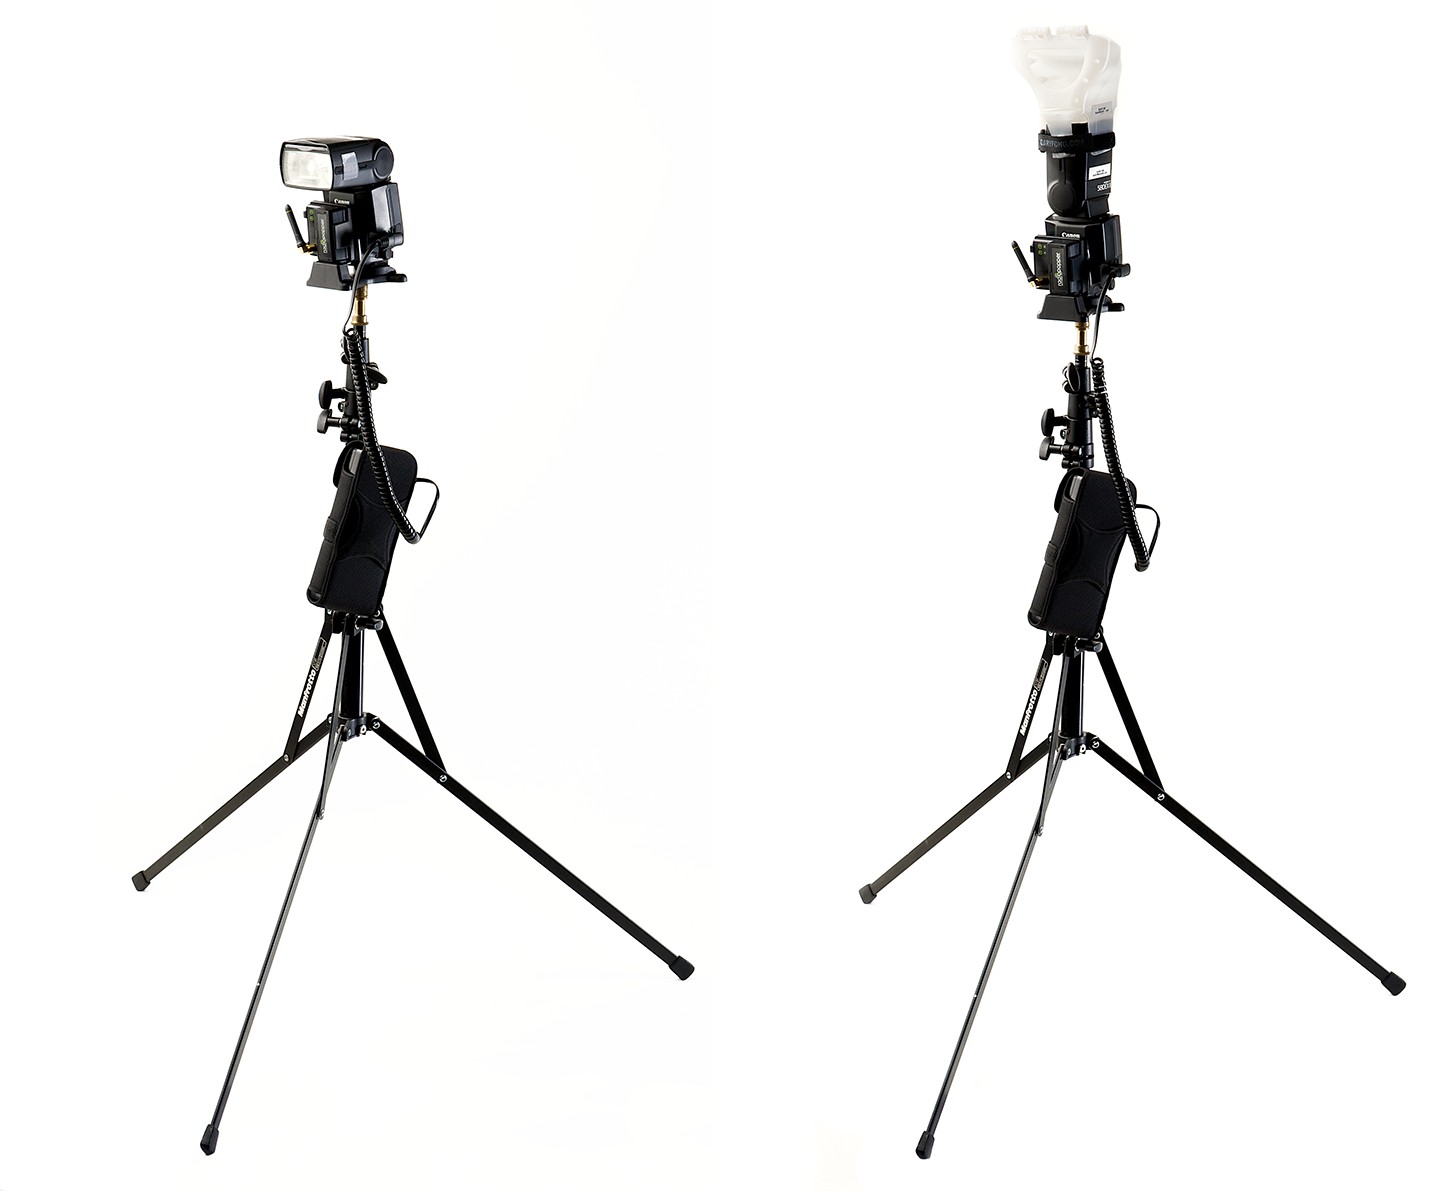
2-18
ABOUT THIS PHOTO Putting a small flash unit on a light stand allows you to place it where it can do the most good. Here, triggers (www.radiopoppers.com) are attached.
• Radio triggers. Most of the flash systems available today allow you to use a master flash to trigger the off-camera flash units. The downside to this is that the flashes usually have to see each other, meaning that the receiver on the off-camera flash has to face the camera to work. A great solution to this is to use a set of radio triggers that are not line-of-sight. You can see the radio triggers (radiopoppers in this case) attached to the lights in Figure 2-18. These triggers allow the off-camera flash units to be triggered no matter where they are, even out of sight of the main flash and the photographer.
• Camera bags. There are a great many camera bag manufacturers, and an even bigger number of different camera bags. Find one that protects your gear and is comfortable enough to carry around all day. One that I like to use is made by Think Tank Photo (www.thinktankphoto.com). The bags are made by photographers with photographers in mind. I love their durability, design, and the variety of storage spaces. The two cases I use the most are shown in Figure 2-19, and they keep my wedding photography gear safe and sound.
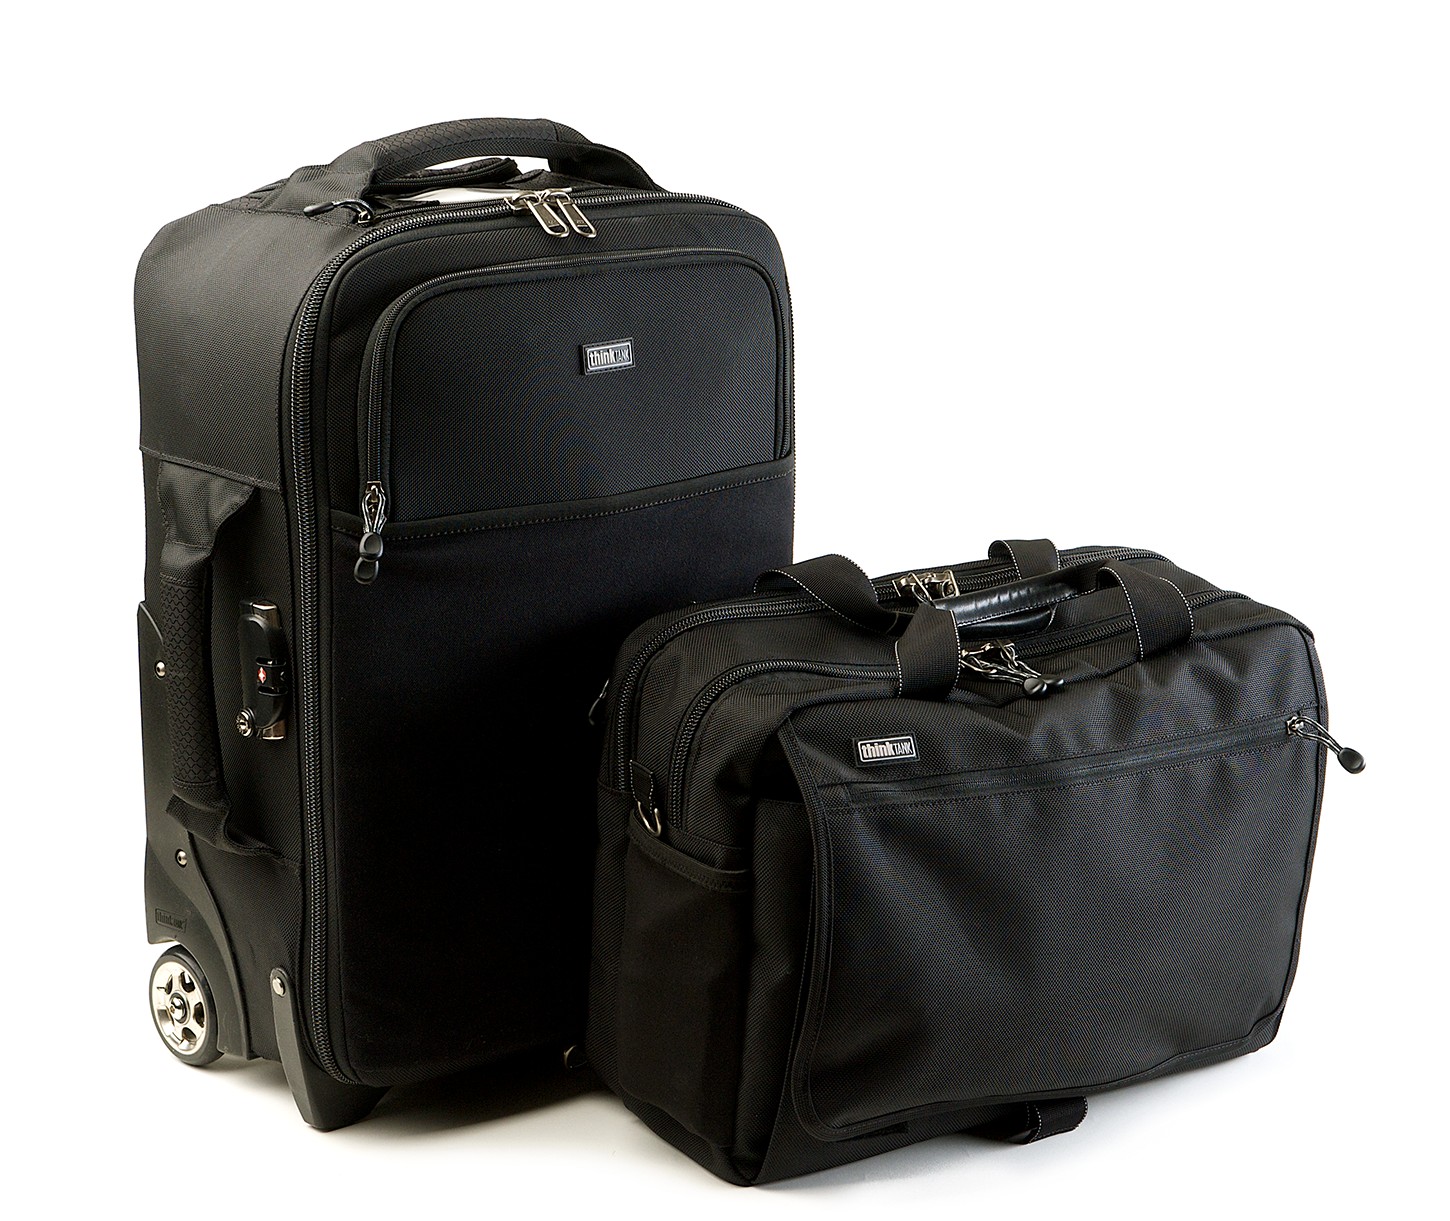
2-19
ABOUT THIS PHOTO I use these camera bags from Think Tank Photo and really like the size and weight of the pair.
Assignment
Same Scene, Different Focal Lengths
One of the easiest ways to learn about different focal lengths and how a wide-angle or telephoto lens can cause distortion is to shoot the same scene using two different focal lengths, preferably two very different ones.
There are two methods to try here: The first is to stay in one spot and photograph the scene in front of you using a variety of focal lengths to see how much of the scene you can capture and how the location you shoot from affects your subject. Remember that when you are using a wide angle, things in the foreground seem closer while things in the background seem farther away; and when you are using a telephoto, the background is compressed. The second method is to move so that as you change focal lengths, the subject stays the same size. This method will help show you how different focal lengths can change how a person looks and how the background will be very different depending on the focal length. Try both methods and post your favorite shot to the Web site.
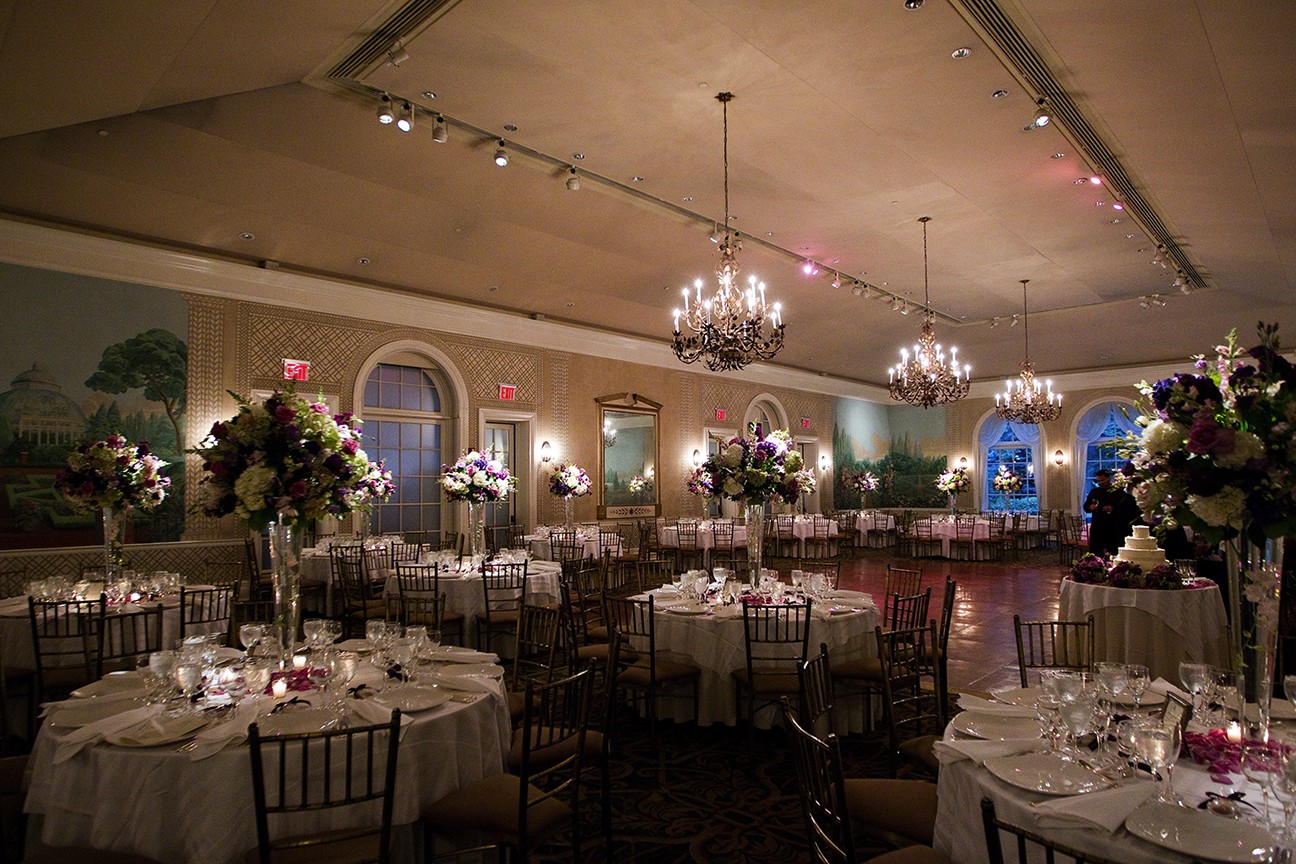
The choice of focal length is really important in rendering the scene in the best way possible; a wide angle can really make a small room look very large. Using a very wide angle, in this case a Canon EF16-35mm lens at the 16mm focal length, allowed me to capture the whole room in a single frame. The use of the wide-angle lens also creates a feeling of space due to the wide-angle distortion. Another reason to use a wide-angle lens was that there was limited space to photograph from. Standing in the corner meant that I could not back up any farther, and a longer focal length would have meant cropping the sides.

Remember to visit www.pwassignments.com after you complete the assignment and share your favorite photo! It’s a community of enthusiastic photographers and a great place to view what other readers have created. You can also post comments and read encouraging suggestions and feedback.