
Chapter 3
Getting Up and Running With Windows 365
IN THIS CHAPTER
![]() Signing up for Microsoft 365 and Windows 365
Signing up for Microsoft 365 and Windows 365
![]() Discovering what subscriptions you need to get started
Discovering what subscriptions you need to get started
![]() Assigning your Windows 365 licenses
Assigning your Windows 365 licenses
![]() Taking a peek at your new Windows 365 cloud PC
Taking a peek at your new Windows 365 cloud PC
On the surface, the concept of a cloud-based PC is a bit of a mind-bender. You can read all about it and still struggle to really come to terms with the concepts and how they work and what they mean. With such a tricky concept as Windows 365, we think it is best to jump right in and start clicking around and using it yourself. After you are up and running with your cloud PC, the things you read about cloud PCs will make a lot more sense. You will be able to read something and then do it right in your own environment.
In this chapter, you get up and running with Windows 365. You learn how to get a Microsoft 365 subscription and how to sign up for a cloud PC with Windows 365. When you are up and running, we show you how to sign in and take a peek around at the future of Windows.
Up and Running with Windows 365 in Five Minutes Flat
Getting up and running with Windows 365 is simple and straightforward, but without guidance, it can take some time to get your bearings on how everything works. First, you need to sign up for Microsoft 365, and then sign up to add a Windows 365 subscription. When that is done, you can sign in and start using your new cloud PC desktop.
 When Windows 365 was first released, you could sign up for a free trial. Microsoft quickly paused the free trial due to massive demand. We expect that the free trial will come back at some point, if it is not already back by the time you read this book. Also, there is still a free trial of Microsoft 365 you can sign up for if you don’t want to pay for it to get started.
Signing up for Microsoft 365
As we just mentioned, you need a Microsoft 365 business subscription in order to sign up for Windows 365. The easiest way to get up and running is to use your existing Microsoft 365 business subscription. If you don’t already have a subscription, you can sign up for a free trial. Here’s how:
-
Open the web browser on your computer and go to
https://www.office.com/.The Office Home page appears, as shown in Figure 3-1.
-
Click the Get Office button.
To get Windows 365, you need to use a business plan subscription. We expect that at some point in the future Microsoft will release a consumer version of Windows 365, but for now it is available only for Microsoft 365 business subscriptions. If you really want to use Windows 365 for home use, however, nothing is stopping you from signing yourself up for a business subscription. We have plenty of friends who run their households better than others run their businesses.
-
Click the For Business tab to see the available business plans.
In the table that appears, you will see the Microsoft 365 business plans. We will choose the Business Standard plan (see Figure 3-2) because it comes with Office client applications such as Word, Excel, Outlook, and PowerPoint. You can either choose the same plan as we did or you can choose another plan that better fits your circumstances. The Business Standard plan also comes with collaboration tools such as Teams, SharePoint, and OneDrive. We plan to use the Office clients (see Chapter 10) and the collaboration tools (see Chapter 11) on our cloud PC, so we want to be sure they are included in our subscription.
-
Get a free trial by clicking the Try for Free for 1 Month link just below the Buy Now button.
A welcome screen appears that asks for your information.
- Walk through the wizard, providing your information as needed, in order to set up your Microsoft 365 business subscription.
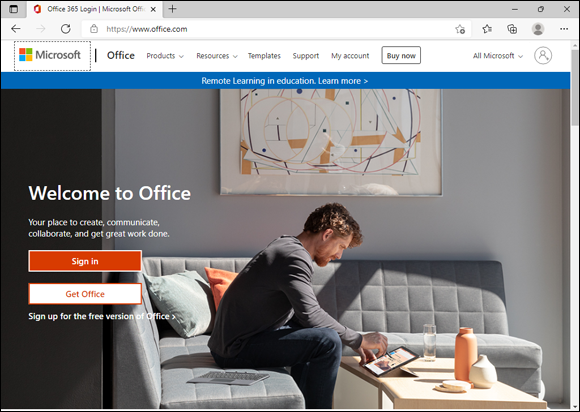
FIGURE 3-1: The main office.com landing page.
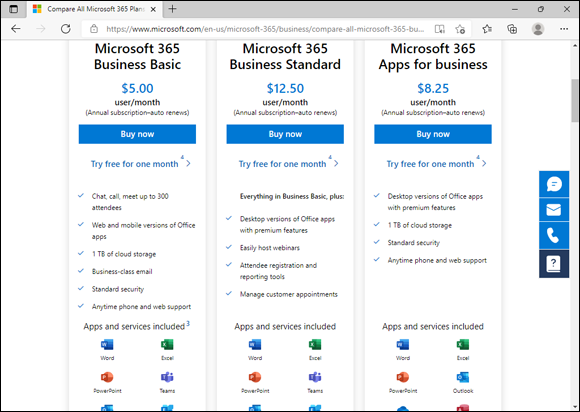
FIGURE 3-2: Choosing a Microsoft 365 business plan.
After you complete the process, it takes a few minutes to create your Microsoft 365 subscription. When it is done, your free trial will be created, as shown in Figure 3-3. Click the button that says Get Started to sign in to your Microsoft 365 dashboard.

FIGURE 3-3: Finishing the sign-up process for the free trial.
Microsoft 365 walks you through the additional setup items. However, for our purposes, we just want to get to Windows 365, so we click the link to exit setup and get to our Microsoft 365 dashboard, as shown in Figure 3-4.
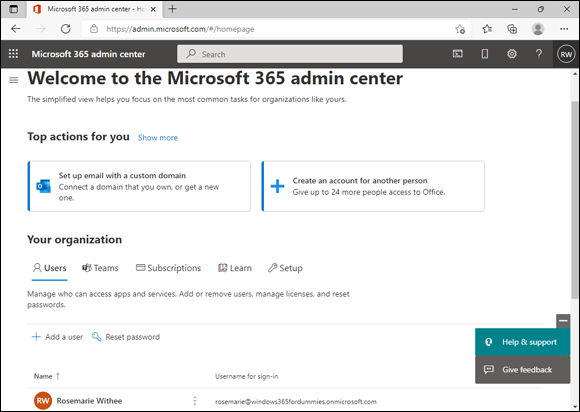
FIGURE 3-4: The Microsoft 365 administration dashboard.
You can always get back to your Microsoft 365 dashboard by navigating your web browser to https://admin.microsoft.com and signing in with your admin account. Your admin account is the account that was set up when you first signed up for Microsoft 365. It ends with the domain .onmicrosoft.com. In Figure 3-3, our admin account is [email protected].
Signing up for Windows 365
Now that you have Microsoft 365, you can add Windows 365 to your subscription. When you sign up for Windows 365, you can choose between a Business subscription and an Enterprise subscription. The best way to think of these is to think of two different types of businesses: The first type of business is a small business that buys their computers at their local computer store and then sets everything up themselves. The second type of business is a large enterprise that has a dedicated IT team. The second business gets their computers from some direct supplier and tightly controls and manages the setup using automation and strict governance controls.
The Windows 365 Business subscription is suitable for the first type of business and the Enterprise subscription is suitable for the second type of business. In this chapter, we get set up using the Windows 365 Business subscription because it is straightforward and designed for small business. We cover the Enterprise subscription features later in Chapters 15, 16, and 17.
To sign up for Windows 365:
-
Navigate to
www.windows365.comin your web browser.The Windows 365 Cloud PC Home page appears, as shown in Figure 3-5.
-
Click the Windows 365 Business button.
To get Windows 365, you will need to use a Microsoft 365 business plan subscription. If you are following along, you set this up previously in the chapter. If you are using an existing Microsoft 365 subscription then you need to verify it is a business plan.
-
Click the Compare Plans and Pricing button.
In the table that appears, you can view the different specifications for the cloud PC you want to add, as shown in Figure 3-6. We cover the various cloud PC specification options further in Chapter 17. For our purposes, we just want a basic cloud PC for now. It includes 2 virtual CPUs, 4GB of memory, and 128GB of storage.
-
Select the Basic option and click the Buy Now button.
A screen appears that lets you know you can save money if you will be using Windows 10 Pro or Windows 11 Pro on the physical device you will be using to access your cloud PC. They call this the Windows Hybrid Benefit. The idea being that if you use Windows locally, and are the primary user of the device and using it regularly, then you are paying a license for that Windows too. On the other hand, if you only use Macs then you don’t qualify for the benefit. The benefit is designed to help you reduce the cost of Windows 365 licensing. Select whichever option is relevant for you.
-
On the next screen, you sign up for Windows 365. In the email address field, be sure to use the email address you set up for your Microsoft 365 business subscription.
Earlier in this chapter, when we signed up for Microsoft 365, we used the email address
[email protected], so we enter it here into the form. -
Continue filling out the form and then click the Place Order button to complete your order.
A screen appears letting you know the order went through and that you have been sent a welcome email. Check your inbox to find details on next steps and getting started, as shown in Figure 3-7.
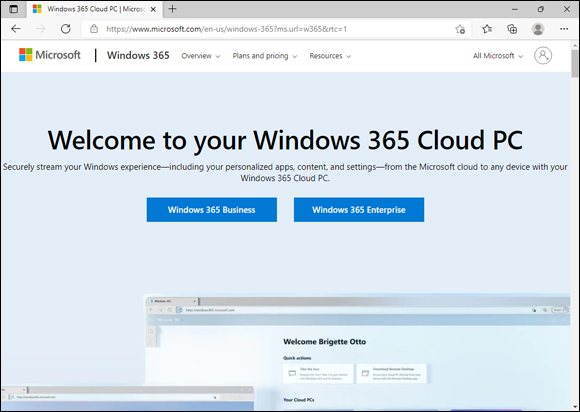
FIGURE 3-5: The Windows 365 main landing page.
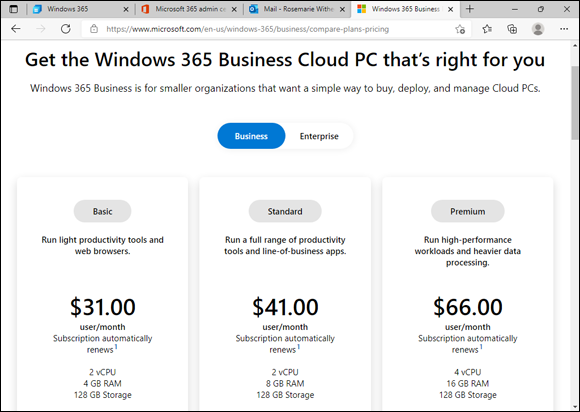
FIGURE 3-6: The Windows 365 cloud PC options.
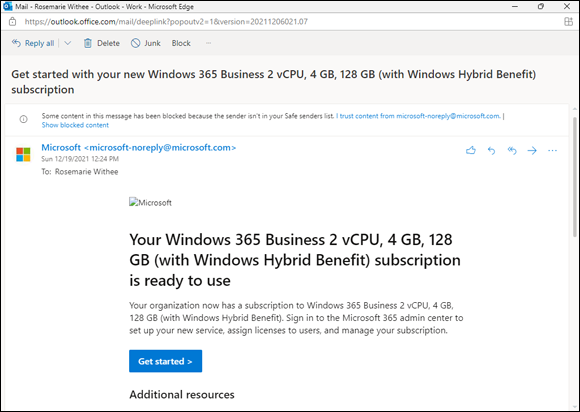
FIGURE 3-7: The Windows 365 welcome email.
Assigning yourself a license to your new cloud PC
When you signed up for Windows 365 in the previous step, you received a welcome email. (Refer to Figure 3-7.) The welcome email includes a Get Started button that automatically directs your web browser to the Windows 365 section of your Microsoft 365 administration center.
In that section, you can assign yourself the new license you just purchased by clicking the Assign License link and then clicking Assign License again to display the user search tool, as shown in Figure 3-8. If you are following along, then you will only have one user so that user shouldn’t be hard to find. Select your user and then click the Assign button.
Congratulations! You have successfully signed up for Microsoft 365, Windows 365, and assigned yourself a license. The next step is finding the Windows 365 administration center, signing into your new system, and taking a look around.
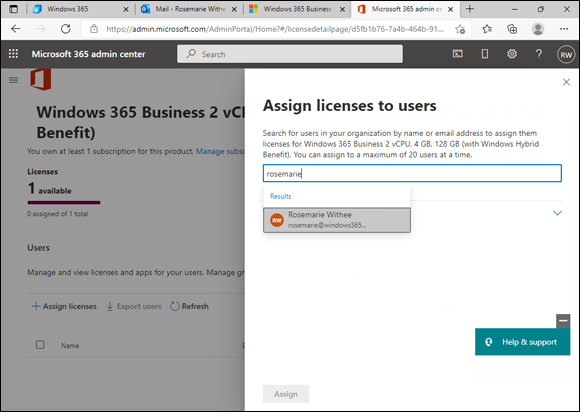
FIGURE 3-8: Assigning a Windows 365 license in the Microsoft 365 administration center.
You can always get back to your Microsoft 365 dashboard by opening your web browser and going to https://www.office.com/ and signing in with the user you created.
Finding the Windows 365 Administration Center
The Windows 365 administration center is where you can see all of the details about your cloud PC. You can see specifications such as the CPU, memory, and storage space and you can also reset and connect to your computer. You access the administration center by navigating your web browser to https://windows365.microsoft.com.
The first time you open the administration center you are presented with a message welcoming you to Windows 365. Click the Next button a few times to read about cloud PCs and then you will land on the main administration page, as shown in Figure 3-9. We cover the administration center further in Chapter 18.
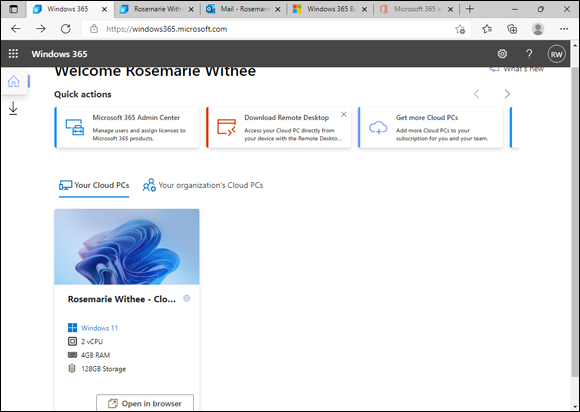
FIGURE 3-9: The Windows 365 administration center.
Your cloud PC takes a little time to get set up. You might see a message above your cloud PC item on the administration page that lets you know it is still being set up.
Signing In to Your New Cloud PC
Now that you have set up your new cloud PC, you are ready to sign in and take a look. Your cloud PC is running out in the cloud and is always on and available and waiting for you. There are two primary ways to interact with it. The first is using the Windows 365 client app you can install on your local computer, and the second is using your web browser.
The Windows 365 client app is a special version of a software application called Remote Desktop, and it provides tight and seamless integration between your physical computer and your cloud computer. To get the most out of your Windows 365 cloud PC, you will want to install the client on whatever computer you plan to use regularly. We cover installing the client and taking a spin around its features in Chapter 4.
Using your web browser, you can also connect to your cloud PC. Your web browser doesn’t provide as tight an integration as the Windows 365 client app, but it will get the job done, and it is super easy to use. Let’s use the web browser to quickly sign into the cloud PC you just created.
To sign into your new Windows 365 cloud PC, follow these steps:
-
Navigate to
https://windows365.microsoft.comin your web browser and sign in with your Microsoft 365 credentials.The Windows 365 Cloud PC Home page appears (refer back to Figure 3-9). Here you can see all of your cloud PCs, including the one you just created earlier in the chapter.
-
Each cloud PC is displayed as a card with its name, operating system, and specifications. At the bottom of the card, click the Open in Browser button.
A new tab on your browser opens that displays a number of features your cloud PC can use from the physical PC with which you are using to connect. Figure 3-10 shows the selections. You can select or deselect these based on how you want to connect the physical computer you are sitting at with the cloud PC you are connecting to. We cover connecting your physical computer to your cloud PC computer in further detail in Chapter 4 and Chapter 5. The Advanced Settings drop-down includes options to select an alternative keyboard layout.
-
Click the Connect button.
A screen appears letting you know your browser window is connecting to your cloud PC, and then you will be asked to sign in.
-
Enter your Microsoft 365 credentials and then click the Sign In button.
Your cloud PC is automatically configured to use your Microsoft 365 credentials. If you are following along with this chapter, these are the credentials you created when you signed up for Microsoft 365. In our example earlier in the book, the credentials are
[email protected]. Your cloud PC will take some time to load for the first time, and then you will be presented with a view of your cloud PC, as shown in Figure 3-11.
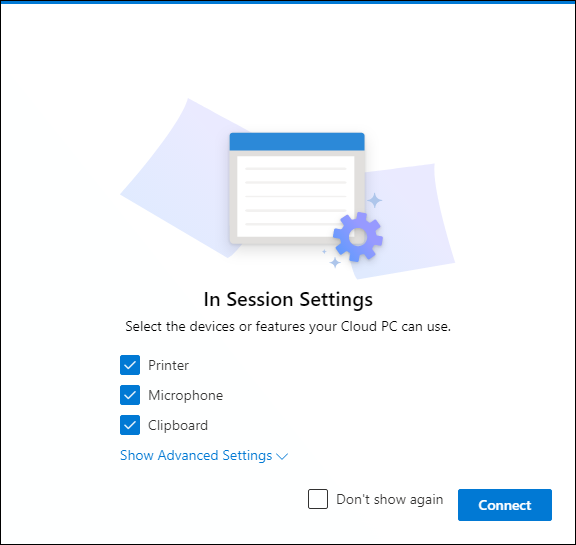
FIGURE 3-10: Selecting components that your current physical computer will connect to your cloud PC.

FIGURE 3-11: Viewing your cloud PC in the web browser of your physical computer.
Congratulations! You are viewing your cloud PC in the web browser on a physical computer. The first time you experience this it can be a bit confusing. Especially if you are also using Windows for your physical computer. You might see a Start menu on your physical computer and a Start menu on your cloud PC, and if you have the web browser maximized, those two Start menus might be really close to each other.
To make things simpler, we like to click the little full screen icon in the upper-right corner of the screen. You can see it in Figure 3-11. It is a diagonal line with arrows on each end. When you click that icon, the cloud PC screen takes over your entire physical screen, and you can use your computer just like you normally would. Just remember that everything you do is on your cloud PC. Pressing the Esc key reduces your cloud PC screen back to the smaller window, and you can interact with your physical computer again. We cover working with your cloud PC using the Windows 365 client in Chapter 4 and with your web browser in Chapter 5.
We cover using your web browser to connect to your Windows 365 cloud PC further in Chapter 5.
You can disconnect from the cloud PC by closing the window that contains your cloud PC desktop. We cover this further in Chapter 4.