Now that we have some idea about how our site is supposed to look and function fresh in our minds from the last chapter, we're going to get started by creating the basic skeleton for the site.
First, we're going to create the Django site and have a look at the files that Django creates for you by default, and how you're supposed to use each one to set up the site. As every dynamic web site requires a back-end datastore, we're going to create and configure the MySQL database for our project. Then, we'll learn how Django maps requests to your site to view functions, and how these serve templates back to the users of your site.
We're just going to create something very simple, but don't let this interfere with your own design needs. You're welcome to detract from my setup and use your own custom layout inside of our template files. You should be able to follow along with the technical concepts in the rest of the book using your own HTML and CSS.
So, now that we have our development environment up and running, let's create our first Django site! Actually, when compared to getting Django installed and running properly, creating the site and getting to our first default "Welcome!" page is really a breeze. This is probably a good thing: after spending the first chapter plowing through our schemes and configuring all the software we're going to be using, I'm sure you're ready for some instant gratification.
The first thing to do, whether or not you've opted to use the Eclipse IDE, is to fire up a shell on your system and navigate to the directory where you plan to store your project. On my system, this happens to be in /home/smoochy/eclipse/workspace. Once you're there, run the following command:
$ django-admin.py startproject ecomstore
Once you've run this, go ahead and run ls to see that a directory called ecomstore was, in fact, created for you. If it's there, change into it and boot up your new site by doing the following:
$ cd ecomstore
$ python manage.py runserver
You should see a few quick lines about validating Django's models, which I'll discuss in later chapters. More importantly, you should see a URL where you can view your new site in the browser. Leave the shell open, fire up your favorite browser, and navigate to the URL the shell told you about. It should be http://localhost:8000/, or as http://127.0.0.1/. The page you get should look something like Figure 2-1.
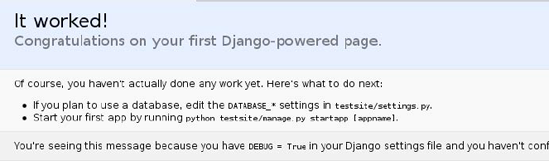
Phew! That was easy! Actually, at the risk of being sued by the Staples corporation, I'll gladly amend the latter statement and say: That was Django!
Notice that I named my project "ecomstore" even though we had planned to call our store "Modern Musician." Why didn't I use the store name as the name of our project? The reason is that our project's code will use the project name in our Python code in a few places, and in the interest of keeping things reusable, I've opted to use a more generic name. That way, in a year from now, when you clone your project in an effort to set up "Amazing Athlete" (or whatever), you'll easily be able to migrate over what you've created.
Let's look briefly at the files that are generated with a new Django site.
Before we start exploring, if you want to open your new project using something other than the command line, open up Eclipse. Go to File ? New and select "PyDev Project." Type ecomstore in as the name of your project, and set the directory as the path to the directory your project is in. (If you've used the default, as I've done, it should already be typed in for you.) Make sure you select the correct version of Python to correspond with what's on your system, then click "Finish." After some quick whirring, the ecomstore folder should appear in Eclipse's file navigator.
If you've been following along, there should be at least four items in your ecomstore folder: __init__.py, manage.py, settings.py, and urls.py. Let's look at each one of these in turn and talk briefly about what it does:
__init__.py:This file should be empty, and exists solely to tell your system that yourecomstoredirectory should be treated like a Python module.[12]
manage.py:A local Python file that enables you to run various commands to administer your Django site. You've already used it to boot up the local development server.
urls.py:The file responsible for mapping incoming requests to their respective responses. It's like the phone operator in the days before cell phones. When you puthttp://yoursite.com/product/dwight-schrute-bobblehead/into your browser and you get back that product page, you can thank theurls.pyfile.
settings.py:A configuration file where you'll tell your site what database to use. This is the file where you would put site-wide configuration data, such as cookie expiration lengths, or credentials for a credit card processor. Using this file for such values instead of in your code makes the application easier to maintain, and makes these values easier to change, should you ever need to do so. This file can actually contain Python statements where necessary.
We'll look at each of these in more detail as the need to do so arises. For now, though, let's take a moment to set up our MySQL database.
In order to set up the database for our Django project, we need to do the following three things:
Create a new database.
Create a new MySQL user with a password.
Grant the new MySQL user permissions to manipulate the database.
We can't do these from within the Django project. For these, we need to open up MySQL directly and get our hands dirty. Don't worry... this isn't quite as difficult as it might sound. Open up your local MySQL server with root user access however you feel most comfortable. Since I'm using a Unix variant, I'm going to do this from the command line, but feel free to use something more GUI-friendly. Execute the following commands:
mysql> CREATE DATABASE ecomstore CHARACTER SET utf8;
Query OK, 1 row affected (0.00 sec)

mysql> CREATE USER 'username'@'localhost' IDENTIFIED BY 'password';
Query OK, 0 rows affected (0.00 sec)

mysql> GRANT ALL ON ecomstore.* TO 'username'@'localhost';
Query OK, 0 rows affected (0.00 sec)
Feel free to change the name of the database, the username, or the password (especially the password!) to suit your own situation.
Back to the database user we just created: why not just run the database as it stands right now? We're doing this for security reasons. When you start up MySQL for the first time, you're probably logging in as "root"with the password you specified when you installed MySQL. This root user has privileges to execute any command on any database that it chooses. If you use the root username and password in your Django project, and someone compromises your Django files, then there's no limit to the damage they can do to all of the databases in your MySQL database server. Taking this extra step limits the damage they can do to only the ecomstore database. Consider it a containment strategy.
More than likely, no outsider will ever hack into your application. A much more distinct possibility is as your site and organization grow, you may hire at least one more developer to help you maintain your application. No matter who you choose to hire, there's always a chance your professional relationship will end in a not-so-good manner and you want to make sure there's a limit to what they are able to do. Even if this particular case doesn't apply to you, it's important to be aware of the potential consequences of what you choose to do now.
Now that we have our database set up and our ecomstore user configured, open up your settings.py file in your project. Start scrolling down... close to the top, you should see a list of database settings, starting with DATABASE_, all in caps. The settings should all be empty strings. Based on the database you just created, change the values to read as follows:
DATABASE_ENGINE = 'mysql'           # 'postgresql_psycopg2',...
DATABASE_NAME = 'ecomstore'             # Or path to database file...
DATABASE_USER = 'username'             # Not used with sqlite3.
DATABASE_PASSWORD = 'password'         # Not used with sqlite3.
DATABASE_HOST = ''             # Set to empty string for localhost....
DATABASE_PORT = ''             # Set to empty string for default...
Provided that you've got your MySQL server installed locally, you can leave the host and port blank (it will assume localhost and the MySQL default port of 3306).
The manage.py file includes a dbshell utility that will enter a MySQL command shell within your project's database, and it provides a means for you to test your database connection. Back in your system's shell, in your project's root, type the following:
$ python manage.py dbshell
This command should drop you into the MySQL command shell. You're now connected as the user you just created, and, as you had intended, you're only able to access the ecomstore database. You can exit the MySQL prompt by typing quit.
If you get an error when trying to enter your MySQL shell, examine the error message that Django displays back at you and try to determine what the problem is. The most common mistake is to try and use the incorrect database information. Check your settings.py database values again to make sure they contain the correct database credentials.
So now that we've done all this work setting up our database, let's put it to good use for ourselves by getting it to log exceptions for us. An exception is an unexpected and unusual condition that causes your computer program—whether it's a Python program or a Django web project—to halt normal execution. This could be your site trying to do something it's not allowed to do, or perhaps you've pointed your code to a file that doesn't exist.
For practical reasons, you want to anticipate where potential exceptions might occur in your code and log them so you can review (and hopefully fix) them later. As good a programmer as you might be, as soon as you release your Django project into the wild, there is a slew of things that can potentially go wrong, and you want a means to track these issues. Of course, tracking these exceptions is a very good thing to do during development. And that's what we're going to do with our database right now.
Thanks to the open source community, there's already a solution out there that we can use to log Django exceptions to our database. The package is available at http://code.google.com/p/django-db-log/.
Go ahead and download the code (you might need to check it out of the subversion repository as we discussed in Chapter 1) to a directory of your choice, navigate into the directory, and install the package using the standard distutils method:
$ python setup.py install
This will extract the code into your Python's site-packages directory. Once this is on your machine, there are a couple of changes you need to make to your settings.py file in order for the logging to begin. There are two Python tuples in your settings.py file called MIDDLEWARE_CLASSES, and INSTALLED_APPS.
Add the Django DB Log middleware module to MIDDLEWARE_CLASSES:
MIDDLEWARE_CLASSES = (
    'django.middleware.common.CommonMiddleware',
    'django.contrib.sessions.middleware.SessionMiddleware',
    'django.contrib.auth.middleware.AuthenticationMiddleware',
    'djangodblog.DBLogMiddleware',
)
Be sure you include the trailing comma after that last item in the tuple. Items listed in Python tuples are delimited by commas, which is a simple concept to keep in mind. The problem comes up when there is a Python tuple that contains only a single item. In this case, there must be a comma after the only item in order for Python to recognize it as a valid tuple object. You don't need a comma after this last item, but it's good practice to follow every item in your tuples with a comma to get in the habit. By default, the INSTALLED_APPS tuple includes a few apps enabled for your convenience. However, to keep things simple in the meantime, we're going to disable those four and add the Django DB Log. You can comment out lines in your Python files by placing a # symbol at the beginning of each line you want to remove. Edit your INSTALLED_APPS so that it looks like this:
INSTALLED_APPS = (
    #'django.contrib.auth',
    #'django.contrib.contenttypes',
    #'django.contrib.sessions',
    #'django.contrib.sites',
    'djangodblog',
)
Once again, don't forget the comma after the last (and in this case, only) element in the tuple. With this in place, hop on back to your shell and run the following command:
$ python manage.py syncdb
Creating table djangodblog_errorbatch
Creating table djangodblog_error
Installing index for djangodblog.ErrorBatch model
Installing index for djangodblog.Error model
If you've set up your database, you should see a message about the creation of two tables with two indexes added to them. Your Django project will now log all of its exceptions to a database table called djangodblog_error. All we need now is an exception for our application to catch.
So now that we have a database in place, let's look at setting up our first custom web page by examining the Django templating system (more on the exception later). First, let's briefly go over how Django handles a request made to our site:
The request comes in to the server from the client and this is routed from the web server to our application.
The URL resolver examines the request and compares it with a set of regular expressions specified in the project's
urls.pyfiles, which are mapped to Django functions called views.The request and any additional parameters supplied by the URL are passed to the corresponding view function.
After running whatever logic the site needs, the view function returns a response, which typically takes the form of a generated HTML page.
Defining everything as simply as possible, a Django application is little more than a group of Python functions that take HTTP requests and return HTML responses. Your urls.py file just acts as a dispatcher directing what functions the requests are routed to. This may sound a little esoteric in theory, so let's put it into practice.
Here's an example of a Python function that acts as a Django view (you don't have to type this in yet):
def catalog(request):
     site_name = "Modern Musician"
     response_html = u"<html><body>Welcome to %s.</body></html>" % site_name
     return HttpResponse(response_html)
In this overly simple example, we create two strings, embed one in the other using the string format operator (the %) and Python string interpolation,[17] pass them into a new HttpResponse object, and return it to the request. All we'd need to do to make this page usable in the real world is give it a corresponding entry in our urls.py file, which might look something like this:
urlpatterns = patterns('',
    # other commented code here.
    (r'^catalog/$', 'ecomstore.views.catalog'),
)
Given this, if you were to navigate to http://localhost:8000/catalog/, you would be presented with the welcome message you created previously. While it's probably not a code sample that will land you your dream job, it does illustrate the basic concept of what a Django view does.
Naturally, in the face of such simplicity with our example, there are some very obvious drawbacks to this approach, which should be immediately apparent to anyone who's spent more than five minutes coding for the web. The first thing you should note is that we've just hard-coded the basic HTML tags for our page in a Python string. Perfect for a "Hello World!" example, but definitely not ideal for a real-world application.
This is where Django templates come in. In almost all practical cases, you'll load a file in your project's directory into a Django Template object that you can use in your response. This file will contain all of the HTML markup that your page has, along with placeholders for variables.
You'll also notice that we passed in the name of the site using the Python string formatter syntax. For larger pages that require a lot of variables to be passed in, this could very quickly become an unmanageable headache. Fortunately, Django templates manage their variables using special objects called contexts.
A Context object takes one optional parameter, which is a Python dictionary of name-value pairs. These values are the variables you can use in your templates, and reference by name, when you return them to the response.
So, if we refactored what we did previously to follow Django standards, we might create a file called sample.html within our project's template directory (which we haven't made yet) containing the following HTML:
<html><body>Welcome to {{ site_name }}.</body></html>and we would change our Python view function to look like this:
def catalog(request):
    my_context = Context({ 'site_name': 'Modern Musician' })
    response_html = return_to_string('sample.html', my_context)
    return HttpResponse(response_html)
This makes things much simpler and more flexible. You create a Context object and pass it a Python dictionary with one entry: the name of your site. You then call the return_to_string() function, passing it the name of your template and the Context object you created. Then, like before, you return the response.
Don't worry if you're completely lost about how things are supposed to really come together in Django at this point. You might be wondering how Django knows where to look when it's loading your template file, or why we'd do anything as inane as specifying our site's name in a local variable in a single view function. I've only provided these examples so that you get some idea of how you create a template and the means by which you pass in any variables.
In particular, take note of the double curly-braces in the template: {{ site_name }}. That is Django's syntax for a variable. When the Django templating engine parses this code, it will stick the name of your site—in this case, "Modern Musician—in the {{ site_name }} placeholder.
As a Django programmer, you'll be loading templates and creating Context objects very often during the development of your site. For this reason, you want to take the easiest approach possible. We're now going to leave the realm of theoretical examples and implement a real page with the tactics that will carry us through the rest of the book.
Templates are made easier in Django with functionality referred to as template inheritance. If you're familiar with object-oriented programming, template inheritance is much like class inheritance: child templates take the content of their parent template, and custom content can be added to the child to override and extend that of the parent.
Let's put this thought into action. First, create a new folder in the root of your project and called it templates. Then open up your settings.py file and find the variable TEMPLATE_DIRS, which should be an empty tuple by default. You'll need to put the absolute path on your system to the directory or directories where you plan to keep your template files. On the Ubuntu box I'm using, this looks like this:
"/home/smoochy/eclipse/workspace/ecomstore/templates",
On a Windows machine, your path will likely start with C:/, and should take only forward slashes. Make sure not to copy the backslashes from your Explorer window because they won't work.
A quick word about what we just did: we opted to put the template files into a directory inside our project. Depending on your particular requirements, this may not be what you want. The Django community, as well as the Python community at large, prides itself on maximum flexibility, and being able to reuse work that you've already done in other Django projects is a large component of that flexibility. It's not a requirement that your template directory is within your project... it could be just about anywhere on your system that your user account has the proper permissions to access.
I've chosen to contain them within our project for simplicity and convenience, and because I'm pretty sure any future sites I'll be coding will have drastically different layout needs, I want to set things up so that later, when I need to edit one site, I don't have to edit them all. I prefer the templating for each project be decoupled from all of the others, and any base similarities can merely be copied from the other projects at the start of development. Despite this philosophy, if you think you'll be doing lots of other projects and want to put them elsewhere, outside of your directory, I would be the first person to insist on it.
Typically, to allow yourself some "wiggle room" as far as the templates go, Django templates should be three levels deep. The template in the first level contains all of the elements that are common to all HTML pages on your site, like the opening and closing html, head, and body tags, and any meta, link, or script tags inside of the head tags. The template directly below this will contain the HTML for your site's overall layout structure, marked up with id and class attributes for CSS styling. The third and last level should contain content specific to individual pages. To start creating our templates, let's look at the needs that will be fundamental to most every HTML page on your site. You can safely assume you'll have a Document Type Declaration, and opening and closing html, head, body, title, and meta tags. Create a file in the templates directory you just created and call it base.html. Put the following code into the file:
<!DOCTYPE html PUBLIC "-//W3C//DTD XHTML 1.0 Strict//EN" "XHTML1-s.dtd" ><html
xmlns="http://www.w3.org/1999/xhtml" xml:lang="en" lang="en">
<head>
<meta http-equiv="Content-Type" content="text/html; charset=utf-8" />
<title>{% block title %}{% if page_title %}{{ page_title }} - {% endif %}  {{ site_name }}{% endblock %}</title>
<meta name="
{{ site_name }}{% endblock %}</title>
<meta name="keywords" content="{{ meta_keywords }}" />
<meta name="description" content="{{ meta_description }}" />
</head>
<body>
{% block site_wrapper %}{% endblock %}
</body></html>Okay, I see some hands starting to pop up in the back of the room. I realize that I covered the placeholders for template variables with the double curly braces, but you haven't yet seen the Django template blocks. Django blocks in a parent template are spaces reserved for content in the child templates. So, if you create a template that inherits from base.html, you'll be able to specify a block in the child template called site_wrapper and put whatever content you would like into it. Whenever one of these children is rendered, the content of site_wrapper will be nested in your base.html template. Neat, huh?
The first Django template block we've defined, called title, contains some logic and variables for the corresponding tags in the head element of our site. We'll come back to the {% if %} Django template blocks later, but basically, they allow you to put logic in your templates the same way you would your code. Of course, the amount of actual logic you put in your template should be small. Even though Django templates come equipped to handle programming flow, they are intended to act as a thin presentation layer for your application. You should keep its use to a minimum to keep your templates simple and maintainable.
In this case, our template is checking for the presence of a variable called page_title and if it's present, the template renders it before the name of the site, with a dash separating them. Make sure that the title block is only on one line, since line breaks will be included in the content of the tag.
There are also two variables for meta keywords and meta description inside of the standard meta tags, which we'll set later when we write our view functions.
The next level down should contain the layout that will be used by most of the pages on the site, like the homepage, category and product pages, and any static content pages, such as an "About Us" or "Privacy Policy" page. This layout will include a side bar with extra content. When we get around to making the checkout pages, we will probably create a different second-level template. We want to allow ourselves the options to do this, so we can change pages based on our needs. For example, we might remove the side bar from the checkout pages so that users are less likely to get distracted during the checkout process and click somewhere else.
Create a new file in your templates directory called catalog.html and put in the following content:
{% extends "base.html" %}

{% block site_wrapper %}
<div id="main">
     <a href="#content" class="skip_link">Skip to main content</a>
     <div id="banner" >
          <div class="bannerIEPadder">
               <div class="cart_box">
                [link to cart here]
                </div>
Modern Musician
</div>
</div>
<div id="navigation">
<div class="navIEPadder">
[navigation here]
</div>
</div>
<div id="middle" >
<div id="sidebar" >
<div class="sidebarIEPadder" >
[search box here]
<br />
[category listing here]
</div>
</div>
<div id="content" >
<a name="content"></a>
<div class="contentIEPadder" >
{% block content %}{% endblock %}
</div>
</div>
</div>
<div id="footer" >
<div class="footerIEPadder">
[footer here]
</div>
</div>
</div>
{% endblock %}The key thing is to make sure that {% extends "base.html" %} is the first line in the file. This is the directive that tells catalog.html to inherit from base.html.
In the rest of the file, you see that we've overridden the content of the site_wrapper block with a bunch of markup for the site layout. We've also created a new content block called, aptly enough, content, which we'll use for the content of individual pages. We'll see the CSS that accompanies this markup in a moment.
Finally, create a third template in your templates directory that we'll use for the homepage, and name it the traditional index.html. Within that template, put the following:
{% extends "catalog.html" %}

{% block content %}
     <h2>Welcome!</h2<
{% endblock %}
Our content block has a cordial welcome message in it. Look over these three templates and make sure you understand how things are flowing from top to bottom. In a moment, we'll see what they look like all put together.
Before we go further, it's worth retracing our steps and examining the blocks in our templates that open and close with curly braces and percentage signs. We used them to create blocks in our templates, but these tags are much more versatile in Django templates. They are used for if statements, for loops, including blocks of template code, and other directives much like the {% extends... %} we saw before. We'll come back to those other uses at various points in the book.
Now that we've done all of this work setting up the templates, we just have to test them to see if everything's been done correctly. We still have more work to do, but let's gratify ourselves with a quick peek at our layout so far.
Code inside of a Django project resides inside of individual subdirectories called apps, which we'll learn more about in the next chapter. For now, we're going to create an app to store code for this simple preview. Inside your project's root directory, execute the following to create an app called preview:
$ python manage.py startapp preview
Inside this new app directory, you should find a file named views.py. Open up that file and add the following code to create a single view function:
from django.shortcuts import render_to_response

def home(request):
     return render_to_response("index.html")
That's interesting. Using render_to_response() sure seems to make everything quite a bit quicker than the sample views we looked at before. As it turns out, the Django developers created the render_to_response() function to do the heavy lifting for us whenever we are writing Django view functions, which allows us to handle a very common case using only a single line of code. In our case, we just passed it the name of the template to render, but it takes an optional second argument: a Python dictionary of variables. The render_to_response() function takes the template, populates it with variables, and then returns the generated content to us in form of an HttpResponse.
In most web frameworks, such as ASP.NET, PHP, and Ruby on Rails, the URL is mapped to a file on the file system that contains application code, such as Default.aspx or index.php. In Django, your URL ends up being mapped to a function in Python code, which in turn renders a template file on the file system. It's a different way of doing things, but you'll get used to it quickly, so don't sweat it.
So, we have a simple view for testing our homepage. Unfortunately, we still don't have a way of navigating to it, so open up your urls.py file and add the following line:
urlpatterns += patterns('',
    #other commented code here
    (r'^catalog/$', 'preview.views.home'),
)
With this in place, jump back to the shell and boot up the server (if it's not running already):
$ python manage.py runserver
Once that's up, fire up a browser and navigate to http://localhost:8000/catalog/. You should see some black on white text that lacks any formatting whatsoever:
Skip to main content
[link to cart here]
Modern Musician
[navigation here]
[search box here]
[category listing here]
Welcome!
[footer here]
The reason we're not seeing anything particularly pretty is because we haven't yet attached our CSS file. That's all right... I deliberately left out that step so we could check what our site looks like without any CSS markup. Remember, there are people out there with special browsers that don't render CSS, and you don't want to preclude them from being able to use your site conveniently. Sure, the preceding markup on a product page might be awkward, but the flow is still there in good order, and we're not preventing anyone from checking out.
Make it a point to check your site during the various stages of development to ensure that the layout looks okay, and that elements are logically ordered, without the aid of any CSS styles. You actually don't have to remove the CSS link from your template code each time you want to do this. If you're using Firefox, with the Firefox Accessibility Extension toolbar installed, you can easily disable CSS from the "Style" menu by toggling off the "Author CSS" setting.
There's one piece of the puzzle still missing, and it's the CSS for our layout in catalog.html. To add the CSS, create a directory called static in the root of your Django project and create a file called css.css within your new static folder. Enter the following CSS:
*{
    margin:0;
    padding:0;
}
html{
    font-size:medium;
}
html,body{
    background-color:Silver;
}
.cb{
    clear:both;
}
.fr{
    float:right;
}
.fl{
float:left;
}
.bn{
border:none;
}#main{
margin: 0 auto;
width:900px;
background-color:White;
}
.bannerIEPadder, .sidebarIEPadder, .contentIEPadder{
padding:10px;
}
.navIEPadder, .footerIEPadder{
padding:5px;
}
#banner{
width:900px;
height:75px;
background-color:DarkOrange;
color:White;
font-size:36px;
font-weight:bold;
position:relative;
}
div.cart_box{
position:absolute;
top:10px;
right:10px;
font-size:medium;
}
div.cart_box a{
color:white;
}
#sidebar{
width:200px;
float:left;;
}
#content{
width:700px;
float:left;
}
#footer{
clear:both;
background-color:#98AC5E;
color:White;
text-align:center;
}a.skip_link{
position:absolute;
left:−1000px;
top:−1000px;
}Some browsers come equipped with some default settings, such as margin and padding for elements. These default styles can create differences in appearance between browsers, so the solution is to use a CSS reset to set all padding and margin to zero. The preceding code contains a CSS reset (which is the style attached to the asterisk * character), some basic classes I will be using, and the more specific classes and attributes contained in our HTML markup. One thing that may jump out at you is the "Skip to main content" link we set at the top of our page. You'll notice that we're using CSS to hide this link. Why the invisible link?
This is for accessibility reasons. Users that have impaired vision may be listening to the markup of the page being read aloud to them, and with each new page they navigate to, they will have to start listening at the very top. That means that with each new page, they might potentially need to hear the banner, navigation, and side column markup before they get to the content. Putting in a skip link at the very top of the pages enables them to jump right to the start of the page content, thus making your site much more usable to people using screen readers. You can see that this link is not visible to all users when CSS is on, so it won't distract or interfere with people who don't need it. If the CSS is not available or rendered, as is the case with screen readers, then it appears right at the top of the page above the logo.
Now we need to attach the CSS file to our template files. This is simple enough, but there is one issue we need to address before we do so. When you're developing your site on a single machine, you have everything running on that one computer: the database, images, style sheets, JavaScript files, and so forth. However, in real-world sites deployed into production, these items are usually split out onto different machines. The creators of Django believe (and rightly so) that for scalability reasons, the server that is serving your site's pages shouldn't be the server that is hosting and serving up your static media, such as style sheets or images.
During the development phase, configuring a full web server such as Apache to serve your site's static media can be kind of a hassle, so there is a workaround for this while you're developing locally. Go into your urls.py file and add the following entry to refer to the static directory with your CSS file in it:
urlpatterns = patterns('',
     # other commented code here
     (r'^catalog/?', 'views.home'),
     (r'^static/(?P<path>.*)$', 'django.views.static.serve',
          { 'document_root' : '/home/smoochy/eclipse/workspace/ecomstore/static' }),
)
This will point any request to your site made to http://localhost:8000/static/ into the static directory you created. Next, go into your base.html file and add the following line to your site's head:
<head>
    <link rel="Stylesheet" type="text/css" href="/static/css.css" />
    <meta http-equiv="Content-Type" content="text/html; charset=utf-8" />
Make sure you include the slash before static in the href attribute.
This approach is a hack, albeit a useful one, that should never be used in production. We've got things set up for ourselves in the meantime, but definitely make a substantial mental note to change this later. We'll cover the change you should make, and how to do things correctly, in the chapter on deployment much later in the book.
Optionally, you could add logic to your urls.py file to only include the static media path as a URL entry if your site is not currently in production. Before deploying your site, one thing you should do is set the DEBUG property in your settings.py file to False. You could conditionalize this by importing your settings module into urls.py and adding it if DEBUG is set to True:
from ecomstore import settings

urlpatterns = patterns('',
# other urlpatterns defined here

if settings.DEBUG:
   urlpatterns += patterns('',
(r'^static/(?P<path>.*)$', 'django.views.static.serve',
          { 'document_root' : '/home/smoochy/eclipse/workspace/ecomstore/static' }),
)
Notice that this code block is separate from the first urlpatterns block, and we're using the += operator, which adds the static URL pattern to the existing urlpatterns block.
You can read more advice about this hack at http://docs.djangoproject.com/en/dev/howto/static-files/.
With our CSS now attached, go back to your browser and refresh the site. You should see a colorful layout that resembles Figure 2-2.

I'd like to reiterate one point that I made in Chapter 1: I'm not a visual designer, I'm a programmer. Yes, programming code is a form of design, but I know nothing about color theory and couldn't tell you what psychological effect this orange and green color combination might have on our potential customers. Maybe it will make them laugh, and maybe that's a bad thing. Remember that the design in this book is just a placeholder. When you have the resources and the wherewithal, you can hire a designer to overhaul your catalog.html file and make it look the way you want.
A quick note on CSS: for very large sites, you might want to break out your CSS into multiple files and import them into the one that you include in the link element in your site's head. You could conceivably put this into your css.css file (must be the first thing in the file):
@import 'layout.css';
@import 'styles.css';
@import 'links.css';
The content of these three other files will be downloaded with your one style sheet. This can be extremely useful for partitioning areas of your CSS, especially for large projects, but be aware that each of your @import directives makes the loading of your site require an additional HTTP request. For performance optimization, you don't want to go "import crazy" and have 20 imports for relatively small files. If your project will be fairly tiny, like mine, it's probably better for you to do as I will, and just use a single CSS file.
We are repeating ourselves in the settings.py file with regard to one particular configuration: the path to our project on the system on which it's running. For example, there are two places in settings.py and one place in urls.py where the following path is located:
/home/smoochy/eclipse/workspace/ecomstore... (etc)
Clearly, this is suboptimal and we want to not only have this information declared in one place, but it should also be determined for us automatically, at runtime, based on the project environment.
As it turns out, Python comes with a very simple function that returns the path to the current directory as a string. The following code will do this and return the path as a Unicode string:
import os
os.path.abspath(os.path.dirname(__file__).decode('utf-8'))
Simple as that. One problem with this approach is that it will not work on Windows. If you run this function on a Windows box, the directory delimiters will be two backslashes: one that's really supposed to be a backslash and one that's escaping the backslash character. So, we can perform a simple find and replace on our string in order to get this working correctly on Windows boxes by replacing double backslashes with single forward slashes.
Let's set a constant in our settings.py file that encapsulates this information. In your settings.py file, enter the following two lines of code somewhere near the top of the file:
import os # hack to accommodate Windows CURRENT_PATH =os.path.abspath(os.path.dirname(__file__).decode('utf-8')).replace('', '/')
Now, wherever you reference the path to your project in your configuration files, just replace the text with the CURRENT_PATH variable. Here is my TEMPLATE_DIRS tuple reconfigured:
TEMPLATE_DIRS = (
    os.path.join(CURRENT_PATH, 'templates'),
)
Here we are using another method that ships with the os.path module. The join() function takes the CURRENT_PATH variable and appends the templates subdirectory to it. Now, if your project moves around between multiple machines during development (as mine tends to do), and regardless of where it ends up on the system when you deploy the site, you don't need to alter these directory paths after each move.
Things are set up for us to start developing the site pages, but I'm going to show you one last template item briefly before we continue. The placeholder reading [navigation here] will be replaced by a set of anchor elements leading to the pages on our site. This is simple enough for HTML gurus that we can do this now.
Create a directory within your templates folder called tags, and create a new file inside of your tags directory called navigation.html. Put the following HTML into that file:
<ul>
     <li><a href="/catalog/">Home</a></li>
     <li><a href="/catalog/">About</a></li>
     <li><a href="/catalog/" >Privacy</a></li>
     <li><a href="/catalog/">Products</a></li>
     <li><a href="/catalog/" >Contact</a></li>
</ul>
<div class="cb"></div>
Next, open up your project's CSS file and add in the following styles for our navigation list of hyperlinks:
#navigation{
     width:900px;
     height:auto;
     background-color:#98AC5E;
     text-align:middle;
}
#navigation ul{
     list-style:none;
}
#navigation ul li{
     float:left;
     margin-right:15px;
}
#navigation ul li a{
     color:White;
     font-weight:bold;
     text-decoration:underline;
}
#navigation ul li a:hover{
     color:#616161;
     background-color:White;
     text-decoration:none;
}
You should now have this file set up in your project at: /templates/tags/navigation.html. We're going to use a Django templating option that allows us to separate out the template code, by using an include directive. Open up your catalog.html file and find the placeholder for the navigation. Replace it with the following line:
{% include 'navigation.html' %}The include directive looks in your template directories for the file you specified, and if it finds it, inserts the HTML it finds in the template file into that spot in your template. If you come from a PHP background, this should look very familiar to you. This template has nothing to do with our inheritance model we structured earlier. Instead, it's merely an easy means of breaking out chunks of HTML in your site (in this case, the navigation) into a separate file that you can inject in your template where you want. This helps keep your templates more manageable, as it allows you take large blocks of HTML content and keep them out of your base templates, which should only contain markup related to the overall site structure.
So, with this code in place, load up the catalog page. If you get an error, and a message on the error page that says something like TemplateSyntaxError and a message about an exception that was caught while rendering the exception, then bravo.
You haven't done anything wrong. Remember earlier in the chapter when I promised you a Django template exception to test our error handling code? Our include tag is incorrect because we didn't specify the correct directory. Remember, we put the navigation.html file into /templates/tags/navigation.html, and not just in our /templates directory. Our Django project is looking in the templates directory for the file, and not inside any subdirectories.
So, to fix your include tag, alter it so that it looks like this:
{% include "tags/navigation.html" %}Try reloading your page again. You should be greeted with the same page as before, except now you should have five navigation links at the top, styled according to your CSS (and that, when clicked, don't take you anywhere).
So let's check for that exception you just caused. Drop down into your database, either using the manage.py dbshell or otherwise, and run the following:
SELECT * FROM djangodblog_error;
You should get back at least one row, and the last one should contain the same details about the TemplateSyntaxError that were on the page when you encountered the exception. So why did we take the trouble to log the details about Django exceptions when we can plainly see the details about exceptions on the pages that throw them?
As mentioned in the last section, in a production setting, there will be one crucial difference: your site will not be running in debug mode. In the settings.py file, near the top, is a variable called DEBUG. You'll notice that right now, it's set to True.
This is one thing you need to change before deploying, and when you do, Django will, among lots of other things, display a custom generic "Sorry, we encountered an unexpected error!" page to display to the users of your site. The two most common errors are the 404 Page Not Found error, which is returned when a customer makes a request for a URL that doesn't exist, and the 500 Internal Server error, which occurs if Django raises an exception. The default files that are shown in this case lie in the root templates folder of the Django source, and are aptly named 404.html and 500.html.
Ensuring that DEBUG is set to True is good for security, as these generic template files prevent your users from easily finding out that you're using Django, or reading the traceback of your site's code that potentially gets displayed on an error page in debug mode. However, you need to have this information accessible to you somewhere, if for no other reason than to let you know where an exception occurred and any details you might need to fix it. This is the reason we've taken the trouble to log these errors to our database.
One last thing: now that you know how to make a page, you might be tempted to jump in and start creating your "Privacy Policy" or "Contact" pages. Hold off on that. There's a much easier way, using a Django app called flatpages, which will help you do this without needing to create a bunch of static template files. We'll come back to that later in the book.
Before we jump into coding our models and adding lots of templates to inherit from our catalog.html template, let's talk about URLs. The creators of Django didn't like messy URLs in their pages. If you've ever tried to type in a URL in by hand that looks something like:
http://www.somesite.com/products/product.php?product_id=5674&category=bananas&lang=
en-us
then you know just how terrible and unreadable these can be. Django handles the mapping of cleaner URLs to its pages in a very simple way. If you've ever used Apache's mod_rewrite[18] to make your URLs look better, Django has a very similar functionality built in. The only difference is that in Django, the mapping is handled at the level of your web application and not by the web server. This is particularly useful when you're dealing with a shared hosting environment, and you're not allowed to tweak the Apache conf files directly.
Let's take a quick look at URLs. You added the one line for the /catalog/ page earlier:
urlpatterns = patterns('',
     #other commented code here
     (r'^catalog/$', 'views.home'),
)
Each entry in the patterns tuple takes a regular expression and the name of the view function to call as its arguments. I sense that some of you might be a little taken aback by the first part. Regular expressions? Aren't those things really hard? And isn't Django supposed to make things easier on us?
In response to all three of those questions: yes. Regular expressions are pretty tricky to get the hang of. My advice to you is not to worry about it, since most of what you'll be doing will only involve a small handful of regular expression tips and tricks. And for the most part, when a problem arises that isn't covered in this book, a little Googling around for the answer will probably get you what you're looking for.
We set a lot of important groundwork in this chapter. We created our Django application, configured exception logging to our database, and set up a hierarchy of templates for most of our site's pages. We now have a basic site layout and appearance that will act as a simple interface while we set up all of the back-end architecture in the next chapter, where we'll create the product catalog with a category structure and even some stuff customers can browse.
In the next chapter, we're going to put our database to good use, and create categories and products. Then we'll really sink our teeth into creating content for our site by creating their corresponding pages.
[12] Each directory on your system that you want to be recognized by Python should contain this file. One important point about these __init__.py files: they can contain Python code, and can be imported by importing the name of the directory. In this case, since our project in on our system's PYTHONPATH, then import ecomstore in a Python shell will import the code in the __init__.py file.
[13] http://dev.mysql.com/doc/refman/5.0/en/storage-engines.html
[14] http://docs.djangoproject.com/en/dev/topics/db/transactions/
[15] http://unicode.org/
[16] http://dev.mysql.com/doc/refman/5.0/en/charset-server.html
[17] http://www.python.org/dev/peps/pep-0292/
[18] http://httpd.apache.org/docs/2.2/mod/mod_rewrite.html