
A Simple First Game
In this book you are going to learn a lot about working with iOS. The goal, of course, is to be able to build a game that runs on iOS. To do that, you must learn about a lot of different elements that a full game will incorporate, such as basic UI widgets, audio, complex touch input, Game Center, in-app purchases, and of course graphics. This book will explore these concepts and many others. Think of it as a guide to the building blocks that you will need to make a compelling game that is specific to iOS and Apple’s mobile devices. All iOS applications have one thing in common—the application Xcode—so it makes sense to start with that.
In this first chapter, we are going to build a very simple game of Rock, Paper, Scissors. We will use the Storyboard feature of Xcode to create an application with two views and the navigation between them.
Included with this book are sample Xcode projects; all of the code examples are taken directly from these projects. In this way, you can follow along with each one in Xcode. I used version 4.5 of Xcode when creating the projects for this book. The project that accompanies this chapter is called Sample 1; you can easily build it for yourself by following the steps outlined in this chapter.
The project is a very simple game in which we use Storyboard to create two scenes. The first scene is the starting view, and the second scene is where the user can play the Rock, Paper, Scissors game. The second scene is where you will add a UIView and specify the class as RockPaperScissorView. The source code for the class RockPaperScissorView can be found in the project Sample 1.
We will walk through each of these steps, but first let’s take a quick look at our game, shown in Figure 1-1.
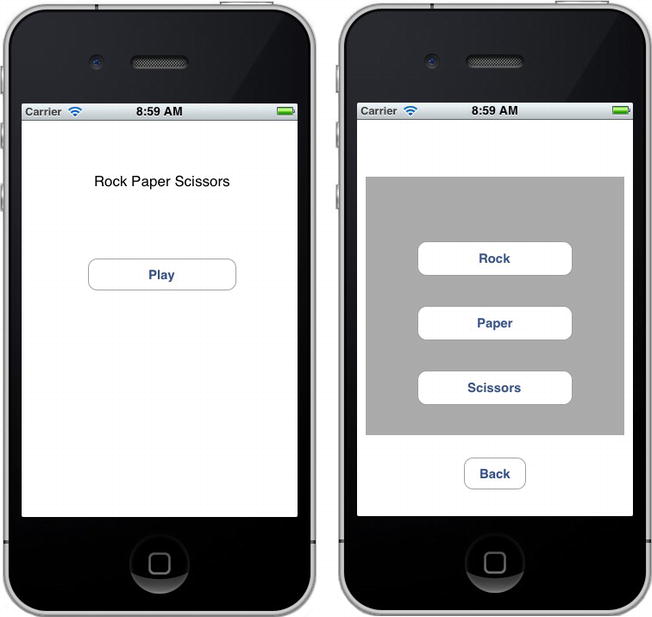
Figure 1-1. The two views of our first game: Sample 1
On the left of Figure 1-1 we see the starting view. It just has a simple title and a Play button. When the user clicks the Play button, he is transitioned to the second view, shown on the right of the figure. In this view, the user can play Rock, Paper, Scissors. If the user wishes to return to the starting view, or home screen, he can press the Back button. This simple game is composed of a Storyboard layout in Xcode and a custom class that implements the game.
Let’s take a look at how I created this game and at some ways you can customize a project.
Creating a Project in Xcode: Sample 1
Creating this game involves only a few steps, which we’ll walk through as an introduction to Xcode.
Start by launching Xcode. From the File menu, select New Project. You will see a screen showing the types of projects you can create with Xcode (See Figure 1-2).
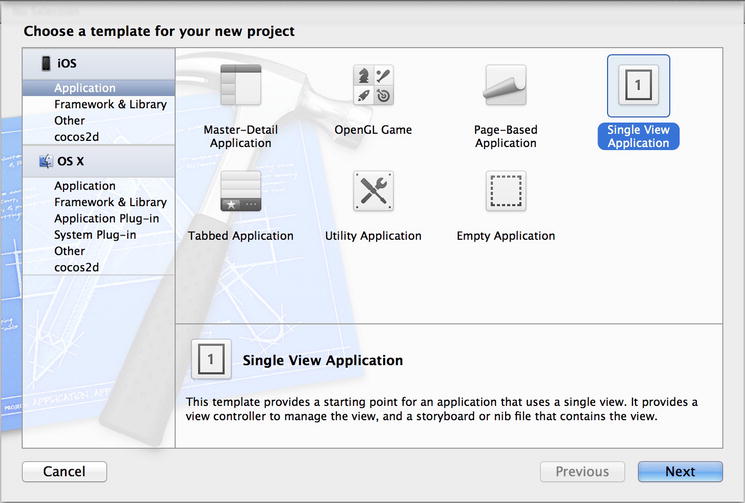
Figure 1-2. Project templates in Xcode
For this project, select the template Single View Application. Click Next, and you will be prompted to name the project, as shown in Figure 1-3.
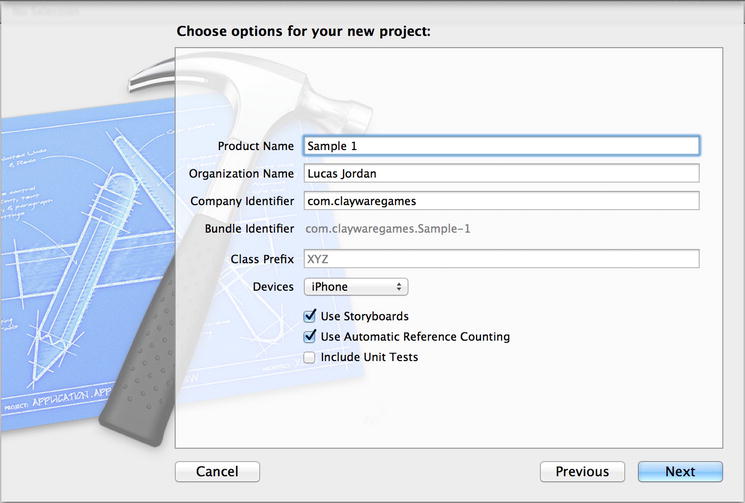
Figure 1-3. Naming an Xcode project
Name your project whatever you want. The name you give your project will be the name of the root folder that contains it. You also want make sure Use Storyboard and Use Automatic Reference Counting are selected.
This time we will be making an application just for the iPhone, but from the Device Family pull-down menu you could also select iPad or Universal. After you click Next, you will be prompted to pick a place to save your project. The project can be saved anywhere on your computer.
Before moving on, let’s take a moment to understand a little about how an Xcode project is organized.
After saving a new project, Xcode will create a single new folder within the folder you select. This single folder will contain the project. You can move this folder later if you want without affecting the project. Figure 1-4 shows the files created by Xcode.
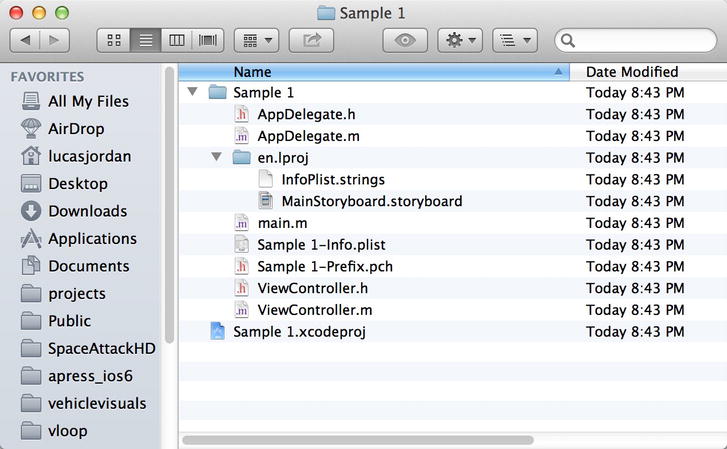
Figure 1-4. Files created by Xcode
In Figure 1-4, we see a Finder window showing the file structure created. I selected that I wanted the project saved on my desktop, so Xcode created a root folder name Sample 1 that contains the Sample 1.xcodeproj file. The xcodeproj file is the file that describes the project to Xcode, and all resources are by default relative to that file. Once you have saved your project, Xcode will open your new project automatically. Then you can start customizing it as you like.
We have looked at how to create a project. Now you are going to learn a little about working with Xcode to customize your project before moving on to adding a new UIView that implements the game.
Arranging Xcode Views to Make Life Easier
Once you have a new project created, you can start customizing it. You should have Xcode open with your new project at this point. Go ahead and click the MainStoryboard.storyboard file found on the left so your project looks like Figure 1-5.
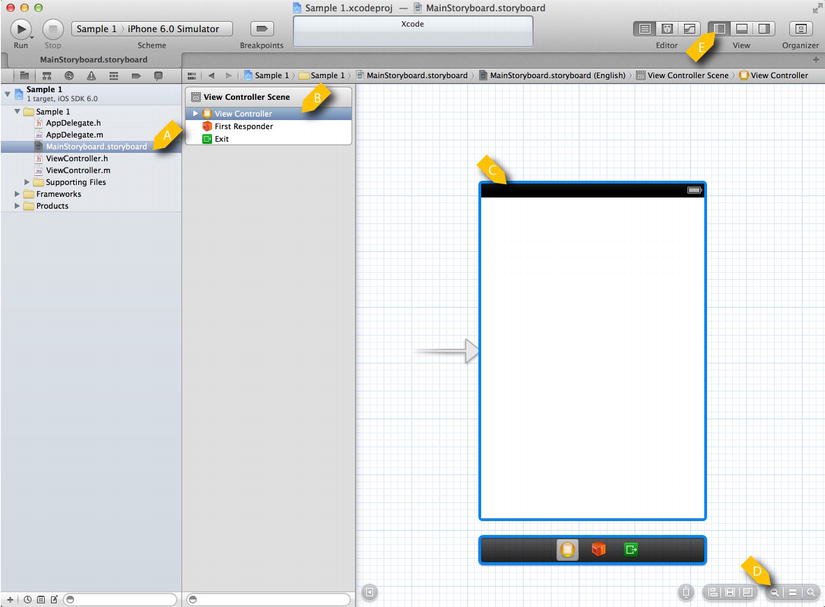
Figure 1-5. MainStoryboard.storyboard before customization
In Figure 1-5, we see the file MainStoryboard.storyboard selected (item A). This file is used to describe multiple views and the navigation relationships between them. It shows the selected storyboard file and describes the content of the right side of the screen. In item B, we see an item called View Controller. This is the controller for the view described in item C. The items at D are used to zoom in and out of a storyboard view, and are critical to successfully navigating your way around. Additionally, the buttons in item E are used to control which of the main panels are visible in Xcode. Go ahead and play around with those buttons.
Next, let’s look at how to add a new view.
Once you have had a chance to play a little with the different view setups available in Xcode, you can move on and add a new view to your project. Arrange Xcode so the right-most panel is visible, and hide the left-most panel if you want. Xcode should look something like Figure 1-6.
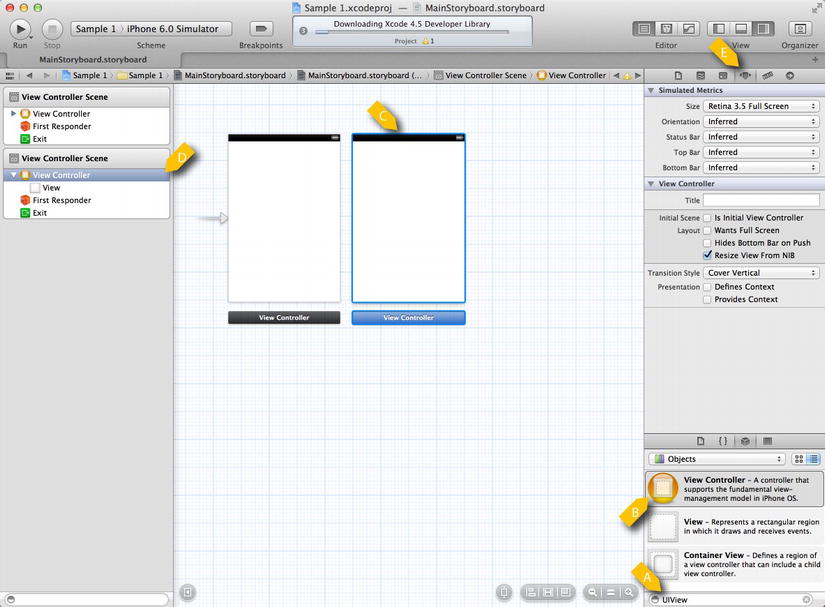
Figure 1-6. Storyboard with second view
In Figure 1-6, we see that we have added a second view to the storyboard. Like any good Apple desktop application, most of the work is done by dragging and dropping. To add the second view, we enter the word “UIView” into the bottom-right text field, at item A. This filters the list so we can drag the icon labeled item B on the work area in the center. Click on the new view so it is selected (see item C), which we can see correlates to the selected icon in item D. Item E shows the properties for the selected item.
Now that we have a new view in the project, we want to set up a way to navigate between our views.
We now want to create some buttons that enable us to navigate from one view to the other. The first step is to add the buttons, and the second is to configure the navigation. Figure 1-7 shows these views being wired up for navigation.
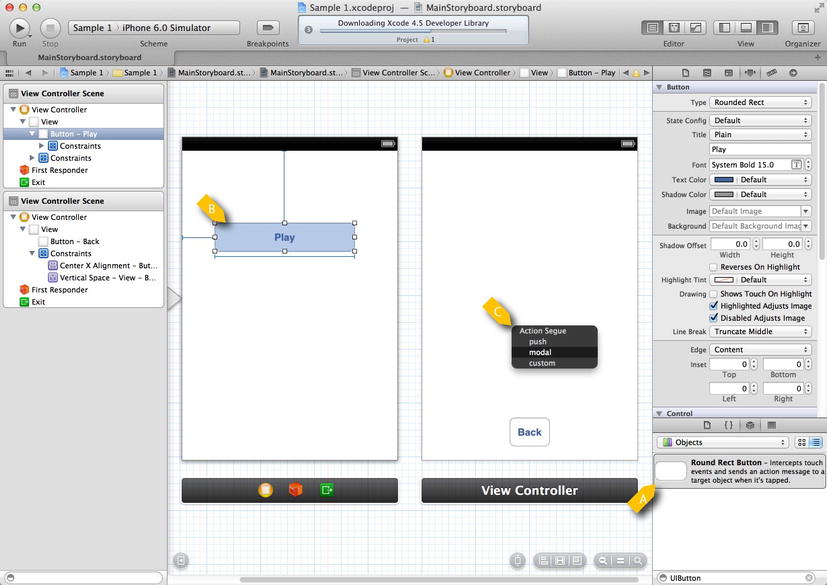
Figure 1-7. Storyboard with navigation
In Figure 1-7, we see that we have dragged a UIButton from the library item A onto each of the views. We gave the UIButton on the left the label Play, and the UIButton on the right the label Back. To make the Play button navigate to the view on the right, we right-drag from the Play button (item B) to the view on the right and release at item C. When we do this, a context dialog pops up, allowing us to select which type of transition we want. I selected Model. We can repeat the process for the Back button: right-drag it to the view on the left and select the transition you want for the return trip. You can run the application at this point and navigate between these two views. In order to make it a game, though, we need to include the Rock, Paper, Scissors view and buttons.
Adding the Rock, Paper, Scissors View
To add the Rock, Paper, Scissors view, we need to include a class from the sample code in the project you are building. The easiest way to do this is to open the sample project and drag the files RockPaperScissorsView.h and RockPaperScissorsView.m from the sample project to your new project. Figure 1-8 shows the dialog that pops up when you drag files into an Xcode project.

Figure 1-8. Dragging files into an Xcode project
In Figure 1-8, we see the dialog confirming that we want to drag new files into an Xcode project. Be sure the Destination box is checked. Otherwise, Xcode will not copy the files to the location of the target project. It is good practice to keep all project resources in the root folder of a project. Xcode is flexible enough to not require that you do this, but I have been burned too many times by this flexibility. Anyway, now that we have the required class in our project, let’s wire up our interface to include it.
The last step in preparing a simple application is to create a new UIView in our interface that is of the class RockPaperScissorsView. Figure 1-9 shows how this is done.
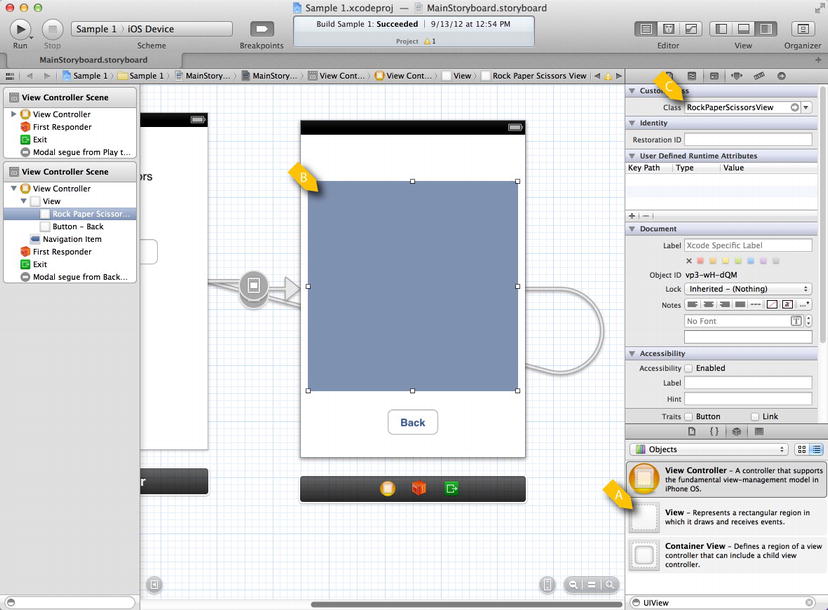
Figure 1-9. A customized UIView
In Figure 1-9, we see a UIView added to the view on the right. We did this by dragging the icon from item A onto the storyboard in item B. After adjusting the size of the new UIView, we set its class to be RockPaperScissorsView, as shown in item C. At this point, we are technically done. We have created our first game! Obviously, we have not looked at the implementation of RockPaperScissorsView, which is discussed on the next chapter.
The rest of this book will use Sample 1 as a starting place. You will learn many new techniques for customizing a simple app to make a truly complete game.
Summary
In this chapter, we have taken a quick tour through Xcode, learning how to create a project with it and build a simple navigation using Storyboard. The chapters that follow will add to the basic lessons given here to show you how to build a complete game.