We are now on the verge of getting started on the Celtic Crusader RPG, which is the focus of most of this book! The first three chapters should have brought you up to speed on the basics of programming in Visual Basic and working with forms and controls. Now we will begin studying the graphics capabilities of the .NET Framework that will make it possible to build a complex game. Examples will no longer be tied to the form and its controls and their limitations, as far as game programming is concerned. Although future chapters will again use forms and controls for our game editors, graphics code will no longer be dependent on controls. The .NET Framework has abstracted classes around the Windows Graphics Device Interface (GDI) so that we can create drawing surfaces and render shapes onto them using classes such as Graphics and Bitmap in conjunction with a PictureBox control. We will just create what is needed at runtime. The examples will be hands on once again so that you will learn new techniques first by using them rather than learning about them.
Here’s what we’ll cover in this chapter:
Lines and other vector shapes may not be very exciting but we are going to use line drawing as a starting point for learning about graphics programming with the .NET Framework and GDI+. The graphics code we’ll go over here in a bit produces the result shown in Figure 4.1.

For our purposes in this chapter, we will just look at the features specific to 2D graphics programming using the Image property of a PictureBox control. The PictureBox can be added to a form manually, but it’s easier to use a global PictureBox control and just create it at runtime in the Form1_Load function. In fact, we will just configure the form in code as well so that no manual property editing is needed. Any property you see in the Properties window of the Form Designer can be modified in code—and it’s easier to do that in code. So, in the globals section of Public Class Form1, let’s add a new PictureBox control:
Public pb As PictureBox
Public rand As Random
In Form1_Load, we will create this new PictureBox and add it to the form. The Parent property is used to attach the control to Form1 (referred to with the Me keyword—which is like the this keyword in C++: it refers to the current Form). DockStyle.Fill causes the PictureBox to fill the entire form, so that we can set the size of the form and the PictureBox will resize with it.
pb = New PictureBox()
pb.Parent = Me
pb.Dock = DockStyle.Fill
pb.BackColor = Color.Black
While we’re working in Form1_Load, let’s just go ahead and set the form’s settings. Again, this is being done in code while it could also be done using the Properties window in the Form Designer.
REM set up the form
Me.Text = "Line Drawing Demo"
Me.FormBorderStyle = Windows.Forms.FormBorderStyle.FixedSingle
Me.MaximizeBox = False
Me.Size = New Point(600, 500)

REM create random generator
rand = New Random()
Back in the globals sections at the top of the code, we need two new objects: a Bitmap and a Graphics object.
Public surface As Bitmap
Public device As Graphics
The Bitmap represents a drawing surface and is really just a pointer to the data in memory. After drawing something using the Graphics object (onto a PictureBox.Image), we then set the Bitmap variable (which is a pointer) equal to the PictureBox.Image, and that Bitmap can then be treated as an independent surface—which can be copied elsewhere, saved to a file, and other things. The Bitmap should be created with the same dimensions as the PictureBox control. This code goes in Form1_Load:
surface = New Bitmap(Me.Size.Width, Me.Size.Height)
pb.Image = surface
device = Graphics.FromImage(surface)
There are quite a few versions of the Graphics.DrawLine() function with various parameter variations that use Points, Single-, and Integer-based X,Y coordinates and drawing modes. I will use a pen defined with the desired color and line width. The drawLine() function creates a pen with a random color and random line size, and two random points for the line ends that fit inside the dimensions of the form. After calling DrawLine(), then the PictureBox.Image is refreshed.
Private Sub drawLine()
    REM make a random color
    Dim A As Integer = rand.Next(0, 255)
    Dim R As Integer = rand.Next(0, 255)
    Dim G As Integer = rand.Next(0, 255)
    Dim B As Integer = rand.Next(0, 255)
    Dim color As Color = color.FromArgb(A, R, G, B)
    REM make a pen
    Dim width As Integer = rand.Next(2, 8)
    Dim pen As New Pen(color, width)
    REM random line ends
    Dim x1 As Integer = rand.Next(1, Me.Size.Width)
    Dim y1 As Integer = rand.Next(1, Me.Size.Height)
    Dim x2 As Integer = rand.Next(1, Me.Size.Width)
    Dim y2 As Integer = rand.Next(1, Me.Size.Height)
    REM draw the line
    device.DrawLine(pen, x1, y1, x2, y2)
    REM refresh the drawing surface
    pb.Image = surface
End Sub
We can even create a Timer in code without using the Form Designer. There is just one extra step to take and then the new Timer will work like usual—its variable must be declared using the WithEvents keyword:
Public WithEvents timer As Timer
We can then initialize the Timer object and set its properties in Forml_Load:
REM set up the timer
timer = New Timer()
timer.Interval = 20
timer.Enabled = True
When a new object is declared using WithEvents, then it is “visible” to the event handler system in Visual Basic, and can be used as an event trigger even when we write the function ourselves (rather than having Visual Basic generate it for us). Suffice it to say, we want the drawLine() function to run every 20 milliseconds, which is 50 frames per second (50 Hz).
Private Sub timer_Tick(ByVal sender As System.Object, _
    ByVal e As System.EventArgs) Handles timer.Tick
    drawLine()
End Sub
One final point: we must always free memory after we finish with objects created in heap memory. This is best done in the FormClosed event.
Private Sub Form1_FormClosed(ByVal sender As Object, _
    ByVal e As System.Windows.Forms.FormClosedEventArgs) _
    Handles Me.FormClosed
    device.Dispose()
    surface.Dispose()
    timer.Dispose()
End Sub
Once we have the framework in place to draw lines, there are many other vector shapes that can be drawn with only a few minor changes in the code. One such shape is a rectangle, which we will look at next. Figure 4.2 shows the result.

For reference, we’ll go over the entire code listing (which is still quite short). First up are the global variables, Form1_Load, which initializes the program, and Form1_FormClosed, which frees memory.
Public pb As PictureBox
Public WithEvents timer As Timer
Public surface As Bitmap
Public device As Graphics
Public rand As Random

Private Sub Form1_Load(ByVal sender As System.Object, _
    ByVal e As System.EventArgs) Handles MyBase.Load
    REM set up the form
    Me.Text = "Rectangle Drawing Demo"
    Me.FormBorderStyle = Windows.Forms.FormBorderStyle.FixedSingle
    Me.MaximizeBox = False
    Me.Size = New Point(600, 500)
    REM create a new picturebox

    pb = New PictureBox()
    pb.Parent = Me
    pb.Dock = DockStyle.Fill
    pb.BackColor = Color.Black
    REM create graphics device
    surface = New Bitmap(Me.Size.Width, Me.Size.Height)
    pb.Image = surface
    device = Graphics.FromImage(surface)
    REM create random generator
    rand = New Random()
    REM set up the timer
    timer = New Timer()
    timer.Interval = 20
    timer.Enabled = True
End Sub

Private Sub Form1_FormClosed(ByVal sender As Object, _
    ByVal e As System.Windows.Forms.FormClosedEventArgs) _
    Handles Me.FormClosed
    device.Dispose()
    surface.Dispose()
    timer.Dispose()
End Sub
Lastly, we have the timer_Tick event and the drawRect() function, which does the actual rasterizing of rectangle shapes. Again, there are several versions of the Graphics.DrawRectangle() function, and I have just chosen the easiest one, but there are others that let you use a Point for the coordinates instead of individual X and Y values.
Private Sub timer_Tick(ByVal sender As System.Object, _
    ByVal e As System.EventArgs) _
    Handles timer.Tick
    drawRect()
End Sub

Private Sub drawRect()
    REM make a random color
    Dim A As Integer = rand.Next(0, 255)
    Dim R As Integer = rand.Next(0, 255)
    Dim G As Integer = rand.Next(0, 255)
    Dim B As Integer = rand.Next(0, 255)
    Dim color As Color = color.FromArgb(A, R, G, B)

    REM make pen out of color
    Dim width As Integer = rand.Next(2, 8)
    Dim pen As New Pen(color, width)
    REM random line ends
    Dim x As Integer = rand.Next(1, Me.Size.Width - 50)
    Dim y As Integer = rand.Next(1, Me.Size.Height - 50)
    Dim rect As New Rectangle(x, y, 50, 50)
    REM draw the rectangle
    device.DrawRectangle(pen, rect)
    REM refresh the drawing surface
    pb.Image = surface
End Sub
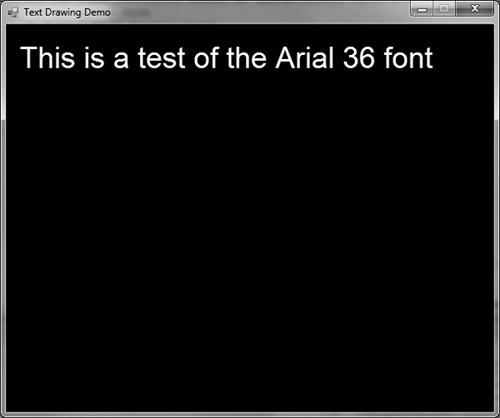
We will need to draw text onto the game screen using any desired font, and the Graphics class gives us this ability too via the DrawString() function. There are several versions of the function with various sets of parameters, but we will be using the simplest version that just needs a String (for the words we want to print out), a custom Font object, the color, and the coordinates. Figure 4.3 shows the result of this example program.
Public pb As PictureBox
Public surface As Bitmap
Public device As Graphics
Public rand As New Random()


Private Sub Form1_FormClosed(ByVal sender As Object, _
    ByVal e As System.Windows.Forms.FormClosedEventArgs) _
    Handles Me.FormClosed
    device.Dispose()
    surface.Dispose()
End Sub

Private Sub Form1_Load(ByVal sender As System.Object, _
    ByVal e As System.EventArgs) Handles MyBase.Load
    REM set up the form
    Me.Text = "Text Drawing Demo"
    Me.FormBorderStyle = Windows.Forms.FormBorderStyle.FixedSingle
    Me.MaximizeBox = False
    Me.Size = New Point(600, 500)
    REM create a new picturebox
    pb = New PictureBox()
    pb.Parent = Me
    pb.Dock = DockStyle.Fill
    pb.BackColor = Color.Black
    REM create graphics device
    surface = New Bitmap(Me.Size.Width, Me.Size.Height)
    pb.Image = surface
    device = Graphics.FromImage(surface)

    REM make a new font
    Dim font As New Font("Arial", 36, FontStyle.Regular, GraphicsUnit.Pixel)
    REM draw the text
    device.DrawString("This is a test of the Arial 36 font", _
        font, Brushes.White, 10, 20)
    REM refresh the drawing surface
    pb.Image = surface
End Sub
There are other shapes in addition to lines, rectangles, and text that the Graphics class can draw. Now that you have a foundation, see if you can modify the program to use any of the following functions:
DrawArcDrawBezierDrawCurveDrawEllipseDrawPieDrawPolygon
This quick chapter gave us the ability to create a rendering system in code and bypass the Form Designer (by creating controls at runtime instead of design time). Using this technique, we created a PictureBox for use in rendering and a Timer to give our programs real time updating. The one really big topic missing from this chapter was left out intentionally—drawing bitmaps. After all, we need bitmaps to make an RPG like Celtic Crusader, so what gives? That sole subject is the focus of Chapter 5.