This chapter introduces a game library called Pygame that was developed to make it possible to draw graphics, get user input, do animation, and use a timer to make the game run at a consistent frame rate. We’re going to just get started with Pygame in this chapter, learn the basics of drawing shapes and text, and will be writing quite a bit of code along the way. As you will see, Pygame does more than just provide drawing functions for shapes and bitmaps. Pygame also provides services for getting user input, handling audio playback, and polling the mouse and keyboard. We will get to these additional topics in due time.
Here are the topics covered in this chapter:
Using the Pygame library
Printing text with fonts
Using looping to repeat actions
Drawing circles, rectangles, lines, and arcs
Creating The Pie Game
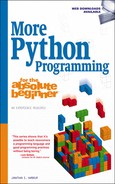
Our example in this chapter is called The Pie Game. The Pie Game uses Pygame to draw filled-in pie slices. To draw a pie slice in our Pie Game with Pygame, the user presses number keys corresponding to the pie pieces. We then use Pygame drawing functions to draw the pie pieces. The player wins by pressing the keys for all of the pieces without making a mistake.
Note
Pygame must be installed before you can use it, because Pygame is not packaged with Python. Download Pygame from http://www.pygame.org/download.shtml. It is important to get the right version of Pygame that goes with the version of Python you are using. This book uses Python 3.2 with Pygame 1.9. If you need help getting it installed, please see Appendix A for more details.
The first step to using Pygame is to import the Pygame library into our Python program so it can be used.
import pygame
The next step is to import all of the constants in Pygame so they are more readily accessible in our code. This is optional but tends to make the code cleaner. Some Python programmers dislike importing everything from a library due to efficiency concerns, but this makes our code a whole lot easier to read.
from pygame.locals import *
pygame.init()
Now that Pygame has been initialized, we have access to all of the resources of the library. The next order of business is to gain access to the display system and create a window. The resolution is up to you, but did you note that the screen width and height parameters are enclosed in parentheses? The (600,500) pair becomes a point with an x and y property. In Python, source code syntax is loosely enforced by the interpreter, so we can write code like this where a more strongly typed language—such as C++—would not allow it.
screen = pygame.display.set_mode((600,500))
Pygame supports text output to the graphics window using pygame.font. To draw text, we must first create a font object:
myfont = pygame.font.Font(None,60)
The name of a TrueType font can be supplied to the pygame.font.Font() constructor, such as “Arial”, but using None (no quotes) causes the default Pygame font to be used. A point size of 60 is quite large, but this is a simple example. Now, drawing text is not a light process with Pygame; it’s a heavy process. Meaning, text is not just quickly drawn to the screen, it is rendered onto a surface which is then drawn to the screen. Because this is a rather time-consuming process, it is advised to create the text surface (or image) in memory first, and then draw the text as an image. When we simply must draw text in real time, that’s okay, but if the text doesn’t change, it’s better to pre-render the text onto an image.
white = 255,255,255
blue = 0,0,255
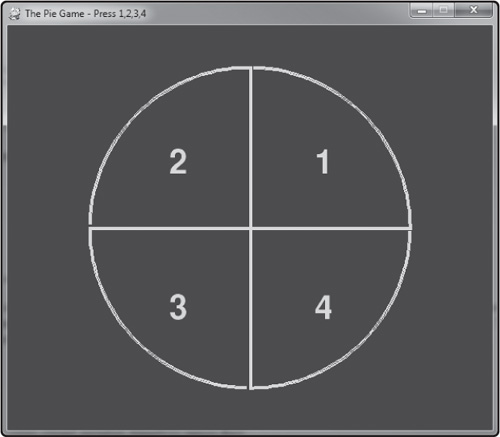
textImage = myfont.render("Hello Pygame", True, white)
The textImage object will be a surface that can be drawn with screen.blit(), our die-hard drawing function that will be used extensively in all of our games and demos! The first parameter is obviously the text message; the second parameter is a flag to anti-alias the font (to improve quality); the third parameter is the color (an RGB value).
To draw the text, the usual process is to clear the screen, do our drawing, and then refresh the display. Let’s see all three lines of code:
screen.fill(blue)
screen.blit(textImage, (100,100))
pygame.display.update()
Now, if you run the program at this point, what happens? Go ahead and give it a try. Did you see the window come up after running the program? Since there is no delay anywhere in our code, the window should come up and then close just as quickly. A delay is needed. But, instead of a delay, we’ll go a step further.
There are two problems with the simplistic example we’ve just seen. First, it just runs once and then quits. Second, there’s no way to get any user input (even if it did not just immediately exit). So, let’s look into correcting that oversight. First, we need a loop. This is done in Python with the while keyword. The while statement will execute the code following the colon until the condition is false. As long as the while condition is true, it will keep running:
while True:
Next, we will create an event handler. At this early stage, all we want to happen is for the window to stay up until the user closes it. The close event can be clicking the “X” at the upper-right corner of the window, or by just pressing any key. Note that the code is indented within the while loop. Any code that is indented after this point will be contained in the while loop.
while True:
    for event in pygame.event.get():
        if event.type in (QUIT, KEYDOWN):
            sys.exit()
Lastly, we add the drawing code and screen refresh indented in the while loop, and this wraps up the program. Just for the sake of learning, here is the complete program without any blank lines or comments. The output of the program is shown in Figure 2.2.
import pygame
from pygame.locals import *
white = 255,255,255
blue = 0,0,200
pygame.init()
screen = pygame.display.set_mode((600,500))
myfont = pygame.font.Font(None,60)
textImage = myfont.render("Hello Pygame", True, white)
while True:
    for event in pygame.event.get():
        if event.type in (QUIT, KEYDOWN):
            sys.exit()
    screen.fill(blue)
    screen.blit(textImage, (100,100))
    pygame.display.update()
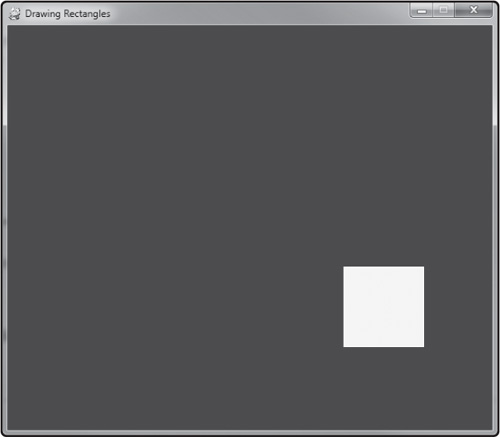
We can draw many different shapes with the pygame.draw library. Figure 2.3 shows the circle drawn by the example code shown. To draw a circle, we use pygame.draw.circle(), and pass a number of parameters to customize the size, color, and position of the circle.

import pygame
from pygame.locals import *
pygame.init()
screen = pygame.display.set_mode((600,500))
pygame.display.set_caption("Drawing Circles")
while True:
    for event in pygame.event.get():
        if event.type in (QUIT, KEYDOWN):
            sys.exit()

    screen.fill((0,0,200))

    #draw a circle
    color = 255,255,0
    position = 300,250
    radius = 100
    width = 10
    pygame.draw.circle(screen, color, position, radius, width)

    pygame.display.update()
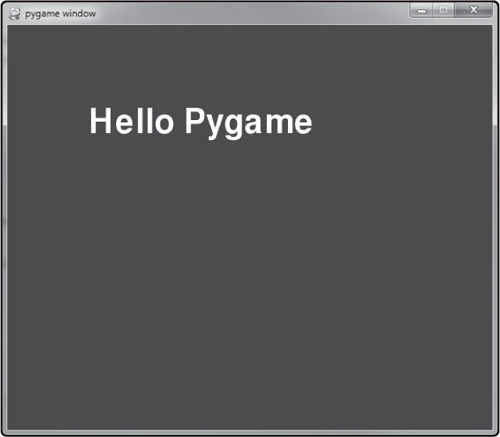
To draw a rectangle, we use the pygame.draw.rect() function with a number of parameters. The window displayed by this program is shown in Figure 2.4. This example is a little more advanced than the one before. Instead of just drawing a rectangle at the center of the screen, this example moves the rectangle! The way this works is, we keep track of the rectangle’s position outside of the while loop (with pos_x and pos_y), and create a pair of velocity variables (vel_x and vel_y). Inside the while loop, we can update the position using the velocity, and then some logic keeps the rectangle on the screen. The way this works is, any time the rectangle reaches an edge of the screen, the velocity is reversed!
import pygame
from pygame.locals import *
pygame.init()
screen = pygame.display.set_mode((600,500))
pygame.display.set_caption("Drawing Rectangles")

pos_x = 300
pos_y = 250
vel_x = 2
vel_y = 1
while True:
    for event in pygame.event.get():
        if event.type in (QUIT, KEYDOWN):
            sys.exit()

    screen.fill((0,0,200))

    #move the rectangle
    pos_x += vel_x
    pos_y += vel_y

    #keep rectangle on the screen
    if pos_x > 500 or pos_x < 0:
        vel_x = -vel_x
    if pos_y > 400 or pos_y < 0:
        vel_y = -vel_y

    #draw the rectangle
    color = 255,255,0
    width = 0 #solid fill
    pos = pos_x, pos_y, 100, 100
    pygame.draw.rect(screen, color, pos, width)

    pygame.display.update()
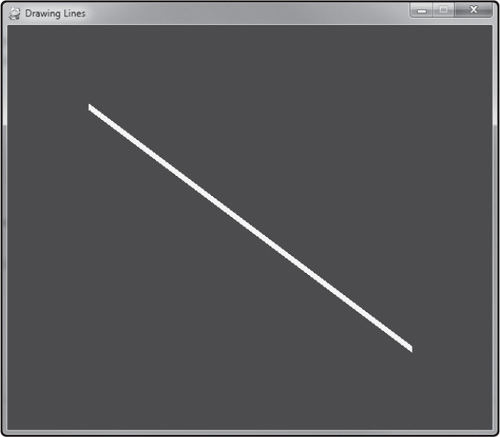
We can draw straight lines using the pygame.draw.line() function. Line drawing is a little more complex than drawing other shapes, only because both the start position and end position of the line must be supplied. We can draw the line in any color and with any desired line width. Figure 2.5 shows the example running.
import pygame
from pygame.locals import *
pygame.init()
screen = pygame.display.set_mode((600,500))
pygame.display.set_caption("Drawing Lines")

while True:
    for event in pygame.event.get():
        if event.type in (QUIT, KEYDOWN):
            sys.exit()

    screen.fill((0,80,0))

    #draw the line
    color = 100,255,200
    width = 8
    pygame.draw.line(screen, color, (100,100), (500,400), width)

    pygame.display.update()
An arc is a partial circle that can be drawn with the pygame.draw.arc() function. This is another rather complex shape that requires additional parameters. We have to supply a rectangle that represents the boundary of the arc, beginning with the upper-left corner and then the width and height, within which the arc will be drawn. Next, we have to supply the starting angle and ending angle. Normally, we tend to think about angles in terms of degrees, but trigonometry works with radians, and that is the form of circle measurement we must use. To convert an angle to radians, we can use the math.radians() function, with the degree angle as the parameter. Since the math library is required, we have to import math at the top of the program. Figure 2.6 shows the output of the example listed below.

import math
import pygame
from pygame.locals import *
pygame.init()
screen = pygame.display.set_mode((600,500))
pygame.display.set_caption("Drawing Arcs")

while True:
    for event in pygame.event.get():
        if event.type in (QUIT, KEYDOWN):
            sys.exit()

    screen.fill((0,0,200))

    #draw the arc
    color = 255,0,255
    position = 200,150,200,200
    start_angle = math.radians(0)
    end_angle = math.radians(180)
    width = 8
    pygame.draw.arc(screen, color, position, start_angle, end_angle, width)

    pygame.display.update()
The Pie Game is a very simple game that does not have much by way of difficulty, but it does have a rudimentary level of gameplay and a minor “goodie” when the player “wins.” The gameplay involves just pressing the number keys 1, 2, 3, and 4, in any order. As each number is pressed, the corresponding pie piece is drawn. When all four pie pieces are completed, then the pie changes color. The game is shown in Figure 2.7.
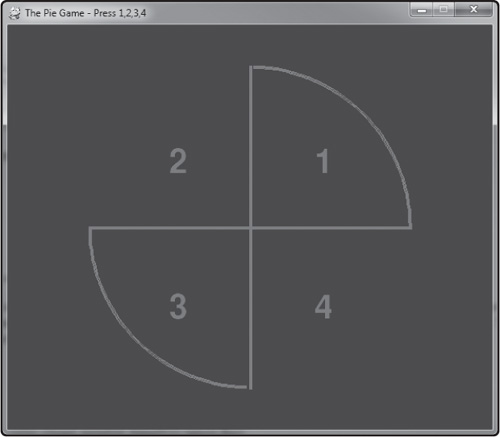
When the player finishes the entire pie, then the color changes to bright green and the numbers and pie shapes are drawn in bright green to reflect that the player has won! This might be a simple game, but it demonstrates a lot of important Pygame concepts that we must learn to become proficient with this library. This game also demonstrates basic logic code in Python, and believe it or not, the very important subject of state-based programming. You see, the four pie pieces are not drawn automatically just when the player presses the correct key (1, 2, 3, or 4). Instead, a state flag is set when a key is pressed, and that flag is used later to draw the pie pieces based on that flag. This is a very important concept, as it demonstrates how to handle events and user interaction indirectly.
import math
import pygame
from pygame.locals import *
pygame.init()
screen = pygame.display.set_mode((600,500))
pygame.display.set_caption("The Pie Game - Press 1,2,3,4")
myfont = pygame.font.Font(None, 60)

color = 200, 80, 60
width = 4
x = 300
y = 250
radius = 200
position = x-radius, y-radius, radius*2, radius*2

piece1 = False
piece2 = False
piece3 = False
piece4 = False

while True:
    for event in pygame.event.get():
        if event.type == QUIT:
            sys.exit()
        elif event.type == KEYUP:
            if event.key == pygame.K_ESCAPE:
                sys.exit()
            elif event.key == pygame.K_1:
                piece1 = True
            elif event.key == pygame.K_2:
                piece2 = True
            elif event.key == pygame.K_3:
                piece3 = True
            elif event.key == pygame.K_4:
                piece4 = True

    #clear the screen
    screen.fill((0,0,200))

    #draw the four numbers
    textImg1 = myfont.render("1", True, color)
    screen.blit(textImg1, (x+radius/2-20, y-radius/2))
    textImg2 = myfont.render("2", True, color)
    screen.blit(textImg2, (x-radius/2, y-radius/2))
    textImg3 = myfont.render("3", True, color)
    screen.blit(textImg3, (x-radius/2, y+radius/2-20))
    textImg4 = myfont.render("4", True, color)
    screen.blit(textImg4, (x+radius/2-20, y+radius/2-20))

    #should the pieces be drawn?
    if piece1:
        start_angle = math.radians(0)
        end_angle = math.radians(90)
        pygame.draw.arc(screen, color, position, start_angle, end_angle, width)
        pygame.draw.line(screen, color, (x,y), (x,y-radius), width)
        pygame.draw.line(screen, color, (x,y), (x+radius,y), width)
    if piece2:
        start_angle = math.radians(90)
        end_angle = math.radians(180)
        pygame.draw.arc(screen, color, position, start_angle, end_angle, width)
        pygame.draw.line(screen, color, (x,y), (x,y-radius), width)
        pygame.draw.line(screen, color, (x,y), (x-radius,y), width)
    if piece3:
        start_angle = math.radians(180)
        end_angle = math.radians(270)
        pygame.draw.arc(screen, color, position, start_angle, end_angle, width)
        pygame.draw.line(screen, color, (x,y), (x-radius,y), width)
        pygame.draw.line(screen, color, (x,y), (x,y+radius), width)
    if piece4:
        start_angle = math.radians(270)
        end_angle = math.radians(360)
        pygame.draw.arc(screen, color, position, start_angle, end_angle, width)
        pygame.draw.line(screen, color, (x,y), (x,y+radius), width)
        pygame.draw.line(screen, color, (x,y), (x+radius,y), width)

    #is the pie finished?
    if piece1 and piece2 and piece3 and piece4:
        color = 0,255,0

    pygame.display.update()