This chapter covers the basics of the Compiler API, including the essentials of a compiler and their history in the .NET world. You’ll learn how to compile code and the trees that constitute the fundamental API data structure. You’ll discover how to build your own trees from scratch and navigate their content. Finally, we’ll explore annotating and formatting trees.
From Closed to Open
Compilers are used more than any other tool by a developer. Every time you tell Visual Studio to build your code, you’re invoking csc.exe, which is the C# compiler. Without compilers, your C# code would be worthless. In this section, you’ll gain an understanding of what compilers do, how they’ve been designed in the .NET world, and how they have changed in .NET 4.6.
Note
You can invoke csc.exe directly from the command line, but generally most .NET developers will use it indirectly through Visual Studio or some other IDE.
What Do Compilers Do?
It’s almost a tradition in the developer’s world to have a program print “Hello world” to get familiar with the fundamentals of a language, so that’s where we’ll start our discussion of compilers. Here’s code that will do just that:
using System;namespace HelloWorld{class Program{static void Main(string[] args){Console.Out.WriteLine("Hello world");}}}
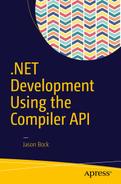
Figure 1-1 shows you what you’ll see when you run the program.
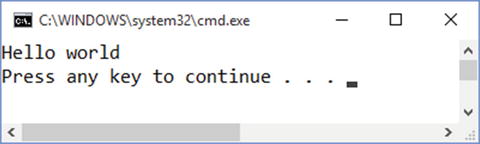
Figure 1-1. Running a simple Hello World program
Of course, your computer didn’t “execute” that text. There’s a translation step that, most of the time, you probably don’t think about, and that’s what the compiler does. It’s easy to say that you’ve compiled your code, but there’s a lot that a compiler has to do to make your code actually execute. Let’s do a simplistic examination of a compiler’s workflow to get a better understanding of its machinery.
First, the compiler scans your text and figures out all the tokens that are contained within. Tokens are the individual textural pieces within code that have meaning based on a language’s specification. These can be member names, language keywords, and operators. For example, Figure 1-2 shows what the line of code that prints out “Hello world” looks like when it’s tokenized.

Figure 1-2. Breaking code into separate tokens
The compiler will find everything it can about that line of text and break it up into separate chunks. That includes the period between Console and Out, the tabs before the Console token, and the semicolon at the end of the line. The compiler also has to be smart enough to figure out when there are problems and report meaningful errors when its process is finished without stopping on that one error because there may be more issues in the code.
But the complexities of tokenizing code don’t stop here. Now the compiler needs to figure out what those tokens really mean. A tab isn’t important from an execution standpoint, but it may matter if you’re debugging your code, as the compiler needs to make sure the debugging information ignores that whitespace correctly when a developer creates breakpoints in code. A semicolon means that the line of code is complete, so that’s important to know, although you’re not really doing any execution with that character. But what does the period mean? It may mean that you’re trying to access a property on an object, or call a method. Which one is it? And if it’s a method, is it an extension method? If so, where does that extension method exist? Is there an appropriate using statement in the file that will help the compiler figure out where that method is? Or is the developer using a new feature in C#6, like using static, which needs to be accounted for? The compiler needs to figure out semantics for these tokens based on the rules of the C# language, and if you’ve ever read the C# specification, you know that this can be an extremely difficult endeavor.
Note
You’ll find the C# specification at https://www.microsoft.com/en-us/download/details.aspx?id=7029 , although at the time of this writing, it was at version 5; C#6 features are not included.
Finally, the last job of the compiler is to take all the information it’s assembled and actually generate a .NET assembly . This assembly, in turn, contains what’s known as an Intermediate Language (IL) that can be interpreted by the Common Language Runtime (CLR) along with metadata information, such as the names of types and methods. Transforming tokens into IL is a nontrivial job. If you’ve spent any time working with members in the System.Reflection.Emit namespace , you know it’s not easy to encode a method correctly. Forget just one IL instruction and you may end up creating an assembly that will crash horribly at runtime.
To summarize, Figure 1-3 demonstrates what a compiler does with code, although keep in mind that this is a rudimentary view of a compiler’s internal components .

Figure 1-3. General steps that a compiler takes to produce executables
Here’s a brief description of each step:
Parsing finds each token in code and classifies it.
Semantics provides meaning to each token (e.g., is the token a type name or a language keyword?).
Emitting produces an executable based on the semantic analysis of the tokens.
Compilers are complex beasts. Whenever I’ve done a talk on the Compiler API and asked the audience how many people have created and/or worked on a compiler, I rarely see even one hand go up. Most developers do not spend a significant amount of time developing and maintaining a compiler. They might have written one in a college class, but writing compilers is not an activity most developers ever do on a day-to-day basis. Developers are typically more concerned with creating applications for customers. Plus, creating a compiler that handles the specifications of a given programming language is typically difficult. It’s a challenge for just two different implementations of a compiler for a language written by two different teams to work exactly the same. Therefore, developers who use a programming language will gravitate to a very small set of compiler implementations to reduce the chances of discrepancies.
Note
If you’re interested in learning more about compilers, check out Modern Compiler Design (Springer, 2012) at http://www.springer.com/us/book/9781461446989 .
Compilers as a Closed Box
In the .NET space, the compiler has been a monolithic executable that did not have any public APIs exposed. Essentially, you give it path information to the files you want to compile (or include as resources in the assembly) and it produces your executable. Figure 1-4 illustrates how this works.

Figure 1-4. The compiler is a closed box that just does its job
Notice that you can pass in a handful of optional switches to the compiler to control tasks like optimization (/optimize) and release or debug (/debug) builds. But this interaction is very limited. There’s no way to plug into the compiler’s pipeline and augment the process, nor can you use any of its functionality outside of compilation.
Note
You can find the latest set of switches for VS2015 at https://msdn.microsoft.com/en-us/library/6ds95cz0.aspx .
Why is this an issue? There are two reasons. First, there are a number of products, both for purchase and open-source, that analyze your code to find issues and suggest refactorings to improve your code’s structure and reliability. As discussed in the previous section, parsing and analyzing code is not a trivial endeavor. All of these products and libraries need to invest a fair amount of time duplicating the compilation logic that already exists in the .NET compilers. But they have no choice but to reproduce that functionality as there’s no way to access it. This gives rise to the issue of inconsistency. It’s possible that the .NET compiler logic and another tool’s logic may disagree when it comes to analyzing a specific piece of code. Even if these tools get everything right, whenever a new version of C# comes along with new features, they have to update their code to make sure they’re current.
The second reason is that because the compiler is closed, it’s harder to build a strong community around it. Traditionally, Microsoft has controlled the compiler’s implementation without publishing its source. Although C# is a popular language with millions of developers using it, the community at large hasn’t had direct access to its core parts, such as the compiler. There are developers who have a deep interest in being part of that project, either by fixing issues or adding new features to the product. Without an open community, C# developers didn’t have a lot of options available to influence the language’s direction.
Compilers as an Open Box
Fortunately, Microsoft started working on a new version of the compilers sometime around 2007, using the code name Project Roslyn. This new compiler infrastructure opens up the internals of the pipeline via a public .NET API so anyone can use its functionality within any .NET application. This is a big improvement for tools that provide code analysis as well as for developers who may want to do code generation and dynamic compilation in their own applications. There is now one open standard that everyone can use. Furthermore, as you’ll see in Chapters 2 and 3, you can use this API to enhance a .NET developer’s experience within Visual Studio via diagnostics and refactorings.
Not only are the compiler assemblies freely available to use, the source code is now available for anyone to read and contribute to! On April 4, 2014, Microsoft pushed the entire Compiler API code base to CodePlex. Since then, the project has migrated to GitHub ( http://github.com/dotnet/roslyn ) with numerous individuals (Microsoft employees and others who don’t work for Microsoft) contributing to the code base and providing feedback to various issues and feature requests. This is a major departure from the traditional Microsoft model of closed source. Although Microsoft will always publish “official” versions of the compilers through traditional channels, there’s nothing to prevent you from being an active member of this community and contributing to its continuing evolution.
Compiling Code
Having an open source compiler for C# is exciting news, but where do we start? How can you use the compiler’s assemblies? In this section you’ll get an introduction into the Compiler API. You’ll create a C# project that references the Compiler API assemblies, and then you’ll use them to compile code on the fly.
Referencing Assemblies
Let’s start by creating a project that references the Compiler API assemblies from NuGet so we can build and execute a Hello World application. For the rest of the book, I won’t go through these explicit steps of project creation and setup, especially as all of the code samples are online, but this one time I’ll walk through it so you know exactly what needs to be done. Create a console application, making sure that the .NET Framework version is 4.6.1, as shown in Figure 1-5.

Figure 1-5. Creating a project that will reference the Compiler API assemblies
Now, go to the Solution Explorer. Right-click on the References node, and select Manage NuGet Packages . Select Browse, and type in “Microsoft.CodeAnalysis”. You should see a list that looks something like the one in Figure 1-6.

Figure 1-6. Finding the right Compiler API NuGet package
Select the “Microsoft.CodeAnalysis” package and install the latest stable version (which, at the time of this writing, was 1.1.1). This, as the description says, is the “all-in-one” package for the Compiler API. As you get familiar with the assemblies within the Compiler API world, you can be more selective with the package you pick, but for this example we’ll use this package.
Note
You can also get the packages shown in Figure 1-6 via the Package Manager Console (which can be found under View ➤ Other Windows) and then execute the Install-Package Microsoft.CodeAnalysis command. Use whichever tool you’re comfortable with.
Building Code
Once NuGet is finished adding the various Compiler API assemblies to your project, you can see how the basics work. Change the Program.cs file so that it looks like Listing 1-1.
Listing 1-1. Compiling a “Hello World” application
using Microsoft.CodeAnalysis;using Microsoft.CodeAnalysis.CSharp;using System.IO;using System.Reflection;namespace CompileHelloWorld{class Program{static void Main(string[] args){var code =@"using System;namespace HelloWorld{class Program{static void Main(string[] args){Console.Out.WriteLine(""Hello compiled world"");}}}";var tree = SyntaxFactory.ParseSyntaxTree(code);var compilation = CSharpCompilation.Create("HelloWorldCompiled.exe",options: new CSharpCompilationOptions(OutputKind.ConsoleApplication),syntaxTrees: new[] { tree },references: new[]{MetadataReference.CreateFromFile(typeof(object).Assembly.Location)});using (var stream = new MemoryStream()){var compileResult = compilation.Emit(stream);var assembly = Assembly.Load(stream.GetBuffer());assembly.EntryPoint.Invoke(null,BindingFlags.NonPublic | BindingFlags.Static,null, new object[] { null }, null);}}}}
Let’s go through this code in detail. The code variable is a string that contains the code you want to compile. In this case, it’s the same code you saw in the “Hello World” example at the beginning of this chapter, except with a slightly different “Hello” message. We need to parse this code, so that’s what ParseSyntaxTree()does (syntax trees will be covered in greater detail in the “Creating Code Using Trees” section later in this chapter). Once we have a tree, we can compile that tree using a CSharpCompilation object , which we get from calling Compile(). Notice that we can specify that this compilation should produce a console application (the OutputKind value), and that it needs to reference the assembly that System.Object comes from ( MetadataReference.CreateFromFile()). If this code was referencing types from other assemblies, those MetadataReference objects should be passed into Compile() as well.
The last step is to emit the assembly. Notice that the assembly isn’t actually written to disk because we’re using a MemoryStream rather than a file-based stream. You can also pass in other streams to capture debug and resource information related to the assembly if you’d like. Once the assembly is created, it’s a simple matter of using the EntryPoint property to get access to Main() and invoke it. Figure 1-7 shows what you should see when you run this program.
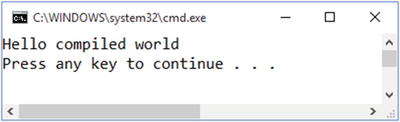
Figure 1-7. Running code that compiles code at runtime
Note
As you can see in Listing 1-1, the Compiler API usually has a fair amount of types, method overloads, and optional arguments. In fact, the Microsoft.CodeAnalysis.dll assembly has 246 types and over 23,000 methods! Going through every possible option in this book would be extremely counterproductive; you are highly encouraged to do your own spelunking and explore the numerous types and members that the Compiler API has.
This was a quick introduction into the Compiler API. Now let’s take a closer look at trees, the main data structure the Compiler API uses.
Creating Code Using Trees
In the previous section, you saw how you could change text into executable code via the Compiler API. One of the major components of that process was creating a tree. Let’s take a deeper dive into what this structure is and how it works. We’ll start by using tools that help you see what a tree looks like and how it is composed.
Visualizing Trees
Most developers know what a tree structure is. It starts with one object that contains a list of objects, where those objects can also contain lists of objects, and so on. If you wanted to represent a simple mathematical function, F(a), that performs a calculation like “2 * a” as a tree, you’d probably do it using a similar tree to the one in Figure 1-8.

Figure 1-8. Modeling the “2 * a” function as a tree
In this case, what the tree represents is easy to see. The “*” node is multiplication, the “2” node is the constant value 2, and the “a” node is the argument to the fuction. Of course, the code we all write is far more complex than that. The trees in the Compiler API that derive from code we’d usually write will never be as small as the tree in Figure 1-8. As Figure 1-9 illustrates, these trees can get quite large.

Figure 1-9. A small part of a tree
The tree in Figure 1-9 is a very small fragment of the code used in Listing 1-1. Figure 1-10 shows the entire tree for that code.

Figure 1-10. The full code tree
Even with a small piece of C# code, the tree can get so large you can’t even read any of the descriptions for any of the nodes!
Now, you may be wondering how the diagrams in Figure 1-9 and 1-10 were created. It’s a tool that comes with the installation of the .NET Compiler SDK that you’ll really want to install if you’re going to work with the Compiler APIs. Let’s make sure you have the required set of tools installed on your machine so you’ll be able to generate this diagram if you want as well as build other components discussed in other chapters in this book. To do this, act like you’ll create a new project form the Extensibility node (even though you won’t), and you should see an option in the list called “Install Visual Studio Extensibility Tools” as illustrated in Figure 1-11.
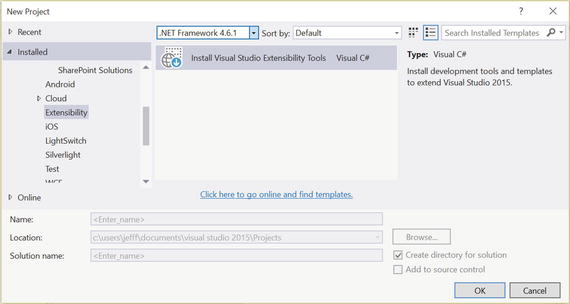
Figure 1-11. Installing the Extensibility tools
Second, go thorugh the same project creation steps, except this time you should see a “Download the .NET Compiler Platform SDK” option as shown in Figure 1-12.
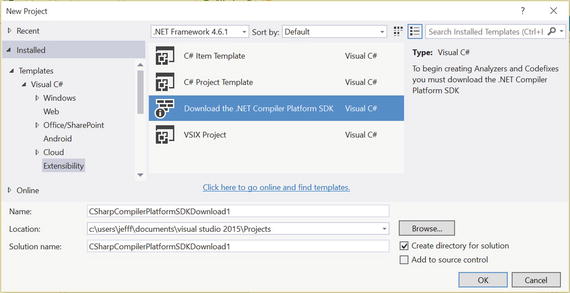
Figure 1-12. Installing the Compiler Platform SDK
Note
Unfortunately, this second step will create a project that is worthless. To circumvent this unnescessary project creation step, you can try to download the SDK directly by going to http://go.microsoft.com/fwlink/?LinkID=526901 .
In subsequent chapters we’ll use the project templates that are installed by performing these steps, but for now we’ll just use one extremely useful window that should have been added in Visual Studio after you installed these tools. Select View ➤ Other Windows to see an option for Syntax Visualizer.
Note
You can also use Quick Launch (Ctrl+Q) to search for and access Syntax Visualizer. Ctrl+Q is one of the most powerful keystrokes you can use in Visual Studio as it can find any command in the product, while also showing you if there’s a key mapping for that tool. If you haven’t used it before, I highly recommend getting familiar with it.
The Syntax Visualizer makes it easy to see what the full tree looks like for a given piece of code in Visual Studio. Figure 1-13 is a screenshot of the Visualizer in action.

Figure 1-13. Using the Visualizer to show the tree for code in a file
The root node is a “compilation unit,” which contains other nodes like using directives and a namespace declaration. (I’ll cover the specific types later in this section.) If you click on a specific member in your code, the tree will expand to that exact node in the tree. In Figure 1-14, the focus has been moved to the declaration of the Program class.

Figure 1-14. Highlighting a specific piece of code to move around in the tree
We’ll get to what the types mean shortly. For now, notice that the Syntax Visualizer moved to the node in the tree that represents the name of the class—an IdentifierTokenNode, which is part of a ClassDeclaractionSyntax node .
The tree will also work if you have errors in your code, which demonstrates how hard the Compiler APIs work to give you a tree with as much information as possible. Figure 1-15 shows what the tree looks like if you remove the opening curly brace after the namespace declaration.
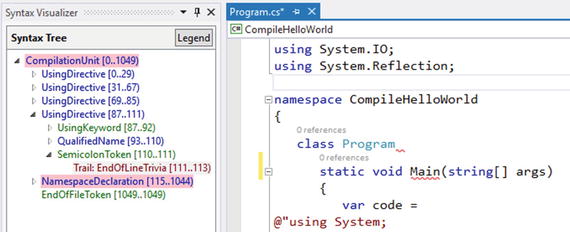
Figure 1-15. The Syntax Visualizer with errors in the code
You can see that the tree starts highlighting certain nodes with a pink rectangle to illustrate that there are errors within. You may not be able to see the pink highlighting color if you’re viewing this in grayscale, but it’s there onscreen. The Legend button shows what each color in the tree represents, as you can see in Figure 1-16.

Figure 1-16. The color coding in the Syntax Visualizer
Up to now I’ve been using the word “node” in a generic fashion to talk about the members within a tree, but it’s time to get a little more formal about the types within a Compiler API tree. There are essentially three base types: SyntaxNode, SyntaxToken, and SyntaxTrivia. SyntaxNode is an abstract class that can contain other tree types (either directly or indirectly). Specific kinds of SyntaxNode classes are ClassDeclarationSyntax, which specifies the contents of a class, and ParameterListSyntax, which defines the parameters for a methd. A SyntaxToken is a struct that defines a termination in the tree and is used to specify items like keywords, idenifiers, braces, and so on. The different kinds of tokens are represented by the Kind property, which is a SyntaxKind enumeration value . SyntaxTrivia are also structs, and they make up all the “unimportant” parts of code, like spaces, tabs and end-of-line characters. Although they don’t affect the resultant executable, they are important to retain. To prove how important, go into someone’s code, and if they put the opening curly brace to a member definition on the next line, move it to the end of the previous line. You’ll definitely get some feedback for changing that coding style! We’ll focus on preserving trivia in Chapters 2 and 3 when we change code for a developer to improve their applications.
Finally, if you want to create the diagram in Figure 1-10, simply right-click on any node within the Visualizer, and select View Directed Syntax Graph. Figure 1-17 shows this context menu.

Figure 1-17. Using the Syntax Visualizer to print a pretty tree diagram of your code
The Syntax Visualizer is a tool that you’ll probably end up using a lot as you wade through the Compiler API because it makes it easy to find out what nodes constitute a specific part of the C# language. For example, an IdentifierTokenNode does what its name implies: it identifies a node within a tree. As you’ve seen in Figures 1-13, 1-14, and 1-15, the Syntax Visualizer shows the names of the node kinds, like CompilationUnitand NamespaceDeclaration. The node’s type name appears in the Properties section of the Syntax Visualizer, as shown in Figure 1-18.
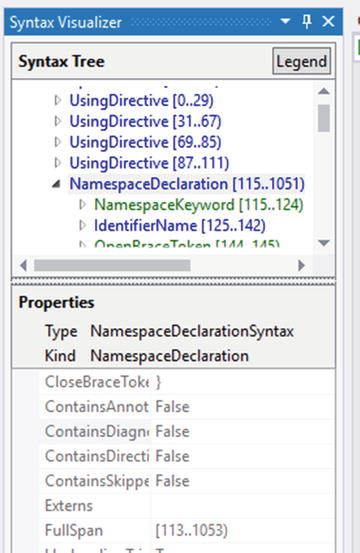
Figure 1-18. Seeing the type name for a node within a tree
The Syntax Visualizer is great for finding out which parts of your code map to what types in the Compiler API. All you have to do is type some code in Visual Studio, and the visualizer automatically shows you everything you need to see in a tree. But how can you create and manipulate the tree structure itself? That’s what we’ll do in the next section.
Building Trees
In this section, we’ll create a tree from scratch. We’ll use the example of the “2 * a” function mentioned in the previous section and turn that into a C# method:
namespace BuildingTrees{public static class Doubler{public static int Double(int a){return 2 * a;}}}
Note
In C# you can’t just write a small piece of code like “2 * a”; you need a method declaration along with a class. However, in Chapter 4 you’ll see how you can use the Scripting APIs to do just that!
To create a tree that will represent this code, you’ll use the SyntaxFactory class along with the SyntaxTree class. First, let’s create the namespace declaration:
var treeNamespace = SyntaxFactory.NamespaceDeclaration(SyntaxFactory.IdentifierName("BuildingTrees"))
The SyntaxFactory class has a large number of static methods to create any node, token, or trivia you need in a tree. In this case, NamespaceDeclaration()is called, passing in the IdentifierNameSyntax object creatd from IdentifierName() to create a NamespaceDeclarationSyntax object .
Next, create a class:
var doublerClass = SyntaxFactory.ClassDeclaration("Doubler");Then add the Double method to that class:
var doubleMethod = doublerClass.WithMembers(SyntaxFactory.SingletonList<MemberDeclarationSyntax>(SyntaxFactory.MethodDeclaration(SyntaxFactory.PredefinedType(SyntaxFactory.Token(SyntaxKind.IntKeyword)),SyntaxFactory.Identifier("Double"))));
Notice that with a MethodDeclarationSyntax, you need to define the return type, which, with Double() is an int. That’s why PredefinedType() is called, using SyntaxKind.IntKeywordas “int” is already known in the C# type system.
To actually create the entire CompilationUnitSyntax object that contains all of the nodes, tokens, and trivia takes a fair amount of code. It’s also quite repetitive in nature. If you want to see the entire tree, you’ll find it in the BuildingTrees project for this chapter. Keep in mind that the code wasn’t generated by hand. There’s a wonderful tool that you can use that generates a CompilationUnitSyntaxfor you based on a C# code snippet called RoslynQuoter. You can get the code for the RoslynQuoter tool at https://github.com/KirillOsenkov/RoslynQuoter , but there’s an online version of it at http://roslynquoter.azurewebsites.net/ . Figure 1-19 shows what this website looks like.
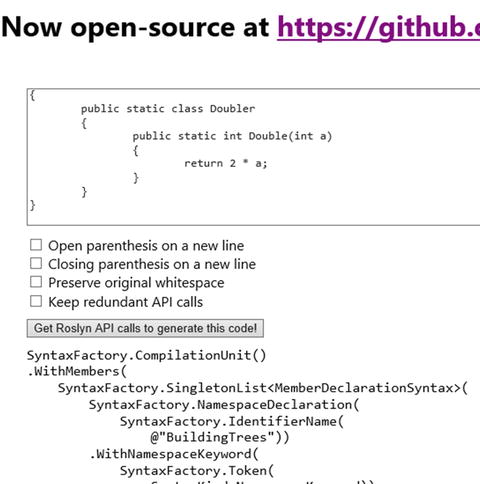
Figure 1-19. Using RoslynQuoter to generate syntax trees
The lines of code to generate the CompilationUnitSyntax object is around 100. That’s a lot! But once you have that root node, you can put it into a tree:
var tree = SyntaxFactory.SyntaxTree(unit);Once the tree is created, you can compile that tree and invoke the method, as shown in Listing 1-2.
Listing 1-2. Compiling a syntax tree
var compilation = CSharpCompilation.Create("Doubler.dll",options: new CSharpCompilationOptions(OutputKind.DynamicallyLinkedLibrary),syntaxTrees: new[] { tree },references: new[]{MetadataReference.CreateFromFile(typeof(object).Assembly.Location)});using (var stream = new MemoryStream()){var compileResult = compilation.Emit(stream);var assembly = Assembly.Load(stream.GetBuffer());var type = assembly.GetType($"{Program.NamespaceName}.{Program.ClassName}");var method = type.GetMethod(Program.MethodName);var result = (int)method.Invoke(null, new object[] { 2 });Console.Out.WriteLine(result);}
Figure 1-20 shows what you should see when you pass 2 into the Double() method .
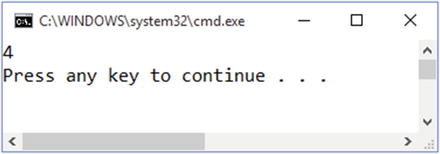
Figure 1-20. Dynamically invoking a method compiled at runtime
Now you know how to create trees from scratch . But how can you navigate their content and change what they contain? That’s what we’ll cover in the next section.
Navigating and Editing Trees
In the previous section, you saw how to create a tree. But what if you’re given a tree that you didn’t create? You may want to find out what’s in it and potentially change it. In this section, we’ll cover a couple of different ways you can do that via node methods and classes called walkers. We’ll also see what semantic models can do to make tree traversal easier. Finally, you’ll discover how to edit these trees to create a new tree. This information is critical to understand when we cover diagnostics in Chapter 2 and refactorings in Chapter 3, so make sure you’re comfortable with these concepts before you move on to the content in those chapters.
Finding Content from a Node
Using trees created for you is something you’ll do a lot if you’re using the Compiler API. As you’ve already seen, these trees are rich with information. When you run Listing 1-3, you’ll see that the resultant tree has nearly 60 items within it:
Listing 1-3. Getting a count of all nodes in a tree
var code = @"using System;public class ContainsMethods{public void Method1() { }public void Method2(int a, Guid b) { }public void Method3(string a) { }public void Method4(ref string a) { }}";var tree = SyntaxFactory.ParseSyntaxTree(code);Console.Out.WriteLine(tree.GetRoot().DescendantNodesAndTokensAndSelf(_ => true, true).Count());
There’s a couple of “Descendant” methods that you can use on a node to find information within it. Listing 1-4 uses DescendantNodes()to find all the methods within that tree.
Listing 1-4. Using DescendantNodes() to find methods
private static void PrintMethodContentViaTree(SyntaxTree tree){var methods = tree.GetRoot().DescendantNodes(_ => true).OfType<MethodDeclarationSyntax>();foreach (var method in methods){var parameters = new List<string>();foreach (var parameter in method.ParameterList.Parameters){parameters.Add($"{parameter.Type.ToFullString().Trim()} {parameter.Identifier.Text}");}Console.Out.WriteLine($"{method.Identifier.Text}({string.Join(", ", parameters)})");}}
Figure 1-21 shows what you’ll see when you run the code in Listing 1-4.
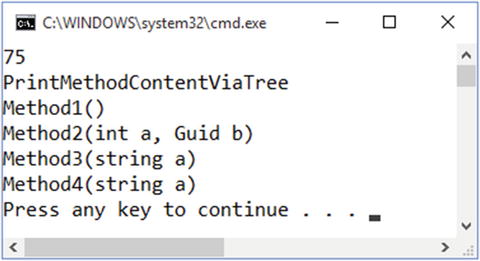
Figure 1-21. Using DescendentNodes() to find method content
Note that although it looks like you’re getting type information back as “int” and “Guid” in the console window, the trees don’t have that type information available. All a tree has is knowledge about the textural content of the tree’s information and how that content relates to C#. You’ll see how you can get closer to that type information in the upcoming “Semantic Models” section, but first let’s look at another way you can peruse a node’s content.
Finding Content Using Walkers
You can use a “walker” class in the Compiler API to discover the information on a tree. For example, the CSharpSyntaxWalker class is a visitor class that will start with a given node and visit every node within that node’s tree. Listing 1-5 shows how you can write a class to visit methods in a node, just like what you saw in Listing 1-4.
Listing 1-5. Using a walker to find methods in a tree
public sealed class MethodWalker: CSharpSyntaxWalker{public MethodWalker(SyntaxWalkerDepth depth = SyntaxWalkerDepth.Node): base(depth){ }public override void VisitMethodDeclaration(MethodDeclarationSyntax node){var parameters = new List<string>();foreach (var parameter in node.ParameterList.Parameters){parameters.Add($"{parameter.Type.ToFullString().Trim()} {parameter.Identifier.Text}");}Console.Out.WriteLine($"{node.Identifier.Text}({string.Join(", ", parameters)})");base.VisitMethodDeclaration(node);}}
You can override the “Visit” method that matches the kind of content you’re looking for. In this case, we want to find method defintions, so we override VisitMethodDeclaration(). The code is essentially the same as what you saw with DescendantNodes() in Listing 1-4, with the same results. So, when should you use one over the other? Using the methods on the node works well if you just want to find one kind of node. You also don’t have to create a new class to do that. The walker is advantageous if you want to find multiple node kinds in the tree, as you’ll walk it once. Doing that with the node methods can be more cumbersome. Experiment with both and see which one works best with the problem at hand.
In either case, you’re still working with nodes and tokens. If you want more information about the tree’s content, you’ll need to get semantic information, which we’ll cover in the next section.
Semantic Models
If you were trying to find crucial information in a node and all you had were the traversal tools described in the previous sections, you’d get frustrated pretty quickly. The nodes have a lot of information, but it’s not always obvious how they relate to one another, especially as it pertains to C# and .NET information. For example, what are the type names? Is a class sealed? Is this argument by reference? You could try and piece all of that information together with the nodes, or you can use the semantic model. A semantic model provides a layer on top of the tree to provide a level of information you can’t easily stitch together from syntax.
To get a model, you need to use a compilation object like the one in Listing 1-6.
Listing 1-6. Using a semantic model to discover method information
private static void PrintMethodContentViaSemanticModel(SyntaxTree tree){Console.Out.WriteLine(nameof(Program.PrintMethodContentViaSemanticModel));var compilation = CSharpCompilation.Create("MethodContent",syntaxTrees: new[] { tree },references: new[]{MetadataReference.CreateFromFile(typeof(object).Assembly.Location)});var model = compilation.GetSemanticModel(tree, true);var methods = tree.GetRoot().DescendantNodes(_ => true).OfType<MethodDeclarationSyntax>();foreach (var method in methods){var methodInfo = model.GetDeclaredSymbol(method) as IMethodSymbol;var parameters = new List<string>();foreach (var parameter in methodInfo.Parameters){var isRef = parameter.RefKind == RefKind.Ref ? "ref " : string.Empty;parameters.Add($"{isRef}{parameter.Type.Name} {parameter.Name}");}Console.Out.WriteLine($"{methodInfo.Name}({string.Join(", ", parameters)})");}}
To get method symbol information, you use GetDeclaredSymbol()on a semantic tree obtained from the CSharpCompilation object . You then cast that to an IMethodSymbol, and use that to print out method information as shown in Figure 1-22, which looks exactly the same as Figure 1-21.
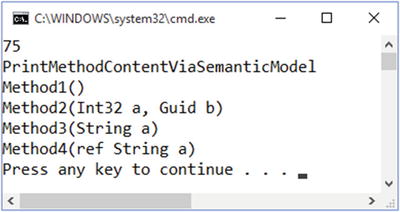
Figure 1-22. Using a semantic model to find method content
Note that in this case, we can use the RefKind property to easily figure out if the parameter is passed by reference. To do this with a syntax tree, you’d have to look to see if the descendents of a ParameterSyntax object contains a SyntaxToken that is of a RefKeyword kind. It’s doable, but the semantic model makes it easier to find that out.
Also, keep in mind that obtaining a semantic tree requires the compilation object to perform extra work to assemble it. If you run the NavigatingTrees project in the Chapter1 folder from the book’s source code repository, you’ll see a brief pause when the code gets the semantic model. The model is handy to have around as it makes discovery a much easier endeavor with usually less code, but that comes with a small performance price. You’ll have to weigh the cost between the two depending on your scenario.
Now you know how to peruse a tree and find out different aspects about it. But what if you want to change the tree? We’ll cover that in the next section.
Editing Trees
In Chapters 2 and 3, you’ll need to change the code that a developer has entered to either fix it or refactor it. This requires modifying a tree. However, let’s be clear: you don’t modify trees in the Compiler API because they’re immutable. If you call a method to replace a node in the tree, you get a new node back. The original node’s child content hasn’t change; the node you got back as a return value is the one with the changes. This may seem like a fairly large memory footprint to deal with all in the name of immutability, but you gain a lot by having immutable structures, like the ability to easily compare between the two nodes in Visual Studio (you’ll see this in Chapters 2 and 3). Plus, the size of the memory footprint doesn’t double the working set of your process every time you modify a new node. The Compiler API team has worked hard to ensure that the performance and memory footprint of the compiler is efficient.
Note
If you want a deep dive into the inner workings of trees and how they work with reducing memory pressure, read the article at http://robinsedlaczek.com/2015/04/29/inside-the-net-compiler-platform-performance-considerations-during-syntax-analysis-speakroslyn/ .
Let’s explore two different ways you can get a “modified” tree back in the Compiler API: replace methods and rewriters. Let’s say that you want to change all of the methods in a class so they’re public. Listing 1-7 contains the starting tree.
Listing 1-7. Building the source tree
var code = @"using System;public class ContainsMethods{public void Method1() { }protected void Method2(int a, Guid b) { }internal void Method3(string a) { }private void Method4(ref string a) { }protected internal void Method5(long a) { }}";var tree = SyntaxFactory.ParseSyntaxTree(code);
To change the contents of the node from Listing 1-7 via a replace method, you can use the ReplaceNodes() method, as shown in Listing 1-8.
Listing 1-8. Replacing nodes in a tree via ReplaceNodes()
private static void ModifyTreeViaTree(SyntaxTree tree){Console.Out.WriteLine(nameof(Program.ModifyTreeViaTree));Console.Out.WriteLine(tree);var methods = tree.GetRoot().DescendantNodes(_ => true).OfType<MethodDeclarationSyntax>();var newTree = tree.GetRoot().ReplaceNodes(methods, (method, methodWithReplacements) =>{var visibilityTokens = method.DescendantTokens(_ => true).Where(_ => _.IsKind(SyntaxKind.PublicKeyword) ||_.IsKind(SyntaxKind.PrivateKeyword) ||_.IsKind(SyntaxKind.ProtectedKeyword) ||_.IsKind(SyntaxKind.InternalKeyword)).ToImmutableList();if (!visibilityTokens.Any(_ => _.IsKind(SyntaxKind.PublicKeyword))){var tokenPosition = 0;var newMethod = method.ReplaceTokens(visibilityTokens,(_, __) =>{tokenPosition++;return tokenPosition == 1 ?SyntaxFactory.Token(_.LeadingTrivia,SyntaxKind.PublicKeyword,_.TrailingTrivia) :new SyntaxToken();});return newMethod;}else{return method;}});Console.Out.WriteLine(newTree);}
There’s a lot going on in Listing 1-8, so let’s go through it step by step. Once we get a list of MethodDeclarationSyntax nodes , we call ReplaceNodes(). In this overload, we pass in the list of methods we want to replace, and then a Func that takes two arguments and returns a MethodDeclarationSyntax object . In our implementation, we’ll only look at the first argument, as that is a reference to an element that you may want to replace. In the Func, we look for tokens with DescendantTokens()that represent the visibility of the method. If none of them are a “public” token, then we replace the visibility tokens via ReplaceTokens(). The first token in the list is changed to a “public” token, and the rest are removed with a new SyntaxToken()—this effectively gets rid of the token from the tree. Note that we keep the leading and trailing trivia around the first node so we don’t lose what the developer has put in the code to format it they way they want it to be.
Figure 1-23 shows what the tree looks like before and after the modification.
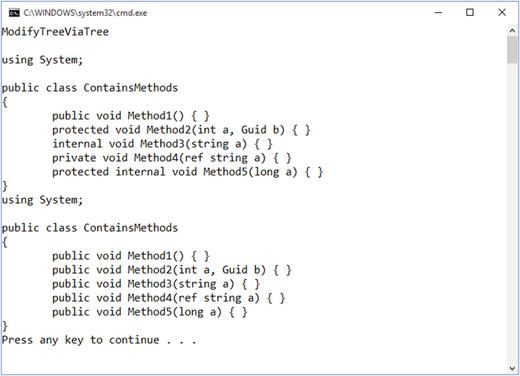
Figure 1-23. Modifying a tree with replacement methods on nodes
Remember that the original tree has not changed. All of the work in this code has only created a new tree with new nodes.
As always, there are lots of other methods you can use to replace content, like ReplaceTrivia(), so depending upon your scenario, take a look at the SyntaxNode you have and see if a different “Replace” method matches your needs.
You can also use a visitor class to rewrite the node. You inherit from the CSharpSyntaxRewriter class and override the correct “Visit” methods you need to create a new node. Listing 1-9 shows what a rewriter looks like to make all methods public.
Listing 1-9. Replacing nodes in a tree via a rewriter class
public sealed class MethodRewriter: CSharpSyntaxRewriter{public override SyntaxNode VisitMethodDeclaration(MethodDeclarationSyntax node){var visibilityTokens = node.DescendantTokens(_ => true).Where(_ => _.IsKind(SyntaxKind.PublicKeyword) ||_.IsKind(SyntaxKind.PrivateKeyword) ||_.IsKind(SyntaxKind.ProtectedKeyword) ||_.IsKind(SyntaxKind.InternalKeyword)).ToImmutableList();if (!visibilityTokens.Any(_ => _.IsKind(SyntaxKind.PublicKeyword))){var tokenPosition = 0;var newMethod = node.ReplaceTokens(visibilityTokens,(_, __) =>{tokenPosition++;return tokenPosition == 1 ?SyntaxFactory.Token(_.LeadingTrivia,SyntaxKind.PublicKeyword,_.TrailingTrivia) :new SyntaxToken();});return newMethod;}else{return node;}}}
Using the rewriter to get a new node is pretty simple:
var newTree = new MethodRewriter().Visit(tree.GetRoot());As with reading nodes, the approach you use to create new nodes is up to you.
Before we close out this chapter, let’s look at two more pieces of a tree that you may find useful when you create and/or modify trees: annotations and formatters.
Annotations and Formatters
You’ve seen the core parts of trees that the Compiler API uses throughout its pipeline. But there are two parts to the tree that, while they may not be highly important to the resulting compilation output, you (and those who read the code generated by a tree) may find them useful. They are annotations and formatters. Let’s start with annotations.
Using Annotations
Being a .NET developer means you’ve probably used attributes in some capacity. For example, if you use a unit testing framework, you typically mark a method that should be run as a test with some kind of attribute, like this:
[TestMethod]public void MyTest() { /*...*/ }
The TestMethodAttributeis a piece of metadata in your code that lies dormant until code looks for the existence of that attribute and reacts accordingly. In this unit testing example, a test runner would use Reflection to find all methods marked with TestMethodAttribute and invoke them during a test run.
In the Compiler API, you can use an instance of the SyntaxAnnotation class to mark nodes and tokens with a piece of information you’d like to use later on. The annotations won’t do anything when the code is compiled; they’re only there for you to find and perform some specfic action based on their existence. For example, if you wanted to know how many methods were changed to public based on code from Listing 1-8, you can add an annotation to the new MethodDeclarationSyntax object like this:
const string newMethodAnnotation = "MethodMadePublic";// ... method rewriting goes here ...return newMethod.WithAdditionalAnnotations(new SyntaxAnnotation(newMethodAnnotation));
Then you only need one line of code to get the count of changed methods from a tree:
newTree.GetAnnotatedNodes(newMethodAnnotation).Count();Annotations are not required for anything you do when you work with trees. In fact, they won’t show up when you print code or save it to a text file, nor will they end up in a resulting executable. But they can come in handy when you want to tag elements in a tree to quickly find them later. Speaking of printing code, let’s now look at how you can format your code (and, interestingly enough, use an annotation to specify formatting).
Using Formatters
As mentioned earlier in the “Visualizing Trees” section, developers can be really picky about the code they write when it comes to formatting. If they want the curly brace on the next line, they write this:
public class MyClass{// ...}
But if someone comes along and changes it to this:
public class MyClass {// ...}
stern words may be spoken to the one who made the change! How you format your code makes no difference in the way the code will execute when it’s compiled, but having consistency pervasive in a code base is one indication that the development team is striving for clean, healthy code.
One way to handle formatting is to explicity add in all the trivia manually. With the RoslynQuoter tool mentioned earlier in the “Building Trees” section, you may have noticed that you had the option to “Preserve original whitespace”. If you use that option, all of the nodes created from SyntaxFactory have explicit leading and trailing trivia lists defined. If you omit that option, then the code is less verbose, but it does have a call to NormalizeWhitespace() at the end of the factory calls.
What does NormalizeWhitespace()do? Essentially it applies some “common” C# formatting to the code represented in the tree. For example, consider the code in Listing 1-10.
Listing 1-10. Creating a ClassDeclarationNode
public static class Program{public static void Main(string[] args){Program.FormatClassNode();}private static void FormatClassNode(){Console.Out.WriteLine(nameof(Program.FormatClassNode));var code = SyntaxFactory.ClassDeclaration("NewClass");Console.Out.WriteLine(code);Console.Out.WriteLine(code.NormalizeWhitespace());}}
Here’s the output when the code from Listing 1-10 is run:
FormatClassNodeclassNewClass{}class NewClass{}
Notice that the second line is the class definition with no formatting, and the last two lines are the definition with formatting applied. You can use overloads of NormalizeWhitespace() to define the indentation and end-of-line trivia if you’d like, but that’s it—you have to use whatever formatting NormalizeWhitespace()decides to apply.
You can also use workspaces to define how the tree’s code should be formatted. We’ll cover workspaces in detail in Chapter 4, but for now you can think of a workspace as a way to abstract how a solution, projects, and files should be managed. The following code shows how you can use different implementations of the Workspace class (AdhocWorkspace and MSBuildWorkspace) to format your code:
Console.Out.WriteLine(Formatter.Format(code, new AdhocWorkspace()));Console.Out.WriteLine(Formatter.Format(code, MSBuildWorkspace.Create()));
In both cases, the output is the same as it is for NormalizeWhitespace(). In other chapters we’ll use workspaces for testing and project and solution management.
There’s one other way you can specify how nodes should be formatted. It’s by using the Annotation property on the Formatter class, like this:
Console.Out.WriteLine(code.WithAdditionalAnnotations(Formatter.Annotation));
If you print the node to the console window, it will look like the original node’s output: classNewClass{}. However, the reason you’d want to do this is when you create a code fix, which we’ll talk about in Chapter 2. The code fix engine will look for nodes that have this annotation, and format their content based on the rules specified by the developer in Visual Studio. In cases with a new node in a console application, adding this annotation doesn’t change anything. However, when you’re creating a code fix, using Formatter.Annotation is valulable because you can let other aspects of the Compiler API handle code formatting for you.
Conclusion
In this chapter, you received an introduction into the Compiler API world. You saw how you could parse code and create executables based on the syntax trees produce. You learned how you to create trees directly and produce new trees based on a tree’s content. Finally, you saw how you can use annotations and formatting with syntax trees . In the next chapter, we’ll use this newfound knowledge of trees to create diagnostics and code fixes to help you find and fix errors in your code.