
Model evaluation is the most important step in developing any machine learning solution. At this stage in model development we measure the model performance and decide whether to go ahead with the model or revisit all our previous steps as described in the PEBE, our machine learning process flow, in Chapter 1. In many cases, we may even discard the complete model based on the performance metrics. This phase of the PEBE plays a very critical role in the success of any ML based projects.
The central idea of model evaluation is minimizing the error on test data, where error can be defined in many ways. In most intuitive sense, error is the difference between the actual value of the predictor variable in data and the value the ML model predicts. The error metrics are not always universal, and some specific problems require creative error metrics that suit the problem and the domain knowledge.
It is important to emphasize here that the error metric used to train the model might be different from evaluation error metric. For instance, for a classification model you might have used the LogLoss error metric, but for evaluation the model, you might want to see a classification rate using a confusion matrix.
In this chapter, we will enumerate the basic idea behind evaluating a model and discuss some of the methods in detail.
Learning objectives
Introduction to model performance and evaluation
Population stability index
Model evaluation for continuous output
Model evaluation for discrete output
Probabilistic techniques
Illustration of advanced metrics like the Kappa Error Metric
7.1 Dataset
The dataset for this chapter is same as what we introduced in the Chapter 6 to explain the machine learning techniques for regression-based methods and classification problems. Let’s do a quick recap of them once and then we can jump into the concepts.
7.1.1 House Sale Prices
We will be using the house sale prices dataset detailed in Chapter 6. Let’s have a quick look at the dataset.
library(data.table)Data_House_Price <-fread("Dataset/House Sale Price Dataset.csv",header=T, verbose =FALSE, showProgress =FALSE)str(Data_House_Price)Classes 'data.table' and 'data.frame': 1300 obs. of 14 variables:$ HOUSE_ID : chr "0001" "0002" "0003" "0004" ...$ HousePrice : int 163000 102000 265979 181900 252000 180000 115000 176000 192000 132500 ...$ StoreArea : int 433 396 864 572 1043 440 336 486 430 264 ...$ BasementArea : int 662 836 0 594 0 570 0 552 24 588 ...$ LawnArea : int 9120 8877 11700 14585 10574 10335 21750 9900 3182 7758 ...$ StreetHouseFront: int 76 67 65 NA 85 78 100 NA 43 NA ...$ Location : chr "RK Puram" "Jama Masjid" "Burari" "RK Puram" ...$ ConnectivityType: chr "Byway" "Byway" "Byway" "Byway" ...$ BuildingType : chr "IndividualHouse" "IndividualHouse" "IndividualHouse" "IndividualHouse" ...$ ConstructionYear: int 1958 1951 1880 1960 2005 1968 1960 1968 2004 1962 ...$ EstateType : chr "Other" "Other" "Other" "Other" ...$ SellingYear : int 2008 2006 2009 2007 2009 2006 2009 2008 2010 2007 ...$ Rating : int 6 4 7 6 8 5 5 7 8 5 ...$ SaleType : chr "NewHouse" "NewHouse" "NewHouse" "NewHouse" ...- attr(*, ".internal.selfref")=<externalptr>
These are the variables and their types. It can be seen that the data is a mix of character and numeric data.
The following code and Figure 7-1 present a summary of House Sale Price. This is our dependent variable in all the modeling examples we have built in this book.

Figure 7-1. Distribution of house sale price
dim(Data_House_Price)[1] 1300 14Check the distribution of dependent variable ( House Price). We plot a histogram to see how the House Price are spread in our dataset.hist(Data_House_Price$HousePrice/1000000, breaks=20, col="blue", xlab="House Sale Price(Million)",main="Distribution of House Sale Price")
Here, we call the summary() function to see basic properties of the HousePrice data. The output gives us a minimum, first quantile, median, mean, third quantile, and maximum.
#Also look at the summary of the Dependent Variablesummary(Data_House_Price$HousePrice)Min. 1st Qu. Median Mean 3rd Qu. Max.34900 129800 163000 181500 214000 755000#Pulling out relevant columns and assigning required fields in the datasetData_House_Price <-Data_House_Price[,.(HOUSE_ID,HousePrice,StoreArea,StreetHouseFront,BasementArea,LawnArea,Rating,SaleType)]
The following code snippet removes the missing values from the dataset. This is important to make sure the data is consistent throughout.
#Omit Any missing valueData_House_Price <-na.omit(Data_House_Price)Data_House_Price$HOUSE_ID <-as.character(Data_House_Price$HOUSE_ID)
These statistics give us some idea of how the house price is distributed in the dataset. The average sale price is $181,500 and the highest sale price is $755,000.
7.1.2 Purchase Preference
This data contains transaction history for customers who bought a particular product. For each customer_ID, multiple data points are simulated to capture the purchase behavior. The data is originally set for solving multiple classes with four possible products of insurance industry. Here, we show summary of the purchase prediction data.
Data_Purchase <-fread("Dataset/Purchase Prediction Dataset.csv",header=T, verbose =FALSE, showProgress =FALSE)str(Data_Purchase)Classes 'data.table' and 'data.frame': 500000 obs. of 12 variables:$ CUSTOMER_ID : chr "000001" "000002" "000003" "000004" ...$ ProductChoice : int 2 3 2 3 2 3 2 2 2 3 ...$ MembershipPoints : int 6 2 4 2 6 6 5 9 5 3 ...$ ModeOfPayment : chr "MoneyWallet" "CreditCard" "MoneyWallet" "MoneyWallet" ...$ ResidentCity : chr "Madurai" "Kolkata" "Vijayawada" "Meerut" ...$ PurchaseTenure : int 4 4 10 6 3 3 13 1 9 8 ...$ Channel : chr "Online" "Online" "Online" "Online" ...$ IncomeClass : chr "4" "7" "5" "4" ...$ CustomerPropensity : chr "Medium" "VeryHigh" "Unknown" "Low" ...$ CustomerAge : int 55 75 34 26 38 71 72 27 33 29 ...$ MartialStatus : int 0 0 0 0 1 0 0 0 0 1 ...$ LastPurchaseDuration: int 4 15 15 6 6 10 5 4 15 6 ...- attr(*, ".internal.selfref")=<externalptr>
This data output shows a mixed bag of variables in the purchase prediction data. Carefully look at the dependent variable in this dataset, PurchaseChoice, which was loaded as an integer. We have to make sure before we use that for modeling that it’s converted into factor.
Similar to the continuous dependent variable, we will create the dependent variable for discrete case from the purchase prediction data. For simplicity and easy explanation, we will only be working with product preference ProductChoice as a dependent variable with four levels (i.e., 1, 2, 3, and 4).
dim(Data_Purchase);[1] 500000 12#Check the distribution of data before groupingtable(Data_Purchase$ProductChoice)1 2 3 4106603 199286 143893 50218The barplot below shows the distribution of ProductChoice. The highest volume is in for ProductChoice = 2, then 3 followed by 1 and 4.barplot(table(Data_Purchase$ProductChoice),main="Distribution of ProductChoice", xlab="ProductChoice Options", col="Blue")

Figure 7-2. Distribution of product choice options
In the following code, we subset the data to select only the columns we will be using in this chapter. Also we remove all missing values (NA) to keep the data consistent across different options.
#Pulling out only the relevant data to this chapterData_Purchase <-Data_Purchase[,.(CUSTOMER_ID,ProductChoice,MembershipPoints,IncomeClass,CustomerPropensity,LastPurchaseDuration)]#Delete NA from subsetData_Purchase <-na.omit(Data_Purchase)Data_Purchase$CUSTOMER_ID <-as.character(Data_Purchase$CUSTOMER_ID)
This subset of data will be used throughout this chapter to explain the various concepts.
7.2 Introduction to Model Performance and Evaluation
Model performance and evaluation is carried out once you have developed the model and want to understand how the model performs on the test data/validation data. Before the start of model development, you usually divide the data into three categories:
Training data: This dataset is used to train the model/machine. At this stage, the focus of the machine learning algorithm is to optimize some well-defined metric reflecting the model fit. For instance, in Ordinary Least Square, we will be using the training data to train a linear regression model by minimizing squared errors.
Testing data: Test dataset contain data points that the ML algorithm has not seen before. We apply this dataset to see how the model performs on the new data. Most of the model performance and evaluation are calculated and evaluated against thresholds in this step. Here, the modeler can decide if the model needs any improvement and can make the changes and tweaks accordingly.
Validation data: In many cases, the modeler doesn’t keep this dataset due to multiple reasons (e.g., limited data, short time period, larger test set etc.). In essence, this dataset’s purpose is to check for overfitting of the model and provide insights into calibration needs. Once the modeler believes the ML model has done well on testing data and starts to use validation data, they can’t go back and change the model. They rather have to try to calibrate the model and check for overfitting. If the model fails to set standards, we are forced to drop the model and start the process again.
Depending on the problem and other statistical constraints, the proportion of these datasets will be decided. In general, for sufficiently large data we may use the 60%:20%:20% ratio for our training, testing, and validation datasets.
Model performance is measured using test data and the modeler decides what thresholds are acceptable to validate the model. Performance metrics are in general generated using the basic criteria of model fit, i.e., how different the model output is from the actual. This error between actual and predicted will be the error that should be minimized for a good performance.
Within the scope of this book, we will be discussing how to use some commonly used performance and evaluation metrics on two types of model output (predictor) variables:
Continuous output: The model or series of models that give continuous predicted value against a continuous dependent variable in model. For instance, house prices are continuous and, when used to predict using a model, will be giving continuous predicted values.
Discrete output: The model or series of models that gives discrete predicted value against a discrete dependent variable in model. For instance, for a credit card application, the risk class of the borrower when used in predictive model for classification will give a discrete predicted value (i.e., predicted risk class).
We can expand this list based on other complicated modeling techniques and how we want to evaluate them. For instance, think about a logistic model; the dependent is a binomial distributed variable but the output is on the probability scale (0 to 1). Depending on what is the final purpose of the business, we have to decide what to evaluate and at what step of the process. For completeness purposes, you can use concordant-discordant ratios to evaluate the model separation power among 0s and 1s. Concordant-discordant ratios are discussed in Chapter 6 . Reader is encouraged to pursue statistical underpinning of model performance measurement concepts.
7.3 Objectives of Model Performance Evaluation
Business stakeholders play an important role in defining the performance metrics. The models have direct implications on costs for business. Simply minimizing a complicated statistical measure might not always be the best model for a business. For illustration purposes, assume a credit risk model for credit scoring new applicants. A few of the input variables is internal and some are purchased from external sources. The model performs really well by having external data from multiple parties, which comes with a cost. In that case simply having a model with minimum classification error is not enough; the model output should also make economic sense to the business.
In general, we can classify the purpose of model performance and evaluation focus into three buckets. These three are part of general framework for using statistical methods and their interpretation.
Accuracy: The accuracy of a model reflects the proportion of right predictions—in a continuous case, its minimum residual, and in discrete, the correct class prediction. A minimum residual in continuous cases or few incorrect classifications in discrete case implies higher accuracy and a better model.
Gains: The gains statistic gives us an idea about the performance of the model itself. The method is generalized to different modeling techniques and is very intuitive. This compares the model output with the result that we get without using a model (or a random model). So in essence, this will tell you how good the model is compared to a random model that has an random outcome. When comparing two models, the model having the higher gains statistics at a specified percentile is preferred.
Accreditation: The model accreditation reflects the credibility of a model for actual use. This approach ensures that the data on which model is applied is similar to the training data. Population stability index is one of the measures to ensure accreditation before using the model. Population stability index is a measure to ascertain if the model training dataset is similar to the data where the model is used, or the population is stable with respect to the features used in the model. The index value varies from 0 to 1, with high values indicating greater similarity between the predictors in the two datasets. A stable population confirms the use of model for prediction.
These kind of scenarios are abundant in actual practice. In this book, we will discuss the basic statistical methods used to evaluate the model performance. We will also look at the intuitive way of thinking about model performance. Intuitive ways of thinking help create new error metrics and add business context while measuring model performance.
7.4 Population Stability Index
Population stability is seldom ignored by modelers while testing the model performance on various datasets. The idea here is to ensure that the testing dataset is same as the train dataset. If this is the case, the model performance tested on this data will give you insights into how well the model performed; otherwise, your model performance results are of no use.
Consider an example. You developed a model for predicting mean income of U.S. consumers using a dataset from 2000 to 2009. You developed the model by training it on dataset from 2000 to 2007 and then kept the last two years for testing the model. What is going to happen with the test results? The trained model might be the best model but the model performance in the test results is still bad. Why? Because the population characteristics between train and test have changed. The U.S. economy went through a severe recession between Q4 2007 and Q4 2008. In statistical terms, the underlying population is not stable between two periods.
Population Stability is very important in time series data to keep following the underlying changes in the population to make sure that the model stays relevant. The financial service industry has been using this metric for a long time to make sure the financial models are relevant to the market.
Let’s illustrate the concept of population stability for a continuous distribution . We will divide the population data into two portions, say set 1 and set 2. In machine learning performance testing, think about set 1 as the train data and set 2 as the test data.
Note
The concept of population stability is very important when the underlying relationship structure of dependent and independent variable is effected by external unseen factors.
#Create set 1 and set 2 : First 2/3 as set 1 and remaining 1/3 as set 2summary(Data_House_Price$HousePrice)Min. 1st Qu. Median Mean 3rd Qu. Max.34900 127500 159000 181300 213200 755000set_1 <-Data_House_Price[1:floor(nrow(Data_House_Price)*(2/3)),]$HousePricesummary(set_1)Min. 1st Qu. Median Mean 3rd Qu. Max.34900 128800 160000 180800 208900 755000set_2 <-Data_House_Price[floor(nrow(Data_House_Price)*(2/3) +1):nrow(Data_House_Price),]$HousePricesummary(set_2)Min. 1st Qu. Median Mean 3rd Qu. Max.52500 127000 155000 182200 221000 745000
For the continuous case, we can check for stability using two sample Kolmogorov-Smirnov tests (KS test) . KS testing is a non-parametric test for comparing the cumulative distribution of two samples.
The empirical distribution function Fn for n iid observations Xi is defined as:
![$$ {F}_n(x)=frac{1}{n}{displaystyle sum_{i=1}^n{I}_{left[-infty, x
ight]}left({X}_i
ight)} $$](http://images-20200215.ebookreading.net/19/4/4/9781484223345/9781484223345__machine-learning-using__9781484223345__A416805_1_En_7_Chapter_Equa.gif)
where ![]() is the indicator function, equal to 1 if
is the indicator function, equal to 1 if ![]() and equal to 0 otherwise.
and equal to 0 otherwise.
The Kolmogorov-Smirnov statistic for a given cumulative distribution function F(x) is
![]() where sup x is the maximum of the set of distances.
where sup x is the maximum of the set of distances.
Essentially, the KS statistic will get the highest point of difference between the empirical distribution comparison of two samples and, if that is too high, we say the two samples are different. In terms of population stability, it says your model performance can’t be measured on new samples and the underlying sample is not from the same distribution on which the model was trained.
In following code first defines a function ks_test() that plots the Empirical Cumulative Distribution Function (ECDF) and display the KS test result.
#Defining a function to give ks test result and ECDF plots on log scalelibrary(rgr)ks_test <-function (xx1, xx2, xlab ="House Price", x1lab =deparse(substitute(xx1)),x2lab =deparse(substitute(xx2)), ylab ="Empirical Cumulative Distribution Function",log =TRUE, main ="Empirical EDF Plots - K-S Test", pch1 =3, col1 =2, pch2 =4, col2 =4, cex =0.8, cexp =0.9, ...){temp.x <-remove.na(xx1)x1 <-sort(temp.x$x[1:temp.x$n])nx1 <-temp.x$ny1 <-((1:nx1) -0.5)/nx1temp.x <-remove.na(xx2)x2 <-sort(temp.x$x[1:temp.x$n])nx2 <-temp.x$ny2 <-((1:nx2) -0.5)/nx2xlim <-range(c(x1, x2))if (log) {logx <- "x"if (xlim[1] <=0)stop(" Values cannot be .le. zero for a log plot ")}else logx <- ""plot(x1, y1, log = logx, xlim = xlim, xlab = xlab, ylab = ylab,main = main, type ="n", ...)points(x1, y1, pch = pch1, col = col1, cex = cexp)points(x2, y2, pch = pch2, col = col2, cex = cexp)temp <-ks.test(x1, x2)print(temp)}
Here, we call the custom function, which perform this KS test on set_1 and set_2 and display the Empirical Cumulative Distribution Plots (ECDF):
#Perform K-S test on set_1 and set_2 and also display Empirical Cummulative Distribution Plotsks_test(set_1,set_2)

Figure 7-3. ECDF plots for Set_1 and Set_2
Here, we show the hypothesis test results for the KS test. This is the Kolmogorov-Smirnov test for the hypothesis that both distributions were drawn from the same underlying distribution.
Two-sample Kolmogorov-Smirnov testdata: x1 and x2D = 0.050684, p-value = 0.5744alternative hypothesis: two-sided
As you can see, the p-value is more than 0.05 and we fail to reject the null hypothesis. So we are good to go ahead and test model performance on test data. Also, looking at the Empirical Cumulative Distribution Function (ECDF) plot, we can see the ECDF for both the samples look the same, and hence they come from the same population distribution.
How do the results look when the population becomes unstable? Let’s manipulate our set_2 to show that scenario.
Consider that set_2 got exposed to a new law, where the houses in set_2 were subjected to additional tax by a local body and hence the prices went up. The question we will have is, can the existing model still perform well on this new set?
#Manipulate the set 2set_2_new <-set_2*exp(set_2/100000)# Now do the k-s test againks_test(set_1,set_2_new)
Now let’s again plot the ECDF for set_1 and set_2 and see how they look in comparison (see Figure 7-4).

Figure 7-4. ECDF Plots for Set_1 and Set_2 (Manipulated)
We again perform the KS test to check the hypothesis results.
Two-sample Kolmogorov-Smirnov testdata: x1 and x2D = 0.79957, p-value < 2.2e-16alternative hypothesis: two-sided
The KS test’s p-value is less than 0.05 and hence the test rejects the null hypothesis that both samples are from the same population. Visually the ECDF plots look way off to each other. Hence, the model can’t be used on new dataset, although the dataset is of same schema and business feed.
We can quickly show how to do population stability tests for discrete cases of purchase prediction for ProductChoice. The test is performed by calculating the statistic, Population Stability Index (PSI), defined as here:
PSI=∑((n1i/N1)−(n2i/N2))*ln((n1i/N1)/(n2i/N2))
where: n1i,n2i is the number of observations in bin i for populations 1 and 2, and N1,N2 is the total number of observations for populations 1 and 2.
As the Population Stability Index for the discrete case does not follow a distribution, we have threshold values . As a rule, values below thresholds can be used to interpret the population stability index:
A PSI < 0.1 indicates a minimal change in the population.
A PSI 0.1 to 0.2 indicates changes that require further investigation.
A PSI > 0.2 indicates a significant change in the population.
This code snippet calculates the Population Stability Index using this formula.
#Let's create set 1 and set 2 from our Purchase Prediction Dataprint("Distribution of ProductChoice values before partition")[1] "Distribution of ProductChoice values before partition"table(Data_Purchase$ProductChoice)1 2 3 4104619 189351 142504 49470set_1 <-Data_Purchase[1:floor(nrow(Data_Purchase)*(2/3)),]$ProductChoicetable(set_1)set_11 2 3 469402 126391 95157 33012set_2 <-Data_Purchase[floor(nrow(Data_Purchase)*(2/3) +1):nrow(Data_Purchase),]$ProductChoicetable(set_2)set_21 2 3 435217 62960 47347 16458
Now we will treat set_1 as population 1 and set_2 as population 2 and calculate the PSI. A similar exercise can be repeated with different parameters to see if the population remains stable with respect to other discrete distributions .
#PSI=Summation((n1i/N1)(n2i/N2))ln((n1i/N1)/(n2i/N2))temp1 <-(table(set_1)/length(set_1) -table(set_2)/length(set_2))temp2 <-log((table(set_1)/length(set_1))*(table(set_2)/length(set_2)))psi <-abs(sum(temp1*temp2))if(psi <0.1 ){cat("The population is stable with a PSI of " ,psi)} else if (psi >=0.1&psi <=0.2) {cat("The population need further investigation with a PSI of " ,psi)} else {cat("The population has gone through significant changes with a PSi of " ,psi)}The population is stable with a PSI of 0.002147654
As you must have observed from these examples, essentially we are comparing two distributions and making sure the distributions are similar. This test helps us ascertain how credible the model would be on the new data.
7.5 Model Evaluation for Continuous Output
The distribution of dependent variables is an important consideration in choosing the methods for evaluating the models. Intuitively, we end up comparing the residual distribution (actual versus predicted value) with either normal distribution (i.e., random noise) or some other distribution based on the metrics we choose.
This section is dedicated to the cases where the residual error is on a continuous scale. Within the scope of this chapter, we will focus on the linear regression model and calculate some basic metrics. The metrics come with their own merits and demerits, and we will try to focus on some of them from a business interpretation perspective.
Let’s fit a linear regression model with the variables subsetted to a forward selection on the house price data. Then, with this model, we will show different model performance metrics .
# Create a model on Set 1 = Train datalinear_reg_model <-lm(HousePrice ∼StoreArea +StreetHouseFront +BasementArea +LawnArea +Rating +SaleType ,data=Data_House_Price[1:floor(nrow(Data_House_Price)*(2/3)),])summary(linear_reg_model)Call:lm(formula = HousePrice ∼ StoreArea + StreetHouseFront + BasementArea +LawnArea + Rating + SaleType, data = Data_House_Price[1:floor(nrow(Data_House_Price) *(2/3)), ])Residuals:Min 1Q Median 3Q Max-432276 -22901 -3239 17285 380300Coefficients:Estimate Std. Error t value Pr(>|t|)(Intercept) -8.003e+04 3.262e+04 -2.454 0.014387 *StoreArea 5.817e+01 9.851e+00 5.905 5.48e-09 ***StreetHouseFront 1.370e+02 8.083e+01 1.695 0.090578 .BasementArea 2.362e+01 3.722e+00 6.346 3.96e-10 ***LawnArea 7.746e-01 1.987e-01 3.897 0.000107 ***Rating 3.540e+04 1.519e+03 23.300 < 2e-16 ***SaleTypeFirstResale 1.012e+04 3.250e+04 0.311 0.755651SaleTypeFourthResale -3.221e+04 3.678e+04 -0.876 0.381511SaleTypeNewHouse -1.298e+04 3.190e+04 -0.407 0.684268SaleTypeSecondResale -2.456e+04 3.248e+04 -0.756 0.449750SaleTypeThirdResale -2.256e+04 3.485e+04 -0.647 0.517536---Signif. codes: 0 '***' 0.001 '**' 0.01 '*' 0.05 '.' 0.1 ' ' 1Residual standard error: 44860 on 701 degrees of freedomMultiple R-squared: 0.7155, Adjusted R-squared: 0.7115F-statistic: 176.3 on 10 and 701 DF, p-value: < 2.2e-16
The model summary shows a few things:
The Multiple R Square of the fitted model is 71.5%, which is a good fit model.
The SaleType variable is insignificant at all levels (but we have kept that in model as we believe that it’s an important element of HousePrice).
The p-value for the F-test of the overall significance test is less than 0.05, so we can reject the null hypothesis and conclude that the model provides a better fit than the intercept-only model.
Now we will move on to the performance measures for a continuous dependent variable.
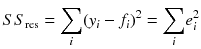
7.5.1 Mean Absolute Error
Mean absolute error or MAD is one of the most basic error metrics used to evaluate a model. MAD is directly derived from the residual error first norm. This is the average/mean of the absolute errors.
In statistics, the mean absolute error is an average of the absolute errors

where f
i
is the prediction and y
i
the true value.
There are other similar measures like Mean Absolute Scaled Error (MASE) and Mean Absolute Percentage Error (MAPE) . In all these measures, the performance is summarized in a way that it treats both underprediction and overprediction the same, and mean signed difference is ignored. This is a specific demerit because of ignorance to over-prediction or under-prediction. In business problems we are usually fine with error in one direction but not the other. For instance, calculating credit loss on credit cards. The business should be fine if it is overpredicting the loss and hence keeping a little more reserve. However, the other side is highly costly and may trigger bankruptcy in extreme cases.
#Create the test data which is set 2test <-Data_House_Price[floor(nrow(Data_House_Price)*(2/3) +1):nrow(Data_House_Price),]#Fit the linear regression model on this and get predicted valuespredicted_lm <-predict(linear_reg_model,test, type="response")actual_predicted <-as.data.frame(cbind(as.numeric(test$HOUSE_ID),as.numeric(test$HousePrice),as.numeric(predicted_lm)))names(actual_predicted) <-c("HOUSE_ID","Actual","Predicted")#Find the absolute residual and then take mean of thatlibrary(ggplot2)#Plot Actual vs Predicted values for Test Casesggplot(actual_predicted,aes(x = actual_predicted$HOUSE_ID,color=Series)) +geom_line(data = actual_predicted, aes(x = actual_predicted$HOUSE_ID, y =Actual, color ="Actual")) +geom_line(data = actual_predicted, aes(x = actual_predicted$HOUSE_ID, y = Predicted, color ="Predicted")) +xlab('HOUSE_ID') +ylab('House Sale Price')
It’s clear from the plot in Figure 7-5 that the actual is very close to the predicted. Now let’s find out how our model is performing on a Mean Square Error metric.

Figure 7-5. Actual versus predicted plot
#Remove NA from test, as we have not done any treatment for NAactual_predicted <-na.omit(actual_predicted)#First take Actual - Predicted, then take mean of absolute errors(residual)mae <-sum(abs(actual_predicted$Actual -actual_predicted$Predicted))/nrow(actual_predicted)cat("Mean Absolute Error for the test case is ", mae)Mean Absolute Error for the test case is 29570.3
The MAE says on average the error is $29,570. This is equivalent to saying on dollar scale 17% error is expected for a mean of $180,921.
This metric can also be used to fit linear model. Just as least square method is related to mean squared errors, mean absolute error is related to least absolute deviations.
7.5.2 Root Mean Square Error
Root mean square error or RMSE is one of the most popular metrics used to evaluate continuous error models. As the name suggests, it is the square root of mean of squared errors. The most important feature of this metric is that the errors are weighted by means of squaring them.
For example, suppose the predicted value is 5.5 while the actual value is 4.1. Then the error is 1.4 (5.5 - 4.1). The square of this error is 1.4 x 1.4 = 1.96. Assume another scenario, where the predicted value is 6.5, then the error is 2.4 (6.5 - 4.1), and the square of error is 2.4 x 2.4 = 5.76. As you can see, while the error only changed 2.4/1.4 = 1.7 times, the squared error changed 5.76/1.96 = 2.93 times. Hence, RMSE penalizes the far off error more strictly than any close by errors.
The RMSE of predicted values ŷ
t
for times t of a regression’s dependent variable y
t
is computed for n different predictions as the square root of the mean of the squares of the deviations:

It is important to understand how the operations in the metric change the interpretation of the metric. Suppose our dependent variable is house price, which is captured in dollar numbers. Let’s see how the metric dimensions evolve to interpret the measure.
The predicted and actual value is in dollars, so their difference is error, again in dollars. Then you square the error, so the dimension becomes dollar squared. You can’t compare a dollar square value to a dollar value. So, we square root that to bring back the dimension to dollars and can now interpret RMSE is dollar terms. It’s important to note that, generally the metrics for model comparison are dimensionless, but for model itself we prefer metrics having some dimension to provide a business context to the metric.
#As we have already have actual and predicted value we can directly calculate the RMSE valuermse <-sqrt(sum((actual_predicted$Actual-actual_predicted$Predicted)^2)/nrow(actual_predicted))cat("Root Mean Square Error for the test case is ", rmse)Root Mean Square Error for the test case is 44459.42
Now you can see that the error has scaled up to $44,459. This is due to the fact now we are penalizing the model for far away predictions by means of squaring the errors.
As mentioned earlier as well, if you want to use a metric to compare datasets or models with different scales, you need to bring the metric into a dimensionless form. We can do the same with RMSE by normalizing it. The most common way is by dividing the RMSE by range or mean:

This value is referred to as the normalized root-mean-square deviation or error (NRMSD or NRMSE), and usually expressed as a percentage. A low value indicates less residual variance and hence is a good model.
7.5.3 R-Square
R-square is a popular measure used for linear regression based techniques. The appropriate terminology used by statisticians for R-square is Coefficient of Determination. The Coefficient of Determination gives an indication of the relationship between the dependent variable (y) and a set of independent variables (x). In mathematical form, it is a ratio of residual sum of squares and total sum of squares. Again, note that this measure is also originating from residual (error metric) using actual and predicted values. Here, we explain how the R 2 metric gets calculated for a model, and then how we interpret the metric.
Note
Capital R
2 and r
2 are loosely used interchangeably but they are not same. R
2 is the multiple R
2 in a multiple regression model. In bivariate linear regression, there is no multiple R, and ![]() . So the key difference is applicability of the term (or notation): "multiple R" implies multiple regressors, whereas “R
2” doesn’t.
. So the key difference is applicability of the term (or notation): "multiple R" implies multiple regressors, whereas “R
2” doesn’t.
A dataset has n values marked y1…yn (collectively known as yi or as a vector y = [y1…yn]), each associated with a predicted (or modeled) value f1…fn (known as fi, or sometimes ŷi, as a vector f).
The residual (error in prediction) is defined as ei = yi - fi (forming a vector e).
If ![]() is the mean of the observed data
is the mean of the observed data  then the variability of the dataset can be measured using three sums of squares formulas:
The total sum of squares (proportional to the variance of the data):

The regression sum of squares, also called the explained sum of squares:

The sum of squares of residuals, also called the residual sum of squares:
The general definition of the coefficient of determination or r 2is

In Figure 7-6, we can see the the interpetation of the sum of squares and how they come together to form the definition of the coefficient of determination.

Figure 7-6. Image Explaining Squared errors (taken from https://en.wikipedia.org/wiki/Coefficient_of_determination )
R 2 = 1- Blue Color/Red Color
These small squares represent the squared residuals with respect to the linear regression. The areas of the larger squares represent the squared residuals with respect to the average value.
On left the linear regression fits the data in comparison to the simple average, while on the right it fits the actual value of data. R 2 is then a ratio between them, indicating if rather than taking simple average you use this model how much more you will be able to capture. Needless to say, a perfect value of 1 means all the variation is explained by the model.
Since R 2 is a proportion, it is always a number between 0 and 1.
If R2 = 1, all of the data points fall perfectly on the regression line (or the predictor x accounts for all the variation in y)
If R2 = 0, the estimated regression line is perfectly horizontal (or the predictor x accounts for none of the variation in y)
If R2 is between 0 and 1, it explains variance in y (using the model is better than not using the model)
Though R-square is the default output of all the standard linear regression packages, we will show you the calculations as well. Another term that you need to be aware is adjusted R-squared. It makes the correction for the number of predictors in the model. In other words it takes into account the overfitting of the model due to a high number of predictors, and it increases only if the new term improves the model more than would be expected by chance.
#Model training data ( we will show our analysis on this dataset)train <-Data_House_Price[1:floor(nrow(Data_House_Price)*(2/3)),.(HousePrice,StoreArea,StreetHouseFront,BasementArea,LawnArea,StreetHouseFront,LawnArea,Rating,SaleType)];#Omitting the NA from datasettrain <-na.omit(train)# Get a linear regression modellinear_reg_model <-lm(HousePrice ∼StoreArea +StreetHouseFront +BasementArea +LawnArea +StreetHouseFront +LawnArea +Rating +SaleType ,data=train)# Show the function call to identify what model we will be working onprint(linear_reg_model$call)lm(formula = HousePrice ∼ StoreArea + StreetHouseFront + BasementArea +LawnArea + StreetHouseFront + LawnArea + Rating + SaleType,data = train)#System generated Square valuecat("The system generated R square value is " , summary(linear_reg_model)$r.squared)The system generated R square value is 0.7155461
You can see that the default model output calculated R-square for us. The current linear model has an R-square of 0.72. it can be interpreted as 72% percent of the variation in house price is “explained by” the variation in predictors StoreArea, StreetHouseFront, BasementArea, LawnArea, StreetHouseFront, LawnArea, Rating, and SaleType.
Here, we calculate the measure step by step to get the same R-square value.
#calculate Total Sum of SquaresSST <-sum((train$HousePrice -mean(train$HousePrice))^2);#Calculate Regression Sum of SquaresSSR <-sum((linear_reg_model$fitted.values -mean(train$HousePrice))^2);#Calculate residual(Error) Sum of SquaresSSE <-sum((train$HousePrice -linear_reg_model$fitted.values)^2);
One of the important relationships that these three sum of squares share is
SST = SSR + SSEYou can test that on your own. Now we will use these values and get the R-square for our model:
#calculate R-squaredR_Sqr <-1-(SSE/SST)#Display the calculated R-Sqrcat("The calculated R Square is ", R_Sqr)The calculated R Square is 0.7155461
You can see the calculated R-square is same as the lm() function output. You can now see the calculations behind R-square.
In this section, you saw some of the basic metrics that we can create around the errors (residuals) and interpreted them as a measure of how well our model will do on the actual data. In the next section, we will introduce techniques for discrete cases.
7.6 Model Evaluation for Discrete Output
In previous section, we introduced metrics for models where the dependent variable and predicted values were of continuous types. In this section, we will introduce some metrics for cases where the distribution is discrete.
For this section, we will go back to our purchase prediction data and generate the metrics and discuss their interpretation. We will leverage the setup we created for population stability.
7.6.1 Classification Matrix
A classification matrix is the most intuitive ways of looking at the performance of a classifier. This is sometimes also called a confusion matrix. Visually, this is a two way matrix with one axis showing the distribution of the actual class and the another axis showing a predicted class (see Figure 7-7).

Figure 7-7. Two class classification matrix
The accuracy of the model is calculated by the diagonal elements of the classification matrix, as they represent the correct classification by the classifier, i.e., the actual and predicted values are the same.
Classification Rate = (True Positive + True Negative) / Total CasesNow we will show you the classification matrix and calculate the classification rate for our purchase prediction data. The method we will use for modeling probabilities is a multinomial logistic and the classifier will pick the highest probability.
Note
To avoid class imbalance problem, we will be using stratified sampling to create equal size classes for illustration of model performance concepts. A class imbalance problem causes the probabilities to bias toward the high frequency classes, and hence the classifier fails to allocate classes to low frequency classes.
#Remove the data having NA. NA is ignored in modeling algorithmsData_Purchase<-na.omit(Data_Purchase)#Sample equal sizes from Data_Purchase to reduce class imbalance issuelibrary(splitstackshape)Data_Purchase_Model<-stratified(Data_Purchase, group=c("ProductChoice"),size=10000,replace=FALSE)print("The Distribution of equal classes is as below")[1] "The Distribution of equal classes is as below"table(Data_Purchase_Model$ProductChoice)1 2 3 410000 10000 10000 10000Build the multinomial model on Train Data (Set_1) and then test data (Set_2) will be used for performance testingset.seed(917);train <-Data_Purchase_Model[sample(nrow(Data_Purchase_Model),size=nrow(Data_Purchase_Model)*(0.7), replace =TRUE, prob =NULL),]dim(train)[1] 28000 6test <-Data_Purchase_Model[!(Data_Purchase_Model$CUSTOMER_ID %in%train$CUSTOMER_ID),]dim(test)[1] 20002 6Fit a multinomial logistic modellibrary(nnet)mnl_model <-multinom (ProductChoice ∼MembershipPoints +IncomeClass +CustomerPropensity +LastPurchaseDuration, data = train)# weights: 68 (48 variable)initial value 38816.242111iter 10 value 37672.163254iter 20 value 37574.198380iter 30 value 37413.360061iter 40 value 37327.695046iter 50 value 37263.280870iter 60 value 37261.603993final value 37261.599306convergedDisplay the summary of model statisticsmnl_modelCall:multinom(formula = ProductChoice ∼ MembershipPoints + IncomeClass +CustomerPropensity + LastPurchaseDuration, data = train)Coefficients:(Intercept) MembershipPoints IncomeClass1 IncomeClass2 IncomeClass32 11.682714 -0.03332131 -11.4405637 -11.314417 -11.3076913 -1.967090 0.02730530 0.9855891 1.644233 2.2244304 -1.618001 -0.12008110 1.5710959 1.692566 2.062924IncomeClass4 IncomeClass5 IncomeClass6 IncomeClass7 IncomeClass82 -11.547647 -11.465621 -11.447368 -11.388917 -11.3679263 2.023594 2.119750 2.201136 2.169300 2.2413954 1.911509 2.062195 2.296741 2.249285 2.509872IncomeClass9 CustomerPropensityLow CustomerPropensityMedium2 -12.047828 -0.4106025 -0.25806523 1.997350 -0.8727976 -0.51845744 2.027252 -0.6549446 -0.5105506CustomerPropensityUnknown CustomerPropensityVeryHigh2 -0.5689626 0.17744203 -1.1769285 0.46463284 -1.1494067 0.5660523LastPurchaseDuration2 0.048092743 0.056249924 0.08436483Residual Deviance: 74523.2AIC: 74619.2Predict the probabilitiespredicted_test <-as.data.frame(predict(mnl_model, newdata = test, type="probs"))Display the predicted probabilitieshead(predicted_test)1 2 3 41 0.3423453 0.2468372 0.2252361 0.185581322 0.2599605 0.2755778 0.2546863 0.209775423 0.4096704 0.2429370 0.2482094 0.099183264 0.2220821 0.2485851 0.3188838 0.210448945 0.4163053 0.2689046 0.1763766 0.138413556 0.4284514 0.2626000 0.1948703 0.11407836Do the prediction based in highest probabilitytest_result <-apply(predicted_test,1,which.max)table(test_result)test_result1 2 3 48928 1265 3879 5930Combine to get predicted and actuals at one placeresult <-as.data.frame(cbind(test$ProductChoice,test_result))colnames(result) <-c("Actual Class", "Predicted Class")head(result)Actual Class Predicted Class1 1 12 1 23 1 14 1 35 1 16 1 1
Now when we have the matrix of actual versus predicted, we will create the classification matrix. Now we will calculate some key features of the classification matrix :
Number of cases: Total number of cases or number of rows in test (n)
Number of classes: Total number of classes for which prediction is done (nc)
Number of correct classification: This is the sum over the diagonal of classification matrix (diag)
Number of instances per class: This is the sum of all the cases in actual (rowsums)
Number of instances per predicted class: This is the sum of all the cases in predicted (colsum)
Distribution of actuals: The total of rowsums divided by the total
Distribution of predicted: Total of colsums divided by the total
Create the classification matrixcmat <-as.matrix(table(Actual = result$`Actual Class`, Predicted = result$`Predicted Class`))Calculated above mentioned measures in ordern <-sum(cmat) ;cat("Number of Cases ", n);Number of Cases 20002nclass <-nrow(cmat);cat("Number of classes ", nclass);Number of classes 4correct_class <-diag(cmat);cat("Number of Correct Classification ", correct_class);Number of Correct Classification 3175 395 1320 2020rowsums <-apply(cmat, 1, sum);cat("Number of Instances per class ", rowsums);Number of Instances per class 4998 4995 5035 4974colsums <-apply(cmat, 2, sum);cat("Number of Instances per predicted class ", colsums);Number of Instances per predicted class 8928 1265 3879 5930actual_dist <-rowsums /n;cat("Distribution of actuals ", actual_dist);Distribution of actuals 0.249875 0.249725 0.2517248 0.2486751predict_dist <-colsums /n;cat("Distribution of predicted ", predict_dist);Distribution of predicted 0.4463554 0.06324368 0.1939306 0.2964704
These quantities are calculated from the classification matrix. You are encouraged to verify these numbers and get good understanding of these quantities. Here is the classification matrix and classification rate for our classifier:
Print the classification matrix - on test dataprint(cmat)PredictedActual 1 2 3 41 3175 312 609 9022 2407 395 825 13683 1791 284 1320 16404 1555 274 1125 2020Print Classification Rateclassification_rate <-sum(correct_class)/n;print(classification_rate)[1] 0.3454655
The classification rate is low for this classifier. A classification rate of 35% means that the model is classifying the cases incorrectly more than 50% of the time. The modeler has to dig into the reasons for the low performance of the classifier. The reasons can be the predicted probabilities, underlying variables explanatory power, a sampling of imbalanced classes, or may be method of picking the highest probability itself.
The model performance here is helping us find out if the model is actually performing up to our standards? Can we really use this in an actual environment? What might be causing the low performance? This step becomes important for any machine learning exercise.
7.6.2 Sensitivity and Specificity
Sensitivity and specificity are used to measure the model performance on positive and negative classes separately. These measures allow you to determine how the model is performing on the positive and negative populations separately. The mathematical notation helps clarify these measures in conjunction with the classification matrix:
Sensitivity: The probability that the test will indicate the True class as True among actual true. Also called True Positive Rate (TPR) and in pattern recognition called the precision. Sensitivity can be calculated from classification matrix (see Figure 7-7).
Sensitivity, True Positive Rate = Correctly Identified Positive/Total Positives = TP/(TP+FN)
Specificity: Probability that the test will indicate that the False class and False are among an actual False. Also called the True Negative Rate (TNR) and in pattern recognition, called recall. Specificity can be calculated from classification matrix (see Figure 7-7).
Specificity, True Positive Rate = Correctly Rejected/Total Negatives = TN/(TN+FP)
Sensitivity and specificity are characteristics of the test. The underlying population does not affect the results. For a good model, we try to maximize both TPR and TNR, and the Receiver Operating Characteristic (ROC) helps in this process. Receiver Operating Curve is a plot between sensitivity and (1- specificity), and the highest point on this curve provide the cutoff which maximizes our classification rate. We will discuss the ROC curve in the next section and connect it back to optimizing sensitivity and specificity.
Note
Sensitivity and specificity are calculated per class. For a multinimial class, we tend to average out the quantity over the classes to get a single number for the whole model. For illustration purposes, we will show the analysis by combining the classes into a two-class problem. You are encouraged to extend the concept to a full model.
The analysis is shown for ProductChoice == 1Actual_Class <-ifelse(result$`Actual Class` ==1,"One","Rest");Predicted_Class <-ifelse(result$`Predicted Class` ==1, "One", "Rest");ss_analysis <-as.data.frame(cbind(Actual_Class,Predicted_Class));Create classification matrix for ProductChoice == 1cmat_ProductChoice1 <-as.matrix(table(Actual = ss_analysis$Actual_Class, Predicted = ss_analysis$Predicted_Class));print(cmat_ProductChoice1)PredictedActual One RestOne 3175 1823Rest 5753 9251classification_rate_ProductChoice1 <-sum(diag(cmat_ProductChoice1))/n;cat("Classification rate for ProductChoice 1 is ", classification_rate_ProductChoice1)Classification rate for ProductChoice 1 is 0.6212379Calculate TPR and TNRTPR <-cmat_ProductChoice1[1,1]/(cmat_ProductChoice1[1,1] +cmat_ProductChoice1[1,2]);cat(" Sensitivity or True Positive Rate is ", TPR);Sensitivity or True Positive Rate is 0.6352541TNR <-cmat_ProductChoice1[2,2]/(cmat_ProductChoice1[2,1] +cmat_ProductChoice1[2,2])cat(" Specificity or True Negative Rate is ", TNR);Specificity or True Negative Rate is 0.6165689
The result shows that for ProductChoice == 1 our model is able to correctly classify in total 63% of cases, among which it is able to identify 61% as “one” from a population of “one” and 62% as “rest” from a population of “rest”. The model performance is better in predicting “rest” from the population.
7.6.3 Area Under ROC Curve
A receiver operating characteristic (ROC) , or ROC curve , is graphical representation of the performance of a binary classifier as the threshold or cutoff to classify changes. As you saw in the previous section that for a good model we want to maximize two interdependent measures TPR and TNR, the ROC curve will show that relationship. The curve is created by plotting the true positive rate (TPR) against the false positive rate (FPR) at various cutoffs or threshold settings.
However, as we are using a multiclass classifier, we are not using a cutoff to classify. You are encouraged to rebuild the multi-class model as a binary model (one and rest) for other ProductChoices/classes, and then use the built-in functions of the ROCR package.
Here we show ROC curve and Area Under the Curve (AUC) value, assuming the model only had two classes: ProductChoice “One” and “Rest”. This will give us a scale of cutoffs if we were to use only probability for class “One”/1. Observe in the following code we are recreating the model to change the multi-class problem into a binary classification problem. Essentially, the probability scale multinomial distributes the probabilities among classes in such a way that the sum is 1, while for ROC we need full range of probabilities for a class to play with the threshold/cutoff values of classification.
For illustration purposes, we will use our purchase prediction data with only two classes of choices—0 or 1—defined here:
1 if the customer chooses product 1 from a catalog of four products; this forms our positives
0 if the customer chooses any other product than 1; this forms our negatives
Here we create binary logistic model with this definition.
# create a the variable Choice_binom as above definitiontrain$ProductChoice_binom <-ifelse(train$ProductChoice ==1,1,0);test$ProductChoice_binom <-ifelse(test$ProductChoice ==1,1,0);Fit a binary logistic model on the modified dependent variable, ProductChoice_binom.glm_ProductChoice_binom <-glm( ProductChoice_binom ∼MembershipPoints +IncomeClass +CustomerPropensity +LastPurchaseDuration, data=train, family =binomial(link="logit"))Print the summary of binomial logistic modelsummary(glm_ProductChoice_binom)Call:glm(formula = ProductChoice_binom ∼ MembershipPoints + IncomeClass +CustomerPropensity + LastPurchaseDuration, family = binomial(link = "logit"),data = train)Deviance Residuals:Min 1Q Median 3Q Max-1.2213 -0.8317 -0.6088 1.2159 2.3976Coefficients:Estimate Std. Error z value Pr(>|z|)(Intercept) -13.360676 71.621773 -0.187 0.852MembershipPoints 0.038574 0.005830 6.616 3.68e-11 ***IncomeClass1 12.379912 71.622606 0.173 0.863IncomeClass2 12.142239 71.622424 0.170 0.865IncomeClass3 11.881615 71.621801 0.166 0.868IncomeClass4 12.086976 71.621763 0.169 0.866IncomeClass5 11.981304 71.621759 0.167 0.867IncomeClass6 11.874714 71.621761 0.166 0.868IncomeClass7 11.879708 71.621765 0.166 0.868IncomeClass8 11.759389 71.621792 0.164 0.870IncomeClass9 12.214044 71.622000 0.171 0.865CustomerPropensityLow 0.650186 0.054060 12.027 < 2e-16 ***CustomerPropensityMedium 0.435307 0.054828 7.939 2.03e-15 ***CustomerPropensityUnknown 0.952099 0.048078 19.803 < 2e-16 ***CustomerPropensityVeryHigh -0.430576 0.065156 -6.608 3.89e-11 ***LastPurchaseDuration -0.062538 0.003409 -18.347 < 2e-16 ***---Signif. codes: 0 '***' 0.001 '**' 0.01 '*' 0.05 '.' 0.1 ' ' 1(Dispersion parameter for binomial family taken to be 1)Null deviance: 31611 on 27999 degrees of freedomResidual deviance: 29759 on 27984 degrees of freedomAIC: 29791Number of Fisher Scoring iterations: 11
We will be using RORC library in R to calculate the Area Under the Curve (AUC) and to create the Receiver Operating Curve (ROC). The ROCR package helps to visualize the performance of scoring classifiers.
Now create the performance dataset to create AUC curvelibrary(ROCR)test_binom <-predict(glm_ProductChoice_binom,newdata=test, type ="response")pred <-prediction(test_binom, test$ProductChoice_binom)perf <-performance(pred,"tpr","fpr")Calculating AUCauc <-unlist(slot(performance(pred,"auc"),"y.values"));cat("The Area Under ROC curve for this model is ",auc);The Area Under ROC curve for this model is 0.6699122Plotting the ROCcurvelibrary(ggplot2)library(plotROC)debug <-as.data.frame(cbind(test_binom,test$ProductChoice_binom))ggplot(debug, aes(d = V2, m = test_binom)) +geom_roc()
We used a ggplot() object and plotROC library to plot the ROC curve with cutoff values highlighted in the plot for easy reading (see Figure 7-8).

Figure 7-8. ROC curve
In the plot, we want to balance between true positive and false positive, and maximize the true positive while minimizing the false positive. This point will be the best cutoff/threshold value that you should use to create the classifier. Here, you can see that the value is close to 0.2—true positive is ∼74% while false positive is ∼48%.
Chapter 6 discussed the use of this optimal value, i.e., 0.2 to use as a cutoff for a binary classifier. Refer to that chapter’s logistics regression discussion. The ROCR R package details are available at https://cran.r-project.org/web/packages/ROCR/ROCR.pdf .
7.7 Probabilistic Techniques
Generally, there is no such specific classification of model performance techniques into probabilistic and otherwise. However, it is helpful for you to understand how more complicated methods are emerging for model performance testing. Probabilistic techniques are those which are based on sampling and simulations. These techniques differ from what we discussed in previous sections; in previous sections we had residuals with us to create metrics. In probabilistic techniques, we will be simulating and sampling subsets to get a robust and stable model.
In this section, we will touch at a very high level the two techniques corresponding to two major buckets of probabilistic tools that data scientists have at their disposal, although both are resampling based techniques:
Simulation based: K-fold cross validation
Sampling based: Bootstrap sampling
A very good understanding of these concepts is provided by Ron Kohavi, Stanford in a much celebrated paper “A Study of Cross-Validation and Bootstrap for Accuracy Estimation and Model Selection,” International Joint Conference on Artificial Intelligence (IJCAI), 1995. The readers interested in this topic should read this paper. In this section, we will touch on these ideas from the perspective of using them in R.
7.7.1 K-Fold Cross Validation
Cross validation is one of the most used techniques for model evaluation and lately has been accepted as a better technique than residual-based metrics. The issue with residual-based methods is that you need to keep a test set, and just with one test set they don’t exactly tell you how the model will behave on unseen data. So while train, test, and validate methods are good, probabilistic simulation and sampling provide us more ways to test that.
K-fold cross validation is very popular in the machine learning community. The greater the number of folds, the better the interpretation (recall the Law of Large Numbers). Steps to execute k-fold cross validation include:
Step 1: Divide the dataset into k subsets.
Step 2: Train a model on k-1 subsets.
Step 3: Test the model on remaining one subset and calculate the error.
Step 4: Repeat Steps 1-3 until all subsets are used exactly once for testing.
Step 5: Average out the errors by this scenario simulation exercise to get the cross-validation error.
The advantage of this method is that the method by which you create the k-subsets is not that important compared to same situation in the train/test (or holdout cross validation) method. Also, this method ensures that every data point gets to be in a test set exactly once, and gets to be in a training set k-1 times. The variance of the resulting estimate is reduced as k is increased.
The disadvantage of this method is that the model has be to estimated k-times and then testing done for k-times, which means a higher computation cost (computation cost is proportional to number of folds). A variant randomly splits the data and controls each fold size. The advantage of doing this is that you can independently choose how large each test set is and how many trials you average over.
Note
In cross-validation techniques we don't keep train and test subsets. Usually, data scientists keep a validation set outside the cross-validation to test the model final model fit. In our example, we will treat our train as train set and test as validation dataset.
Let’s show an example with our house sales price problem. You are encouraged to apply the same techniques on the classification problems as well.
library(caret)library(randomForest)set.seed(917);Model training data (we will show our analysis on this dataset)train <-Data_House_Price[1:floor(nrow(Data_House_Price)*(2/3)),.(HousePrice,StoreArea,StreetHouseFront,BasementArea,LawnArea,StreetHouseFront,LawnArea,Rating,SaleType)];Create the test data which is set 2test <-Data_House_Price[floor(nrow(Data_House_Price)*(2/3) +1):nrow(Data_House_Price),.(HousePrice,StoreArea,StreetHouseFront,BasementArea,LawnArea,StreetHouseFront,LawnArea,Rating,SaleType)]Omitting the NA from datasettrain <-na.omit(train)test <-na.omit(test)Create the k subsets, let's take k as 10 (i.e., 10-fold cross validation)k_10_fold <-trainControl(method ="repeatedcv", number =10, savePredictions =TRUE)Fit the model on folds and use rmse as metric to fit the modelmodel_fitted <-train(HousePrice ∼StoreArea +StreetHouseFront +BasementArea +LawnArea +StreetHouseFront +LawnArea +Rating +SaleType, data=train, family = identity,trControl = k_10_fold, tuneLength =5)Display the summary of the cross validationmodel_fittedRandom Forest712 samples6 predictorNo pre-processingResampling: Cross-Validated (10 fold, repeated 1 times)Summary of sample sizes: 642, 640, 640, 641, 640, 641, ...Resampling results across tuning parameters:mtry RMSE Rsquared2 40235.04 0.78910034 37938.62 0.79611536 38049.31 0.79274418 38132.67 0.791436010 38697.45 0.7858166RMSE was used to select the optimal model using the smallest value.The final value used for the model was mtry = 4.
You can see from the summary that the model selected by cross-validation has a higher R 2 than the one we created previously. The new R-square is 80% and the old was 72%. Also, notice that the default metric to choose the best model is RMSE. You can change the metric and function type based on the need and the optimization function.
7.7.2 Bootstrap Sampling
We have already discussed the bootstrap sampling concepts in Chapter 3. We are just extending the idea to our problem here. Based on random samples from our data we will try to estimate the model and see if we can reduce the error and get the high-performance model. When we use these techniques as a performance evaluation technique, you can see we already have fixed the model, i.e., the predictors, and trying to see probabilistically what gives the best performance and how much.
For showing the bootstrap example we will extend what we showed for cross validation.
Create the the boot experiment, let's take samples as as 10 (i.e., 10-sample bootstrapped)boot_10s <-trainControl(method ="boot", number =10, savePredictions =TRUE)Fit the model on bootstraps and use rmse as metric to fit the modelmodel_fitted <-train(HousePrice ∼StoreArea +StreetHouseFront +BasementArea +LawnArea +StreetHouseFront +LawnArea +Rating +SaleType, data=train, family = identity,trControl = boot_10s, tuneLength =5)Display the summary of the boost raped modelmodel_fittedRandom Forest712 samples6 predictorNo pre-processingResampling: Bootstrapped (10 reps)Summary of sample sizes: 712, 712, 712, 712, 712, 712, ...Resampling results across tuning parameters:mtry RMSE Rsquared2 40865.52 0.77787544 38474.68 0.78710196 38818.70 0.78196088 39540.90 0.774263310 40130.45 0.7681462RMSE was used to select the optimal model using the smallest value.The final value used for the model was mtry = 4.
In the bootstrapped case, you can see that the best model is having a R 2 of 79%, which is still higher than the 72% in previous case but less than the 10-fold cross validation one. One important thing to note is that the bootstrap samples run again and again for model estimation, but cross validation main exclusivity of subsets in each run.
The probabilistic methods are complex and difficult to understand. It is recommended that only experienced data scientist use them, as an in-depth understanding on the machine learning algorithm is required to set these experiments and interpret them properly. The next chapter on parameter tuning is an extension of the probabilistic techniques that we discussed here.
7.8 The Kappa Error Metric
In recent days, machine learning practitioners are trying a lot of new and complicated error metrics for evaluation as well as model creation. These new error metrics are important, as they solve for some specific business problems/objectives. With high computing power, we can frame our own optimization function and apply the iterative algorithm with data.
Kappa or cohen’s kappa coefficient is a statistic that measures the relationship between observed accuracy and expected accuracy. Jacob Cohen introduced Kappa in a paper published in the Journal Educational and Psychological Measurement in 1960. A similar statistic, called Pi, was proposed by Scott (1955). Cohen’s Kappa and Scott’s Pi differ in terms of how the expected probability is calculated. This method found the first use case in inter-rater agreements, with different raters rating the same cases in different buckets.
In the machine learning world, the Kappa is adopted to compare a pure random chance with a model. This type of metric is very effective in cases of imbalanced classification. For example, suppose your training data has 80% “Yes” and 20% “No”. Without a model, you can still achieve up to 80% accuracy in classification (diagonal) if you simply assign everyone a “Yes”.
A more formal definition of Kappa is given here.
Cohen’s Kappa measures the agreement between random approach and modeled approach, where each classify N items into C mutually exclusive categories.
The equation for κ is:

where po is the relative observed agreement among two approaches, and pe is the hypothetical probability of a chance overlap, using the observed data to calculate the probabilities of each approach randomly selecting each category. If the approaches are in complete agreement then κ = 1. If there is no agreement among the approaches other than what would be expected by chance (as given by pe), κ.
For more detailed reading, refer to Fleiss, J. L. (1981) Statistical Methods for Rates and Proportions, 2nd ed. (New York: John Wiley) and Banerjee, M.; Capozzoli, Michelle; McSweeney, Laura; Sinha, Debajyoti (1999), “Beyond Kappa: A Review of Interrater Agreement Measures” from The Canadian Journal of Statistics.
We will use the purchase prediction data with a very simple model to illustrate the Kappa and accuracy measure. The caret() package is used to show this example. This package provides a unified way of training and evaluation of almost 270 different kinds of models. The details of this package are provided in Chapter 8.
library(caret)library(mlbench)Below we randomly sample 5000 cases to make the computation faster.set.seed(917);train_kappa <-Data_Purchase_Model[sample(nrow(Data_Purchase_Model),size=5000, replace =TRUE, prob =NULL),]train() function confuses between numeric levels, hence convert the dependent into text i.e., 1->A, 2->B, 3-> C and 4->Dtrain_kappa$ProductChoice_multi <-ifelse(train_kappa$ProductChoice ==1,"A",ifelse(train_kappa$ProductChoice ==2, "B",ifelse(train_kappa$ProductChoice ==3,"C","D")));train_kappa <-na.omit(train_kappa)Set the experimentcntrl <-trainControl(method="cv", number=5, classProbs =TRUE)Below the distribution shows that number of cases with each purchase historyDistribution of ProductChoicestable(train_kappa$ProductChoice_multi)A B C D1271 1244 1260 1225Making the column names as legitimate namescolnames(train_kappa) <-make.names(names(train_kappa), unique =TRUE, allow_ =TRUE)Convert all the factors into factors in Rtrain_kappa$ProductChoice_multi <-as.factor(train_kappa$ProductChoice_multi)train_kappa$CustomerPropensity <-as.factor(train_kappa$CustomerPropensity)train_kappa$LastPurchaseDuration <-as.factor(train_kappa$LastPurchaseDuration)
Now, the following code will create a random forest model for our sample data.
Fit the model with method as RandomForest.model_fitted <-train(ProductChoice_multi ∼CustomerPropensity +LastPurchaseDuration, data=train_kappa, method="rf", metric="Accuracy",trControl=cntrl)The result displayed the kappa metricsprint(model_fitted)Random Forest5000 samples2 predictor4 classes: 'A', 'B', 'C', 'D'No pre-processingResampling: Cross-Validated (5 fold)Summary of sample sizes: 4000, 3999, 4000, 4001, 4000Resampling results across tuning parameters:mtry Accuracy Kappa2 0.3288009 0.103658010 0.3274019 0.102499919 0.3268065 0.1017419Accuracy was used to select the optimal model using the largest value.The final value used for the model was mtry = 2.Create the predicted values and show that in classification matrixpred <-predict(model_fitted, newdata=train_kappa)confusionMatrix(data=pred, train_kappa$ProductChoice_multi)Confusion Matrix and StatisticsReferencePrediction A B C DA 830 653 475 427B 97 133 108 85C 134 179 304 210D 210 279 373 503Overall StatisticsAccuracy : 0.35495% CI : (0.3407, 0.3674)No Information Rate : 0.2542P-Value [Acc > NIR] : < 2.2e-16Kappa : 0.1377Mcnemar's Test P-Value : < 2.2e-16Statistics by Class:Class: A Class: B Class: C Class: DSensitivity 0.6530 0.1069 0.2413 0.4106Specificity 0.5830 0.9228 0.8602 0.7717Pos Pred Value 0.3480 0.3144 0.3676 0.3685Neg Pred Value 0.8314 0.7573 0.7709 0.8014Prevalence 0.2542 0.2488 0.2520 0.2450Detection Rate 0.1660 0.0266 0.0608 0.1006Detection Prevalence 0.4770 0.0846 0.1654 0.2730Balanced Accuracy 0.6180 0.5149 0.5507 0.5911
From an interpretation point of view, the following guidelines can be used:
Poor agreement when kappa is 0.20 or less
Fair agreement when kappa is 0.20 to 0.40
Moderate agreement when kappa is 0.40 to 0.60
Good agreement when kappa is 0.60 to 0.80
Very good agreement when kappa is 0.80 to 1.00
In this model output, the Kappa value is 0.1377, which implies that there is poor agreement between a random model and our model. Our model results differ from the random model. Now, there can be two possibilities, the our model performing worse than the random model or it performing exceptionally well. Looking at the accuracy measure, 35.4% looks like our model did not do a good job in classification. We need more data and features to get a good model.
7.9 Summary
Model evaluation is a very intricate subject. This chapter just scratched the surface to get the reader started on the idea of model evaluation. The model evaluation subject brings a lot of depth to the measures we use to evaluate the performance. In this ever-changing analytics landscape, business are using models for different purposes, sometimes in custom ways to model a problem to help make business decisions. This trend in industry has given rise to the competitive nature of evaluation measures.
To solve a business problem in a real setting, you have to optimize two different objective functions:
Statistical measure, the one we discussed in this chapter
Business constraints, a problem/business specific measures
Let’s try to understand these constraints on the model performance by a example. Suppose you have to build a model to classify customers into eight buckets. However, the cost of dealing with each bucket of customer is different. Serving a customer in bucket 8 is 10 times more costly than serving someone from bucket 1. Similar to this is the cost of each bucket varies with the bucket number and with some other factors.
Now if the business decides to use a model to classify the objects into these classes, how will you evaluate the performance of the mode? A pure statistical measure of performance might not fit the situations. How we can think about creating hybrid performance metrics, or a serial dependent matrix. The concept of evaluation is a very deep and fairly involved one. Data scientists have to come up with creative and statistically valid metrics to suit business problems.
This chapter introduced the concept of population stability index, which confirms if we can use use the model for prediction. Then we classified our evaluation metrics into continuous and discrete cases. The continuous metrics discussed were different functions of residuals, i.e., mean absolute error, root mean square error, and R-square. The discrete set of measures included classification rate, sensitivity and specificity, and area under the ROC curve. We used our house price data and purchase prediction data to show evaluation metrics examples.
These evaluation techniques are more suited to statistical learning models, the advanced machine learning models do not have any distribution constraints and cannot be evaluated and interpreted on conventional metrics. We introduced probability methods to evaluate machine learning models, i.e., cross validation and bootstrap sampling. These two methods form the backbone of machine learning model performance evaluation.
In the end we discussed an important metric for multi-class problems, the Kappa metric. This metric is gaining in popularity as, in classification problems, each misclassification has a different cost associated with it. Hence, we need to measure performance in a relative manner.
The model performance and evaluation techniques are evolving quickly. The performance metrics are becoming multigoal optimization problems and hence are also helping the algorithms adopt to new ways to fit data. We will continue with some more advanced topics in the next chapter, where we will introduce the difference between statistical learning and machine learning, including how this difference allow us to do more with the data and then how to go about improving the model performance using ensemble techniques. The next chapter introduces the tradeoff between bias and variance, to help us understand the limits of what can be achieved in performance with given constraints.
7.10 References
Jim Frost (2015-09-03). “The Danger of Overfitting Regression Models”.
The Applied Use of Population Stability Index (PSI) in SAS® Enterprise Miner™, Rex Pruitt, PREMIER Bankcard, LLC, Sioux Falls, SD.
Marsaglia G, Tsang WW, Wang J (2003). “Evaluating Kolmogorov’s Distribution”. Journal of Statistical Software.
Mason, Simon J.; Graham, Nicholas E. (2002). “Areas beneath the relative operating characteristics (ROC) and relative operating levels (ROL) curves: Statistical significance and interpretation” (PDF). Quarterly Journal of the Royal Meteorological Society.
Grossman,, Robert; Seni, Giovanni; Elder, John; Agarwal, Nitin; Liu, Huan (2010). Ensemble Methods in Data Mining: Improving Accuracy Through Combining Predictions. Morgan & Claypool.
Efron, B.; Tibshirani, R. (1993). An Introduction to the Bootstrap. Boca Raton, FL: Chapman & Hall/CRC.
Smeeton, N.C. (1985). “Early History of the Kappa Statistic”. Biometrics.