
The rule engine is one of the most powerful blocks of our IoT platform or any IoT platform in general. The fact that anything happening in the connected environment of an IoT platform can trigger something else to happen makes the rule engine a critical block.
Establish working logic for our rule engine
Build the relevant rule engine flow
Create APIs for rule management
Understand authentication logic and implement it
Start with the Rule Engine Logic
We can build a rule engine infrastructure in several ways. There is no right or wrong way per se. There is only smart and smarter or efficient or more efficient. At the same time, the value of a rule engine is directly proportional to the simplicity it can provide and the job it can do to achieve the result. If you must build too many things to achieve results, the value of that build starts to diminish.
Keeping this in mind, we can build our rule engine in two ways. We can leverage the Node-RED flow-based approach and simply add a message stream listener, which can then distribute messages to several other nodes based on certain preprogrammed criterion, and then take further actions. The keyword here is preprogrammed . Yes, that means that we always have to manually preprogram the rules before deploying them. This makes the approach somewhat rigid. What if we must add a new rule on the fly? Or activate or deactivate an existing rule based on another rule’s output? These scenarios lead us to another approach: query-based rules. And this is what we will build now.
Creating a Database

Rule engine data table schema
We are naming it the ruleEngine table . In this data table, we have a primary key and an autoincrementing value, id. This is required to refer to any rule going forward. ruleName is the readable name of the rule. The active column is binary in nature and defines whether the rule is active or not. There are two columns that define a rule’s logic: topicPattern and payloadPattern . These columns hold SQL-like patterns for rule qualifications; based on their qualifications, we can use the webHook value to call on using a defined method in the method column. By default, method is set to GET request.
There could be several possibilities in which we can use this structure or augment it. We can certainly add a few more columns that can hold various other actions to be executed, values to be changed, scripts to be executed, or other global variables to be affected. We can also do all that in another web service or script file located at the webHook URL. It is cleaner this way.

Typical rule entry in our ruleEngine table
Let’s look at what we have added to the table. At the outset, we are calling/naming this rule timestamp rule , and the same is appearing in the ruleName column. The next field, active, is set to 1, which means the rule is active. If we want to disable this rule, we simply set active to 0. The topicPattern field has a value of timestamp%. The payloadPattern field is %, which is a pattern similar to what you would use for SQL queries. From the rules’ perspective, this means that the rule should execute if the received topic matches this pattern (timestamp%) (i.e., the topic starts with the word timestamp) and can have anything after that. For the payload, the pattern is set to % (i.e., anything is acceptable in the payload). The last two fields define the webHook information : the method field defines the type of call, and the webHook field has an actual URL to be invoked.
Building the Flow Sequence

Rule engine flow sequence in combination with database listener
Note
While we already had a database listener, we have tied our rule sequence to the same listener. This will enable us to execute rules faster and closer to the time of message reception in the message stream.
The preceding snippet seems slightly unusual because it does not have return msg; code in it. The node first checks the length of the payload and executes a piece of code only if that length is non-zero. If there is no rule matching to the criterion, then the payload is empty, and thus we avoid going further (because there is no return statement after the if clause). However, if there is some payload, it has an array of rule objects. If there are multiple rules matching the rule condition, then there is more than one.
With the for loop, we ensure that all the rules are executed in sequence (i.e., the rule that was first created is executed first). By default, SQL results are in ascending order, which ensures that our rules are executed in the order of creation—the lowest ID executes first.
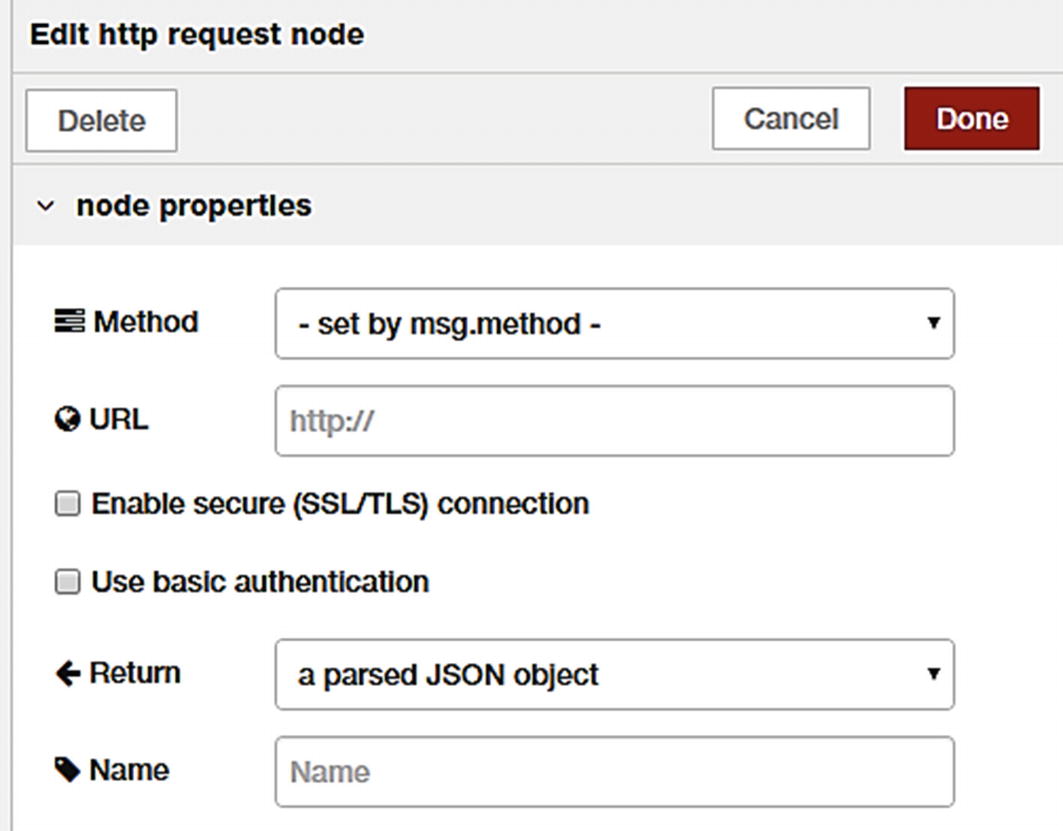
HTTP request node configuration
This means that the HTTP request node will execute an HTTP call and return the output as a parsed JSON object, which we are simply sending to the debug output.

Two rules matching same criterion and one matching subsequent criterion
Testing the Rule Engine
We can test this in several ways, but the best way is to check it with the Paho MQTT utility because you are able to see the action live (i.e., when you publish a timestamp message, it is picked up and the rule engine searches for a rule). Since we already have a matching rule available, it will be executed and another message will be published. While you are on the Paho page, you see this second message coming in live, in almost no time.
To see how powerful our rule engine is, update the ruleEngine table with additional rules, as shown in Figure 10-5.
Here we have two rules matching the criterion (i.e., rule id 1 and id 2), whereas when we execute rule 2, it publishes a message, rule-engine-working-again . We have configured the third rule not to check topicPattern but payloadPattern for messages that end with the word again. This means that our second rule triggers the third rule.
Check this again in the Paho utility. You should see upon publishing something on the timestamp topic; there should be three additional messages following that.
Note
Remember to carefully craft your rules and check for circular references. If not handled carefully, these could result in a loop, which can lock access in no time.
Rule Management APIs
Enable or disable a specified rule by ID
Enable or disable all the rules at once (handy when you want to stop all rules)
Create a new rule with the callback (fulfills the M7 requirement of our wish list)
Enable and Disable a Specific Rule

Activate or deactivate rule flow sequence
Now if you check the database, the rule has an active=0 value.
Enable and Disable All Rules

Activate or deactivate all rules
The preceding code snippet that enables all API query code is self-explanatory. The code written for prepare response is the same as the earlier API’s.
Create a New Rule

Register a call back (add new rule) flow sequence
First, we are creating a new rule called testRule , which is triggered if the topic is like %stamp (which could be timestamp or anything else) and the payload has four numbers in sequence (e.g., %1234%). When this condition is met, we are setting it to send us an SMS using our SMS API. Before you add this rule, make sure that you have inserted a valid mobile number in place of the dummy one.
Upon successful creation, we get the output and its ID (which is 4 in this case.) Remember that this rule is still inactive, so we use our enable API and enable it. Once our rule is active, head over to the Paho MQTT utility and publish something on the timestamp topic. Make sure that the payload has the number sequence 1234 in it (e.g., payload = 1544312340320). If everything is set up correctly thus far, the specified mobile number will receive an SMS that says, “Pattern detected.”
We can also create an additional API to delete the rule from ruleEngine. It is not explained or demonstrated here; however, you can follow the same logic as in the /purge API, and create it yourself.
Building Another Rule Engine with Node-RED
While the rule engine that we are building is using the time-storage database for functioning, we can also build a rule engine with the Node-RED interface. However, as I mentioned earlier, it will not be dynamic in nature and would need to be manually modified every time you want to change rules; at least to a larger extent. Moreover, this method does not check for multiple input parameters (i.e., it can check for topic content or payload content but not both at once). It is the biggest advantage of our core rule engine, which utilizes time-series data storage. For known and fixed rules, however, this serves as an effective and efficient alternative. Let’s see how it can be utilized.

Node-RED-based rule engine
This construct continuously listens to the message stream and uses a switch node from Node-RED for matching every message with predefined conditions. These conditions could be as simplistic as if message-payload = something, to anything complex with regular expressions (a.k.a. RegEx).
I have created two rules to demonstrate how this type of rule engine can work (see Figure 10-5). This method, however, will not allow us to modify these rules programmatically. If this is okay with your type of application or domain, you should use this method because it offers a higher level of ease.

Rules with Node-RED
You can test this rule engine in the same manner as the earlier one. The debug sidebar in Figure 10-10 shows sample test results.
Adding Authentication to the Data API
In simple terms, authentication means confirming your own identity, while authorization means granting access to the system. Simply put, with authentication, the system verifies the user, accessing system, or application. With authorization, the system verifies if the requester has access to the requested resource(s).
Since our focus has been on the core of the platform all the while, it would make sense to have some level of built-in authentication abilities. It would be ideally handled by an upstream application. It would make sense to add topic-based access control to the data access API. We will follow the same logic that we used while adding access controls to the MQTT broker configuration.
What Are Our Options?
Basic. With HTTP basic authentication , the user agent provides a username and password to prove their authenticity. This approach does not require cookies, sessions, or logins, and so forth. Information is provided in the HTTP header. As many experts would suggest, the biggest issue with basic authentication is that unless the SSL is fully enforced for security, the authentication is transmitted in open and insecure channels, and thus is rendered useless. The username and password combination are encoded in the base64 format before adding to the header. In general, this option is good at balancing system costs and performance.
API key. This was created as somewhat of a fix to basic authentication and is a relatively faster approach. A uniquely generated random value or code is assigned to each user for authentication, and usually, such a string is long enough to be guessed easily. Additionally, setting up this type of system is relatively easy, and controlling these keys, once generated, is even easier since they can be managed fully from the server side. While this method is better than a basic authentication method, it is not the best.
OAuth. OAuth combines authentication and authorization to allow more sophisticated scope and validity control. However, it involves an authentication server, a user, and the system to do the handshake, and thereby perform authentication, which leads to authorization. This is supposedly a stronger implementation from a security perspective; however, it is also a time-consuming and costly proposition. Does this fit your purpose? It depends upon what do you plan to do!
Note
In general, the use of the API key method provides the best compromise between implementation costs, ease of usage, and performance overhead. We will use the API key method for authentication. I prefer to keep things as simple as possible, because every time you make the solution unnecessarily complex, you are also likely to leave a hole in it.
In our implementation, we are using authentication only for data access APIs because that is the critical piece of currency our platform may hold. When you implement your own platform, you can take the lead from this implementation and extend it to all other APIs as you see fit.
What Is the Plan?

Authentication table data schema
user. Test user 1. This can be any alphanumeric username because it is the only placeholder for our purpose.
token. A 64-byte random string generated from our own API, /randomcode/64. Instead of random code, we could also use the /uuid API; or it can be either of these, depending on the requirements. This can be used as a bearer token in an HTTP header while making any API requests.
access. Here we are adding an actual query clause (so be careful what goes here) as topic LIKE 'timestamp%. This query clause ensures that when an authFilter is applied, the query is applicable only to topics that start with the word timestamp. This is how we control access to test-user-1 to only limited topics. The default value for this field is set to 0, which will return false if included in the SQL query, and thus result in no records at the output.
details . This is test user 1, who has access to only timestamp topic data and any subtopics under that.
This is a somewhat unconventional way to use the API key, but it is perfectly legal from a programming and coding perspective.
Adding Authentication Middleware
Now open the settings.js file and search for the httpNodeMiddleware section. As the comments for this section state, this property can be used to add a custom middleware function in front of all HTTP in nodes. This allows custom authentication to be applied to all HTTP in nodes, or any other sort of common request processing.
In the preceding code snippet, the middleware function does three main tasks.
First, it defines a user-defined function, which uses the MySQL library to connect with our time-series database and execute the supplied query. When query output is available or failed, the callback function is called with data and the status is passed to that function.
Second, middleware checks for an authorization header in every HTTP API request. If the access token is available, then it is captured in another variable and availability is set to true or false.
Once the token is captured, middleware checks for an access string in authTable , which is defined for the given token. This token, if available, is assigned to the authFilter variable, which we are using later for SQL query building. If no token was supplied, the filter will be set to '0', which will yield zero records upon query.
Enable and Test Authentication
Update settings.js appropriately, save it, and then restart Node-RED. Since Node-RED might have been already running with the forever utility, it is easy to restart it. Simply check for the PID of this process with the forever list command, and then send another command: forever restart <PID>. This restarts your Node-RED instance, and it reloads the updated settings.js file with authentication middleware code.
It is functioning as expected, and we are getting data only when we send the Bearer token . Now try adding a few more users with different tokens and change their topic access with simple SQL syntax. If you wish to provide access to multiple topics, use the OR operator to build the authFilter condition.
Our Core Platform Is Ready Now
While the message router has been represented as a separate block from a logical perspective, it is indeed an integrated functionality. And, we have done it in multiple passes throughout the last few chapters. The MQTT message broker, database listener, rule engine, and REST API all cater to form a functional message router.

Our own IoT platform core is now fully ready and functional
The device manager and application/user management are essentially applications that can use our existing APIs for functioning. These applications can be developed and presented with a nice user interface for regular usage and device configurations to be attached to our IoT platform.
Summary
In this chapter, we created one of the critical blocks of our IoT platform. We also implemented authentication to our REST APIs, and thus secured them. Essentially, our core IoT platform is now ready.
In the next chapter, we see how to document our platform API and make it test-ready for developers. Going forward, this will also help you with regular testing of incremental changes in the platform, so that whenever you make a change to the API or message broker, or if you add a new API, testing can be done almost immediately in a convenient manner.