Now that you have seen how Smart Contract works and how to interact with them through the use of the web3.js APIs, it is now a good time to explore an application from end to end – from the Smart Contract to the front end, and perhaps give you some ideas for building your own decentralized applications.
How the Lottery Game Works
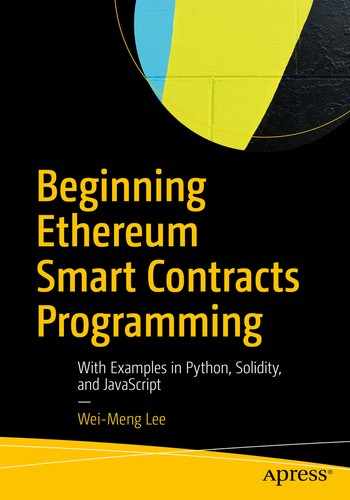
How the online lottery game works
In the figure, there are a total of five players. Each player will place a bet on a number. For example, player 1 bets on the number 1 using 2 Ethers, and player 2 bets on the number 2 with 4 Ethers, and so on. The contract will randomly draw a number when the maximum number of players is reached. In this example, the contract will draw the winning number after the fifth players have betted.
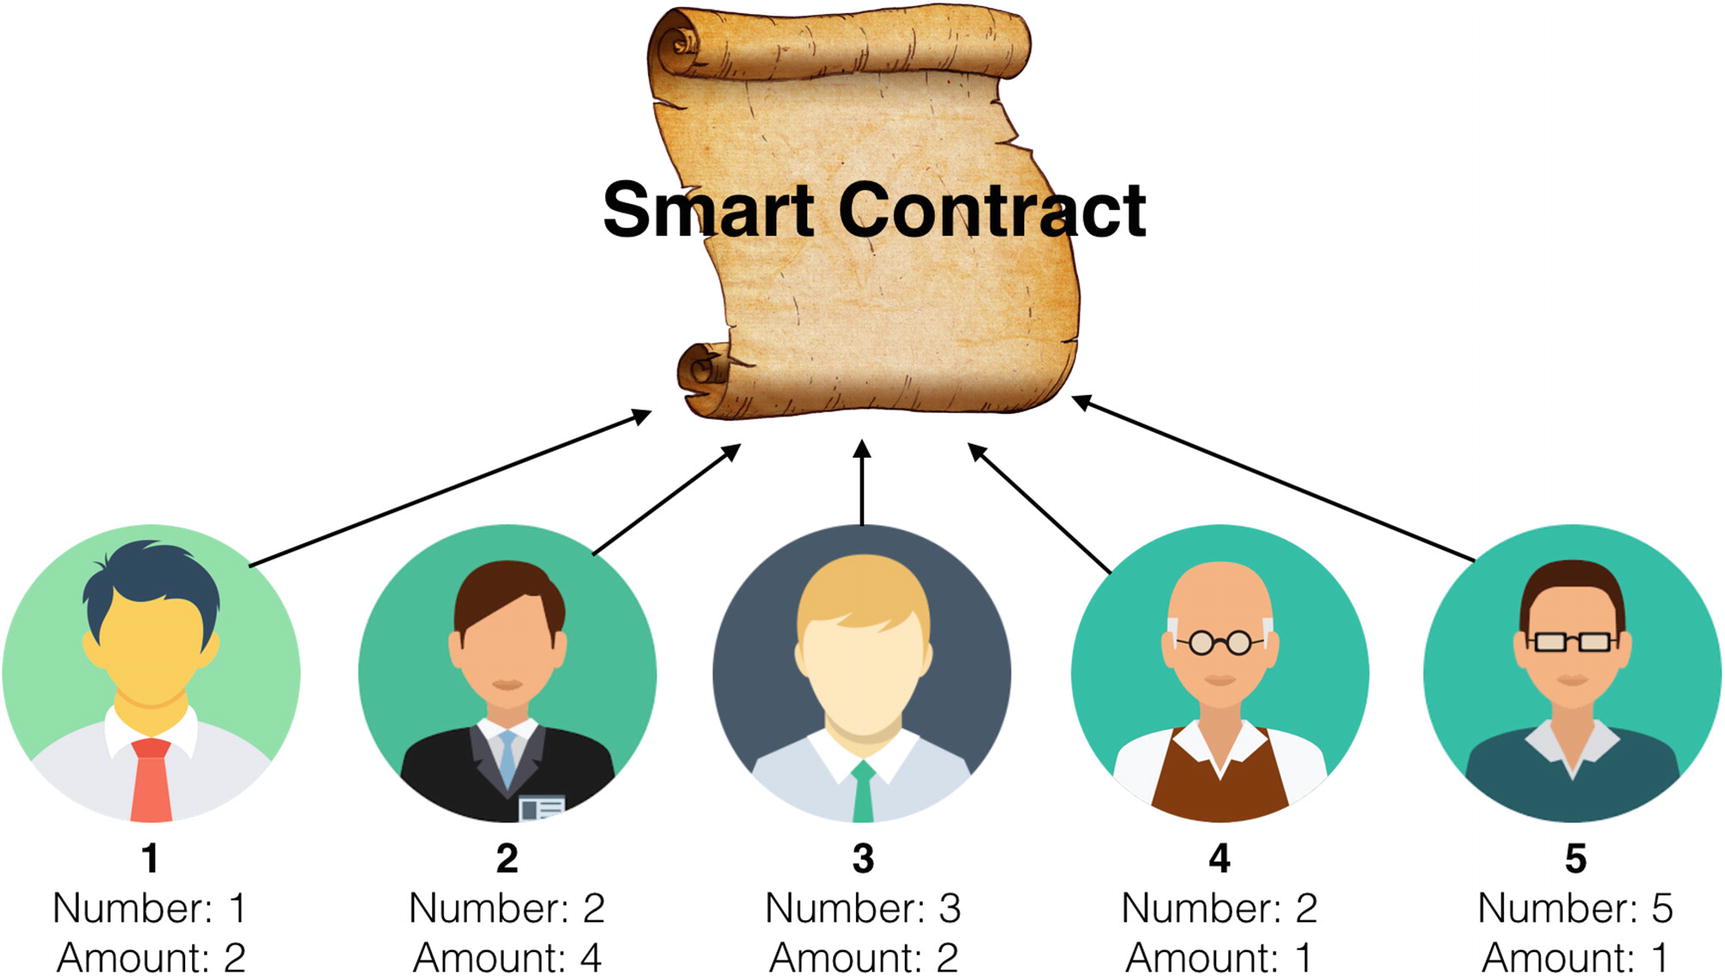
Calculating the winnings of each player
Our contract will automatically transfer the payout to the winners. If there is no winner for the game, all the Ethers will be transferred to the owner of the contract.
Defining the Smart Contract
For the next few sections, we shall walk through the creation of the contract so that you can see how it is built. For building this contract, we shall use the Remix IDE.
owner is used to store the address of the account that deployed the contract.
minWager stores the minimum amount of Ether that a player needs to wager.
totalWager stores the total amount of Ethers all the players have wagered so far in a game.
totalNumberOfWagers stores the total number of players who have played in the game so far.
MAX_NUMBER_OF_WAGERS lets you define the maximum number of players allowed in a game before the winning number is drawn. For ease of testing, we have set it to 2. In real life, this could be set to a much larger number.
winningNumber stores the winning number for the lottery. When it is set to 999, it indicates that the winning number has not been drawn yet.
MAX_WINNING_NUMBER defines the maximum winning number for the lottery game . The winning number is from 1 to MAX_WINNING_NUMBER.
playerAddresses is an array storing the account address of each player. You prefix the declaration with the payable keyword to indicate that each player is able to send/receive Ether.
Besides storing the player account address in the array, you also store them in a mapping object – playerAddressesMapping. This is mainly for performance reason. When you need to search for a particular player address, it is much more efficient to search through a mapping object rather than iterate through all the elements in an array. This is especially true if you have a large number of players in a game.
Player is a structure that contains two members – amountWagered and numberWagered
playerDetails is another mapping object that stores the details of each player’s waging details .
Constructor
For the lottery game , you need to set the minimum amount needed for each bet. To make the contract versatile, you can allow this value to be set when the contract is deployed. To do so, you can pass in the value through the contract’s constructor.
In the constructor, we also saved the address of the account that deployed the account .
Note
For simplicity, we are specifying the minimum wager amount to be in Ether.
Betting a Number
Note
Observe that the bet() function has the payable keyword. This means that when a player bets on a number, he must also send in Ethers.
Drawing the Winning Number and Announcing the Winners
The preceding statement will generate a random number between 1 and MAX_WINNING_NUMBER. Once it is generated and assigned to winningNumber, it will be the same for all other nodes which run the same contract.
Tip
An alternative to determining the winning number using block number is to access an external web service. In real life, you may want to connect to a real lottery feed.
Getting the Winning Number
Killing the Contract
Obviously, you need to ensure that only the owner (the one that deploys the contract) of the contract can kill it. When the contract is killed, all Ethers can automatically be transferred back to the owner.
Testing the Contract
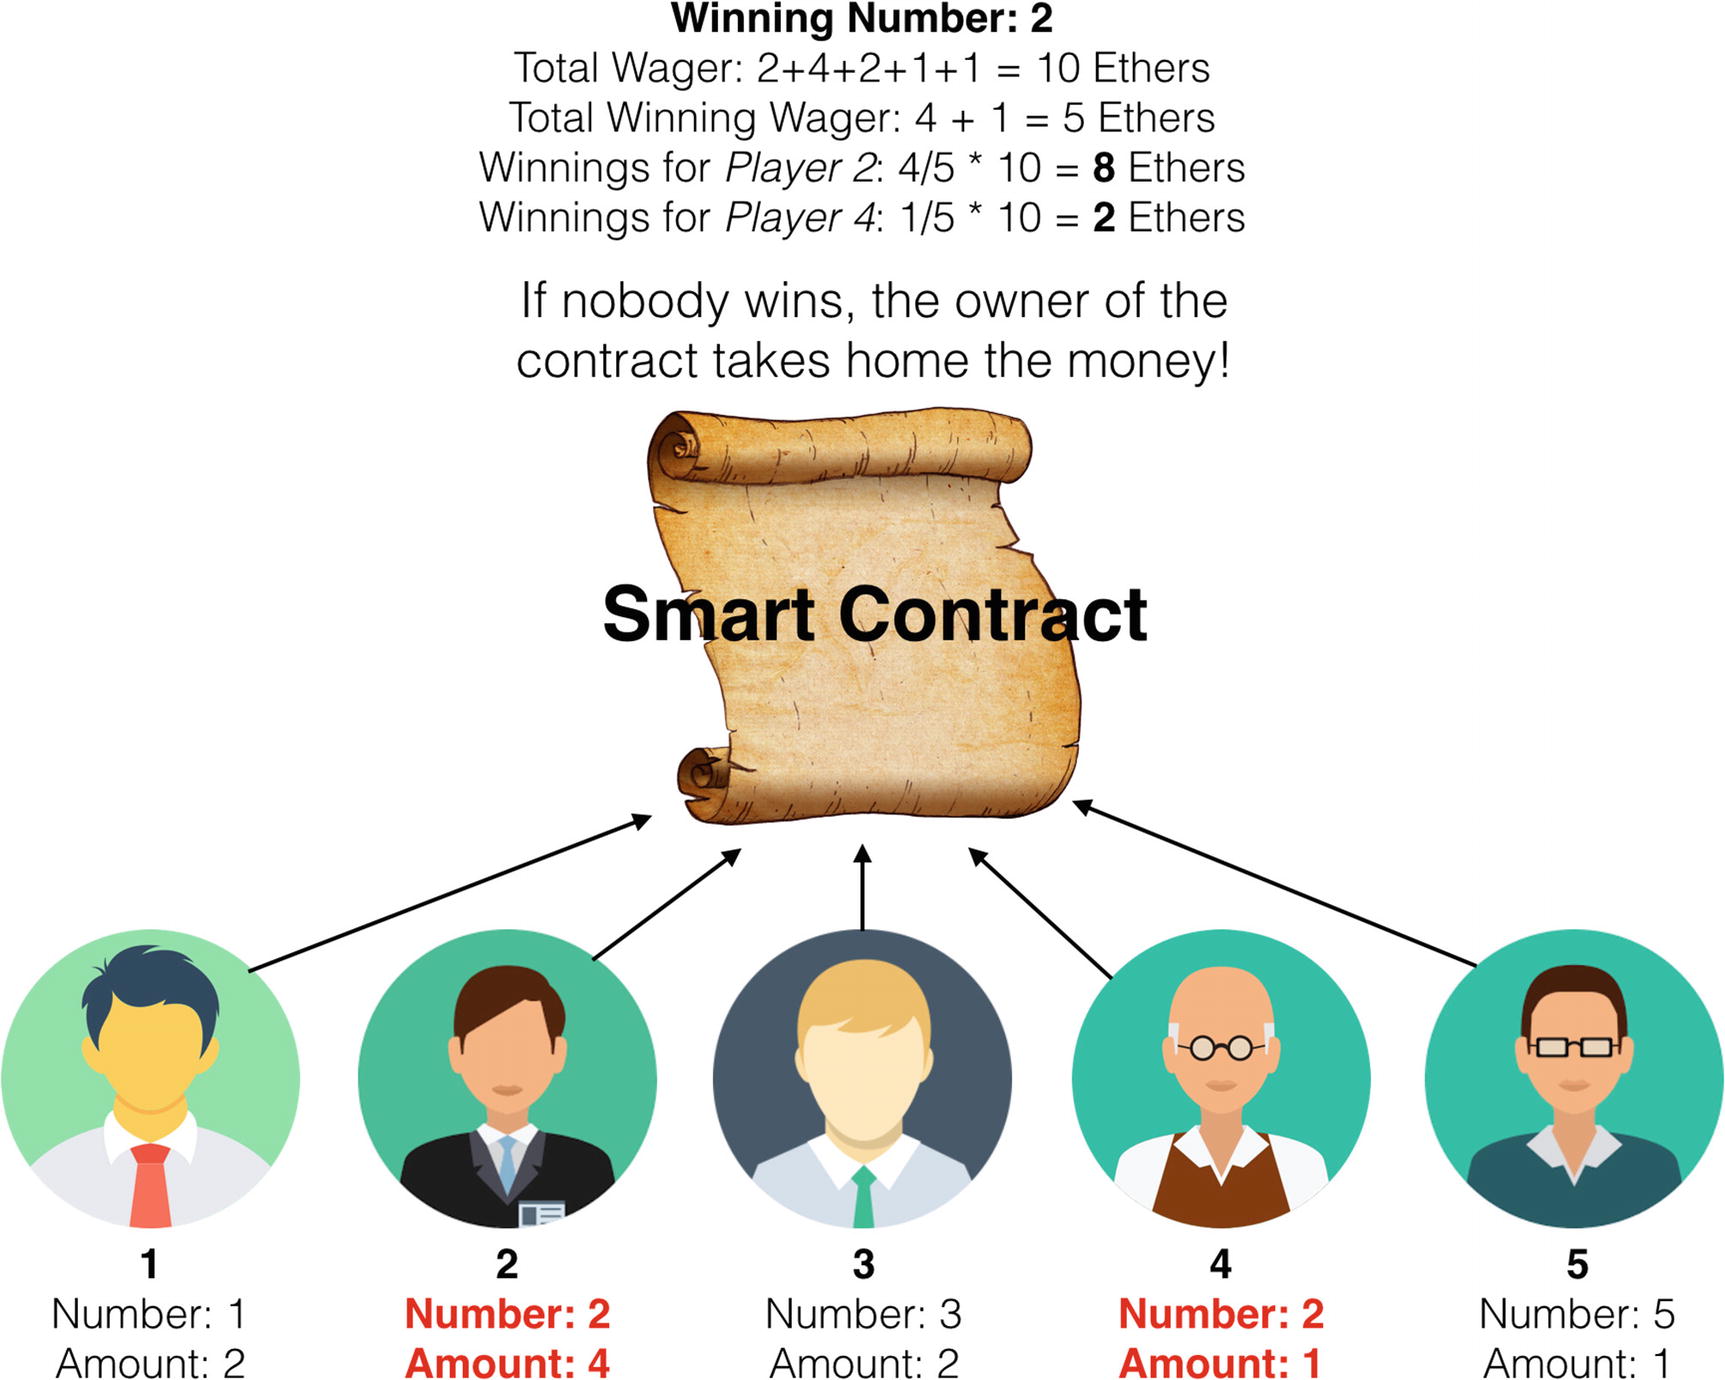
With the contract created, it is now time to deploy it and test it using the Remix IDE. For deployment, we shall use Account 1 in MetaMask.
Setting the constructor for the contract
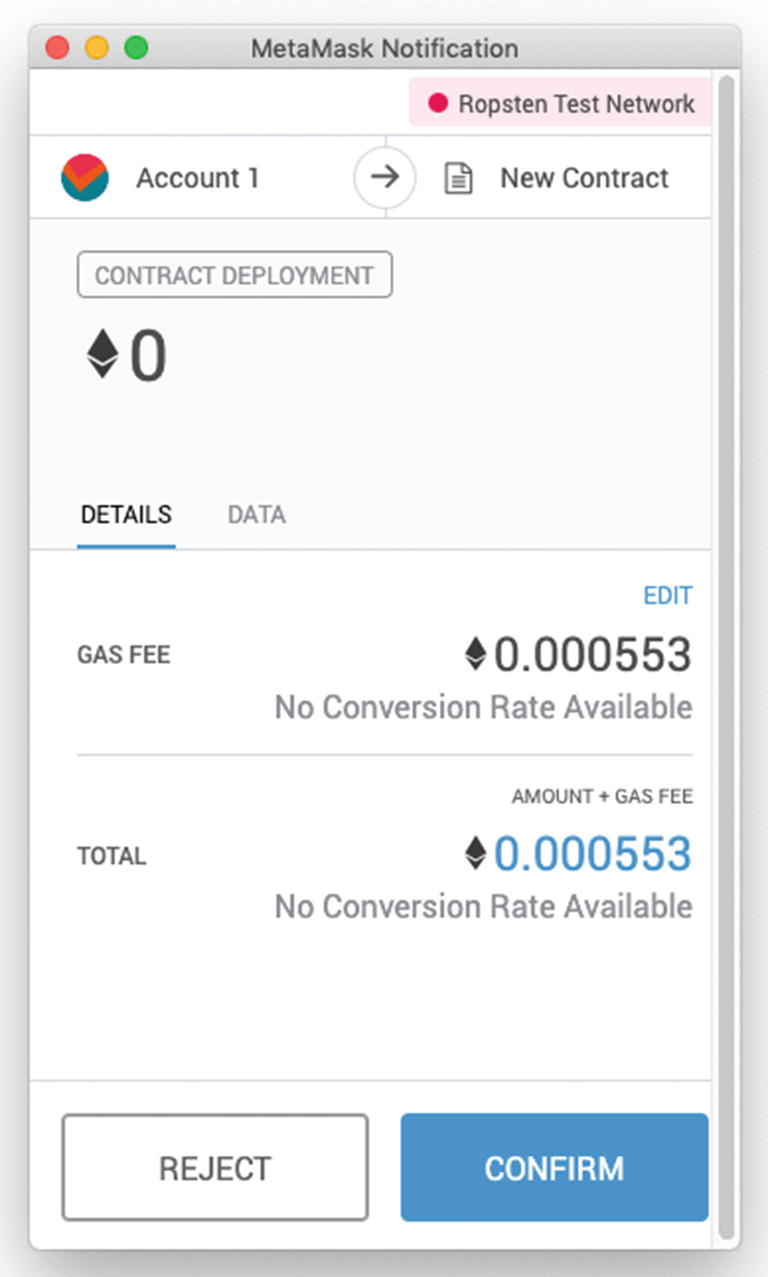
Deploying the contract
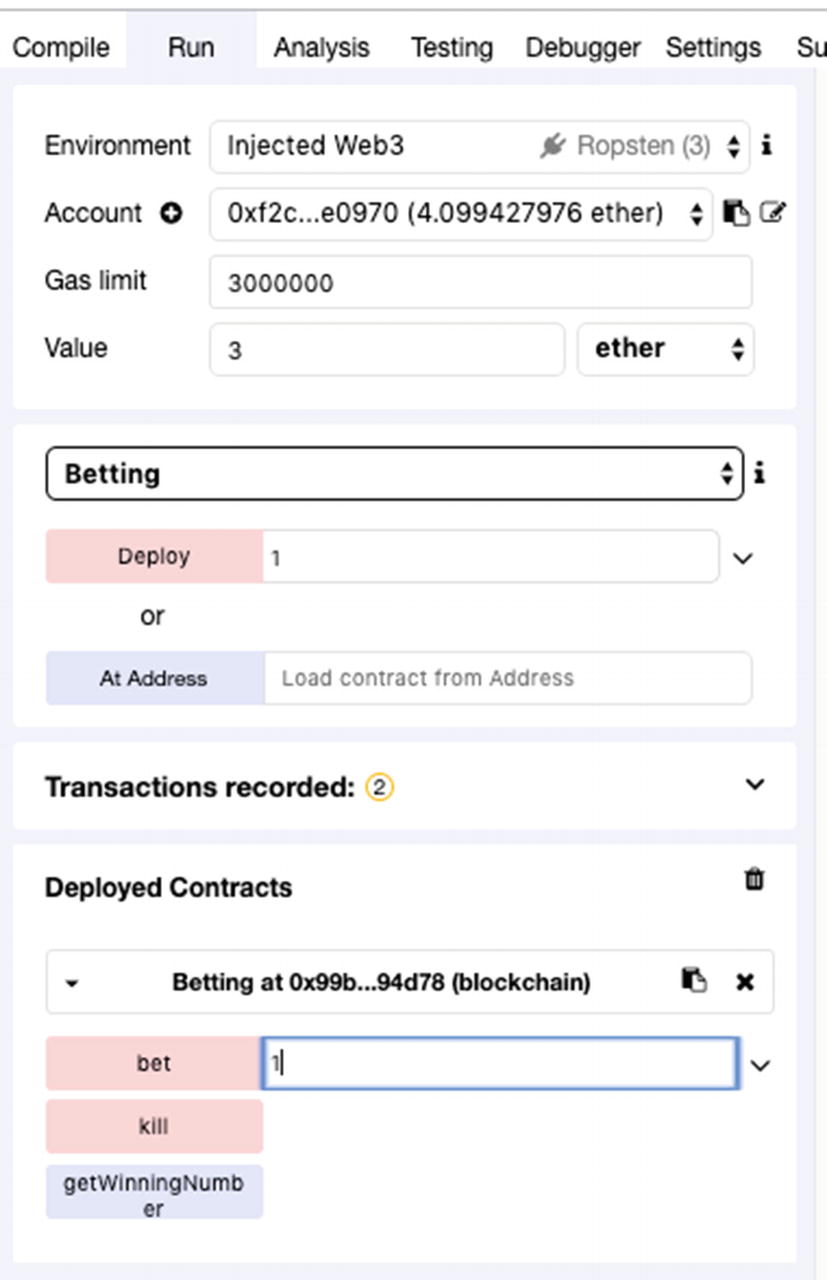
Betting on a Number
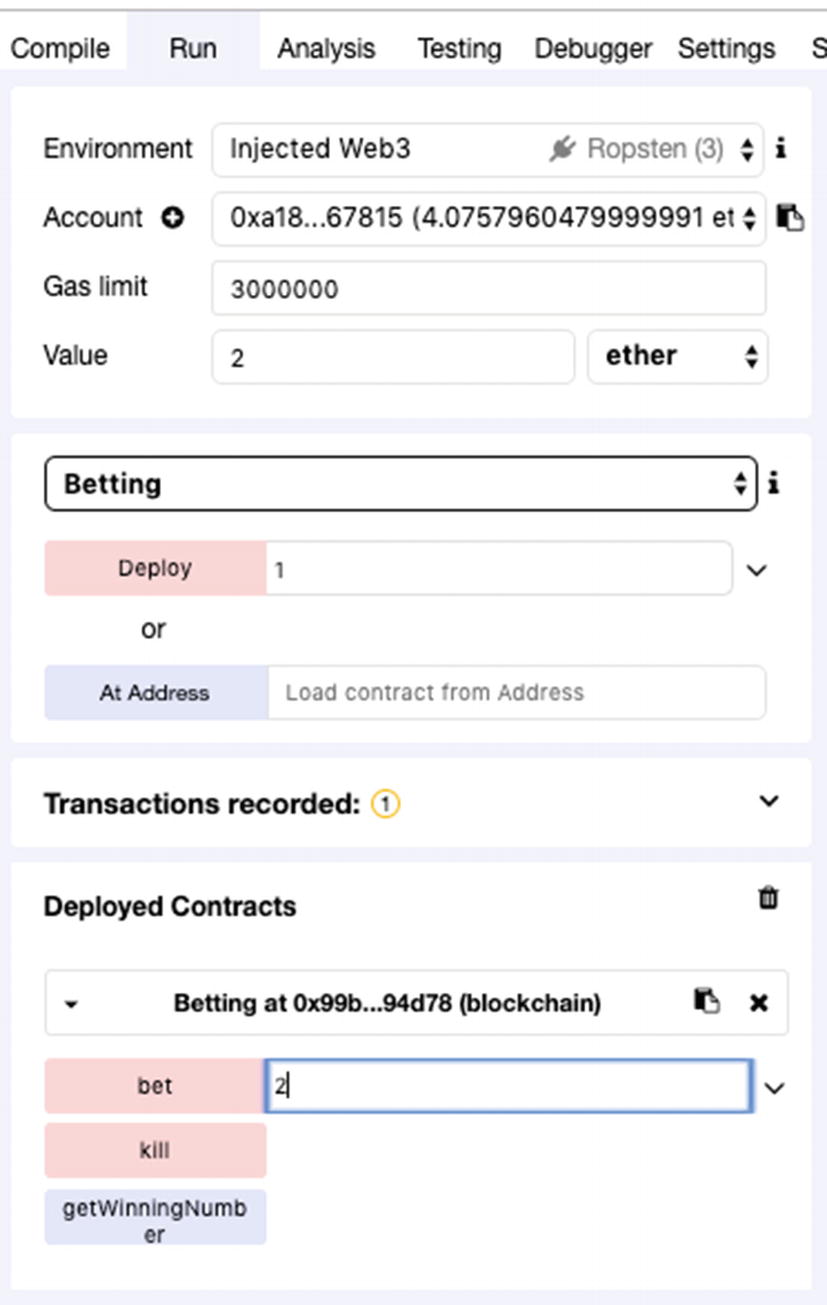
Using Account 1 to bet on a number with the amount of Ether specified
Tip
Remember to set the Value and the unit to ether
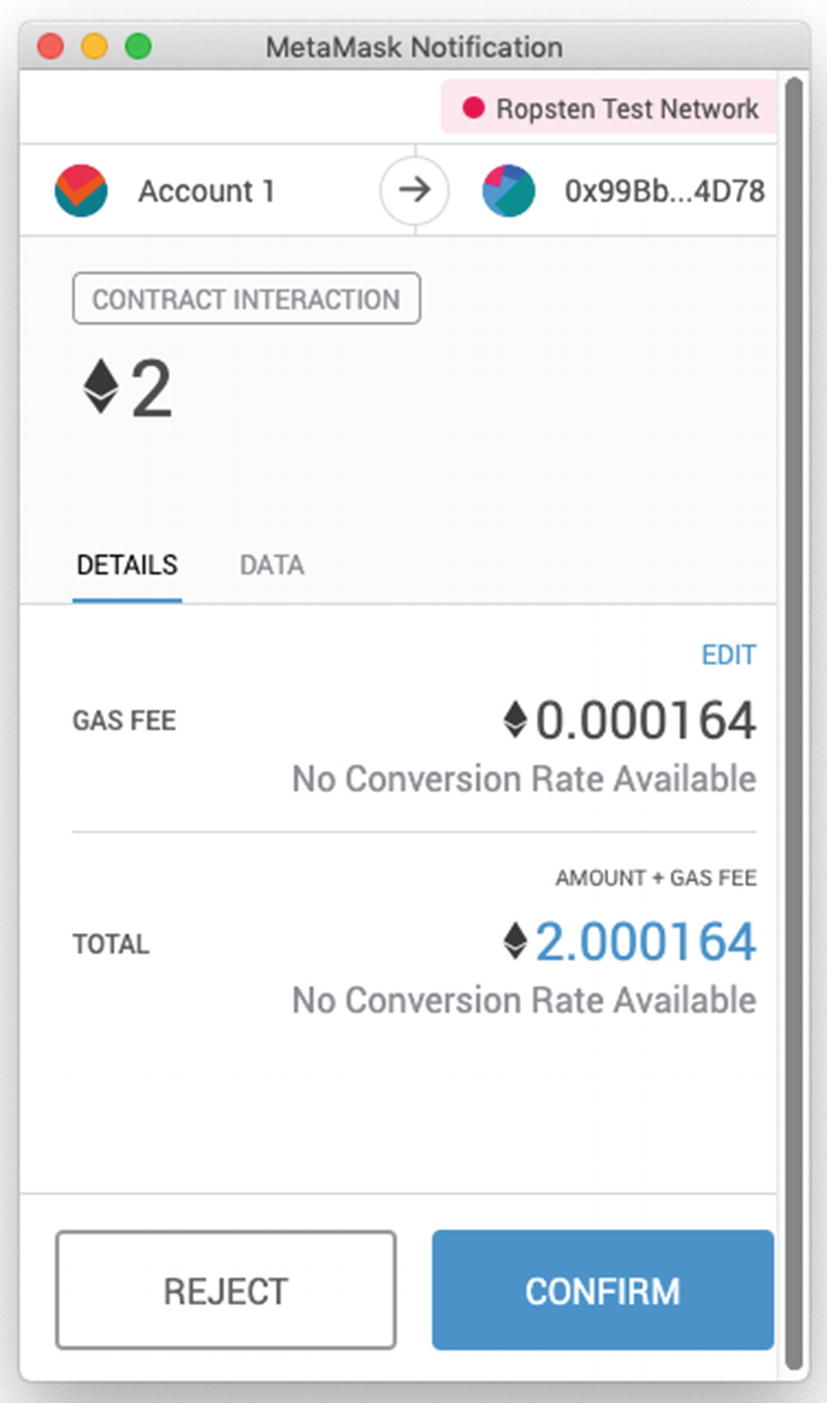
Observe the amount of Ethers you are sending
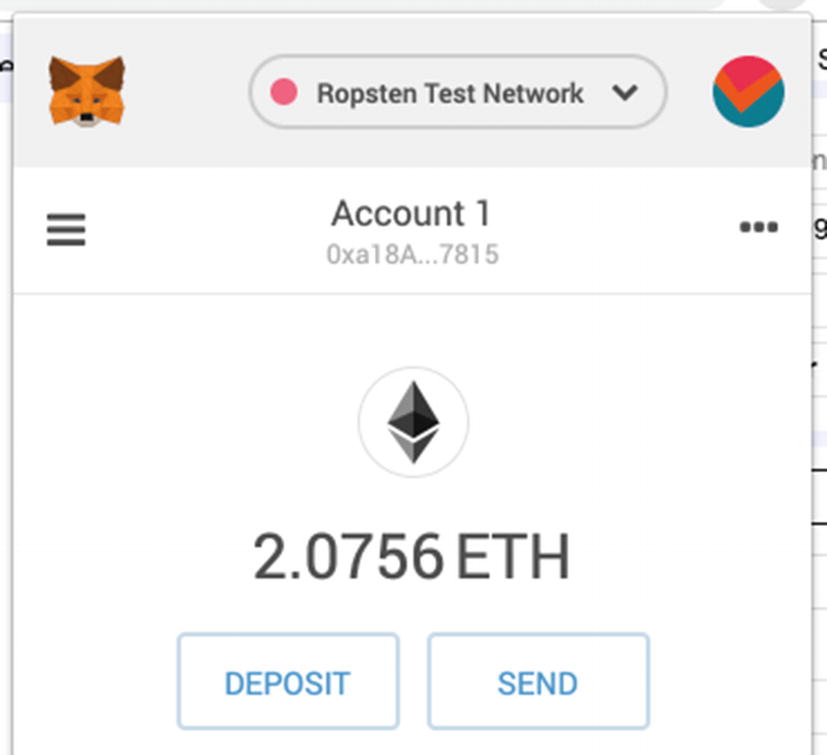
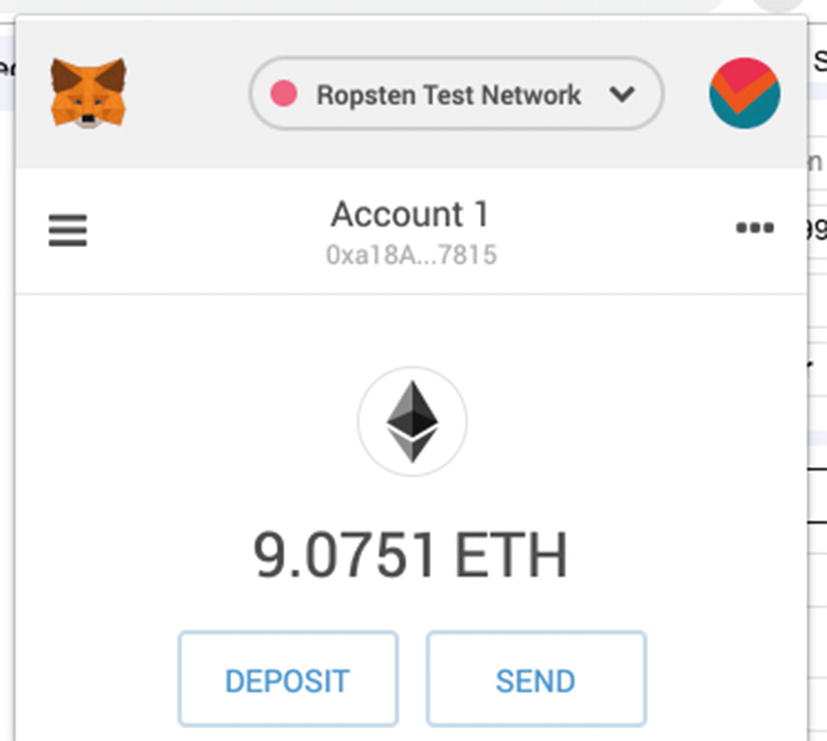
Take note of the balance of Account 1
Using Account 2 to bet on another number with the amount of Ethers specified
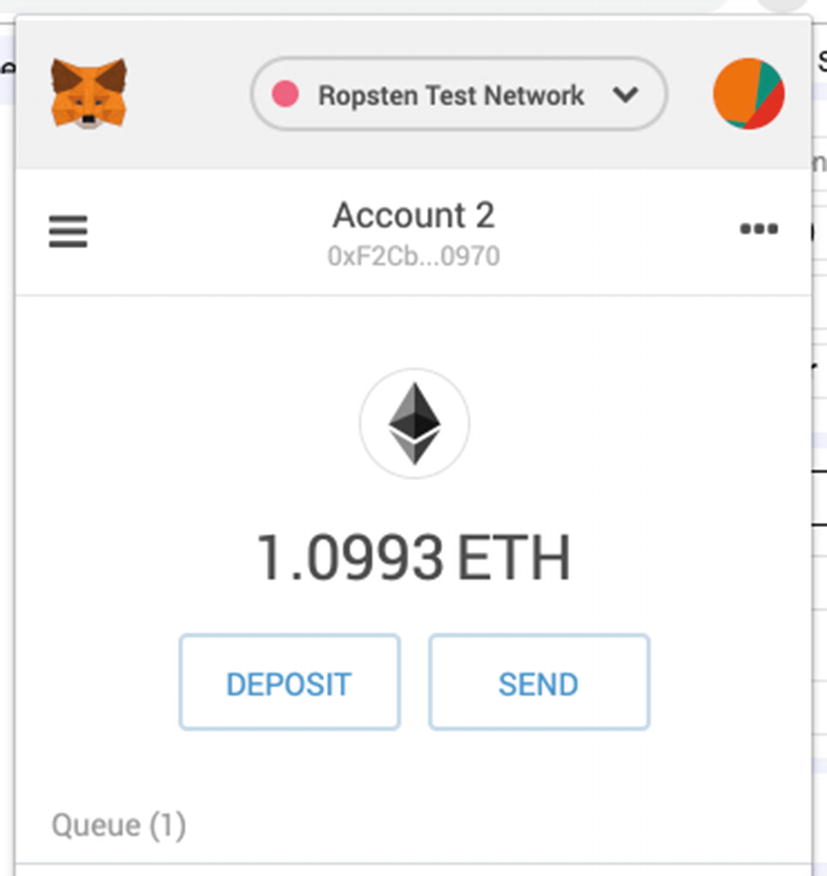
Take note of the balance of Account 2
After the transaction has been confirmed, the winning number would be drawn.
Note
Remember that our contract will draw a winning number after the second player has placed a bet.
Viewing the Winning Number
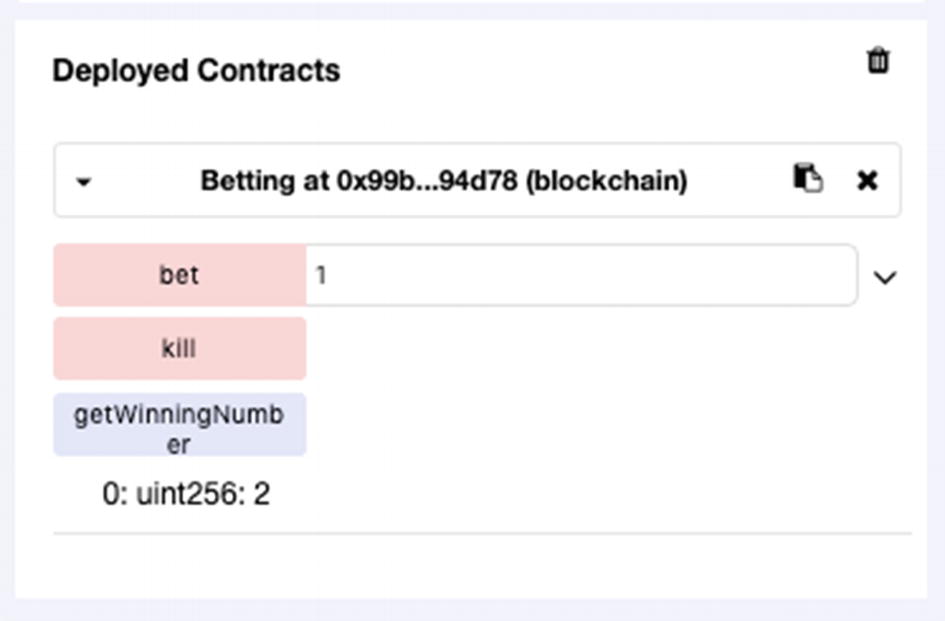
Checking on the winning number
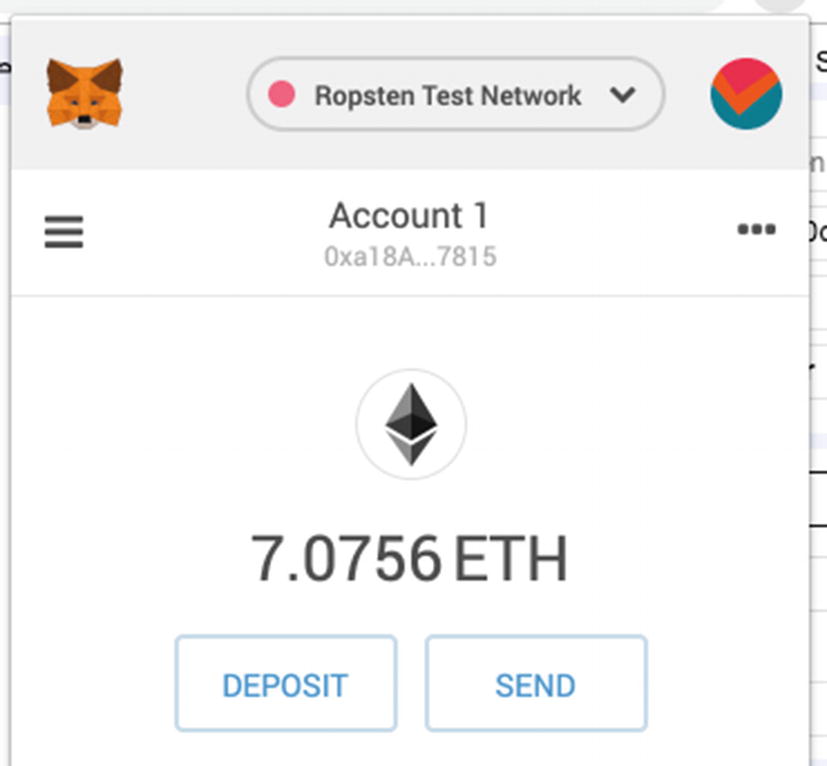
Account 1 balance is now updated with the winnings
Examining the Contract on Etherscan
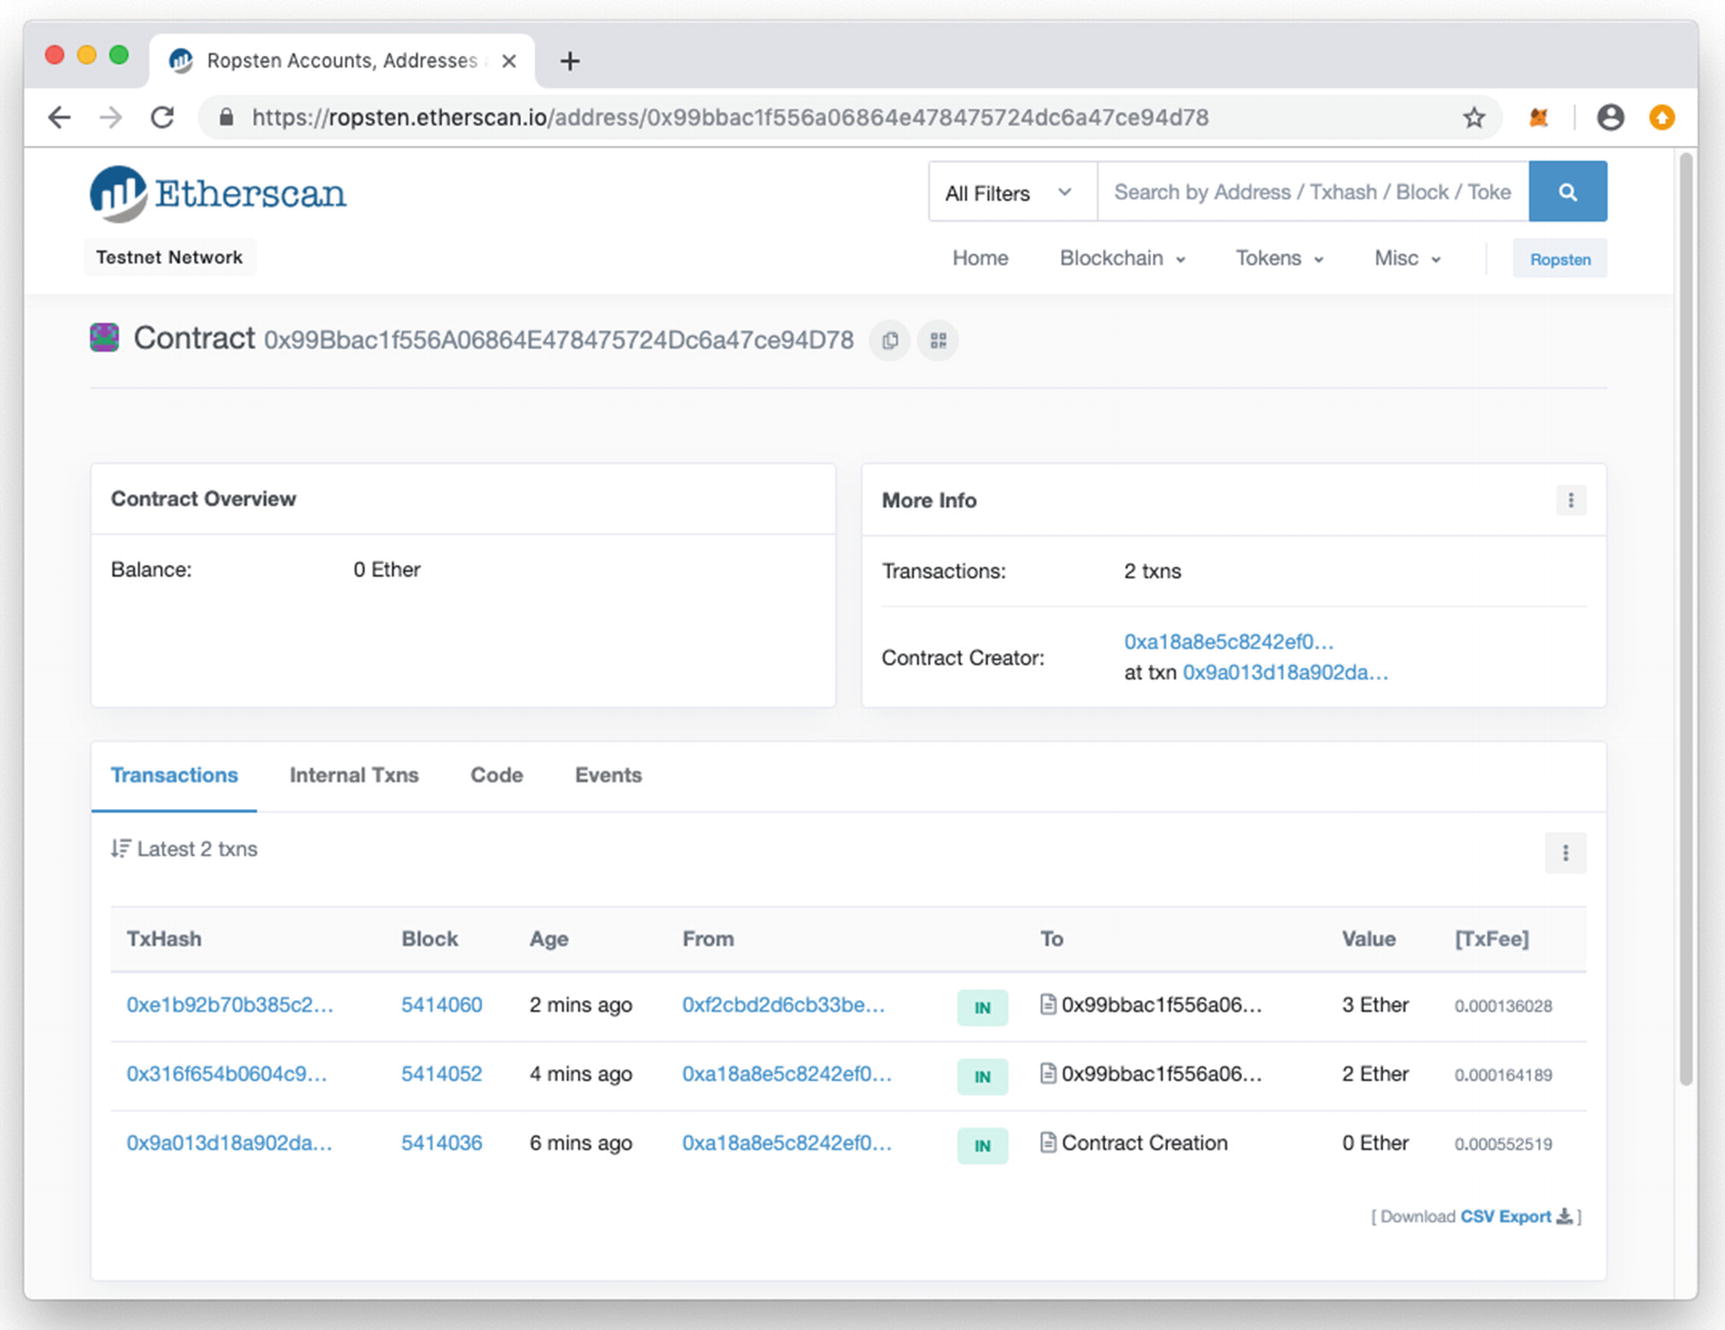
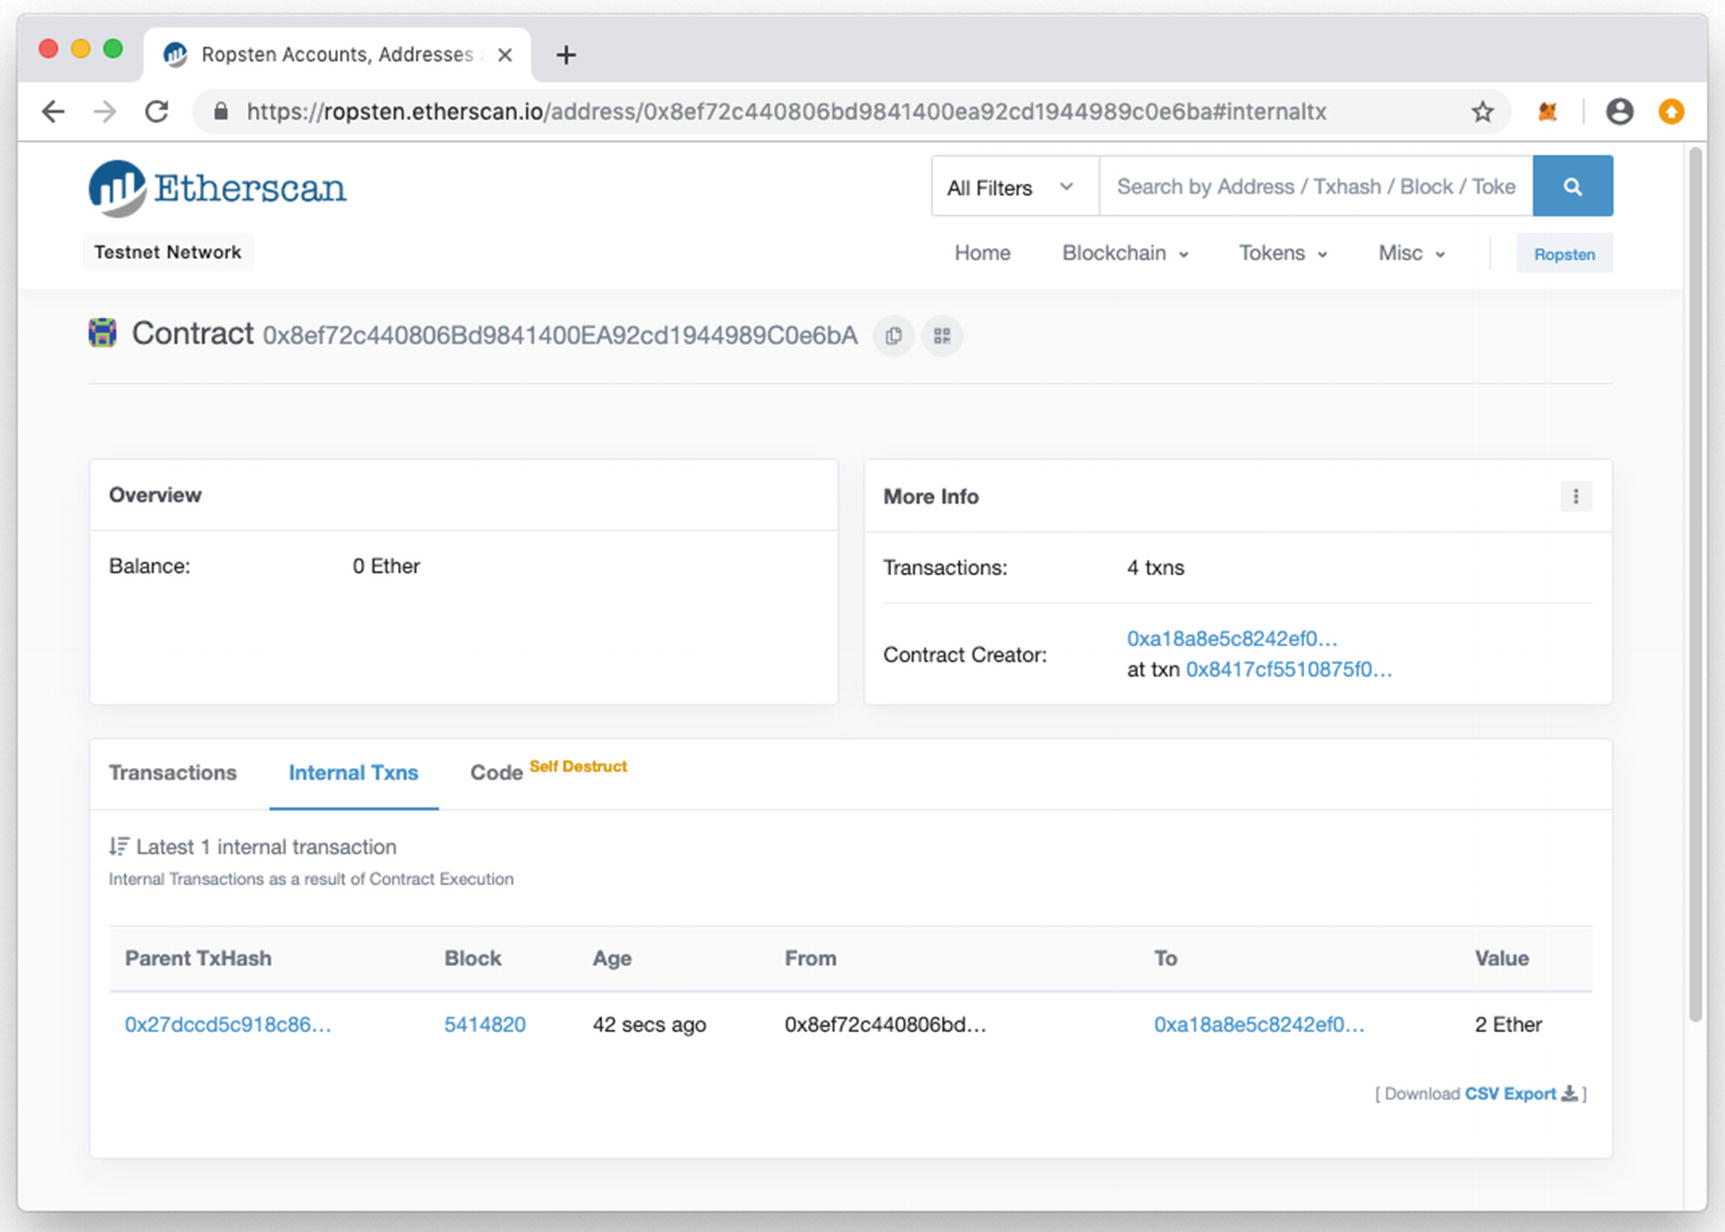
Examining the balance of the contract on Etherscan
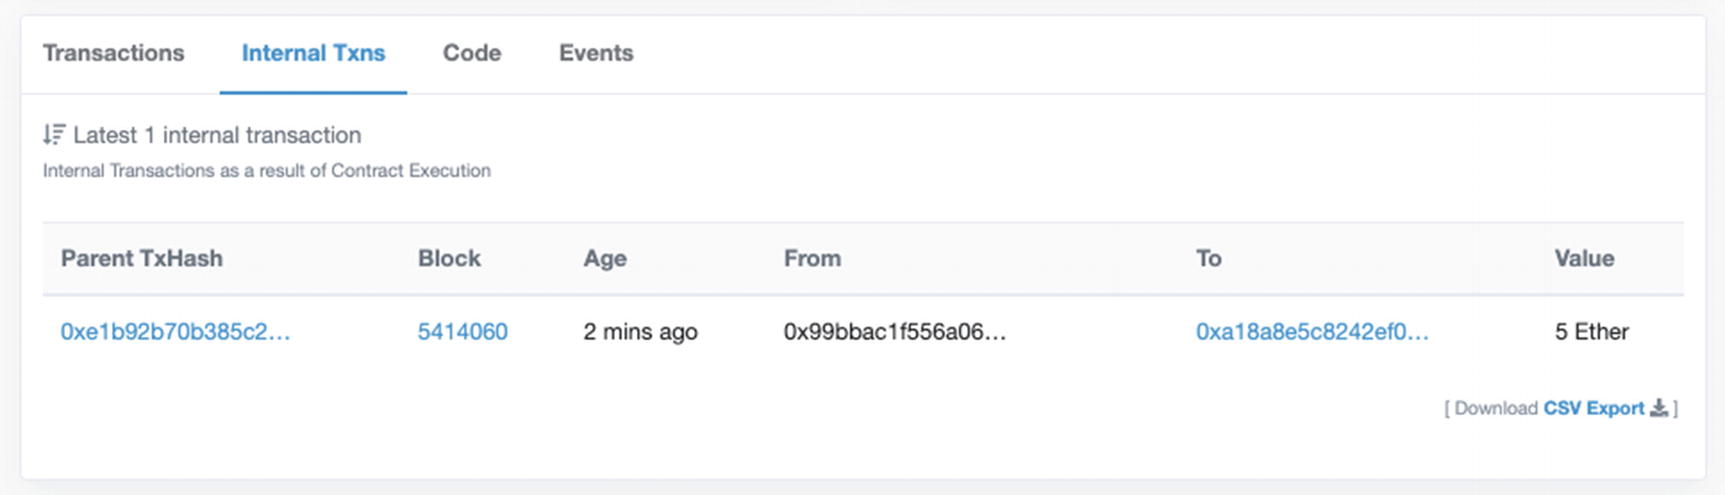
The contract recorded an internal transfer of Ethers to the winner of the game
Killing the Contract
One player wins the game, just like what was illustrated in the previous section.
Both players win the game (both betted on the same winning number). In this case the contract will transfer the winnings to the players based on the number of Ethers they have betted.
No player wins the game. In this case the Ethers betted by both players would be held by the contract.
In this section, we shall examine the last scenario where no one wins the game and how to get back the Ethers held by the contract.
So now the winning number is always 1, and as long as no player bets on 1, there will be no winners.
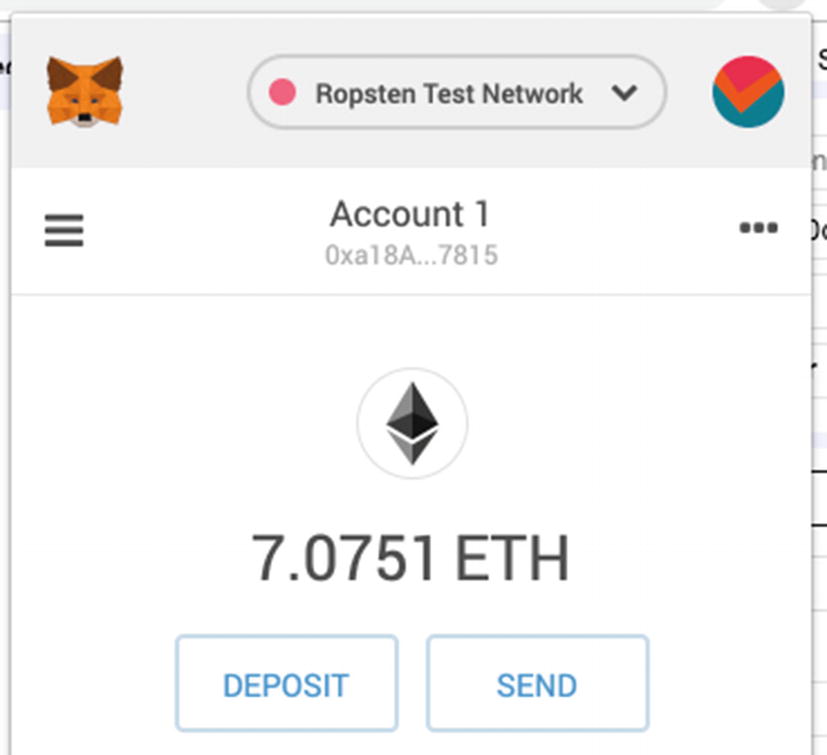
Take note of the balance of Account 1
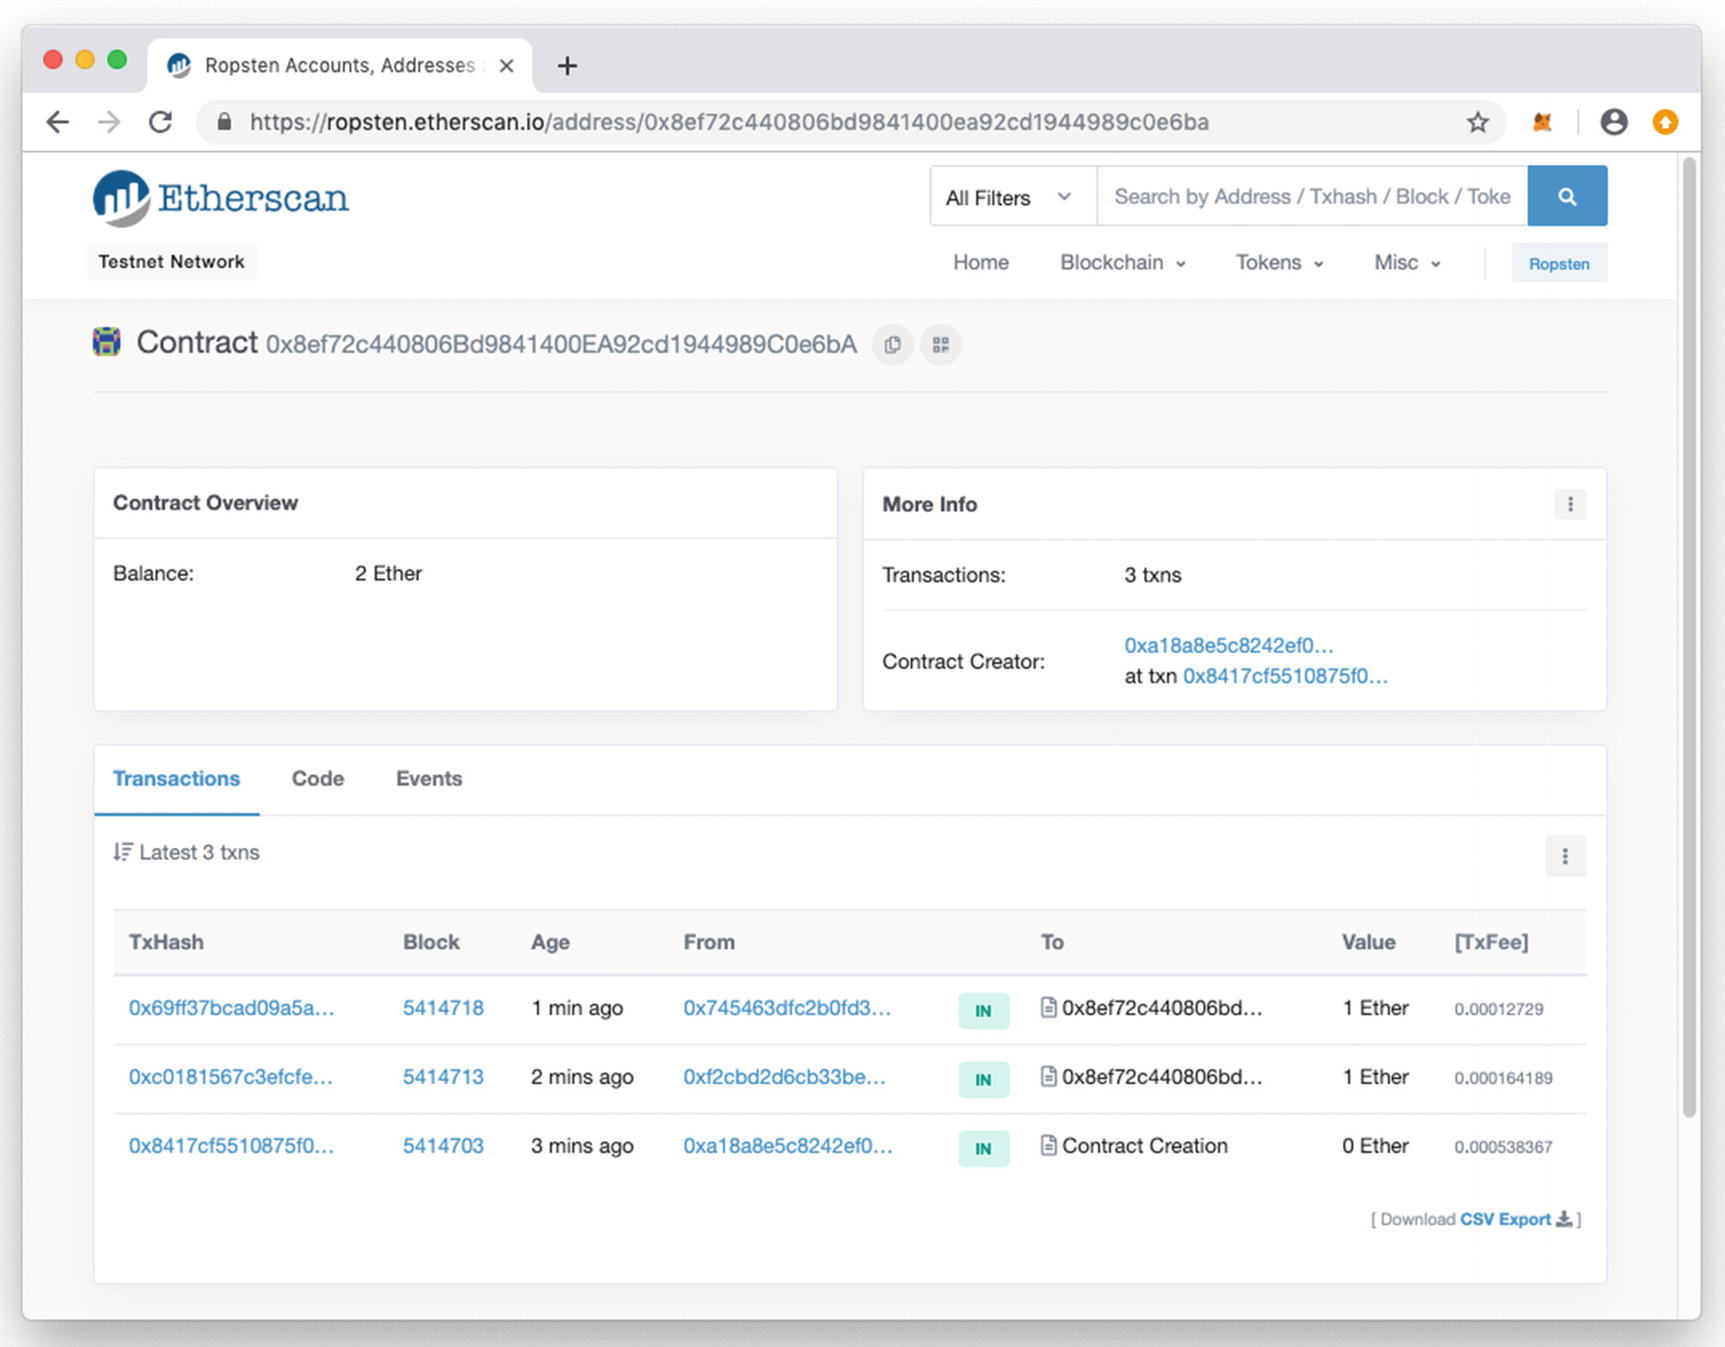
Examining the balance of the contract on Etherscan
Observe that the contract has a balance of 2 Ethers (since no player wins). So how do you get the 2 Ethers back? Turns out that if you kill the contract, the Ethers would be refunded back to the account that deploys it.

Killing the contract in the Remix IDE
Caution
Only the account that deployed the contract can kill it. Hence you need to switch to Account 1 (in MetaMask) in order to kill the contract.
The Ethers would be credited back into Account 1 after the contract has been killed
Verifying that the balance Ether was transferred back to the owner of the contract
Adding Events to the Contract
When the winning number is announced
When there is a change in the game status (e.g., the number of players played so far)
Someone has betted a number
Announcing the winning number
Also observe that we added a function named getStatus() so that when a client connects to the Smart Contract for the first time, it can query the contract to find out the current status of the game.
You can now redeploy the contract (with the constructor value 1). Once the contract is deployed, take note of its address and ABI. You will need it in the next section.
Creating the Web Front End
Let’s now create the web front end for the lottery game. Create a new text file and name it as OnlineBetting.html. Save it in the web3projects folder.
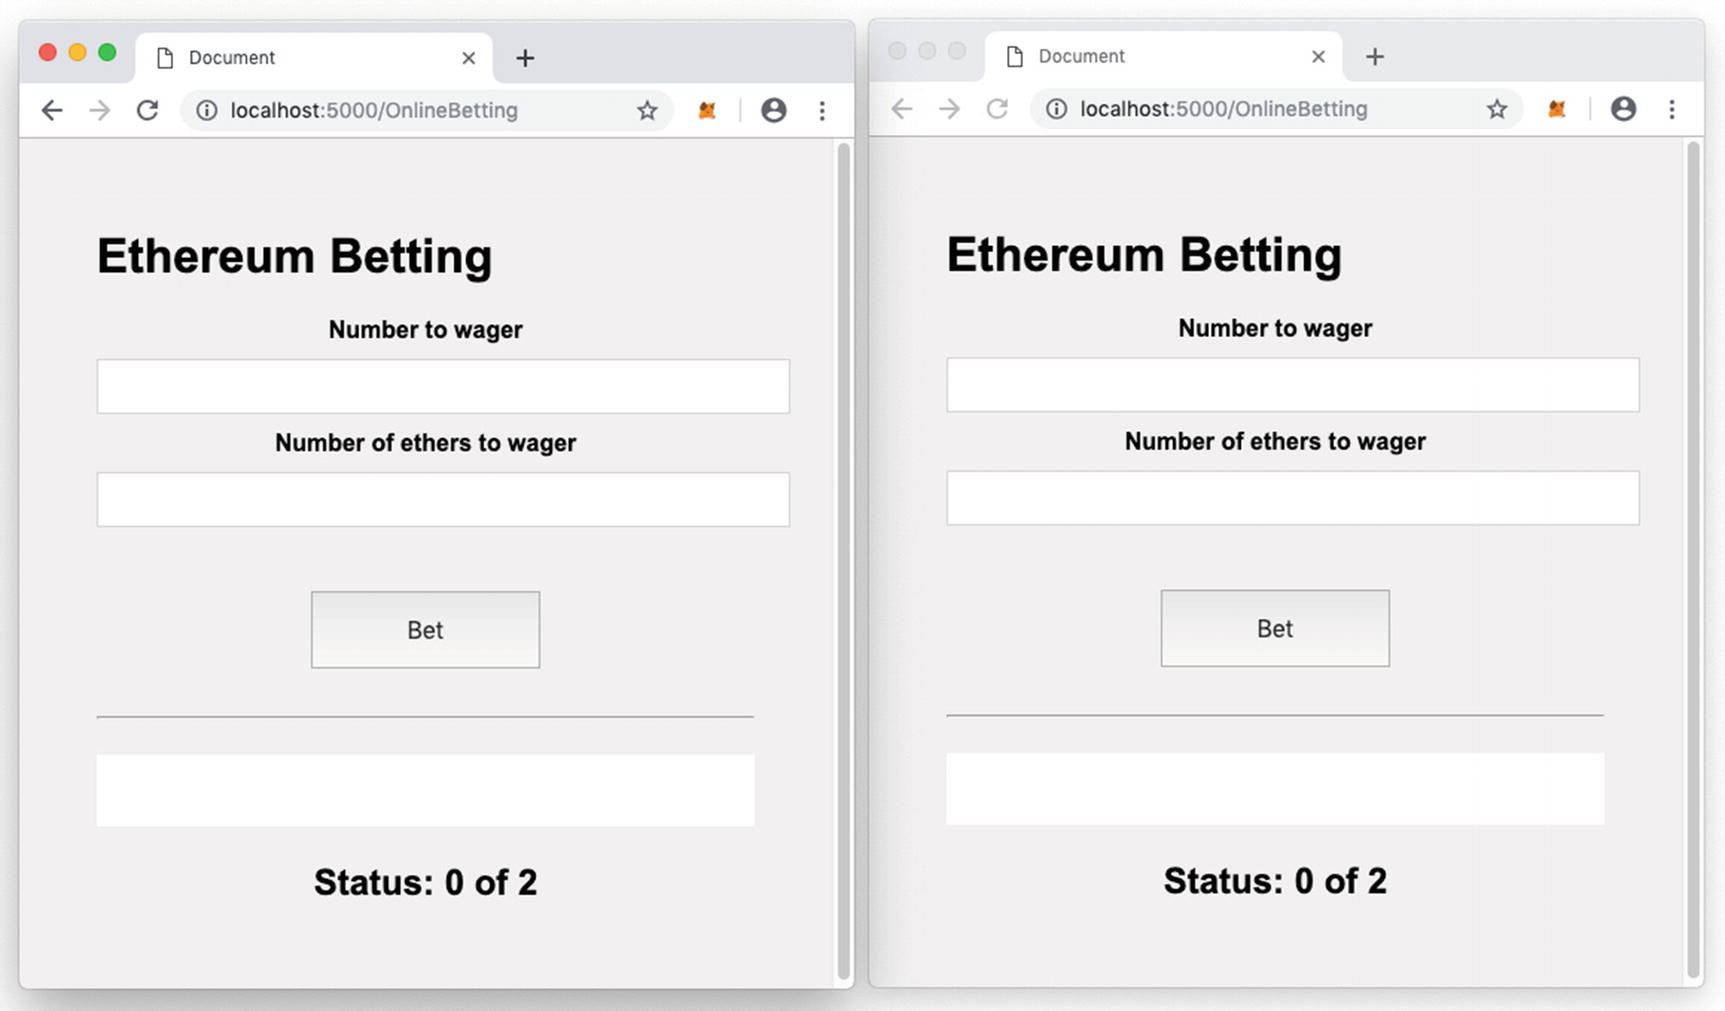
Two instances of Chrome displaying the same page and game status
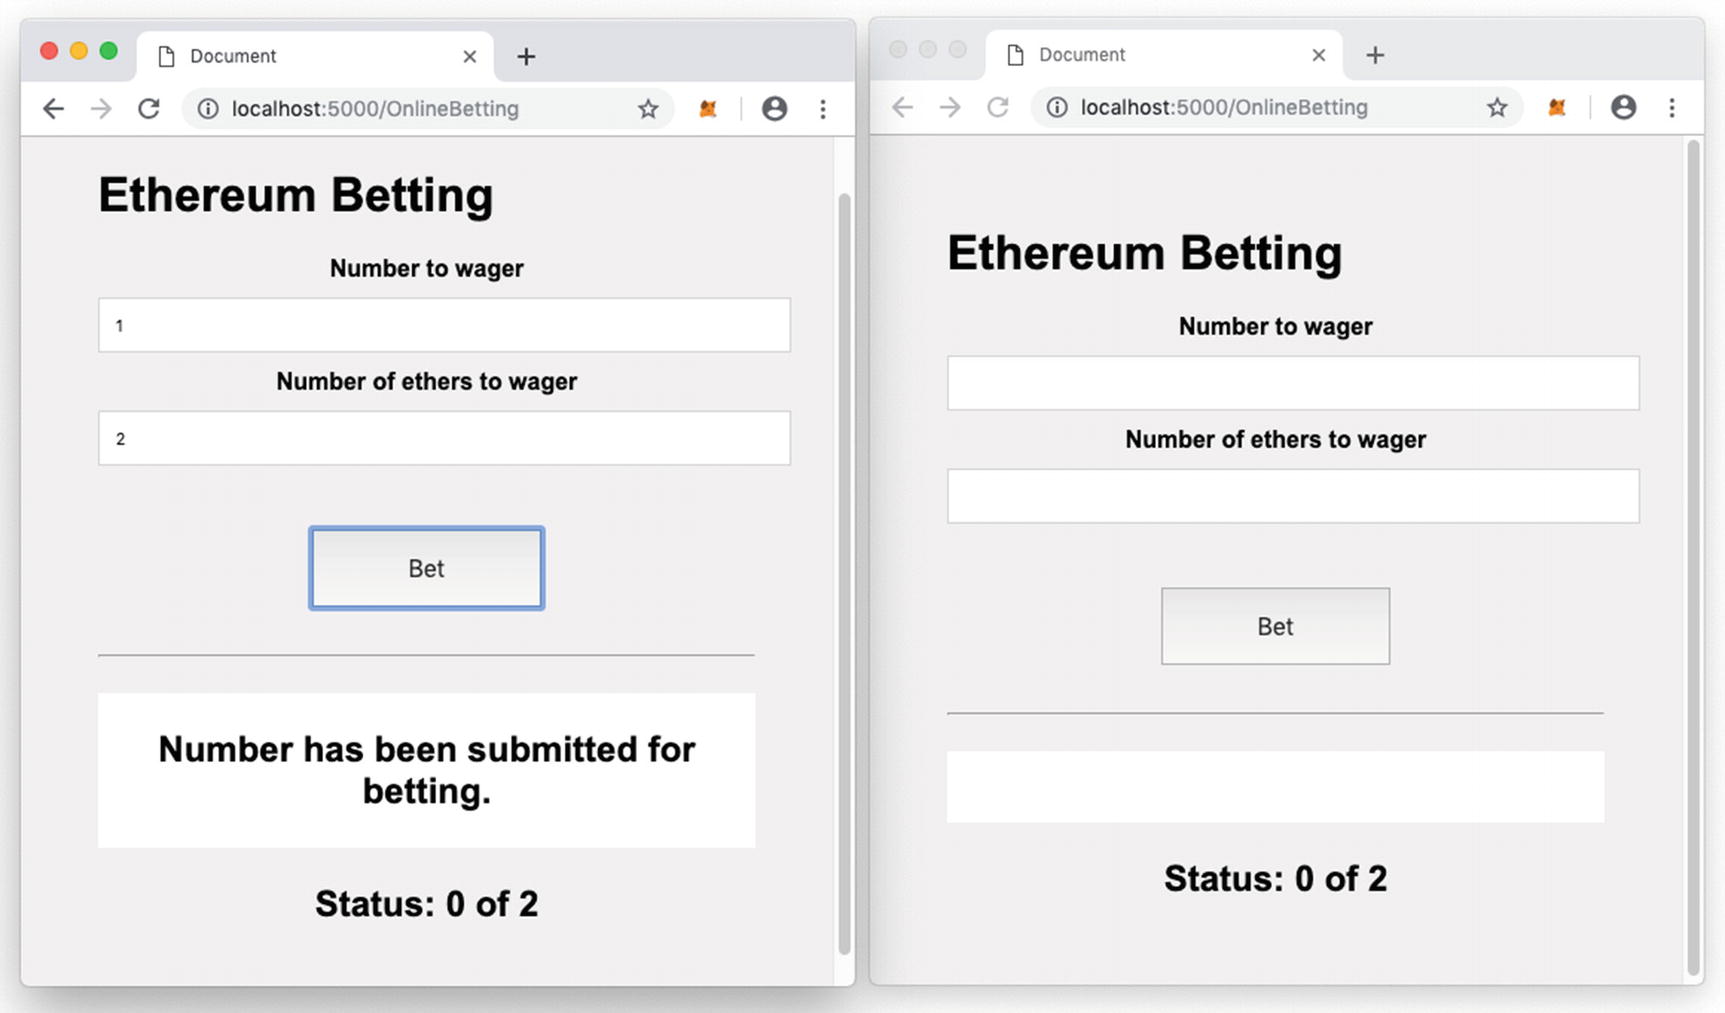
The browser on the left has just betted on a number
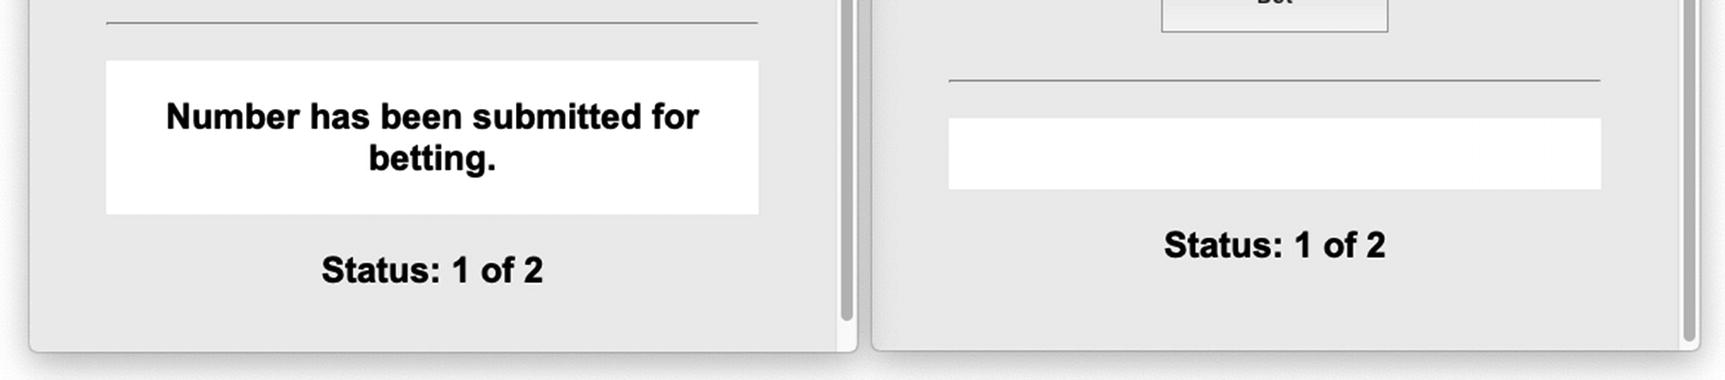
Both browsers now show the updated status of the game
Now switch to Account 2 on the second web browser and bet on the number 3 with 1 Ether. Click Confirm when the pop-up from MetaMask shows.
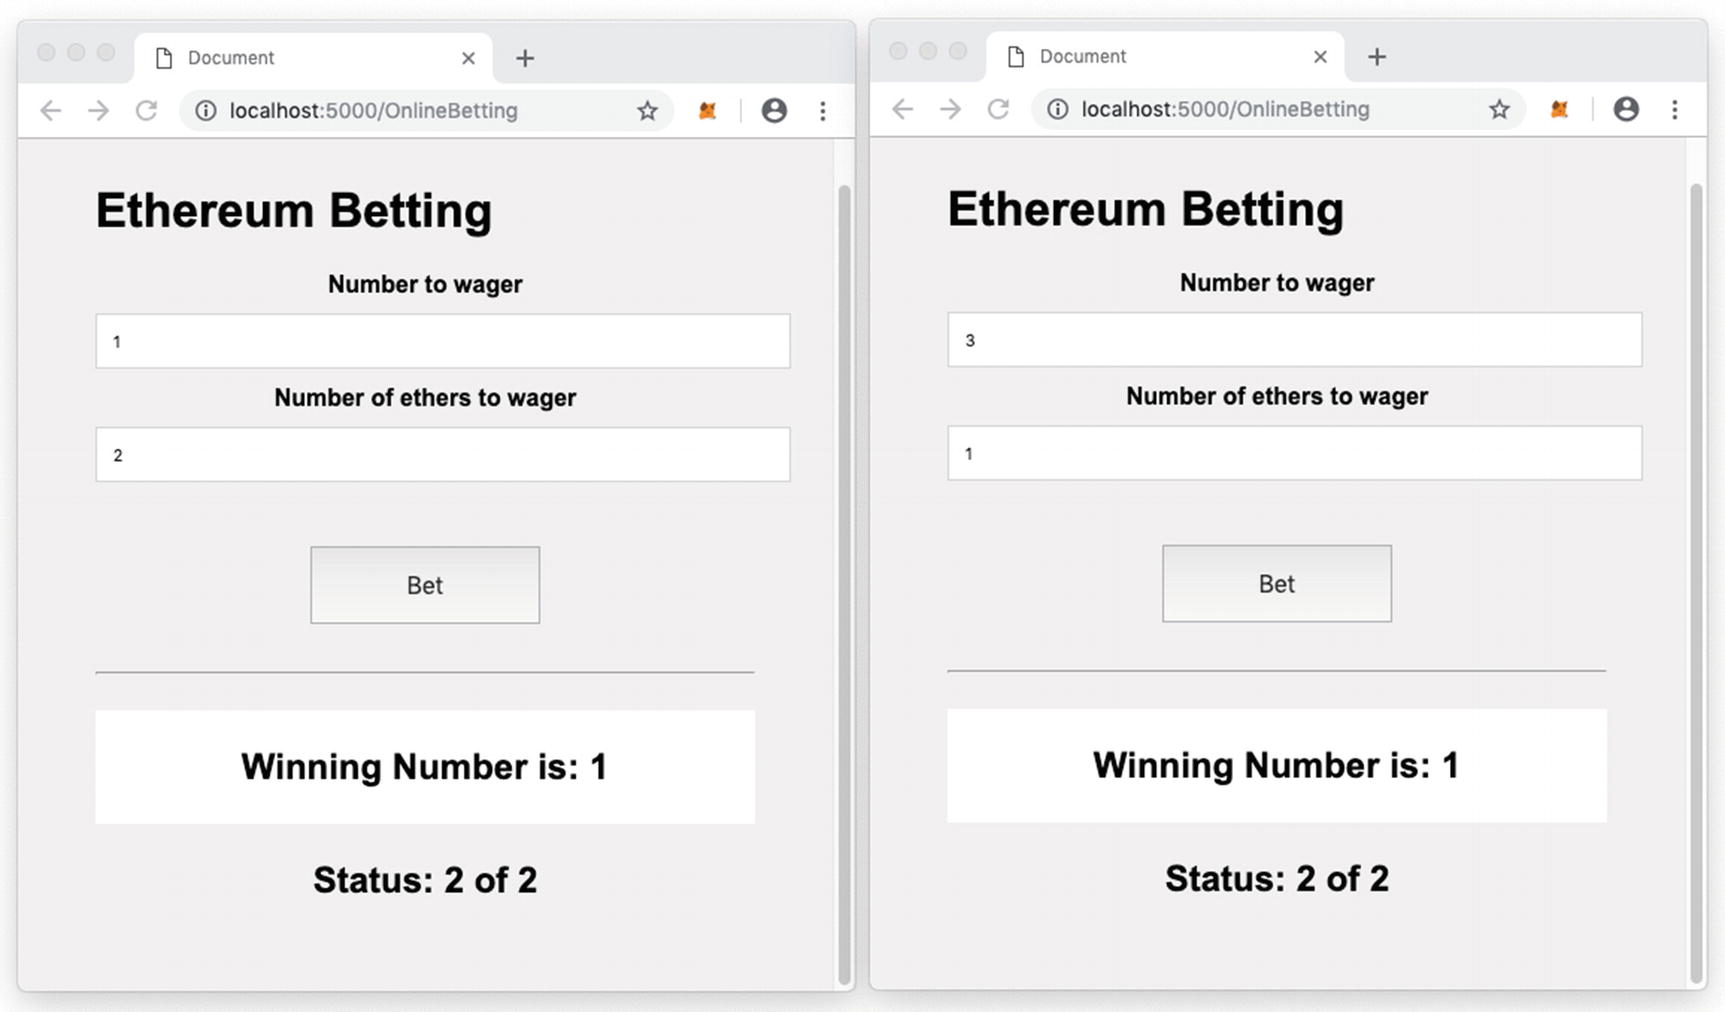
Both browsers showing the winning number
Returning Ethers Back to the Owner at the End of the Game
One issue we observed with the contract earlier in this chapter is that at the end of the game, we need to kill the contract in order to get back the Ethers held by the contract (when no one wins the game). Wouldn’t it be better if you could transfer the remaining Ethers back to the owners automatically at the end of the game instead of having to kill it?
To get the balance of Ethers held by the contract, you can use the balance property of an account. The address(this) statement returns the address of the current contract.
Deploy the contract and update the contract address in the OnlineBetting.html file.
Observe balance of Account 1.
Reload the OnlineBetting.html page using the Chrome browser.
Using Account 2, bet on number 2 using 1 Ether.
Using Account 3, bet on number 3 using 1 Ether
When the winning number is announced (which is still a 1 since we have hardcoded the contract to return 1 as the winning number), check the balance of Account 1. It should have 2 additional Ethers, which is transferred by the contract since no one wins the game).
Making the Game Run Indefinitely
So far our game stops when two players have played. And in order to get back all the Ethers, you have to kill the contract. A much better option is to make the game run indefinitely. That is, after the winning number is drawn, the contract automatically pays out either to the players or the owner and the game starts all over again.
To start a new game, you remove all the players’ address and reset the necessary variables. When you now redeploy the contract, the game can be played indefinitely.
Summary
How to get the Ethers held by a contract to refund to the owner by killing it
How to transfer Ethers programmatically to another account
How to use Etherscan to view the internal transfers made in a contract
In the next chapter, you will learn about tokens and how you can use them in your Smart Contracts.