In Chapter 4, you learned how to create your own private test Ethereum network using the Ethereum client – Geth. While Geth is not that difficult to use to set up an Ethereum blockchain, it still takes considerable effort to set one up. In addition, you also need to create accounts and perform mining in order to obtain Ethers so that you can use them to deploy Smart Contracts and for performing transactions.
A much better option is to use a tool that can emulate an Ethereum blockchain, together with all the required accounts so that you can just focus on testing your Smart Contracts. Well, such tool does exist, and it is called – Ganache.
Ganache is a personal Ethereum blockchain that allows you to test and deploy your Smart Contracts without needing to connect to a real blockchain or set up your own blockchain using an Ethereum client like Geth.
Tip
Ganache was previous known as TestRPC.
In this chapter, you will learn how to download and install Ganache and how to test and deploy your Smart Contracts onto Ganache.
Downloading and Installing Ganache
Ganache comes in two flavors – as a desktop GUI app and as a command line tool. They are both available on the Windows, Mac, and Linux platforms. In the following sections, you will learn how to install the desktop as well as the command-line version of Ganache.
Command-Line Interface
The command-line version of Ganache is a Node.js-based Ethereum client. It uses EthereumJS library to simulate full client behavior and make developing Ethereum applications much faster. It also includes all popular RPC functions and features (like events) and can be run deterministically to make development a breeze.
To install command-line version of Ganache, you would need to install Node.js on your computer. You can then use npm to install the tool.
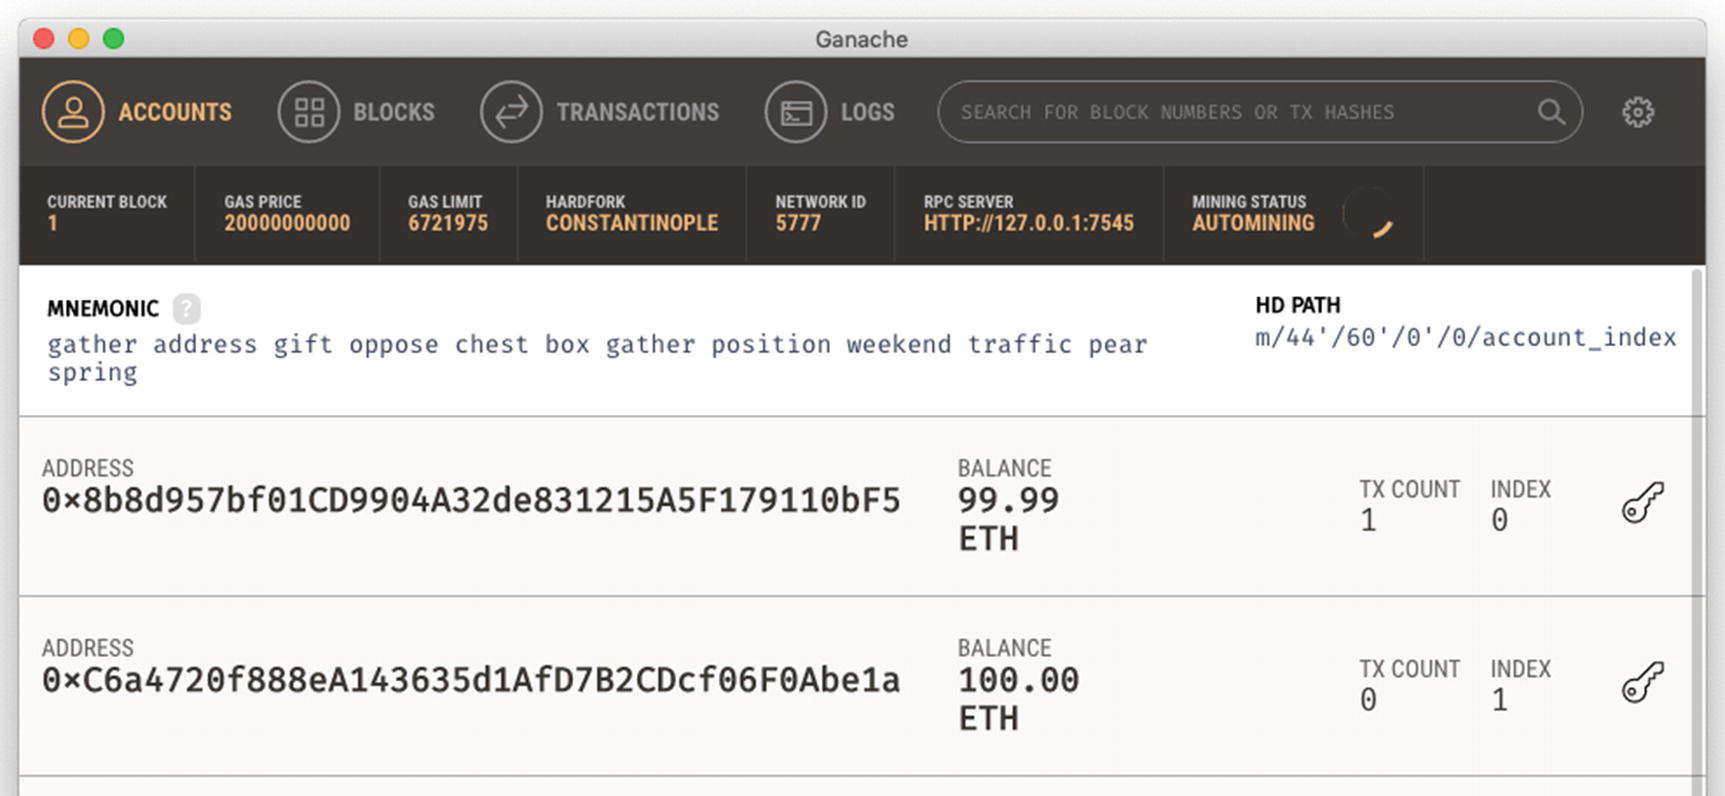
Ganache has pre-created 10 user accounts, each with 100 Ethers.
The section titled “Available Accounts” shows the account addresses of the ten accounts. The section titled “Private Keys” shows the corresponding private keys of each of the ten accounts.
The Ganache CLI is also listening at a local port with port number 8545.
Tip
You will learn how to interact with Ganache through its port in a later section in this chapter.
Graphical User Interface
Installing the Ganache on the Mac
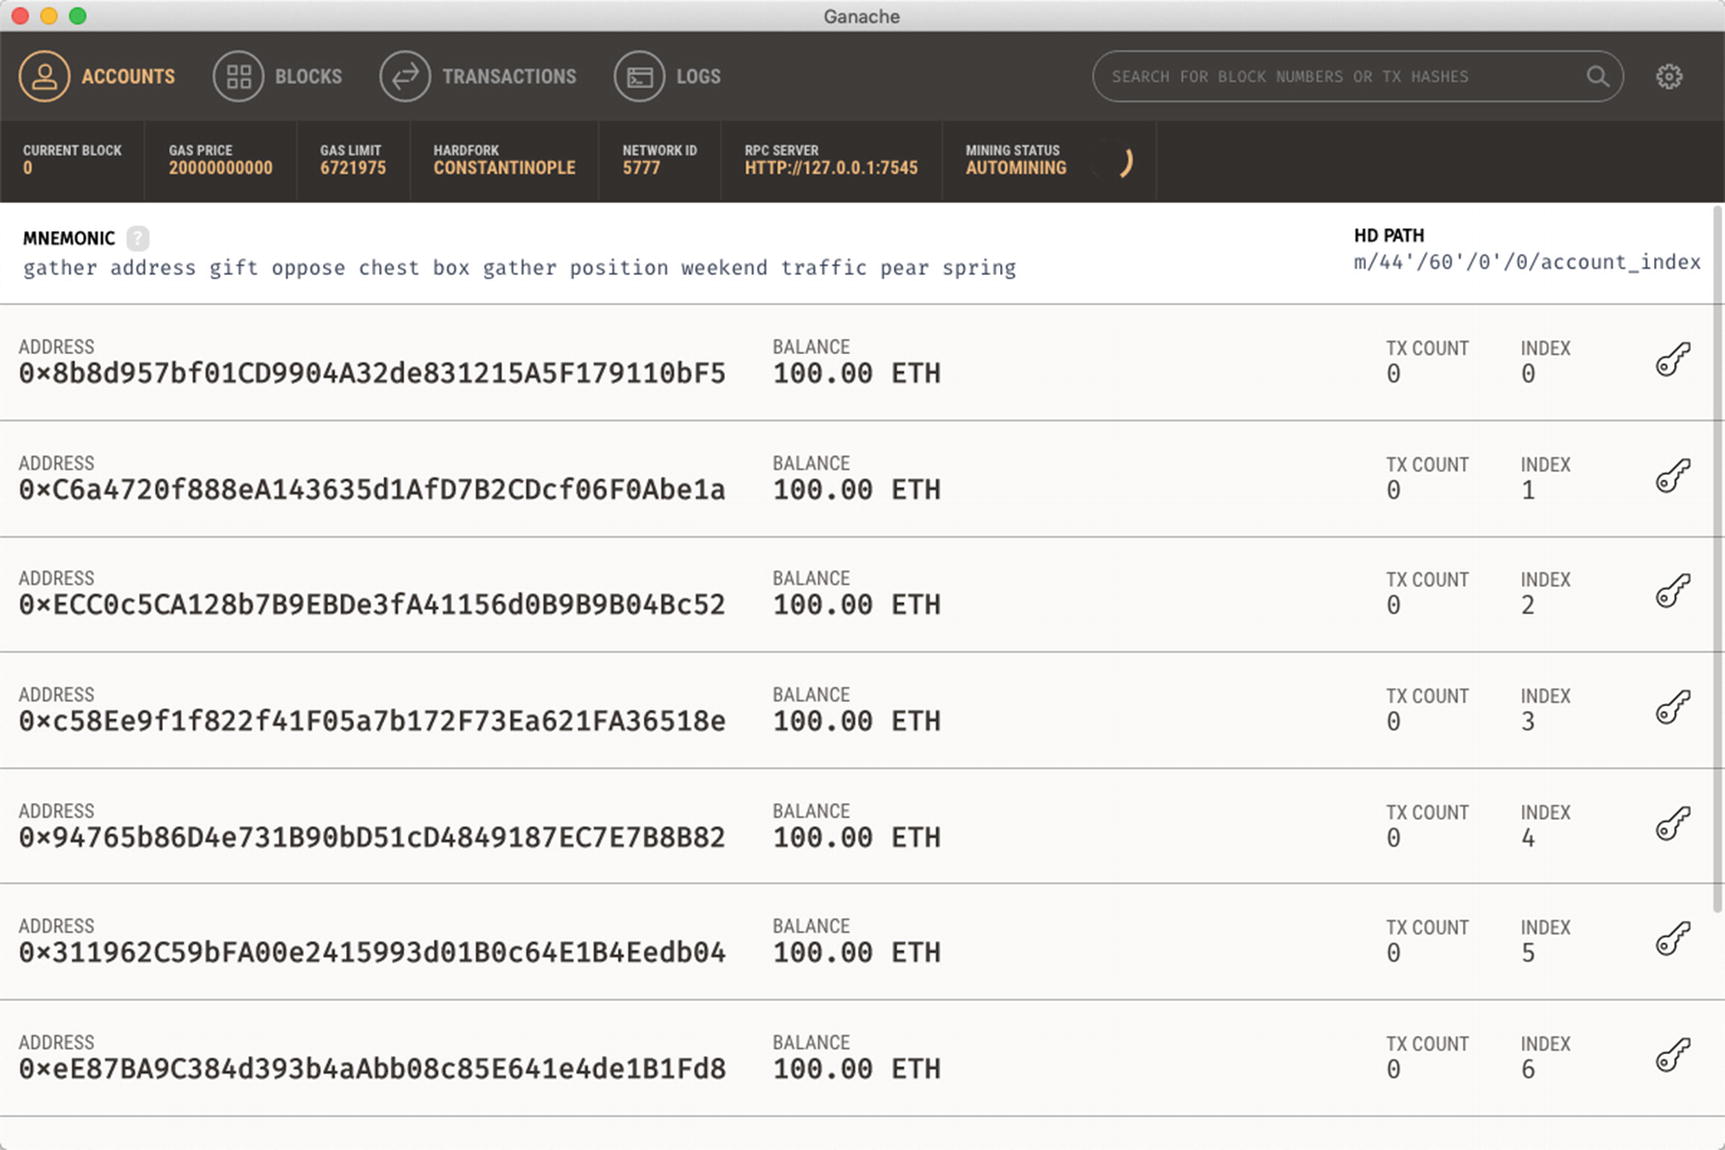
Ganache showing the list of users it has pre-created and the amount of Ethers each account has
Tip
Observe that for the desktop version of Ganache, it is listening at port 7545 (which you can change), instead of the 8545 in the CLI version of Ganache.
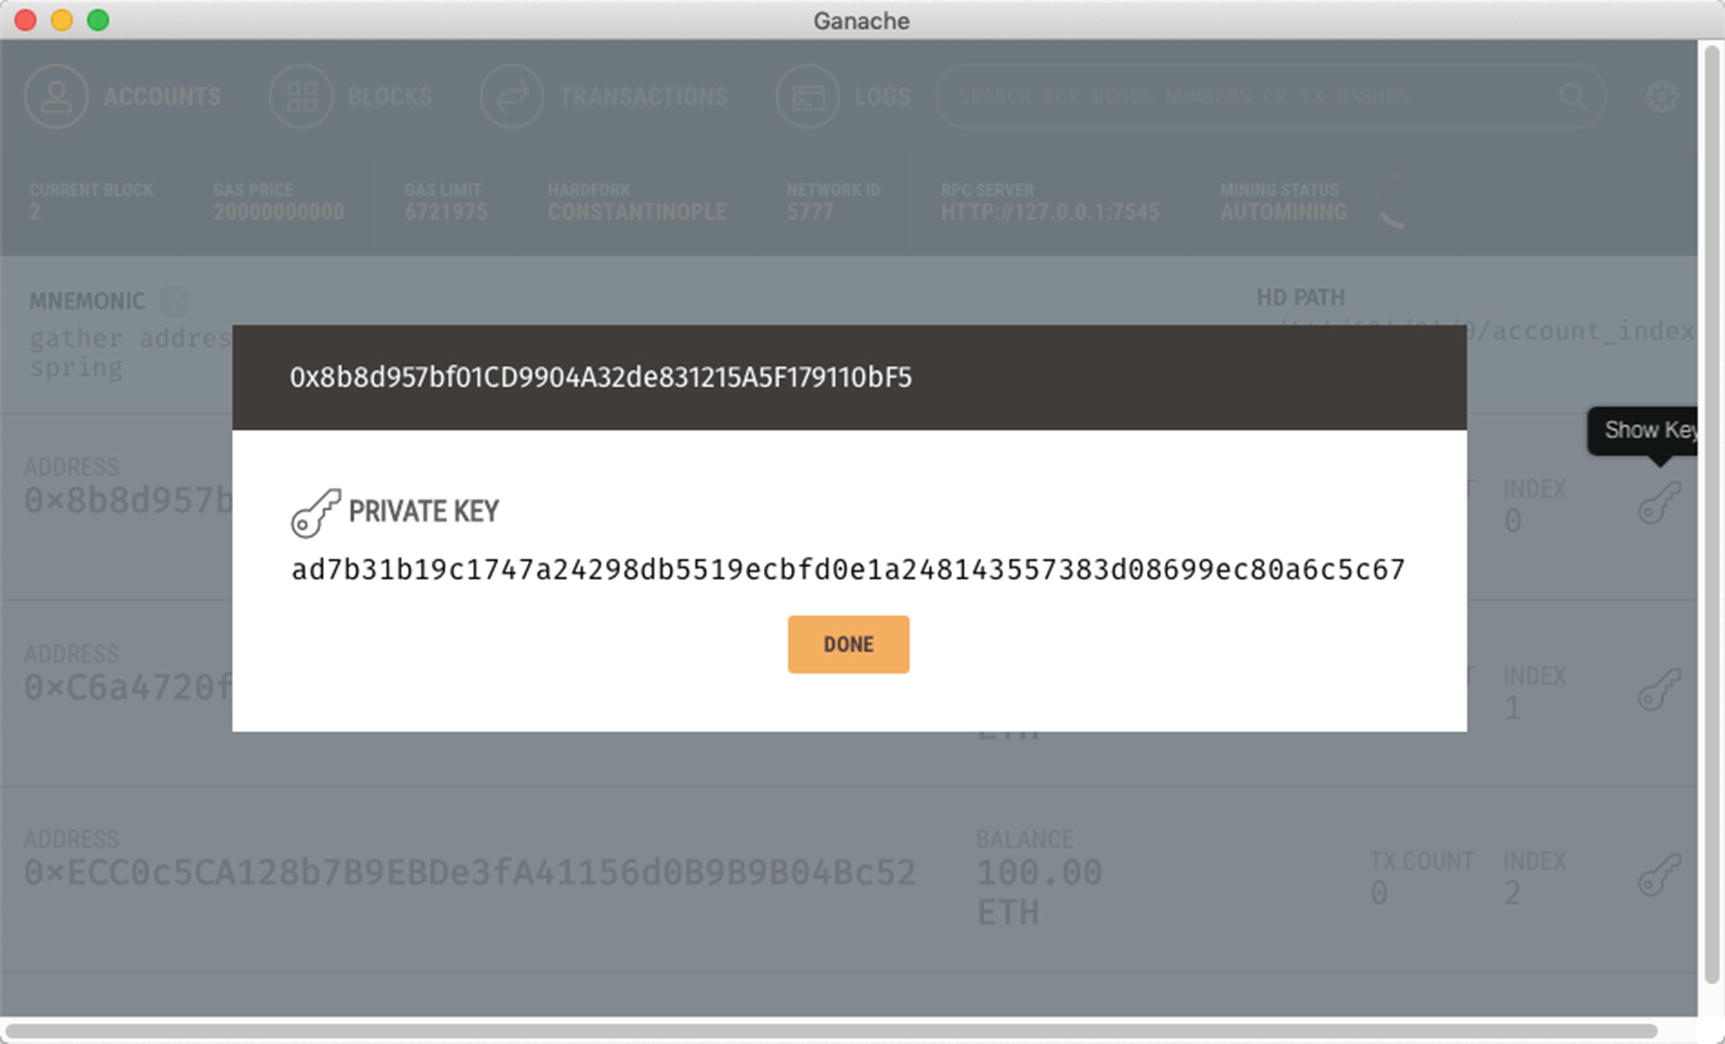
Revealing the private key of an account
Tip
Knowing the private key of each account is important if you want to import that that account into a wallet, such as MetaMask.
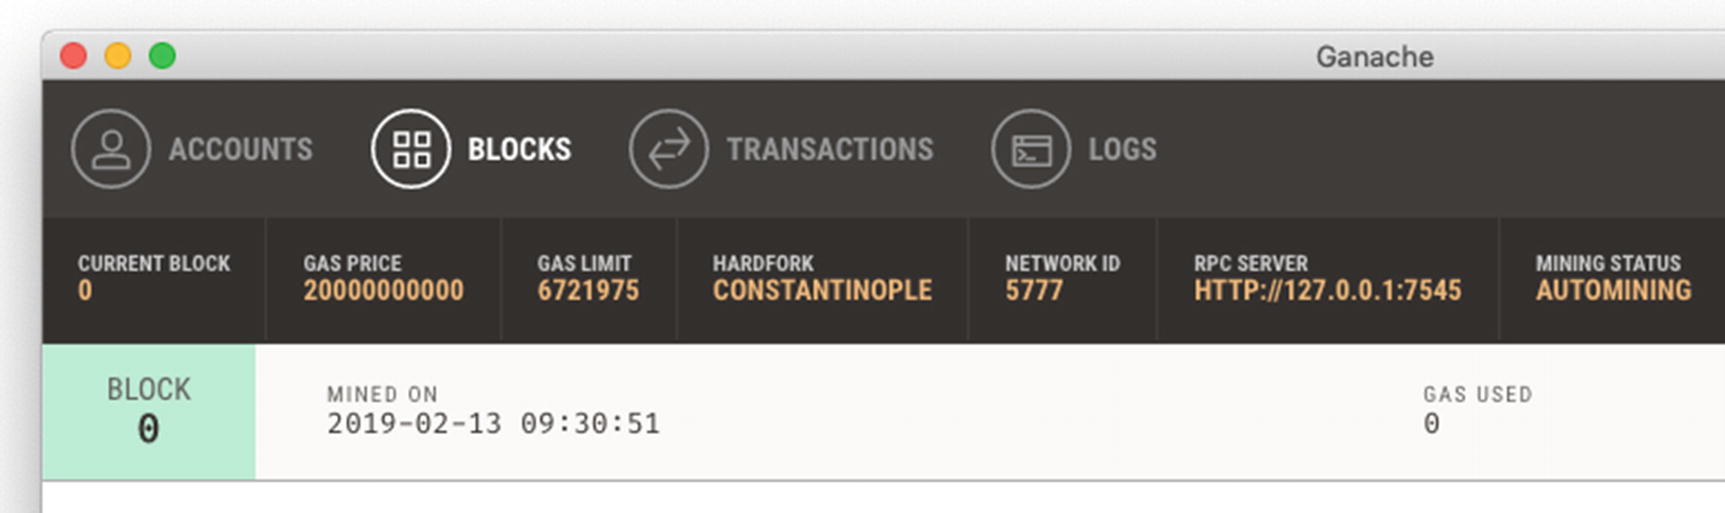
Examining the block(s) in the blockchain
Creating a Smart Contract
Now that you have learned how to install the two different flavors of Ganache, let’s now write a Smart Contract and see how you can deploy it onto Ganache. For illustration, I shall use the desktop version of Ganache.
Using the Remix IDE on Chrome, create the following contract and name it as ProofOfExistence.sol:
Caution
For the Remix IDE, ensure that you are loading it using http and not https.This is because Ganache only accept connections to it using http. If you load the Remix IDE using https, you would have problems connecting to Ganache later on.
It allows users to pass in a string through the notarize() function so that the hash of the string can be stored on the blockchain using the proofs state variable (which is of type mapping, which is like as associative array).
It allows users to verify if a string was previously recorded in the blockchain by calling the checkDocument() function and checking if the hash of the string exists in the proofs state variable.
This Smart Contract acts as a simple notarizer in which a user can store a string (e.g., containing an idea) on the blockchain and proving it later on that this idea was already invented earlier.
Deploying the Contract to Ganache
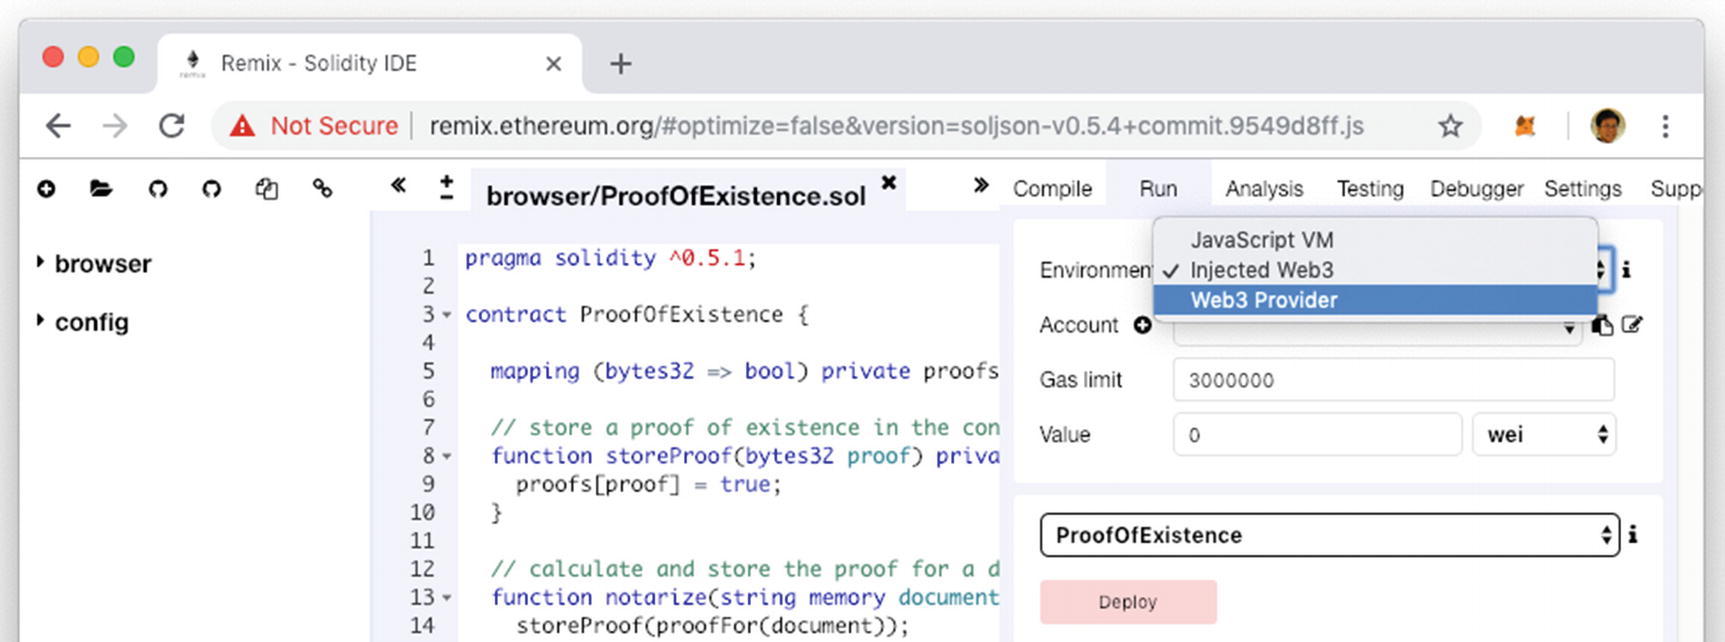
Connecting the Remix IDE to Ganache
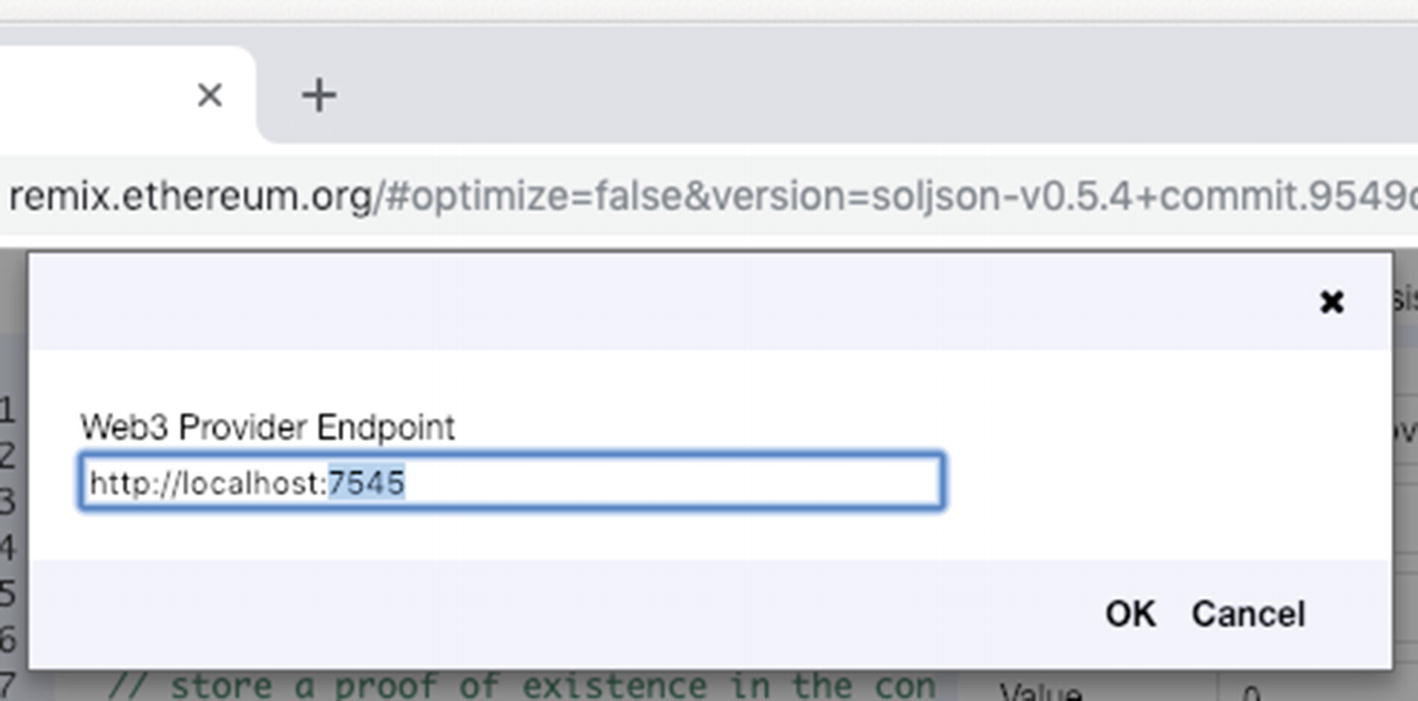
Entering the endpoint URL of Ganache
The preceding endpoint URL is where the Ethereum node (which is Ganache in this case) is listening at. Recall that desktop version of Ganache is listening at port number 7545. Hence, be sure to specify this port number. If you are using the CLI version of Ganache, the port number is then 8545.
Tip
If you have problems in connecting to the rpc (error message: “Not possible to connect to the Web3 provider. Make sure the provider is running and a connection is open (via IPC or RPC).”), this is likely due to the fact that you are using the https version of Remix. To resolve this, simply load Remix using http.
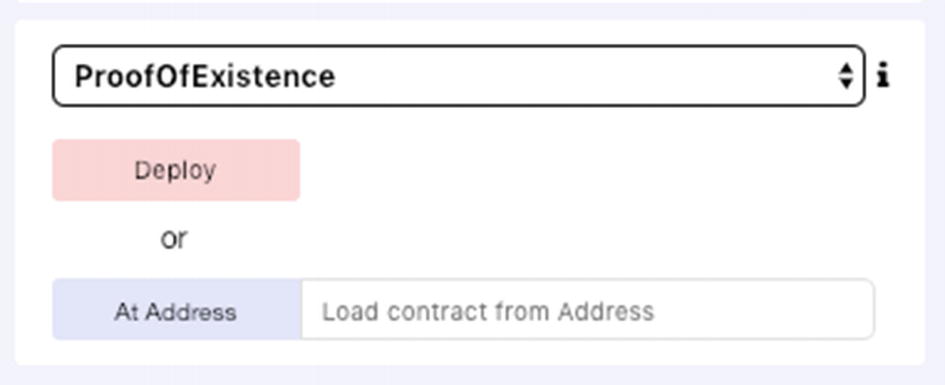
Deploying the Smart Contract
Tip
Be sure to turn on auto compile in the Remix IDE so that your contract is automatically compiled as you type in the code for the contract.
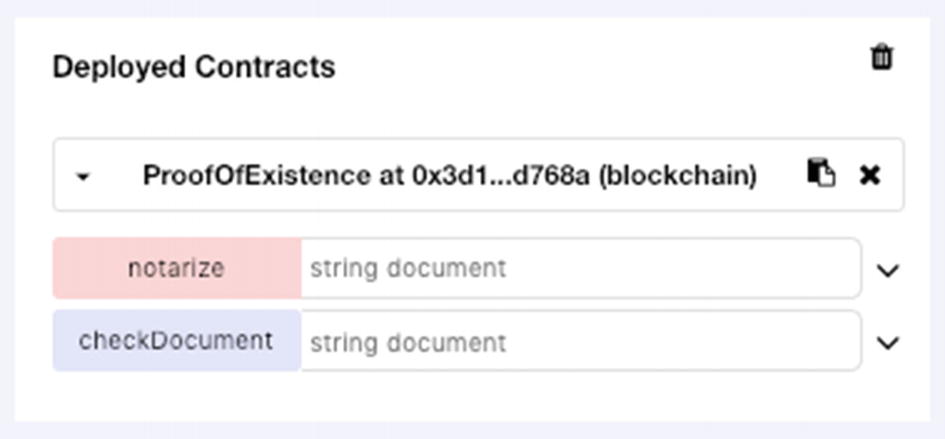
The Smart Contract deployed with the two functions showing
Tip
Click the down arrow if you don’t see the two functions – notarize and checkDocument.
Examining Ganache
Examining the balance of the first account in Ganache
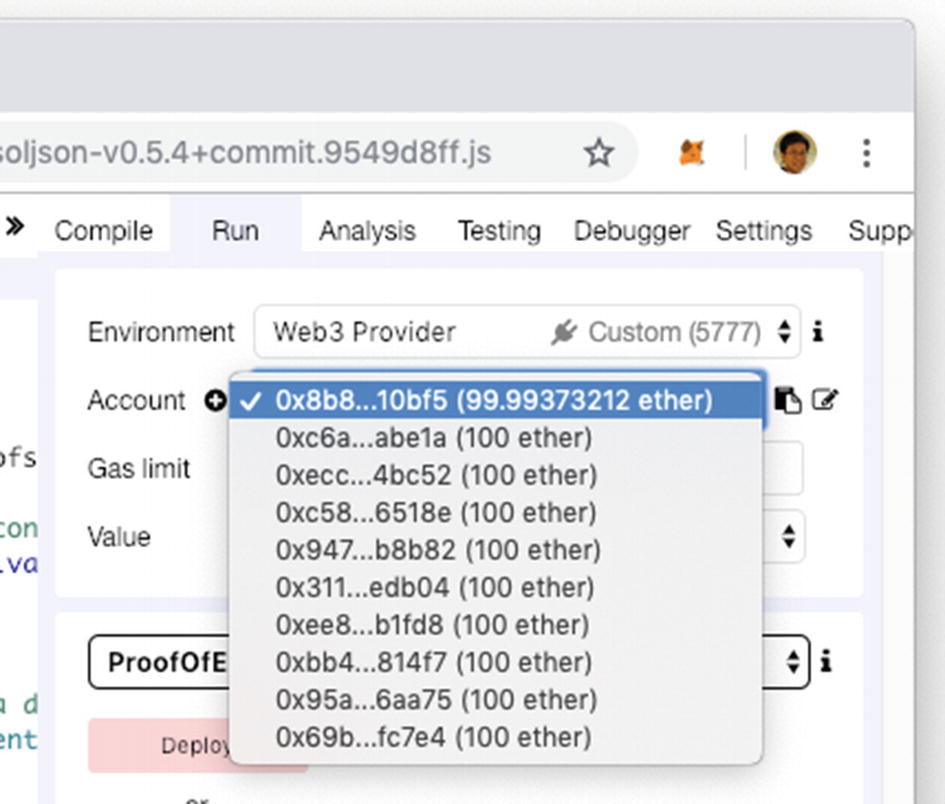
Changing the account to use in the Remix IDE
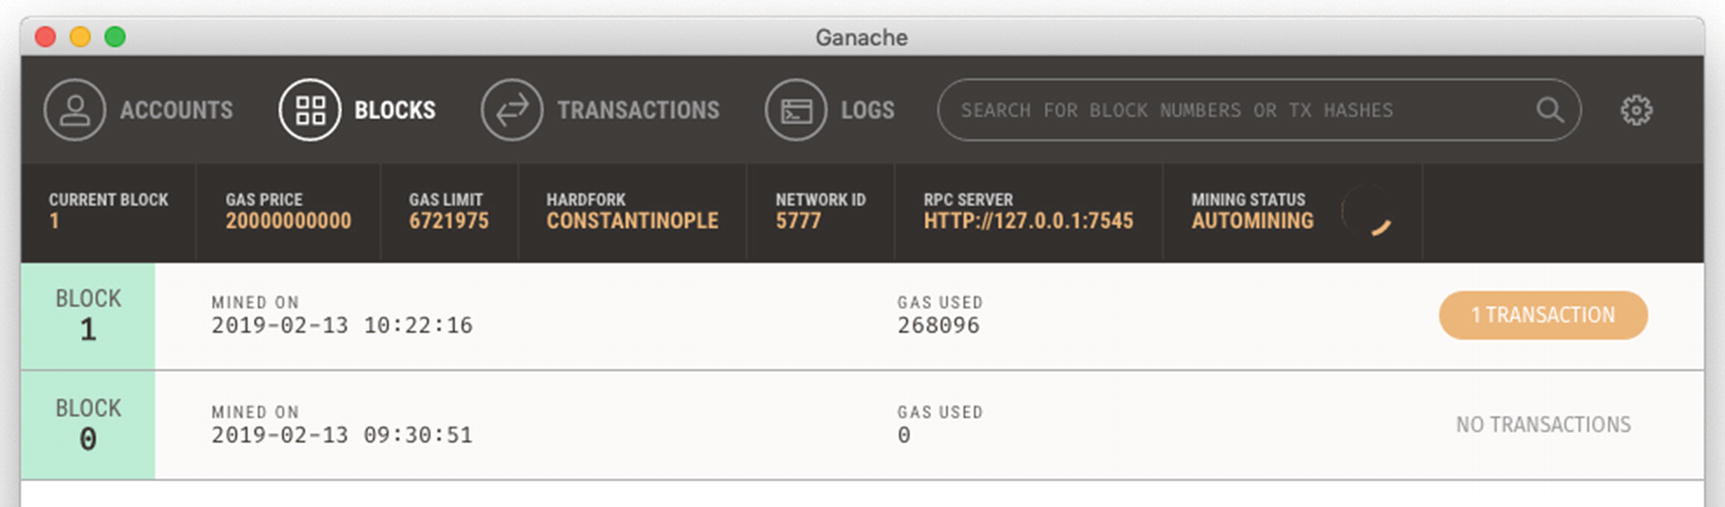
The Ganache blockchain now has an additional block containing the deployed contract
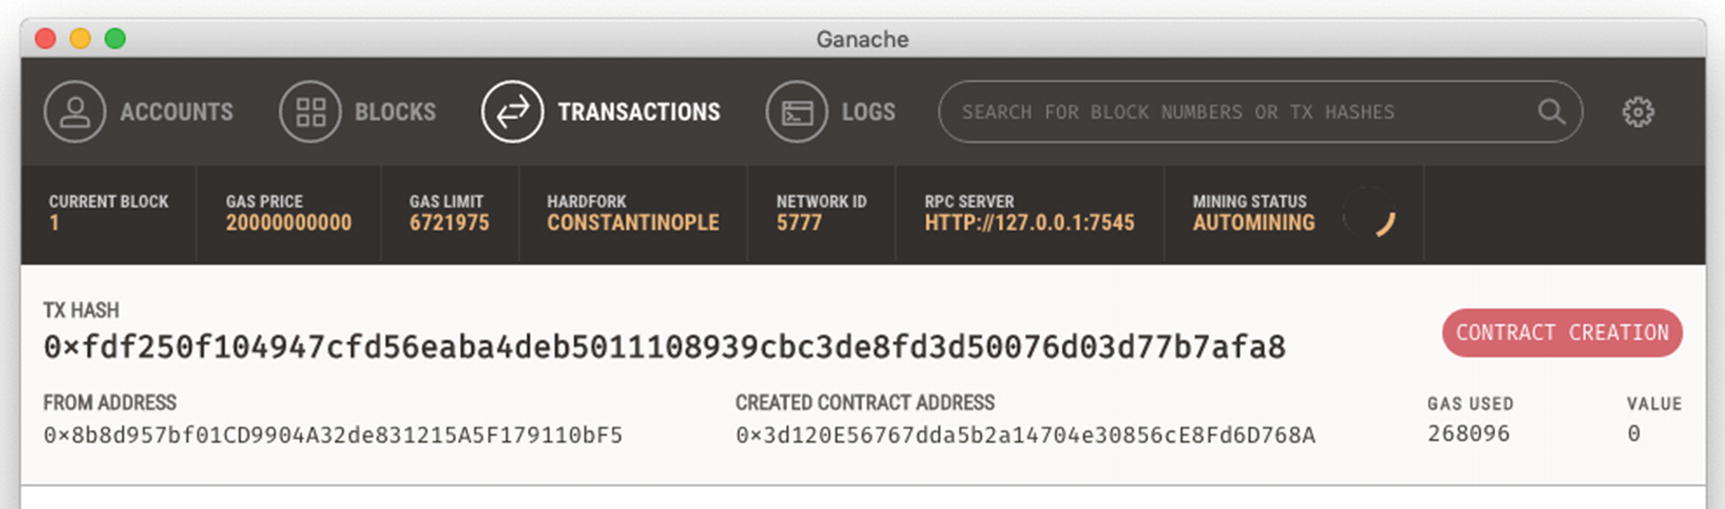
Ganache now shows a new transaction involving the contract deployment
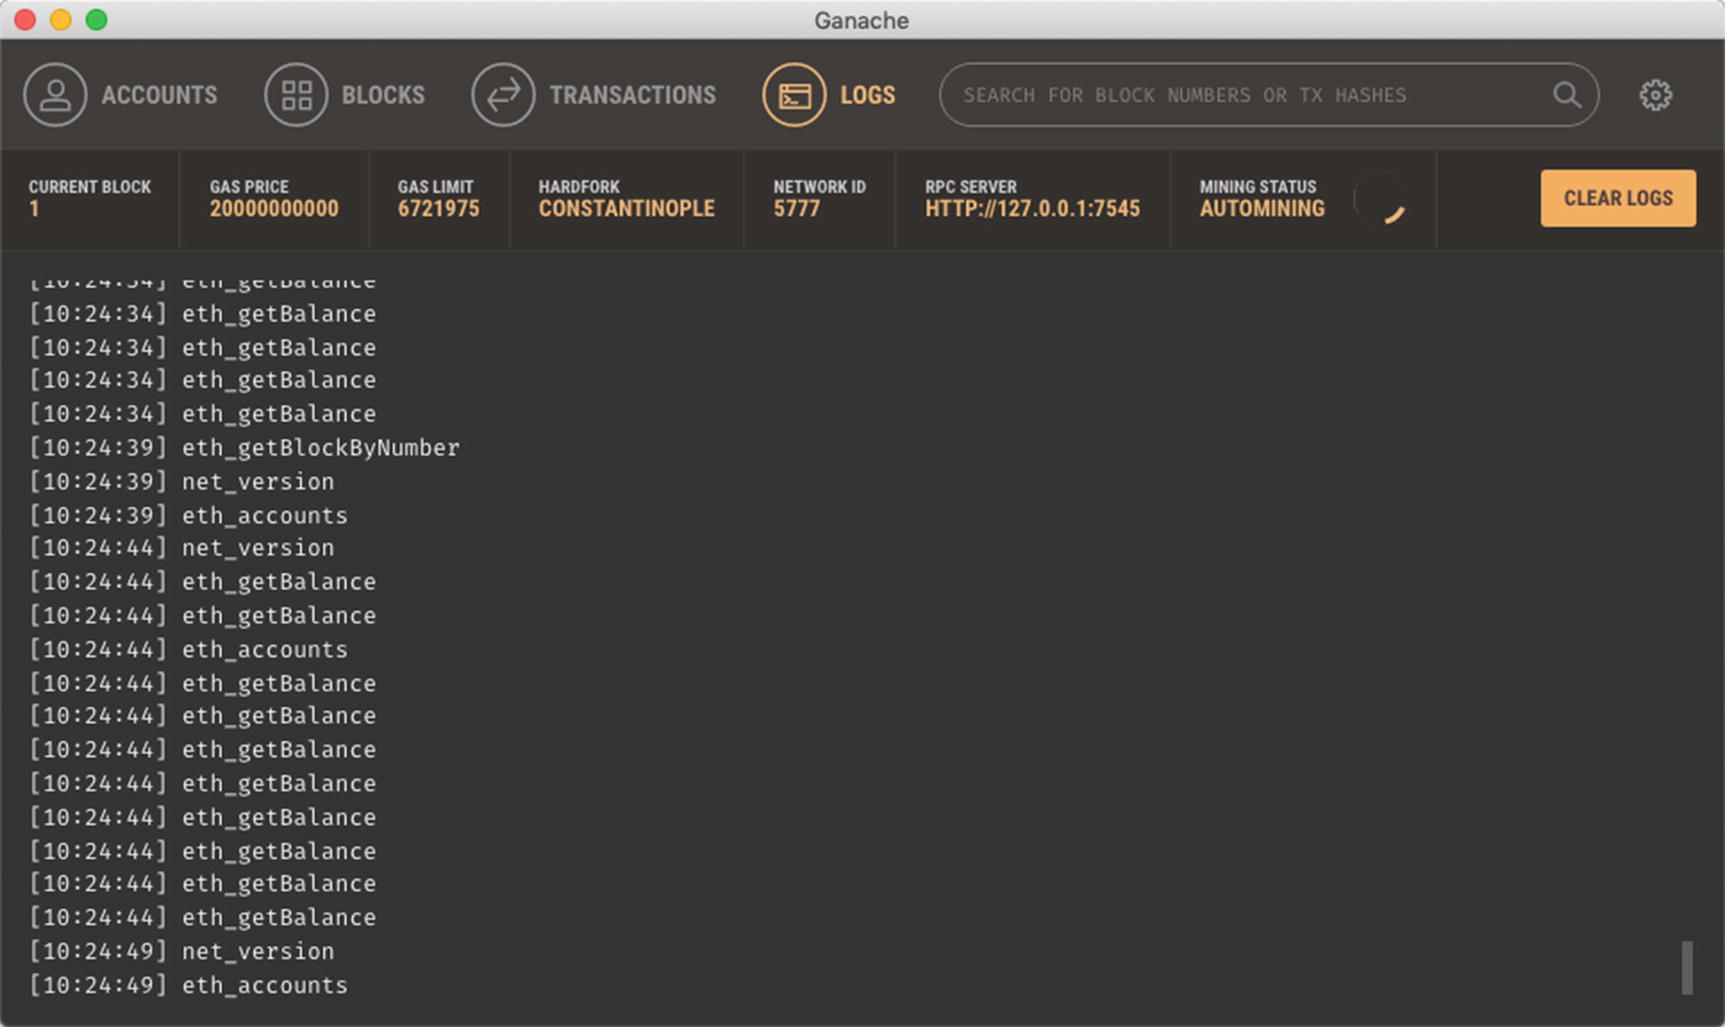
The LOGS tab shows the activities of Ganache behind the scene
Testing the Contract
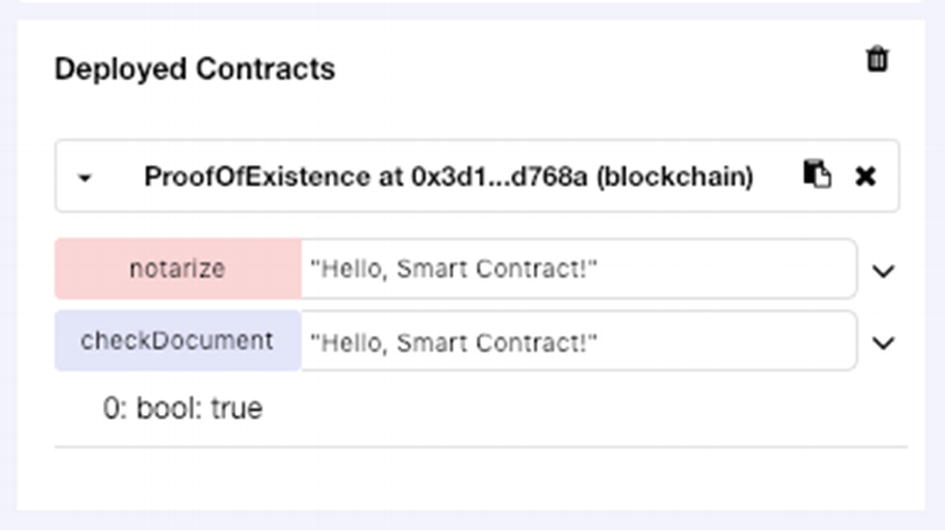
Storing and verifying the existence of the string in the blockchain

Entering a different string other than the original string will yield a result of false
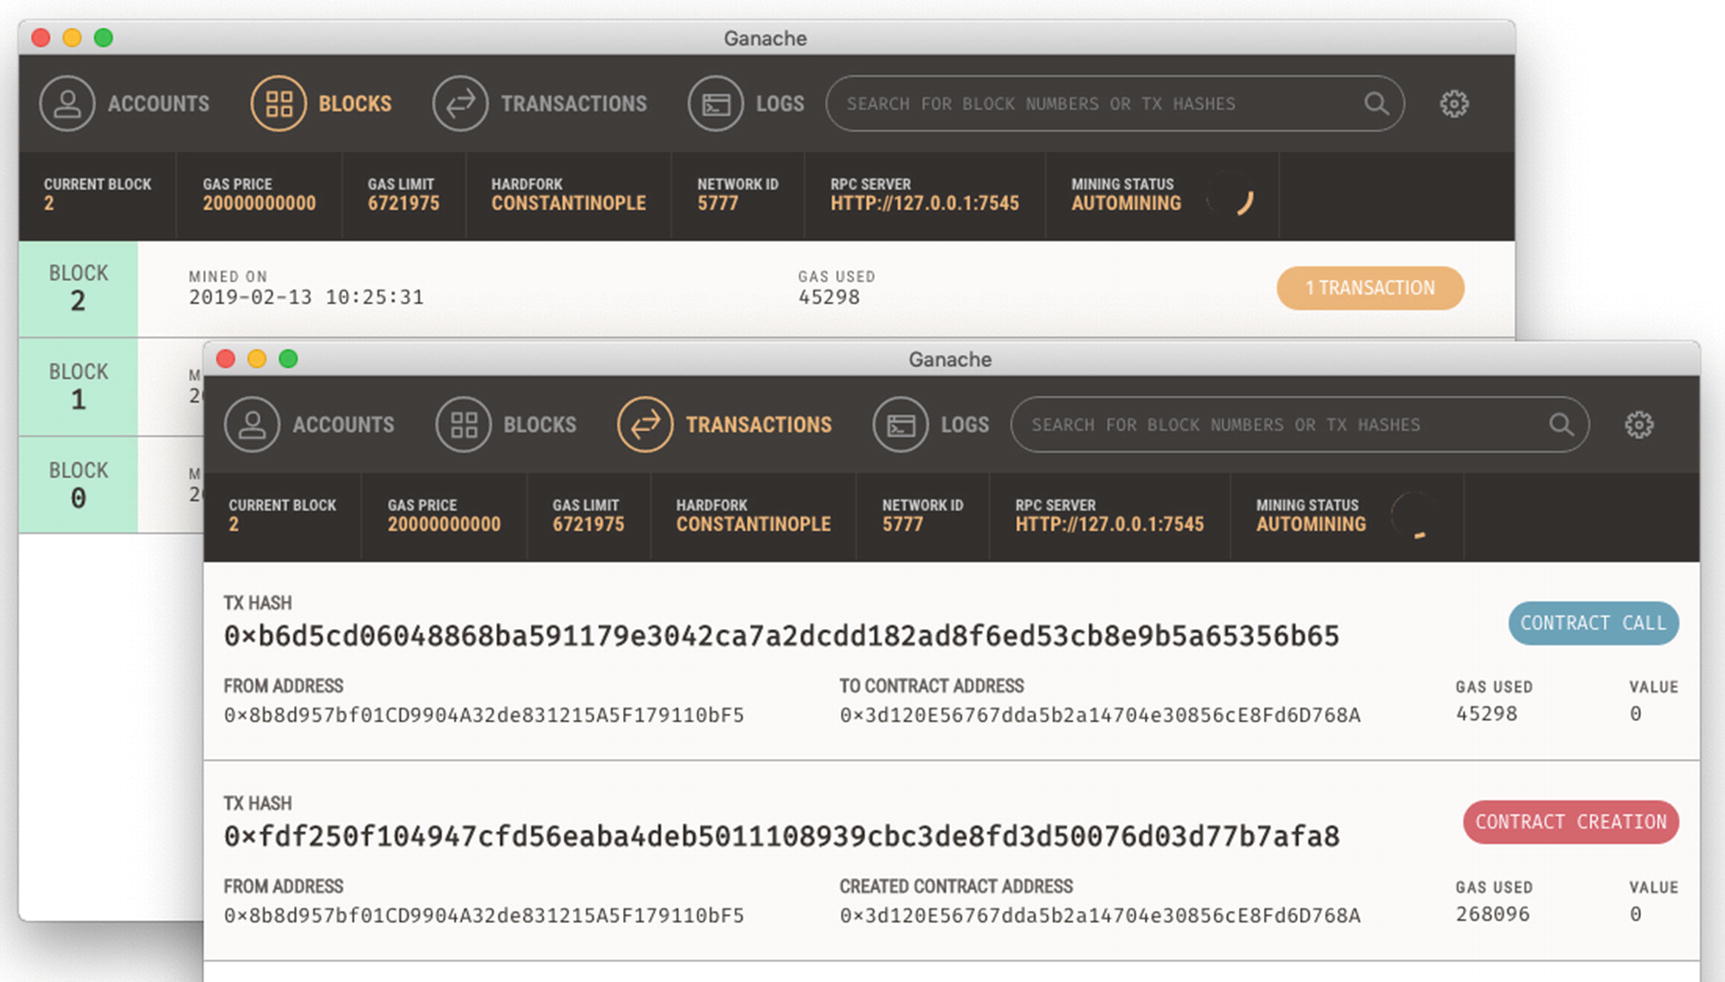
Examining Ganache, which has a new block in the blockchain as well as a new transaction
Connecting MetaMask to Ganache
Since Ganache is a blockchain, you should be able to connect your MetaMask to it. So, let’s see how you can do it.
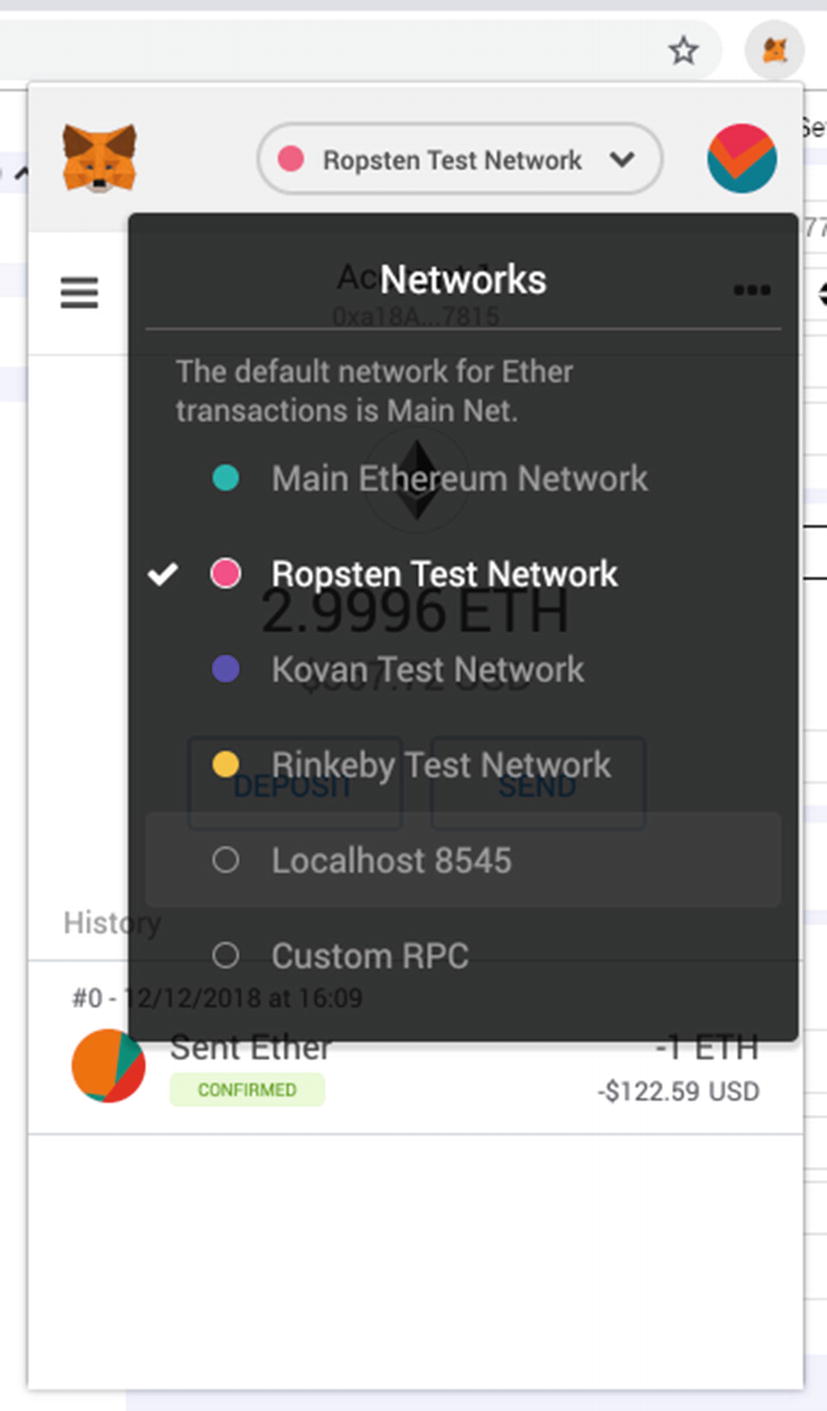
Connecting MetaMask to a custom RPC
Tip
If you are using the CLI version of Ganache, you can directly select the Localhost 8545 menu item.
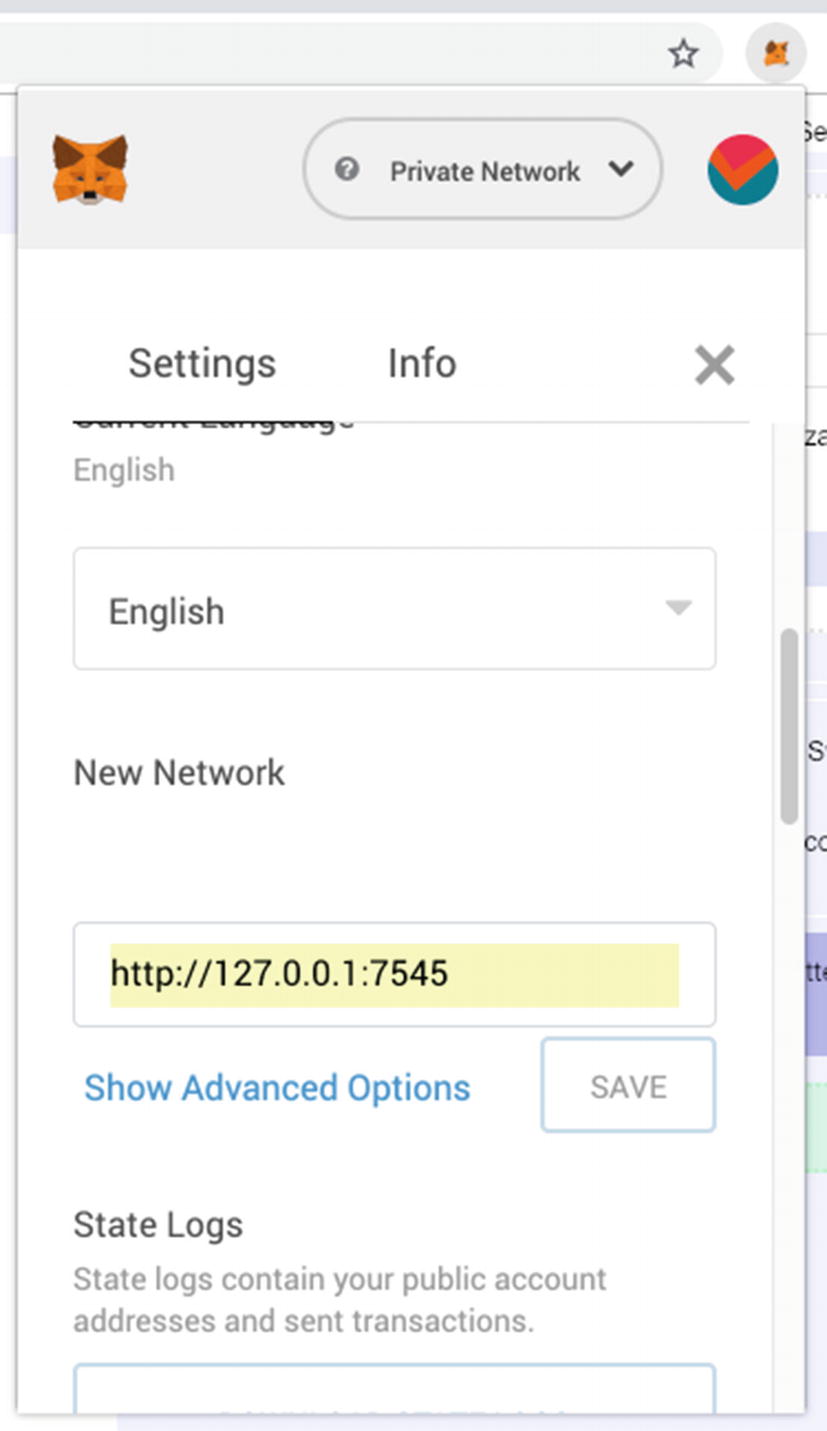
Entering the endpoint URL for Ganache
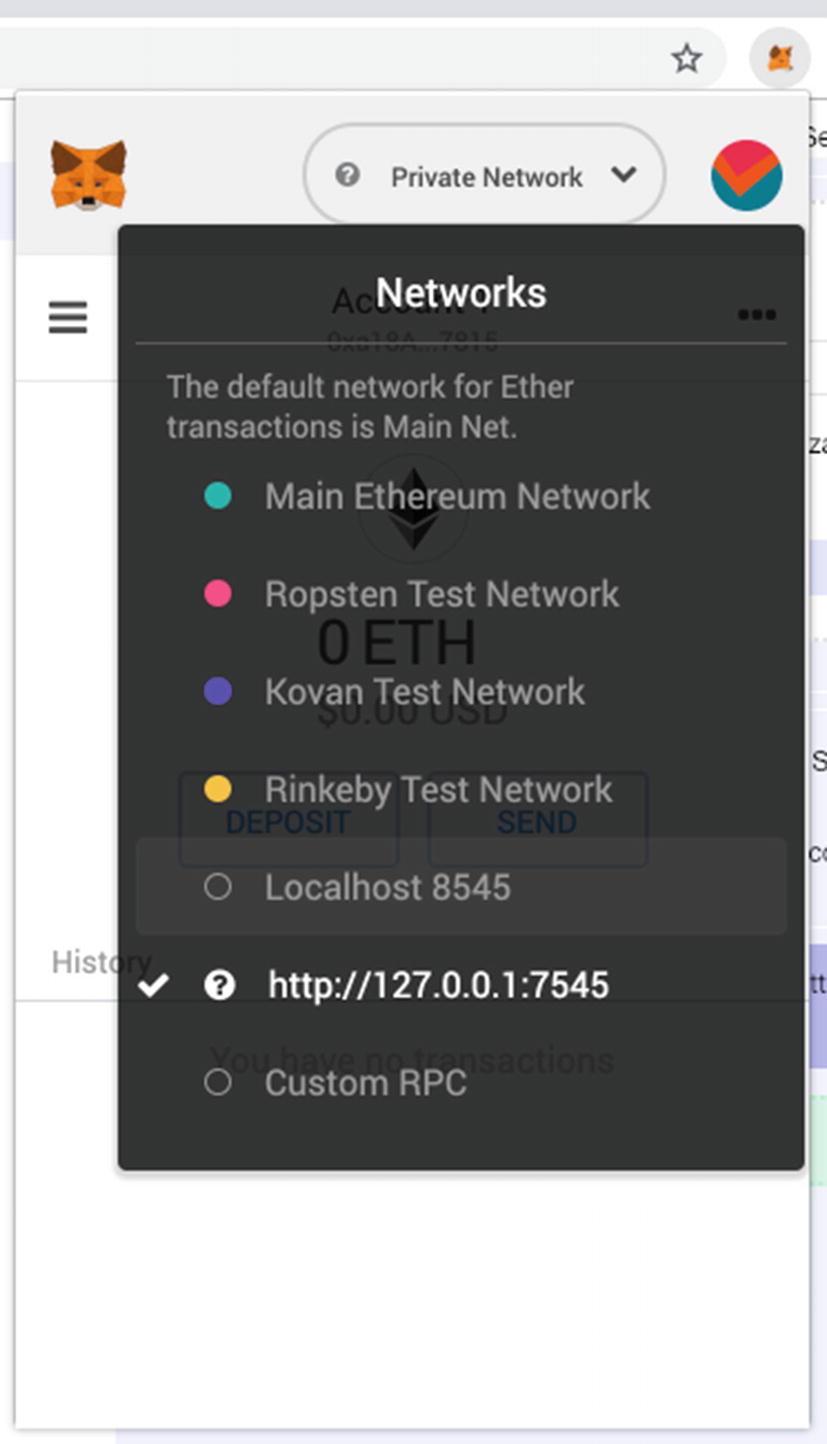
Selecting the newly added RPC to connect to Ganache
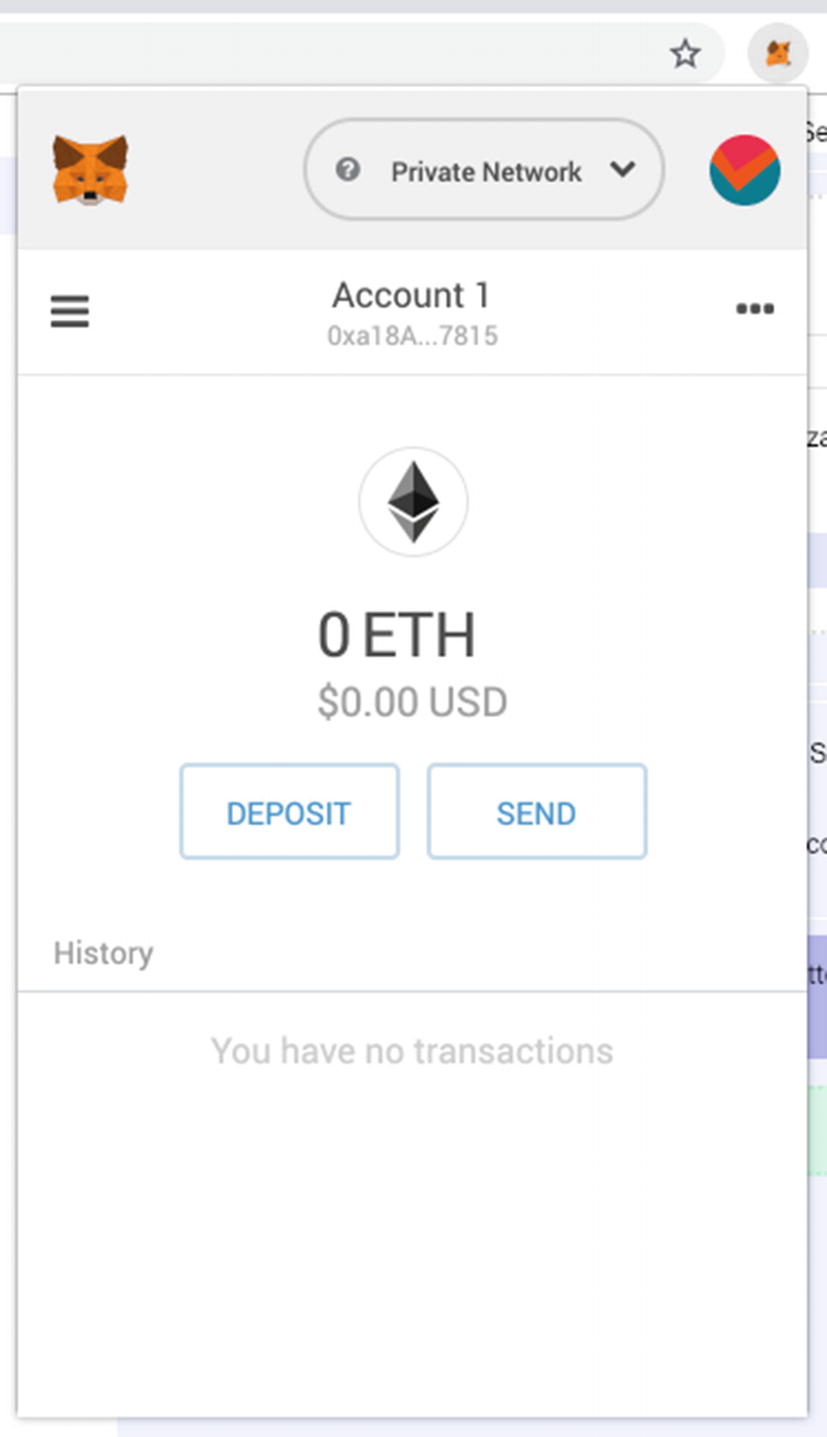
The existing account in MetaMask has no Ethers in the blockchain hosted by Ganache
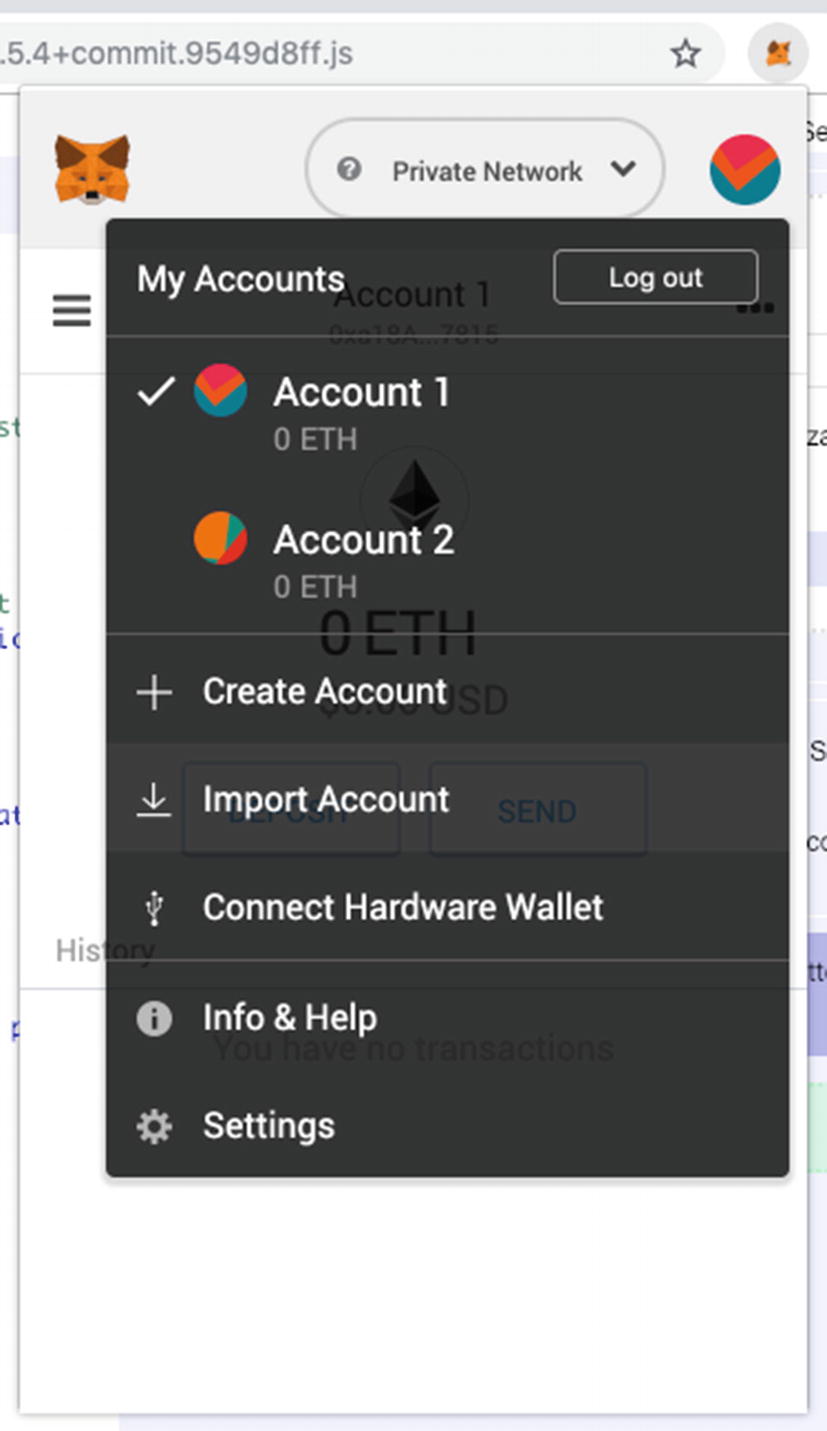
Importing an account in MetaMask
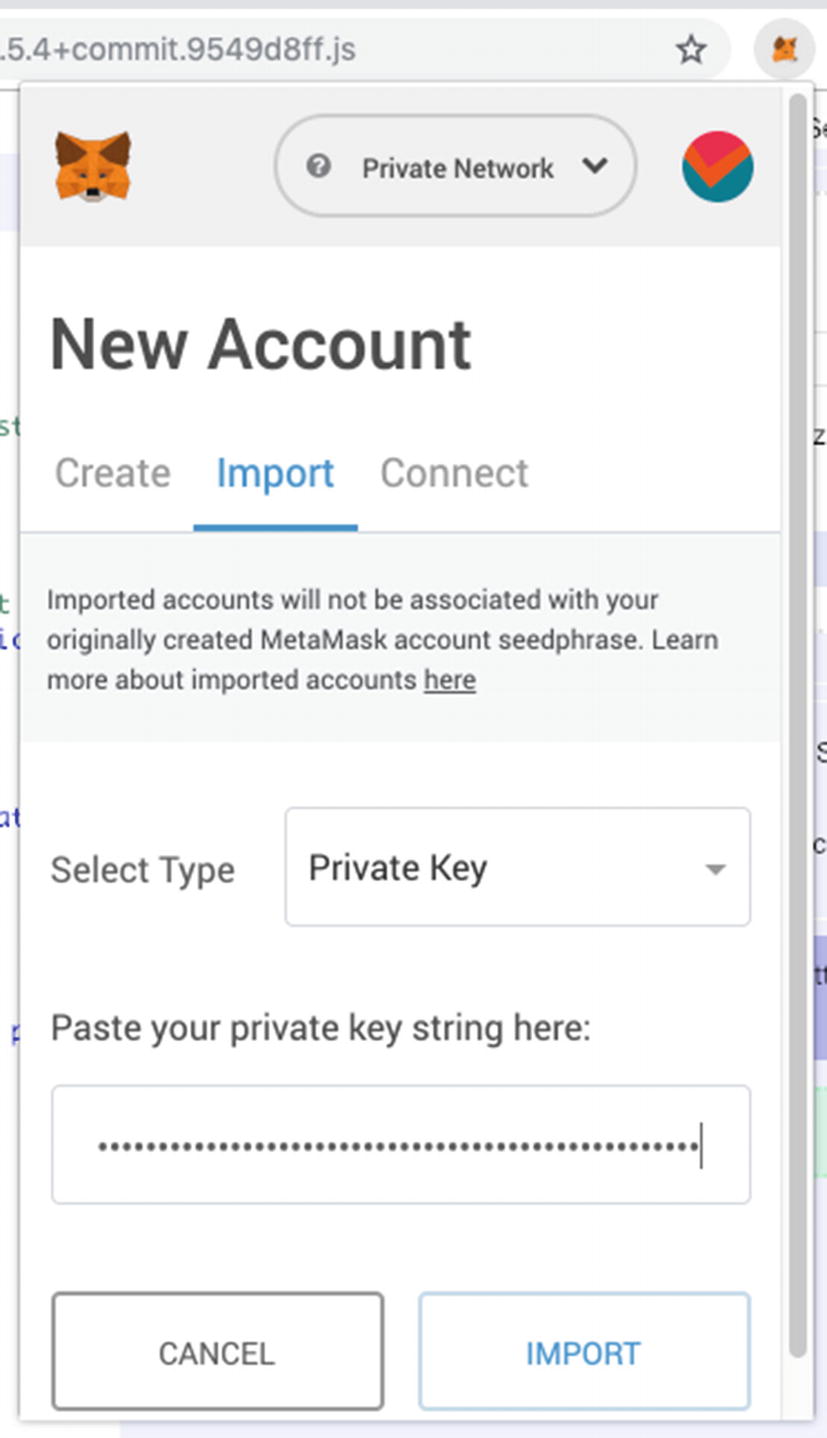
Entering the private key of the first account in Ganache
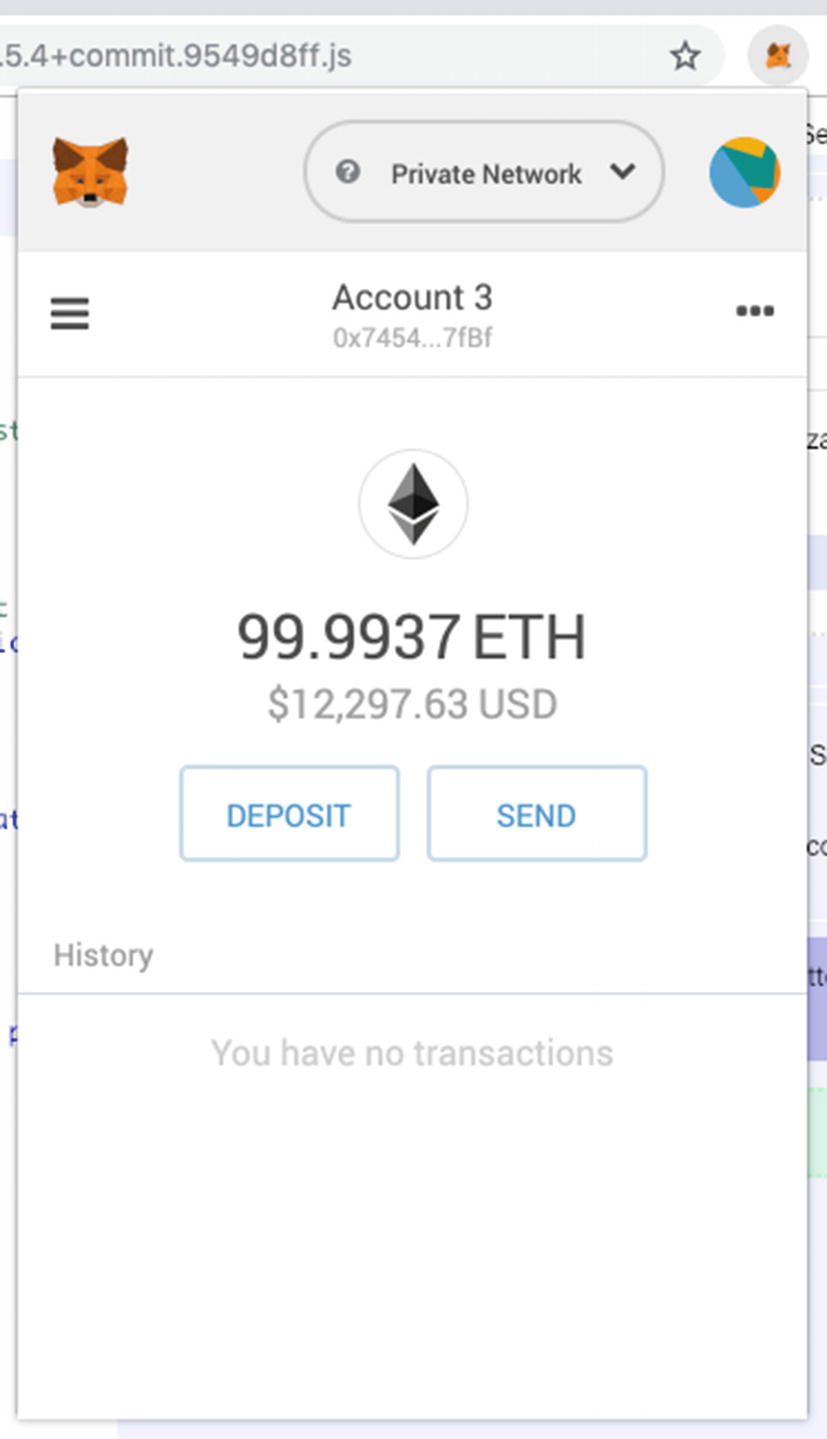
The account in Ganache imported into MetaMask
You can try to import the other accounts from Ganache into MetaMask. You then send Ethers from one account into another.
The ability to connect MetaMask to Ganache is very useful, especially in later chapters where we talk about interacting with your Smart Contracts via the web3.js APIs.
Summary
In this chapter, you learned how to test your Smart Contract in a stand-alone blockchain hosted by Ganache. Using Ganache allows you to simulate running a blockchain without accessing a real one. And it makes testing your Smart Contracts efficient and effortless.