
In the previous chapter, you learned how to create your own private Ethereum test network so that you can try out the various Ethereum transactions, such as transferring Ethers to different accounts and performing mining. You also learned how to create accounts so that you can hold your own Ethers. In this chapter, you will learn how to use a Chrome extension known as the MetaMask. The MetaMask Chrome extension is an Ethereum wallet that allows you to hold your Ethereum account, and it will be an essential tool to help you develop and test Smart Contracts in the next few chapters.
What Is MetaMask?
MetaMask is a very useful tool that plays a pivotal role in allowing you to make your foray into the world of blockchain. Rather than attempt to define what exactly MetaMask is in one paragraph, I shall talk about the role played by MetaMask as we go along.
- Create accounts for use in the various Ethereum networks
It maintains the private keys for your accounts so that you can export them or import new accounts.
Switch between the various Ethereum networks, so that your accounts can reflect the correct balance for each network
- Perform transactions between accounts
You can transfer Ethers from one account to another.
You can also hold tokens in your MetaMask accounts.
You can also view your detail transactions on Etherscan, a blockchain explorer.
Besides being an Ethereum wallet, MetaMask also allows you to interact with the Ethereum blockchain by injecting a Javascript library called web3.js, developed by the Ethereum core team. We will discuss more on this in the next chapter when we discuss Smart Contracts.
How MetaMask Works Behind the Scene
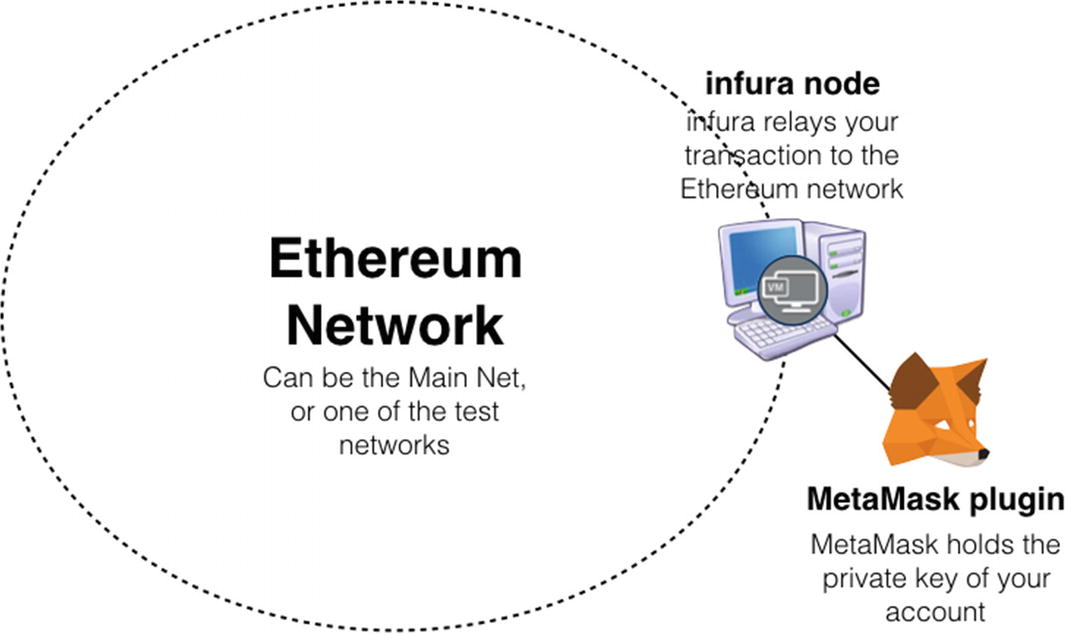
How MetaMask works behind the scene
Main Ethereum Network – https://mainnet.infura.io/metamask
Ropsten Test Network – https://ropsten.infura.io/metamask
Kovan Test Network – https://kovan.infura.io/metamask
Rinkeby Test Network – https://rinkeby.infura.io/metamask
Installing MetaMask
Launch Chrome and navigate to the Chrome Web Store at https://chrome.google.com/webstore/category/extensions .
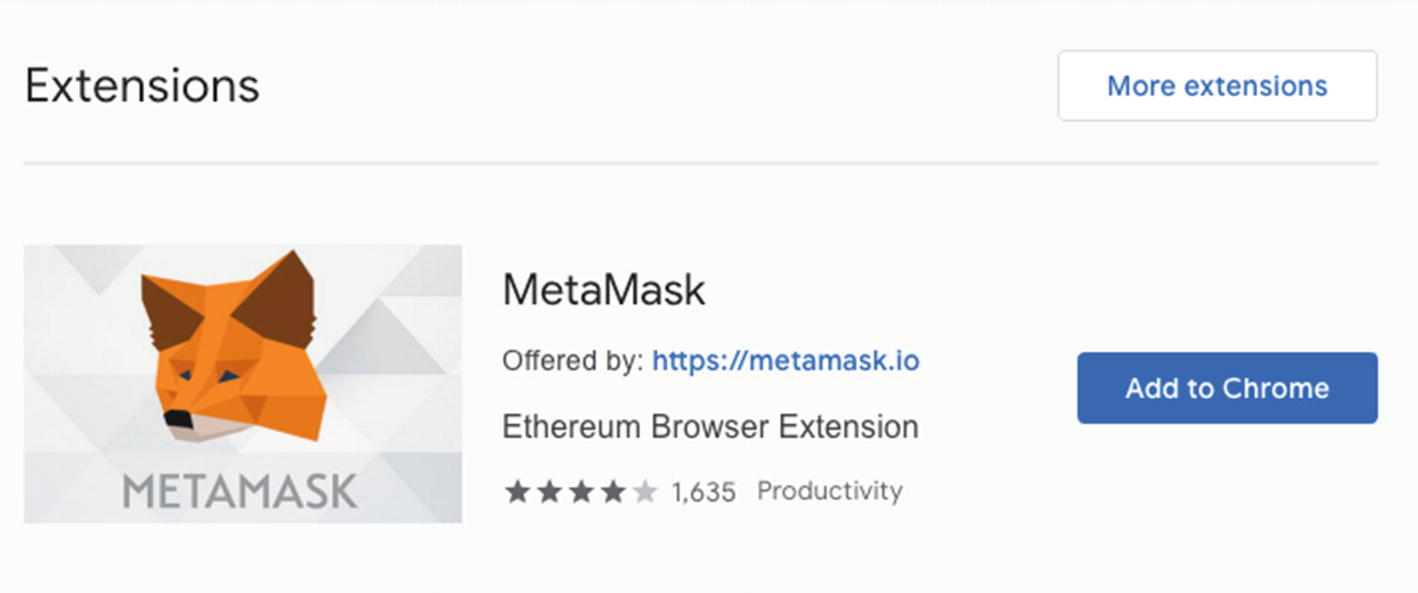
Search for MetaMask.
You should now be able to see the MetaMask extension in the search result. Click Add to Chrome (see Figure 5-2).
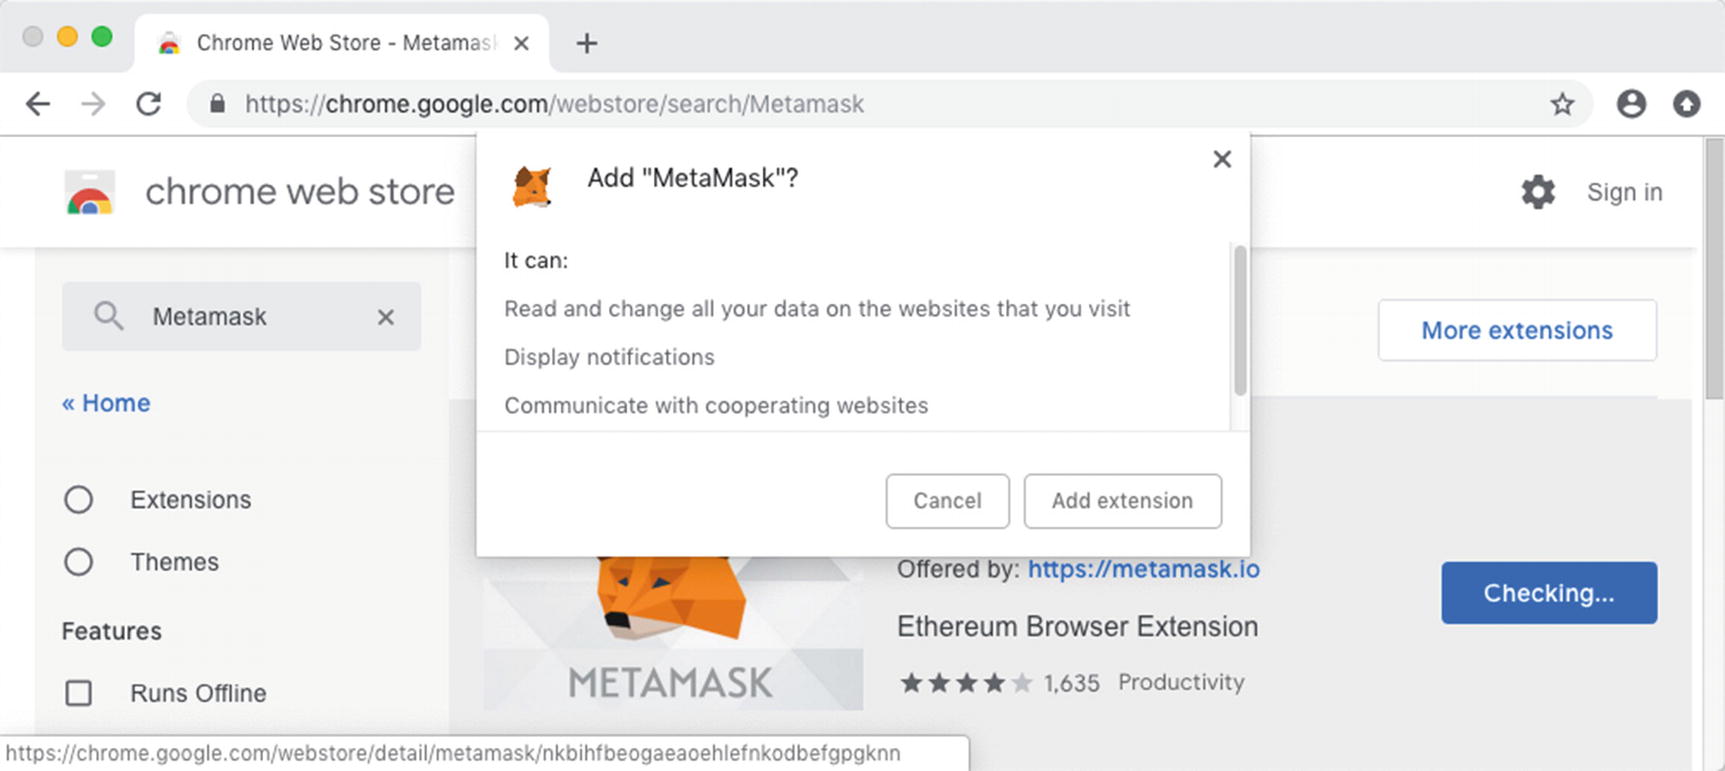
You will be prompted to add MetaMask to Chrome. Click Add extension (see Figure 5-3).
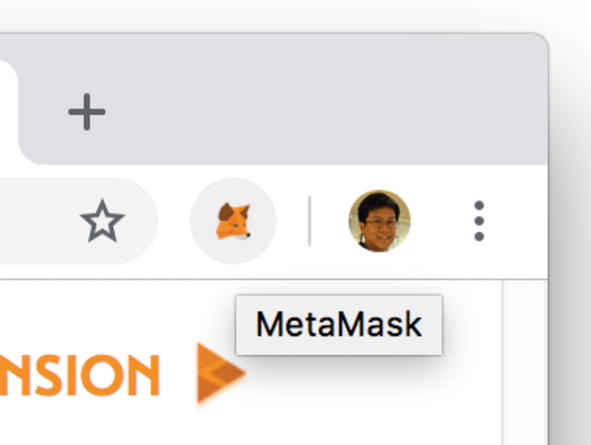
Once MetaMask is added to Chrome, you will be able to see its icon appear on the top right corner of the browser (see Figure 5-4).
Searching for MetaMask in the Chrome Web Store
Adding the MetaMask extension to the Chrome browser
Locating the MetaMask icon in the Chrome browser
Signing in to MetaMask
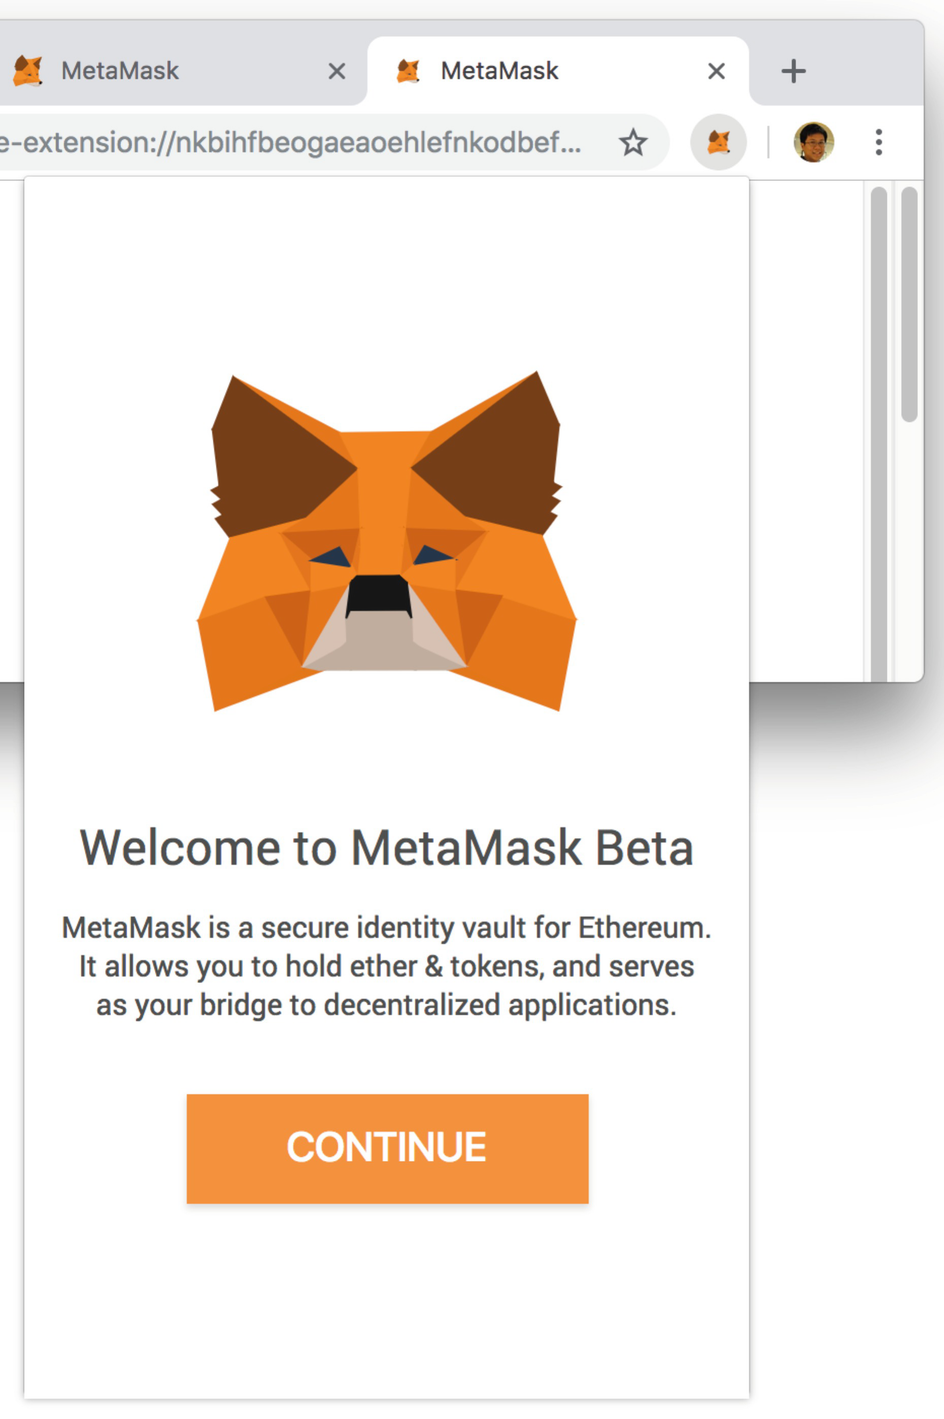
Click the MetaMask icon, and click CONTINUE (see Figure 5-5):
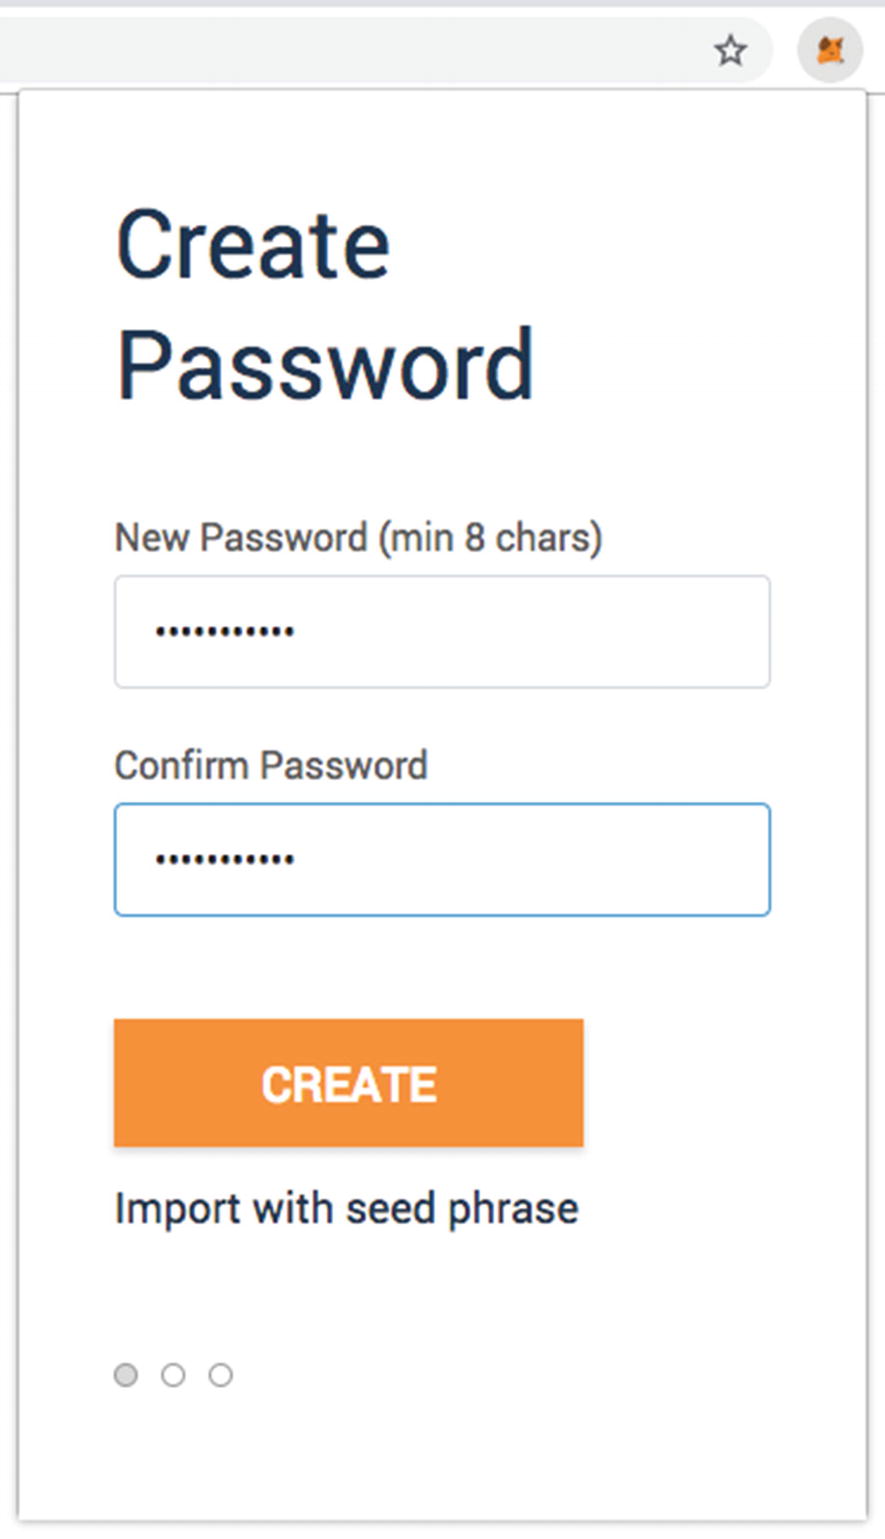
You will be asked to create a password for your account. Enter the password twice (see Figure 5-6) and click CREATE.
In the next screen, click NEXT.
You will be asked to agree to the Terms of Use. Scroll to the bottom of the page and click ACCEPT.
For the next few pages, click ACCEPT a few more times.
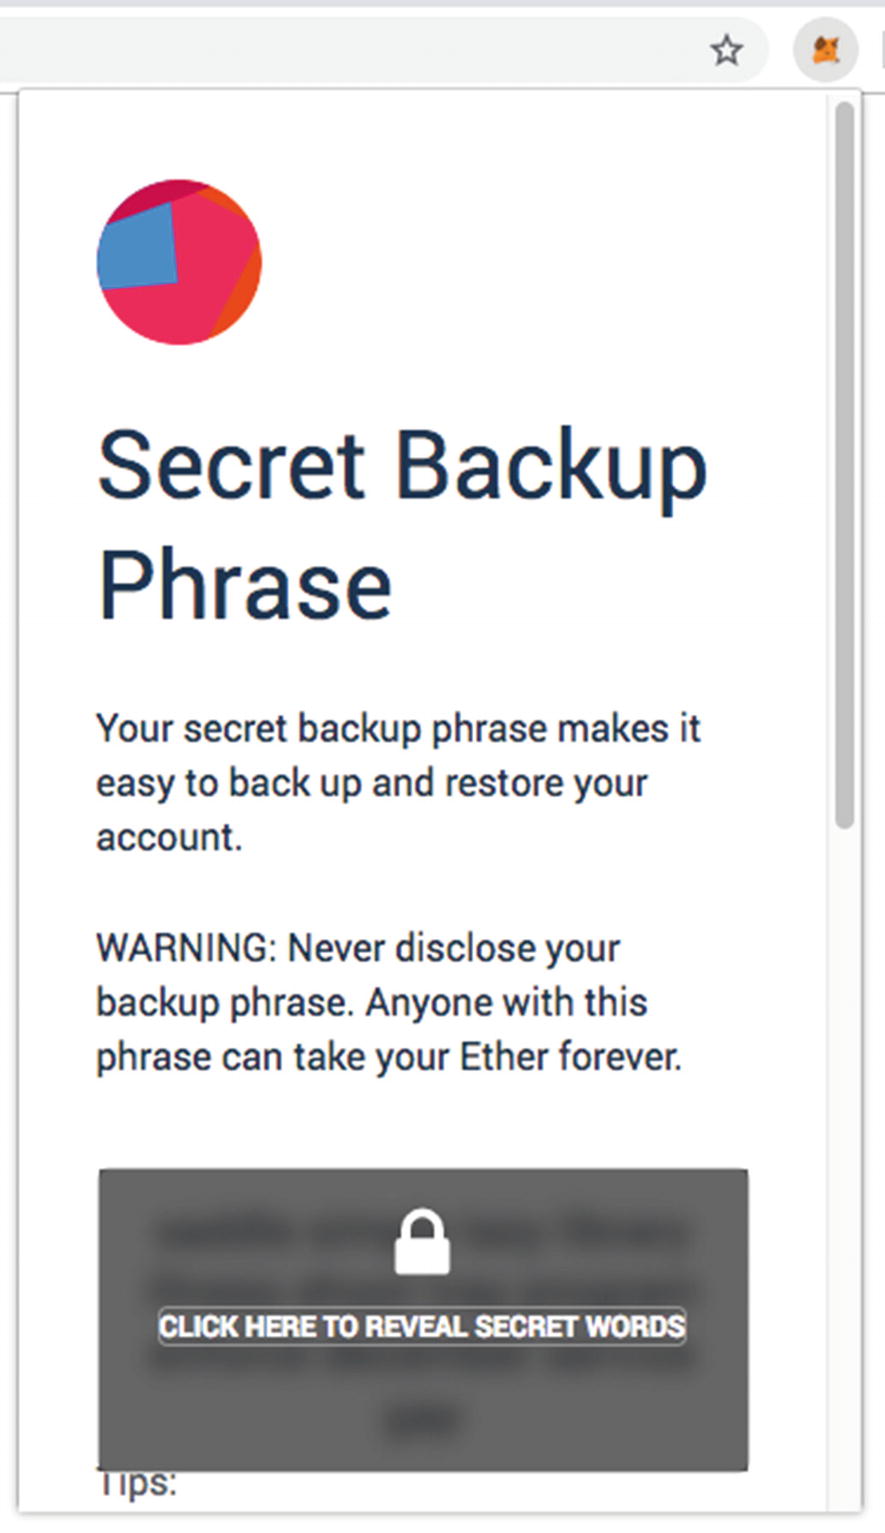
In the next screen, you will see your secret backup phrase. You can click the lock icon (see Figure 5-7) to reveal the 12-word secret phrase or scroll to the bottom of the page to download the 12-word secret phrase in a text file. At the bottom of the page, click NEXT.
The 12-word secret phrase allows you to recover your account in the event that you have forgotten your password. This 12-word secret phrase is known as the BIP39 (Bitcoin Improvement Proposals) seed phrase. MetaMask uses the BIP39 protocol to figure out how to use a set of 12-word secret phrase to get a seed – this seed will be used to generate a root key for each cryptocurrency (in the case of Ethereum, this is Ether).
The root key is then hashed to generate a private key, which will be used to generate a public key, which in turn will be used to generate the public address for an account. To generate a second account, the first private key is hashed to obtain the second private key, which is then used to generate a public key, and so on.
Using this method, the seed works with a deterministic algorithm to generate an unlimited series of addresses for your wallet.
The list of words used in the secret phrase can be found here: https://github.com/bitcoin/bips/blob/master/bip-0039/english.txt . It is based on a list of 2048 words, with 12 words selected in a particular order.
In the next screen, you will be asked to select the 12 words in the specific order that it was shown. This is to confirm that you have the correct phrase.
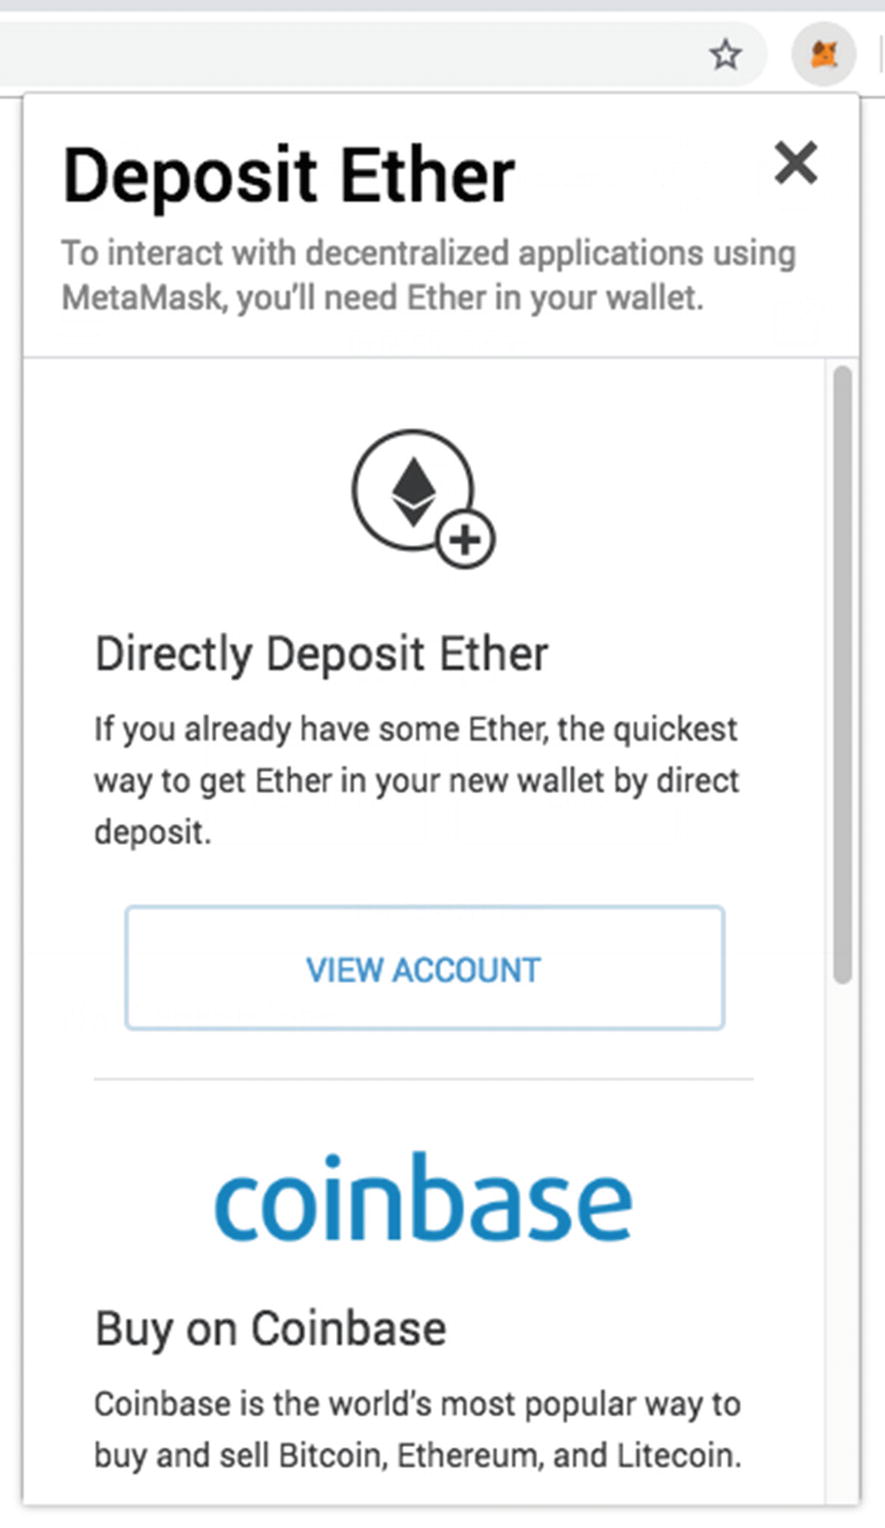
You can now view your account or buy Ether from Coinbase. For now, click the VIEW ACCOUNT button (see Figure 5-8).
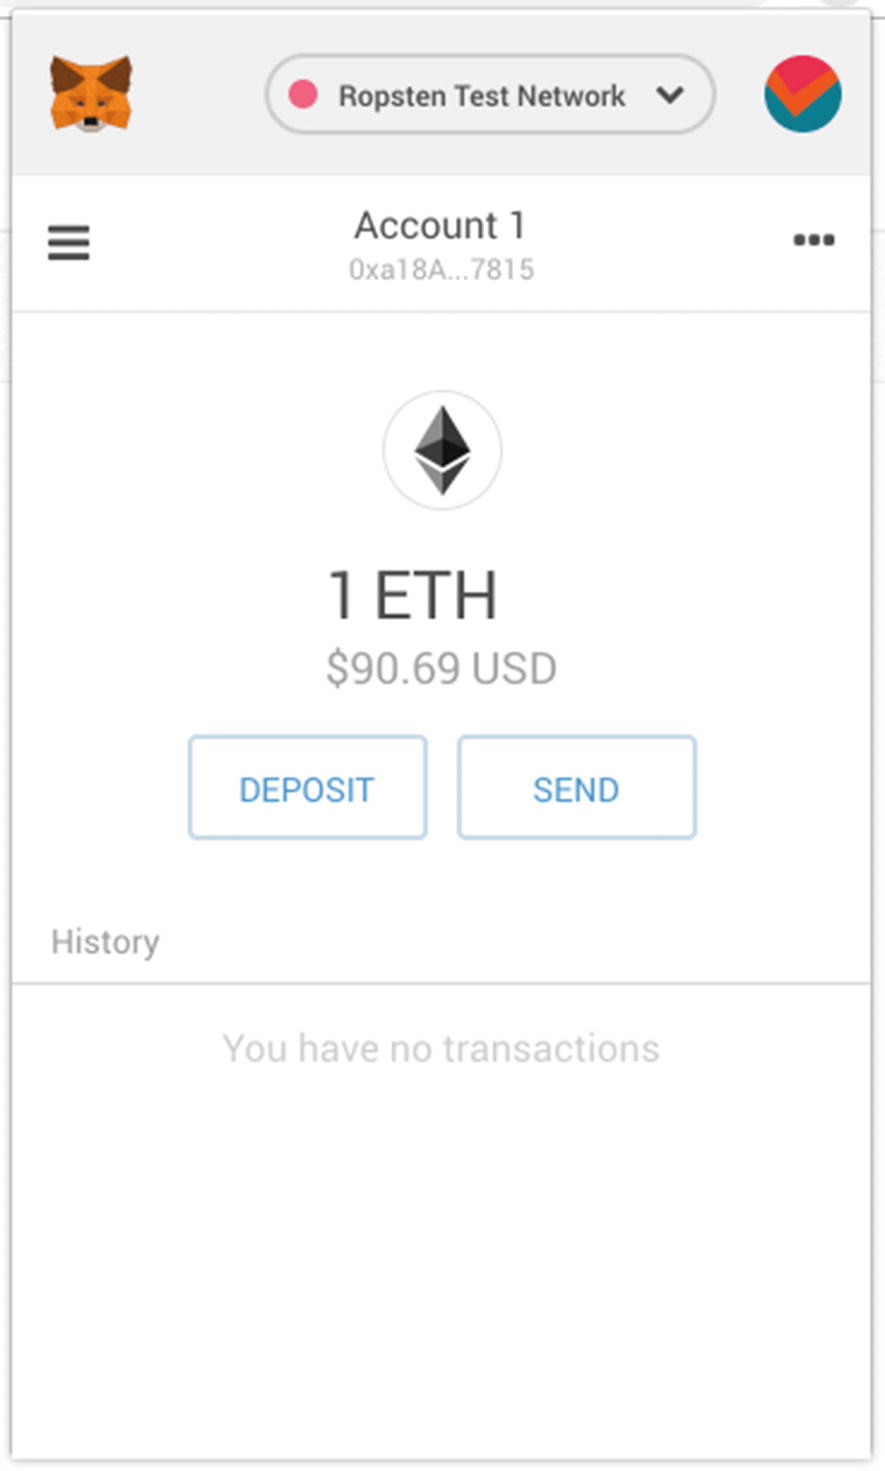
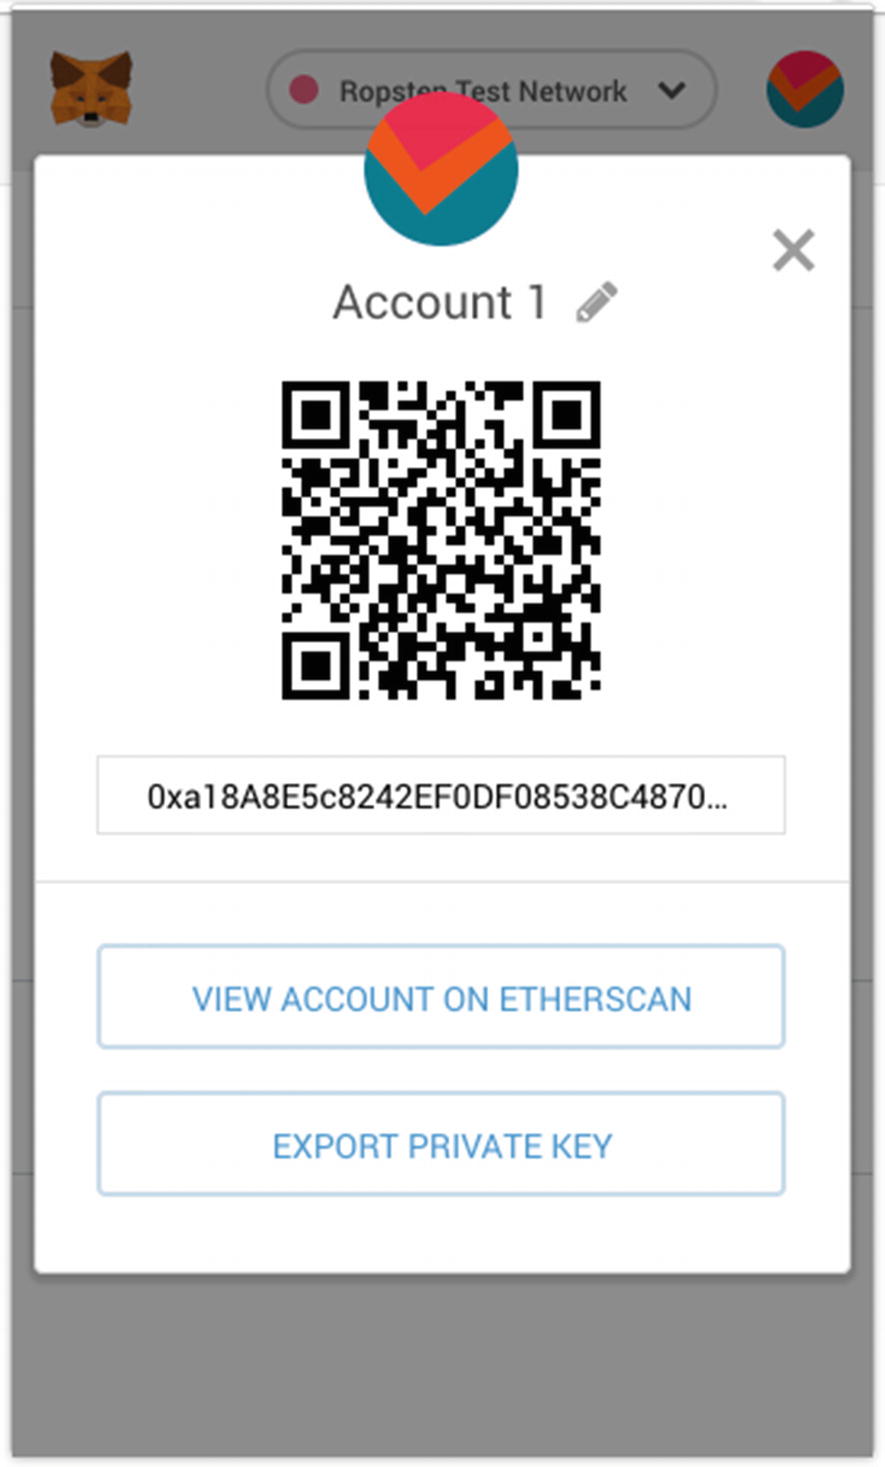
You should now see your account information as shown in Figure 5-9. Your account information is also displayed as a QR code, and you can also view your account details on Etherscan or export your private key (so that you can import your account into another computer). For now, close the pop-up by clicking “X”.
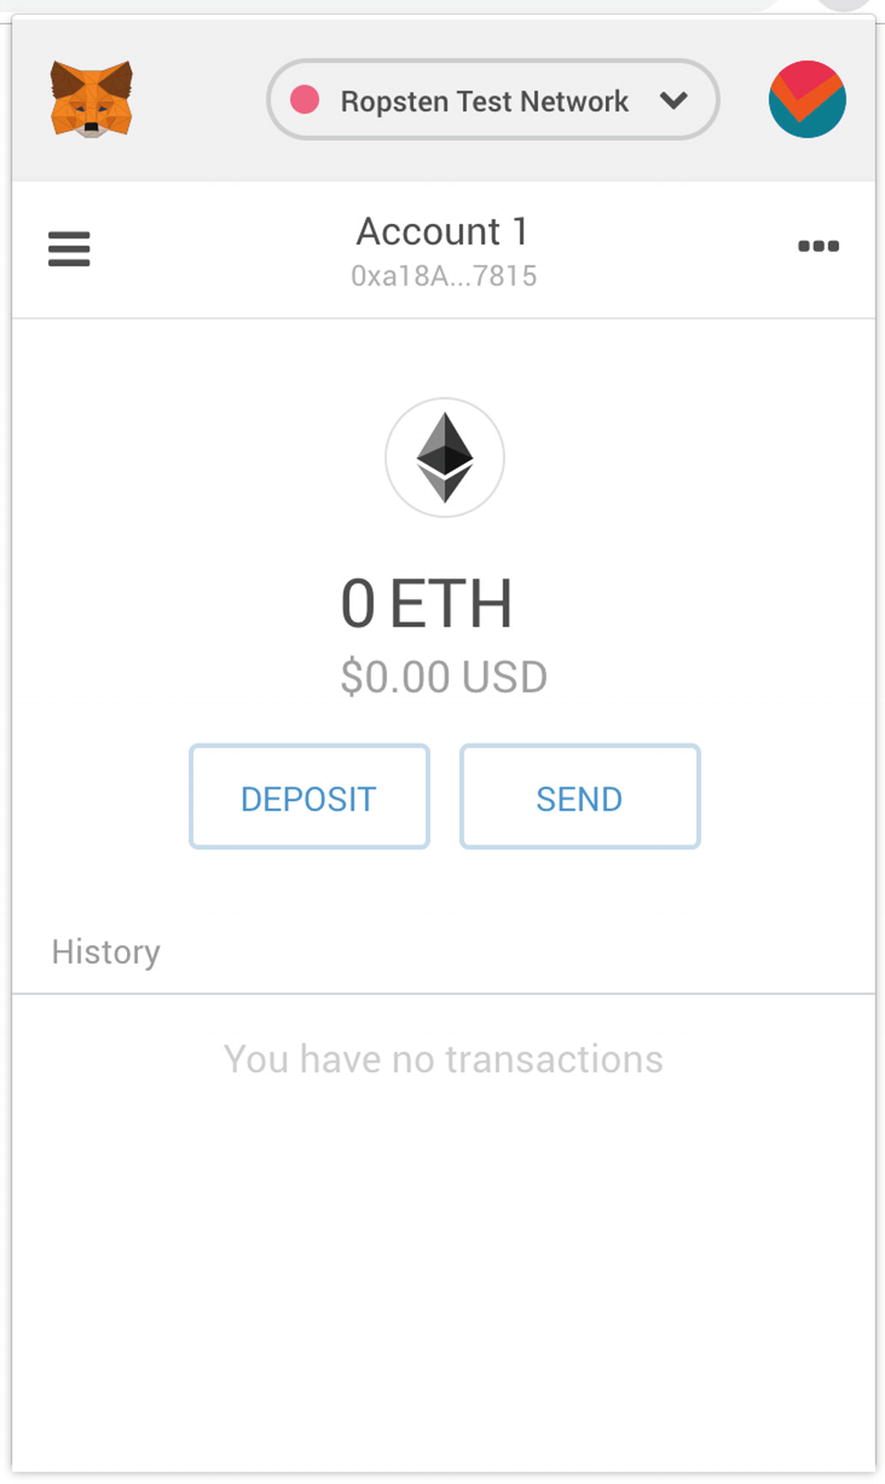
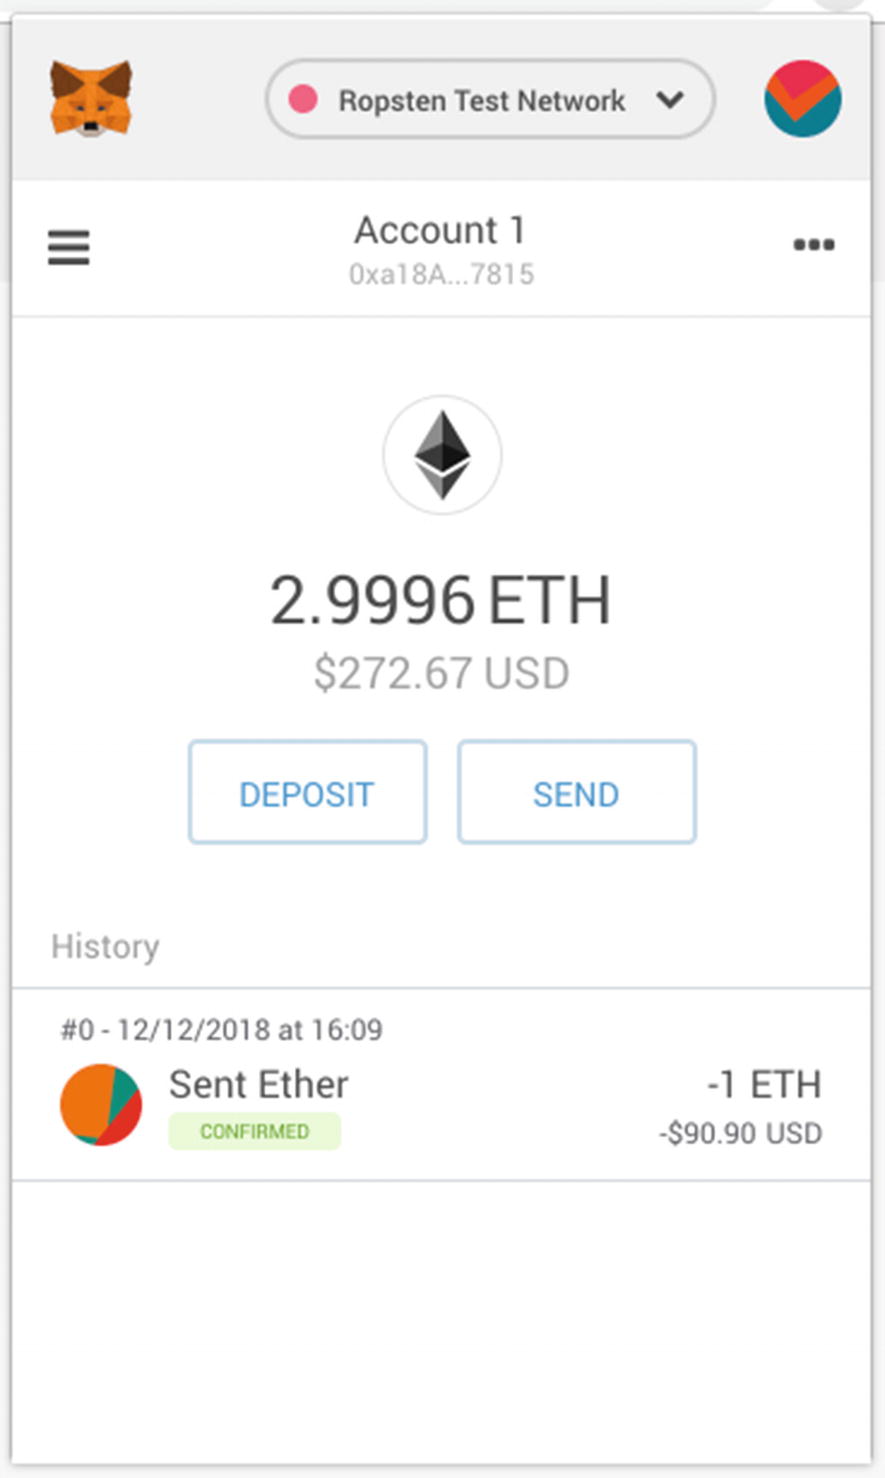
Your account should now see a balance of 0 ETH (see Figure 5-10).
Getting started with MetaMask
Creating a password for MetaMask
Revealing the 12-word secret phrase
You are now ready to view the details of the account
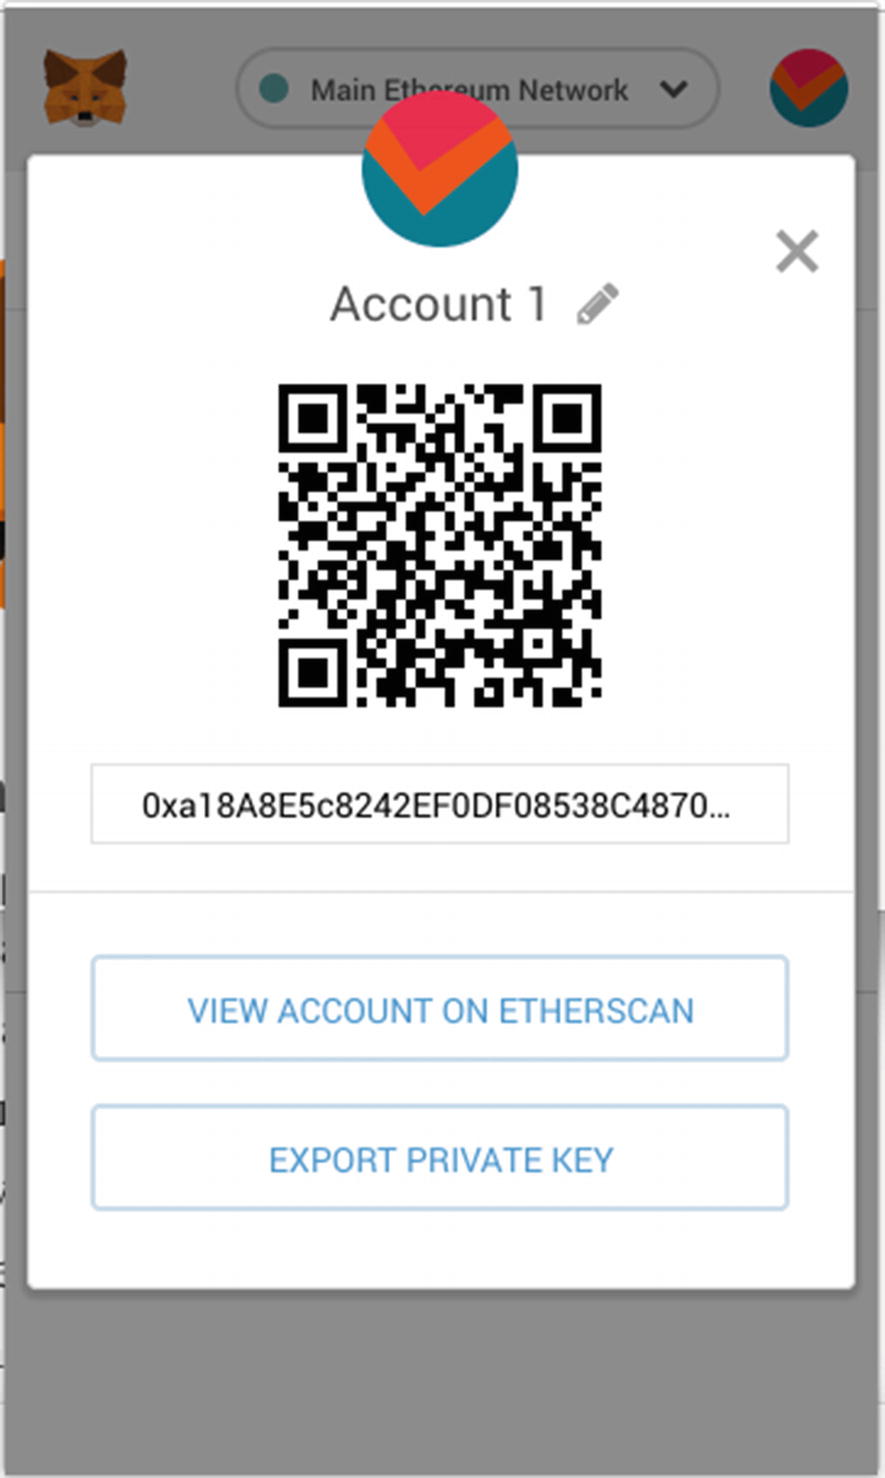
Your account address is also shown in QR code

Current balance of your account
Selecting Ethereum Networks
Ropsten Test Network
Kovan Test Network
Rinkeby Test Network
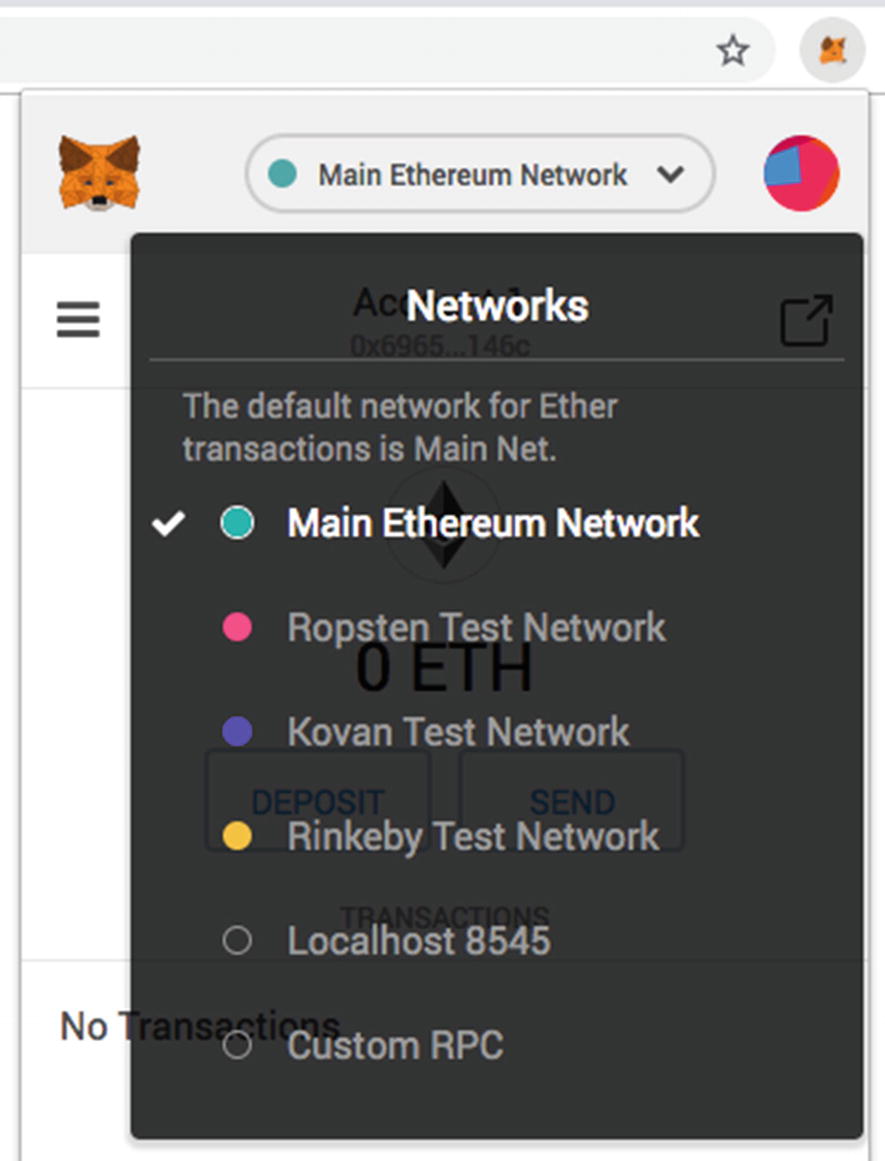
Selecting the Ethereum network to connect to
For this chapter, we shall use the Ropsten Test Network. So, make sure you select the Ropsten Test Network in MetaMask.
Getting Ethers
Once you are connected to the Ropsten Test Network, the first thing to do would be to get some free Ethers so that you can use it to pay for transacting on the network.
Click the DEPOSIT button (see Figure 5-12).
Scroll to the bottom of the page and click GET ETHER (see Figure 5-13).
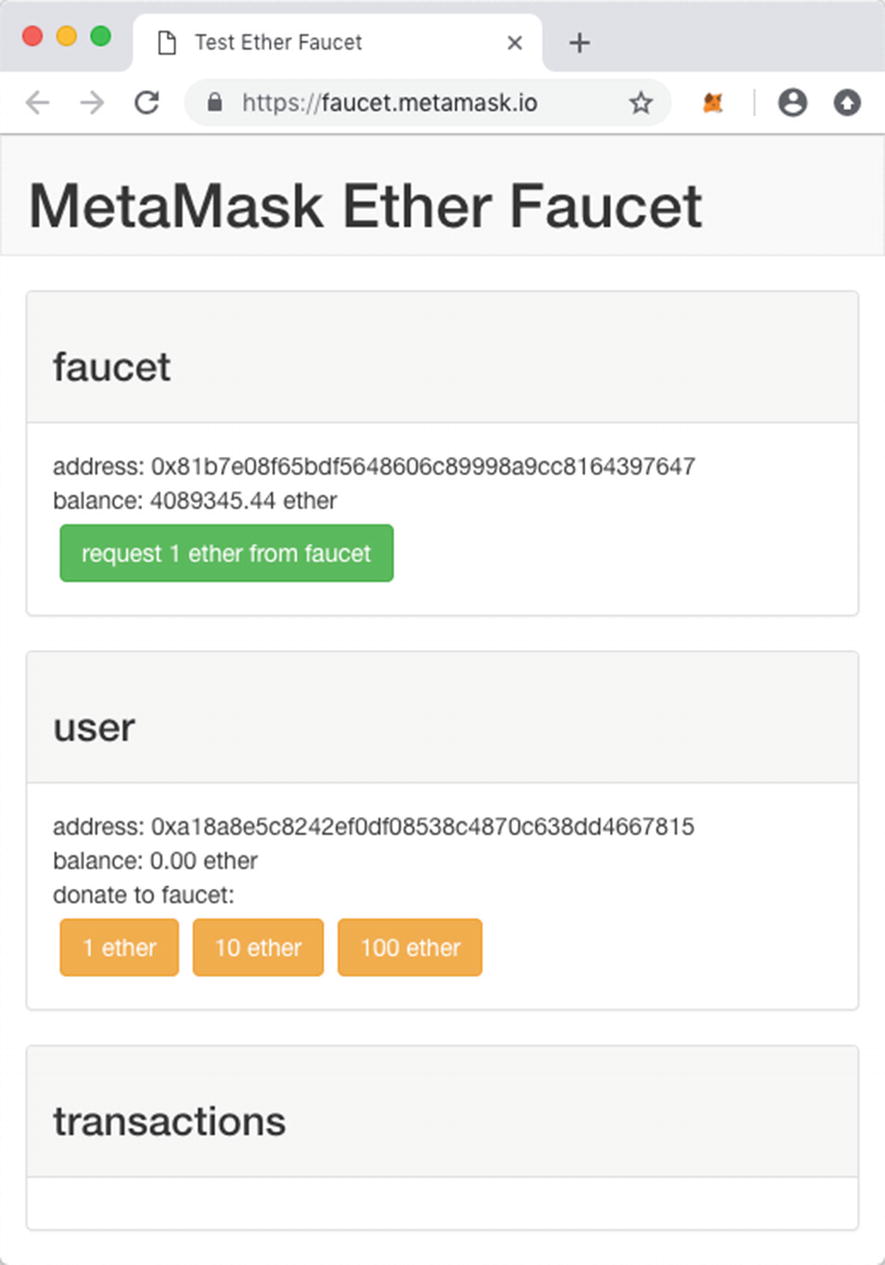
This will bring you to the MetaMask Ether Faucet page (see Figure 5-14). Click the “request 1 ether from faucet” button.
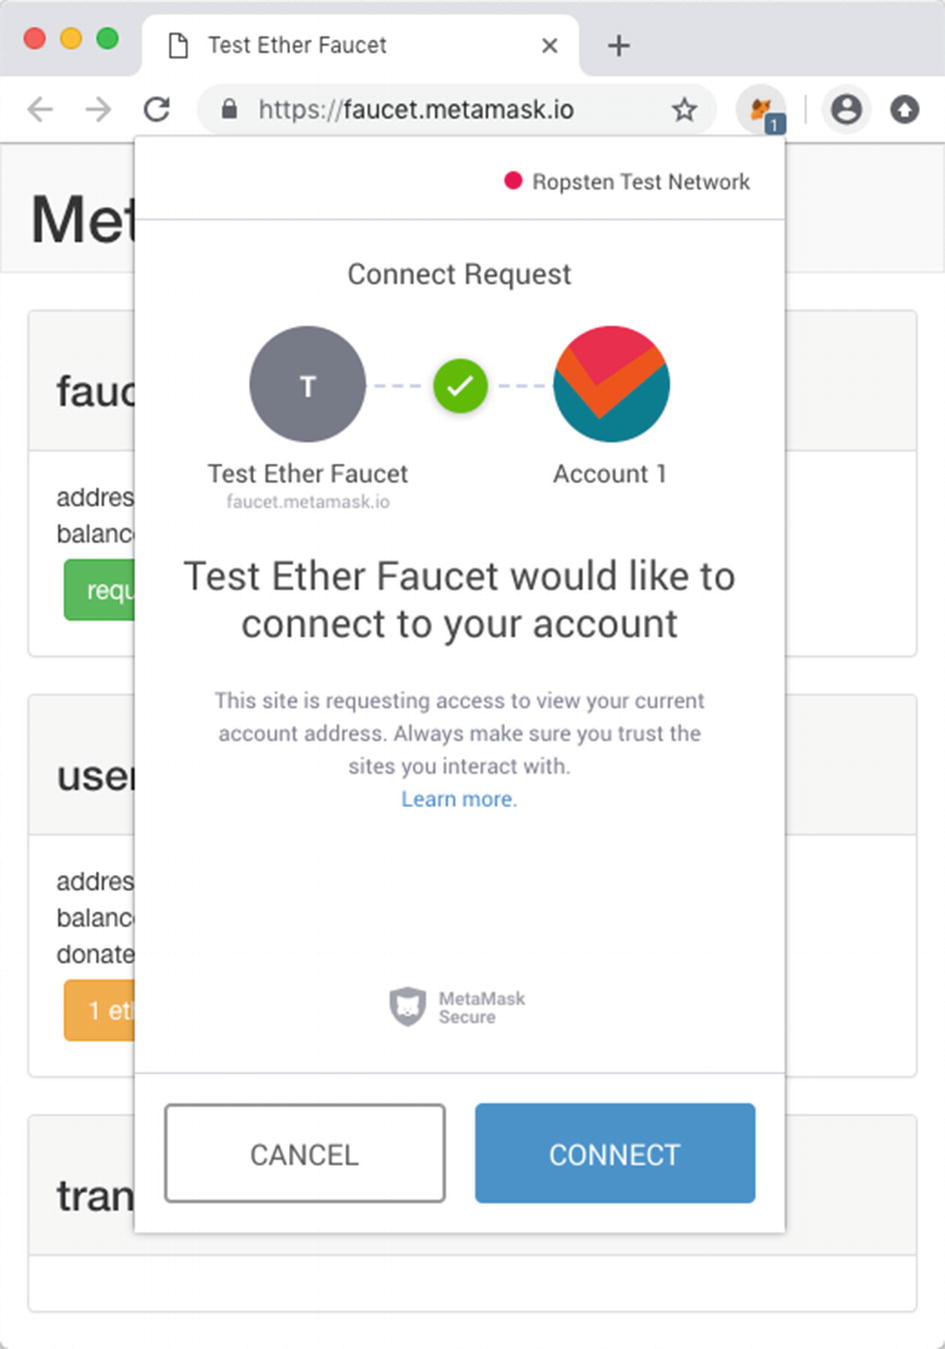
In MetaMask, you will now see that the Test Ether Faucet would like to connect to your account (see Figure 5-15). Click CONNECT.
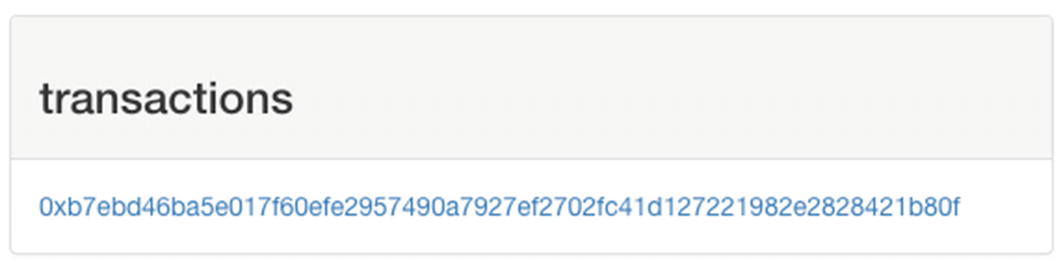
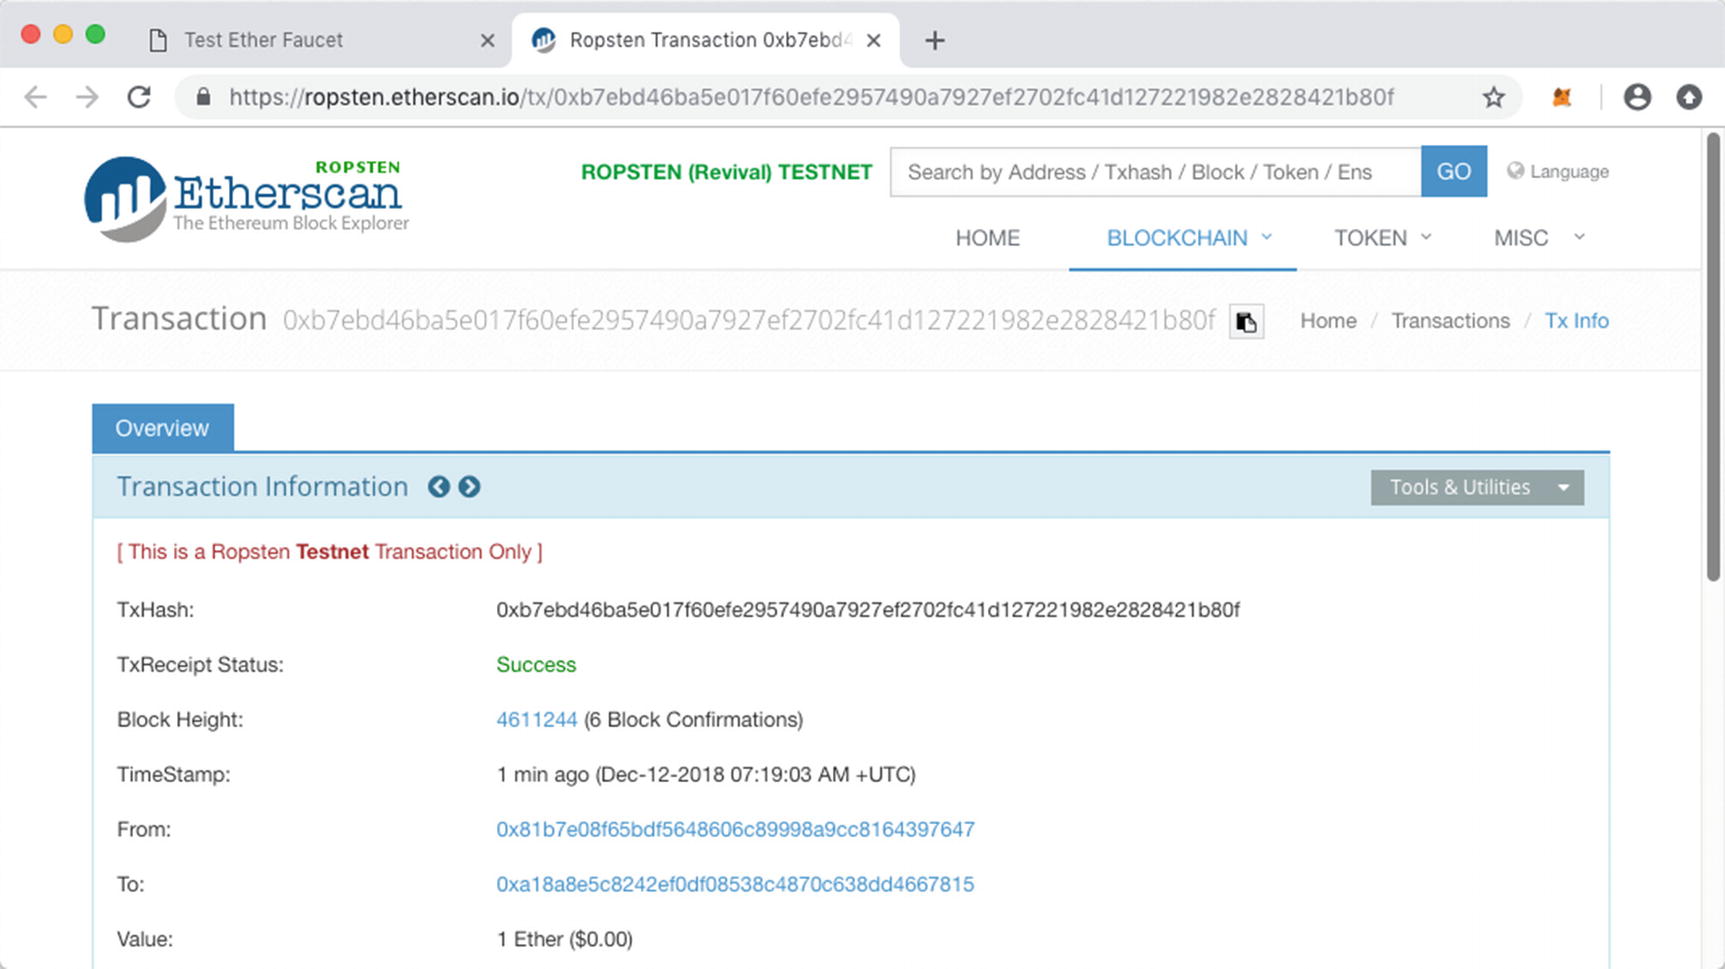
At the bottom of the MetaMask Ether Faucet page, you will now see a transaction hyperlink (see Figure 5-16). Clicking on it allows you to see the status of the transaction on Etherscan (see Figure 5-17).
Etherscan is an Ethereum Blockchain Explorer. It allows you to search the blockchain for transactions, addresses, tokens, prices, as well as activities happening on the blockchain.
After a while, you should be able to see one token deposited into your account (see Figure 5-18).
You can request for more Ethers by clicking the “request 1 ether from faucet” button on the MetaMask Ether Faucet page multiple times. Each button that you clicked will earn you one free Ether. However, do note that sometimes if you click the button too many times, it will respond with an error message that says “User is greedy.” So don’t be greedy!
All Ethers in the test networks have no monetary value. So, don’t be too excited if you see the US dollars equivalent of your Ether balance displayed in MetaMask.
Get free Ethers for your account using the DEPOSIT button
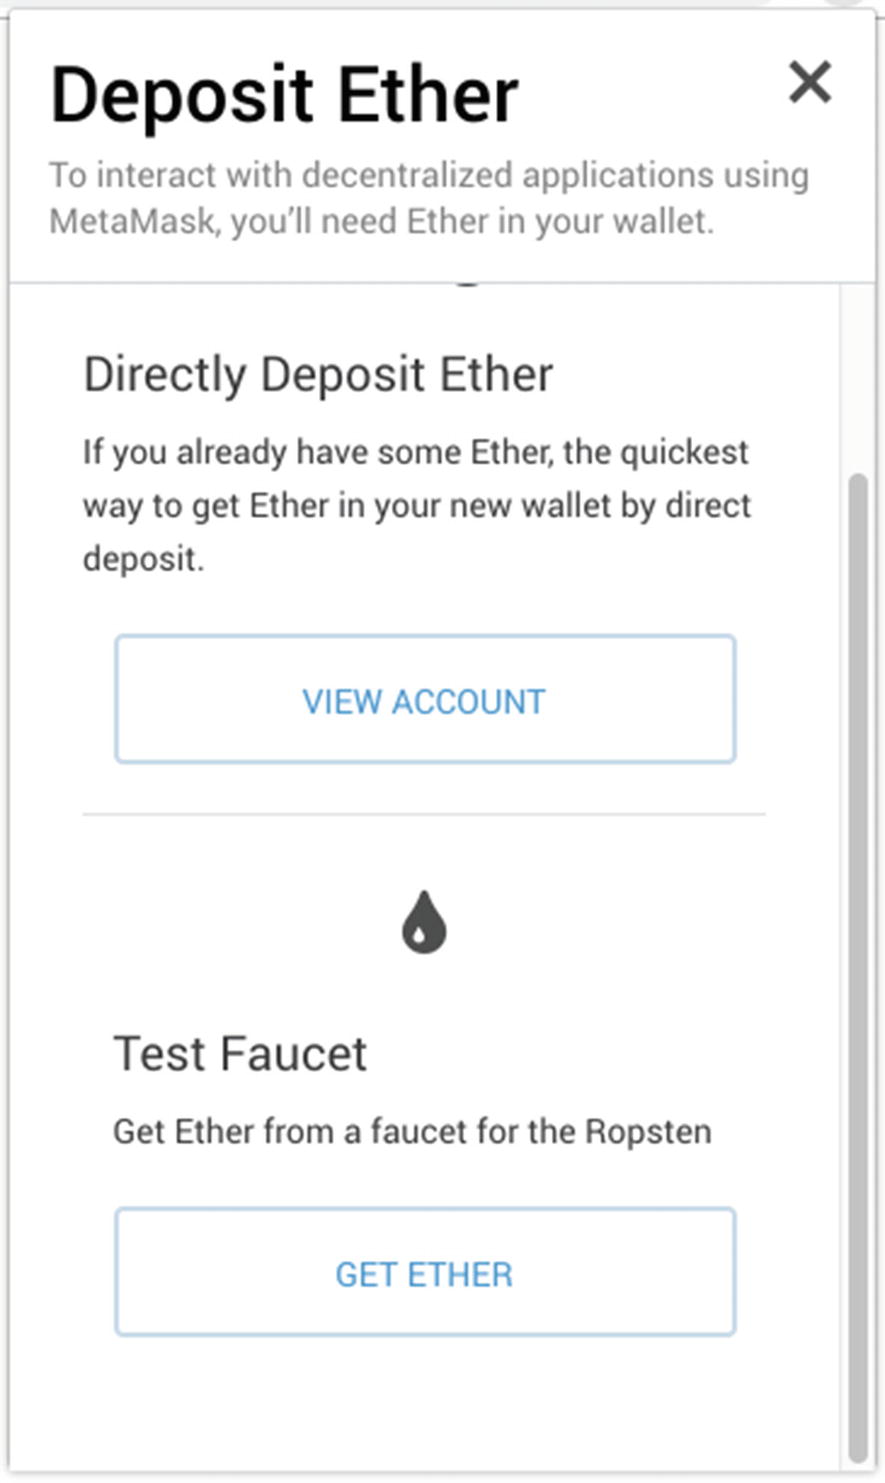
Click the GET ETHER button to get free Ethers from the test faucet
Getting free Ethers from the test faucet
You need to connect the Test Ether Faucet to your account before your free Ether can be credited into your account
The link to the transaction on Etherscan
Viewing the transaction on Etherscan
The free 1 Ether credited into your account
It is important to remember that the amount of Ether you have in your account is valid only for the particular Ethereum network that you have obtained it from. For example, if you now switch to another test network, say the Rinkeby Test Network, your account balance would be reset to 0.
Creating Additional Accounts
MetaMask allows you to create multiple accounts. This is useful when you want to learn how to transfer Ethers from one account to another. It is also useful when testing and debugging your Smart Contracts.
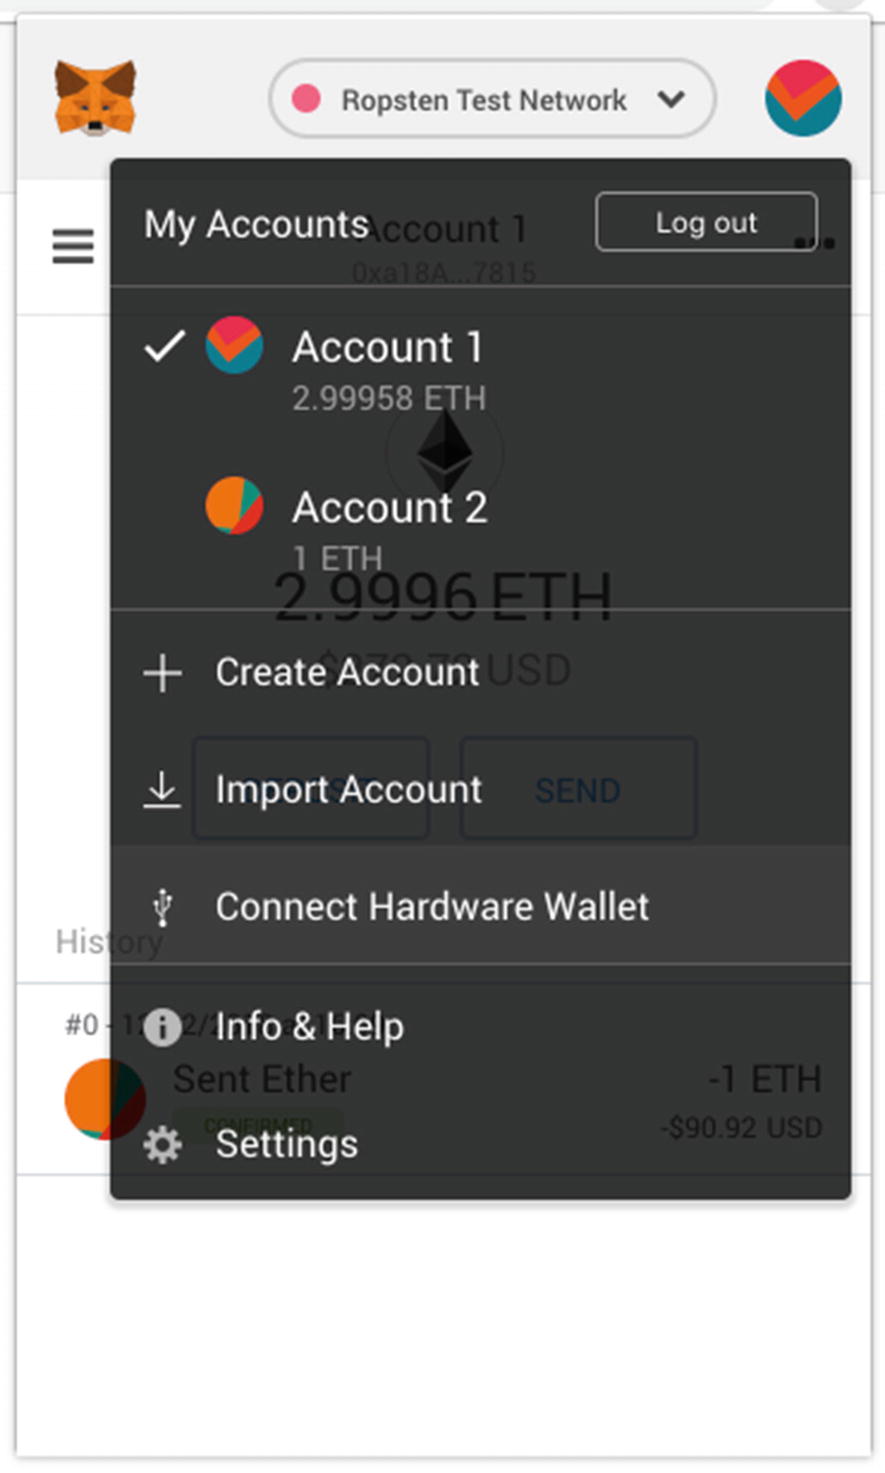
Click the colored icon located at the top right corner of MetaMask (see Figure 5-19).
Click the Create Account item.
In the NEW ACCOUNT screen, click CREATE.
You can now see the new account created (Account 2, see Figure 5-20).
You can create as many accounts as you want. In fact, for testing your Smart Contracts, you should create at least three accounts for testing purposes.
To switch between accounts, click the colored icon (see Figure 5-21) and select the account you want to switch to.
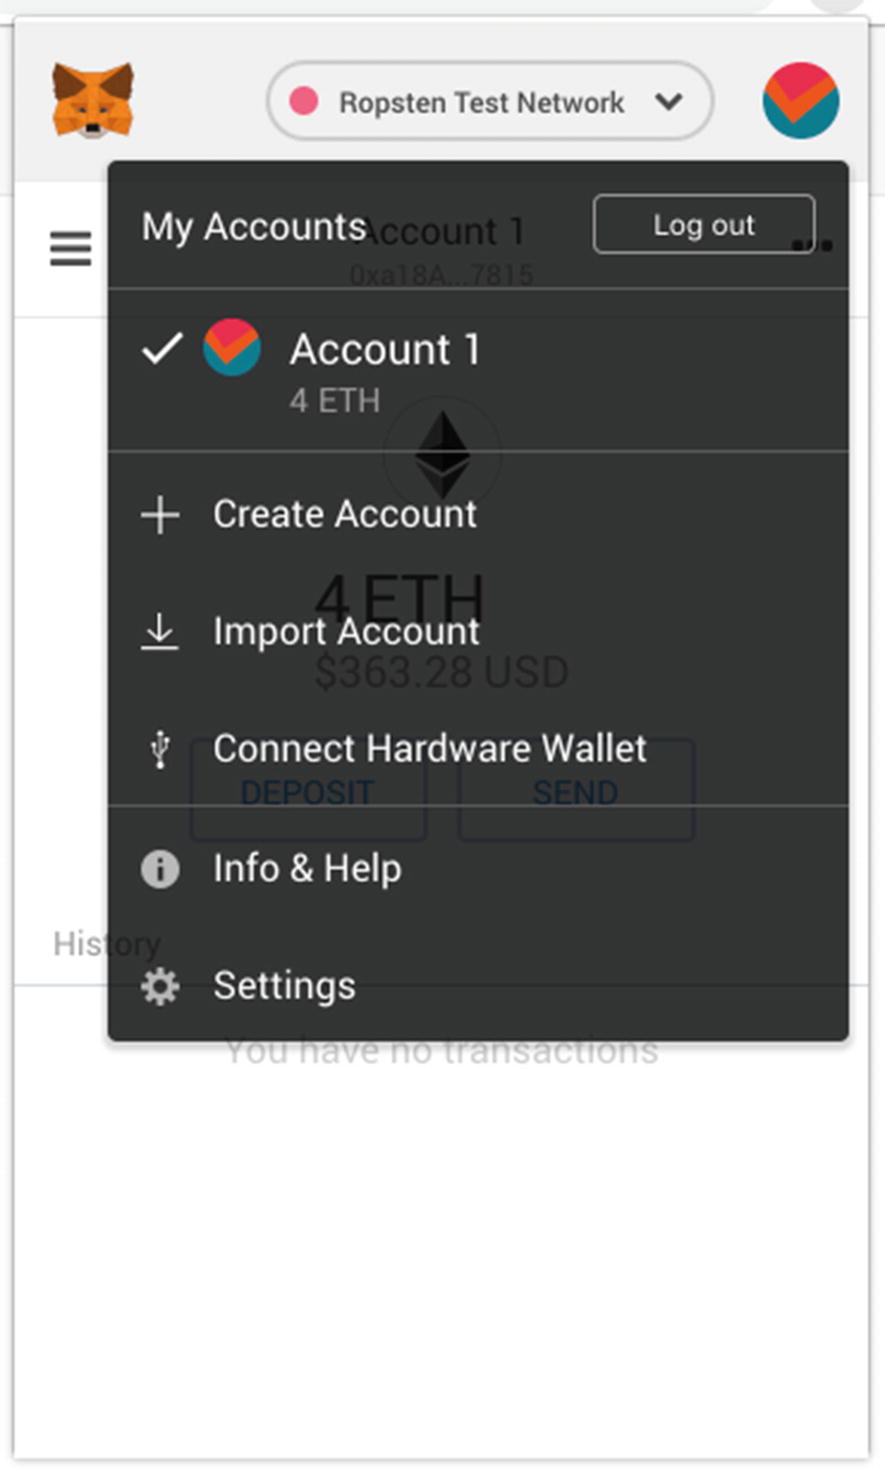
Creating new accounts in MetaMask
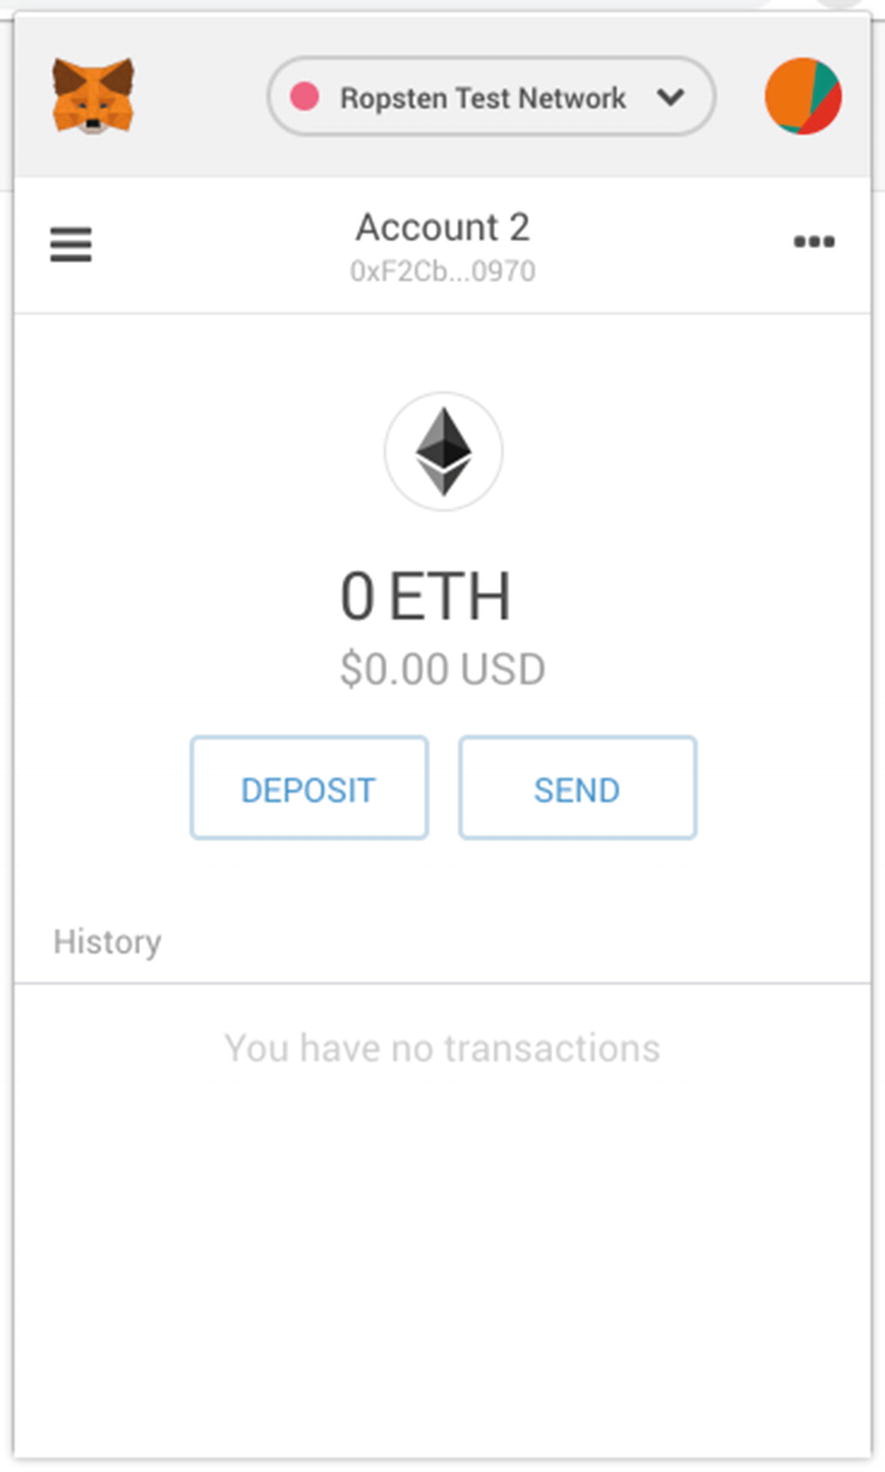
The second newly created account
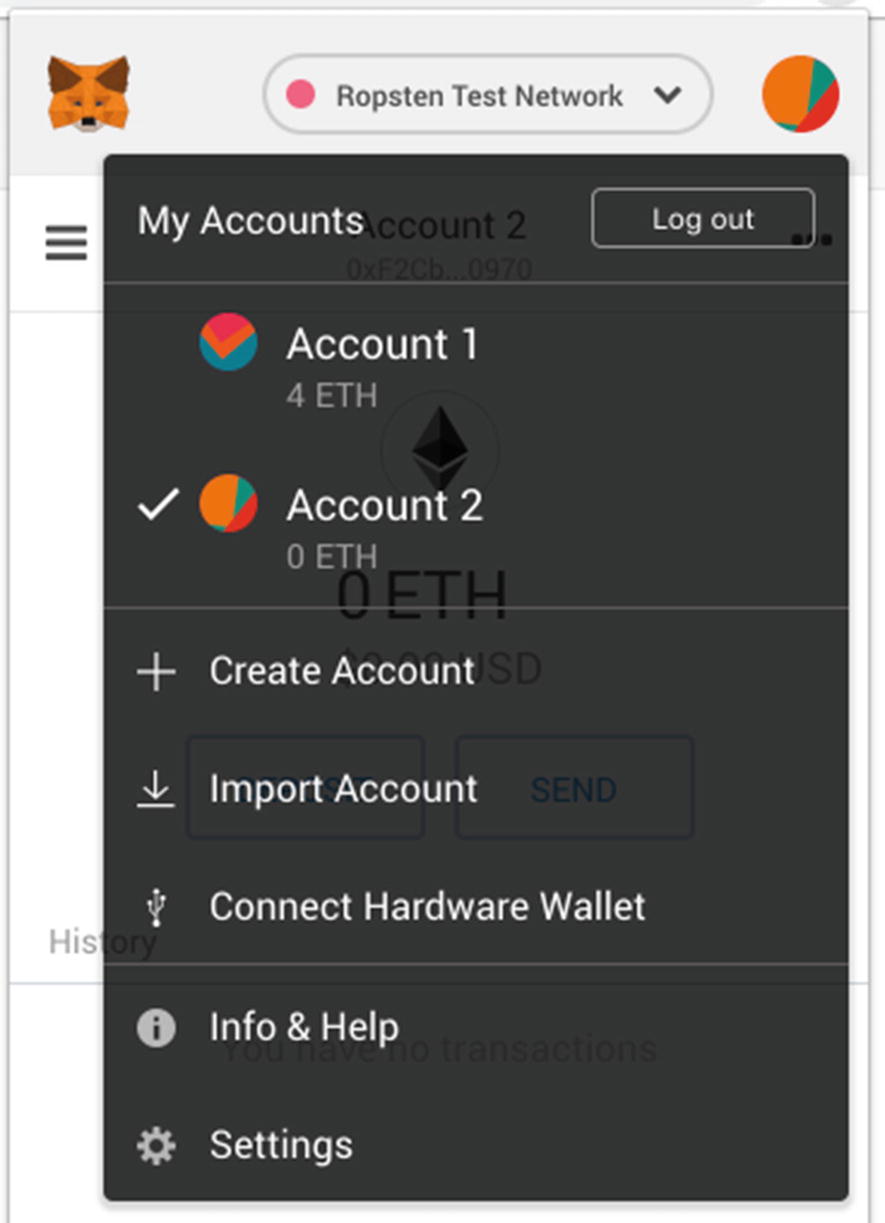
Switching between accounts in MetaMask
Transferring Ethers
MetaMask allows you to transfer Ethers from one account to another very easily. You can transfer to another account within MetaMask or an external account using its public address.
Switch to Account 1.
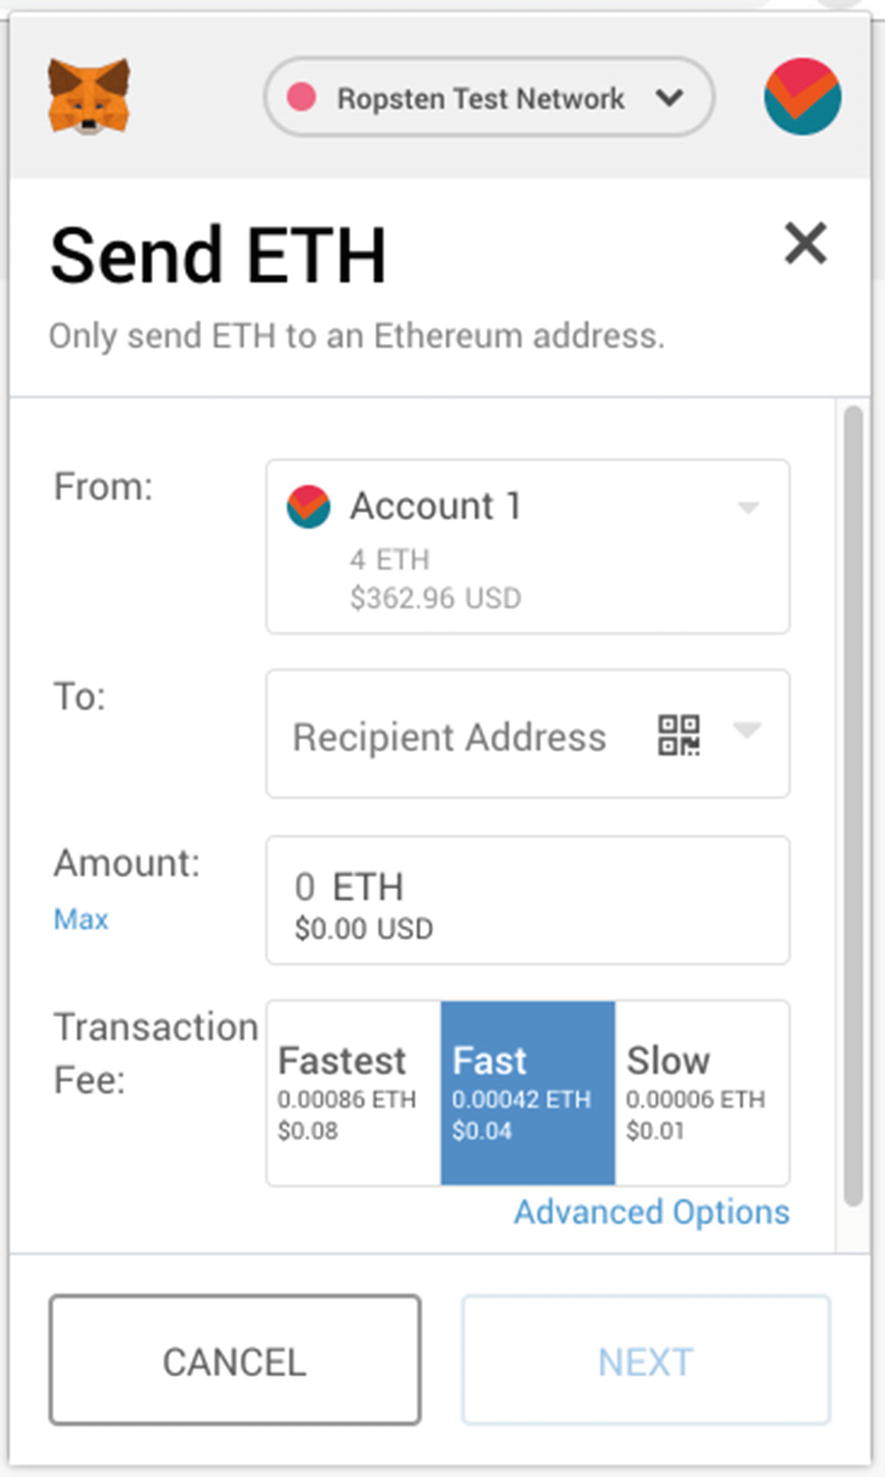
Click the SEND button.
You will now see the screen shown in Figure 5-22.
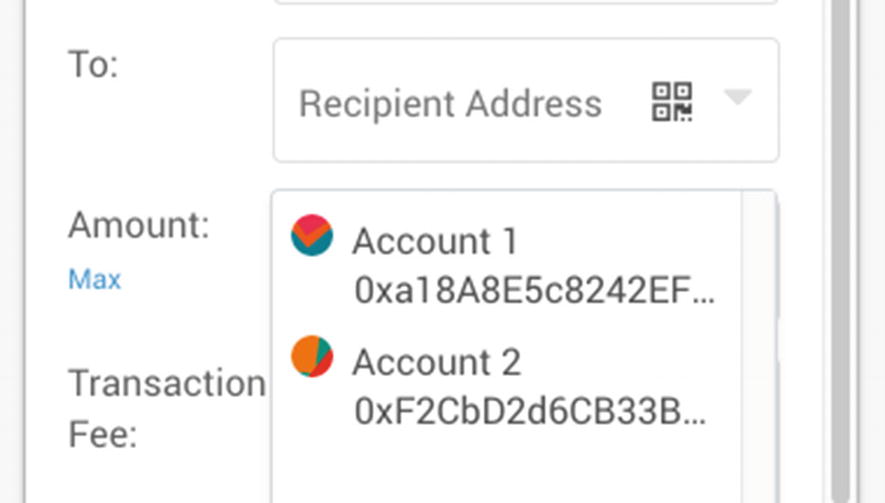
To send Ether to another local account, click the down arrow at the To: item (see Figure 5-23). Select Account 2 in this example.
To send Ether to an external account, click the QR code icon, and you will be able to use your Webcam to scan the QR code of the public address of the external account.
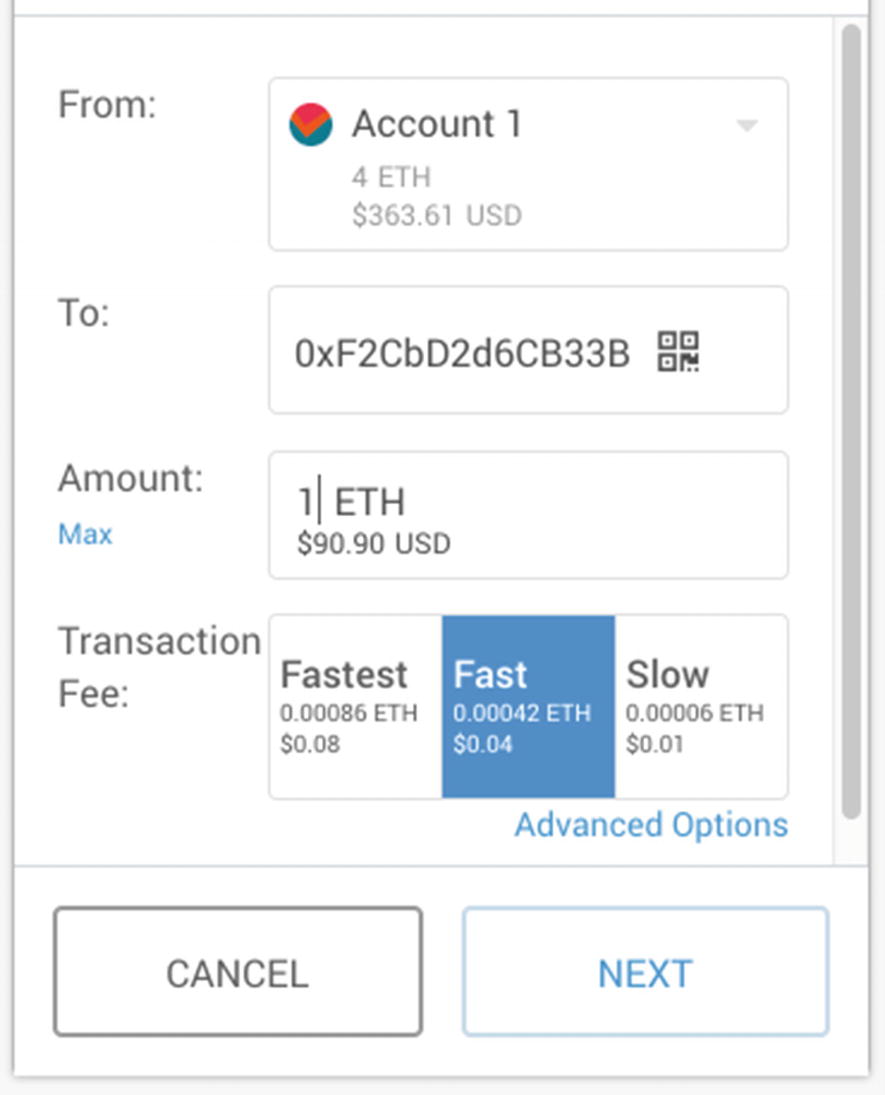
Specify how many Ethers you want to send (one in this example), and select the fast transaction fee (see Figure 5-24). Click NEXT.
In general, the higher the transaction fee, the faster the transaction will be processed.
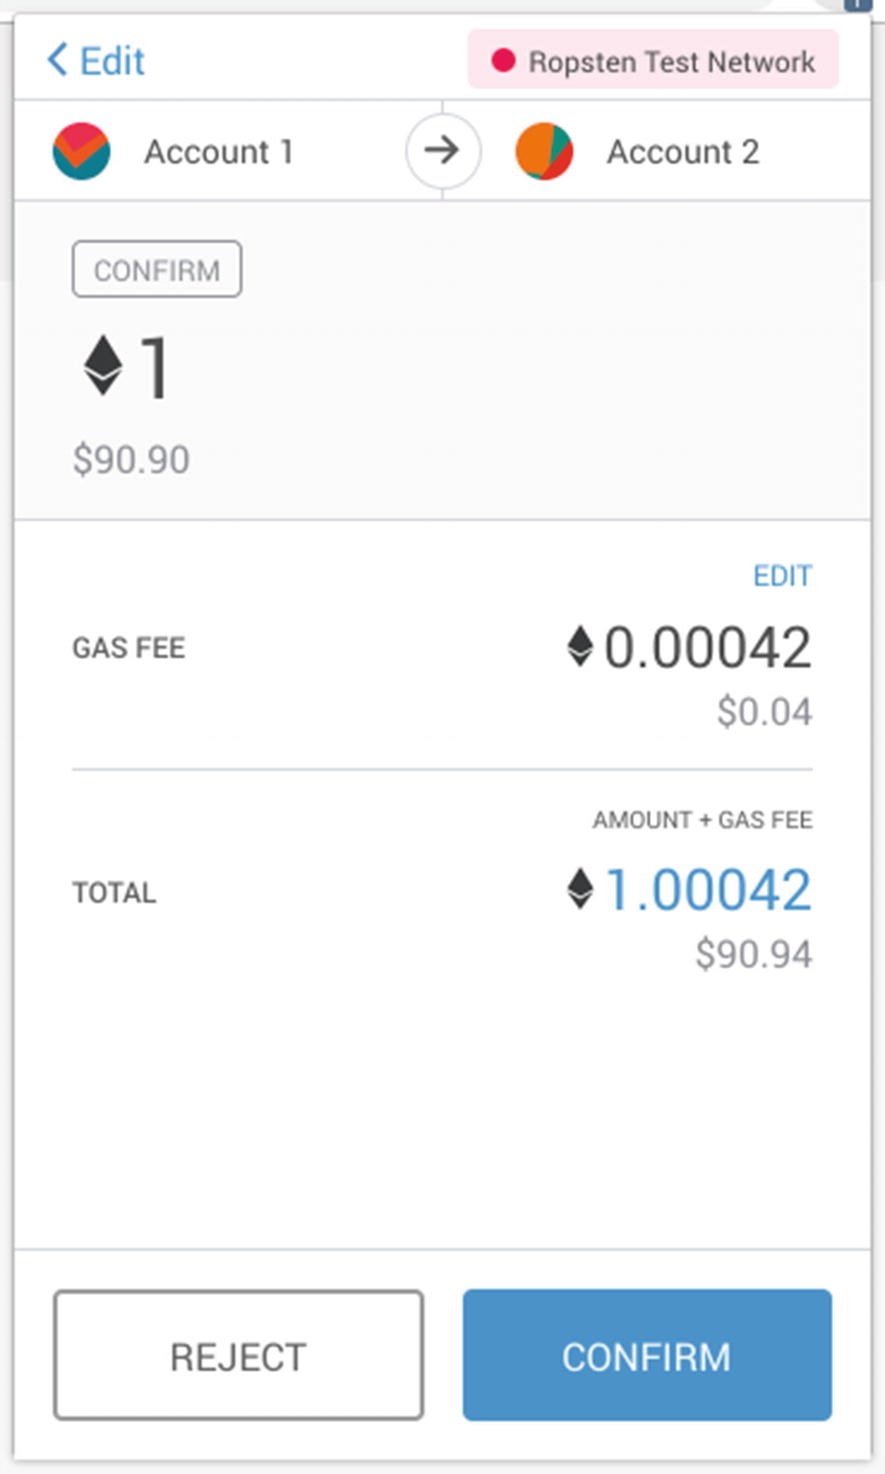
You will now see the total amount that you will incur for this transaction (see Figure 5-25). Click CONFIRM.
The total transaction amount is the amount of Ether you are transferring, plus the transaction fee. The transaction fee is also known as the gas fee.
When the transaction goes through, your account should be deducted by the total transaction amount (see Figure 5-26).
You can verify that the Ether has been transferred to Account 2 by switching to Account 2.
Sending Ethers to another account
Selecting which account to send the Ether to
Specifying how many Ethers to send and selecting the transaction fee
Confirming the transaction
Your account balance after the transfer
Recovering Accounts
You have forgotten your password to login to MetaMask.
You need to transfer your account from one computer to another (perhaps you have bought a new computer or lost your old one).
In either case, MetaMask allows you to very easily recover your existing accounts provided you have backed up the 12-word pass phrase. The beauty of using the 12-word pass phrase is that all your accounts that you have created can be recovered. Say you have created three accounts in MetaMask, all the accounts can be recovered as long as you have the 12-word pass phrase.
Click the “Import using account seed phrase” link in the MetaMask login screen (see Figure 5-27).
You will now be redirected to a web page that shows the same login page. Again, click the “Import using account seed phrase” link.
Enter the 12-word seed phrase in the exact order that it was provided to you earlier (see Figure 5-28). You also need to assign a new password to protect your account. Click RESTORE.
You will now find your original Account 1. However, the other accounts that you have also created earlier is not visible.
You should see the Account 1 with the same amount of Ether that you had earlier.
Go ahead and create a new account like you have done so earlier. You will now see your Account 2. In fact, all the original accounts can be recovered this way, and the amount of Ether that you had earlier will automatically be recovered.
Your Account 2 should also have the same amount of Ether that you had earlier.

Recovering your account(s) using the 12-word secret seed phrase
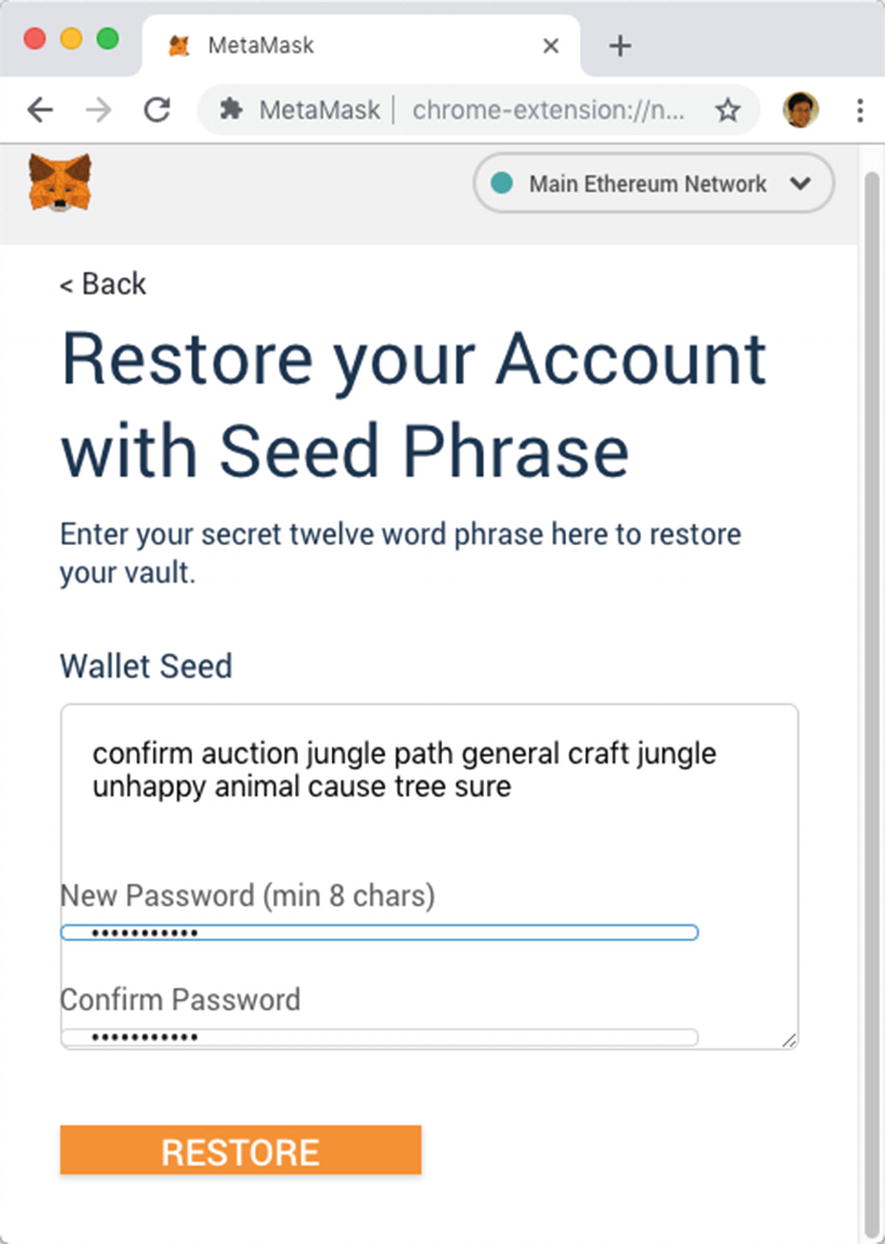
Restoring your accounts and resetting your password
Importing and Exporting Accounts
You can export your accounts in MetaMask so that they can be imported on another computer. All you need to do is to export the private key of your account and import it in another computer using the same private key
Exporting Accounts
Select the account that you want to export.
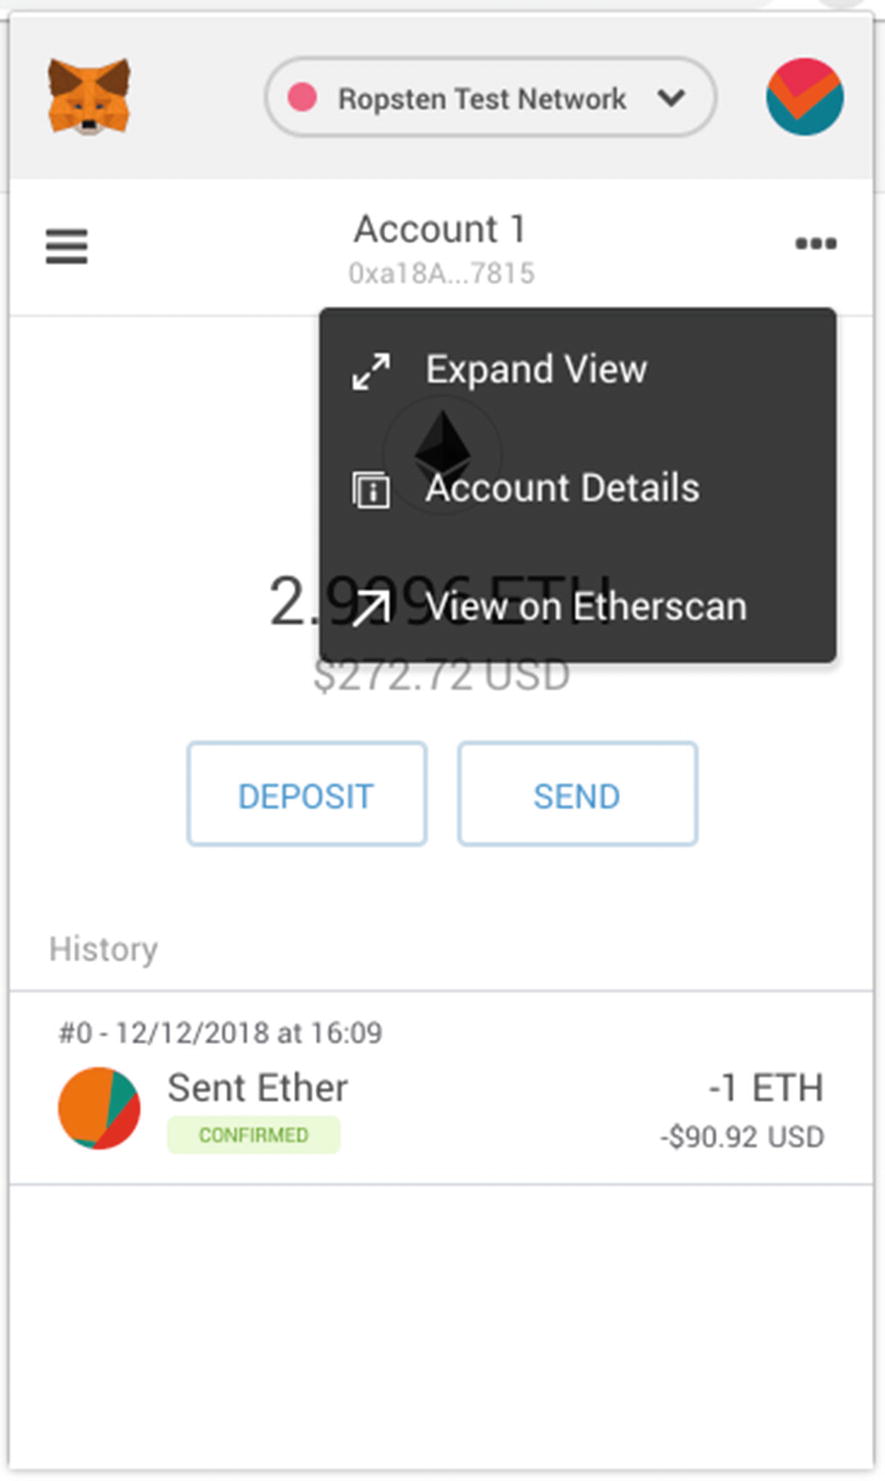
Select the … displayed on the right of the account name, and select Account Details (see Figure 5-29).
Click the EXPORT PRIVATE KEY button (see Figure 5-30).
Enter your MetaMask password and click CONFIRM (see Figure 5-31).
You should now see your private key. Click it to copy it into the clipboard and save it securely to a text file.
When dealing with accounts in the Main Ethereum Network, do be very cautious when exporting your private key and be sure to save it in a secure location. Once the private key is leaked, the assets in your accounts can be stolen easily. Of course, when dealing with one of the test networks, it is far less important as the assets in the test networks have no monetary value.
Viewing your account details
Exporting the private key for your account
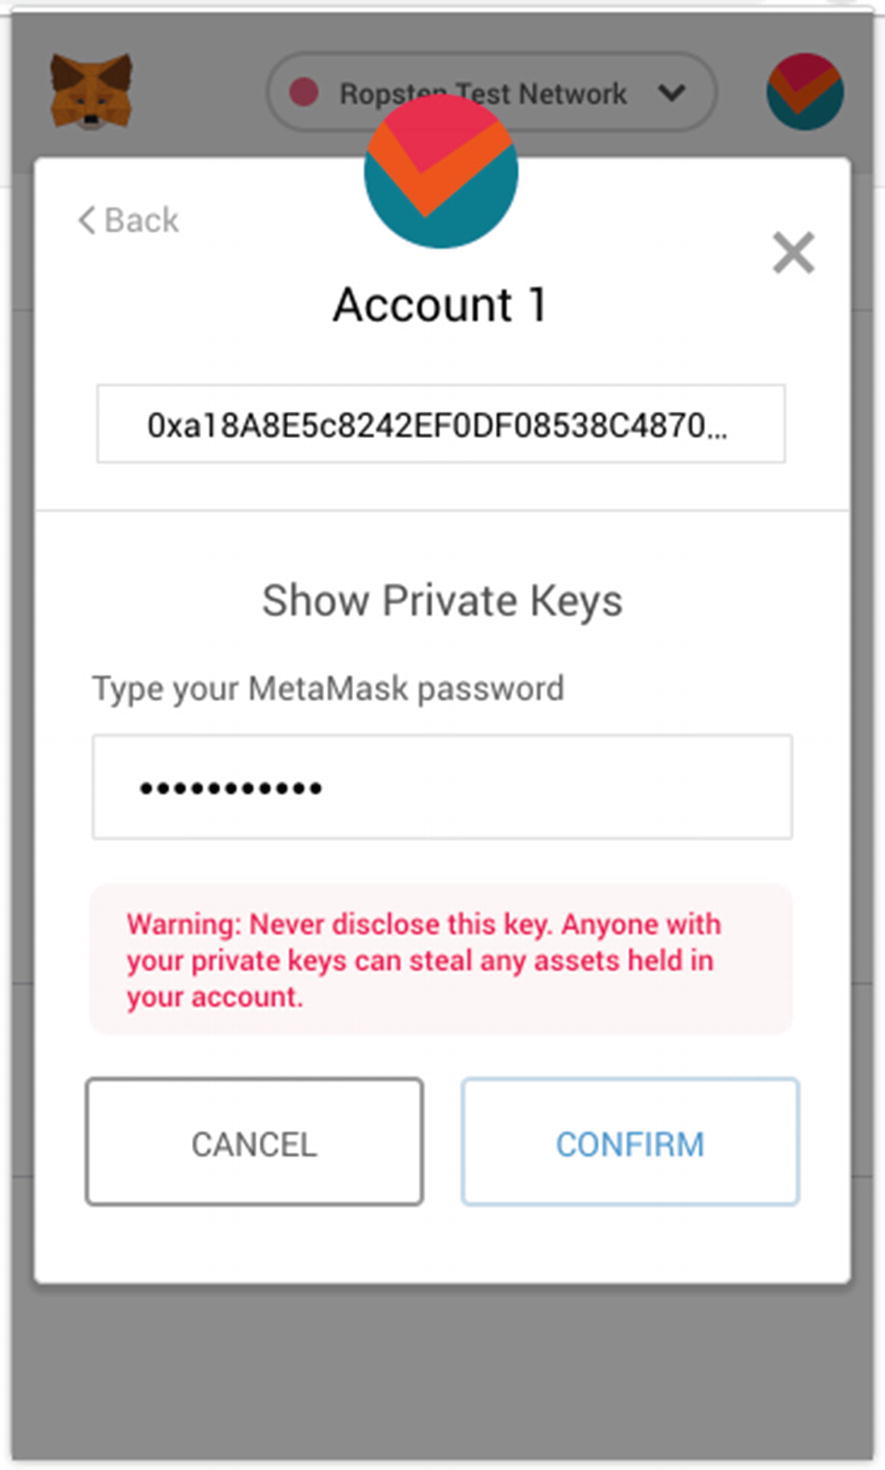
Viewing the private key for your account
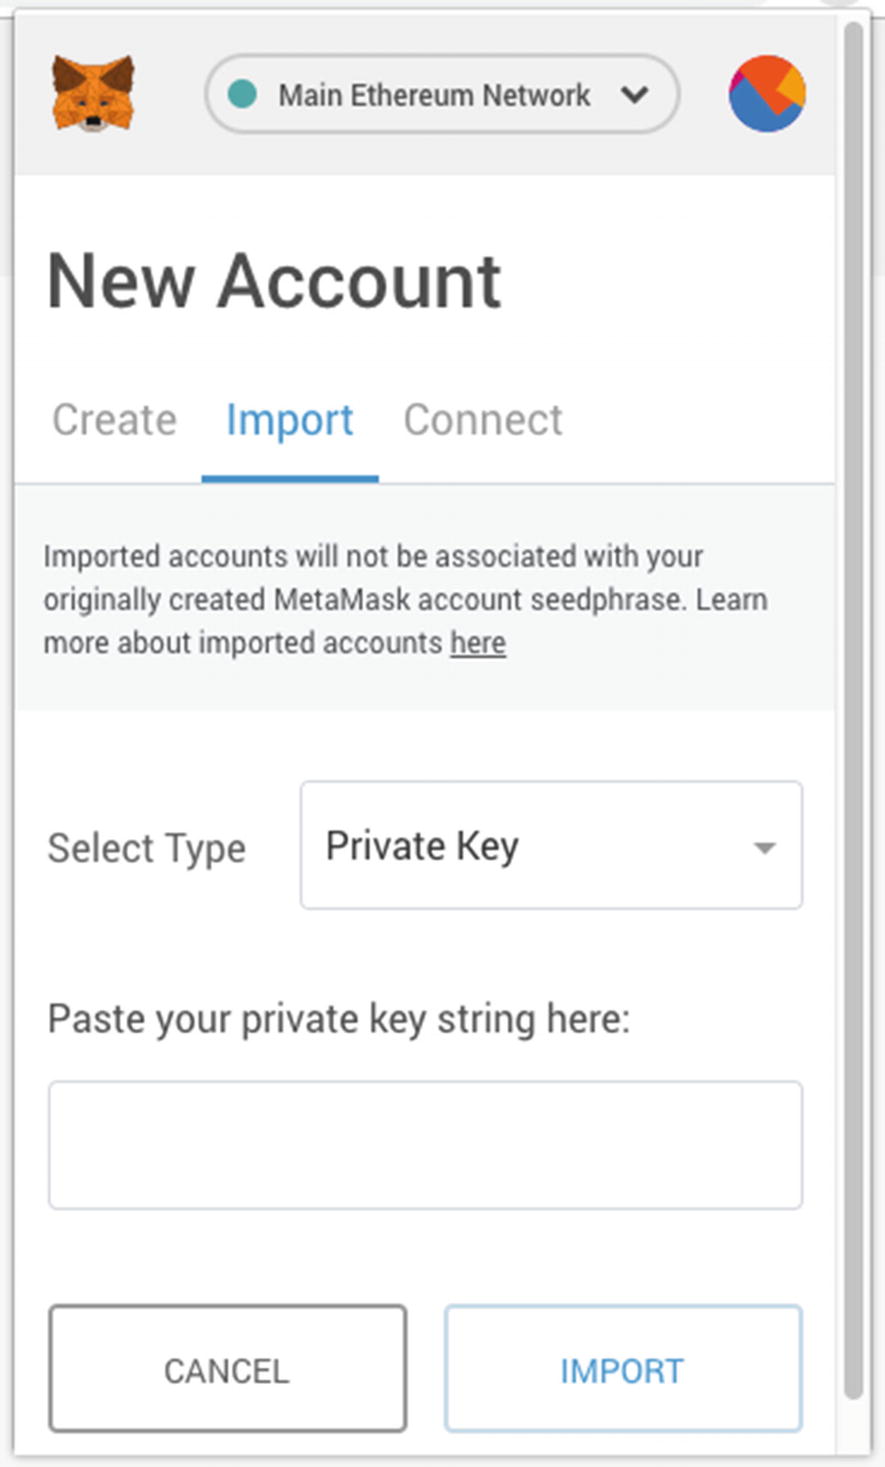
Importing Accounts
Click the colored icon located at the top right corner of MetaMask (see Figure 5-32). Click Import Account.
Paste the private key into the text box as shown in Figure 5-33. Click IMPORT. The account would now be imported into MetaMask.
You can only import a new account based on a private key that is not already in your MetaMask. If not, the import will not be successful. Also, for accounts that you have imported, they are not recoverable using the 12-word secret phrase. To restore these accounts, you have to use their private key or JSON file.
There are two ways to import accounts into MetaMask – using private key or JSON File. In Chapter 4, you learned about the accounts stored in the JSON files. This is what you can use to import the accounts in Geth into the MetaMask.
Importing an existing account
Pasting the private key to import the account
Summary
In this chapter, you have seen how to use the MetaMask Chrome extension to manage your Ethereum accounts. You have learned the basics – how to create accounts, transfer Ethers between accounts, as well as export and import accounts into MetaMask. In the following chapters, you have more opportunities to see MetaMask in action and how it helps you to run dApps in your web browsers.