In the previous chapter, you learned about the basics of blockchain – the motivations behind blockchains, how transactions are added to blocks, and how blocks are added to the previous blocks to form a chain of blocks called blockchain. A good way to understand all these concepts would be to build one yourself. By implementing your own blockchain, you will have a more detailed look at how concepts like transactions, mining, and consensus work.
Obviously, implementing a full blockchain is not for the faint of heart, and that is definitely not our goal in this chapter. What we will try to do in this chapter is to implement a conceptual blockchain using Python and use it to illustrate the key concepts.
Our Conceptual Blockchain Implementation
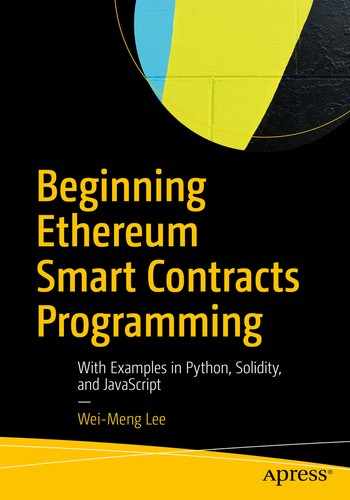
Our conceptual blockchain
Timestamp – the time that the block was added to the blockchain.
Index – a running number starting from 0 indicating the block number.
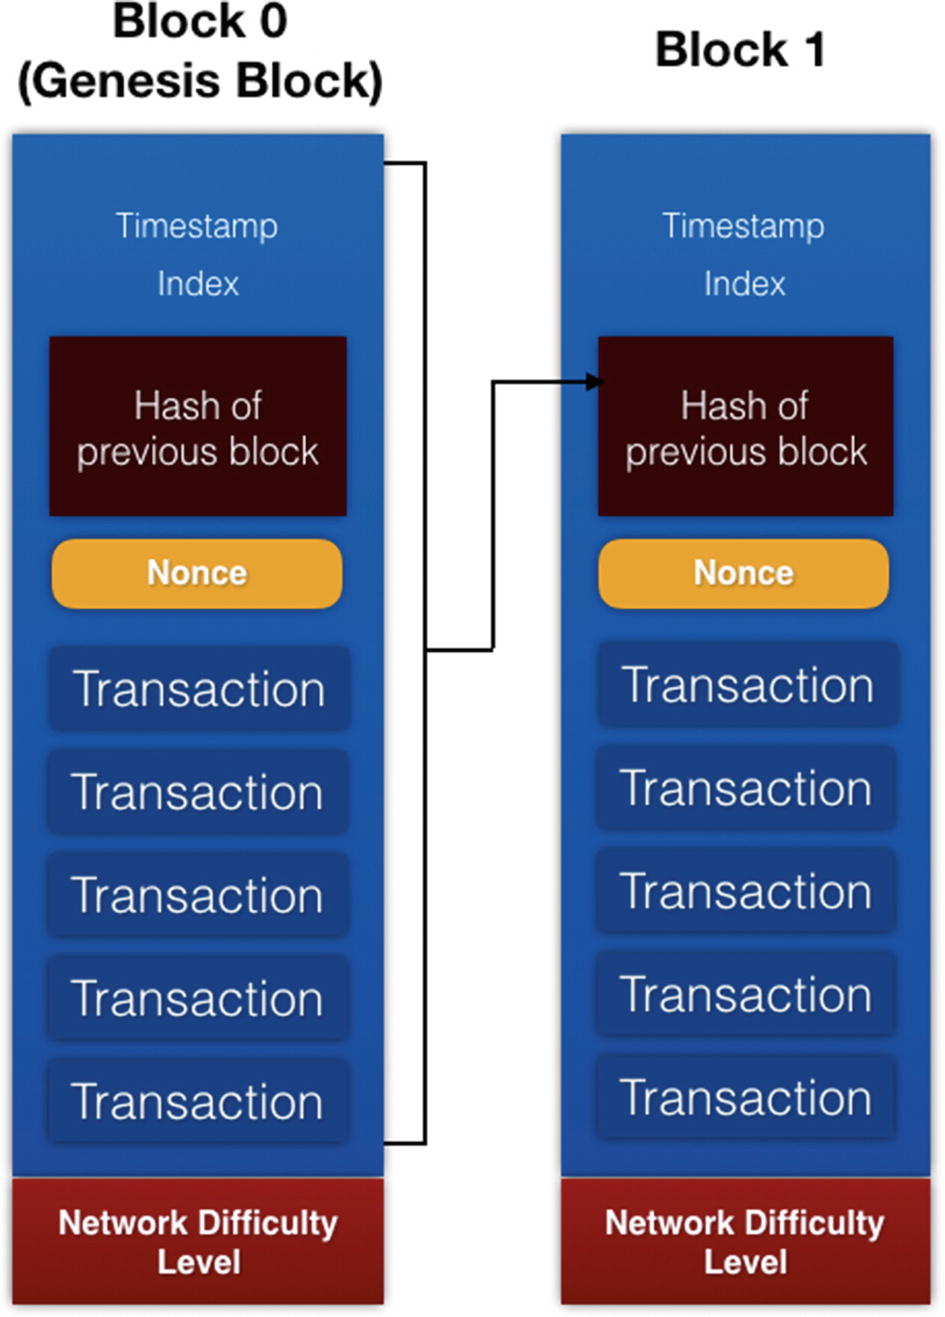
Hash of the previous block – the hash result of the previous block. As shown in the figure, the hash is the result of hashing the content of the block consisting of the timestamp, index, hash of previous block, nonce, and all the transactions.
Nonce – the number used once.
Transaction(s) – each block will hold a variable number of transactions.
Note
For simplicity, we are not going to worry about representing the transactions in a Merkle tree, nor are we going to separate a block into block header and content.
The network difficulty level will also be fixed at four zeros – that is, in order to derive the nonce, the result of the hash of the block must start with four zeros.
Tip
Refer to Chapter 1 for the idea behind nonce and how it relates to network difficulty level.
Obtaining the Nonce
How the nonce will be derived in our conceptual blockchain
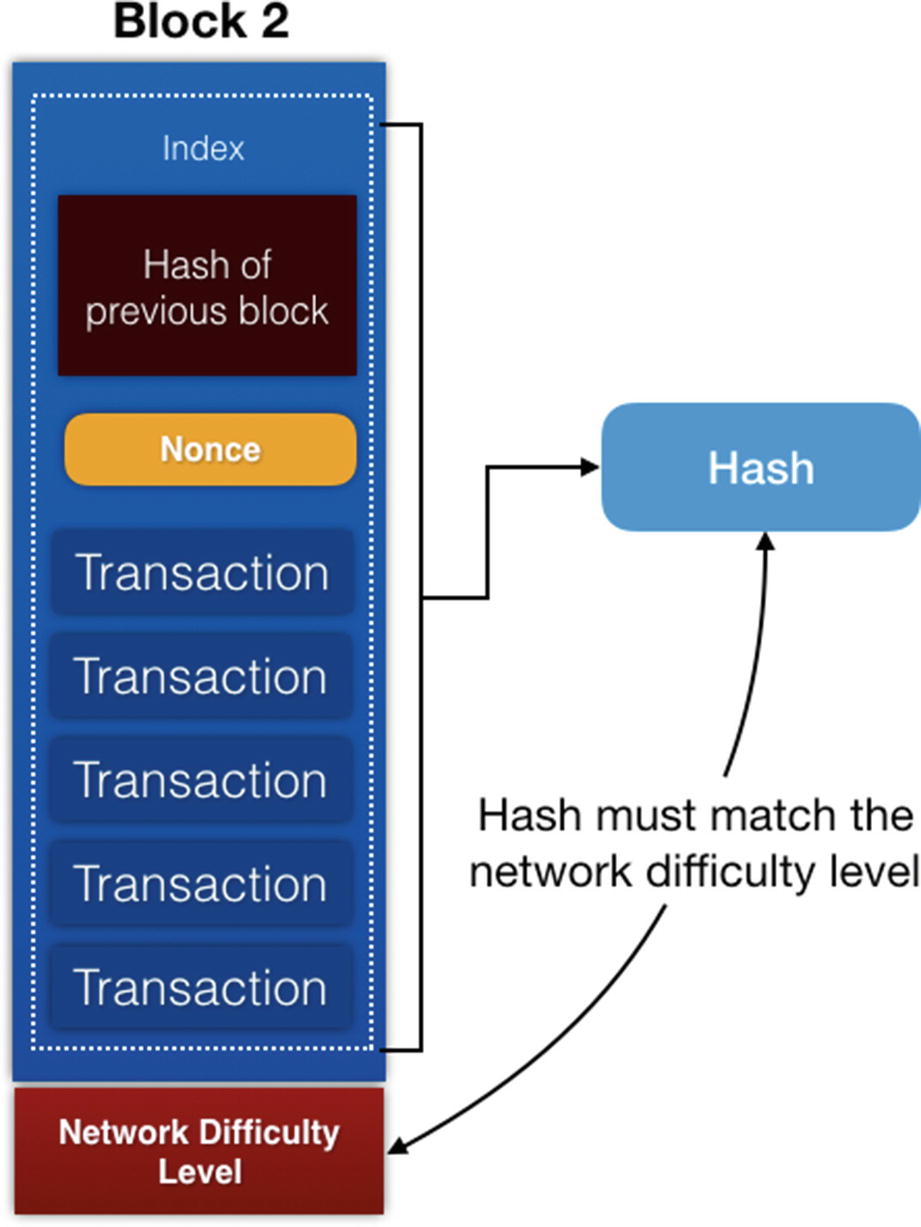
Once a blocked is mined, it will be appended to the blockchain with the timestamp added to the block
Installing Flask
The preceding command installs the Flask microframework.
Tip
Flask is a web framework that makes building web applications easy and rapid.
Importing the Various Modules and Libraries
Declaring the Class in Python
The hash_block() method encodes a block into array of bytes and then hashes it; you need to ensure that the dictionary is sorted, or you’ll have inconsistent hashes later on
The __init__() function is the constructor for the class. Here, you store the entire blockchain as a list. Because every blockchain has a genesis block, you need to initialize the genesis block with the hash of the previous block, and in this example, we simply used a fixed string called “genesis_block” to obtain its hash. Once the hash of the previous block is found, we need to find the nonce for the block using the method named proof_of_work() (which we will define in the next section).
The proof_of_work() method (detailed next) will return a nonce that will result in a hash that matches the difficulty target when the content of the current block is hashed.
For simplicity, we are fixing the difficulty_target to a hash result that starts with four zeros (“0000”).
Tip
The source code for our blockchain is shown at the end of this chapter. For the impatient, you may wish to look at the code while we go through the various concepts in this chapter.
Finding the Nonce
The proof_of_work() function first starts with zero for the nonce and check if the nonce together with the content of the block produces a hash that matches the difficulty target. If not, it increments the nonce by one and then try again until it finds the correct nonce.
Appending the Block to the Blockchain
When the block is added to the blockchain, the current timestamp is also added to the block.
Adding Transactions
This method adds a new transaction to the current list of transactions. It then gets the index of the last block in the blockchain and adds one to it. This new index will be the block that the current transaction will be added to.
Exposing the Blockchain Class as a REST API
Obtaining the Full Blockchain
Performing Mining
When a miner managed to mine a block, he must receive a reward for finding the proof. Here, we added a transaction to send one unit of rewards to the miner to signify the rewards for successfully mining the block.
When mining a block, you need to find hash of the previous block and then use it together with the content of the current block to find the nonce for the block. Once the nonce is found, you will append it to the blockchain.
Adding Transactions
Examples of transactions are users sending cryptocurrencies from one account to another.
Testing Our Blockchain
In this implementation, we allow the user to run the API based on the specified port number.
Our first blockchain running on the first node is now running. It is also listening at port 5000, where you can add transactions to it and mine a block.
Note
The first block (index 0) is the genesis block.
Note
Observe that the block contains a single transaction, which is the reward given to the miner.
Tip
Remember that the default difficulty target is set to four zeros (difficulty_target = "0000"). You can change it to five zeros and retest the blockchain. You will realize that it now takes a longer time to mine a block, since it is more difficult to find a nonce that results in a hash beginning with five zeros.
Caution
Note that Windows does not support single quote (') when using curl in the command line. Hence, you need to use double quote and use the slash character () to turn off the meaning of double quotes (") in your double-quoted string. The preceding command in Windows would be
curl -X POST -H "Content-Type: application/json" -d "{ "sender": "04d0988bfa799f7d7ef9ab3de97ef481", "recipient": "cd0f75d2367ad456607647edde665d6f", "amount": 5}" "http://localhost:5000/transactions/new"
The preceding shows that Block 2 has been mined and it contains two transactions – one that you have added manually and another the rewards for the miner.
Synchronizing Blockchains
In real life, a blockchain network consists of multiple nodes maintaining copies of the same blockchain. So, there must be a way for the nodes to synchronize so that every single node is referring to the same identical blockchain.
When you use Python to run the blockchain.py application, only one node is running. The whole idea of blockchain is decentralization – there should be multiple nodes maintaining the blockchain, not just a single one.
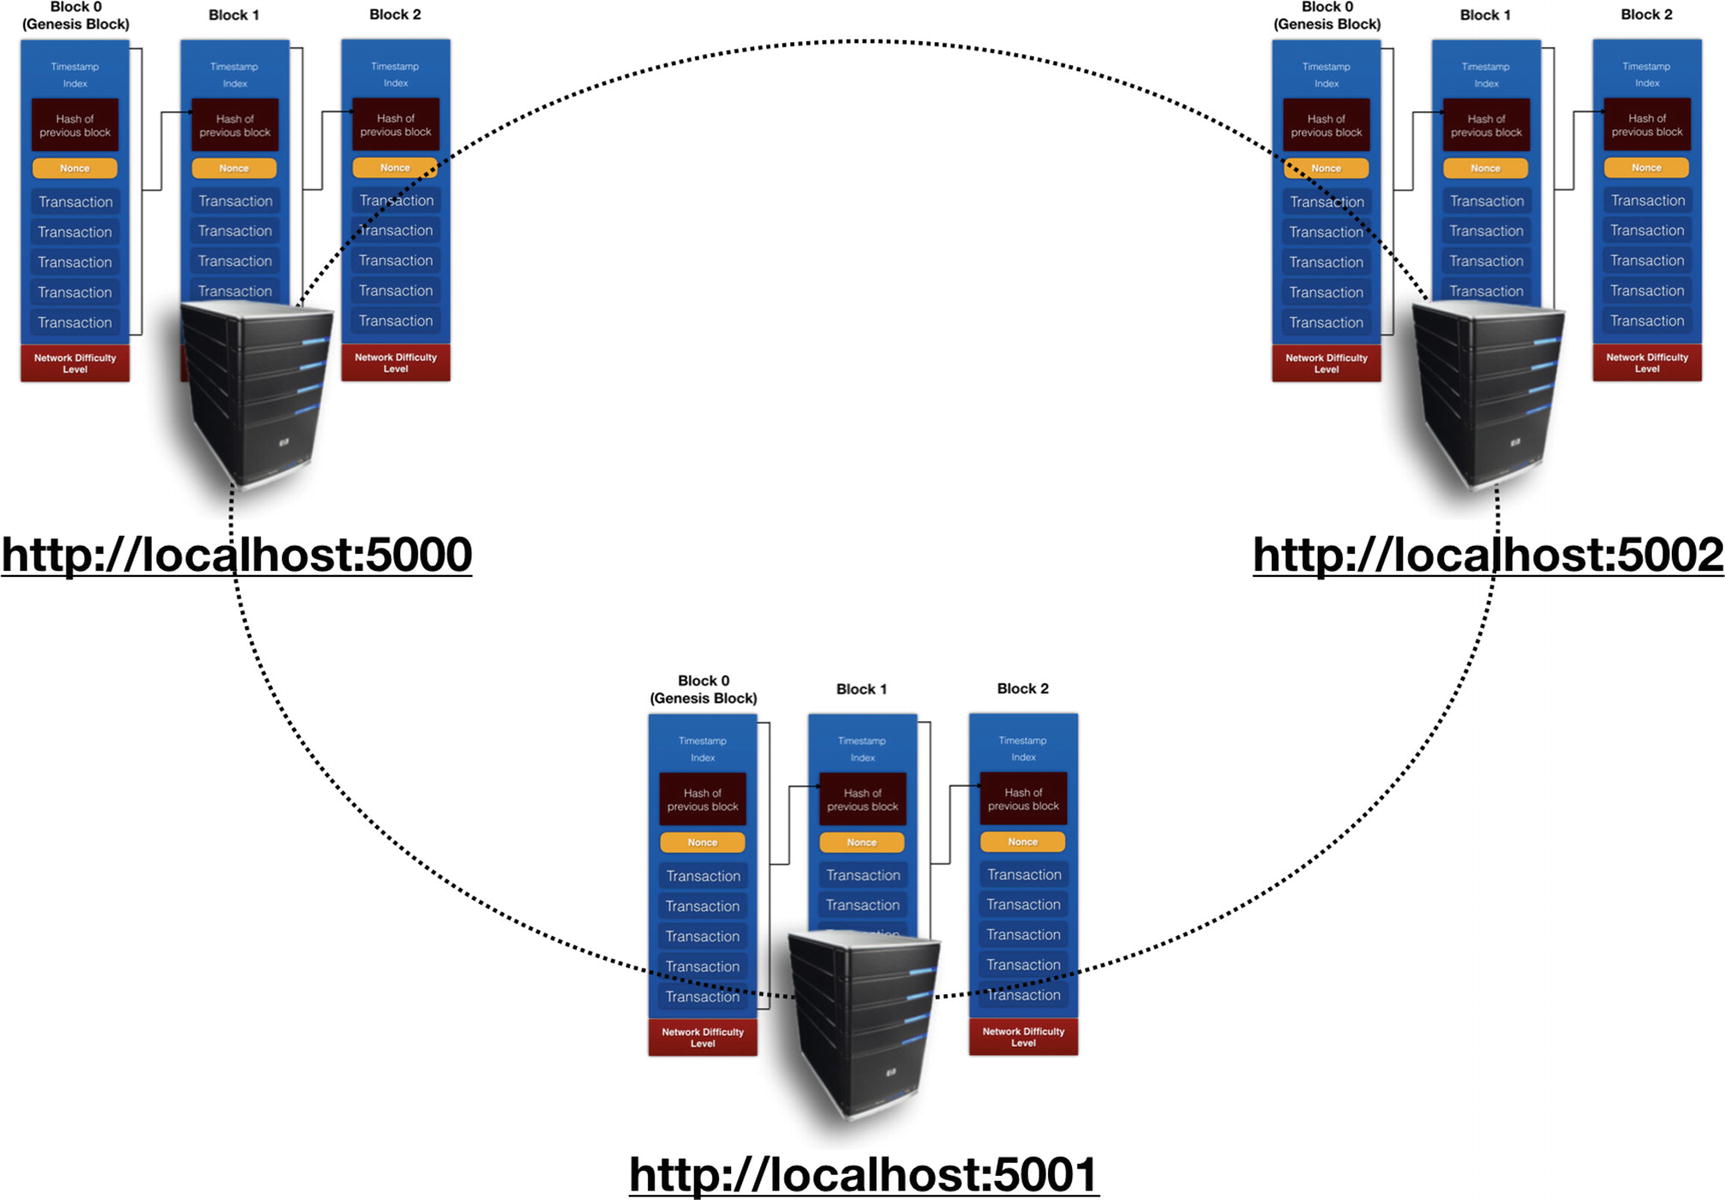
A blockchain network should consist of multiple nodes
This method allows a new node to be added to the nodes member, for example, if “http://192.168.0.5:5000” is passed to the method, the IP address and port number “192.168.0.5:5000” will be added to the nodes member.
It goes through each block in the blockchain and hashes each block and verifies that the hash of each block is correctly recorded in the next block.
It verifies that the nonce in each block is valid.
Checking that the blockchain from neighboring nodes is valid and that the node with the longest valid chain is the authoritative one; if another node with a valid blockchain is longer than the current one, it will replace the current blockchain.
The /nodes/add_nodes route allows a node to register one or more neighboring nodes.
Testing the Blockchain with Multiple Nodes
Tip
You now have two nodes running – one listening at port 5000 and another at 5001.
Tip
The preceding command registers a new node with the node at port 5001 that there is a neighboring node listening at port 5000.
Tip
The preceding command registers a new node with the node at port 5000 that there is a neighboring node listening at port 5001.
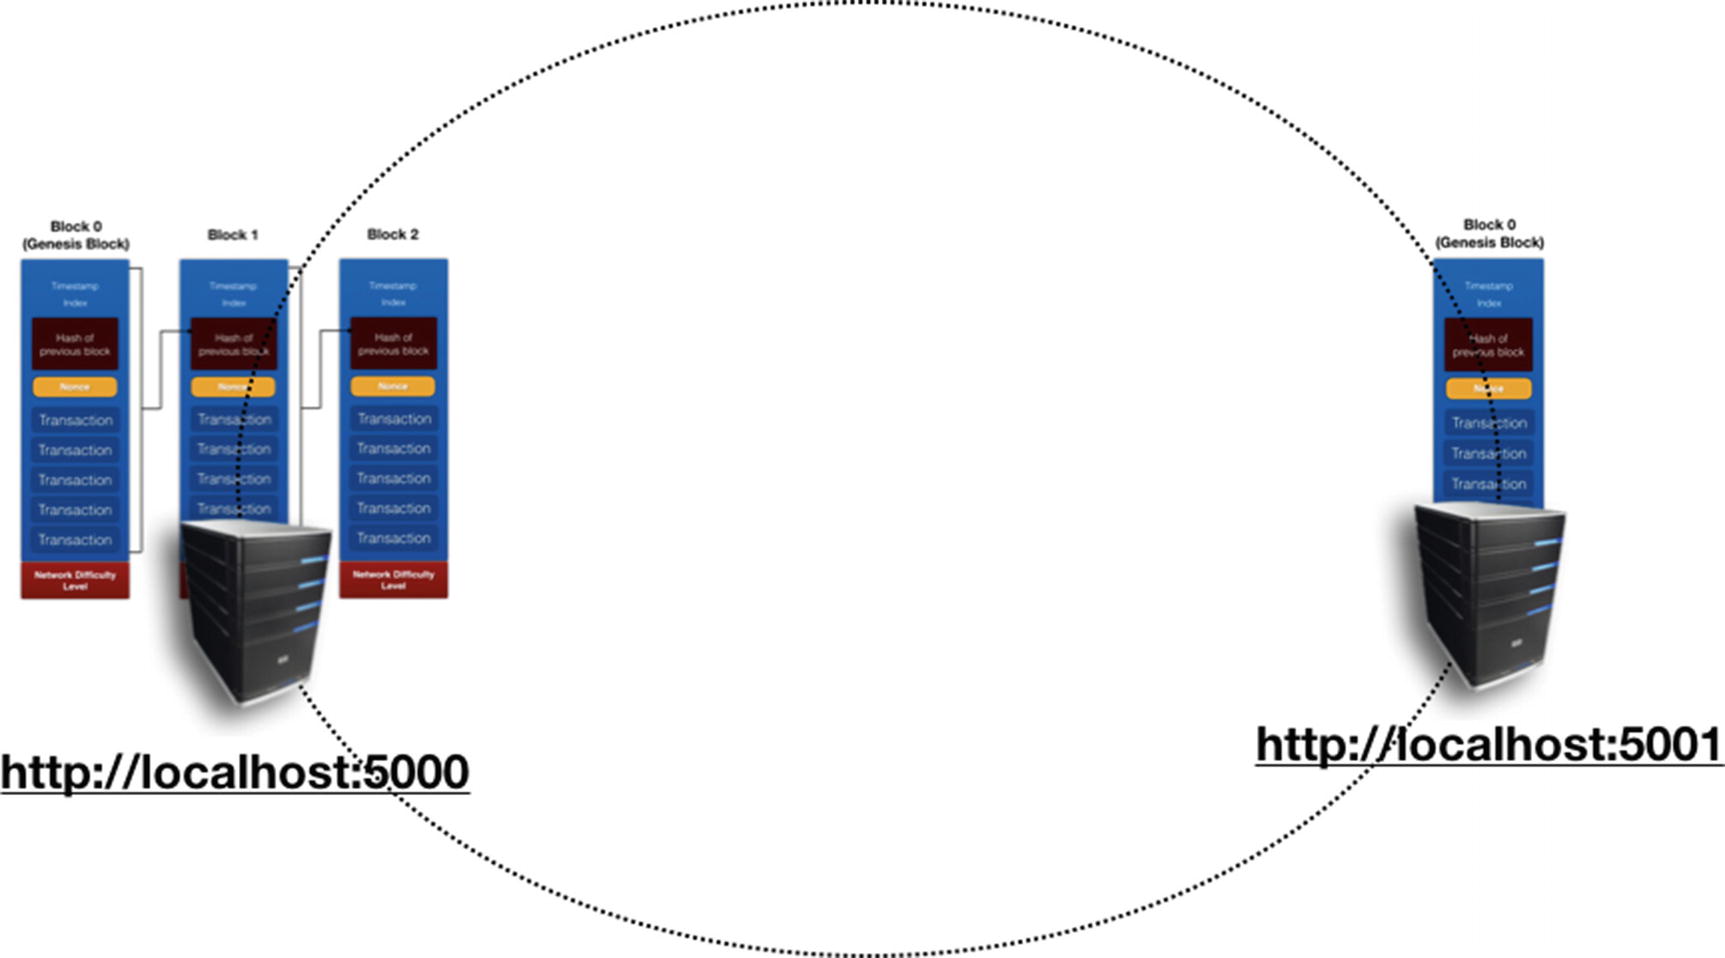
The current states of the two nodes in our blockchain network
As the second node’s blockchain only has one block, it is therefore deemed outdated. It now replaces its blockchain from that of the first node.
Full Listing for the Python Blockchain Implementation
Summary
Blocks are added to the blockchain
The nonce in a block is found
To synchronize blockchains between nodes
In the next chapter, you will learn how to connect to the real blockchain – the Ethereum blockchain.