In the previous chapter, you saw how to download and install the Geth client. You also saw how to connect to the various Ethereum networks and how to examine the blockchain using the blockchain explorer – EtherScan.
One useful feature of Geth is that you can use it to create your own private test network in your local setup, without connecting to the real blockchain. This makes the development work much easier and allow you to explore the Ethereum blockchain without needing to pay for real Ether. Hence, in this chapter you will see how you can create your own private Ethereum test network, as well as how to connect to peers and perform transactions such as sending Ethers between accounts.
Creating the Private Ethereum Test Network
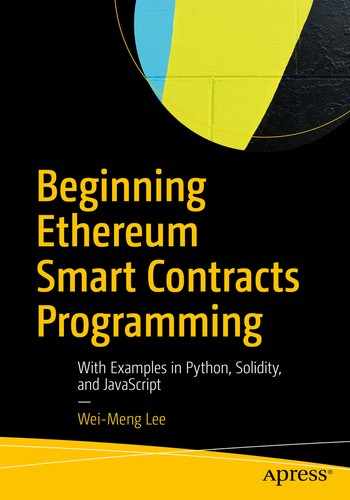
Our private Ethereum test network
These three nodes will form your own test network where you can do things like mining, transferring Ethers to another account, and in the next chapter, deploy your Smart Contracts.
Creating the Genesis Block
Before you proceed to create your own private Ethereum test network, you need to create the genesis block . The genesis block is the start of the blockchain – the first block (block 0), and the only block that does not point to a predecessor block. The Ethereum protocol ensures that no other node will agree with your version of the blockchain unless they have the same genesis block, so you can make as many private testnet blockchains as you’d like.
For Windows users, the home directory is typically C:users<user_name>.
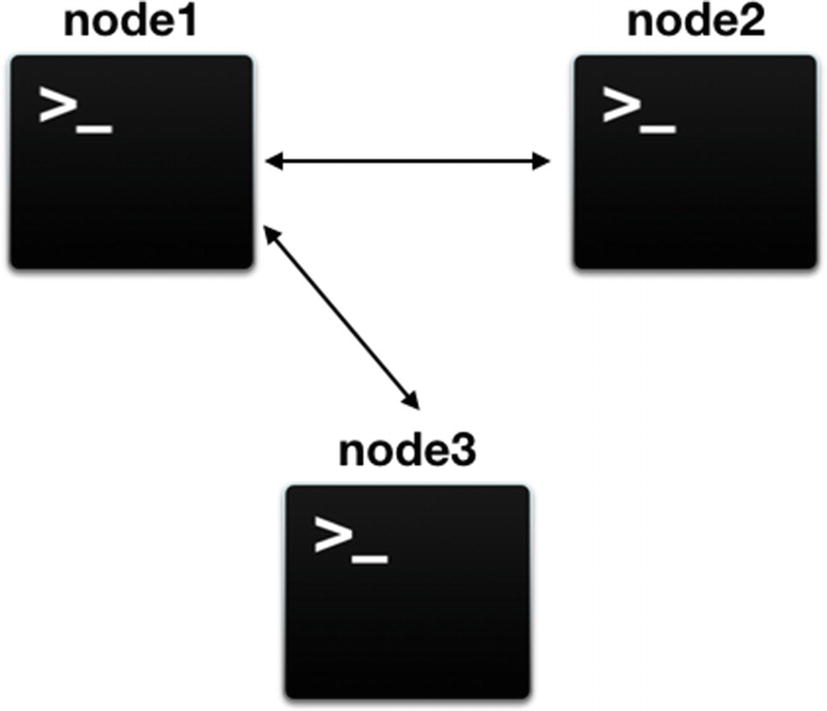
Creating a Folder for Storing Node Data
The content of the MyTestNet directory
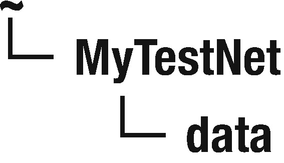
Initiating a Blockchain Node
The content of the node1 directory
The Geth directory contains two folders for storing the blockchains – chaindata and lightchaindata, while the keystore directory contains accounts information (more on this later).
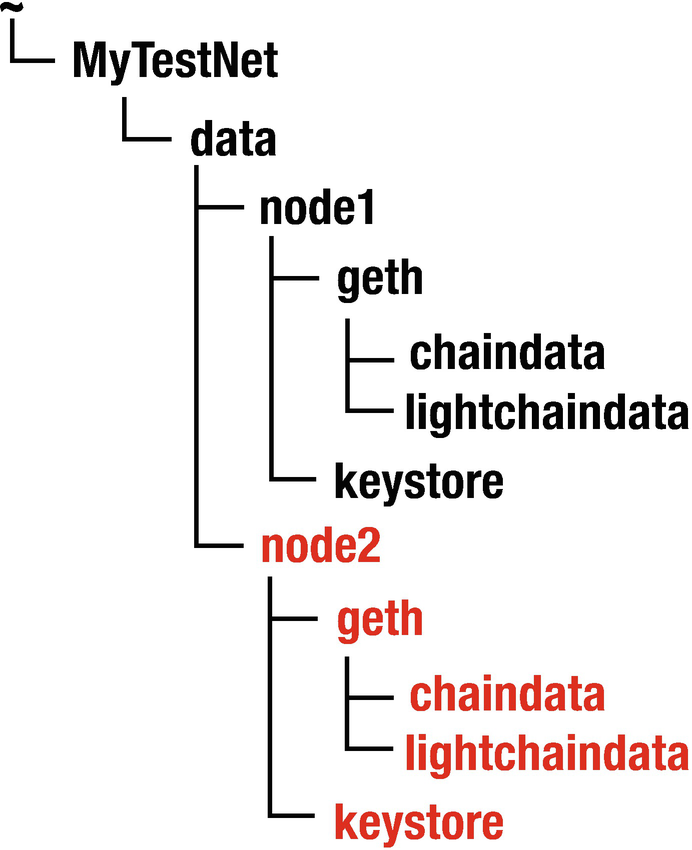
The node2 directory is now added to the data directory
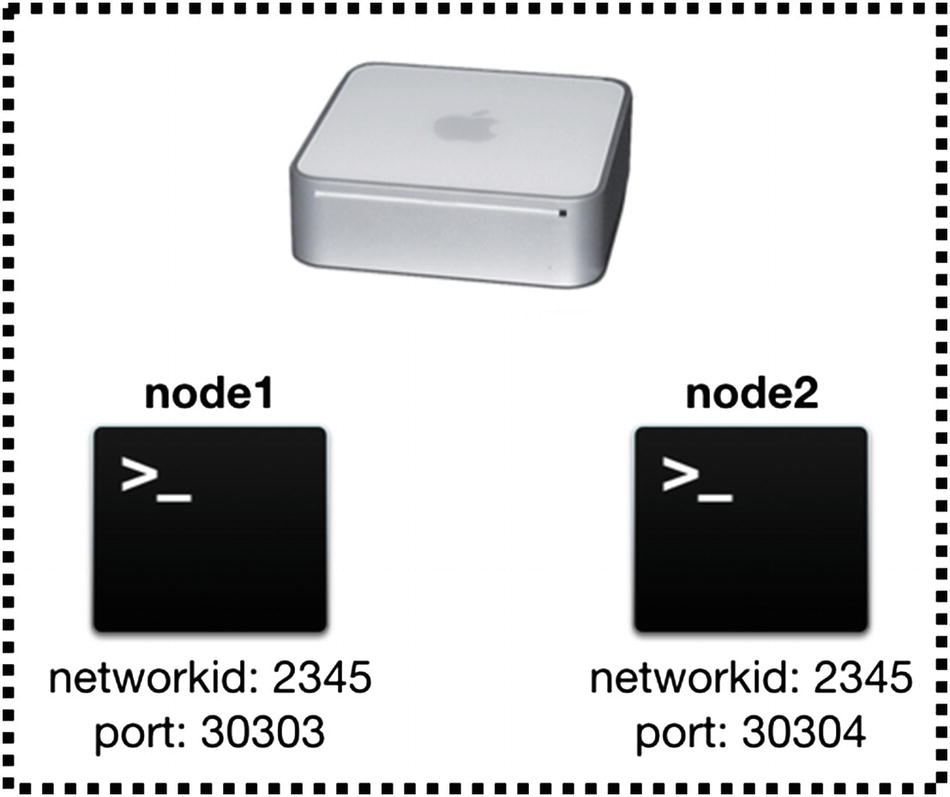
Starting Up the Nodes
Tip
The Geth JavaScript Console provides an interactive console for you to interact with the Ethereum blockchain using the JavaScript language.
The console 2 option basically redirects the output to a file (named console1.log in this example). Without this redirection, Geth would continually generate a lot of output and the Geth JavaScript Console would not be usable.
Creating Accounts
The web3 object (from the web3.js library) allows you to programmatically interact with the Ethereum blockchain. It also exposes the eth object, which itself also exposes the personal object. Hence the full name for the personal.newAccount() function is actually web3.eth.personal.newAccount(). The personal object allows you to interact with the Ethereum node’s accounts.
You can be asked to enter a password for the new account. Once that is done, the public address of the account is displayed.
The list of accounts will be shown as an array. In the example here, there is only one account.
Once the account is created, you will be able to find the account details stored in a file (named beginning with the UTC word) in the ~/MyTestNet/data/node1/keystore directory. We will talk more about this later in this chapter.
Checking the Balance of an Account
As mentioned earlier, the eth object is derived from the web3 object, so the preceding function is equivalent to web3.eth.getBalance(web3.eth.accounts[0]).
Units in Ethereum
Unit | Wei Value | Wei |
|---|---|---|
wei | 1 wei | 1 |
Kwei (babbage) | 103 wei | 1,000 |
Mwei (lovelace) | 106 wei | 1,000,000 |
Gwei (shannon) | 109 wei | 1,000,000,000 |
microether (szabo) | 1012 wei | 1,000,000,000,000 |
milliether (finney) | 1015 wei | 1,000,000,000,000,000 |
ether | 1018 wei | 1,000,000,000,000,000,000 |
Stopping the Node
For now, let’s stop node1.
Starting Another Node
Observe that in the preceding command, I have specified the --port option and set the port to 30304. This is because Geth by default uses port 30303, and if you have multiple nodes running on the same computer, each node must use a unique port number. By setting this to port 30304, it will prevent conflicting with another node using the default port. The --nodiscover option means that peers will not automatically discover each other and that they need to be added manually. The --networkid option specifies the network id so that other nodes can attach to the network with the same network id.
The two nodes currently running within the same computer
Getting Information About the Node
The admin object is derived from the web3 object. Hence the full name of admin.addPeer() is web3.admin.addPeer(). The admin object allows you to interact with the underlying blockchain.
You will a whole bunch of information. In particular, take note of the preceding enode key (bolded for emphasis). At the end of the enode value, observe the port number 30303 (which is the port node 1 is using).
Tip
An enode describes a node in the Ethereum network in the form of an URI.
Pairing the Nodes
Caution
In the preceding example, the 138.75.206.153 refers to my computer’s public IP address. When pairing with another node on the same computer/network, it is important to replace this IP address with that of the local IP address of the computer. If you don’t do this, the two nodes will not be paired correctly.
In the preceding command, the bolded portion is the value of the enode key of node1. The admin.addPeer() function adds a peer to the current node using the peer’s enode value.
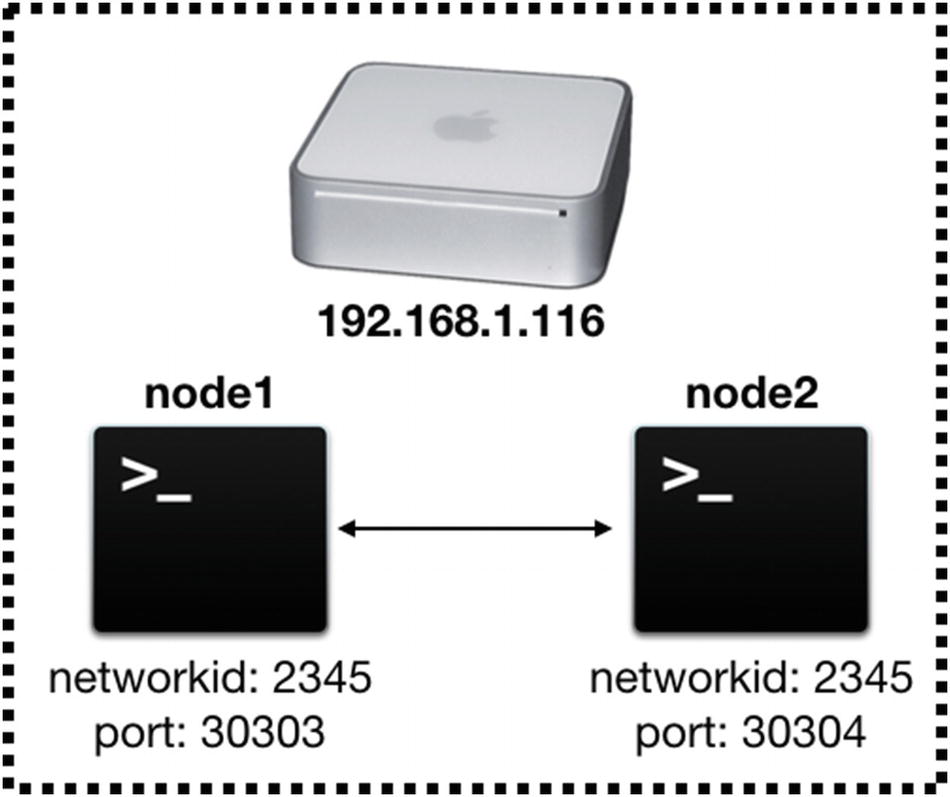
The current state of our private test network, with two peered nodes
The admin.peers property returns a [] if there is currently no peer attached to the node.
So far, we have been pairing the nodes within the same computer. How do you pair nodes from another computer?
Note
I will leave the creation of the third node as an exercise for the reader.
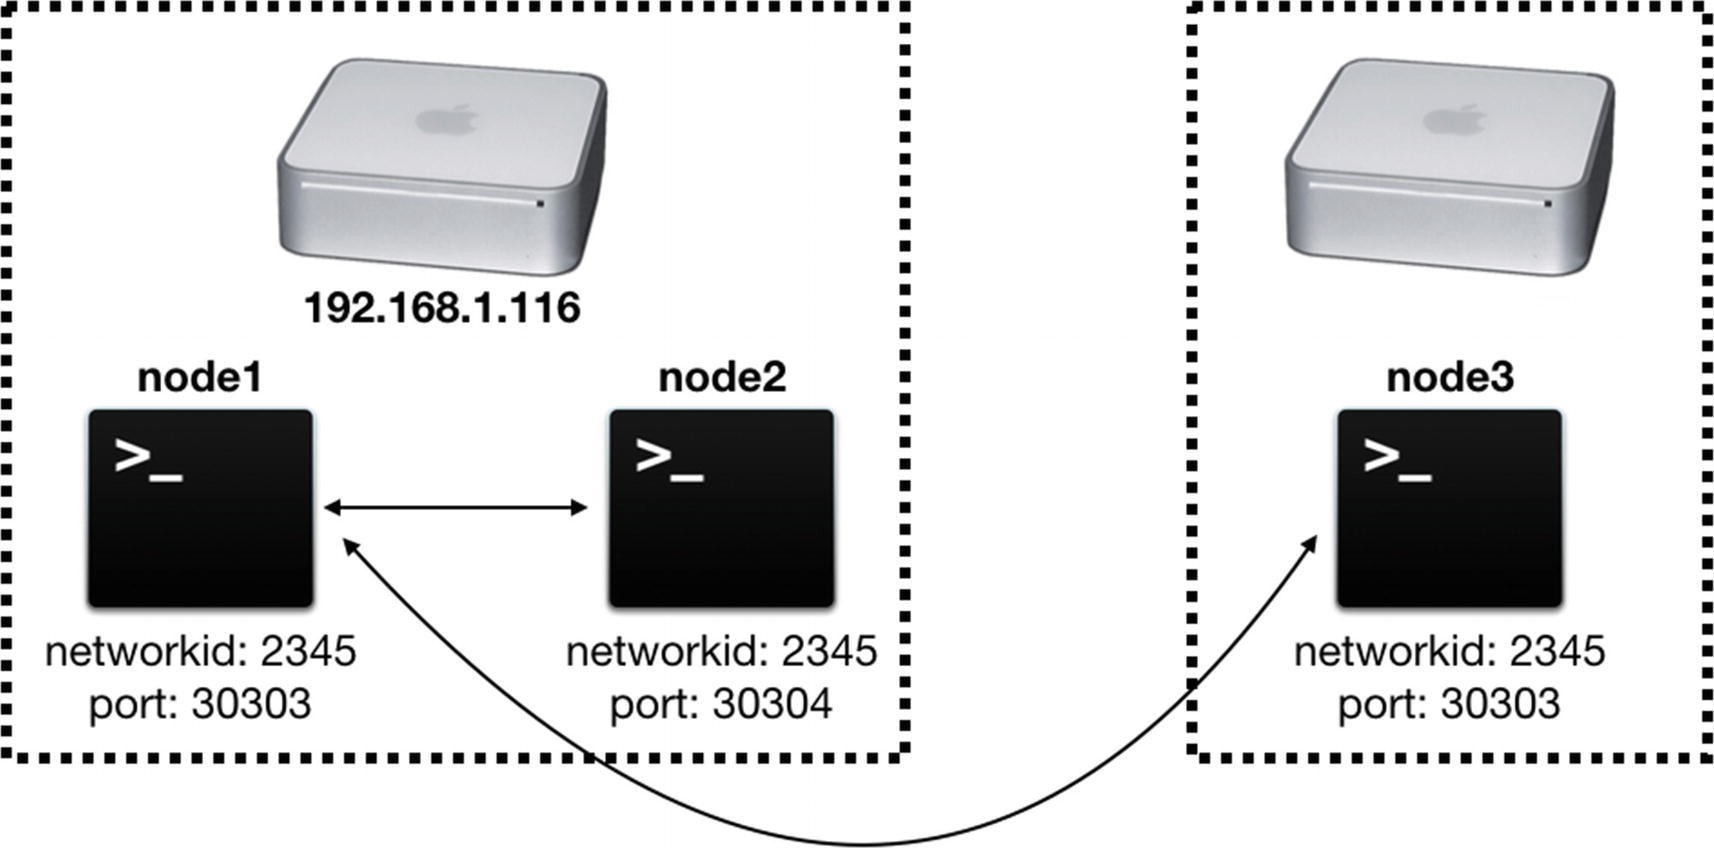
Our private test network with three connected nodes
Performing Mining
The number you passed into the start() function is the number of threads you want to use for the mining operation. Don’t be alarmed with the null result. The null simply means that the function has nothing to return to you; it does not indicate the failure of the mining operation.
Note
The miner object is derived from the web3 object.
The node1 will now start the mining operation. On some computers, it will take a few minutes to mine the first block, while on some slower machines, it will take a much longer time. So be patient.
You can verify that a block has been mined by checking the result of the eth.blockNumber property. If the block number is more than 0, then you have mined your first block! Congratulations!
And since node2 is connected to node1, you can also verify the block number in node2. You should see the same block number.
Caution
If node2 is not seeing the same block number as node1, it means that the two are not paired up correctly.
If you need to stop the mining, you can use the miner.stop() function. For now, leave the mining on.
Tip
This is a good time to check the balance of your account. If you have managed to mine a block, you should have some Ethers in your account now.
Examining a Block
The eth.getBlock() function takes in a number representing the block number that you want to examine. One particular interesting point to note: the miner key indicates the account that successfully mined the block.
Mining on Both Nodes
Why? Simple, in order to perform mining, you need to have at least one account in your node for the rewards to be deposited into. To solve this problem, create a new account using the personal.newAccount() function. Once the account is created, you can use the miner.start() function again.
You now have two miners mining at the same time and competing for rewards. To know who is the miner of the latest block, you can use the eth.getBlock() function and checking its miner property, like this: eth.getBlock(eth.blockNumber).miner . The result would be the address of the account who managed to mine the latest block.
Transferring Ethers Between Nodes
Tip
If you want to transfer Ether to another node on another computer, simply specify the address of the account you want to send to enclosed with a pair of double quotes, like this: eth.sendTransaction({from: eth.accounts[0], to: "0x9ba6f3c9cce2b172d0a85a50101ae05f3b4c8731", value: web3.toWei(5,"ether")})
You are not currently mining. Remember, mining confirms transactions so that the transactions can be recorded on the blockchain. To resolve this, start mining on the node.
If you are currently mining, then it is likely that the transactions have not be confirmed yet. Will a while and try to check the balance again.
Tip
If you check the balance of the first account, you are likely to see it has less than five Ethers deducted. This is because in spite of the five Ethers deducted, it is also earning rewards doing the mining. Hence, it is easier to verify the balance of the second account.
Managing Accounts
The preceding shows the content of the first account in node1 with the file name UTC--2019-01-08T08-37-52.567662000Z--530e822163471b0e65725cbd85dc141ff6b24d59.
Your encrypted private key (encrypted using your supplied password).
The public key is not stored in the JSON file as it can be derived from the private key.
Your account address (which is derived from your public key). The account address is the last 20 bytes of the public key.
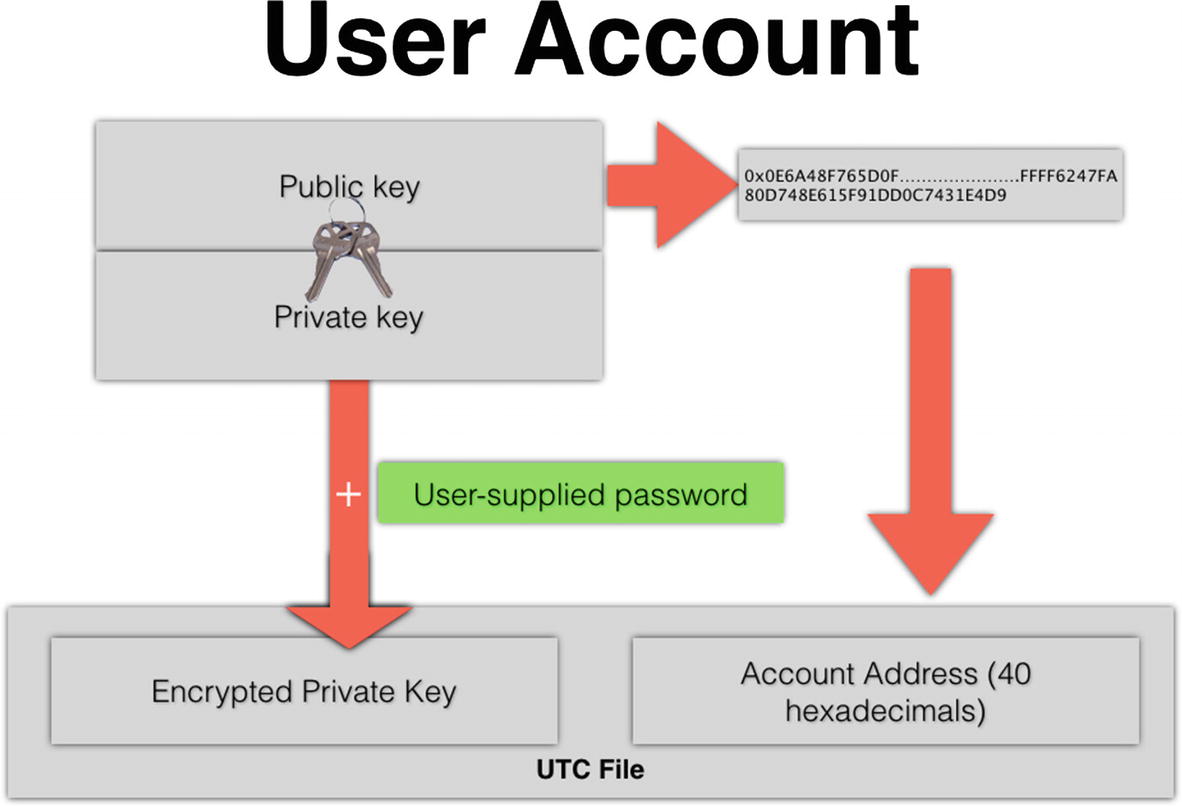
Understanding how the accounts information is derived
Tip
Curious about your private key? You can go to www.myetherwallet.com/#view-wallet-info , select the Keystore File (UTC / JSON) option, and upload your JSON UTC file. You will be asked to enter your password used to secure the account, and voila, your private key will now be displayed. Note that this is purely for educational purposes. Do not try this with your real account.
Removing Accounts
Once you use the personal.newAccount() function, the account is created. There is no equivalent function to remove the account. The easiest way to delete the account is to go to the ~/MyTestNet/data/node1/keystore directory and delete the UTC file corresponding to the account that you want to delete.
Setting the Coinbase
To change the coinbase, you can use the miner.setEtherbase() function. Let’s try it now.
Summary
In this chapter, you have learned how to use Geth to create your own private Ethereum test network. You have learn how to create accounts in your node, connect to other nodes, transfer Ether between nodes, and more. Deploying your own test network is much more efficient than using one of Ethereum’s test network. What’s more, it allows you to experiment and have a deeper understanding of Ethereum.