
Throughout this book, we will build a website for a coffee shop using Gatsby and Netlify CMS. It will include an index page, a menu, and a blog. We will deploy the site on Netlify via GitHub.
Prerequisites
Before we can set up the project, there are a few prerequisite steps required.
Install Git
To work with the example project and deploy it to Netlify, you will need to have Git installed on your system. Installation steps vary depending on your operating system. See https://git-scm.com/ to download and install Git.
If your operating system has a package manager, chances are there is a Git package for it. If you’re on a Mac or Linux system, Git may already be installed.
Install Node.js
To install dependencies and run the build process, you will need Node.js installed on your system. If you don’t have it installed already, you can download it from https://nodejs.org. You can download either the current or LTS (long-term support) version - either will work for this project.
Installing Node.js will also install the npm package manager tool, which we’ll use to install dependencies.
Install the Gatsby command line interface
The -g argument to the npm install command installs the gatsby-cli package globally. After the package is installed, the gatsby command will be available on your system.
Sign up for GitHub
We will deploy the project to Netlify via GitHub, and the starter code is stored there, so you’ll need a GitHub account if you don’t already have one. To sign up, you can go to https://github.com/join.
Create a new repository with the starter code
You won’t need to start from scratch for this project. There is a GitHub template repository with the starter code that you can use to create your own repository to work in.
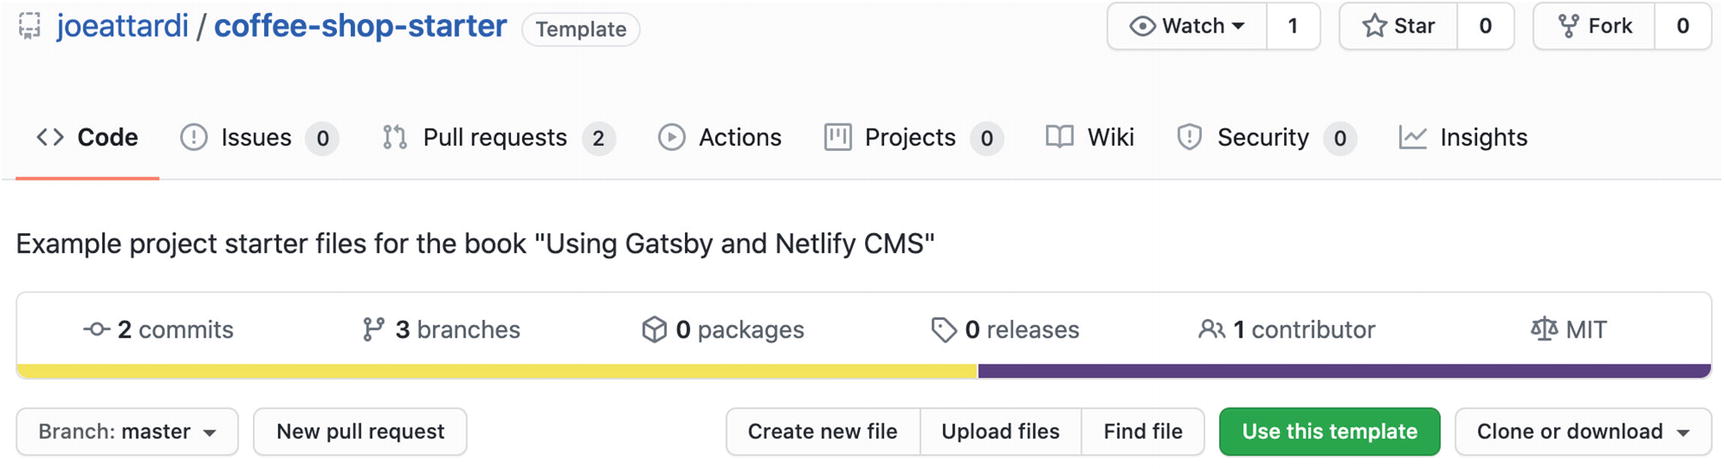
The starter code repository
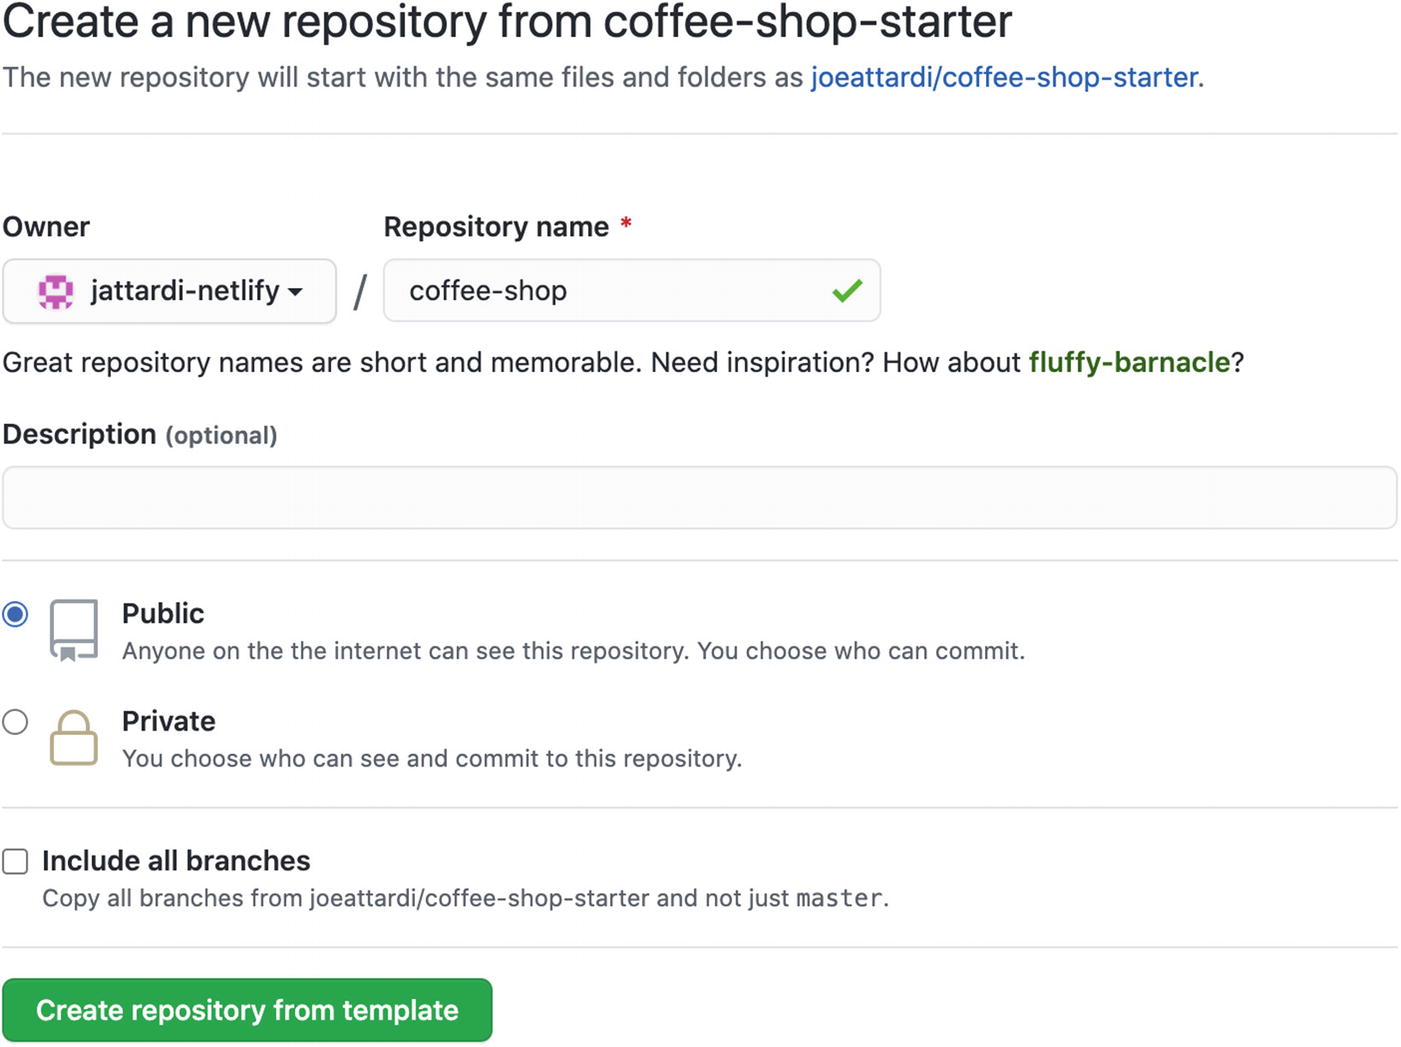
Creating the new repository
Clone the repository
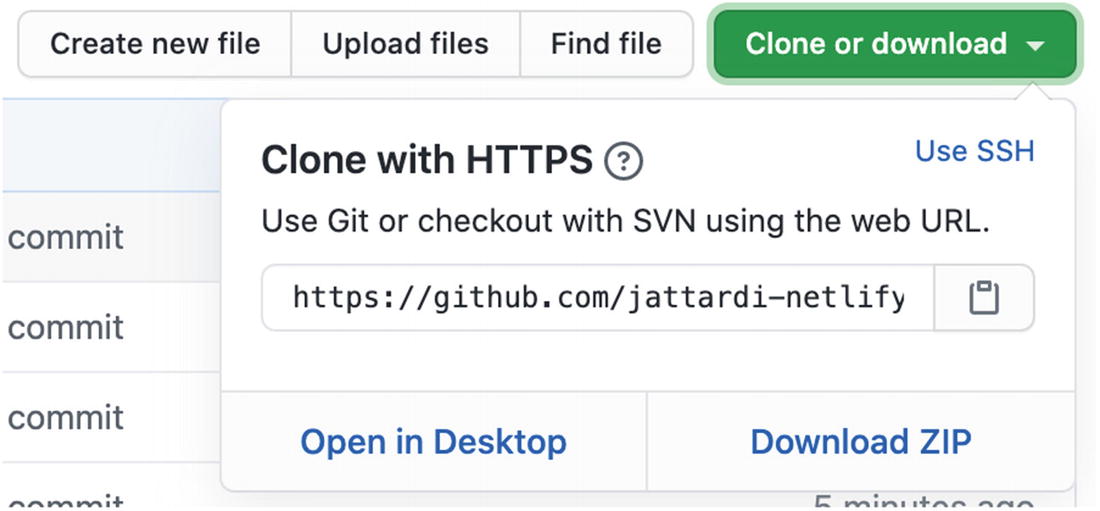
Getting the clone URL for your repository
The repository should be cloned locally to a directory called coffee-shop.
Install dependencies and test it out
Once the clone has completed, change into the coffee-shop directory, and type npm install. This will install all of the project’s dependencies from npm.
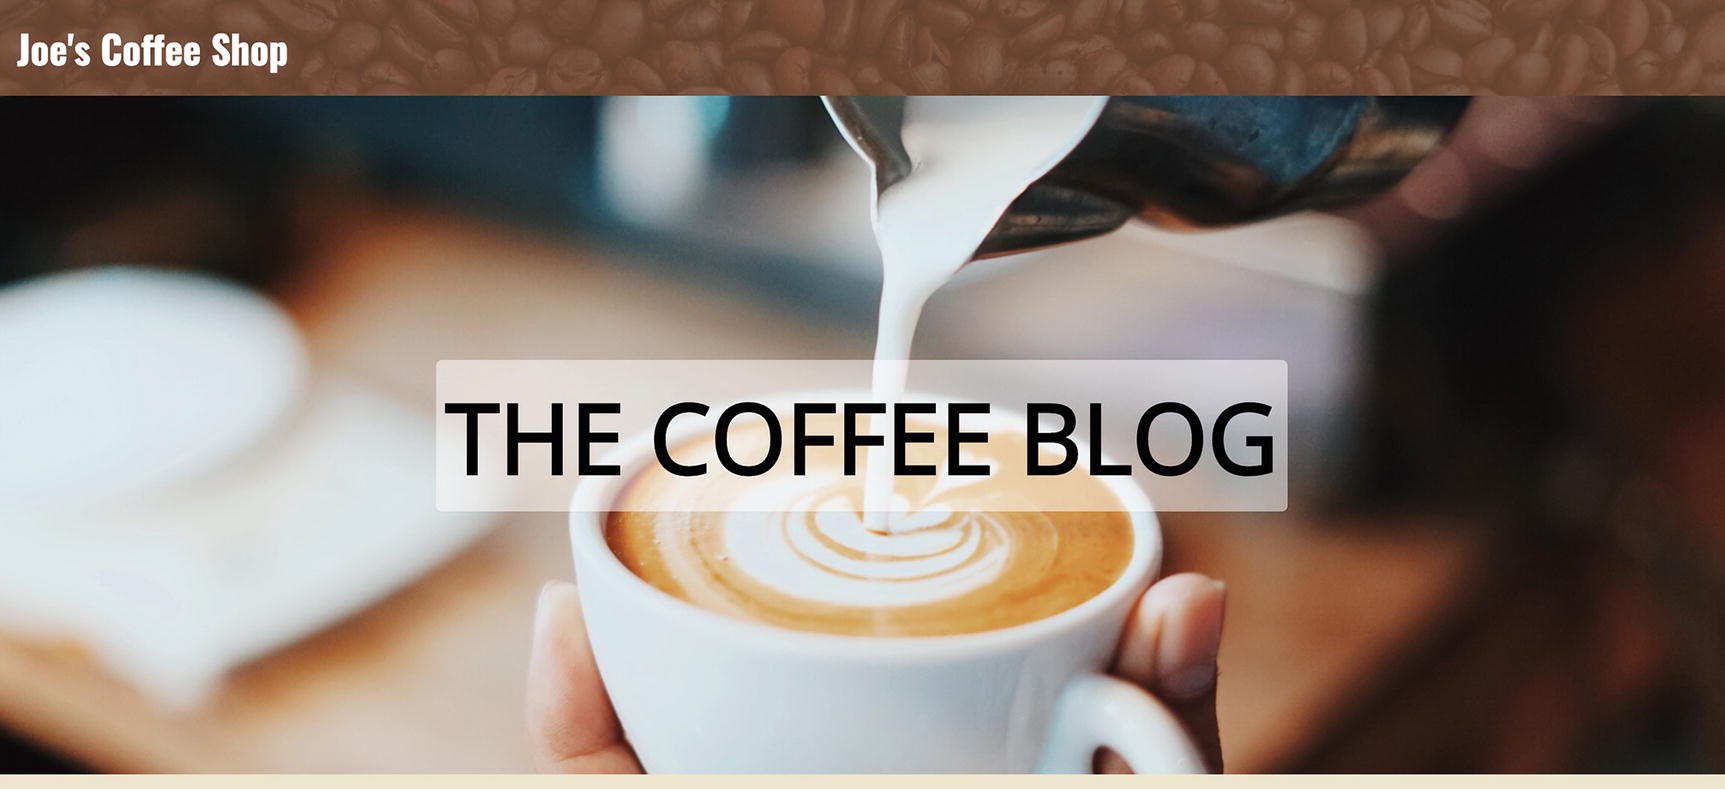
The example project
So far, this is little more than a landing page. We will use this as a starting point and will add functionality to the site over the next several chapters.
Deploy on Netlify
The next step is to get the example project deployed on Netlify.
Sign up
If you don’t already have a Netlify account, we will set one up in this section and link it to our GitHub account. Feel free to skip the sign-up section if you already have an account linked to GitHub.
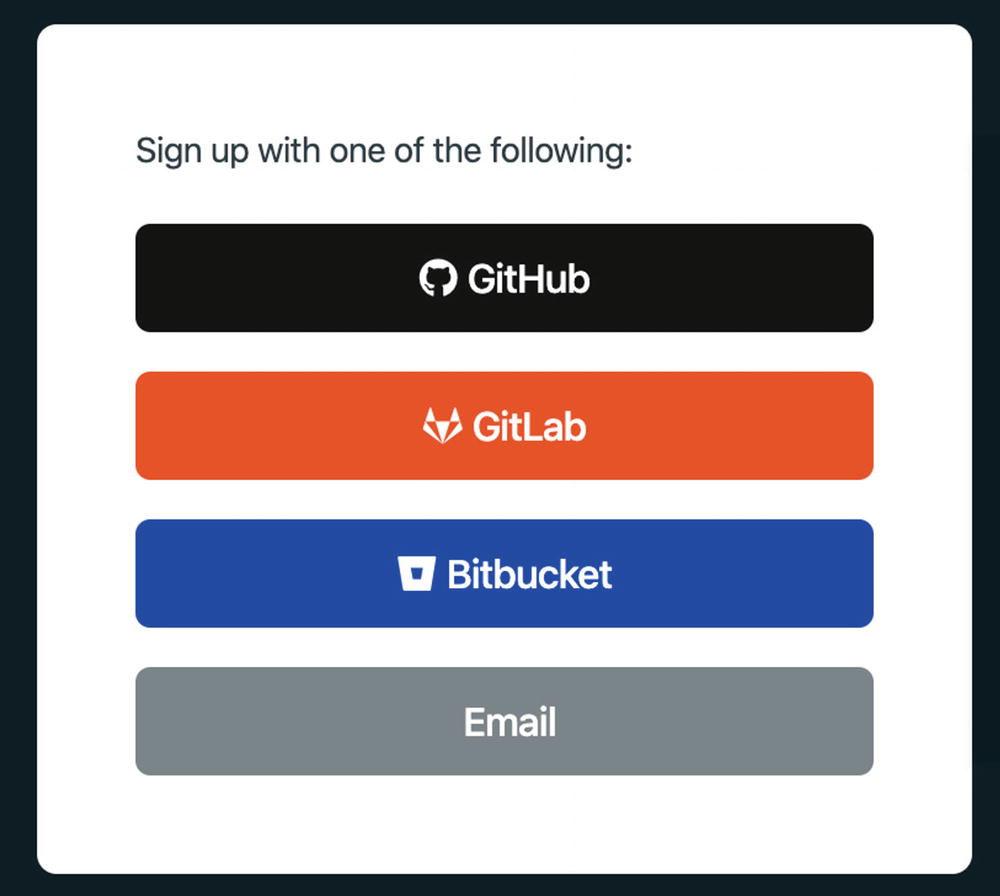
Selecting a sign-up method
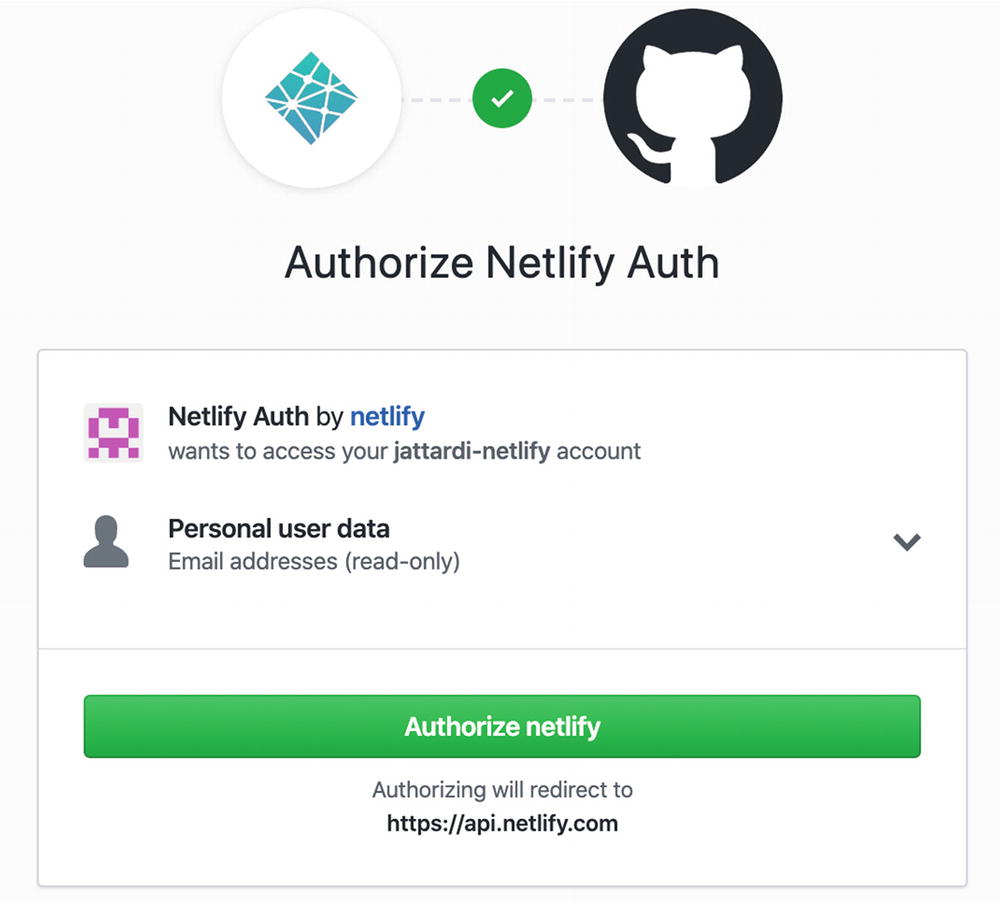
Authorizing Netlify with GitHub
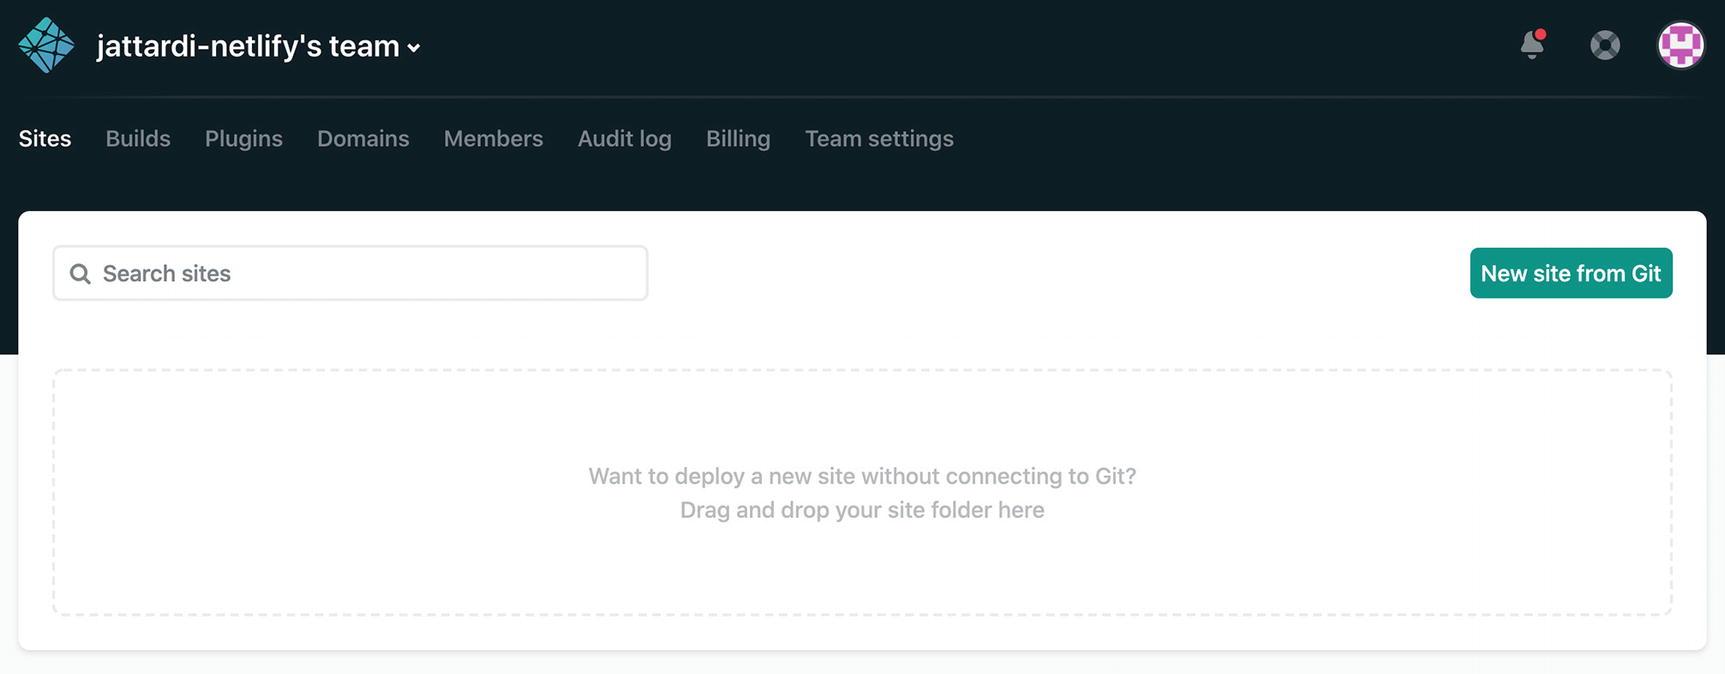
The Netlify dashboard
Create a new site
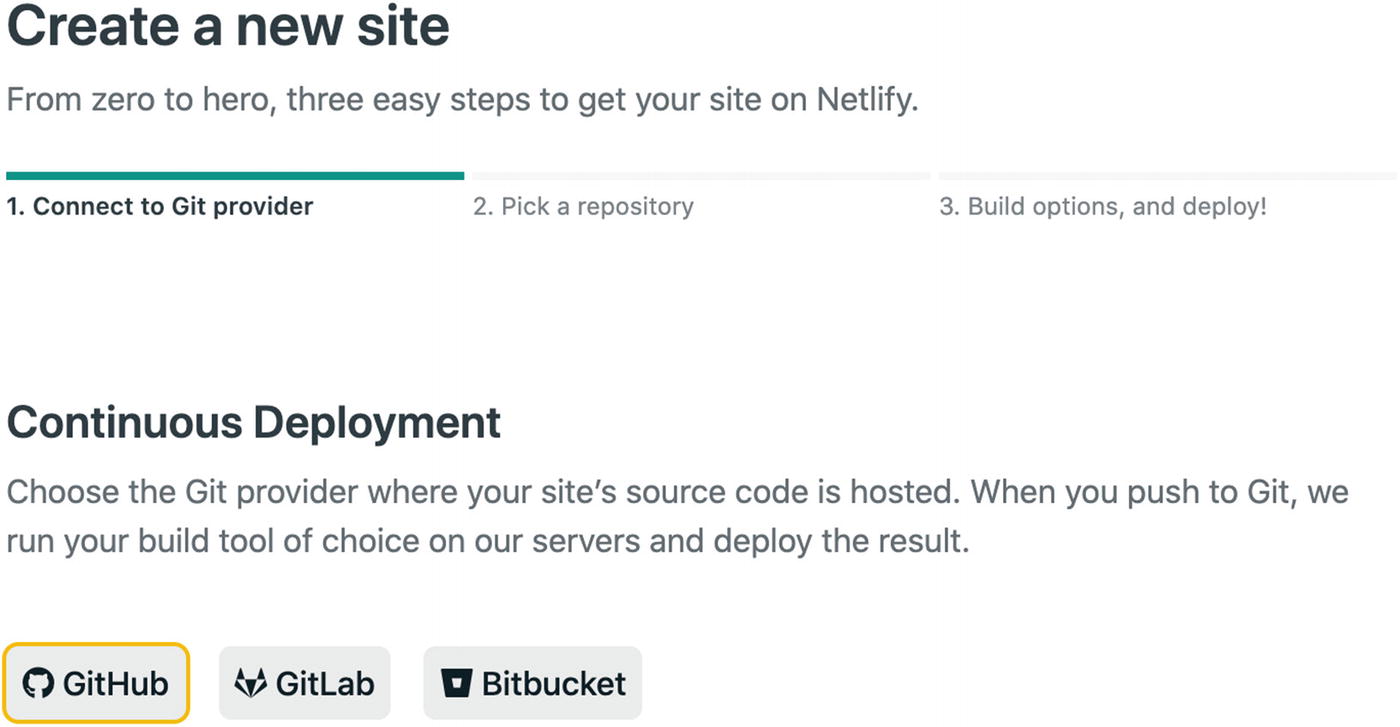
Selecting the GitHub provider
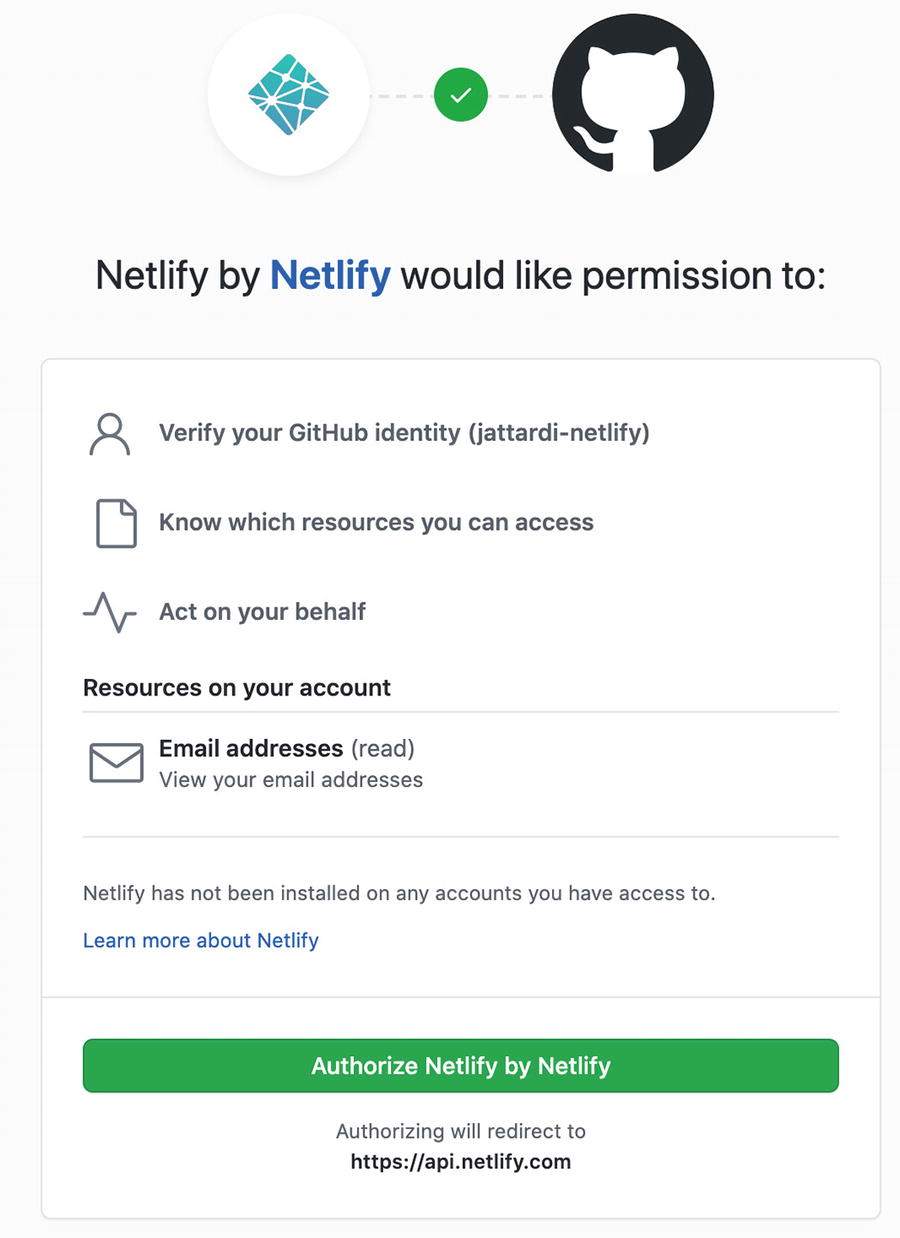
Authorizing Netlify
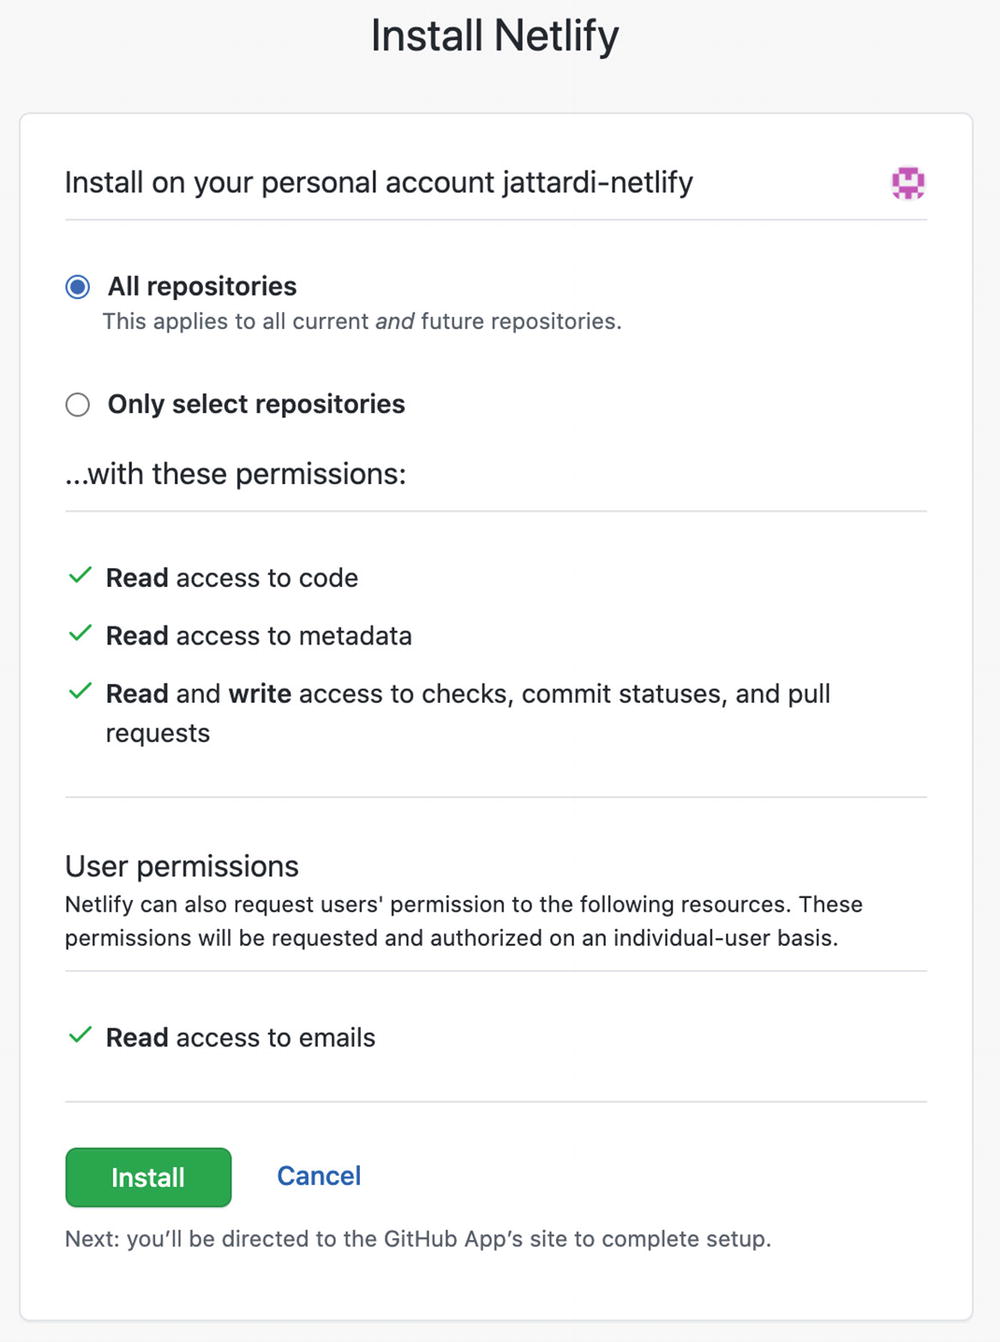
Installing the Netlify app
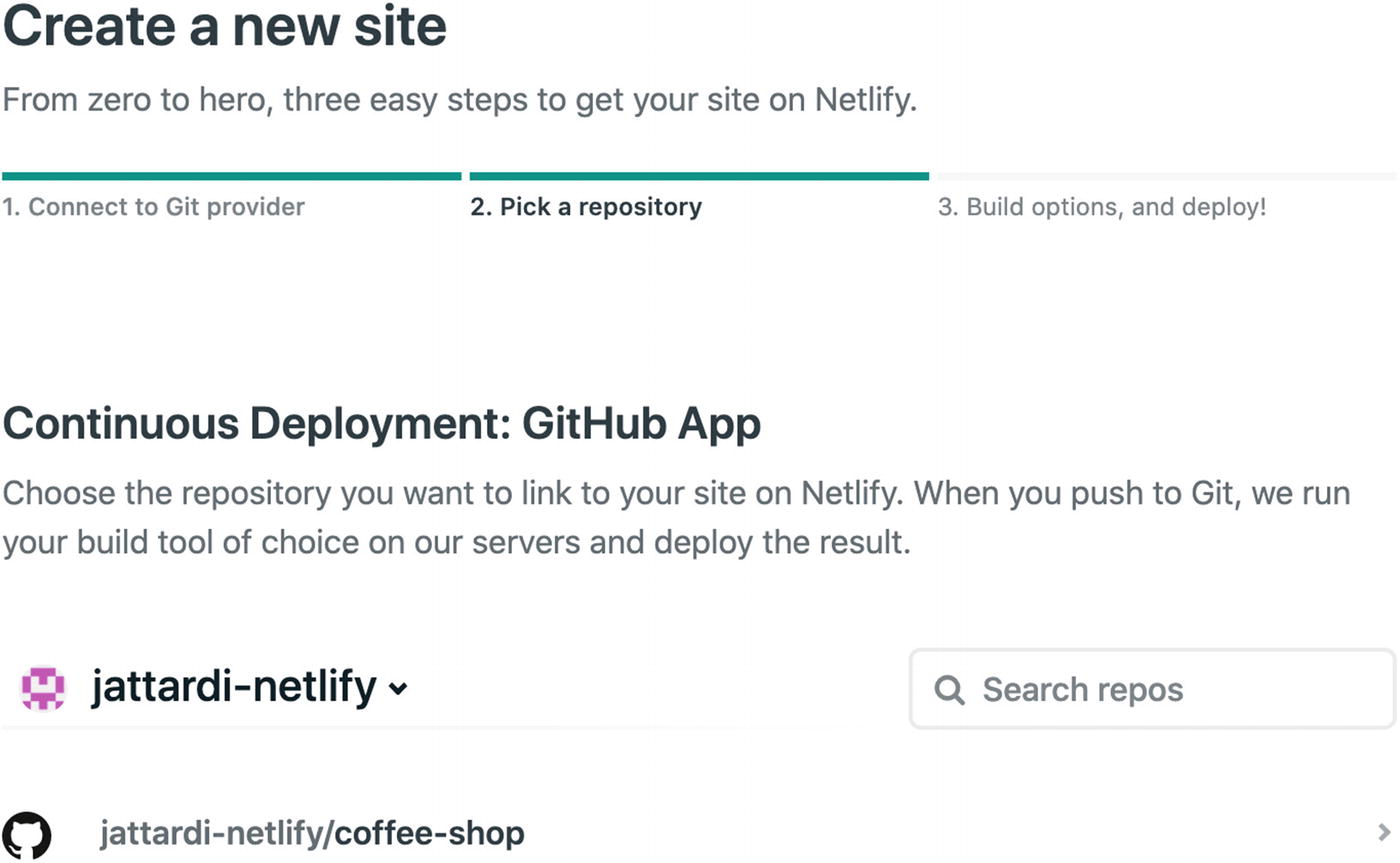
Selecting the repository
Next, the build and deploy settings will be shown. You can leave the defaults selected, as these are correct for a Gatsby site. Whenever commits are pushed to the master branch, Netlify will run the gatsby build command and publish the files that go in the public directory.
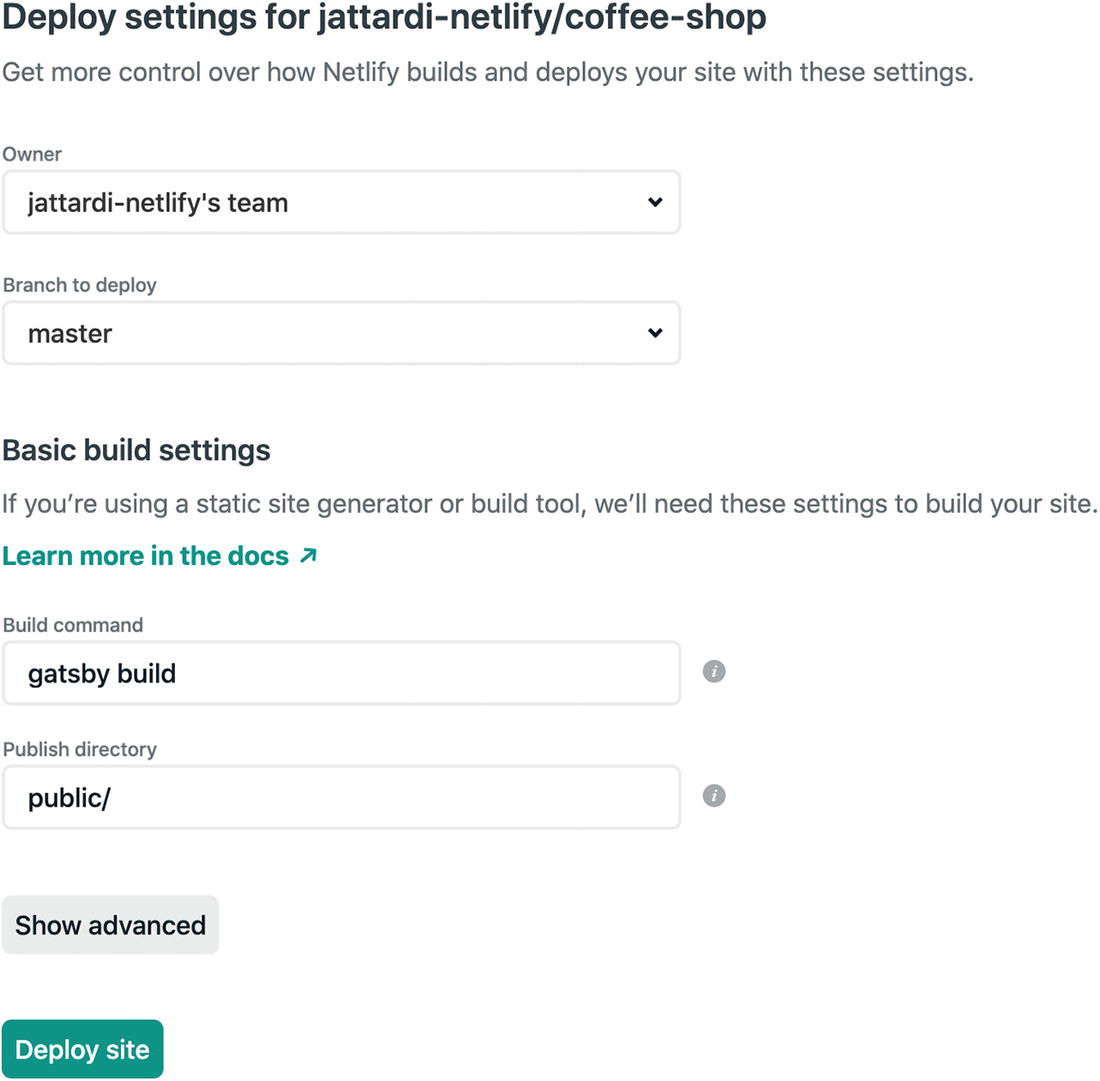
The site deploy settings

Site deploy in progress

The site settings
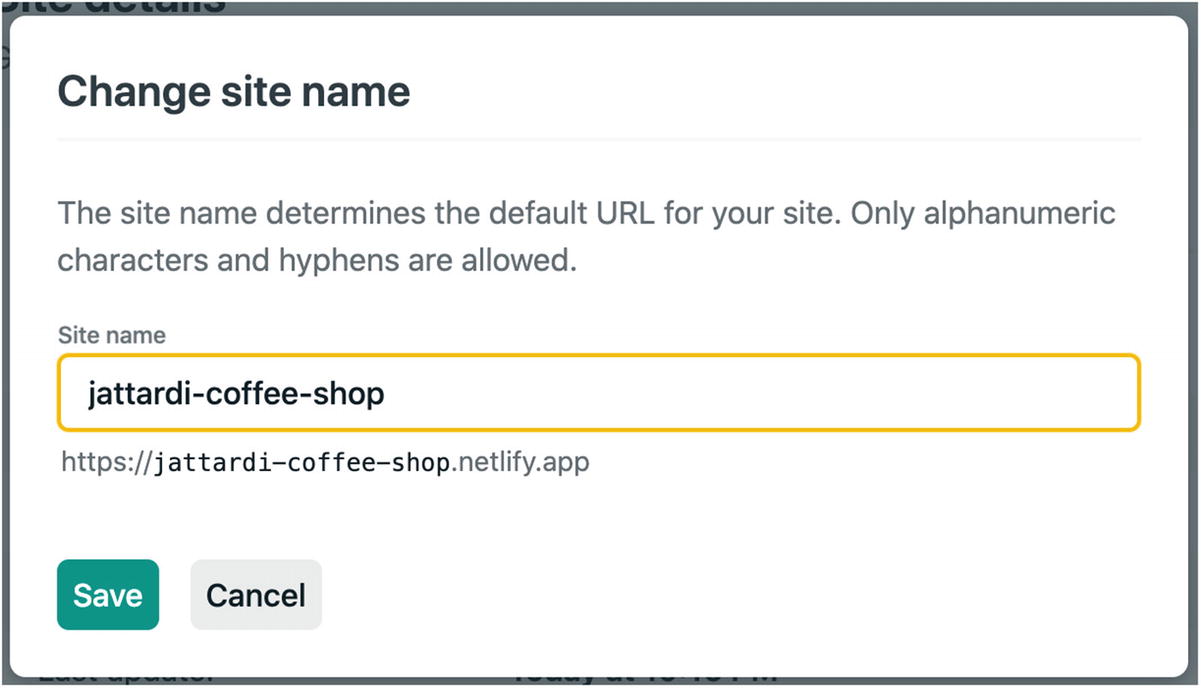
Changing the site name
Finally, let’s try out the live site. In the browser, navigate to https://<your-username>-coffee-shop.netlify.app, and the landing page should appear. We have successfully deployed the project to Netlify. In the future, any time we push commits to the master branch in GitHub, Netlify will build and deploy the new version of the site here.
A tour of the example project
So far, the example project is little more than a landing page. It was created with the gatsby-starter-hello-world Gatsby starter, which is a template for creating new Gatsby sites. Initially, there are no plugins installed in our site. Throughout this book, however, we will install several Gatsby plugins.
Directory structure
src: Source files.
src/components: Reusable components, used by pages.
src/pages: The site’s pages. For now, there is just an index page.
static: Static resources such as images.
The Layout component
The only component in the project so far is the Layout component. This is a common pattern in Gatsby sites. Layout contains common content such as the page header and title. This is so that we don’t need to duplicate this content in each page we create.
CSS modules
There are several different approaches to styling in Gatsby sites (and React applications in general). Some of these include plain CSS, CSS modules, or a CSS-in-JS framework like styled-components. For the example project, we will use CSS modules, mostly to keep things simple.
A simple CSS module
Consuming a CSS module
The class names used by the elements in the Sample component are not strings but rather references to the exported class names. This is an important distinction, because when the final CSS is built, there will be no selectors for the classes header or footer.
Instead, these class names will have a unique identifier added to them to effectively scope the styles to the component. The exports from the CSS module provide a mapping between the class name in the source CSS and the generated class names at build time.
For example, the header class selector will be rendered as something like Sample-module—header—3zaAq. The HTML rendered by the React component will also reference these generated class names. This ensures that the styles in the CSS module will only apply to the React component importing it.
Without CSS modules, style rules could apply to other parts of the page outside of the component, producing unintended effects.
Special Gatsby files
gatsby-browser.js: An entry point to utilize the Gatsby Browser APIs. Here, we simply use it to import a style sheet containing some global styles.
gatsby-config.js: The main Gatsby configuration file. Here is where plugins are configured.
The initial Gatsby configuration
Summary
Installed required tools
Set up our development environment
Created our project repository from the starter code
Deployed the initial project to Netlify
We also took a brief look at the initial project code and got an introduction to CSS Modules.