Building upon the last chapter, in this chapter we will start architecting the game engine. For each chapter, we will implement another component until completion. Proper planning and architecting are crucial to creating a successful engine, game (or any program for that matter). This chapter will also go over a couple design patterns used in game engines in case you want to explore other patterns in your own projects.
Game engine design patterns
Programming design patterns
State management
MonoGame architecture
Game Engine Design
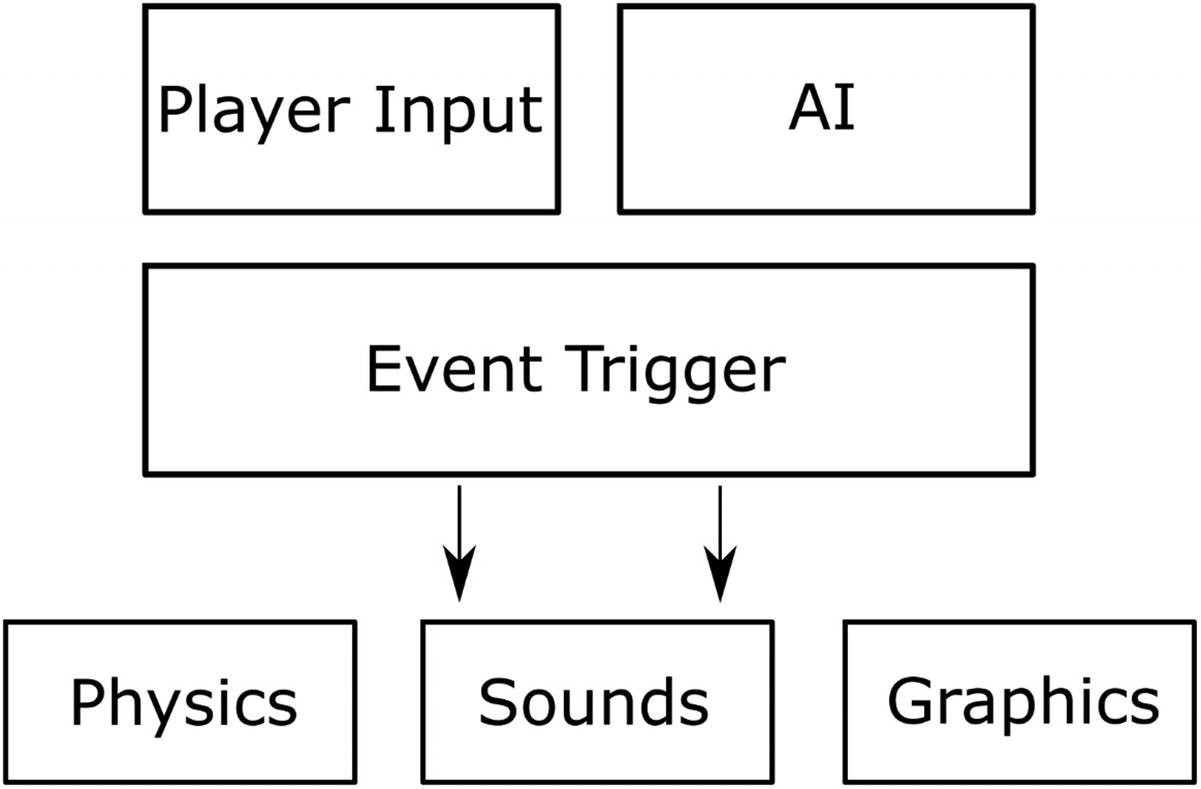
Game engine design architecture
Player Input
Driving many (if not most) of the interaction of your game engine is the input. Depending on your target platform, this can include everything from a standard gamepad, keyboard, and mouse combination to touch or head tracking via a virtual reality headset. In Chapter 6 we will deep dive into integrating a generic interface to gracefully handle the various inputs that exist today for games and future proofing as much as possible.
Artificial Intelligence (AI)
Artificial intelligence has been a critical component of games for decades. One of the earliest examples being Space Invaders in the late 1970s. While primitive by today’s standards, Space Invaders offered the player a challenge against the computer-controlled players with two different enemy types. In today’s games, pathfinding and decision trees drive most games.
Event Triggers
At the heart of our engine and many others is an Event Trigger system . The idea behind this is to define a generic event such as a Player clicks the left mouse button. The actual game would then listen in on this event and perform one or more actions. The advantage here is to keep complexity to a minimum. A more traditional programming approach here would be to have specific calls to Render the Player, but then when the player clicked the right button have very similar code in another Render the Player method. This approach as you can see also creates DRY (don’t repeat yourself) violations. Later in this chapter, we will create the basis for our Event Trigger subsystem that we will build on in subsequent chapters.
Graphical Rendering
One of the most focused on components in a game engine is the graphics. Graphics rendering in most modern game engines includes sprites, 3D models, particles, and various texturing passes, to name a few. Fortunately, MonoGame provides easy-to-use interfaces, and for the purposes of this book, we will only focus on 2D rendering. Over the course of the remaining chapters, we will expand the rendering capabilities of our engine. In addition, we will specifically deep dive into adding a particle subsystem in Chapter 8.
Sound Rendering
Often overlooked, sound rendering is arguably equally critical to provide your audience with a high-quality auditory experience. Imagine watching your favorite action film without sound or music – it is missing half of the experience. In MonoGame, fortunately, it is very easy to add even a basic level to your game engine to provide both music and sound. Those that have done XNA development in the past, MonoGame has overhauled the interface and does not require the use of the XACT (Cross-Platform Audio Creation Tool). At a high level, MonoGame provides a simple Song class for as you probably inferred for music and SoundEffect for your sound effects. We will dive more into audio with MonoGame in Chapter 7 by adding music and sound effects to our engine.
Physics
Depending on the game, physics may actually be a more critical component than sound, input, or even graphics. There is a growing genre of games where the focus is on physics with relatively simple graphics such as Cut the Rope 2 or Angry Birds 2, where birds are slingshot toward precariously balanced structures that crumble to the ground as the bird crashes into its foundations. Much like the sound and graphic triggers, physics triggers may cause additional events such as the main character sprite colliding with an enemy, which in turn would cause an animation, health, and possibly the enemy to be destroyed.
State Management
State management is a common pattern to apply in games and MonoGame in particular due to the simple design it offers. The idea behind state management is that no matter how complex the video game, each screen, like the start menu that appears when the game is launched or the screen that displays the gameplay, can be broken into their own unique state.
Splash Screen
Main Menu
Gameplay
End of Level Summary
Each of these states often offers different input schemes, music, and sounds effects, not to mention different rendering of assets.
Full-screen scaled image or animated video
Music
Timed-based transitions or input-based progression
An input manager that waits on the user to start the game by pressing some key on their input device
On the other hand, the gameplay state will bring in physics, particles, and AI agents used to control enemies. It also has a much more complex input manager, capturing player movement and actions precisely. The gameplay state could also be responsible for synching up game state over a network if the player is playing with friends on the Internet. All this to say that breaking your game into groups of similar states will help as you begin to architect your game. Akin to designing around inheritance, properly grouping similar functionality and only extending when necessary will make the time to maintain your project and the development effort much smaller.
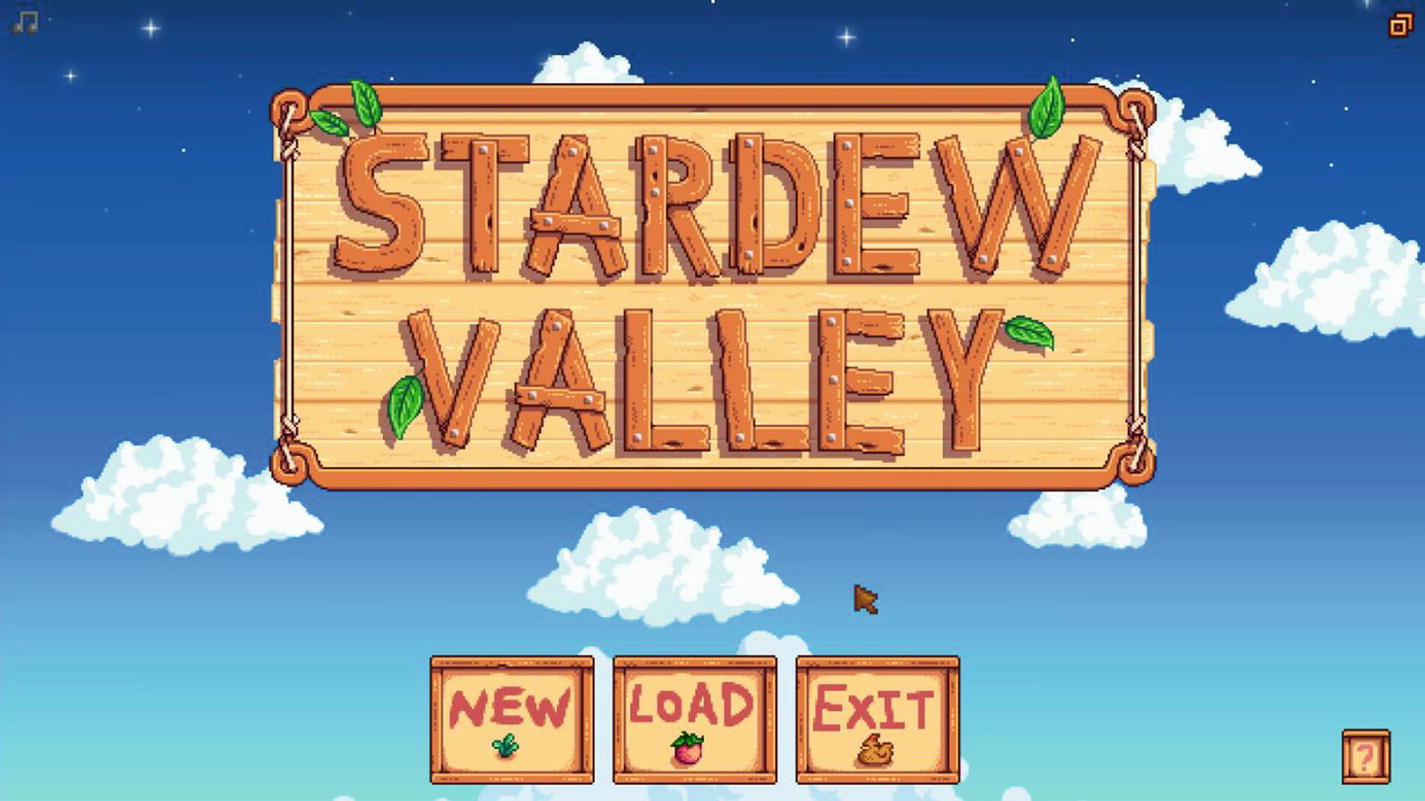
Stardew Valley Main Menu
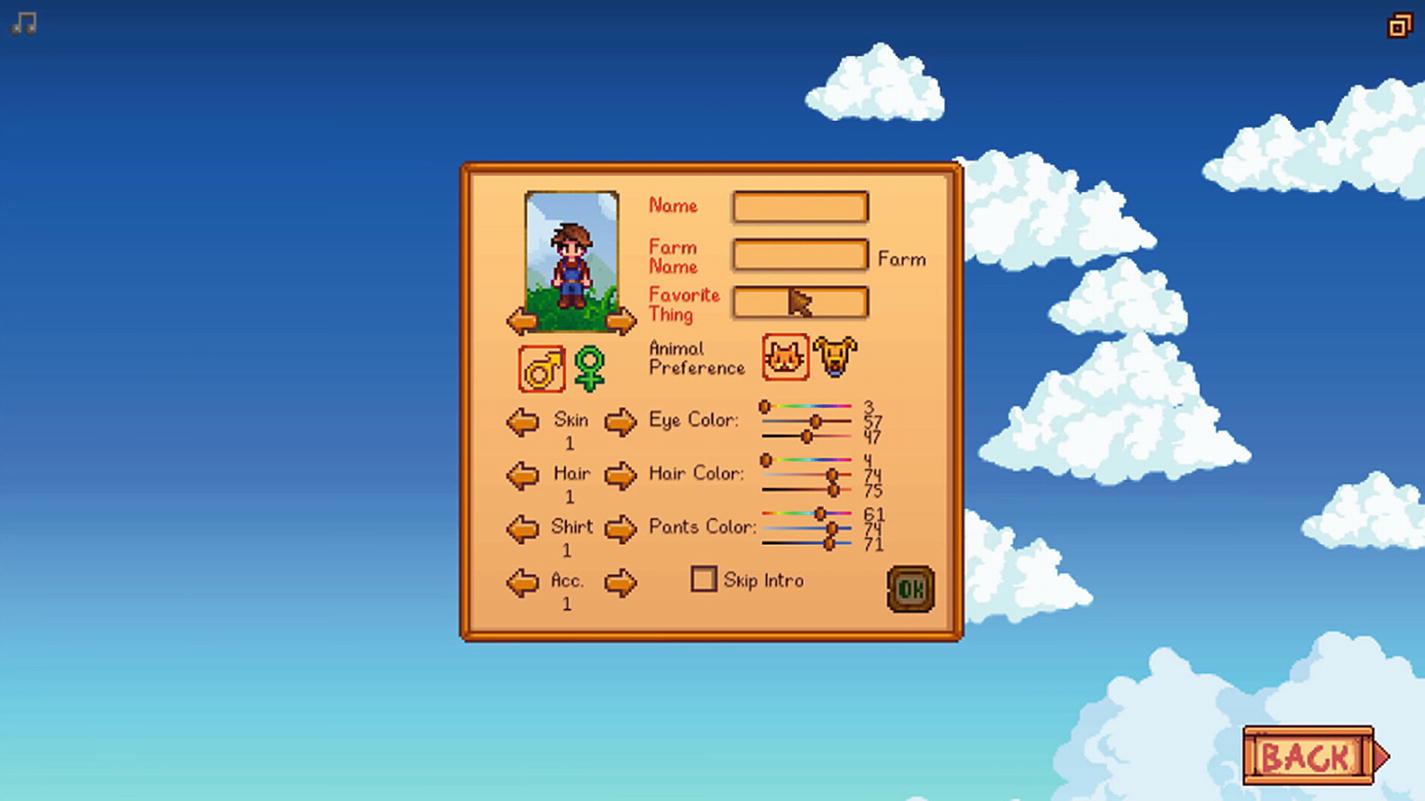
Stardew Valley Menus
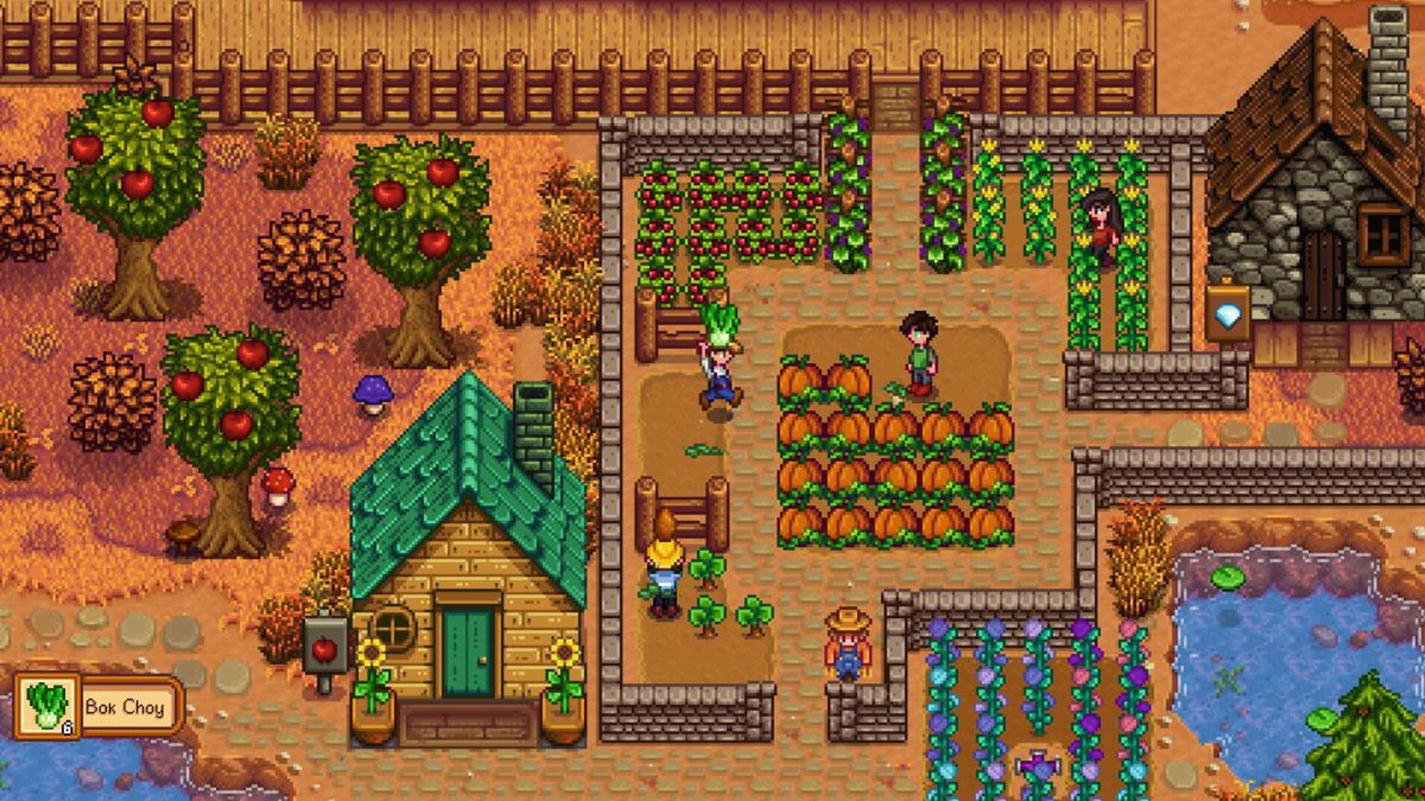
Stardew Valley Gameplay
Layered animated sprites (some aligned)
Clickable buttons
Background music
While Figure 4-3’s Character Creation state is comprised of those same elements with the addition of input fields and more complex positioning of elements, allowing the player to create a new character with the desired appearance.
Finally, Figure 4-4 shows the main gameplay screen and has many components of the first two states but increases the complexity of the graphical rendering by adding game objects that can change over time and allowing the player to move around the game world.
Implementing the Architecture of the Engine
Now that each of the components in a modern game engine has been reviewed, it is now time for us to begin architecting our engine.
For those wanting to download the completed solution, see the chapter-4 folder for both the blank project in the start folder and the completed project in the end folder.
Creating the Project
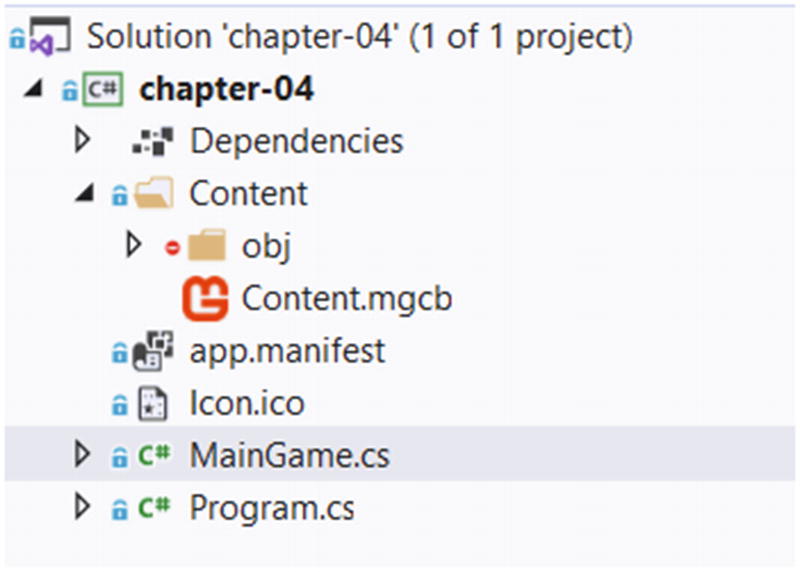
Visual Studio 2019 showing the blank Chapter 4 project
Creating the State Classes
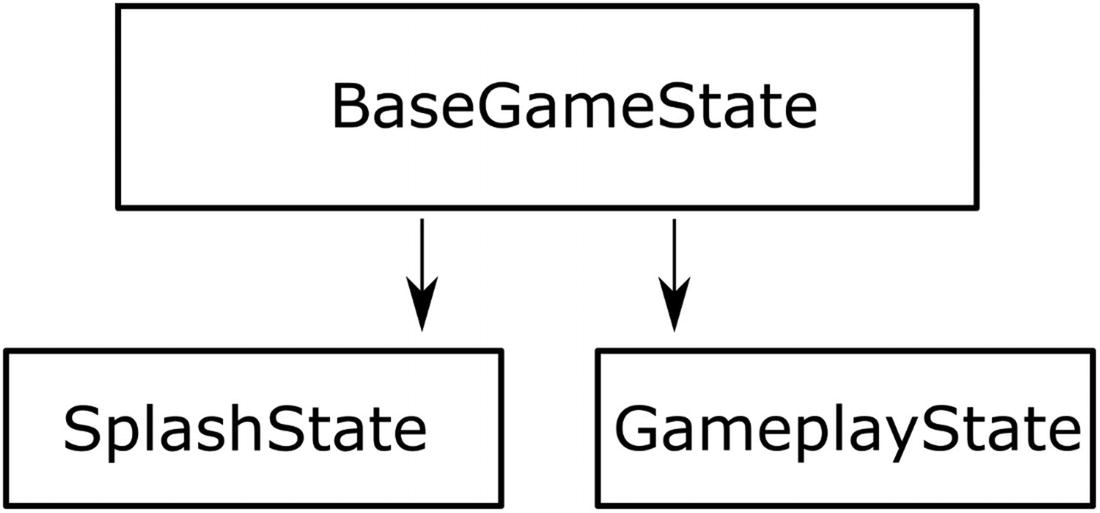
Game States to be implemented
Let’s start with the abstract method declarations of LoadContent and UnloadContent. These methods will provide an interface for, as you probably guessed, the loading and unloading of content. MonoGame uses the ContentManager class object to provide an easy-to-use interface to load content at runtime. We will cover this in detail in the next chapter when diving into asset management. For now, keep in mind that these methods will handle the state-specific unloading and loading of content.
The other abstract method, HandleInput, will provide a method for state-specific input handling. For this chapter, we will keep our implementations simple. In Chapter 6, as mentioned earlier, we will deep dive into abstracting the input handling.
The OnStateSwitched event and the SwitchState method provide both the method to switch the state from another state and the event for the main class to listen for. Any state class implementing this BaseGameState class will be able to call the SwitchState method and pass in the new state we wish to switch to. For example, pressing the Enter key in the SplashScreen state will call SwitchState and specify that we want to now use the Gameplay state. The Switch State method triggers an event that our MainGame class will respond to by unloading the current state and then loading the new state. At the next game loop iteration, the new state’s Update and Draw methods will start being called.
The AddGameObject method is the state method to add objects to the List collection of BaseGameObjects, which is used to keep track of game objects we want to draw on the screen. In future chapters, we will be using this method to add sprites, static images, and other objects to this list.
Lastly, the Render method provides a single method to iterate through all the game objects we want to render on the screen. This method is called from the main Draw method in the MainGame class. It takes all the game objects in other _gameObjects list and orders them by zIndex before drawing them. A zIndex is a technique to order game objects from farthest to closest. When MonoGame draws things to the screen, every drawn object will overwrite objects that were drawn before it. While this is desirable in the cases where objects closer to the viewer must hide objects farther away, the opposite is not something we want to do. For example, clouds should be drawn in front of the sun, not behind. So when we create game objects, we must draw them in order and that’s what we use the zIndex for. Why “z”? Because in 2D games we use an (X, Y) coordinate system where the X axis is horizontal and the Y axis is vertical. In 3D space, there is a third axis called Z, so we are essentially representing depth using a zIndex. Note that if every game object is at zIndex = 0, then our base state class cannot guarantee that everything will be drawn in the correct order.
Creating the Scaler and Window Management
Now that we have looked at our basic state management starting code, ahead of actually rendering anything on the screen, we need to handle scaling and supporting both windowed and full-screen modes.
Window Scaling
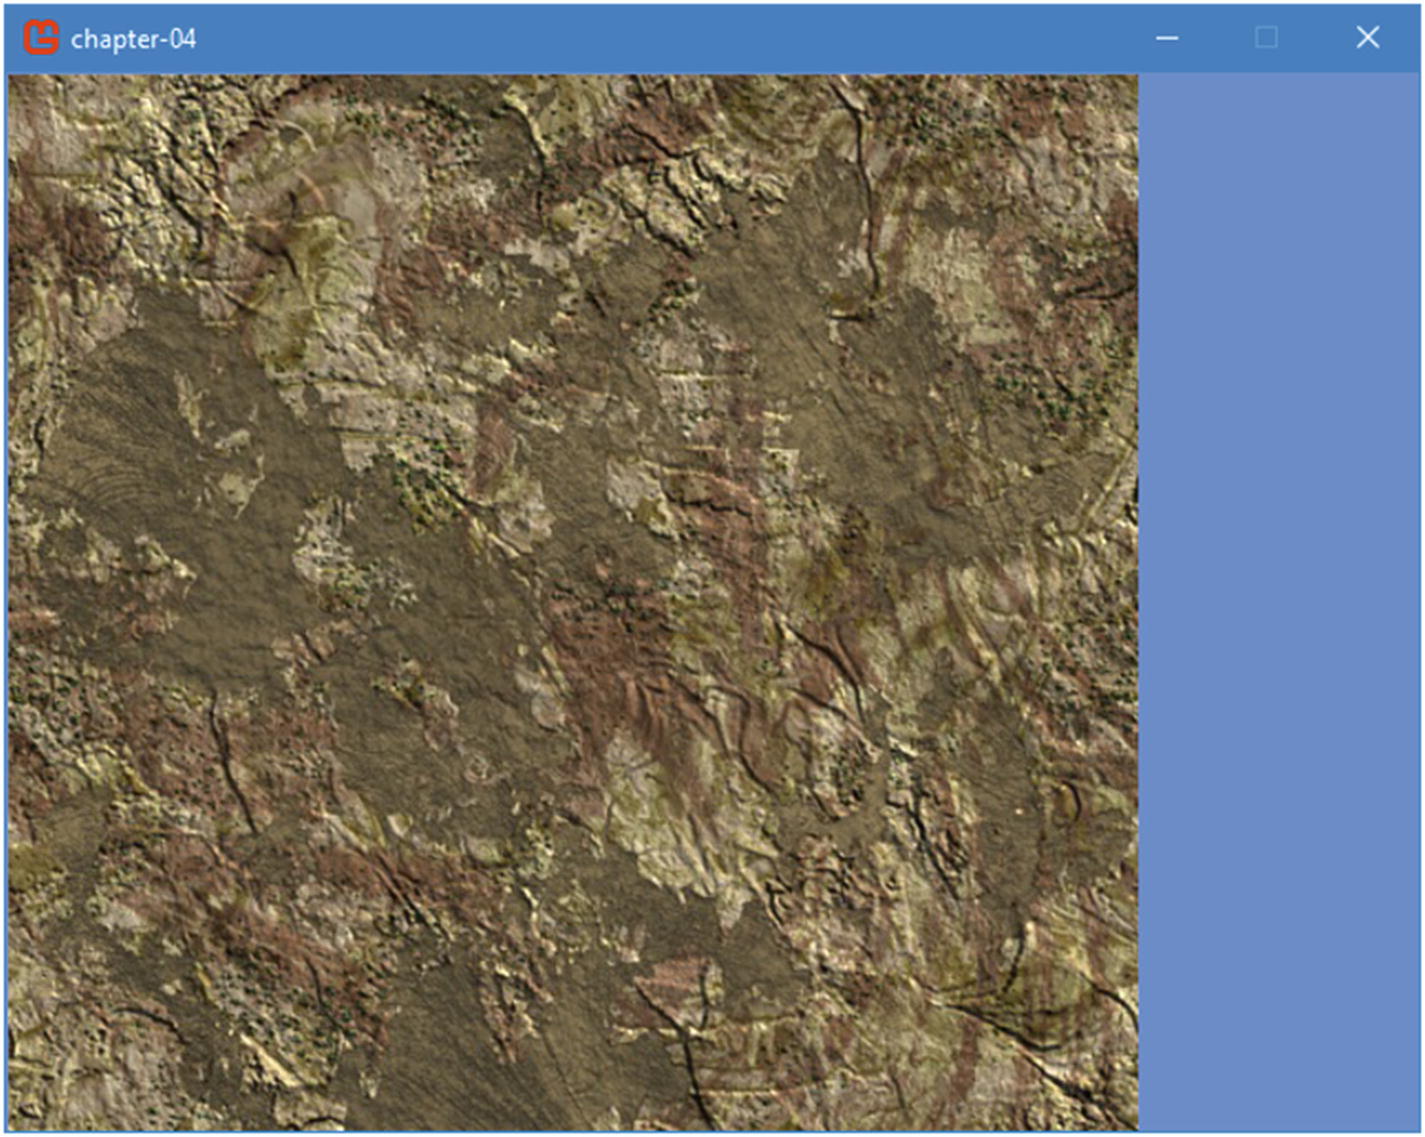
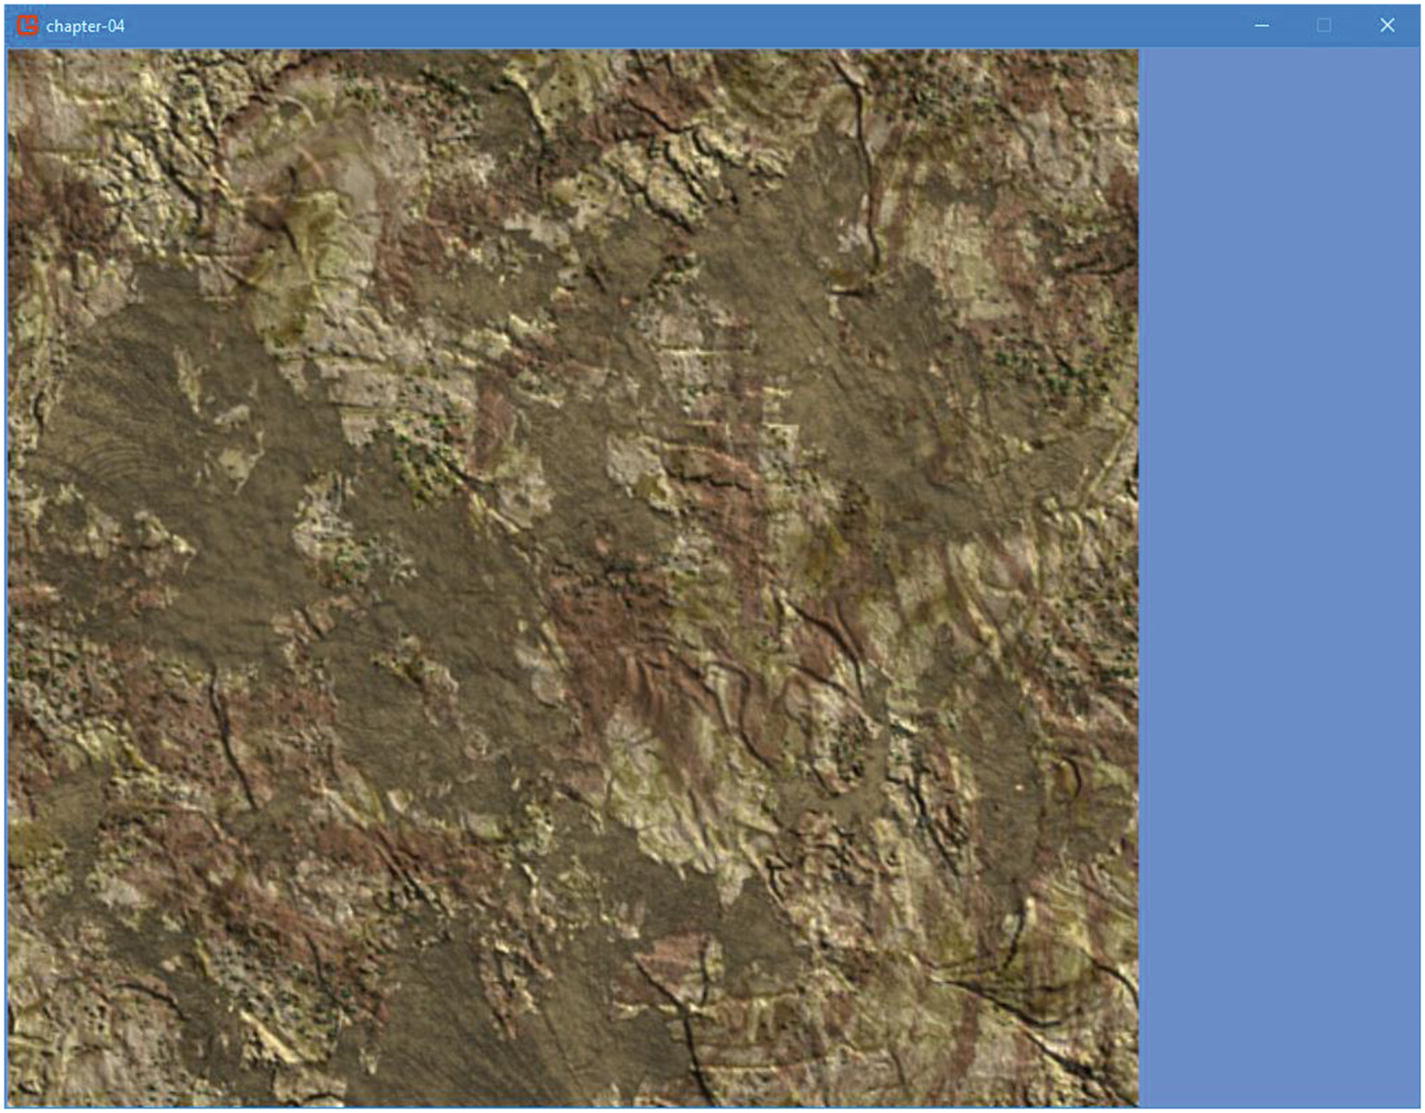
Unscaled 640x480 window with a 512x512 texture
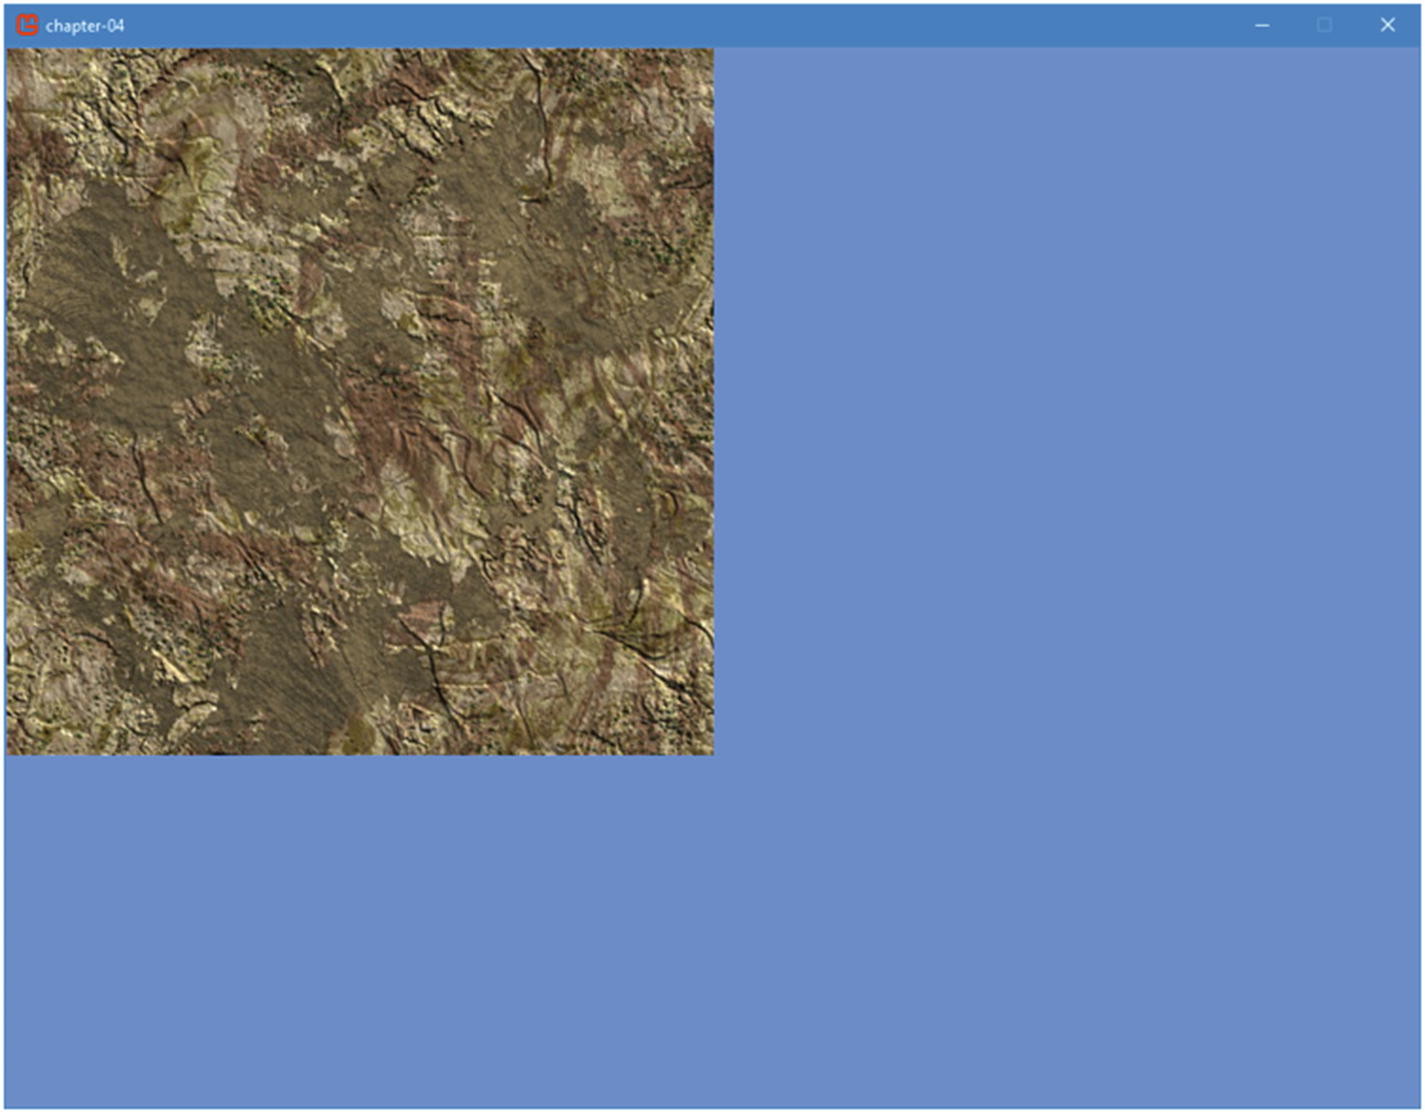
Unscaled 1024x768 window with a 512x512 texture
As clearly shown, the visual experience for the higher resolution consumer of your game is significantly different.
Fortunately, MonoGame offers a very easy way to ensure this experience inconsistency is resolved. The approach assumes you design around a target resolution such as 1080p (1920x1080) if you are targeting PC or home consoles. Once the resolution has been decided, all of your assets should be produced with this resolution in mind. Images such as splash or background images should be this resolution or higher. Asset creation and management will be covered in more detail in the next chapter; however, keeping with this simple rule will help you as you start making your content.
Scaled 1024x768 window with a 512x512 texture
The RenderTarget2D will hold the designed resolution target, while the _renderScaleRectangle variable will hold the scale rectangle. The DESIGNED* variables hold the designed for resolution; feel free to experiment with these values after adding this code.
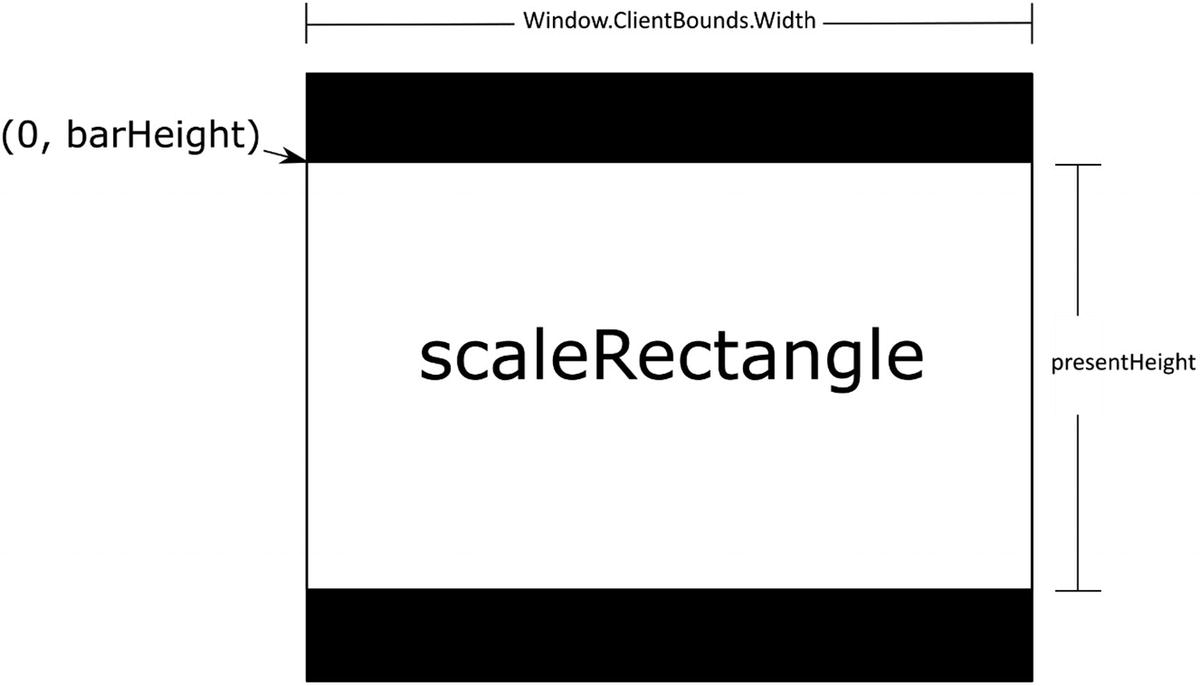
Finding a scale rectangle that fits the game window
A render target is a graphical buffer used to draw things on until we are ready to send it to the screen. While we draw on the render target, nothing will happen on the screen until we decide to draw that render target. Looking at the parameters, it sets the desired game viewport resolution, the area we want to draw it. It also sets the mipmap flag to false, the background color to black (because SurfaceFormat.Color is equal to zero), and specifies that we are not using any depth stencil buffer and that our preferredMultiSampleCount is zero (this is used when doing antialiasing), and whatever we draw into our render target will not be preserved.
We briefly explained the sprite batch in Chapter 3. It is an abstraction that we will use to draw our game primitives to the screen. It is mostly used for our sprites, meaning our game textures, but it can also handle other 2D primitives like lines and rectangles. It is called a sprite batch because we will add many sprites and primitives into a single batch that will be sent to the graphics card in on single call by MonoGame. It is more efficient to build a single batch during the Draw phase of the game loop than multiple batches, although there are a few reasons why a game developer may want to build many batches in a single drawing phase. To create a new batch in our engine, we use the spriteBatch.Begin method. Then we call the Render method on the current game state and close out the sprite batch by calling spriteBatch.End.
Now that we have rendered a single frame to our render target, we are ready to draw it to the screen, which we do by setting the graphics devices’ render target to null. We start by clearing the screen to a black color; then, we perform one more sprite batch phase, where we draw the render target into the scale rectangle we calculated earlier. Because the screen is initially cleared black and the render target was cleared to the cornflower blue color, if the designed resolution and the game window resolutions do not match, we will see black bars on the sides. We then end the sprite batch.
Adding this support early on in our engine design helps begin testing the engine across multiple resolutions and form factors such as a laptop screen vs. desktop monitor. Now that we have our window scaling, let us add in full-screen support to our window.
Full-Screen Support
Event System
The last major development in this chapter is adding the initial work on the event system . The idea behind this pattern is to have a single call and object or class listening to that particular event will do what it is programmed. This pattern will allow us over the course of the book adding all of the events to make a complete game.
With most events not needing to notify the MainGame class, this will be one of the few if any events you will need to handle specifically.
Summary
In this chapter, you learned about game engine design and state management and implemented the initial architecture for the engine that will drive the project going forward.
In the next chapter, we will dive into the Asset Pipeline providing sprite loading to liven up our newly created engine.